Element ELCFW326 User manual


Other manuals for ELCFW326
1
Other Element LCD TV manuals

Element
Element ELCFW329 User manual

Element
Element Connecting Your TV to A/V Devices User manual

Element
Element ELGFW551 User manual

Element
Element ELCFW328 User manual

Element
Element ELEFT502 User manual

Element
Element ELCHS192 User manual

Element
Element ELCHW321 User manual

Element
Element ELEFT321 User manual

Element
Element 40LE45S User manual

Element
Element ELDFC601JA User manual

Element
Element ELCHW261 User manual

Element
Element FLW-1921B User manual

Element
Element FLX3220F A User manual

Element
Element ELGFT471 User manual

Element
Element ELCFT191 User manual

Element
Element 19LE30Q User manual

Element
Element 32LE30Q User manual

Element
Element ELGFW601 User manual

Element
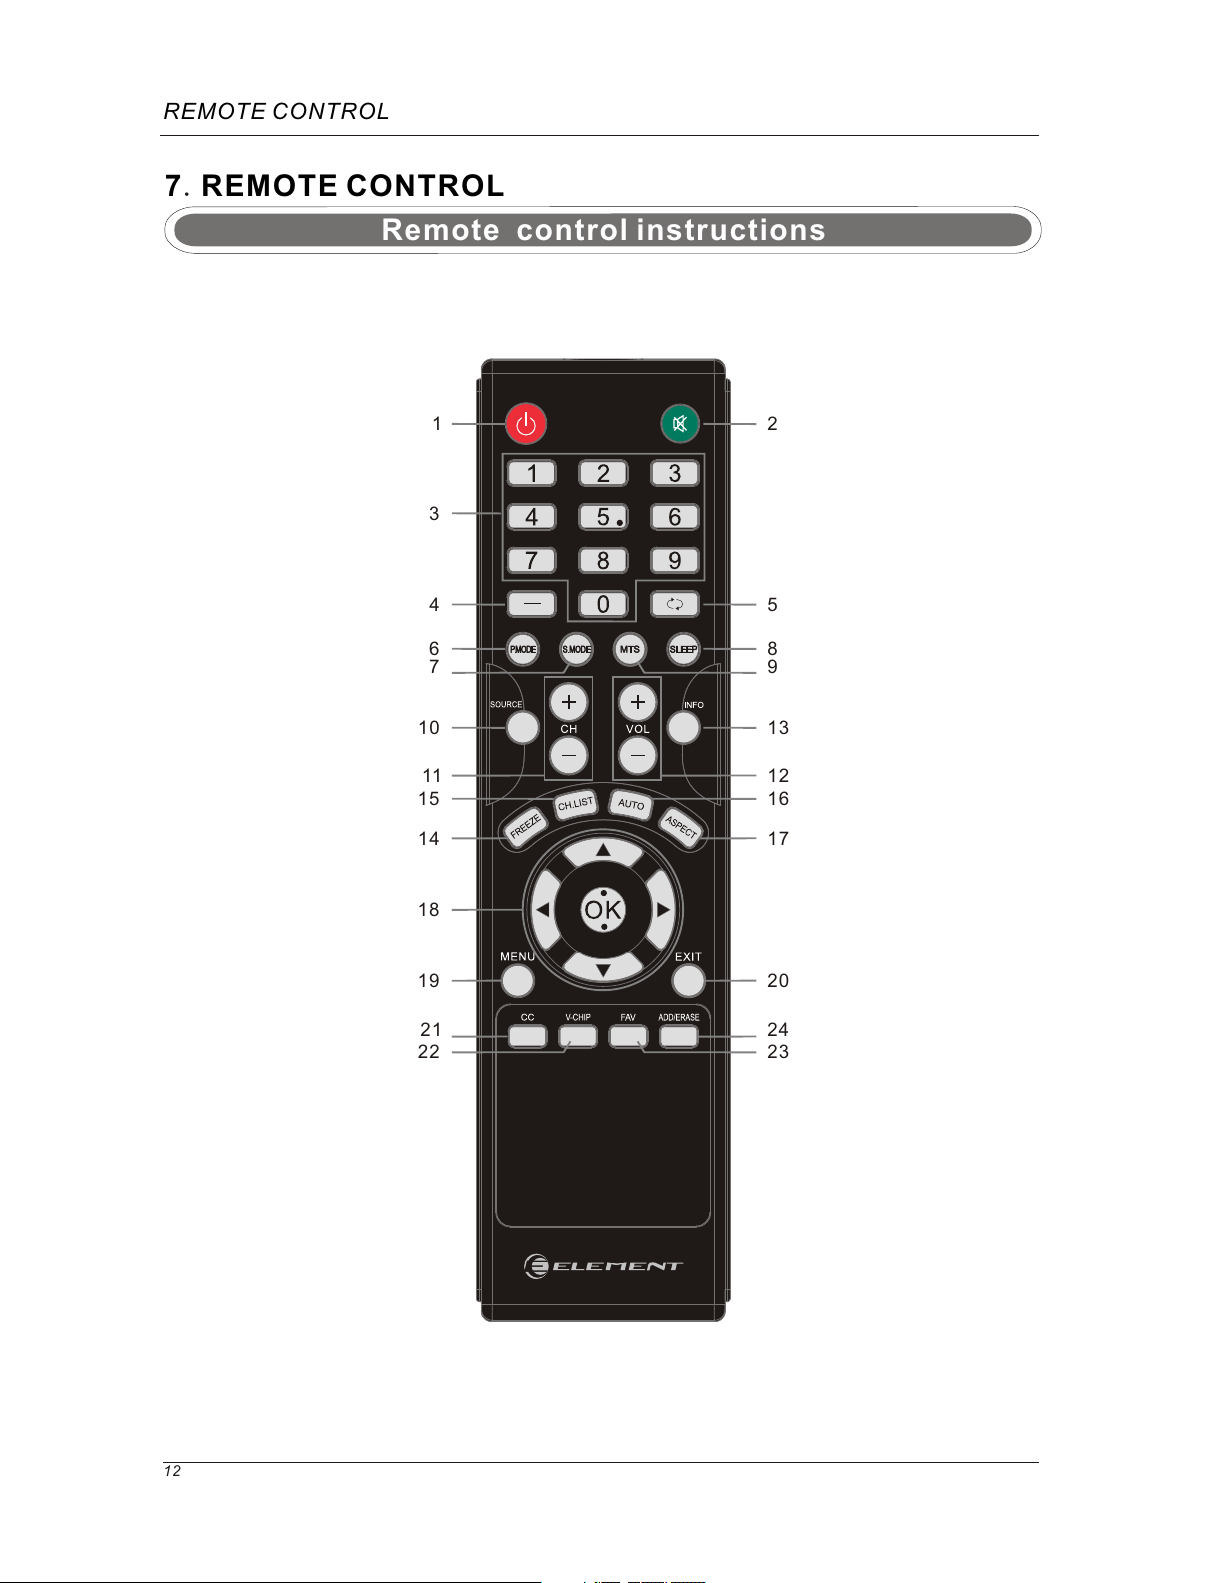
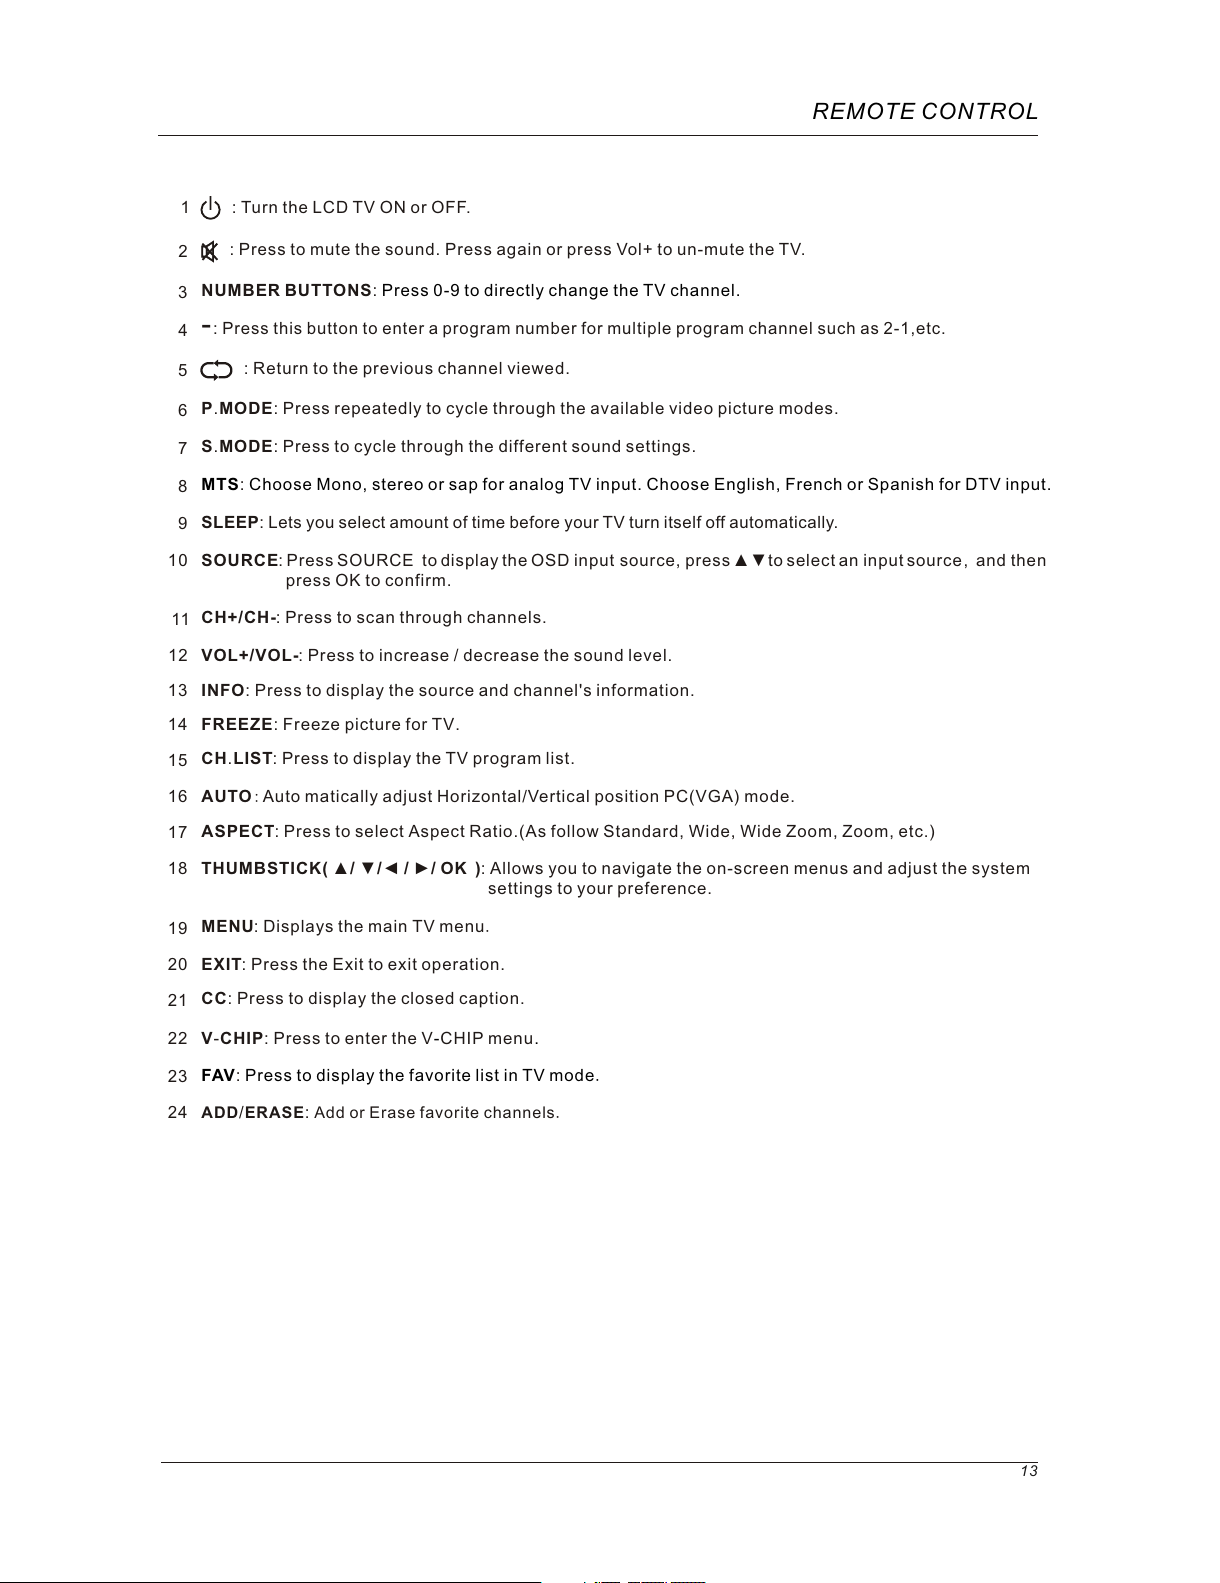
Element ELCFW326 User manual

Element
Element ELDFW322 User manual


Popular LCD TV manuals by other brands

Sony
Sony KDL-32S3000R - 32" Class Bravia S-series Digital Lcd... Specifications

SOYO
SOYO Dymond DYLT032A user manual

Samsung
Samsung 75" ES9000 Series 9 SMART 3D Full HD Slim LED... E-manual

Philips
Philips 42HF7443/10 user manual

LG
LG LB63 Series owner's manual

Sony
Sony BRAVIA KDL-32R400A operating instructions


