Elium IRD 1080 User manual

Operating Instructions
19“ DVB SD/HD IRD
Integrated Receiver Decoder

We thank you for your confidence in our product and congratulate you to the purchase of your Digital Receiver of ELIUM
GmbH.
As this product is provided with an immense array of features, we recommend you to review the contents of this manual
before proceeding.
1
ELIUM GmbH
Brückenstr.8
D-51379 Leverkusen
Tel.: +49 2171 3608-0
Fax.: +49 2171 3608-90
Mail: [email protected]
Web: www.elium.de
14.10.15 // rev.06.en
© ELIUM GmbH
All rights, in particular the right of duplication and broadcasting as well as translation, reserved. No part of these User
manual my be reproduced, processed, multiplied or broadcasted without written permission by ELIUM GmbH.
Errors, printer´s errors and changes excepted.
DiSEqC™ is a registered trade mark of EUTELSAT.
DVB™ is a registered trade mark of DVB Digital Video Broadcasting Projekt (1761).
All marks, trade marks and registered trade marks are property of their respective owners

1. Information
1.1 Accessories . . . . . . . . . . . . . . . . 3
1.2 Safety Regulations . . . . . . . . . . . . . 4
1.3 Remote Control . . . . . . . . . . . . . . 5
2. Installation
2.1 OSD settings . . . . . . . . . . . . . . . 6
2.2 Video settings . . . . . . . . . . . . . . . 7
2.3 Audio settings . . . . . . . . . . . . . . . 8
2.4 Antenna settings only DVB-S . . . . . . . . 9
2.5 Search for channels / programs . . . . . .10
2.6 Edit channels . . . . . . . . . . . . . . .11
3. Technical
3.1 Technical Menu . . . . . . . . . . . . . .13
3.2 Network settings . . . . . . . . . . . . .14
3.3 Menu via display . . . . . . . . . . . .15-16
3.4 External channel editor (Boxedit)
phone support. . . . . . . . . . . . . . .17
3.5 eSATA . . . . . . . . . . . . . . . . 18-19
3.6 Additional functions . . . . . . . . . . . .20
3.7 Network Access . . . . . . . . . . . . . .21
3.8 LiveStreaming => Network . . . . . . .22-24
3.9 LiveStreaming <= Network . . . . . . . . .25
4.0 Information window . . . . . . . . . . . .26
4.1 Update . . . . . . . . . . . . . . . . 27-28
Table of contents
2

▪ Digital SD/HD IRD Integrated Receiver Decoder
▪ Remote Control / Batteries (optional)
▪ Operating Instructions (Service CD)
Information
1.1 Accessories
3
Pay attention to the following before using this unit. To be sure read these instructions carefully and use the set prop-
erly. Be sure to keep this manual for future reference, should any question or problem arise.
Power Cord
Handle the power cord carefully. Hold the plug when unplugging the cord. Do not use a dam-
aged power cord. Do not plug the power cord until all connections have been completed.
Input Voltage
Use only at voltage of 100 - 240V.
Ventilation
The temperature inside the unit is effectual deduced. Please do not cover the ventilation
slots to avoid temperature problems and serious failures.
The unit needs a stable stand at all time.
Opening the unit
Do not open, try to disassemble or modify the unit in any way. There are no user service-
able parts inside. Refer servicing to qualified service personnel only. No liability for electric
shock to persons or accident damage of user when cover of unit was removed or opened.
! ! ! Please refer servicing to qualified staff ! ! !
Insolation
Do not install the unit near any heat sources. Avoid direct insolation. Keep care that the unit
is not used in too low temperature.
The ideal temperature is between 10°C – 45°C.
Moisture
Keep the unit free from moisture, water and dust. The unit should not be used in moist
rooms, wet rooms or near a bath. The ideal humidity is between 10% – 70%.
Earthing
The parabol satellite antenna must be earthed. Please observe the relevant regulations.
Information
1.2 Safety Regulations
4

The remote control enables the interaction with the HCR receiver. Therefore it is very important to know about the main
functionality.
1 - On / Off (StandBy)
2 - Channel selection or data input
3 - Switch between TV and radio mode
4 - Not active
5 - RCL return to last channel
6 - Mute
7 - Up and Down Scroll in channel list or menu
8 - Plus/Minus volume adjustment
or changes in menu
9 - Exit (return to last menu)
10 - OK confirm or select
11 - Main menu or save
12 - Not active
13 - MovieNET menu
14 - Search a channel by name in channel list
15 - Network playback menu
16 - Rewind
17 - Fast forward
18 - Play / Pause
19 - Preview video
20 - Next Video
21 - Start / Stop recording
22 - Program information
23 - Teletext
24 - EPG
25 - Timer menu
26 - Not active
27 - Multifeed and multilanguage
28 - Search / Freeze picture
29 - Technical information
Information
1.3 Remote Control
5
Installation
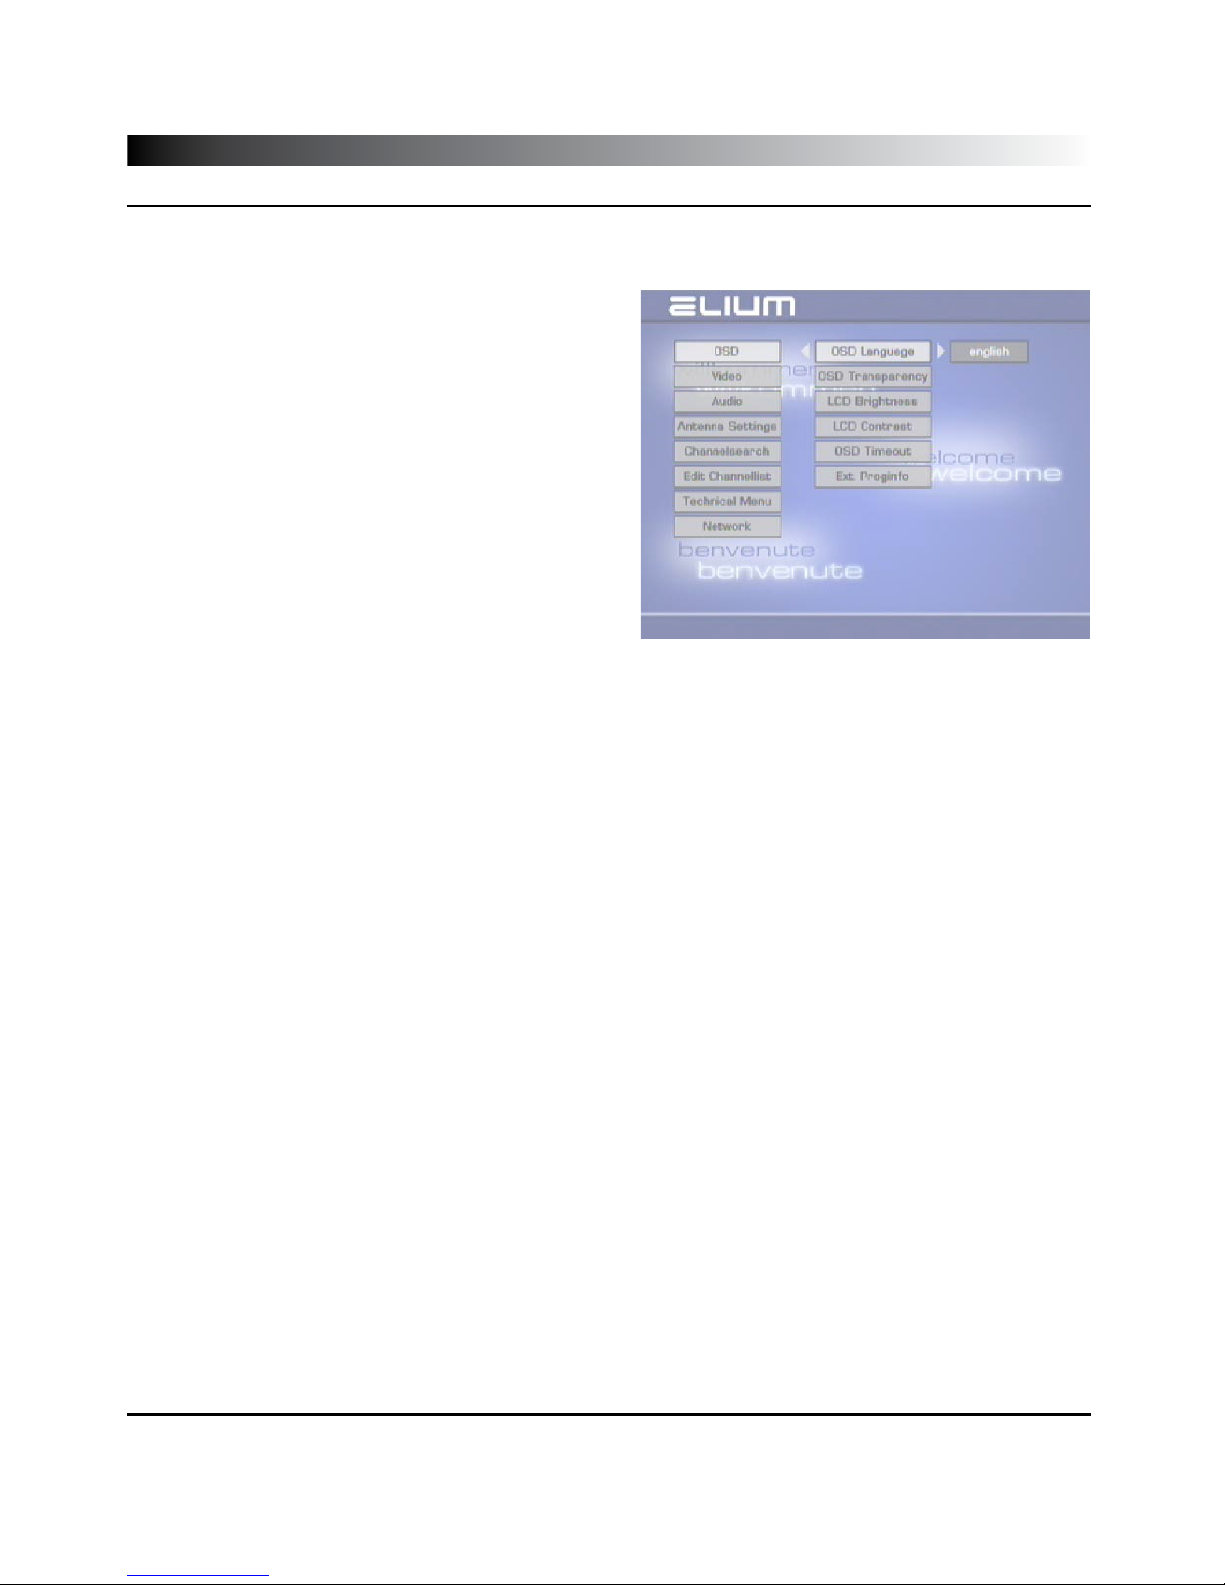
2.1 OSD Settings
After switching on the SD/HD IRD with the StandBy button (1) of the remote control you should see a welcome screen
on the TV set. Now you can start setting up the OSD (On Screen Display) settings.
How to set up the OSD:
▪To move between the different options press the Up or
Down button (7).
▪To select a setting press the OK button (10).
▪To change the value press the left or right button (8).
▪Values you can set up:
› OSD Language: You can select between three OSD lan-
guages: English, German and Russian.
› OSD Transparency: OSD transparency can be adjusted.
› OSD Colours: Adjust colours in OSD menu.
› OSD Background: Upload any picture to set it as background image of the OSD.
› OSD Backlight: Backlight of the front display can be adjusted.
› OSD Contrast: Contrast of the front display can be adjusted.
› OSD Timeout: Select seconds the OSD should apear.
› Program Logo: On or off of program logos (Program logos will be downloaded)
› Ext. Program info: Choose if a permanent OSD overlay should be shown including technical information like sig-
nalpower, signalquality, audio and video PID.
▪To save the adjustment of the OSD installation press the Exit button (9).
▪To leave the OSD installation setup press the Exit button (9) again.
6
Installation
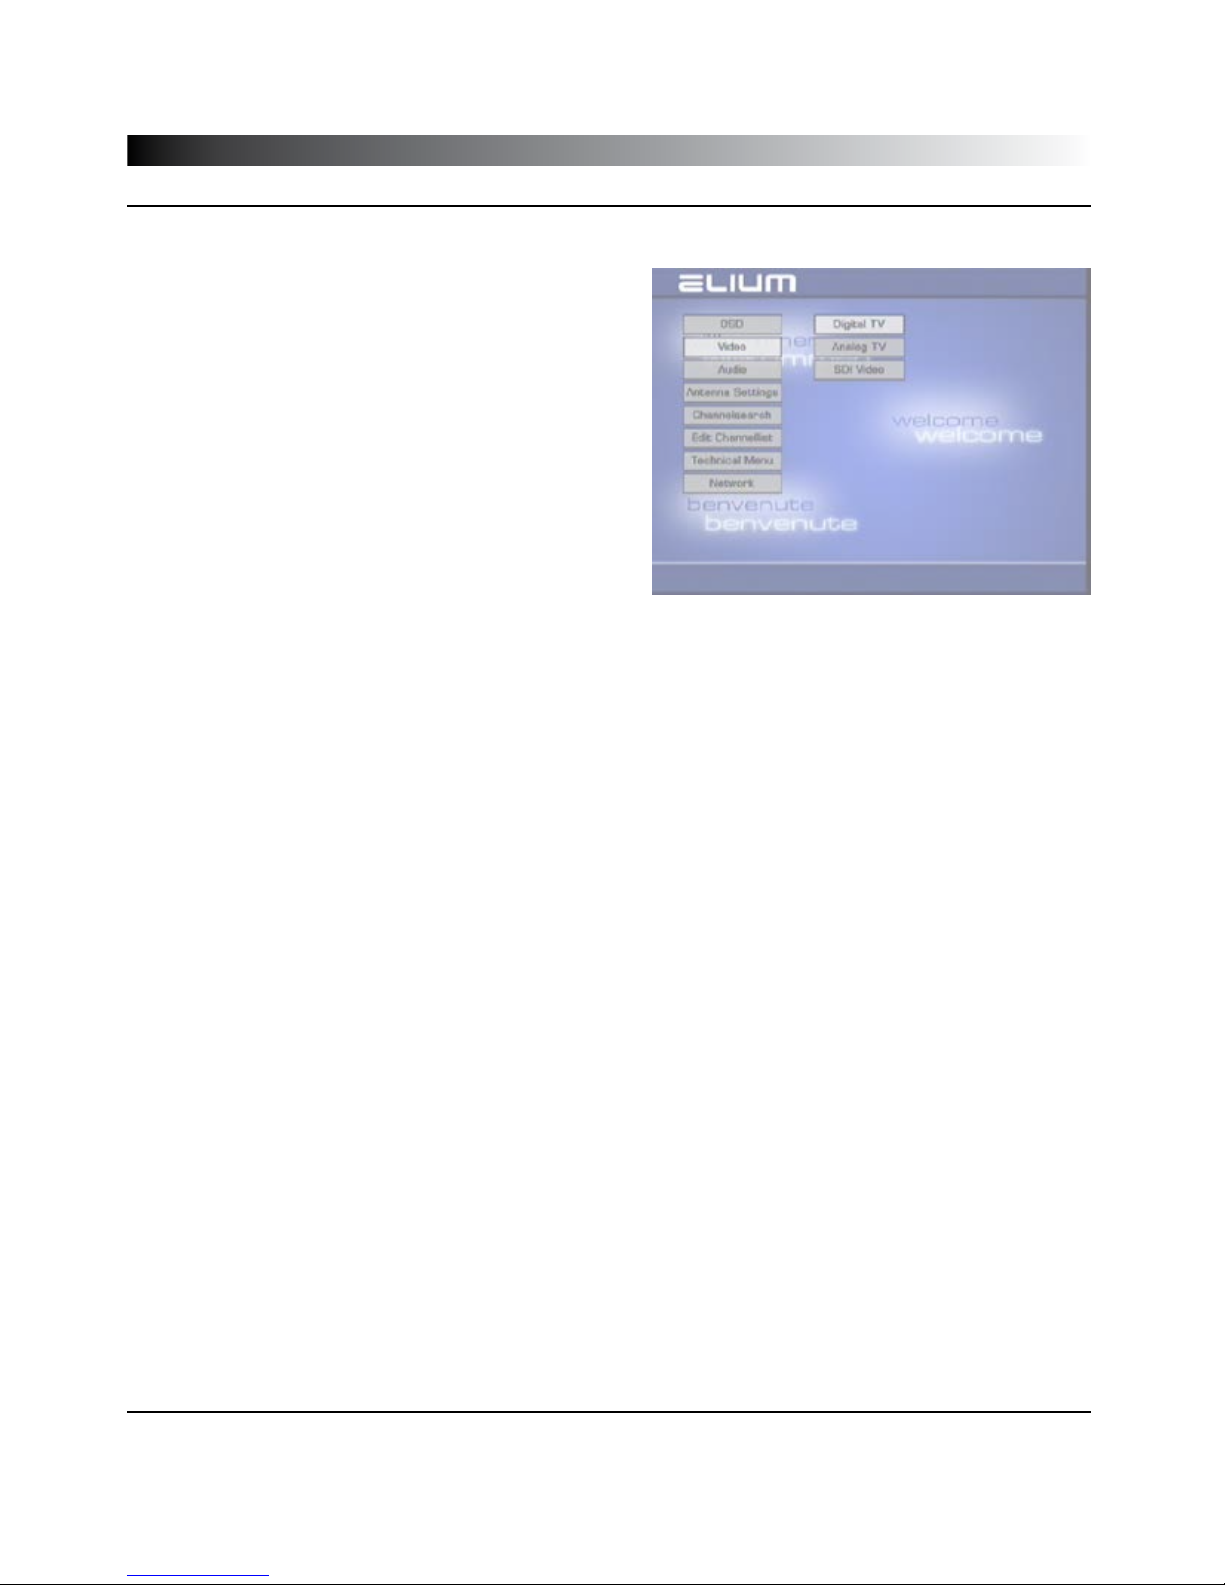
2.2 Video Settings
After setting the OSD you may set up the video settings.
How to set up the video functions:
▪To move between the different options press the up or
down button (7).
▪To select a setting press the OK button (10).
▪To change the value press the left or right button (8).
▪Values you can set up:
› Digital TV: Here you can select between display,
picture format, mode, brightness, colour
saturation, sharpness and RGB/Yuv display.
› Analog TV: You can select between display,
picture format, mode, brightness, contrast,
colour saturation, colour shade, sharpness and
the amplitude.
› SDI Video: You can select between the output
format HD and SD and switch 656 on or off (only if
SDI is available).
▪To save the adjustment of the video settings press the
Exit button (9).
▪To leave the video settings press the Exit button (9) again.
7

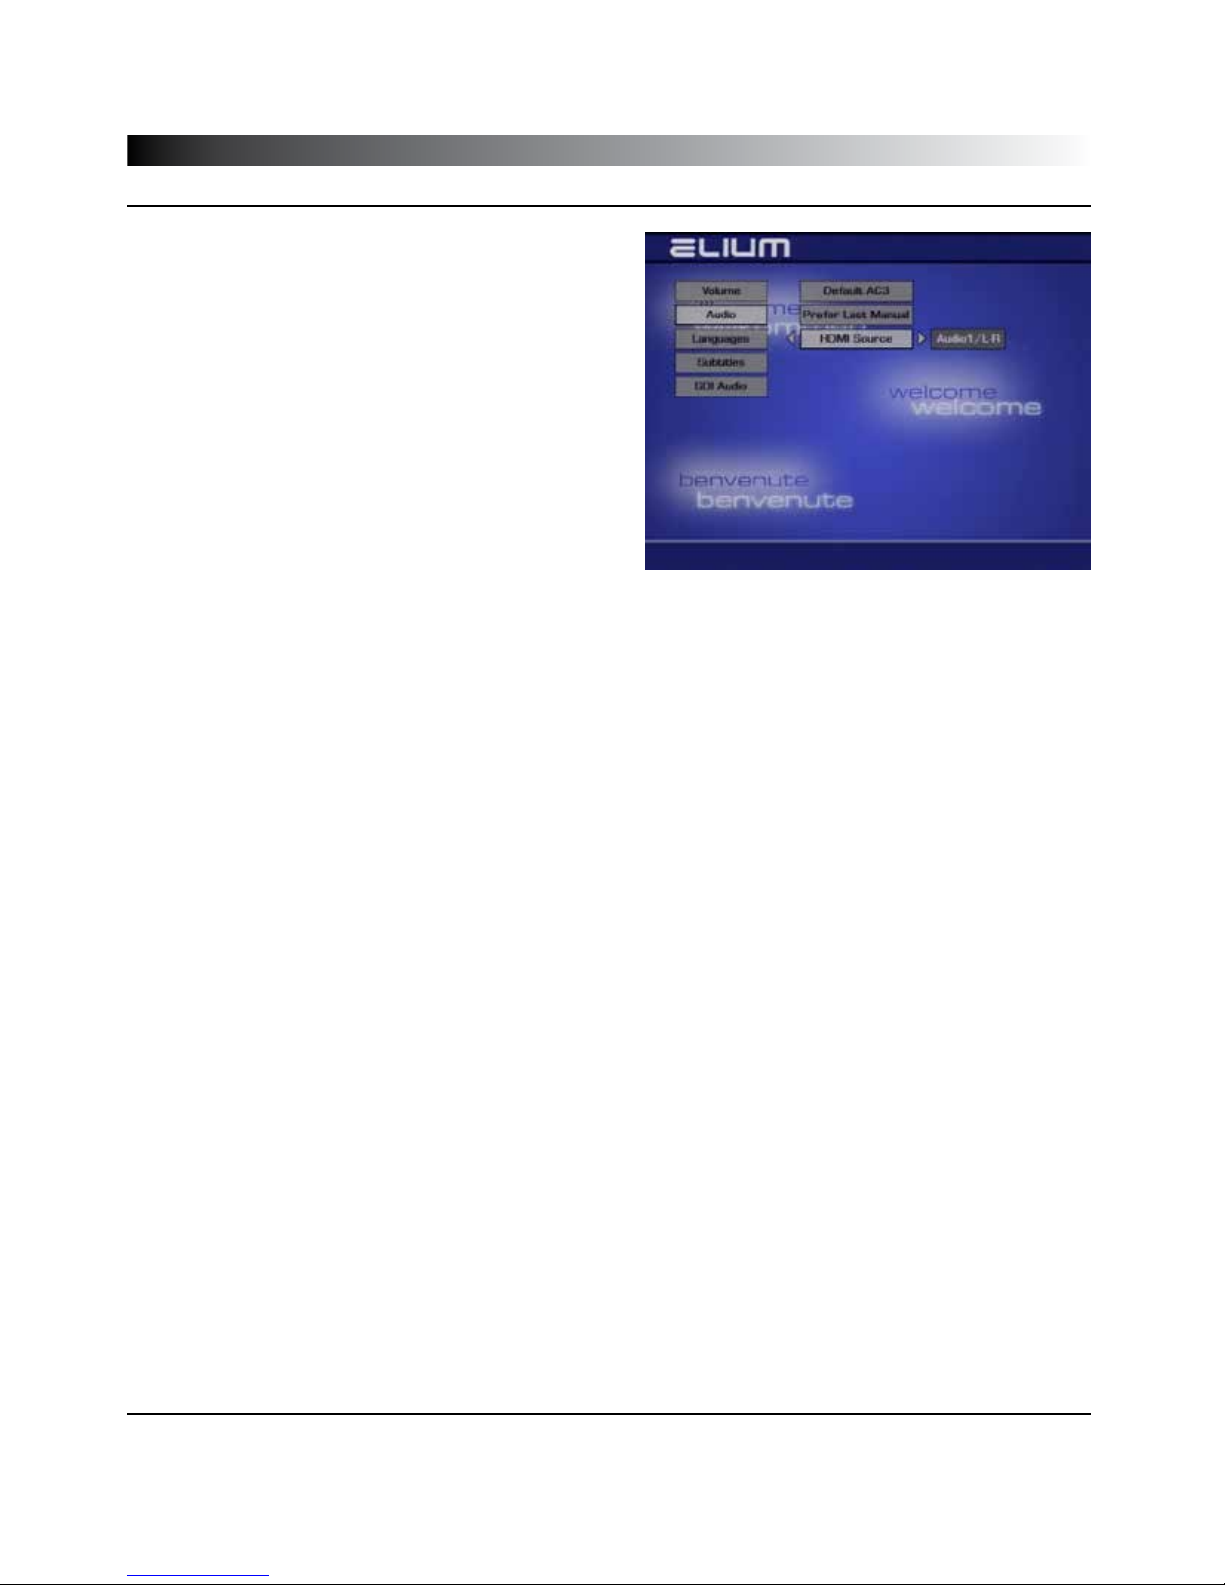
2.3 Audio Settings
Installation
After setting the video settings you may set up the audio settings.
How to set up the audio configuration:
▪To move between the different options press the up or
down button (7).
▪To select a setting press the OK button (10).
▪To change the value press the left or right button (8).
▪Values you can set up:
▪Volume:
› Volume: Change this value to set the Volume.
› Volume Control: Here you can select whether the volume should be controlled by
remote control or the fix volume value setup above should be used.
› Output Mode: Here you can select between mono, mono left, mono right,
mono mix, stereo swap and stereo output.
▪Audio:
› Prefer AC3: Here you can activate the AC3 format. (Warning, only with
AC3 Decoder working.)
› HDMI source: Switch between audio 1 and audio 2.
▪Languages:
› 1st - 3rd Language: Here you can select the Languages fot programs.
▪Subtitles:
› 1st - 3rd Language: Here you can select the Languages for subtitles.
▪SDI Audio: Here you can switch between the audio tracks and adjust the volume
of the SDI Audio (only if SDI available).
SDI Audio:
There are eight audio tracks.
These allow to switch between
Audio 1 and Audio 2.
Audio 1: L-R Analog
Audio 2: Digital ( AES )
8
2.3 Audio Settings
Installation
HDMI AUDIO
In HDMI you can switch between Audio 1
(Analog L-R) and Audio 2 ( Digital / AC3 ).
▪To save the adjustment of the sound settings press the exit button (9).
▪To leave the sound settings press the exit button (9) again.
9

Installation
2.4 Antenna Setting DVB-S
Setting up the antenna. Depending of the receiving part of your SD / HD IRD vary the settings of the channel search.
The SD/HD IRD is preset for astra satellite. But you can set
up the antenna installation as well as the channel search for
other satellites.
▪To move between the different options press the up or
down button (7).
▪Confirm a setting with the OK button (10).
▪To select a setting press the left or right button (8).
If you use only one LNB you have to change the option LNB
Connection(DiSEqC) to “direct“.
Otherwise if you use several LNB or several antenna con-
nected to a multiswitch you have to assign an own DiSEqC
connection to each seperate LNB or antenna.
For older devices without DiSEqC there is a 22kHz switch.
For the correct setup you have to adjust the following parameter.
▪Satellit: Select the satellite you want to receive.
▪DiSEqC Input: Select the LNB Number for example: antenna 1 correspond to LNB number 1, antenna 2 correspond to
LNB number 2 etc.
▪DiSEqC: Select the DiSEqC for example DiSEqC A correspond to sat system A, DiSEqC correspond to sat system
B etc.
▪Relay: Select the to use relaylevel (for example DiSEqC 1.1)
▪Press the exit button (9) to save the parameter.
▪Leave the menu by pressing the exit button (9) again.
Example: Hotbird - LNB number 2 - LNB connection DiSEqC B and Astra - LNB number 1 - LNB connection
DiSEqC A. You will see the signal quality shown at the OSD after a few seconds if set up is correctly.
10
Installation
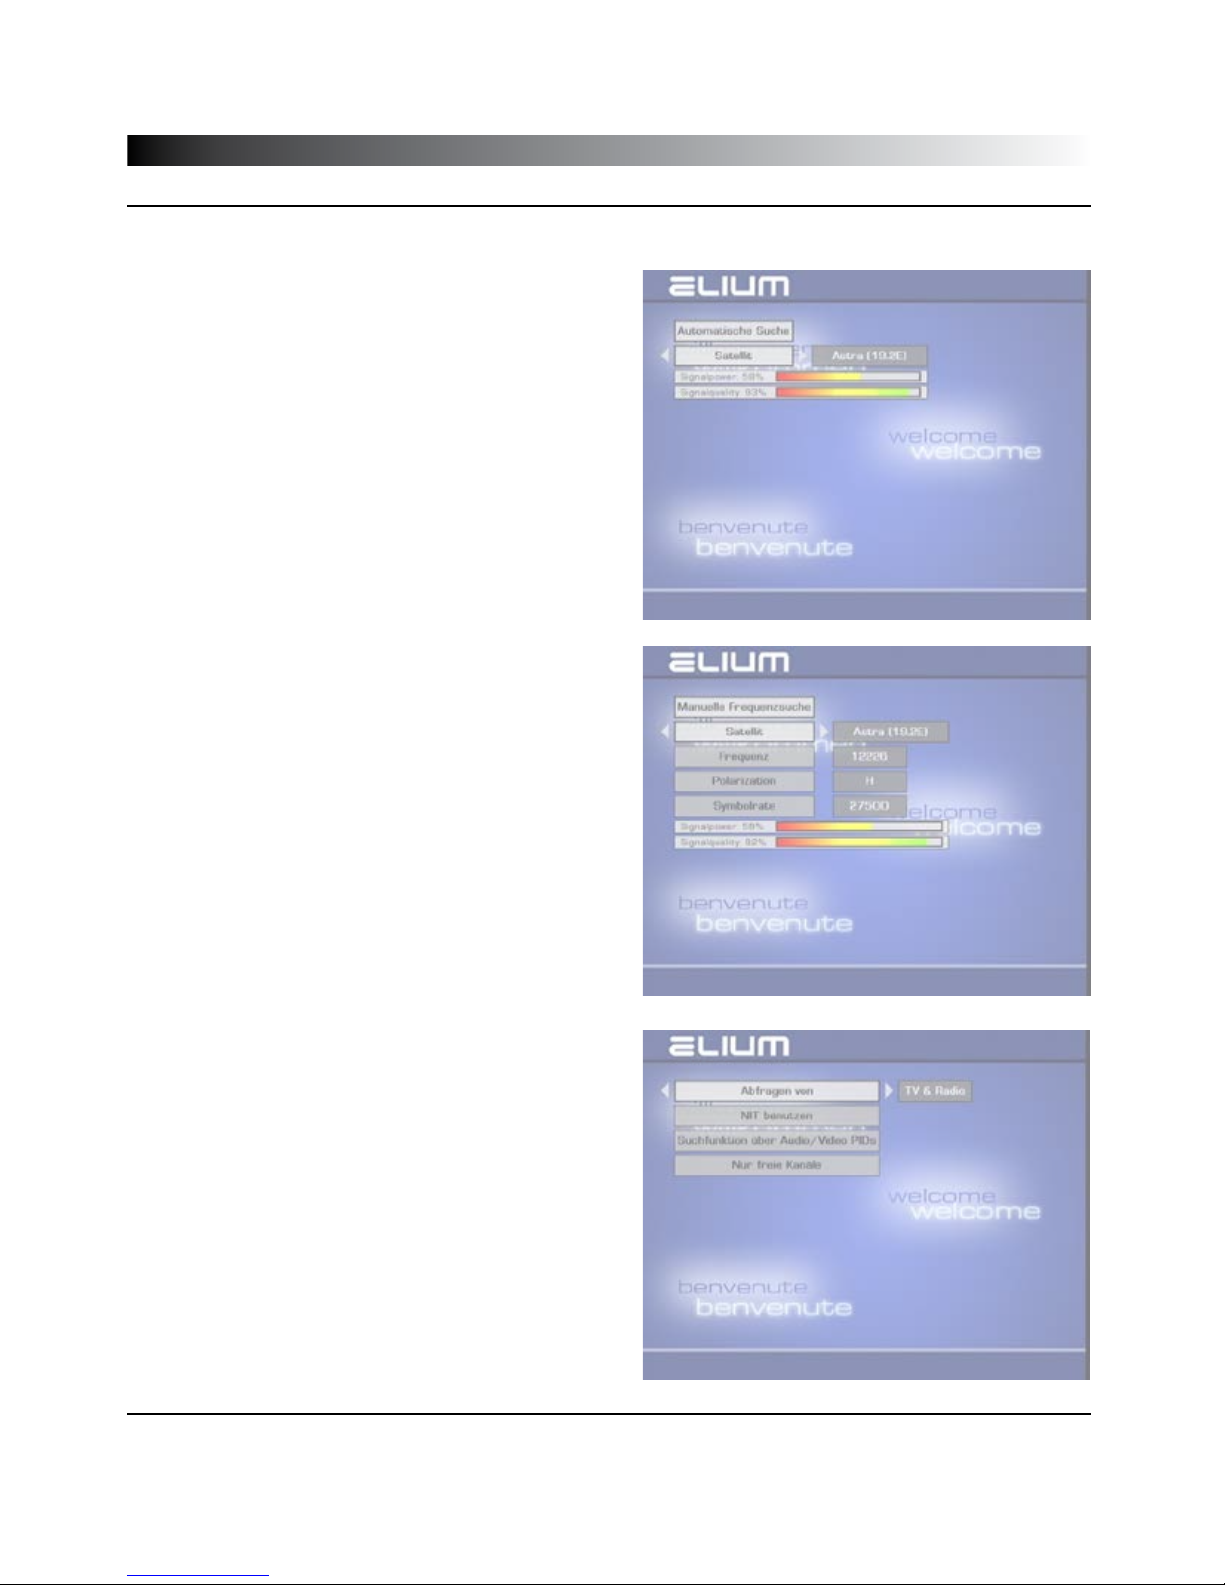
2.5 Channel search
How to do a channel search. Depending on the reception option of the unit, you have different options shown for the
channel search.
In this menu the signal strength and quality is indicated.
To change the frequency press the left or right button (8).
There are two options and additional option for the channel
search:
▪Automatic: All available frequencies are searched and
listed using the standard parameters.
▪Manual: Searching for all channels of a particular frequency.
▪DVB - C/ T: You can set the Cable/Terrestrial Tuner to use a
Cable or Terrestrial Source.
▪Search options:
>Scan for: Here you can separating reach TV from radio.
>Use NIT: Comprehend name and type from the
transmission system (Astra, Satellit). Secondary that
comprehend technical parameters like frequency and
fault protection to.
Allows to find more programs with the information of
some channel.
>Scan/Use Pids: Audio and video will dedicated
to relative programs automatically.
>Just: Free Channels: Only search of free channels.
The following options have to be entered:
› Source: Only for DVB-S
› Frequency:DVB-S, DVB-C and DVB-T
› Modulation: Only for DVB-C
› Polarisation: Only for DVB-S
› Symbol Rate: Only for DVB-S
After finishing the search you have to save the found channels
by pressing the Exit button (9).
11

Channels
2.6 Edit Channels
After the channel search you can edit the found channels. You can select to edit TV channels or Radio channels. Also you
can edit the volume of each channel separately. The description is for both TV and Radio list.
▪Menu functions:
MP3: Search for Channel
OK: Select to delete
TXT: Select all scrambled channels
EPG: invert selection
TV/R: move channel to Radio/TV list
0: move channel to top position
▪Volume:
Is is possible to preset the volume for each program
and channel independently.
▪Delete selected channels:
To select the channels you want to delete, move with
the up and down button (7) and mark each channel by
pressing the OK button (10). The selected channels are
shown grey coloured. To delete the selected channels
you have to press the exit button (9).
▪Move a channel:
Select a channel to move it (marked in white). Now just enter the number, using the numeric buttons (2), you want
the channel to be and press the OK button (10).
The position „0“ is the first position in the list. If you want to move a specific channel you can search for it by using the
MP3/JPEG button (14).
▪Delete all channels:
To delete all channels mark them by pressing the EPG button (24) or the info button (22). You can also unmark all
channels using these buttons. To save this set up you have to press the Exit button (9).
▪Move channels in the Radio Channel list:
The SD/HD IRD searches for channels and stores them in two lists: TV Channel and Radio Channel list. Some radio
channels are broadcasted with wrong information by the provider so that they are stored in the TV Channel list.
To move a channel which is a radio channel to the radio channel list just press the TV/R Button (3).
12
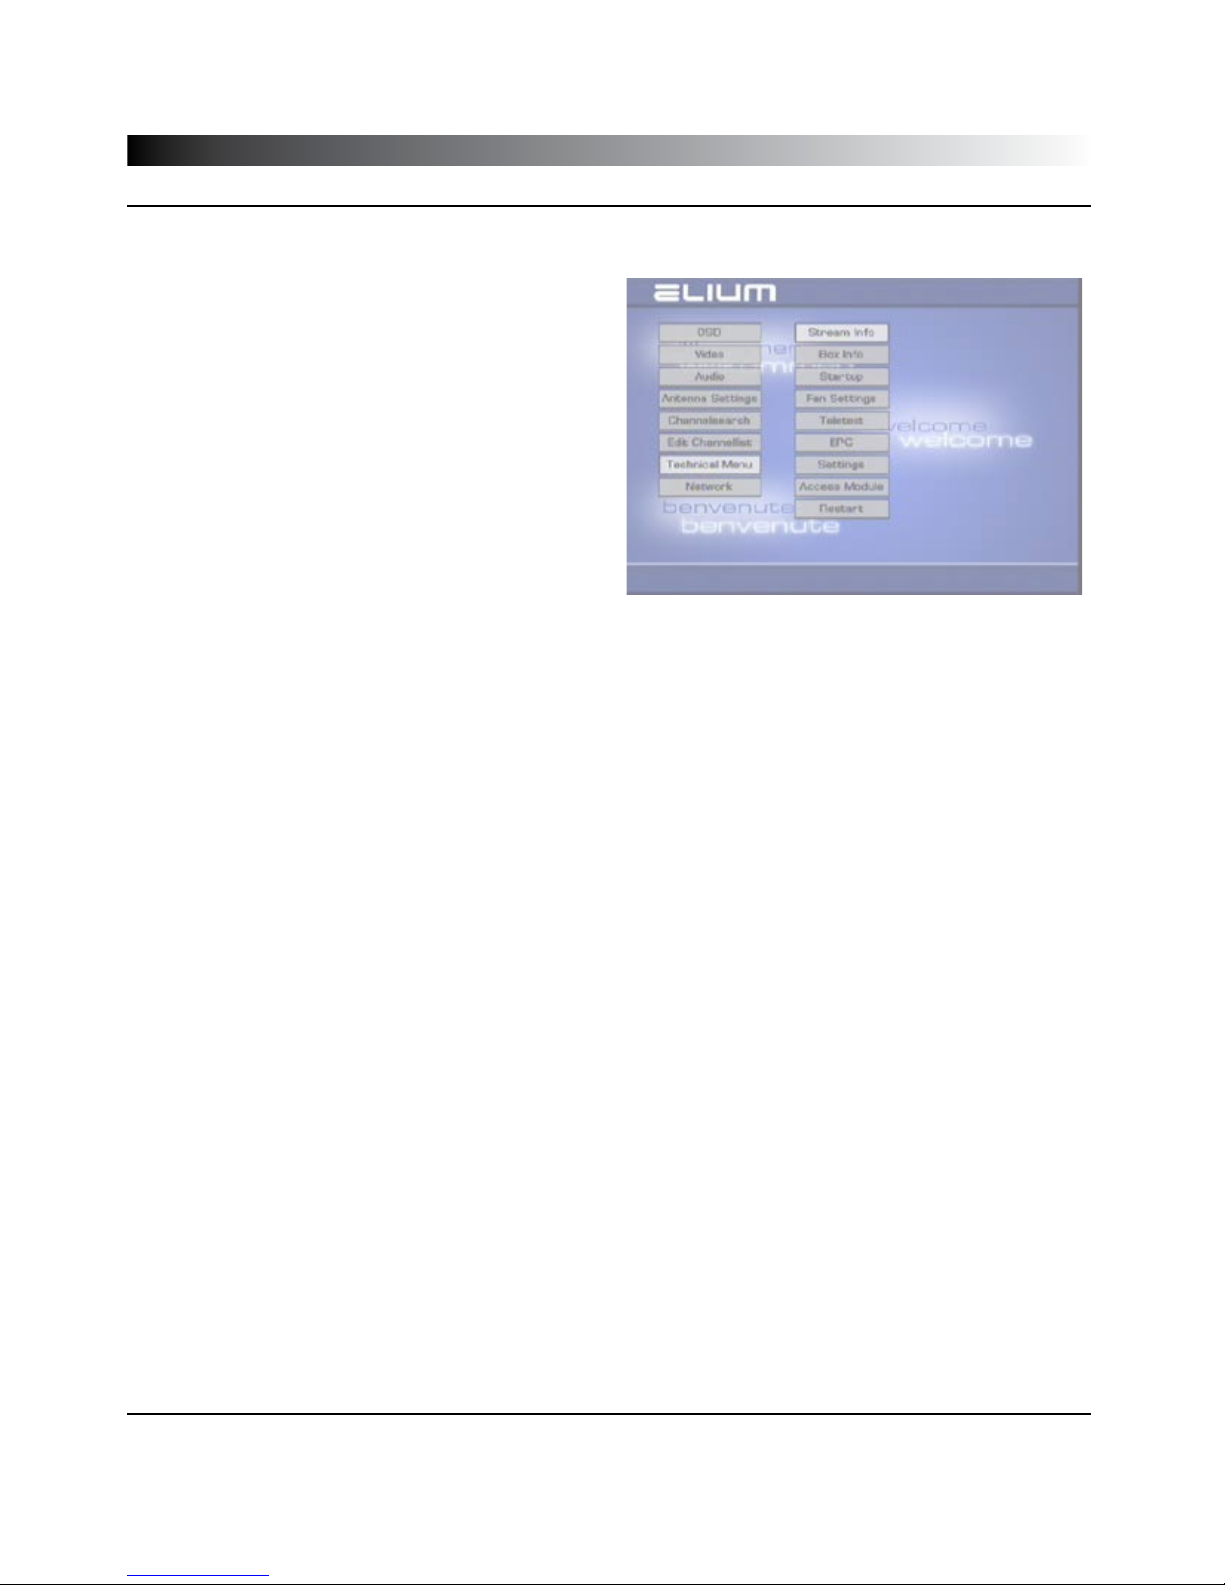
Technical
3.1 Technical Menu
The Technical Menu shows you different information. Here you can set up technical information regarding the unit such
as date and time.
There are different options shown in this menu:
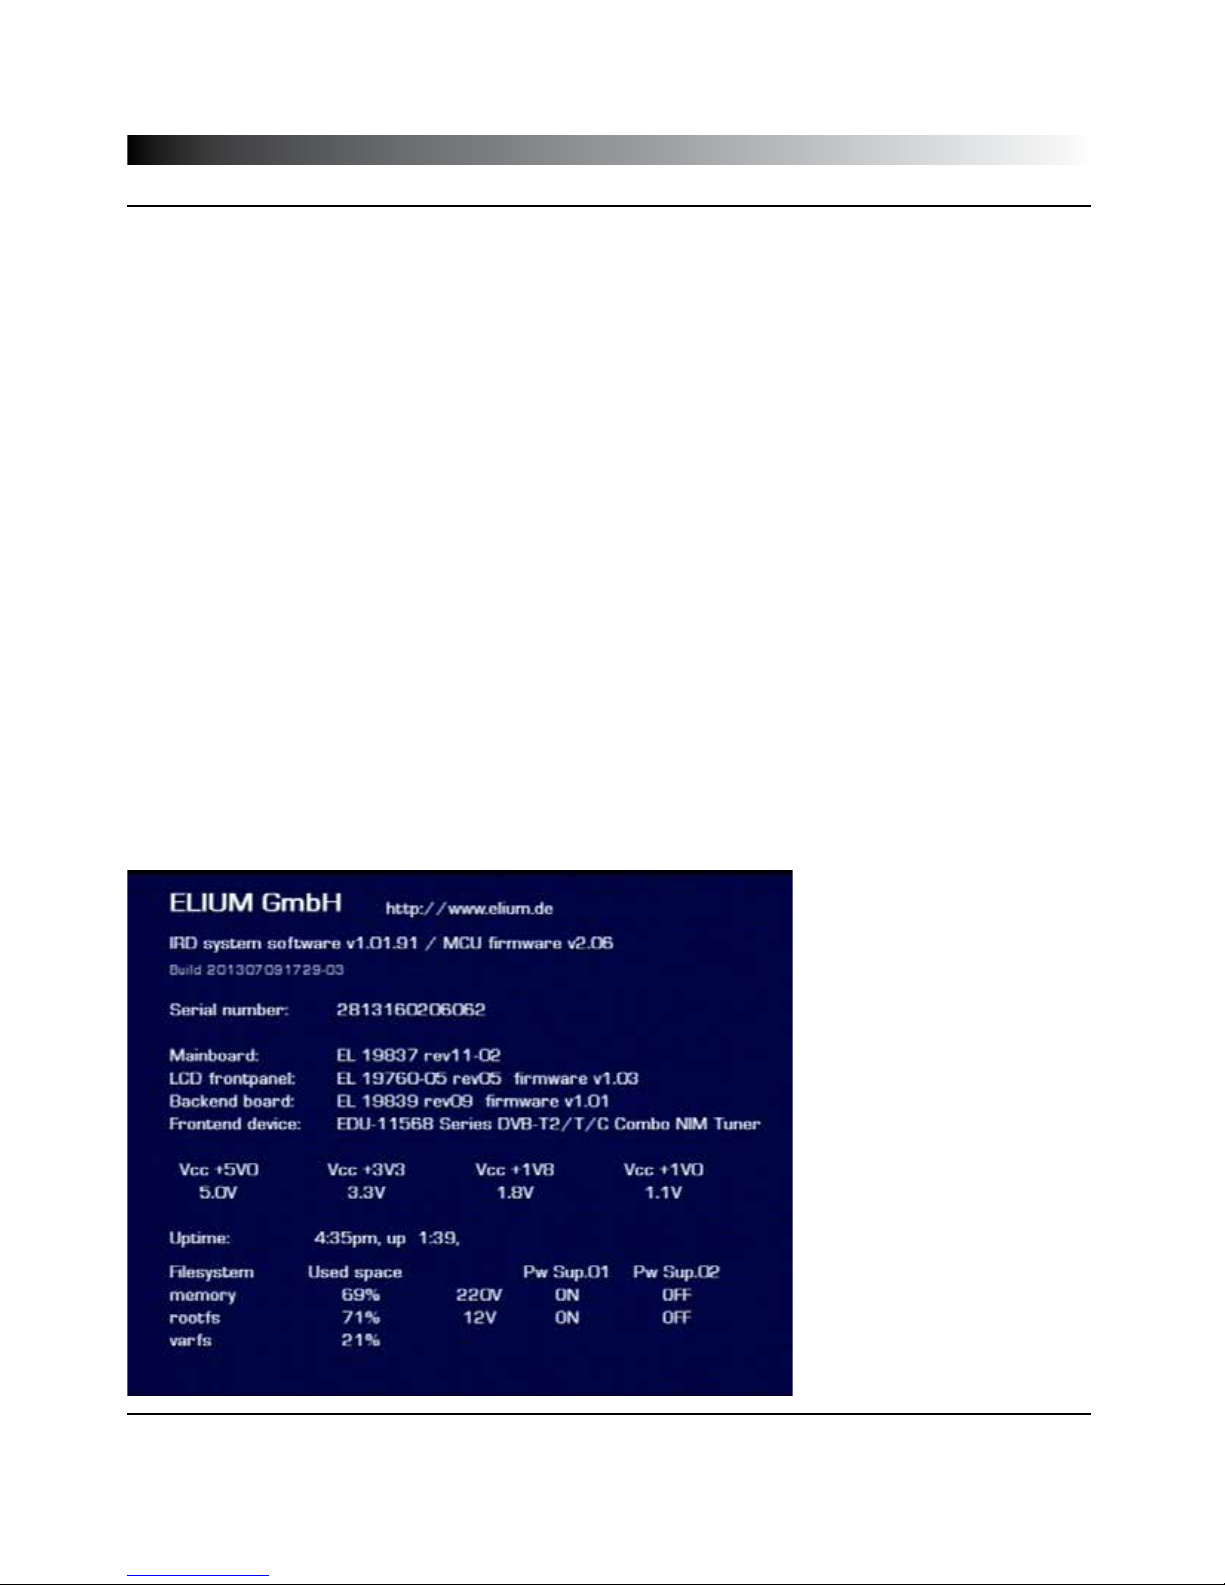
▪Box Info: Shows you technical information of the unit like
the current firmware.
▪Stream Info: Shows you a program information of the
current and next event. You can also get this informa-
tion by pressing the info button (22).
▪Control: Setup the IR addresses and the RS232
baud rate.
▪DVB Services: Set the videotext and the EPG.
▪Fan Settings: Set the speed of cooler by changing the
minimum and maximum temperature of the unit.
Do not turn the cooler off as this may result in serious
damage to the unit. Please pay attention of ventilation
lance, because they must ever be free.
▪eSATA: Manage the hard drives (if available).
▪Time Zome: Here you can change the time zone.
▪ Access Module: Here you can get information and set up the used common interface module (if available).
▪Data Backup: Here you can save your settings to a USB stick or load a recovery point. The file with the „+.tar“ exten-
sion contains the saved settings of the decoder.
▪Restart: Here you can reset your device to default settings or simply restart it.
13

Available settings:
Optional you can select between one or two Ethernet
ports. ( Regulated by your SD/HD IRD )
Ethernet 1 = Streaming and control
Ethernet 2 = Control
The IP addresses of the Ethernet 1 and Ethernet 2
have to be in different IP areas.
▪DHCP: Automatic IP Address
▪RC Port: Select Port. (Default Port 26)
Attention! This port does not be used by default ser-
vices such as:
Port 80: HTTP
Port 23: Telnet u.s.w.
You should check it on the internet first.
▪IP address: Set up the IP Address of the receiver.
▪Netmask: Set up the Network Netmask.
▪Broadcast: Broadcast Address.
▪Default Gateway: Set up the Network Gateway.
▪Name Server: Server IP.
All Settings are entered by the numeric field of the remote control (2)
CAUTION: You have to turn Off/On the unit to have the setup in use.
14
Technical
3.2 IP Settings

3.3 Menu via Display
Technical
It is possible to change the settings via the front panel. By pressing the „M“ button the following menu structure appears
in the display:
OSD
OSD Language Choose the OSD Language
OSD Transparency Choose the transparency on menu
OSD Colours Set the OSD colours
OSD Background Background image, change boot and shutdown image
LCD Brighness Setup the display backlight on device
LCD Contrast Setup the display contrast on device
OSD Timeout Time to show the OSD
Ext. Proginfo Additional information such as signal quality, signal strength
Video Settings
Digital TV Setup the settings like picture format, contrast, sharpness,..
Analog TV Setup the settings like play format, contrrast, sharpness,...
HDMI Switch HDCP on or off
SDI Mode Choose between HD und SD format.
Audio Settings
Volume Change the volume
Audio Activation of AC3
Languages Choose the Language for programs
Subtitle Choose the Language for subtitle
SDI Audio Audio tracks settings and SDI audio rules
Antenna Settings Choose satellite
Channelsearch
Automatic Search Automitically search of programs
Manual Search Manual search of programs
Search Options Search options
15

3.3 Menu via Display
Technical
Technical Menu
Box Info Readout software, hardware version and more ...
Stream Info Readout transponder, picture format, ...
Control Startup functions
Fan Settings Fan settings
eSATA Settings for the hard drive / format hard drive
Time Zone Set time zone
Access Module CI Module info
Data Backup Save and load of settings
Restart Restart or reset your device
You can also enter the main menu by pressing the „OK“ and „M“ button at the same time
16
3.4 External Boxeditor / Telefonsupport
Technical
External Channellisteditor - BOXEDIT
▪Connect your PC and the receiver via a RS232 cable.
▪ Start the Boxedit.
Following functions are available:
▪Load from Box: Loads TV and Radio channel list to the PC and displays it.
▪Load from File: Loads a existing channel list and displays it.
▪Save to Box: Saves the actual channel list to the Receiver.
▪Save to File: Saves the actual channel list at a choosable place on the PC.
(The file with the „+.bed“ extension contains the TV and radio list)
Phone support
If you need any phone support, please make sure you have the following information from the Info Hardware/Software
menu at hand:
App. Ver. and Board Ver.
17
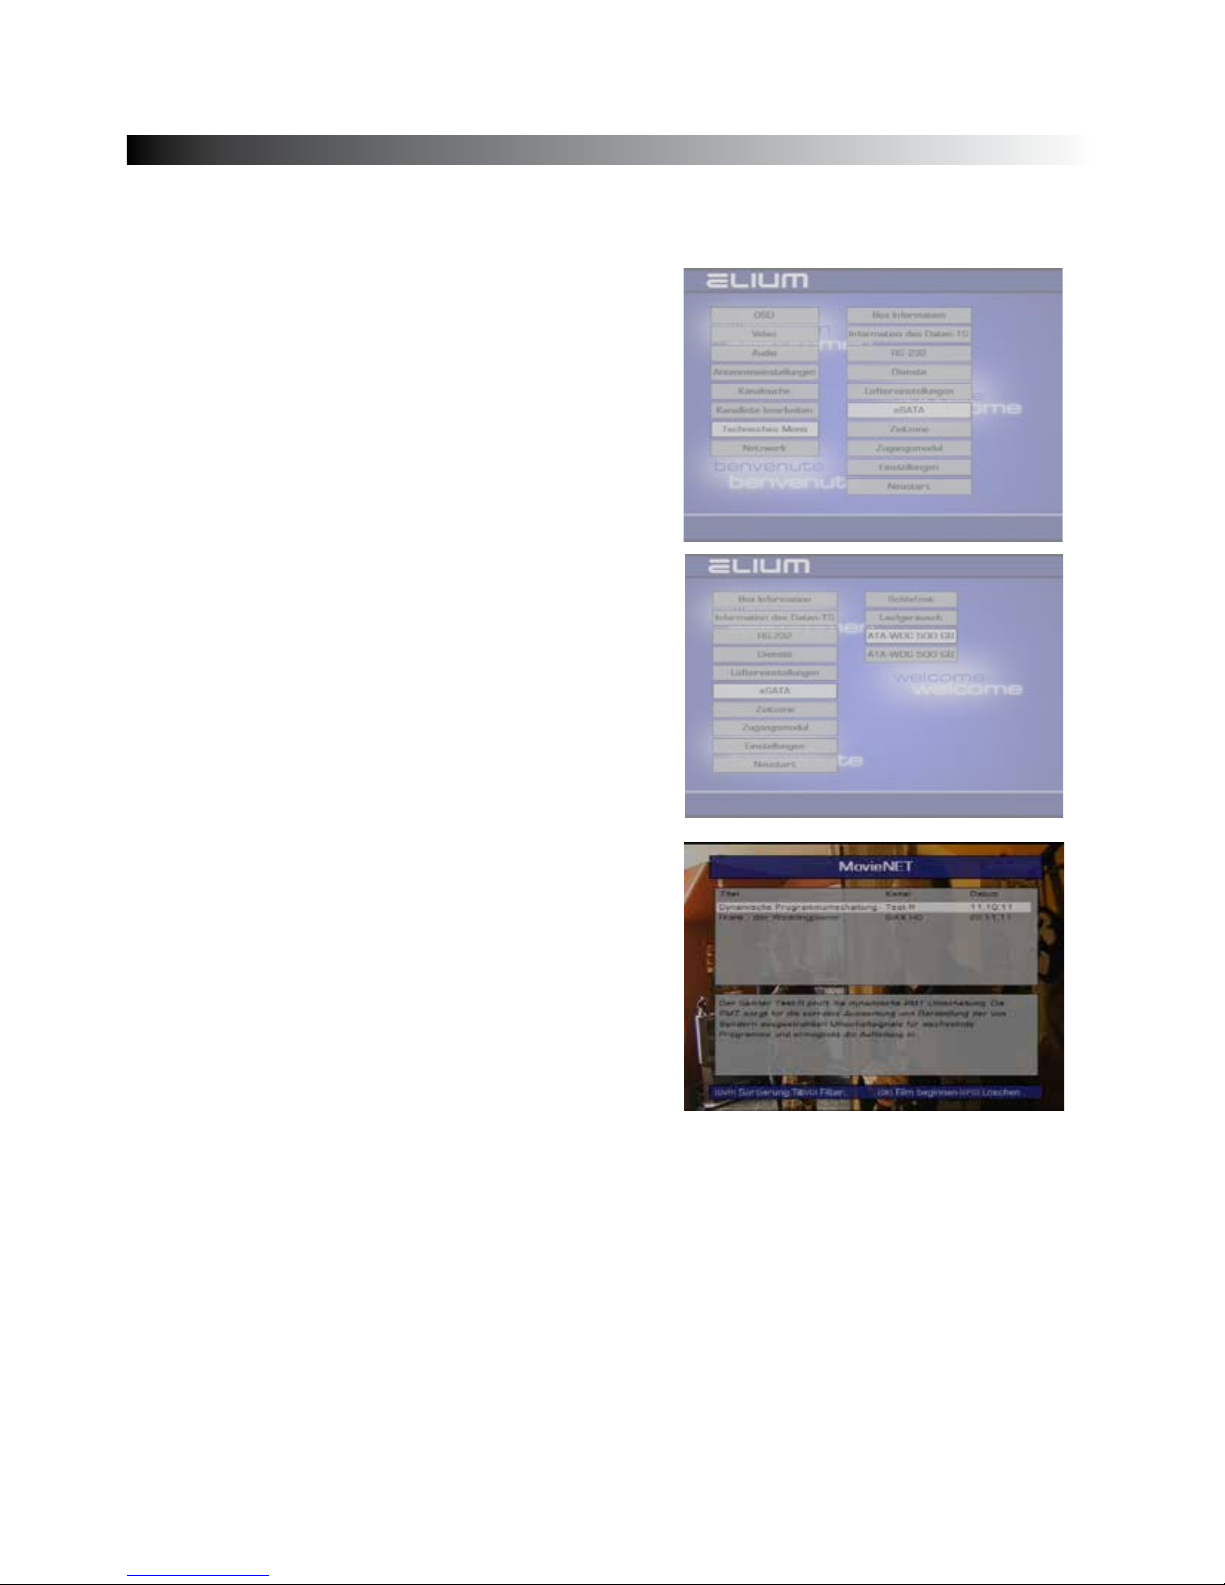
Important: The connected hard drive have to be formatted to the
right format by the device:
Menu/ Technical Menu/ eSATA/ Interface 1/ Format HDD
Interface 2/ Format HDD
Make sure the cables are correct connected.
( eSATA 1 = Bottom interface on device )
( eSATA 2 = Top interface on device)
In the eSATA menu you can change the sleep time and the running
noise of the hard drive.
In preferred data storage you decide where a recording is saved,
the hard drive or network (If you are connected to a network). If
the setting is “ON” the recording is saved on the hard drive.
In the eSata menu you can adjust a time out for the hard drive.
This turns the hard drive off if it is not used.
In the submenu “running speed” you adjust the speed of the
hard drive, which changes the running noise.
In “Management” you can switch between the connected hard
drives and check or format them.
With the DVR button “13” you get into the MovieNET
menu:
This menu allows to play the movies from a connected hard drive.
▪With the stop button “21” you can start or stop a record of
a selected channel or program.
▪With the fast forward “16” and the rewind “17“ button you can
fast forward and rewind.
▪With the play / pause button “18” you can start and stop
a recording.
▪With the video forward and back buttons “19” and “20” you can
switch between the videos and rewind to beginning or
fast forward to the end.
3.5 eSATA
Technical
18

With the PVR button „15“ you get into the movie menu:
The movieNET menu allow to play movies from the hard drive.
▪With the “stop” button „21“ you start a selected movie.
▪With the buttons rewind „16“ fast forward „17“ you can rewind or fast forward a movie.
▪With the Play / Pause button „18“ you can start or stop the movie.
▪With the “next” and “previous” buttons „19“ and „20“, you can switch between movies and rewind to beginning or
fast forward to the end.
With the PVR button „14“ you get into the music menu:
The MP3 mode allows to play MP3 from a hard drive.
▪With the Play / Pause button „18“, you can start and stop the MP3 title.
▪With the “next” and “previous” buttons „19“ and „20“, you can switch between the MP3 titles.
With the PVR button „12“ you get into the picture menu:
The picture mode allows to look at pictures from a hard drive.
▪With the Play / Pause button „18“, you can show the selected picture.
▪With the “next” and “previous” buttons „19“ and „20“, you can switch between the pictures.
Network setup:
To access the hard drive you have to setup the access first.
3.5 eSata
Technisches
19
Table of contents


