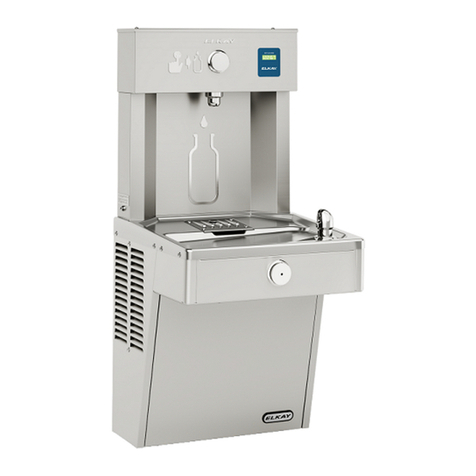
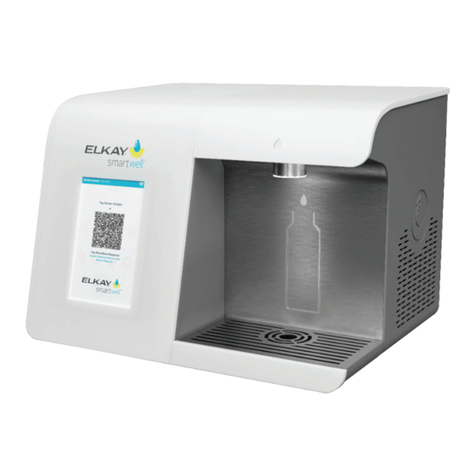
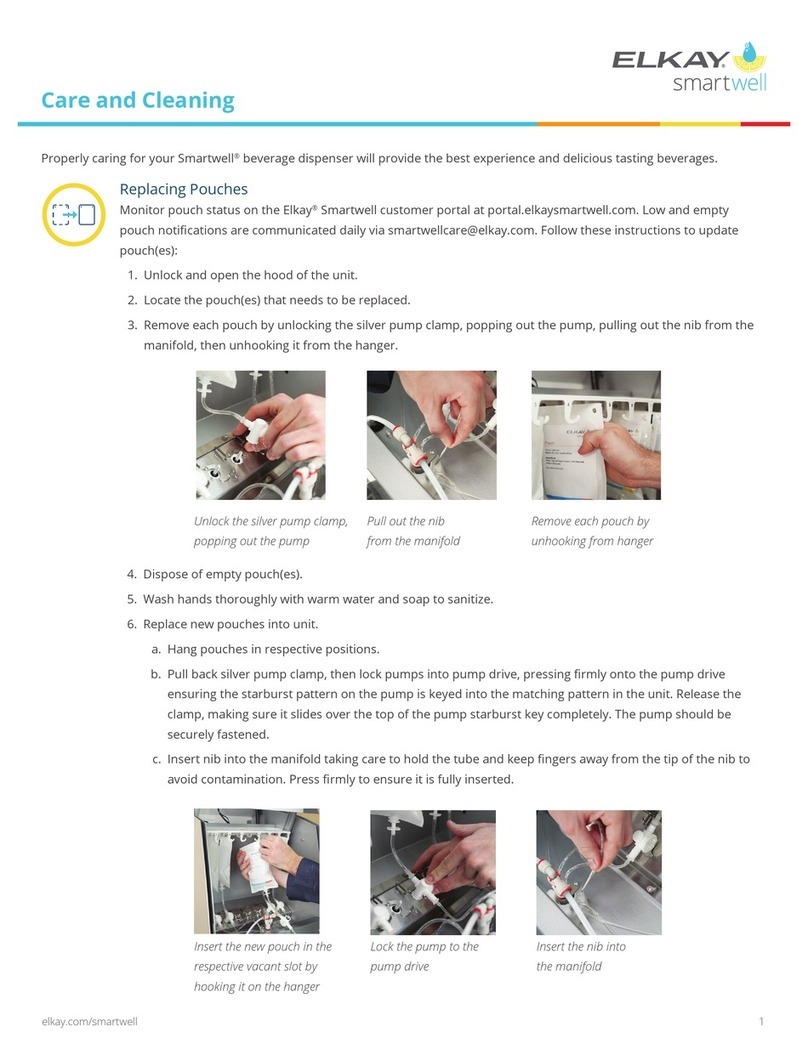
Elkay smartwell SW1806CR User manual

Smartwell™Countertop Beverage Dispenser with
Remote Chiller
Model - SW1806CR
Installation
Manual
Beverage Dispenser
WARNING
Read the instructions in this manual and retain for future reference.

Elkay Manufacturing Company 2
Countertop Installation Manual (2000000029 Rev. A - 04/21)
Contents
1. General Information . . . . . . . . . . . . . . . . . . . . . . . . . . . . . . . . . . 2
1.1 Warning / Notice / Safety Instructions . . . . . . . . . . . . . . . . 2
1.2 ELKAY Smartwell Documents. . . . . . . . . . . . . . . . . . . . . . 2
1.3 Serial Number Locations. . . . . . . . . . . . . . . . . . . . . . . . . . 2
1.4 Contact Information. . . . . . . . . . . . . . . . . . . . . . . . . . . . . . 2
1.5 Notice of Changes . . . . . . . . . . . . . . . . . . . . . . . . . . . . . . 2
1.6 Disclaimer . . . . . . . . . . . . . . . . . . . . . . . . . . . . . . . . . . . . . 3
1.7 Warranty . . . . . . . . . . . . . . . . . . . . . . . . . . . . . . . . . . . . . . 3
2. Safety. . . . . . . . . . . . . . . . . . . . . . . . . . . . . . . . . . . . . . . . . . . . . . 3
2.1 General . . . . . . . . . . . . . . . . . . . . . . . . . . . . . . . . . . . . . . . 3
2.2 Safety Alert Symbol and Signal Words . . . . . . . . . . . . . . . 3
2.3 Safety Signal Words . . . . . . . . . . . . . . . . . . . . . . . . . . . . . 3
2.4 Personal Safety. . . . . . . . . . . . . . . . . . . . . . . . . . . . . . . . . 3
3. Key Components . . . . . . . . . . . . . . . . . . . . . . . . . . . . . . . . . . . . 4
4. Installation Preparation . . . . . . . . . . . . . . . . . . . . . . . . . . . . . . . 5
4.1 Water. . . . . . . . . . . . . . . . . . . . . . . . . . . . . . . . . . . . . . . . . 5
4.2 Electricity. . . . . . . . . . . . . . . . . . . . . . . . . . . . . . . . . . . . . . 5
4.3 Surroundings. . . . . . . . . . . . . . . . . . . . . . . . . . . . . . . . . . . 5
5. Installation . . . . . . . . . . . . . . . . . . . . . . . . . . . . . . . . . . . . . . . . . 6
5.1 What`s in the Box . . . . . . . . . . . . . . . . . . . . . . . . . . . . . . . 6
5.2 Cabinet (Optional). . . . . . . . . . . . . . . . . . . . . . . . . . . . . . . 6
5.3 Connecting the Filter and Remote Chiller . . . . . . . . . . . . . 9
5.4 Connecting the CO2Tank . . . . . . . . . . . . . . . . . . . . . . . . . 9
5.5 Internet . . . . . . . . . . . . . . . . . . . . . . . . . . . . . . . . . . . . . . 10
6. Startup Instructions . . . . . . . . . . . . . . . . . . . . . . . . . . . . . . . . . 11
6.1 Initial Setup . . . . . . . . . . . . . . . . . . . . . . . . . . . . . . . . . . . 11
6.2 Pouches . . . . . . . . . . . . . . . . . . . . . . . . . . . . . . . . . . . . . 12
6.3 Set the Water Flow Parameters . . . . . . . . . . . . . . . . . . . 14
6.4 Unit Diagnostics . . . . . . . . . . . . . . . . . . . . . . . . . . . . . . . 15
6.5 Check for Updates . . . . . . . . . . . . . . . . . . . . . . . . . . . . . 16
1. General Information
1.1 Warning / Notice / Safety Instructions
WARNING
Carefully read,
understand, and follow
all the instructions in
this manual before using the product. Improper installation of this
product could cause a dangerous situation resulting in personal
injury or even death.
DO NOT operate power tools unless you read and understand the
instructions and warnings in this and all other applicable manuals.
Proper use of tools and the products described in this manual is
your responsibility.
NOTICE
Failure to follow these instructions
could also cause a situation that results
in water damage, or other damage to
fl oors, walls, pipes, or electrical wiring.
Read all instructions carefully and familiarize yourself with the various
parts of this product BEFORE starting the installation.
This manual contains step-by-step installation instructions for the
Elkay Smartwell Countertop beverage dispenser with Remote Chiller.
A separate Use and Care manual contains the operating instructions.
The Elkay Smartwell Countertop is a ltered water dispenser that gives
users the option to create their own custom beverages using a touch
screen on the unit or a mobile device for touchless operation.
Followed carefully, these instructions will result in an easy, trouble-free
installation of this Elkay Manufacturing Company (Elkay) product.
Any deviations, additions or deletions from the described methods,
without the prior written approval of our Smartwell Care department, will
void the warranty covering this product.
SAFETY
INSTRUCTIONS
The installer is responsible for making
sure the installation of this product
meets all local, state, and Federal
plumbing and electrical codes.
1.2 ELKAY Smartwell Documents
• Smartwell Owner`s Use & Care Guide
•Smartwell Troubleshooting Chart
Visit www.elkaysmartwell.com for product videos, FAQs and more!
1.3 Serial Number Locations
The serial number is located on the back of the Countertop dispenser
in the upper right corner. Reference this serial number when contacting
Elkay with any questions concerning this product.
The serial number for the Remote Chiller is located on the back of the
Remote Chiller unit as shown.
1.4 Contact Information
Contact your dealer or lease provider if you have any questions relating
to the installation or operation of this unit, or if there are damaged or
missing parts.
If additional support is required, please contact the Smartwell Customer
Care Team.
Write Dealer / Lease Provider Contact Above for Future Reference
Smartwell Customer Care Team
Phone: 866.699.4507
Email: Smartwellcare@elkay.com
1.5 Notice of Changes
The information, speci cations and illustrations in this manual are based
on the information that was available at the time this material was
written and is subject to change without notice.

3 Elkay Manufacturing Company
Countertop
1.6 Disclaimer
The information contained in this manual is given free of charge. This
information is based on reliable technical data and is intended for
people with the technical knowledge to install, use and maintain this
product at their own discretion and risk. Elkay assumes no responsibility
for results obtained or damage incurred from the use of this material
either in whole or in part by the buyer.
1.7 Warranty
This product is covered by a Limited Warranty and Elkay will not be held
responsible for damage of any kind in connection with the installation of
the product.
Refer to the Elkay website http://www.elkay.com/warranty and click on
DRINKING WATER PRODUCT WARRANTY.
2. Safety
THINK
SAFETY!
Think Safety
Before performing any work, read and
understand the safety instructions in this
manual.
2.1 General
The Elkay Manufacturing Company (Elkay) cannot anticipate every
possible circumstance that might involve a potential hazard during
the installation, use or maintenance of this product. The warnings
and instructions in this manual are, therefore, not all-inclusive. If a
tool, procedure or work method that is not specically recommended
by Elkay is used, you must be satised that it is safe for yourself and
others. You should also make sure that the product will not be damaged
by the methods you choose.
Most work-related accidents are caused by failure to observe basic
safety rules or precautions. An accident can often be avoided by
recognizing potentially hazardous situations before an accident occurs.
As you install, use or maintain this product, you must be alert to
potential hazards. You should also have the necessary training, skills
and tools to perform any installation or maintenance procedure.
2.2 Safety Alert Symbol and Signal Words
The safety alert symbol is used to alert you to potential
personal injury hazards. The hazards are identied with
this safety alert symbol along with a signal word such as
"WARNING" or "CAUTION".
Signal words help focus your attention on potential
hazards. The signal words used in this manual are WARNING,
CAUTION, NOTICE, SAFETY INSTRUCTION and Note. The safety
messages must be followed to prevent personal injury or death as well
as prevent product damage.
2.3 Safety Signal Words
WARNING
Indicates a potentially
hazardous situation which, if not
avoided, could result in death or
serious injury.
CAUTION Indicates a potentially
hazardous situation which, if
not avoided, may result in minor
or moderate injury.
NOTICE Indicates that equipment or property
damage can result if instructions are
not followed.
SAFETY
INSTRUCTIONS Safety instructions (or equivalent) signs
indicate specic safety-related
instructions or procedures.
Note: Contains additional information important to a procedure.
2.4 Personal Safety
WARNING
These warnings indicate a
potentially hazardous situation
which, if not avoided, could
result in serious injury or death. Follow all instructions related to
the installation, use or maintenance of this product (unit).
Installation Manual (2000000029 Rev. A - 04/21)
Personal Protection
Be sure to use all personal protective equipment, such as
safety glasses, sturdy work shoes and cut resistant
gloves, whenever necessary to ensure your own safety.
To avoid eye injury, always wear protective glasses
with side shields when working near CO2tanks and lines.
Make sure no one else can be injured by escaping CO2gas
should a hose or tting break.
Wear sturdy shoes when unpacking the unit or
moving it. DO NOT wear open-toed shoes or tennis
shoes.
Wear protective cut resistant gloves during
installation to protect against sharp edges
from sheet metal components.
Shock and Electrocution Hazards
Contact with live electricity can cause serious bodily injury
and in some cases, death.
DO NOT touch any electrical device with wet hands or
allow water to come into contact with electrical devices.
Water will conduct electric current to create a short circuit,
resulting in injury or death.
WARNING
DO NOT create a short circuit between a source of
electricity and a liquid by being in contact with both
simultaneously.
Pressurized Vessel Hazards
Follow all safety recommendations from the CO2tank
supplier, including but not limited to:
A carbon dioxide cylinder is a pressure vessel and
therefore has explosive capabilities.
Due to the possibility of an explosion
which could result in personal injury or
property damage, never allow carbon
dioxide cylinder and its contents to reach a
temperature exceeding 115° F.
If a CO2gas leak is suspected immediately ventilate
the contaminated area before attempting to repair the
leak. People exposed to a high concentration of CO2
gas will experience tremors which are followed rapidly by
loss of consciousness and suffocation.
DO NOT drop a CO2 cylinder or stike it with a
foreign object. Protect cylinders from
damage. Use a suitable hand truck to move
cylinders; DO NOT drag, roll, slide or drop.
Both lled and empty cylinders should be stored
indoors in a cool, dry, ventilated location away from
any source of heat.
Chain or secure the cylinders in an upright position when in
use or storage. Store full and empty cylinders separately.
Elkay Manufacturing Company 4
Countertop Installation Manual (2000000029 Rev. A - 04/21)
Never lay the cylinders on its side. Liquid CO2
entering the gas regulator may cause problems
(rupture the tank or gas line) due to rapid expansion
of the liquid CO2. The gas regulator could freeze up,
preventing the regulator from shutting down, allowing CO2 to
continue to ow from the cylinder.
Gas cylinders must only be transported on an open back
utility truck that is separate from the main body of the vehicle.
DO NOT transport CO2tanks in the passenger compartment of
a vehicle.
CAUTION
These cautions indicate a
potentially hazardous situation
which, if not avoided, may result
in minor or moderate injury. Follow all instructions related to
installation and/or maintenance of this product.
Personal Protection from CO2Gas
Follow all safety recommendations from the CO2 tank
supplier, including but not limited to:
Indirect eye contact with CO2gas may cause mild
irritation. Direct eye contact with the liqueed gas
can freeze the eye causing permanent eye damage or
blindness.
CO2gas displaces oxygen. Make sure there are no
CO2gas leaks in any part of the Smartwell beverage
system.
Direct contact with the liqueed gas can chill or
freeze the skin (frostbite).
Tripping Hazard
Personal injury can result from tripping over power cords,
tools or other installation items. DO NOT leave items lying
around the work area.
Use Proper Tools
Always use proper tools which are in good working
condition during the installation of the product.
3. Key Components
Touch screen
Alcove
Pouch lid
Drip Tray
Nozzle
Main Power
Switch
Lock for Pouch Lid
Smartwell power
switch and circuit
breaker reset
Sparkling water inlet
Still water inlet
Ethernet
cable port
Close view of Main Power Unit
Remote Chiller Unit
Countertop Rear View
Countertop Front View
Note: Sparkling water inlet is labeled as "CO2port" on the back of the unit

5 Elkay Manufacturing Company
Installation Manual (2000000029 Rev. A - 04/21) Countertop
4. Installation Preparation
4.1 Water
CAUTION
Potable Water
Only
DO NOT connect this product to a water source that is
microbiologically unsafe or of unknown quality. Always connect
the unit to a water main that supplies drinking water only.
Lifting Hazard
Use two people to move the Countertop unit and Remote
Chiller. The Countertop unit weighs 51 lbs. The Remote
Chiller unit weighs 55.5 lbs.
NOTICE
DO NOT allow the unit to freeze.
1. Elkay recommends a water pressure of 40 to 105 psi on our cooler
products. A pressure regulator provided in the install kit reduces the
pressure to an optimal 50 psi.
NOTICE
Water pressure that does not meet
the minimum pressure requirement
of 40 psi can cause damage to the
internal components. Low pressure may also affect the
performance of the unit and the taste of the beverage.
2. A standard 3/8” diameter inlet water line is recommended (copper or
FDA-safe plastic).
4.2 Electricity
a. Access to one standard 120-Volts electric wall receptacle is
required. The unit must be close enough to socket that the
supplied power cord reaches without stress or stretching.
NOTICE DO NOT connect the unit to a
power strip and DO NOT use an
extension cord.
b. A minimum 20 Amp GFCI outlet on a dedicated circuit is
recommended with a minimum current of 5 amps. Prior to
installation, ensure that it is possible to disconnect the power
supply either by removing the plug or by circuit breaker.
CAUTION If the cord or plug
becomes damaged,
replace only with a cord
and plug of the same type. Contact Smartwell Customer Care
to request a replacement.
4.3 Surroundings
Location Requirements:
Install the unit in a clean, dry, well-ventilated room. It is designed to
function correctly in environments with a temperature between 60°F
and 80°F.
NOTICE
DO NOT place the unit near a
source of heat.
CAUTION
The unit is not intended for
use by children. Keep the
areas surrounding the unit
dry to avoid the risk of injury due to slipping.
1. The unit requires approx. hole diameter of 3" (7.6 cm) to route the
hoses to the Remote Chiller and CO2tank.
Approx. Hole
Size
Ø 3” (7.6 cm)
24" 4”
36.5"
54.5"
17.6"
19.8"
24"
21.9"
28.5"
4"
18"
4"
25" 10.6"
15.5"
4"
4"
4"
4"
4"
4”
Product Dimension and Minimum Surrounding Space Requirement
CO2Tank
Remote Chiller
Countertop Dispenser
Smartwell Cabinet
(Optional)

Elkay Manufacturing Company 6
Countertop Installation Manual (2000000029 Rev. A - 04/21)
5. Installation
5.1 What`s in the Box
CAUTION
Wear protective
cut-resistant gloves to
protect against sharp edges from sheet metal
components.
Use care when opening and removing the
packaging to prevent damage to the product.
a. Inspect the product for any shipping damage
and report it immediately to your dealer or lease
provider. Installation of a damaged product will void
the warranty.
b. Conrm that all accessory parts have been
included for the proper installation of this product.
Contact your dealer or lease provider if damaged
parts are found.
Note: Accessories may vary in appearance from
image.
Note: Remote chiller will be shipped in a separate
box from the Smartwell dispenser unit.
Factory Supplied Parts
No. Description Part Number Qty.
1 Coil of 3/8” O.D. water tubing (blue) 1000002708 2
2Coil of insulation for 3/8” water tubing
(black)
1000002707 2
3 Coil of 1/4" O.D. CO2tubing (white) 1000002706 1
4 Quick connect CO2regulator 1000002468 1
5 Quarter-turn water supply shut-off
valve
1000002470 1
6 Filter 51299C 1
7 Power Cord 1000004819 1
8 Ethernet Cable (15 feet) 1000005025 1
9 Wi-Fi Extender 1000005047 1
10 CO2Bottle Wall Mounting Bracket 1000005199 1
11 50 psi Water Pressure Regulator 1000002467 1
12 Elbow Fitting 3/8" stem x 3/8" tube 70818C 2
13 Filter Head Assembly 1000006192 1
5.2 Cabinet (Optional)
Note: If you DO NOT own the optional Cabinet, skip to
section 5.3 - Connecting the Filter and Remote
Chiller.
1. Make sure the unit's main power switch on the back
of the unit is in the OFF position.
NOTICE
DO NOT plug the unit into a
power source at this time.
The ice bank must be filled with water before the
unit is turned ON and CO2 cylinder installation
must be completed.
2. Unbox the Cabinet, inspect to ensure no shipping
damage, then place upright on the oor in desired
location for the Smartwell.
Lifting Hazard
Use two people to carefully lift the Countertop
dispenser unit.
6
7
8
9
31
2
11
4
10
5
12
13
Remote Chiller

7 Elkay Manufacturing Company
Installation Manual (2000000029 Rev. A - 04/21) Countertop
3. Use the included key to unlock and open the Cabinet
door.
Cabinet Lock
4. Install the lter in the Cabinet.
a. Firmly press the lter into the lter head, then twist
the lter clockwise to secure.
b. Position and hang the lter head assembly with
bracket carefully onto the 2 screws available
inside the Cabinet.
Note: Tighten the 2 screws after hanging the
filter head assembly.
5. Install the Remote Chiller in the Cabinet.
6. Connect the 3/8" water tubing from the water source
to the inlet side of the water pressure regulator. Next
connect 3/8" water tubing to the outlet side of the
water pressure regulator.
7. Connect the 3/8" water tubing from the water pressure
regulator to the inlet side of the shut off valve.
8. Connect 3/8" water tubing to the outlet side of water
regulator making sure the water ow is in the proper
direction. Connect 3/8" tubing from shut off valve to
inlet of water lter.
Filter Head
Filter
Countertop
Unit
Pressure
Regulator
Shut-off
Valve
3/8" water
tubing
Screw
Filter Head
Assembly

Elkay Manufacturing Company 8
Countertop Installation Manual (2000000029 Rev. A - 04/21)
9. Connect the lter outlet port with the Remote Chiller
water inlet port using 3/8" water tubing.
10. For lling the ice bank in the Remote Chiller, please
reference section 5.4 Step 2.
11. Install the CO2 regulator on top of the CO2 tank.
12. Install the CO2 tank in the Cabinet.
a. Place the CO2tank inside the Cabinet in location
shown.
b. Use the sling to tighten the CO2tank in position.
13. Continue on to sections 5.3 and 5.4 for details on
how to properly connect the tubing between the CO2
tank, Remote Chiller and rear of the Countertop
dispenser.
Countertop
Unit
3/8" water
tubing
Look inside the cabinet

9 Elkay Manufacturing Company
Installation Manual (2000000029 Rev. A - 04/21) Countertop
5.3 Connecting the Filter and Remote Chiller
Note: If you do not have the optional Countertop
Cabinet, place the remote chiller and CO2tank
in the desired storage location. There is 10 ft of
provided tubing to connect the CO2tank, so keep
this in mind when planning the CO2tank storage
location.
1. The lter can be conveniently installed on the back
of the Countertop dispenser unit using the included
two screws, or can be installed with the provided lter
head in the desired under-cabinet location with the
CO2tank and remote chiller.
2. Prepare the water inlet line to connect to the Remote
Chiller unit.
491a
a. Place the black insulation tubing over the 3/8" blue
water tubing.
b. Connect the 3/8" poly tube from the potable water
source to the inlet of the lter.
•Connect the pressure regulator and shut-off
valve to the lter inlet.
•Firmly insert the lter into the lter head,
then twist the lter clockwise to secure.
OFF
•Connect the other end of the lter to the
potable water source of the Remote Chiller
unit.
5.4 Connecting the CO2Tank
1. Connect the CO2tank to the Remote Chiller unit.
a. Install and secure the CO2tank per the
manufacturer’s recommendation.
b. Attach the supplied regulator valve onto the CO2
tank.
c. Cut the supplied 1/4" poly tube to the appropriate
length.
d. Connect the 1/4" poly tube to the CO2inlet port on
the Remote Chiller unit.
2. Fill the ice bank in the Remote Chiller unit.
a. Make sure the Remote Chiller's power switch is in
the OFF position.
b. Remove the plug from the ll port of the ice bank.
Insert the 3/8” water line from a water supply
source into the ice bank Inlet connection.
Filter Head
Screws
Shut-off valve
Potable water
source
Wall
Filter
Pressure Regulator
Filter
Remote Chiller
Water Inlet port
Remote Chiller
CO2 Inlet port
Remote Chiller
Filter CO2 tank
Water Inlet port

Elkay Manufacturing Company 10
Countertop Installation Manual (2000000029 Rev. A - 04/21)
c. Slowly ll the ice bank until the water reaches the
maximum ll line on the overow tube. Do not over
ll the ice bank.
Note: An overfill port is located behind the panel.
This panel can be removed to access the overflow
port but it is not necessary if care is used when
filling the tank.
d. Once the Remote Chiller is lled, remove the water
line and replace the plug.
Note: Residual water may spill out of the fi ll port.
This is completely normal. Wipe the residual spilled
water with a dry cloth.
3. Connect the 3/8” poly tube from the cold water outlet
port of the Remote Chiller to the still water inlet port of
the Countertop unit.
4. Connect the 3/8” poly tube from the sparkling water
outlet port of Remote Chiller to the CO2port of the
Countertop unit.
5.5 Internet
1. Connect an Ethernet cable from your network into the
back of the Countertop dispenser, or skip to step 2 if
connecting via Wi-Fi.
2. Connect the unit to the supplied Wi-Fi extender.
a. Plug the provided Wi-Fi extender into a power
outlet near the unit, at a distance not exceeding
15 feet.
51
3
b. Use an Ethernet cable to connect the Wi-Fi
extender to the back of the Countertop unit.
514
c. Follow the manufacturer's directions for setting up
the unit. The remaining setup will occur during the
setup process for the Smartwell.
3. Attach the power cord and plug directly into a wall
power outlet.
Cold Water Outlet
Port
Countertop Unit
Still Water Inlet Port
Remote Chiller
Countertop Unit
Sparkling
Water Inlet
Port
Sparkling water
Outlet Port
Remote Chiller
Countertop unit
Note: Sparkling water inlet is labeled as "CO2port" on the back of the unit

11 Elkay Manufacturing Company
Installation Manual (2000000029 Rev. A - 04/21) Countertop
4. Turn the Remote Chiller power switch ON.
5. Turn the Countertop unit main power switch ON.
6. Open the water supply valve and purge the trapped
air from the water line.
Note: To fl ush out trapped air, allow water to run
continuously until the fl ow is free of air bubbles.
NOTICE
Water pressure that does
not meet the minimum
pressure requirement of 40 psi can cause
damage to the internal components. Low
pressure may also affect the performance of the
unit and the taste of the beverage.
a. Place a container under the dispenser nozzle.
b. Press the Still water button on the touch screen
and begin dispensing water.
c. Dispense a minimum of two gallons of still water to
purge trapped air from the internal water line and
the lter. This will also ll the water cartridge and
ush out ne carbon particles from the new lter.
d. Press the Sparkling water button on the touch
screen and dispense about 15 ounces of water.
Wait about 30 seconds to allow the carbonator tank
to re ll. Dispense another 15 ounces of water. Wait
another 30 seconds to allow the carbonator tank to
re ll.
7. Slowly open the CO2tank regulator valve on top of
the CO2tank counterclockwise until it is fully opened.
OPEN
4
6
3
b
8. Turn adjusting knob on the regulator until the
pressure reaches 45 psi.
OPEN
463d
6. Startup Instructions
6.1 Initial Setup
1. Once the Countertop unit main power switch has
been ipped to ON, a loading screen followed by the
Welcome screen will appear.
2. Select either Wi-Fi or Ethernet connection and press
continue.
a. If Wi-Fi connection is selected, the Wi-Fi Netgear
screen will open. Please follow the manufacturers
directions to set up.

Elkay Manufacturing Company 12
Countertop Installation Manual (2000000029 Rev. A - 04/21)
b. If connecting the unit with an Ethernet cable directly
to your network, select Ethernet connection.
3. Test connection and check for updates.
— The left-hand screen will appear if the unit is not
connected to the Internet.
— The right-hand screen will appear if the unit
is connected to the Internet. Press Update to
continue.
Note: If there is any issue with connecting after
setup, unplug the Wi-Fi Extender from the wall power
outlet and plug back in to wall outlet to reboot, then
try again to connect.
4. The unit will search for system updates. If there is an
update, it will be automatically installed.
5. Depending on whether or not the unit is connected to
the Internet, one of the following screens will appear.
— The left-hand screen will appear if the unit is not
connected to the Internet. Select the appropriate
date and time zone settings, then press Save.
— The right-hand screen will appear if the unit is
connected to the Internet. Select the appropriate
time zone settings, then press Save.
6. After several seconds, the sign in screen appears.
Enter PIN 0101 and continue to the initial set up
screen for pouch con guration.
6.2 Pouches
Follow these steps to install flavor or enhancement
pouches.
1. Place the magnetic key onto the lock position at the
back of the unit, then slide to unlock. Standing at the
front of the unit, gently pull the lid towards you and lift
to remove.
Pouch lid
Countertop
Unit
Magnetic Key

13 Elkay Manufacturing Company
Installation Manual (2000000029 Rev. A - 04/21) Countertop
2. Wash hands thoroughly with warm water and soap to
sanitize before touching new pouches.
Gently lay new avor and enhancement pouches into
slots, with the tube side of each pouch coming out
towards the front of the unit.
Note: Slot 1 is the furthest to the left.
3. Orient each pump and press down rmly onto the
pump drive until they have clicked onto the pump drive
holder, ensuring it is securely fastened.
4. Fully insert the stainless steel nibs into the holes of
the manifold, taking care to hold by the tubes to avoid
contamination.
5. Select the avor or enhancement for each slot.
Choose the MM/DD/YY from the Best by date slot and
select the date. Press save.
6. Select the CO2 slot and the Tank Capacity screen will
appear. Select either the 5, 10, 15, 20 lb. tank capacity
being installed.
Enhancement pouch
Pump Drive
Holder
Pump
Enhancement Pouch
Manifold
Pump

Elkay Manufacturing Company 14
Countertop Installation Manual (2000000029 Rev. A - 04/21)
7. Con rm once all slots and CO2 are nalized.
8. The Priming screen will appear, and the unit will begin
to dispense the contents from each pouch to catch the
small amount of liquid dispensed during Priming, place
a cup under the dispenser. This process only takes a
few seconds to complete.
9. When the Priming process is complete, the Home
screen will appear, and the unit is ready for use.
10. The Elkay Smartwell customer portal should now be
accessible if the unit is connected to the Internet.
Login and con rm the unit appears in the listing page.
11. Once complete, place the lid on top and slide back
until closed.
12. Move the magnetic key into the lock position, then
remove the key and store in a secure place.
6.3 Set the Water Flow Parameters
1. There are two entries for the ow of water through
the dispenser in milliliters per second. This number
is based on the water pressure at the location of the
Smartwell unit. Test the water ow and then enter the
two numbers into the set up screen. The Still Water
default is 25, and the Sparkling Water default is 50.
a. From the Home screen, push the Wi-Fi signal icon
in the upper right corner of the screen to access
the Sign In screen. Enter 0101 and push the Sign
In button.
Pouch lid
Countertop
Unit
Countertop
Unit
Magnetic Key

15 Elkay Manufacturing Company
Installation Manual (2000000029 Rev. A - 04/21) Countertop
b. Elkay smartwell touchless screen will appear.
Accept the Terms and Conditions. Press submit.
c. Press the Set Up button on the admin screen and
the set up screen will appear.
1) Select the desired concentration of avor in the
beverage: low, medium, or high. This setting is
based on user preferences and the default setting
is MEDIUM. If more avor is desired, select the
HIGH setting.
d. Determine and enter the ow rate for the Still Water
and the ow rate for the Sparkling Water.
1) Place a graduated measuring cup under the
dispenser nozzle.
2) Using a stop watch, measure the volume of still
water dispensed in exactly 10 seconds.
3) The ow rates are entered in ml/sec. If
measuring water in ounces, then follow this
example to calculate ow rate:
9 ounces of water measured in 10 second
dispense. (9 oz x 29.57)/10 = 27 ml/sec.
Input 27 for the ow rate.
If water is instead measured in milliliters, then
simply divide by 10 and input answer for ow rate.
4) Repeat this process for the Sparkling Water
Flow entry. The sparkling water will dispense a
greater volume in 10 seconds.
5) Press Done once complete.
6) Push the back button on the left corner of the
set up screen to return to admin screen.
6.4 Unit Diagnostics
1. From the Home screen, push the Wi-Fi signal icon in
the upper right corner of the screen to access the Sign
In screen. Enter 0101 and press the Sign In button.
2. Press the Set Up button on the admin screen and then
press the Unit Diagnostics button.

Elkay Manufacturing Company 16
Countertop Installation Manual (2000000029 Rev. A - 04/21)
3. Unit Diagnostics screen will appear.
a. Press start test to examine the functionality of
Motors, Water solenoid, Internet speed, Alcove
lighting, Fan speed, Firewall setting, Telemetry.
b. Press stop test to complete the unit diagnostics.
6.5 Check for Updates
The Smartwell unit must be connected to the Internet to
receive automatic system updates. Follow the next steps
to manually check for software updates.
1. From the Home screen, push the Wi-Fi signal icon in
the upper right corner of the screen. Enter 0101 and
press the Sign In button.
2. Press the Service button on the admin screen and
then select Check for Updates.
Note: The Service button will display the system
information for this unit. Select Check for Updates to
manually check for software updates.
3. The unit will search for system updates. If your system
is not up-to-date, the system will begin automatically
updating to the latest software. If there is no update
required, press OK to exit.
ELKAY MANUFACTURING COMPANY • 1333 BUTTERFIELD ROAD SUITE 200 DOWNERS GROVE, IL 60515 • 630.574.8484 • www.elkay.com
FOR PARTS, CONTACT YOUR LOCAL DISTRIBUTOR OR CALL 1.800.834.4816
REPAIR SERVICE INFORMATION TOLL FREE NUMBER 1.800.260.6640
END OF DOCUMENT
Other manuals for smartwell SW1806CR
1
Table of contents
Other Elkay Beverage Dispenser manuals
Popular Beverage Dispenser manuals by other brands

Marvel
Marvel ML24BN Series Installation, operation and maintenance instructions

rosseto
rosseto LD116 quick start guide

Cornelius
Cornelius ED-250 installation instructions

Crathco
Crathco PIC 23A Service manual

Cornelius
Cornelius Visual Display Dispenser JS7-W25 owner's manual

INTERNATIONAL CARBONIC
INTERNATIONAL CARBONIC TUACA Installation and service manual

Multiplex
Multiplex WELBILT Blend-In-Cup MB-8-1PP6 Installation, operation and maintenance manual

NESTLE
NESTLE Express Extra manual

Concordia
Concordia XPRESS Technician manual

Ugolini
Ugolini ARCTIC COMPACT Service manual

Crathco
Crathco 3312 Specification sheet

Cornelius
Cornelius ED 300 BC installation manual