elliTek IIoTA User manual

Quick Start Guide
Edge Server Appliance
Thank You for your purchase! You’re one step closer to
securely geng your data.
1. Power1. Power
Unpack your IIoTA™. Locate and connect the AC power adaptor. Plug the power
adaptor into any standard grounded receptacle.
2. Install2. Install
Before interfacing your IIoTA™, the Workbench setup software must be installed on a
local PC. This software may be downloaded online by navigating to:
https://www.IIoTA.net/resources
Download the Workbench software. Navigate to the installation le location and double-
click the executable le to begin the installation.
Connecng Your Devices to Databases
This quick start guide is your 1-2-3-RUN instructions to connect your devices (e.g. PLCs) to
databases (e.g. SQL) in minutes.
Log-on to www.IIoTA.net for video tutorials and in-depth manual.
3. Connect3. Connect
Ensure the IIoTA™ is connected via standard Ethernet (RJ45) cable connections (not
included). The unit is equipped with two (2) RJ45 network ports labeled ETH0 and
ETH1. The unit comes pre-congured with the following addresses:
ETH0: 192.168.1.68
ETH1: 10.10.10.10
elliTek, Inc.
TM
3. Connect connued3. Connect connued
To connect to the unit, rst reference the Network Connections area in Windows and perform
the steps below. A step-by-step “How To Connect” tutorial can be viewed on
www.IIoTA.net/tutorials.
• Right click the appropriate LAN connection, and select ‘Properties’.
• Highlight ‘Internet Protocol Version 4 (TCP/IPv4)’
• Select ‘Properties’
• Select ‘Use the Following IP Address:’
• If connected to ETH0, the PC address should be set to 192.168.1.nnn, where ‘nnn’ is a
unique number between 2 and 255. ETH1 will be set in similar fashion. Note that the PC
address should not match that of the IIoTA™ port.
• Set the Subnet mask to 255.255.255.0
Run!Run!
Open the Workbench software, right click ‘Nodes’, select a ‘Network’, and ‘Scan’ for the
IIoTA™ unit. Once located, the IIoTA™ icon will be displayed on the left-hand tree
view of the Workbench software.
Resetting the IIoTA™ unit allows the user to return the IP address assignments to the factory
settings without compromising existing programs and settings:
1. Power OFF the IIoTA™
2. Fully press and HOLD the RESET button
3. Press and RELEASE the POWER button. Ensure the red POWER indicator
remains illuminated.
4. Continue HOLDING the RESET button for 25 seconds
5. Release RESET button - the IP addresses will
be reset to:
ETH0: 192.168.1.68 / 255.255.255.0
ETH1: 10.10.10.10 / 255.255.255.0
Reseng IP Addresses to DefaultReseng IP Addresses to Default
Technical Support: +1 (865) 409-1555
Don’t forget to register your new IIoTA™ by lling out the enclosed form or complete the form online
at www.IIoTA.net/resources, scroll down to Product Registration.
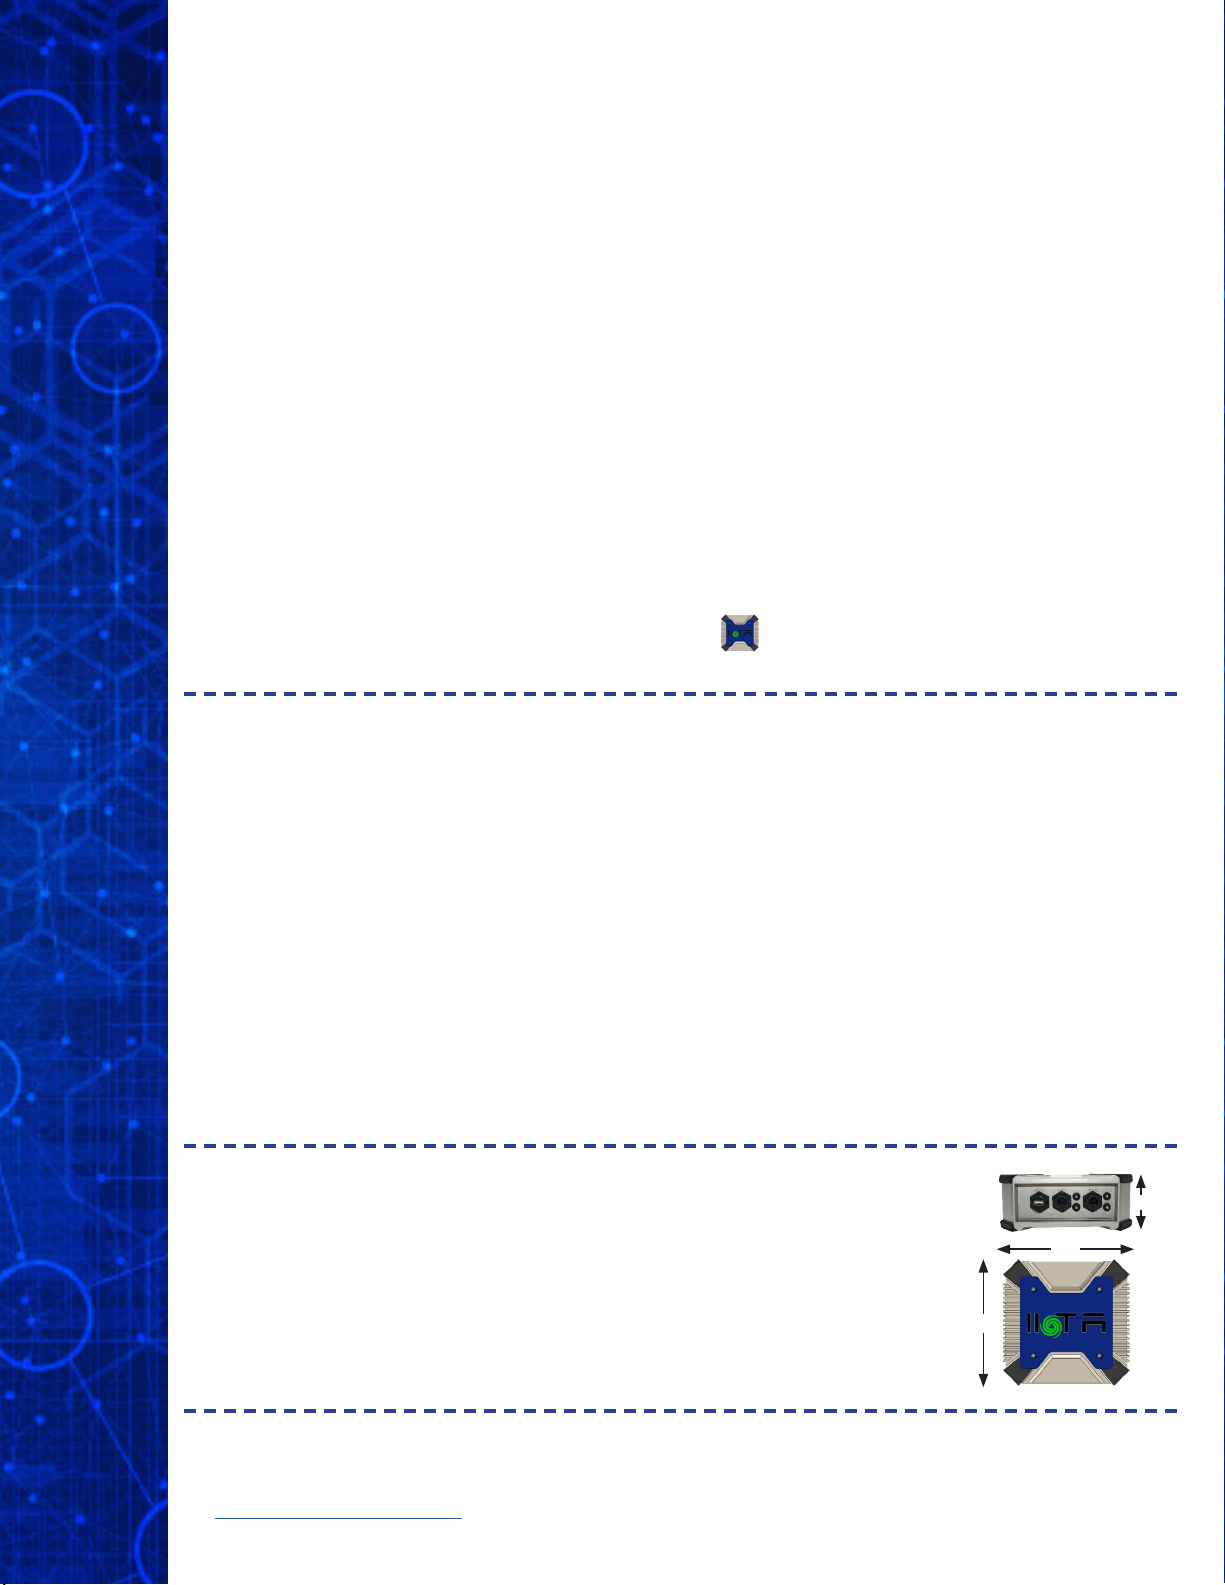
Specicaons:Specicaons:
Power: 110/240 VAC, 50/60 Hz (Grounded)
Temperature: Standard 0°C to 70°C ambient
Temperature: Extended -60°C to 80°C ambient
Dimensions: 7.08” x 7.28” x 3” (180mm x 185mm x 76mm)
Enclosure: IP65 (covers installed)
3”
7.08”
7.28”
©2020 elliTek, Inc.
Table of contents


