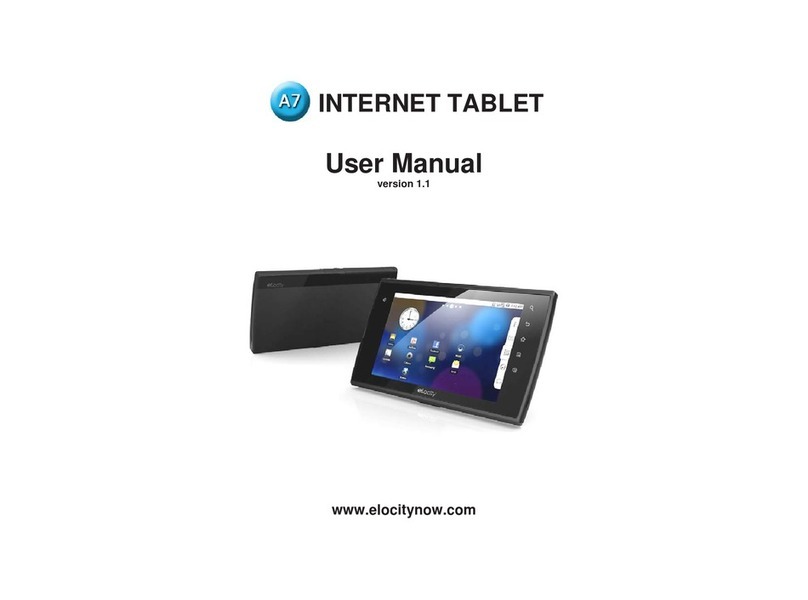
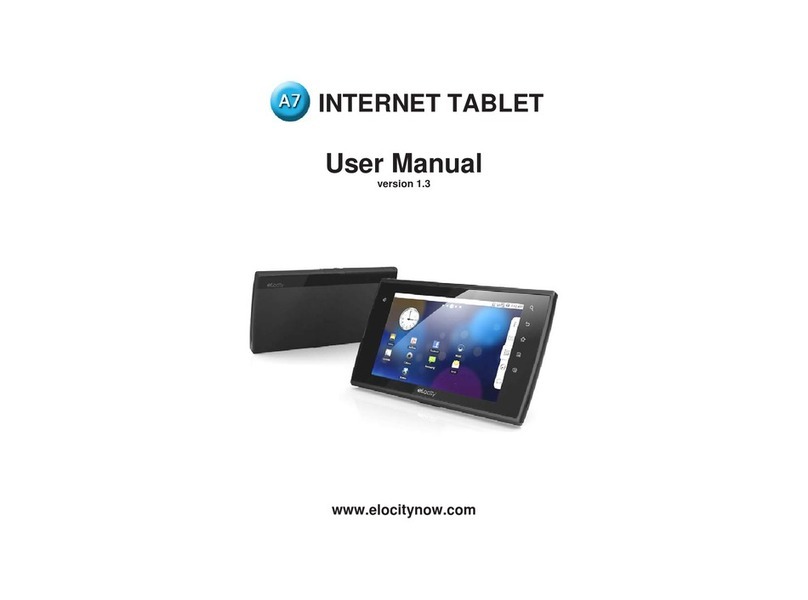
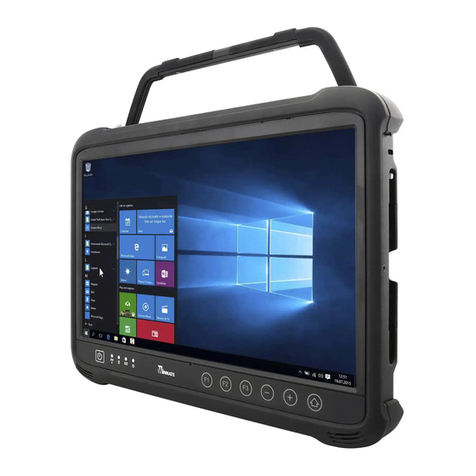
Elocity A7+ User manual

INTERNET TABLET
User Manual
version 1.5
www.elocitynow.com

A7+InternetTablet–UserManualv1.5 Pagei
ELOCITY A7+ INTERNET TABLET – TABLE OF CONTENTS
Safety Warnings & Notifications
Chapter 1 – Introduction
1.1 Overview ……………………………....1
1.2 Front Panel …………………………….1
1.3 Right / Left Panel ……………………...1
1.4 Back Panel …………………………….1
1.5 Top / Bottom Panel ……………………2
1.6 Features ………………………………..2
1.7 Caring for the Tablet ………………….2
Chapter 2 – Getting Started
2.1 Charging the Battery …………………..2
2.2 Checking the Battery Status ………….3
2.3 Connecting USB Devices …………….3
2.4 Using a Micro SD card ………………..4
2.5 Connecting Earphones ………………..4
2.6 Connecting an External Monitor ……..5
2.7 Mouse / Finger Functions …………….5
2.8 The Software Keyboard ………………5
2.9 The Power Switch ……………………..6
2.10 Suspense Mode ……………………….6
2.11 Rebooting the Tablet ………………….6
Chapter 3 – Your Tablet
3.1 Home Screen / Desktop ………………7
3.2 Status Bar ………………………………7
3.3 Smart Keys …………………………….8
3.4 Smart Menu …………………………….8
Chapter 4 – Basic Settings
4.1 Display Options ………………………10
4.2 Volume & Sound ……………………..11
4.3 Customizing the Desktop ……………13
4.4 Date & Time …………………………..15
4.5 Language ……………………………..17
4.6 Location & Security …………………..18
4.7 Accounts & Sync ……………………..20
Chapter 5 – Making a Connection
5.1 Wi-Fi ……………………………..……21
5.2 Bluetooth ………………………………22
5.3 VPN ……………………………...…….23
5.4 Airplane Mode ………………………..23
Chapter 6 – Browsing the Web
6.1 The Default Browser ………….……..23
6.2 Bookmarking Favorite Sites …………24
6.3 Browser History ………………………25
Chapter 7 – Communication
7.1 E-mail Setup ………………………….25
7.2 Multiple Accounts …………………….28
7.3 VoIP – Internet Phone Calling ………28
Chapter 8 – Applications
8.1 App Stores …………………………….29
8.2 Installing Apps ………………………..29
8.3 Uninstalling Apps …………………….31
8.4 Managing Apps ………………………31
8.5 Developing Apps …………………….31
8.6 Notifications …………………………..31
8.7 Camera ………………………………..32
8.8 Sound Recorder ………………………34
8.9 Contact Manager …………………….34
8.10 OI File Manager ………………………35
8.11 Calculator ……………………………..36
8.12 Alarm Clock …………………………..36
8.13 Aldiko e-Book Reader ………………..37
Chapter 9 – The Gallery
9.1 Supported Photo & Video formats ….39
9.2 Viewing Photos ……………………….39
9.3 Editing Photos ………………………..40
9.4 Sharing Photos ……………………….40
9.5 Deleting Photos ………………………40
9.5 Viewing Video Clips ………………….41
Chapter 10 – The Music Player
10.1 Player Features ………………………41
10.2 Supported Audio Formats …………..41
10.3 Importing Music ……………………...41
10.4 Playing Music …………………………43
10.5 Creating Playlists ………………….…43
Chapter 11 – System Management
11.1 System Information ……………….…45
11.2 Power Management ………………….45
11.3 Storage Management ………………..45
11.4 Backup & Restore …………………...46
11.5 Factory Data Reset ………………..…46
11.6 Search Function …………………..….47
11.7 Firmware Updates ……………….…..47
Chapter 12 – Support
12.1 Product Registration………………….48
12.2 Technical Support ……………………48
12.3 Limited Warranty ……………………..48
12.4 Product Specifications ……………….49

A7+InternetTablet–UserManualv1.5 Pageii
Safety Instructions
Use the following safety guidelines to help protect yourself and your
Tablet.
General Warnings
•Do not operate your Tablet for long periods of time while it has direct
contact with your body or other surface that might completely cover the
bottom of the unit. This may cause overheating.
•Do not attempt to disassemble the Tablet yourself. Always follow
installation instructions closely.
•To avoid personal injury from electric shock or fire:
¾Do not operate the Tablet close to water, for example, near the
bathtub, kitchen sink, laundry tub, wet basement, swimming pool,
or in the rain.
¾Do not connect or disconnect any cables or perform maintenance
or reconfiguration of this product during thundershower, tempest or
storm.
¾Do not push objects into the air vents or openings of your interior
components.
•If the battery pack leaks and the battery fluid comes into contact with
your eyes, do not rub them. Wash the eyes with clean running water
and immediately seek medical attention. Otherwise, eye injury may be
result.
•If battery fluid contacts your skin or clothing, immediately wash with
running water. Otherwise, skin inflammation can occur.
•Operate the Tablet at the recommended temperature range of +5˚C to
+35˚C (+41˚F to +95˚F). Store it at a temperature of -20˚C to +60˚C
(-4˚F to +140˚F).
Adapter Warnings
See the installation instructions before connecting the power supply
(refer to “Charging the Battery” on page 5).
•When using your adapter, make sure to position it around objects so it
will not be cut or damaged.
•Use only the AC adapter that is approved for use with this Tablet. Use
of another type of adapter may risk fire or explosion.
•Before you connect the Tablet to a power source, ensure that the
voltage rating of the AC adapter matches that of the available power
source:
¾220 V/50 Hz in China.
¾115 V/60 Hz in most of North and South America and some Far
Eastern countries such as South Korea and Taiwan.
¾100 V/50 Hz in eastern Japan.
¾100 V/60 Hz in western Japan.
¾230 V/50 Hz in most of Europe, the Middle East, and the Far
East.
•If you use an extension cable with your AC adapter, ensure that the
total ampere rating of the products plugged into the extension cable
does not exceed the ampere rating of the extension cable.
•Do not cover the AC adapter with papers or other items that will reduce
cooling. Also, do not use the AC adapter while it is inside a carrying
case.
•To remove power from the Tablet, turn it off, remove the battery, and
disconnect the AC adapter from the electrical outlet.
Battery Pack Warning
•Do not carry the battery pack in your pocket, purse, or other container
where metal objects (such as car keys) could short-circuit the battery
terminals. The resulting current flow can cause extremely high
temperatures and may result in damage or injury from burns.
•There is a danger of explosion if the battery pack is incorrectly
replaced. Replace only with the same or equivalent type battery
recommended by the manufacturer.
•Do not dispose of battery pack near a heat source. Heat can melt the
insulation and damage other safety features, possibly leading it to leak
acid, overheat, emit smoke, burst and /or ignite.
•Do not immerse the battery pack in water or allow it to get wet. Its
protective features can be damaged, it can be charged with extremely

A7+InternetTablet–UserManualv1.5 Pageiii
high current and voltage, abnormal chemical reactions may occur,
possibly leading it to leak acid, overheat, emit smoke, burst and/or
ignite.
•Do not crush, disassemble, puncture, incinerate or short circuit
external contacts of the battery pack.
•Do not connect the positive (+) and negative (-) terminals with a metal
object such as wire. Short-circuiting may occur, leading the battery
pack to leak acid, overheat, emit smoke, burst and/or ignite.
•Do not use an apparently deformed or damaged battery pack, which
may leak acid, overheat, emit smoke, burst and/or ignite.
•If the battery pack leaks fluid, gives off a bad odor, generates heat, or
becomes discolored, immediately remove it from the Tablet or charger
and stop using it.
Battery Pack Disposal
•Dispose of the lithium ion battery packs only at approved disposal
sites. To locate an appropriate site, contact the solid waste disposal
officials where you live or look for a rechargeable battery recycling
website that lists disposal locations near you.
•Do not dispose of battery packs in a fire, throw them in a trash
receptacle, put them in a recycling bin not intended for their disposal,
or otherwise discard them in a manner that may result in their being
hazardous to the environment.
Environment
For human health and environment protection, please take notice of
below information.
WEEE NOTICE
•The Directive 2002/96/EC on Waste Electrical and Electronic
Equipment (WEEE) which entered into force on 13th February 2003, is
to ensure that WEEE are recycled using best available treatment,
recovery and recycling techniques in order to protect human health
and natural resources.
•Recycling & disposal:
¾Do not dispose of your product which has the WEEE logo (shown
as right) on it or on its box in the general household waste bin.
¾Be sure to dispose of all your products in the designed collection
facilities for recycling of such hazardous wastes.
¾Separate collection and proper recovery of your WEEE at the time
of disposal will allow us to help conserving natural resources.
Moreover, proper recycling of WEEE will ensure safety of human
health and environment.
¾For more information about WEEE disposal, recovery, and
collection points, please contact your local city center, household
waste disposal service, retailer or manufacturer of the equipment.
RoHS Compliance
This product is in compliance with Directive 2002/95/EC of the European
Parliament and of the Council of 27 January 2003, on the restriction of
the use of certain hazardous substances in electrical and electronic
equipment (RoHS) and its amendments.
According to Management Methods for Controlling Pollution Caused by
Electronic Products and Management Methods for Controlling Pollution
Caused by Electronic information Products, the information required by
SJ/T11364-2006 is listed in the following table.
Names and Contents of Toxic or Hazardous Substances or Elements
Contained in Products.

A7+InternetTablet–UserManualv1.5 Pageiv
Federal Communications Commission (FCC) Statement
You are cautioned that changes or modifications not expressly approved
by the party responsible for compliance could void the user’s authority to
operate the equipment.
This equipment has been tested and found to comply with the limits for a
Class B digital Tablet, pursuant to part 15 of the FCC rules. These limits
are designed to provide reasonable protection against harmful
interference in a residential installation. This equipment generates, uses
and can radiate radio frequency energy and, if not installed and used in
accordance with the instructions, may cause harmful interference to
radio communications. However, there is no guarantee that interference
will not occur in a particular installation. If this equipment does cause
harmful interference to radio or television reception, which can be
determined by turning the equipment off and on, the user is encouraged
to try to correct the interference by one or more of the following
measures:
•-Reorient or relocate the receiving antenna.
•-Increase the separation between the equipment and receiver.
•-Connect the equipment into an outlet on a circuit different from that to
which the receiver is connected.
•-Consult the dealer or an experienced radio/TV technician for help.
This Tablet complies with Part 15 of the FCC Rules. Operation is subject
to the following two conditions:
1. This Tablet may not cause harmful interference, and
2. This Tablet must accept any interference received, including
interference that may cause undesired operation of the Tablet.
FCC RF Radiation Exposure Statement:
This equipment complies with FCC radiation exposure limits set forth for
an uncontrolled environment. End users must follow the specific
operating instructions for satisfying RF exposure compliance. This
transmitter must not be co-located or operating in conjunction with any
other antenna or transmitter.
Operating System Notice
This A7+ unit ships with the Android 2.2 "Froyo" operating system
preinstalled. The OS software cannot be upgraded. Stream TV
Networks provides regular firmware updates on its website at
www.elocitynow.com. These firmware updates maximize the unit's
performance within the Android 2.2 Operating System.
Third Party Applications
Links to the Appoke, Getjar and Soc.io Mall stores have been pre-
installed for your convenience as a means to access potential apps for
your tablet. Please note that these stores contain apps that have been
created for a wide variety of devices with different processing speeds
and screen sizes. While some popular apps like Angry Birds perform
perfectly, not all apps available in these stores have been optimized for
the A7+. There is no guarantee that any third party app will install
correctly, run with optimized performance, or function at all.
Support for Third Party Applications
We regret that our customer service center (phone and email/web
submissions) is unable to support questions related to third party
applications unless they have come pre-installed on the tablet.
For questions related to applications that were not pre-installed, there is
some limited information in the FAQ Section of our website. Just go to
http://www.elocitynow.com/support and click on the link near the top for
FAQ’s>A7+ FAQ’s. There are also a variety of online community forums
and user groups that may have answers.

A7+InternetTablet–UserManualv1.5 Page1
Chapter 1 – Introduction
1.1 Overview
1.2 Front Panel
1.3 Right / Left Panel
1.4 Back Panel
1.5 Top / Bottom Panel
1.6 Features
1.7 Caring for the Tablet
1.1 Overview
Congratulations on the purchase of your new advanced Tablet. You’re
about to discover so many things about your Tablet that will help you
maximize the experience of its usage. Read this chapter and the next
one to learn more about the functions of the Tablet, battery and SD card
installation, charging the battery, and more.
1.2 Front Panel
1.3 Right / Left Panel
1.4 Back Panel

A7+InternetTablet–UserManualv1.5 Page2
1.5 Top / Bottom Panel
1.6 Features
The Tablet is optimized for rich internet and entertainment experiences
as well as daily business and productivity needs. The Tablet features:
•Touch screen panel
•Wi-Fi network connection for quick access to the web
•Bluetooth connection to send and receive data to and from other
Bluetooth devices
•Browser applications for web surfing on the go
•Chat with friends through the built-in webcam
•Email exchange that allows you to keep in touch with personal and
business contacts
•Media Player for music and movies
•Built-in camera to take digital pictures and record video clips
•Powerful tools and office programs for your business needs
•USB connection for connecting external flash memory
1.7 Caring for the Tablet
A clean screen free of finger oils is necessary for responsive touch
operation. Use a cleaning solution made specifically for touch screens,
applying a small amount to a microfiber cloth and gently wiping the
screen. Do not use paper products, even soft facial tissue which can
scratch the screen, and never spray liquid directly onto the tablet as
overspray may seep into the DC input or IO ports.
Chapter 2 – Getting Started
2.1 Charging the Battery
2.2 Checking the Battery Status
2.3 Connecting USB Devices
2.4 Using a Micro SD card
2.5 Connecting Earphones
2.6 Connecting an External Monitor
2.7 Mouse / Finger Functions
2.8 The Software Keyboard
2.9 The Power Switch
2.10 Suspense Mode
2.11 Rebooting the Tablet
2.1 Charging the Battery
The battery that comes with your Tablet is partially charged. It is
recommended that you use your Tablet until the battery is completely
discharged before charging the battery the first time. Batteries perform
best after being fully charged.
To Charge the Battery
1. Connect the power cable to the Tablet as shown.
2. Plug the power cable into an electrical outlet.
3. Remove the power cable when charging is complete.

A7+InternetTablet–UserManualv1.5 Page3
Battery Charging Time
It takes approximately 3.5 hours to fully charge the battery while the
power is off.
2.2 Checking the Battery Status
There are two ways to check the battery level of your Tablet: the Power
LED Indicator and the Battery Icon on the Status Bar.
Power LED Indicator
The Power LED Indicator indicates the charge level status of your
battery:
•When the Power LED indicator is orange, the battery is charging.
•When the Power LED indicator is green, the battery is fully charged.
When the battery is fully charged, disconnect the charger from the outlet
first, then disconnect it from the Tablet.
Battery Icon on the Status Bar
While the Tablet is turned on, you can check the battery level icon
located on the Status Bar.
A green icon indicates that the battery is completely charged.
While the battery is charging, the icon on the status bar starts scrolling
on the display. When the battery is fully charged, the icon stops scrolling
and indicates green with a flash logo.
The Tablet will have the following defined behaviors when the battery
reaches certain charge levels:
•15% Charge Remaining – the Tablet will show a “Battery Low” warning
message when the charge drops to 15%. The message will also
appear at bootup or when the Tablet is reactivated after being put in
Sleep Mode if the AC charger is not plugged in and battery capacity is
less than 15%.
•6% Charge Remaining – the Tablet will power off automatically.
2.3 Connecting USB Devices
With the USB 2.0 host port, you can connect USB flash drives to your
Tablet to access external files. The Tablet supports drives up to 64GB in
size. Please note that some older USB 1.1 devices may have
compatibility issues.
The Tablet supports flash memory drives only; it does not support other
mechanical drives and it does not support tethering to computers and
other devices.
To Connect USB Devices
1. Locate the USB port on the left side of the Tablet (see “1.3 Right /
Left Panel”).
2. Open the port cover.
3. Connect the USB device as shown below.
To Remove an External Drive Connected to the USB
1. Before removing an external drive, you should unmount the drive.
2. Go to Settings>SD card & device storage>
3. Scroll down and tap Unmount USB0.
4. In the status bar at the top left, you will see a message saying
“External storage safe to remove”.
5. Remove the USB drive.

A7+InternetTablet–UserManualv1.5 Page4
Plug and Play Devices
A Plug and Play (PnP) device does not require installation or drivers after
being connected. Plug the device, then “play” or use it at once. You can
remove the PnP device from the Tablet at any time.
2.4 Using a Micro SD Card
The Tablet supports Micro SD cards up to 32GB in size. The cards must
be formatted in FAT16 or FAT32. NTSF format is not supported. If the
Tablet does not recognize your card, please use a computer to check
and reformat the card if necessary.
For best performance, a class 4 card or higher is recommended.
To Insert a Micro SD Card
1. Open the protective cover door and slide it over to reveal the slot.
2. Insert the card – metal contacts in first, facing the back – into the
small slot closest to the back of the unit by pushing until it clicks into
place. Note that there is a larger non-functioning SIM Card slot that
has been capped inside.
3. Close the card cover door.
4. The Tablet will automatically detect the card. On the left side of the
status bar on top, you will see the message “Preparing external
storage” followed by the addition of the SD Card icon when the card
is ready to access.
To Remove a Micro SD Card
1. Before removing the Micro SD Card, you should unmount it.
2. Go to Settings>SD card & device storage>
3. Tap Unmount SD card.
4. In the status bar at the top left, you will see a message saying
“External storage safe to remove”.
5. Open the slot cover door. To remove the micro card, push it deeper
into the slot until you hear a click as the lock releases, then let go of
the card and it will come half way out of the slot.
6. Gently remove the card and close the slot cover door.
2.5 Connecting Earphones
The Tablet comes equipped with two 0.5-watt stereo speakers, but if you
wish to use headphones for private listening or powered external
speakers for greater volume, these devices can be plugged into the
3.5mm stereo headphone jack located at the top of the Tablet (see “1.5
Top / Bottom Panel”).

A7+InternetTablet–UserManualv1.5 Page5
2.6 Connecting an External Monitor
Even though the screen resolution of the Tablet is 1024x600, the Tablet
is capable of playing back true 1080p HD video through the HDMI output
to an external monitor.
1. Locate the HDMI port on the left side of the Tablet (see “1.3 Right /
Left Panel”).
2. Plug one end of a standard full-size HDMI cable into the Tablet and
the other into the HDMI input port of the external monitor.
3. Note: The HDMI connection overrides the Tablet’s audio output, so
you will see picture on both the Tablet and external monitor, but you
will only hear audio on the external monitor. The Tablet’s speakers
and headphone jack will not produce sound when the HDMI cable is
plugged in.
2.7 Mouse/Finger Functions
The capacitive touch screen allows you to navigate the Tablet with your
fingers. The table to the right lists common movements and their
corresponding functions.
Mouse/Finger Functions:
Finger Function
Single-tap Click or single-tap to select or run an item.
Tap and hold Press and hold for more than 3 seconds to
display the Pop-up menu.
Drag Drag an item to move it.
Flick Flick the pen across the screen in a particular
direction to scroll up, down, left, or right.
2.8 The Software Keyboard
The Tablet has a software QWERTY keyboard for inputting text. Whether
you are surfing the web, writing an email, or using any other app, just tap
on any field requiring data entry and the keyboard will appear. Type in
the desired text, then tap the “Go” button at the top right or the bottom
right to complete your entry.
In situations where there are consecutive data fields, the “Go” button at
the top may “Next” instead and will take you from one field to the next
until all fields have been completed.

A7+InternetTablet–UserManualv1.5 Page6
2.9 The Power Switch
The Power Switch is located on the left side
panel of the Tablet. It is used to power on/off
the Tablet.
Power Button behaviors
System
Status Action Result
Power off Long press
(2 seconds) Turns on the power
Power on
Short press Enters Suspense
Mode
Long press
(2 seconds) Shows power menu
Suspend Press once Resume from
Suspense Mode
To unlock the Tablet
After pressing the power button to turn on the Tablet, move the lock as
indicated to enter the system. Just slide the lock up in the direction of the
arrow as pictured below.
2.10 Suspense Mode
To conserve battery power, your Tablet will automatically enter
Suspense Mode if there is no activity for a defined period of time (see 4.1
Display Options to see how to change Screen Timeout). Some users
prefer a very short timeout of one minute while others may prefer a long
timeout of 30 minutes or even never if they operate the Tablet on AC
power and are not concerned about battery life. The A7+ gives you
several options.
When the Tablet enters Suspense Mode (Screen Timeout), the screen
goes dark and the unit appears to be turned off except for the power light
which slowly flashes green.
Putting the Tablet into Suspense Mode
If you want to put the Tablet to “sleep” without waiting for the automatic
Screen Timeout, you can manually put the Tablet in Suspense Mode by
giving the power button a short press. The screen will immediately go
dark.
Waking the Tablet from Suspense Mode
Unlike a laptop or desktop computer, you cannot “wake up” the unit by
tapping the screen, moving a mouse or typing on the keyboard.
To reactivate the Tablet, give the power button a short press. The screen
will light up within 2-3 seconds. The Tablet will be locked, so you will
need to slide the green lock up as described in the left column of this
page. If your Tablet goes into Suspense Mode too quickly, you can
adjust the Screen Timeout as described in Chapter 4.1.
2.11 Rebooting the Tablet
In the event that the Tablet becomes unresponsive, it is possible to
reboot the unit. Locate the Reboot Key hole on the back of the Tablet
(see “1.4 Back Panel”) and insert a paper clip or other thin object into the
small hole. Press the button inside until you feel a click and the Tablet
screen goes black and initiates the bootup process.

A7+InternetTablet–UserManualv1.5 Page7
Chapter 3 – Your Tablet
3.1 Home Screen / Desktop
3.2 Status Bar
3.3 Smart Keys
3.4 Smart Menu
3.1 Home Screen / Desktop
The Home Screen consists of 5 Desktop Pages that can be customized
with shortcuts for applications and web pages you use most often. Swipe
your finger left or right across the screen to scroll from one desktop page
to another.
The Scroll Bar indicates which of the 5 desktop screens you are currently
viewing. The Status Bar above the Scroll Bar displays status information
as described in Chapter 3.2. By default, tapping the Home Smart Key as
described in Chapter 3.3 will return you to Deskop Page 3.
3.2 Status Bar
The Status Bar appears as a thin white band across the top of the Tablet
Screen. A variety of small icons indicates relevant information at a
glance: current time, alarm clock, battery status, Wi-Fi status, Bluetooth
Status and more.
Icons Description
Indicates a Micro SD Card is installed
Indicates a USB Flash Drive is connected
Indicates that Bluetooth is turned on
Indicates that Wi-Fi is turned on
Indicates battery status: more green denotes more power
Indicates that Alarm clock is set
7:10 PM Indicates current time of day
You can pull down the Status Bar like a window shade, making it full
screen to reveal details about certain items, then swipe it back up top
until it becomes a small white bar again.
Status Bar
Displays key status
information
Scroll Bar
Tap the left/right arrows to
scroll through the Main Toolbar.

A7+InternetTablet–UserManualv1.5 Page8
3.3 Smart Keys
The Smart Keys are located on the black bezel, just to the right side of
the front Tablet screen.
There are 3 Smart Keys as below:
Icons Description
Back: Tap to go back to the previous screen or
web page (if browsing the internet)
Home: Tap to go back to the Main Desktop Page (3)
Menu: Tap to bring up the additional menu options
(varies from application to application)
3.4 Smart Menu
The Smart Menu is located at the right edge of the Tablet Screen and
consists of 5 quick keys that link to the most often-used features:
1. Tap this to open the Music Player.
This versatile player organizes music by Artists, Albums, Songs,
Playlists, and Now Playing (see Chapter 11 for details).
1
Smart Keys
Tap to access
additional menus,
go back to a
previous screen,
or to escape to
the Home Screen
any time
Smart Menu
Tap to access
The most often-used
Categories – music
Player, gallery,
Main apps listing,
Web browser
And email

A7+InternetTablet–UserManualv1.5 Page9
2. Tap this to open the Gallery.
You can watch videos, browse pictures or take photos by pressing the
camera icon on the top right corner as shown below.
3. Tap this to display the Master List of Apps.
You can browse the list and choose the app you need by tapping the
icon.
4.TapthistoopentheWebBrowser.
You can browse the web by typing in the web address at the top of the
screen (see Chapter 6 for details).
5. Tap this to open the Email utility.
Set up your email when you first log in by following a few simple
on-screen instructions (see Chapter 11 for details)..

A7+InternetTablet–UserManualv1.5 Page10
Chapter 4 – Basic Settings
4.1 Display Options
4.2 Volume & Sound
4.3 Customizing the Desktop
4.4 Date & Time
4.5 Language
4.6 Location & Security
4.7 Accounts & Sync
4.1 Display Options
The A7+ offers easy flexibility in setting the screen brightness level,
animation options and screen timeout settings.
Setting the Brightness Level
There are two ways to set the brightness level of your Tablet:
1. Slide the Status Bar down from the top of the screen to reveal the
brightness slider bar. Adjust it to the desired level or tap the check
box to turn on/off the auto-brightness function.
2. Launch Settings>Display>Brightness and adjust the slider bar.
Changing the Screen Timeout Setting
To set your preferences for how quickly the Tablet goes into Suspense
Mode (Screen Timeout), launch Settings>Display>Screen timeout and
make your selection from the popup menu as shown below.
In this submenu you will see a wide variety of choices. A green radio
button on the right indicates the Tablet’s current setting. If you want to
make a change, just tap your selection and the screen will change back
to the previous menu to indicate that your selection has been selected.

A7+InternetTablet–UserManualv1.5 Page11
Changing the Animation Preferences
To set your preferences for what animations are displayed on the Tablet,
launch Settings>Display>Animation and make your selection from the
popup menu as shown below.
Screen Auto-Rotate
The Tablet can auto-rotate the image on your screen depending on
whether you are holding the Tablet in a vertical (portrait) or horizontal
(landscape) position. To turn the feature on or off, slide the Status Bar
down from the top of the screen to reveal the check box for Auto-rotate
screen. If the box has a green check mark, the feature is turned on. Tap
the box again to toggle the feature off if desired.
4.2 Volume & Sound
The Tablet has user-defined audio settings that include ringtones, silent
mode (vibrate), and separate volume options for media, alarm and
notifications. To access these settings, launch Settings>Sound.
Adjusting the Volume
There are two ways to adjust the volume. To adjust the master volume or
to mute the Tablet entirely, slide the Status Bar down from the top of the
screen to reveal the volume slider bar. Adjust it to the desired level or tap
the check box to mute all sound.

A7+InternetTablet–UserManualv1.5 Page12
To adjust separate volume levels for media, alarm and notifications
separately, launch Settings>Sound>Volume. In the popup menu as
shown below, set the sliders to the desired levels.
Selecting Silent Mode
To put the Tablet into Silent mode, launch Settings>Sound and tap the
check box as shown below.
Notification Ringtones
Although the Tablet is not a phone, you can select a ringtone to be used
for audible notifications. Launch Settings>Sound>Notification ringtone
and make your selection.
Additional Audio/Vibration Settings
In Settings>Sound you also have the opportunity to have the Tablet
make sounds or vibrate while you use it.

A7+InternetTablet–UserManualv1.5 Page13
4.3 Customizing the Desktop
The Tablet desktop is fully customizable, allowing you to select the
desktop wallpaper and add shortcuts for widgets, folders and apps.
Selecting the Desktop Wallpaper
The background image – the Desktop Wallpaper – may be selected from
pre-loaded images and animations or it may be an original photo or
image imported through the Gallery. To change the desktop wallpaper:
1. Tap and hold a blank spot on the Home Screen to bring up the Add
to Home screen popup menu, then select Wallpapers.
Note: You can also access this menu by tapping the Menu Smart Key
(bottom button on the black bezel) and then tapping the Wallpaper button
as shown below.
2. As shown below, the Select wallpaper from menu will pop up,
allowing you to choose the source of your new wallpaper: Gallery (for
images you have imported), Live wallpapers (for animated
background that are attractive but consume more battery power) or
Wallpaper (for non-moving pre-loaded images).
Choose Gallery if you have your own image you want to use.
If you want to select an animated background, there are several Live
wallpapers to choose from, as shown below. Tap on the wallpaper you
want to select and you will see a preview of the new background. If you
like it, press the Set wallpaper button at the bottom. If you don’t’ like it,
press the Back Smart Key on the black bezel to return to the menu of
choices.
Note: Live wallpapers use more battery power than static wallpapers.

A7+InternetTablet–UserManualv1.5 Page14
If you want to select a static background, choose Wallpapers from the
Select wallpaper from menu and you will see a variety of still images to
choose from. Move the scroll through the bar near the bottom until the
image you want is shown big at the top. Press the Set wallpaper button
at the bottom to make your selection.
Adding Shortcuts
To make it quicker to use the apps you like best, it is possible to add
shortcuts to the 5 desktop pages.
1. Go to the desktop page where you want to add the shortcut.
2. Tap this to display the Master List of Apps.
3. Locate the app you want to create a shortcut for, then push and
HOLD the icon until it “pushes through” to the desktop page.
Organizing and Removing Shortcuts
If you want to organize the shortcuts on a page, you can rearrange them
easily. Tap the icon you want to move, pressing with a long push until the
icon enlarges. Once it does, you can drag it to any available spot on the
page. Drop it where you want it.
The Smart Menu on the right is replaced with a trash can when you drag
shortcuts, so if you want to delete one, just drop it in the trash. When the
app and trash can turn red, just let go and it’s gone. There is no need to
empty the trash, as Android does not hold files there for later retrieval.
Adding Widgets
You can also add Widgets to your desktop pages:
1. Tap and hold a blank spot on the Home Screen to bring up the Add
to Home screen popup menu, then select Widgets

A7+InternetTablet–UserManualv1.5 Page15
2. Tap on the widget you want, and it will be added to the desktop.
Adding Folders
To help you stay organized, you can also add Folders to your desktop
pages:
1. Tap and hold a blank spot on the Home Screen to bring up the Add
to Home screen popup menu, then select Folders
2. Tap the kind of folder you want, and it will be added to the desktop.
4.4 Date and Time
To Open the Date and Time Application
Launch Settings>Date and time to see the master menu. Here you can
set the time, time zone, time format and date format.
Other manuals for A7+
2
Table of contents
Other Elocity Tablet manuals
