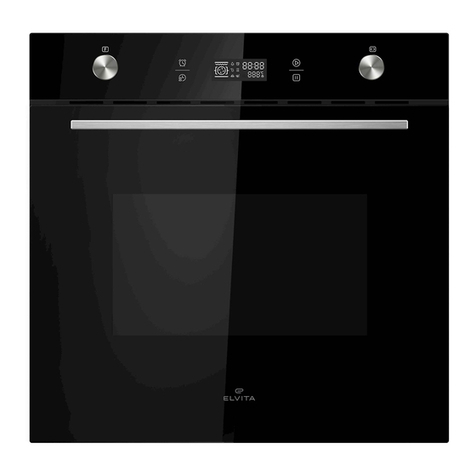
elvita CUI4703S User manual

User manual
Built-in oven
CUI4703S

Thank you
for your trust and the purchase of our product. This user manual is supplied to help you
use this product. The instructions should allow you to learn about your new product as
quickly as possible.
Make sure you have received an undamaged product. If you do find transport damage,
please contact the seller from which you purchased the product, or the regional
warehouse from which it was supplied.
Language: en-GB, Publication date: 2021-03-12
This document and its content, including written material and images, are the property of Elon Group AB. You may not
copy, reproduce, modify, republish or distribute this document or any of its content without express written permission
from Elon Group AB. © 2020, Elon Group AB. All rights reserved.

Warranty 3
© 2020, Elon Group AB. All rights reserved.
Warranty
Consumer warranty regarding quality of product applies.

4 Contents
© 2020, Elon Group AB. All rights reserved.
Contents
SAFETY 6
Admonitions .............................................................................................................................. 6
Intended use ............................................................................................................................. 6
Safety for children and people with disabilities........................................................................ 6
General safety........................................................................................................................... 7
Safety during installation .......................................................................................................... 7
Safety during operation ............................................................................................................ 7
Safety during maintenance ...................................................................................................... 8
Disposal..................................................................................................................................... 8
QUICK START 9
Quick start ................................................................................................................................ 9
GETTING STARTED 10
Installation................................................................................................................................. 10
Getting to know your oven ....................................................................................................... 10
Control panel....................................................................................................................................... 10
Use the child lock ................................................................................................................................ 10
Accessories.......................................................................................................................................... 10
Cooling fan .......................................................................................................................................... 11
Before first use .......................................................................................................................... 11
Set the time.......................................................................................................................................... 11
Heat up the oven for the first time...................................................................................................... 11
COOKING 12
Wire guides ............................................................................................................................... 12
Insert the oven grid ................................................................................................................... 12
Start cooking ............................................................................................................................. 13
Adjust cooking time................................................................................................................... 13
Adjust temperature ................................................................................................................... 13
Pause cooking........................................................................................................................... 13
Stop cooking ............................................................................................................................. 13
Oven functions .......................................................................................................................... 13
Oven lamp ........................................................................................................................................... 13
Defrost.................................................................................................................................................. 13
Bottom heater...................................................................................................................................... 13
Conventional cooking.......................................................................................................................... 14
Conventional cooking with fan ........................................................................................................... 14
Radiant grilling..................................................................................................................................... 14
Double grilling ..................................................................................................................................... 14
Double grilling with fan....................................................................................................................... 14
ECO function ........................................................................................................................................ 14
Convection ........................................................................................................................................... 14
Use the reservation function ..................................................................................................... 14

Contents 5
© 2020, Elon Group AB. All rights reserved.
Set a reminder........................................................................................................................... 15
Use the energy saving function ................................................................................................ 15
CLEANING 16
Clean the oven .......................................................................................................................... 16
TROUBLESHOOTING 17
Replace the light bulb ............................................................................................................... 17
Remove and install the oven door ............................................................................................ 17
Replace the oven glass panes .................................................................................................. 18
INSTALLATION 19
Oven placement........................................................................................................................ 19
Install the oven .......................................................................................................................... 19
APPENDIX 21
Specifications ............................................................................................................................ 21
EU directives and standards...................................................................................................... 21
Recommendations for the eco function.................................................................................... 21

6 Safety
© 2020, Elon Group AB. All rights reserved.
SAFETY
Carefully read the instructions before you install and use the product. Save the instructions and keep them near the
product for future reference. All kinds of warranties shall be invalid if these instructions are not followed.
Admonitions
WARNING!
Used when there is a risk for personal injury.
CAUTION!
Used when there is a risk for damage to the product.
NOTE!
General information that you should be aware of.
Helpful tips that you may find useful.
Intended use
This product is intended
• to be used in a household setting,
• to be installed as a built-in unit and
• for heating and cooking various foodstuff.
This product is not intended
• to be used in locations where special conditions prevail, such as the presence of a corrosive or explosive atmosphere
(dust, vapour or gas),
• for outdoor use or
• for room heating or similar purposes.
Safety for children and people with disabilities
WARNING!
• Do not allow children to go near the product when it is in operation, particularly when the grill is on.
WARNING!
• Keep packing materials such as plastic bags, polystyrene, or nails out of the reach of children as these
items can be dangerous to them.
WARNING!
Only let the following groups use the product if they are supervised or if instructions are provided to them
about how to use the product in a safe way. They must understand the hazards involved.
• Children. (Children younger than 8 years old must be continuously supervised.)
• Persons with reduced physical, sensory or mental capabilities.
• Persons with lack of experience and knowledge.
WARNING!
• Do not let children play with the product.
• Do not let children clean the product without supervision.

Safety 7
© 2020, Elon Group AB. All rights reserved.
General safety
WARNING!
• Some parts of the product may retain heat for a long time. Wait for the parts that are directly exposed to
heat to cool down before touching them.
• If the surface is cracked, switch off the product to avoid the risk of electric shock.
CAUTION!
Do not place anything on the door of the product when open. Do not place anything on the drawer of the
product when open. You may unbalance your product or break the door or the drawer.
NOTE!
If you are not going to use the product for some time, it is advisable to disconnect it from the mains socket.
Safety during installation
WARNING!
• Only a qualified electrician who takes the local laws and regulations into account may replace or repair
the power connection of this oven.
• Make sure the connection parameters of the oven (fuse rating, voltage and frequency) match the mains
power supply. If in any doubt, consult a qualified electrician.
• The power cord of the oven must be connected to an earthed socket.
• Electrical parts must be completely insulated.
• Do not kink the power cord.
• All guards must be firmly fixed into place so that it is impossible to remove them without using special
tools.
CAUTION!
Do not hold or carry the oven by the door handle. The door handle cannot hold the weight of the oven and
may break off.
Safety during operation
WARNING!
Make sure all packaging remnants have been removed from the cooking compartment.
WARNING!
• Position the oven grid correctly between the wire guides to ensure that the oven operates safely.
• Insert the oven grid in the correct direction. This will ensure that hot food items do not slide out during
careful removal of the grid or tray.
• The door of the product should be opened as little as possible during cooking.
• The product becomes very hot during use. Do not touch the heating elements inside the product.
• Use the product in an open environment.

8 Safety
© 2020, Elon Group AB. All rights reserved.
Safety during maintenance
WARNING!
• If the power cord is damaged, it must be replaced by the manufacturer, the manufacturer's service agent
or similarly qualified person in order to avoid hazards.
• Wait for the oven to cool down or use protection when removing an old light bulb to avoid burning
yourself.
• Ensure that the oven is switched off before replacing the oven lamp to avoid the possibility of electric
shock.
• When removing or installing the oven door the hinge springs may loosen, causing personal injury.
CAUTION!
• Do not use steam cleaners.
• Do not use harsh abrasive cleaners or sharp metal scrapers to clean the oven door glass as they can
scratch the surface, potentially resulting in the glass shattering.
• Do not forcibly pull out the door. The glass may break.
• Do not lift or carry the oven door by the door handle.
Disposal
Dispose of packaging in an environmentally-friendly manner. Recycling packaging, while observing national
and local regulations, can reduce the consumption of raw materials and the amount of waste in landfill
sites.
This product is marked in compliance with European Directive 2012/19/EU, Waste Electrical and Electronic
Equipment (WEEE). The symbol on the product or on its packaging indicates that this product should not be
treated as household waste. Instead it shall be handed over to the applicable collection point for the
recycling of electrical and electronic equipment.
By ensuring this product is disposed of correctly, you will help prevent potential negative consequences for
the environment and human health, which could otherwise be caused by inappropriate waste handling of
this product. For more detailed information about recycling of this product, please contact the relevant
municipal body in charge of waste management, your household waste disposal service or the store where
you purchased the product.

Quick start 9
© 2020, Elon Group AB. All rights reserved.
QUICK START
Quick start
Using the oven
After using the oven

10 Getting started
© 2020, Elon Group AB. All rights reserved.
GETTING STARTED
Installation
See section "Installation", page 19.
Getting to know your oven
Control panel
Use the controller knobs and the touch symbols to control the oven.
A. Reminder
B. Display
C. Start
D. Function selector
E. Time
F. Stop
G. Setting selector
Use the child lock
Use the child lock to prevent accidental operation of the oven.
1. To turn on the child lock, touch and hold for 3 seconds.
The child lock is turned on and is displayed.
2. To turn off the child lock, touch and hold for 3 seconds.
The child lock is turned off and disappears.
To stop cooking when the child lock is turned on, you only need to touch once.
Accessories

Getting started 11
© 2020, Elon Group AB. All rights reserved.
Shallow trays For baking pastries or as a drip tray.
Deep tray For roasting large amounts of vegetables and meat or preserving food.
Oven grid For grilling or roasting food, either placed directly on the grid, or in a baking dish. The
oven grid has a raised rear edge to ensure that food items do not slide off when you
remove the grid from the oven.
Cooling fan
Your oven has a cooling fan. The cooling fan switches on during operation. The hot air escapes above the door. The
cooling fan continues to run for a certain time after operation.
Before first use
Set the time
When you first connect the oven to a power source, you will be prompted to set the time.
1. Touch .
The hour digits start to flash.
2. Turn to the current hour.
3. Touch again.
The minute digits start to flash.
4. Turn to the current minute.
5. Touch again.
The time is now set.
Heat up the oven for the first time
Heat up the oven without food in it to get rid of the new oven smell.
WARNING!
Make sure all packaging remnants have been removed from the cooking compartment.
1. Turn to .
2. Turn to 250°C.
3. Touch to start the oven.
4. Turn to 90 minutes and touch within 3 seconds to confirm.
The oven begins to heat up and turns off after 90 minutes.
During initial use, it is completely normal that there will be a small amount of smoke and odour. If this does occur, you
simply have to wait for the smell to clear before putting food into the oven.

12 Cooking
© 2020, Elon Group AB. All rights reserved.
COOKING
Wire guides
Wire guides allow you to choose between 5 different levels when you insert a grid, tray or other accessory into the oven.
The levels are counted from the bottom and up.
The oven is safe to use both with and without the guides.
Insert the oven grid
WARNING!
• Position the oven grid correctly between the wire guides to ensure that the oven operates safely.
• Insert the oven grid in the correct direction. This will ensure that hot food items do not slide out during
careful removal of the grid or tray

Cooking 13
© 2020, Elon Group AB. All rights reserved.
Start cooking
1. Turn to the desired oven function.
2. To change from the default temperature, turn to the desired temperature.
3. Touch to start cooking.
The default cooking time is 9 hours.
4. To change the default cooking time, turn to the desired cooking time and touch within 3 seconds to confirm.
The cooking time starts to count down. The buzzer will sound 5 times when the countdown has finished.
To view the current time during the cooking countdown, touch .
If you have set the oven function but not touched within 5 minutes, the oven returns to standby.
Adjust cooking time
1. Turn to the desired cooking time.
2. Touch within 3 seconds to confirm.
Adjust temperature
1. Turn to the desired temperature.
2. Touch within 3 seconds to confirm.
Pause cooking
1. To pause cooking when the cooking time is set, touch once.
The heat is turned off and the cooking time countdown is paused.
2. Touch to resume.
Stop cooking
1. To stop cooking, touch twice.
Oven functions
Oven lamp
Enables you to observe cooking progress without opening the door. The oven lamp comes on automatically
for all oven functions, except the ECO function.
Defrost
Circulation of air at room temperature enables quicker thawing of frozen food (without use of any heat). It is
a gentle but fast way to speed up defrosting time and thawing of, for example, ready-made dishes and
produce filled with cream.
Bottom heater
A concealed element in the bottom of the oven provides heat. It is mainly used for keeping food warm. The
temperature can be set within the range of 60-120°C. The default temperature is 60°C.

14 Cooking
© 2020, Elon Group AB. All rights reserved.
Conventional cooking
Top heater and bottom heater work together to provide conventional cooking. The temperature can be set
within the range of 50-250°C. The default temperature is 220°C.
Conventional cooking with fan
Combination of the fan and both heating elements provides more even heat penetration, providing an
energy saving of up to 30-40 %. Dishes are lightly browned on the outside and still moist on the inside. This
function is suitable for grilling or roasting large pieces of meat at a higher temperature. The temperature can
be set within the range of 50-250°C. The default temperature is 220°C.
Radiant grilling
The inner grill element switches on and off to maintain temperature. The temperature can be set within the
range of 150-240°C. The default temperature is 210°C.
Double grilling
The inner radiant element and the top element are both on. The temperature can be set within the range of
150-240°C. The default temperature is 210°C.
Double grilling with fan
The inner radiant element and the top element are on in conjunction with the fan. The temperature can be
set within the range of 150-240°C. The default temperature is 210°C.
ECO function
Cooks the selected ingredients in a gentle manner, with the heat coming from the top and the bottom.
Convection
An element around the convection fan provides an additional source of heat for convection style cooking.
When using the convection function, the fan automatically comes on to improve air circulation inside the
oven and creates an even heat for cooking. The temperature can be set within the range of 50-240°C. The
default temperature is 180°C.
Use the reservation function
Use the reservation function to let the oven start cooking automatically. Set a time when the cooking should start, an oven
function, a cooking time and a temperature.
The clock must be set in advance.
1. Set the starting time:
a. Touch and turn to the hour of the starting time.
b. Touch again and turn to the minute of the starting time.
NOTE! Do not touch again.
2. Turn to the desired oven function.
You can select all oven functions except , and .
3. Touch to confirm starting time and oven function.

Cooking 15
© 2020, Elon Group AB. All rights reserved.
4. Turn to the desired cooking time.
5. Turn to the desired temperature.
6. Touch to confirm cooking time and temperature.
The reservation is now set and the display shows the current time and .
7. Before the starting time is reached you can do any of the following:
•To view the set starting time, touch .
•To view the set cooking time and temperature, touch .
Touch to return to the reservation state.
•To cancel the reservation, touch twice.
At the set starting time, cooking starts automatically. This is indicated by a buzzing sound and disappears. The oven
operates as normal during cooking.
NOTE!
You cannot use the reminder function and the reservation function at the same time.
Set a reminder
Set a reminder to count down the time or help you remember to do something. You can only set the reminder in standby
mode.
1. Touch and turn to the number of hours (0-9 hours).
2. Touch again and turn to the number of minutes (0-59 minutes).
3. Touch to confirm.
The time starts to count down. When it reaches 0 an acoustic signal sounds 10 times.
To view the current time during the reminder countdown, touch .
You can cancel the reminder during setting by touching . After the reminder has been set, you can cancel it by touching
twice.
Use the energy saving function
Use the energy saving function to turn off the display immediately.
NOTE!
The display is automatically turned off after 10 minutes of inactivity during standby mode or when a reminder
is active.
1. To activate the energy saving function right away, touch and hold for 3 seconds.
The display turns off immediately and enters energy saving mode.
2. To turn off the energy-saving function, touch any symbol or turn any control knob. The display lights up.

16 Cleaning
© 2020, Elon Group AB. All rights reserved.
CLEANING
Make sure to clean your oven regularly to make it last longer and keep a good appearance.
CAUTION!
• Do not use harsh abrasive cleaners or sharp metal scrapers to clean the oven door glass as they can
scratch the surface, potentially resulting in the glass shattering.
• Do not use steam cleaners.
Clean the oven
Clean the oven cavity regularly. The modern design of this oven keeps maintenance to a minimum.
• Disconnect the power before performing any maintenance and cleaning.
• Set all controls in the off position.
• Wait until the inside of the oven cavity is not hot but only slightly warm.
• Clean the surface of the oven cavity with a damp cloth, soft brush or fine sponge and then wipe dry.
• If there is heavy soiling, use hot water with a non-abrasive cleaning product.
• Never leave acidic substances (lemon juice, vinegar) on stainless steel parts.
• Clean the baking pans using a mild detergent.
• Clean the wire guides using a conventional detergent.

Troubleshooting 17
© 2020, Elon Group AB. All rights reserved.
TROUBLESHOOTING
Learn how to remove and install the light bulb, the oven door, and the oven glass panes.
Replace the light bulb
You can easily replace a broken light bulb yourself.
WARNING!
Wait for the oven to cool down or use protection when you remove the old light bulb to avoid burning yourself.
1. Disconnect power from the mains outlet or switch off the circuit breaker of the unit’s mains outlet.
WARNING! Ensure that the oven is switched off before replacing the oven lamp to avoid the possibility of electric
shock.
2. Unscrew the glass lamp cover by turning it anti-clockwise.
3. Replace the bulb with a new one of the same type.
NOTE! Only use 25-40W/220V-240V, T300°C halogen bulbs.
4. Screw the glass lamp cover back in place.
Remove and install the oven door
Remove the oven door to replace it with a new door, or to be able to remove the oven glass panes (see section "Replace
the oven glass panes", page 18).

18 Troubleshooting
© 2020, Elon Group AB. All rights reserved.
1. Open the door fully.
2. Pull the buckle at the door hinge upwards and then towards the door. Repeat for the other door hinge.
WARNING! The hinge springs may loosen, causing personal injury.
3. Close the door to an angle of about 30°.
4. Hold the door with one hand on each side. Lift it upwards and slowly pull the door out from the oven.
CAUTION! Do not forcibly pull out the door. The glass may break.
CAUTION! Do not lift or carry the oven door by the door handle.
Install in the reverse order.
Replace the oven glass panes
Remove the oven glass panes to clean them or to replace broken panes.
1. Remove the door from the oven (section "Remove and install the oven door", page 17).
2. Open the door rotation bracket assembly.
3. Lift up the door's outer glass and pull it out.
4. Lift up the door's middle glass and pull it out.
Install in the reverse order.

Installation 19
© 2020, Elon Group AB. All rights reserved.
INSTALLATION
Follow the instructions in this section to install your oven.
• This oven is only intended to be fully fitted in a kitchen. The oven can either be fitted under a worktop or into a tall
cupboard.
• This oven is not designed to be used as a tabletop oven or installed behind a decorative door.
• The kitchen unit must not have a back wall behind the oven.
• A gap of at least 45 mm must be maintained between the wall and the base or back panel of the unit above.
• Ventilation slots and intakes must not be covered.
• The safe operation of this oven can only be guaranteed if it has been installed in accordance with these installation
instructions.
• The fitter is liable for any damage resulting from incorrect installation.
• The units into which the oven is fitted must be heat-resistant up to 120 °C.
Oven placement
Make sure to place the oven considering the measurements and other factors described in this section. Proper placement
allows proper ventilation.
NOTE!
The dimensions do not include room for a power switch or socket.
Install the oven
Make sure to follow the instructions in this section when you install your oven.
NOTE!
The oven must be installed and put into use by an authorised technician and according to local laws and
regulations. The manufacturer and the retailer are not responsible for any damage that might be caused by
defective positioning and installation by unauthorised personnel.

20 Installation
© 2020, Elon Group AB. All rights reserved.
1. Install the power cord and connect to power mains.
WARNING! Make sure the connection parameters of the oven (fuse rating, voltage and frequency) match the
mains power supply. If in any doubt, consult a qualified electrician.
WARNING! The power cord of the oven must be connected to an earthed socket.
WARNING! Electrical parts must be completely insulated.
2. Carefully push the oven into the kitchen unit.
WARNING! Do not kink the power cord.
CAUTION! Do not hold or carry the oven by the door handle. The door handle cannot hold the weight of the
oven and may break off.
Make sure it is centred.
3. Open the oven door and fasten the oven with the supplied distance holders and screws.
WARNING!
• All guards must be firmly fixed into place so that it is impossible to remove them without using special
tools.
• Only a qualified electrician who takes the local laws and regulations into account may replace or repair
the power connection of this oven.
NOTE!
The oven is not intended to be operated in conjunction with an external timer or separate remote control
system.
Other manuals for CUI4703S
2
Table of contents
Other elvita Oven manuals

