Emerald Innovations Digital Photo Album User manual

Digital Photo Album
Operating Instructions
245 Pittsburgh Road, Suite 200
Butler, Penns lvania 16001

Single Word Definitions
DANGER – Indicates an imminently hazardous situation, which, if not avoided, will result in death or serious injury.
sage of this signal word is limited to the most extreme situations.
WARNING – Indicates a potentially hazardous situation, which, if not avoided, could result in death or serious injury.
CA TION – Indicates a potentially hazardous situation, which, if not avoided, may result in minor/moderate injury or
product/property damage. It also alerts against unsafe practices.
Read all instructions before use!
WAR'I'G – To reduce the risk of fire, electric shock, or serious personal injury:
• Do not use digital frame while operating a vehicle.
• Do not immerse the unit in water or other liquids.
• se only manufacture-recommended attachments or accessories.
• Keep the Digital Photo Album away from sources of high heat such as radiators, stoves or direct sunlight.
• Only power the Digital Photo Album with A/C adapter and SB cable provided.
• Seek service by qualified service personnel when:
o The power supply has been damaged.
o Liquid has been spilled onto/into the Digital Photo Album.
o The unit does not operate normally, or exhibits a noticeable change in performance.
o The unit has been dropped or physically damaged.
• Do not attempt to service the Digital Photo Album beyond those means described in these operating instructions.
All other servicing should be referred to qualified service personnel.
CAUTIO' – To reduce the risk of personal injury or product/property damage:
• Power off and unplug Digital Photo Album before cleaning. To clean the outer surface of the Digital Photo
Album (except screen) gently using a soft cloth dampened with water. Clean screen with a specified cleaning
solution for use with products such as laptops and other computer monitors. These are available at most retail,
consumer electronics stores. Do not clean the inside of the unit.
• Do not remove cover; there are no user-serviceable parts inside. Refer any servicing to qualified personnel.
**If you experience difficulty with this product or are missing parts, DO NOT RET RN THE PROD CT TO THE
STORE where you bought it. Qualified assistance is available by dialing 1-800-692-2656.
Contents:
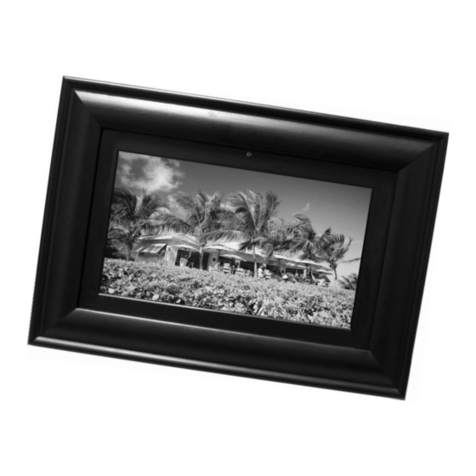
Digital Photo Album
A/C Adapter
SB Cable
Ornament
Everyday Frame
Instruction Manual
S stem Requirements:
Operating Systems: Windows ME/2000/XP/Vista
Minimum memory (RAM): 256MB
Minimum free hard drive space: 30MB
CP : Pentium 233MHz Processor or faster
One available SB port
To set up:
• Plug the SB cable into the back of the Digital Photo Album and into an available SB port on your computer.
• Turn the Digital Photo Album on.
• **Note: After 10 seconds the unit will default to automatically playing slideshow. Scroll down to the “ pdate
Photo” using the “Down” button then push the “Menu” button.
• After a few seconds Photo Viewer 2.0 software application will appear on your computer.

Parts:
PC Connection
• Windows ME/2000/XP
o Connect the supplied SB cable to an available SB port on your computer.
o Insert the mini SB plug into the SB slot on the side of the Digital Photo Album.
o Turn the Photo Album’s “On/Off” button to the “On” position.
o After a few seconds the “Photo Viewer 2.0” program will open.
• Windows Vista
o Connect the supplied SB cable to an available SB port on your computer.
o Insert the mini SB plug into the SB slot on the side of the Digital Photo Album.
o Turn the Photo Album’s On/Off button to the “On” position.
o After a few seconds the “Photo Viewer 2.0” program will open.
• Troubleshooting
If you encounter problems in starting the Auto Play Program after connecting the digital photo viewer to your
computer, please follow the following steps:
1. Check to make sure that your digital photo viewer is properly connected to your computer with the SB cable
provided.
2. If the “Photo Viewer 2.0” does not automatically one on its own you can manually start it by:
a. Making sure the Digital Photo Album is turned on and that you have scrolled down to “update photo” and
pushed the “Menu” button on the back of the Digital Photo Album (the screen should read
“Connecting…..”).
b. Clicking on “My Computer” (“Computer” for Vista users)
c. Double click on the drive that has four colored boxes (one blue, one green, one yellow, one red) and the
program will run.
**If you experience difficulty with this product or are missing parts, DO NOT RET RN THE PROD CT TO THE
STORE where you bought it. Qualified assistance is available by dialing 1-800-692-2656.
4.USB
O'/OFF
3.DOW' 2. UP
1.ME'U

Working with Photos
Photo Viewer V2.0 Window Edit Image Window
Adding Photos
1. Before starting, please rotate your pictures to the proper orientation based on your frame style.
2. Plug the SB cable into the back of the Digital Photo Album and into an available SB port on your computer.
3. Turn the Digital Photo Album on.
4. Scroll down to the “ pdate Photo” using the “Down” button then push the “Menu” button.
*Note: After 10 seconds the unit will default to automatically playing slideshow.
5. After a few seconds Photo Viewer 2.0 software application will appear on your computer.
6. se the “Add Photo” button in the upper Right hand side of the dialog box and navigate folders on your
computer and select photos to add. The Photo Viewer Image Editor recognizes images in JPG, GIF, and BMP
formats.
7. Select the photo(s) in the file list that you wish to add to the Digital Photo Album.
*Note: you can select multiple pictures by holding the “control” (Ctrl) button down while making selections.
8. Once you have the photo(s) you wish to add selected click on the “open” button.
9. Now you can position them in the sequence you wish them to appear in the slide show mode by using the
“Move p” and “Move Down” buttons.
10. If you wish to delete a particular photo select the photo you wish to delete and click on the “Delete” button.
11. If you wish to delete all photos in the photo album click on the “Clear” button. When the dialog box asking
“Are you sure?” appears click on “Yes”.
12. You can rotate photos in 90° increments by selecting the photo on the left so that it appears on the right then
clicking the “Edit” button below the picture on the right. The “Edit Image” window will then appear. In the
“Edit Image” window click on the “Rotate” button as necessary to get the desired orientation.
13. If you wish to crop a picture, click on the “Edit” button under the photo on the right and click on the “Crop”
button in the “Edit Image” window. Drag the cropping box to the desired size pulling the sides of the box with
your cursor. You can reposition the cropped area by putting your cursor in the middle of the box then clicking
and dragging to the desired position. Once the cropped box is the size and position you desire click on the
“Crop” button on the right side of the “Edit Image” window. You can preview the changes made to the photo in
the “Preview” box in the upper right-hand corner of the “Edit Image” window. To undo any cropping to the
photo click on the “Auto Stretch” button in “Edit Image” window.
14. Once you have added/deleted/modified all desired photos click on the “Save” button on the bottom of the dialog
box to save all changes.
15. Once the status bar at the bottom of the dialog box reads “Save OK” you can then exit the program.
16. In order for updates to take effect the Digital Photo Album must be turned off then turned back on to reset the
memory.

'ormal Use
Power on/off:
To turn the Digital Photo Album on, plug the Digital Photo Album in to either a PC using the SB Cable or to an outlet
using the A/C adapter provided. Then push the “On/Off” button to the “On” position. To turn off, push the “On/Off”
button to the “Off” position.
Viewing Photos:
When first turned on a screen will appear with the following options:
1. Play Slide Show
2. pdate Photo
To view the slide show select “Play Slide Show”. The Digital Photo Album will then start displaying the photos that
have been uploaded on to its memory.
Menu Options
To access the menu hit the menu button twice after turning the Digital Photo Album on (or once if the Digital Photo
Album is currently displaying photos).
Displa Mode:
nder the “Display Mode” menu there are two options:
1. Auto Slide
a. Auto slide allows the user to adjust the number of seconds (ranging from 5 to 30 seconds) each
picture is shown on the display screen.
2. Manual Slide Show
a. To view slides manually under the “Auto Slide” menu scroll through all the second intervals (ranging
from 5 to 30 seconds) until “disable” appears. With “disable” showing push the “Menu” button on
the back of the Digital Photo Album module. This feature allows the user to shut off the “Auto Slide”
feature so that each picture is displayed on the screen until the user progresses to the next (or
previous) picture using the “Down” or “ p” buttons.
Clock Set:
This Digital Photo Album comes with a built in clock function. In order to set the clock scroll down to “Clock Set” by
pushing the “Down” button once then push the “Menu” button once. Now set the Year/Month/Day using the “ p,”
“Down” buttons and pushing the “Menu” button between setting each one. Next set the Hours/Minutes/Seconds again
using the “ p,” “Down” buttons and pushing the “Menu” button between setting each one.
Auto On/Off:
If you wish to have the Digital Photo Album automatically turn on and off under menu options go to “Auto On/Off” and
push the “Menu” button. Set the time you wish to have the Digital Photo Frame turn on using the “ p” and “Down”
buttons to set the Hour/Minutes and pushing “Menu” once the desired Hour/Minutes are selected. Next the cursor
progress to the time you would like the Digital Photo Frame to shut off. Again, use the “ p” and “Down” buttons to set
the Hour/Minutes and pushing “Menu” once the desired Hour/Minutes are selected. If you wish to disable this feature
go back to the Menu and select “Auto On/Off” and use the “Down” and “ p” buttons to change the Hours/Minute
setting back to “00:00” under both “On” and “Off” settings.
Clock Displa :
This Digital Photo Album comes equipped with a clock display that can be shown in place of photos for 25 seconds. To
turn on the clock feature push the “Menu” button and scroll down to “Clock Display and push “Menu”. This will
display the Year/Month/Day, Hour/Minutes/Seconds and day of week for 25 seconds before returning to the slide show.
LCD Contrast:
If you wish to adjust the LCD contrast go to the menu and scroll down to “LCD Contrast” and push the “Menu” button
on the back of the Digital Photo Album module. To adjust the contrasts to the desired level (between 0 and 16) use the
“ P” and “Down” buttons on the back of the Digital Photo Album module. Once you have found the desired contrast
push the “Menu” button on the back of the Digital Photo Album to save changes and to return to the Main Menu.

Delete one:
This feature allows you to delete individual photos while not being connected to a computer. To delete a picture scroll
down to “Delete one” in the Main Menu and push the “Menu” button on the back of the Digital Photo Album. By
default “YES” is selected, push the “Menu” button on the back of the Digital Photo Album and you are taken to the
photos that are stored on the Digital Photo Album module. Scroll through the photos using the “ p” and “Down”
buttons on the back of the Digital Photo Album until you come to the one you wish to delete. To delete the photo push
the “Menu” button on the back of the Digital Photo Album. The photo is then deleted and you are returned to the Main
Menu.
Delete all:
The “Delete all” function allows you to delete all photos stored on the Digital Photo Album while not connected to a
computer.
Main Menu:
The “Main Menu” function takes you back to the very first screen that appears when the unit is first turned on. After
push the “Menu” button on the back of the Digital Photo Album you will be taken to the screen where you can choose to
either: “play slide mode” or “update photo”. If no selection is made within 10 seconds the module automatically begin
in slide show.
*Note: You can only select the “update photo” option while you are connected to a computer. If you select “update
photo” while connected to the AC adapter the screen will say “Connecting..…” however, the module will be unable to
make a connection.
Care and Maintenance
• Do not expose this product to rain or moisture.
• Avoid prolonged exposure to direct sunlight.
• Do not open the case of the Digital Photo Album. There are no user-serviceable parts inside. Opening the case
will void your warranty.
• Do not subject product to strong impacts.
If you experience difficulty with this product or are missing parts, DO NOT RET RN THE PROD CT TO THE
STORE where you bought it. Qualified assistance is available by dialing 1-800-692-2656.
Designed in the SA - Made in China
Table of contents
