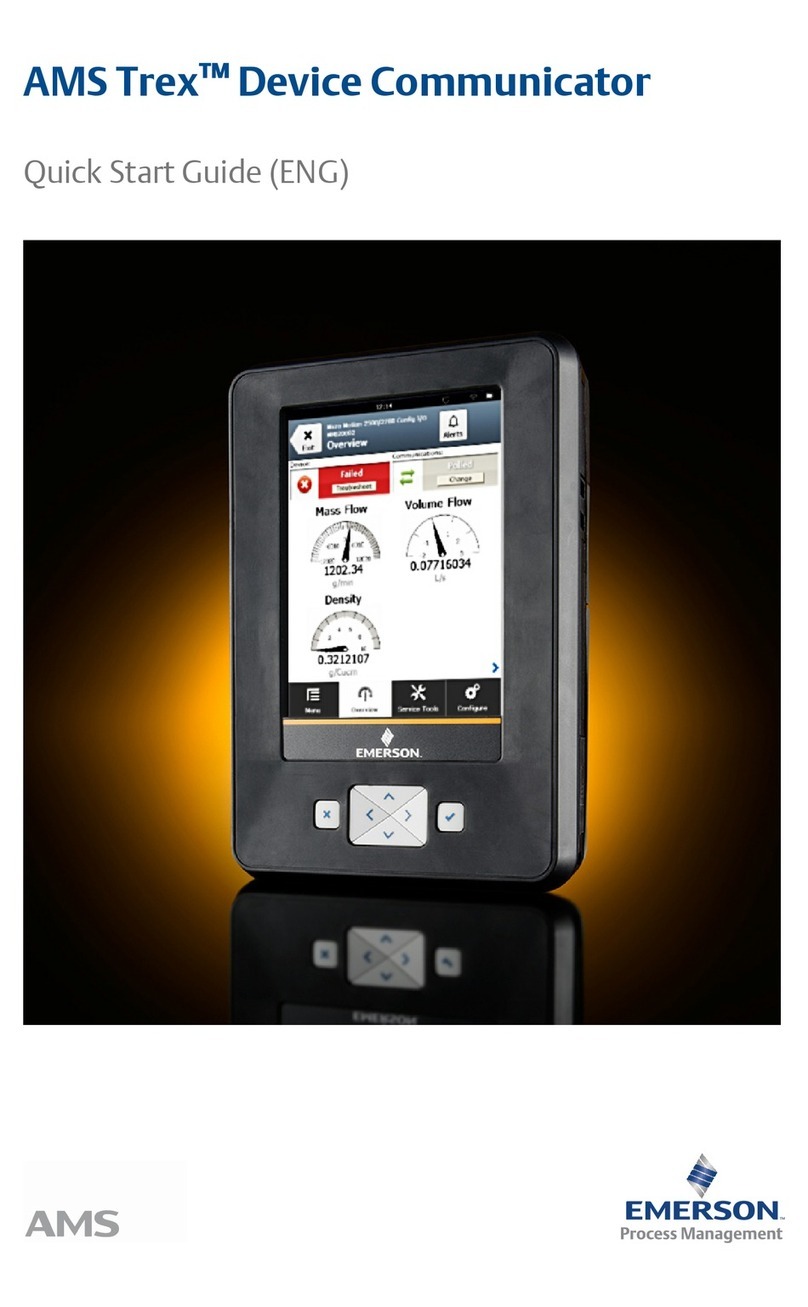
Emerson AMS Trex User manual

User Guide
, Rev 3
August 2017
AMS Trex™ Device Communicator
User Guide

Copyright and trademark information
©2017 Emerson. All rights reserved.
FOUNDATION™, HART® and WirelessHART® are marks of the FieldComm Group of Austin, Texas, USA.
The Emerson logo is a trademark and service mark of Emerson Electric Co.
All other marks are the property of their respective owners.
Notice
Important
Read this manual before working with the Trex unit. For personal and system safety, and for optimum product performance, thoroughly
understand the contents before using or servicing this product.
For equipment service needs, contact the nearest product representative.
Important
This device complies with Part 15 of the FCC Rules. Operation is subject to the following two conditions: (1) this device may not cause harmful
interference, and (2) this device must accept any interference received, including interference that may cause undesired operation.
WARNING!
If the Trex unit is used in a manner not specified by Emerson, the protection provided by the equipment may be impaired.
WARNING!
Do not directly connect the ports or terminals on the Trex unit to any main line voltage.
WARNING!
WARNING - POTENTIAL ELECTROSTATIC CHARGING HAZARD - SEE INSTRUCTIONS.
AVERTISSEMENT - DANGER POTENTIEL DE CHARGES ÉLECTROSTATIQUES - VOIR INSTRUCTIONS

Contents
Chapter 1 AMS Trex Device Communicator User Guide ..................................................................... 1
1.1 User Guide overview .......................................................................................................................1
1.2 Documentation conventions ......................................................................................................... 1
1.3 Technical support ...........................................................................................................................2
1.3.1 Information to provide to technical support .................................................................... 2
Chapter 2 AMS Trex Device Communicator overview ....................................................................... 3
2.1 Precautions for the Trex unit .......................................................................................................... 4
2.1.1 Hazardous areas .............................................................................................................. 4
2.2 Front view of the Trex unit ..............................................................................................................5
2.2.1 Keypad ............................................................................................................................ 5
2.3 Touchscreen .................................................................................................................................. 6
2.3.1 Supported gestures ......................................................................................................... 7
2.3.2 Enter text, numbers, or special characters ....................................................................... 8
2.3.3 Clean the touchscreen ..................................................................................................... 8
2.4 Back view of the Trex unit ...............................................................................................................9
2.4.1 Serial numbers .................................................................................................................9
2.5 Communication modules .............................................................................................................10
2.5.1 Ammeter on the Device Communicator Plus communication module ...........................12
2.5.2 Install a communication module ....................................................................................13
2.5.3 Remove a communication module ................................................................................ 14
2.6 Power module ..............................................................................................................................14
2.6.1 Precautions for the power module and AC adapter ........................................................ 15
2.6.2 AC adapter .................................................................................................................... 15
2.6.3 LEDs on the power module ........................................................................................... 16
2.6.4 View the remaining power module charge .................................................................... 17
2.6.5 Charge the power module ............................................................................................. 18
2.6.6 Install the power module into the Trex unit ....................................................................18
2.6.7 Remove the power module from the Trex unit ...............................................................19
2.6.8 Maintain the power module ...........................................................................................19
2.7 Accessories .................................................................................................................................. 20
2.7.1 Cables and lead sets .......................................................................................................20
2.7.2 Carrying case for the Trex unit ....................................................................................... 21
2.8 Power on or off .............................................................................................................................22
2.8.1 Reboot .......................................................................................................................... 22
2.8.2 Hard shut down ............................................................................................................. 23
2.9 Home screen ................................................................................................................................23
2.9.1 Return to the Home screen ............................................................................................25
2.9.2 Status bar ...................................................................................................................... 25
2.9.3 Shortcut bar .................................................................................................................. 26
2.10 Settings ........................................................................................................................................26
2.10.1 View all open applications ............................................................................................. 27
2.10.2 Close an application .......................................................................................................27
2.10.3 Change the screen brightness ........................................................................................27
2.10.4 Wireless communication ............................................................................................... 27
2.10.5 View information about the Trex hardware and operating system ................................. 30
2.10.6 Enter a name for the Trex unit ........................................................................................31
Contents
User Guide i

2.10.7 View the application version number .............................................................................31
2.10.8 Set the time and date .................................................................................................... 31
2.10.9 Calibrate the touchscreen ..............................................................................................32
2.10.10 Set the language on Trex ............................................................................................... 32
2.10.11 View the amount of available memory ...........................................................................32
2.10.12 Power management ...................................................................................................... 33
2.10.13 Enable or disable automatically connecting to HART devices .........................................35
2.10.14 Enable Diagnostic Logging ............................................................................................ 35
2.11 Applications on the Trex unit ........................................................................................................36
2.11.1 Activation ......................................................................................................................36
2.11.2 Close an application .......................................................................................................36
2.12 USB communication .....................................................................................................................37
2.13 Synchronizing AMS Trex data with AMS Device Manager ..............................................................37
2.13.1 Synchronize AMS Trex data to AMS Device Manager using USB ..................................... 38
2.13.2 Pair an AMS Trex unit with an AMS Device Manager station ........................................... 38
2.13.3 Unpair an AMS Trex unit .................................................................................................39
2.14 Upgrade Studio ............................................................................................................................ 40
2.14.1 Connect the Trex unit to Upgrade Studio using USB .......................................................41
2.14.2 Create a Trex online user account ................................................................................. 41
2.14.3 Activate the Trex unit .....................................................................................................42
2.14.4 Activate the Trex unit without using an internet connection ..........................................42
2.15 Transferring log files to a PC ......................................................................................................... 43
2.16 Maintenance and repair ................................................................................................................44
2.16.1 Replace the stand .......................................................................................................... 44
2.16.2 Calibration .....................................................................................................................44
Chapter 3 Field Communicator application .....................................................................................45
3.1 Open or close the Field Communicator application ...................................................................... 46
3.2 Device interoperability ................................................................................................................. 46
3.3 Forward Compatibility rules for saving and sending configurations to AMS Trex ...........................47
3.4 Automatically detect a device ...................................................................................................... 47
3.4.1 Automatically connect to a HART device ....................................................................... 48
3.5 Connect - Select screen ................................................................................................................ 48
3.6 Device connection wizard ............................................................................................................ 50
3.7 Status when detecting a device .................................................................................................... 51
3.8 Online menu or Device Dashboard ............................................................................................... 53
3.8.1 Device screen layout ......................................................................................................55
3.8.2 Application bar .............................................................................................................. 57
3.8.3 Menu screen ..................................................................................................................58
3.9 Icons on the device menus ........................................................................................................... 61
3.10 Connections to HART devices .......................................................................................................62
3.10.1 HART communication terminals .................................................................................... 62
3.10.2 Wiring diagrams for HART devices and the Field Communicator application ..................64
3.10.3 Wiring diagrams for the Smart Wireless THUM™ Adapter and the Field Communicator
application .................................................................................................................... 69
3.10.4 HART Device List ............................................................................................................73
3.11 Internal resistors .......................................................................................................................... 74
3.11.1 Enable or disable the internal resistors ...........................................................................76
3.12 Power and connect to a HART device ........................................................................................... 78
3.12.1 Power and connect to a Smart Wireless THUM adapter ..................................................80
3.13 Connect to an externally-powered HART device ...........................................................................81
3.14 Online HART devices .................................................................................................................... 82
Contents
ii User Guide

3.14.1 HART icons .................................................................................................................... 82
3.14.2 Device Setup options .....................................................................................................83
3.14.3 Changing device parameters ......................................................................................... 84
3.14.4 Change a HART device parameter ..................................................................................85
3.14.5 Edit a HART configuration ..............................................................................................86
3.14.6 Display the HART short tag or long tag .......................................................................... 86
3.14.7 View device alerts ......................................................................................................... 88
3.14.8 Send a configuration to a connected HART device ......................................................... 89
3.14.9 Save a configuration from a HART device .......................................................................89
3.15 Offline HART configurations .........................................................................................................89
3.15.1 Create a HART configuration ......................................................................................... 90
3.15.2 Edit a HART configuration ..............................................................................................90
3.15.3 Copy a HART configuration ............................................................................................91
3.15.4 Rename a HART configuration .......................................................................................91
3.15.5 Delete a HART configuration ......................................................................................... 91
3.16 Favorites ...................................................................................................................................... 91
3.16.1 Open a menu item from the favorites list .......................................................................92
3.16.2 Add a menu item to the favorites list ............................................................................. 92
3.16.3 Remove a menu item from the favorites list ...................................................................93
3.17 Polling options for HART devices .................................................................................................. 94
3.17.1 Set the polling options for HART devices ........................................................................94
3.18 Connections to FOUNDATION fieldbus devices ............................................................................ 95
3.18.1 Precautions for using the Trex unit with FOUNDATION fieldbus devices .........................96
3.18.2 FOUNDATION fieldbus communication terminals ..........................................................96
3.18.3 Wiring diagrams for FOUNDATION fieldbus devices and the Field Communicator
application .................................................................................................................... 98
3.18.4 Link Active Scheduler (LAS) ..........................................................................................100
3.18.5 Fieldbus Device List ......................................................................................................100
3.19 Power and connect to a FOUNDATION fieldbus device ............................................................... 101
3.20 Connect to an externally-powered FOUNDATION fieldbus device ...............................................103
3.21 Online FOUNDATION fieldbus devices ........................................................................................104
3.21.1 Limitations for commissioned devices ......................................................................... 104
3.21.2 Device blocks ...............................................................................................................104
3.21.3 Run a method ..............................................................................................................108
3.21.4 View the device information ........................................................................................109
3.21.5 Change a FOUNDATION fieldbus device parameter ..................................................... 109
3.21.6 Change the tag for a FOUNDATION fieldbus device ..................................................... 110
3.21.7 Guidelines for changing the device address ................................................................. 111
3.21.8 Change the device address for a FOUNDATION fieldbus device ....................................111
3.21.9 Polling for FOUNDATION fieldbus devices ....................................................................112
3.21.10 Set a FOUNDATION fieldbus device to be a link master or basic device ........................ 112
3.22 Simulate a live device ................................................................................................................. 113
3.23 View the device descriptions on the Trex unit .............................................................................113
3.24 View the device description information .................................................................................... 114
3.25 View Help for a device parameter ...............................................................................................115
3.26 Graphics .....................................................................................................................................115
3.26.1 Images ........................................................................................................................ 115
3.26.2 Charts ..........................................................................................................................116
3.26.3 Strip/sweep/scope chart ..............................................................................................116
3.26.4 Horizontal bar charts ................................................................................................... 117
3.26.5 Vertical bar charts ........................................................................................................118
Contents
User Guide iii

3.26.6 Gauge charts ............................................................................................................... 119
3.26.7 Graphs .........................................................................................................................120
3.27 Disconnect a device ................................................................................................................... 121
Chapter 4 Loop Diagnostics application ........................................................................................123
4.1 Open or close the Loop Diagnostics application ......................................................................... 124
4.2 Loop Diagnostics screen .............................................................................................................124
4.2.1 View the connection diagram as a full-screen image ....................................................127
4.3 Powering transmitters or positioners from Loop Diagnostics ......................................................127
4.4 Voltage and current measurements in Loop Diagnostics ............................................................129
4.5 Wiring diagrams for the Loop Diagnostics application ................................................................130
4.6 Power a 2-wire transmitter .........................................................................................................136
4.7 Power a 2-wire transmitter and measure analog output ............................................................. 137
4.8 Power a positioner ..................................................................................................................... 139
4.9 Stroke a valve ............................................................................................................................. 140
4.10 Settings for controlling current .................................................................................................. 141
4.10.1 Change the values for the quick buttons ......................................................................141
4.10.2 Change the scale for the up and down arrow keys .......................................................142
4.10.3 Set the duration to change the current ........................................................................ 143
4.11 Loop checks ............................................................................................................................... 143
4.11.1 Measure voltage on an externally-powered loop ..........................................................145
4.11.2 Measure the control system output ............................................................................. 145
4.11.3 Simulate a transmitter on an externally-powered loop for a loop check ....................... 146
4.11.4 Simulate a transmitter on an unpowered loop for a loop check ....................................147
Chapter 5 Fieldbus Diagnostics application .................................................................................. 149
5.1 Open or close the Fieldbus Diagnostics application .................................................................... 150
5.2 Fieldbus Diagnostics Overview screen ........................................................................................ 150
5.3 GOOD, BAD, and CHECK measurements in Fieldbus Diagnostics ................................................153
5.4 Wiring diagrams for the Fieldbus Diagnostics application ...........................................................155
5.5 Power a FOUNDATION fieldbus device ....................................................................................... 157
5.6 Connect to an externally-powered fieldbus segment ..................................................................158
5.7 Measure the DC voltage, noise, and the fieldbus signal .............................................................. 159
5.8 Details screen .............................................................................................................................160
5.9 View the live measurement values in Fieldbus Diagnostics ......................................................... 161
5.10 View help for a measurement .....................................................................................................161
5.11 Noise spectrum ..........................................................................................................................162
5.11.1 View a spectrum of the noise measurement ................................................................ 165
5.12 Settings ......................................................................................................................................166
5.12.1 View or hide the minimum, maximum, and average values for a measurement ...........167
5.12.2 View or hide the device tags when online .................................................................... 167
5.12.3 Set the number of measurements to average .............................................................. 167
5.12.4 Set the range of values for the GOOD and BAD status .................................................. 168
5.12.5 Reset the Fieldbus Diagnostics settings to the default values .......................................168
5.13 Saving measurements to a log file .............................................................................................. 168
5.13.1 Log file overview ..........................................................................................................169
5.13.2 Enable or disable logging .............................................................................................171
5.13.3 Save measurements to an existing log file ................................................................... 172
5.13.4 Transfer a Fieldbus Diagnostics log file from the Trex unit to a PC ................................ 173
5.14 Troubleshooting Fieldbus Diagnostics ........................................................................................174
Appendices and reference
Contents
iv User Guide

Appendix A Troubleshooting .......................................................................................................... 179
A.1 Troubleshoot HART communication .......................................................................................... 179
A.1.1 HART loops ..................................................................................................................181
A.2 Troubleshoot fieldbus communication .......................................................................................182
Appendix B Technical specifications ................................................................................................183
B.1 Physical specifications ................................................................................................................183
B.2 Communication module specifications ...................................................................................... 184
B.3 Processor, memory, operating system specifications ................................................................. 186
B.4 Environmental specifications ..................................................................................................... 186
B.5 Intrinsically Safe electrical parameters ........................................................................................187
B.6 Power module specifications ......................................................................................................188
B.7 AC adapter specifications ........................................................................................................... 188
Appendix C Product certifications ...................................................................................................191
Appendix D Wireless/Spectrum approvals .......................................................................................193
Glossary ........................................................................................................................................... 195
Index ................................................................................................................................................199
Contents
User Guide v

Contents
vi User Guide

1 AMS Trex Device Communicator User
Guide
Topics covered in this chapter:
•User Guide overview
•Documentation conventions
•Technical support
1.1 User Guide overview
The AMS Trex Device Communicator User Guide is written for instrument technicians who
work with field devices, including HART® and FOUNDATION™ fieldbus devices. The user
guide describes the hardware, connections to devices, the supported applications, and the
diagnostics you can run on devices, 4-20 mA current loops, or FOUNDATION fieldbus
segments.
Note
The Trex unit has two communication module options. This user guide describes both modules. Any
differences in the procedures based on these modules are noted.
1.2 Documentation conventions
The following conventions are used throughout:
Note
A note paragraph contains special comments or instructions.
CAUTION!
A caution paragraph alerts you to actions that can have a major impact on the equipment or
stored data.
WARNING!
A warning paragraph alerts you to actions that can have extremely serious consequences for
equipment and/or personnel.
AMS Trex Device Communicator User Guide
User Guide 1

1.3 Technical support
Contact your local representative or go to the AMS Trex Device Communicator website for
technical support contact information.
1.3.1 Information to provide to technical support
Before you call technical support personnel, have a detailed description of the issue,
including the information below (if applicable). Ensure you have the user manual for the
devices or digital control system available.
Information about the Trex unit
•Operating system version on the Trex unit. (Tap Settings > About.)
•The serial number of the Trex unit. You can view the serial number from the Settings.
(Tap Settings > About > CPU Board Serial Number.) The serial number is located on the
label on the bottom of the Trex unit, near the power module LEDs.
•Version number for the application. (Tap Settings > Installed Applications.)
Troubleshooting device communication issues
•Does the control system support HART® or FOUNDATION™ fieldbus
communications?
•What is the manufacturer and model of the control system?
•What is the device manufacturer name (or ID) and model revision of the device
(exact spelling if possible)?
•What task is being performed when the communication problem occurs?
•Can AMS Device Manager or another Trex unit communicate with the device?
•Are you having communication problems with multiple devices?
•Are there any error messages displayed when attempting to communicate with a
device?
•Does communication work when certain devices or processes are not running?
•What is the total cable length run from the termination panel to the device?
When you are working with HART devices, answer the following questions:
•What is the loop impedance (resistance value) in the HART loop?
•If a HART multiplexer is being used, what is the manufacturer and model?
•Is the device in burst mode?
•Is the device address set to "0"?
•Is more than one device on the loop?
•Is another master (primary or secondary) on the loop? (For example, a control
system or multiplexer.)
•Is the device powered by the Trex unit or an external power supply?
AMS Trex Device Communicator User Guide
2User Guide

2 AMS Trex Device Communicator
overview
Topics covered in this chapter:
•Precautions for the Trex unit
•Front view of the Trex unit
•Touchscreen
•Back view of the Trex unit
•Communication modules
•Power module
•Accessories
•Power on or off
•Home screen
•Settings
•Applications on the Trex unit
•USB communication
•Synchronizing AMS Trex data with AMS Device Manager
•Upgrade Studio
•Transferring log files to a PC
•Maintenance and repair
The Trex unit supports HART® and FOUNDATION™ fieldbus devices, so you can configure
or troubleshoot in the field or on the work bench. Electronic Device Description Language
(EDDL) technology enables the Trex unit to communicate with a variety of devices
independent of device manufacturer.
Depending on the attached communication module, the Trex unit lets you:
•Configure HART and FOUNDATION fieldbus devices.
•Power one HART or FOUNDATION fieldbus device.
•Measure current and voltage.
•Perform diagnostics on a 4-20 mA current loop or FOUNDATION fieldbus segment.
The Trex unit includes a color LCD touchscreen, a Lithium-Ion power module (battery
pack), a processor, memory components, and optional communication modules.
CAUTION!
When the Trex unit communicates with devices, follow all standards and procedures
applicable to the location. Failure to comply may result in equipment damage and/or personal
injury. Understand and comply with the sections in this manual.
AMS Trex Device Communicator overview
User Guide 3

2.1 Precautions for the Trex unit
Before operating the Trex unit, ensure:
•The Trex unit is not damaged.
•The power module is securely attached.
•All screws are sufficiently tightened.
•The communication terminal recess is free of dirt and debris.
•The communication module is securely attached.
CAUTION!
Do not use a screen protector on an IS-approved Trex unit. Static discharge is possible.
2.1.1 Hazardous areas
A Trex unit that meets the Intrinsic Safety requirements (IS-approved) can be used in Zone
1, or Zone 2, for Group IIC, and Class I, Division 1 and Division 2, Groups A, B, C, and D
locations.
An IS-approved Trex unit may be connected to loops or segments that are attached to
equipment located in Zone 0, Zone 1, Zone 2, for Group IIC; Zone 20, Zone 21, Zone 22,
and Class I, Division 1 and Division 2, Groups A, B, C, and D locations.
An IS-approved Trex unit can be ordered by selecting the KL option. The Trex unit has a
label that lists the approvals.
CAUTION!
Do not use a screen protector on an IS-approved Trex unit. Static discharge is possible.
WARNING!
Do not install, remove, or charge the Lithium Ion (Li-Ion) power module in a hazardous area
environment.
WARNING!
Explosions can result in serious injury or death.
Use in an explosive environment must be in accordance with the appropriate local, national,
and international standards, codes, and practices. Please review the Technical specifications
and Product certifications sections of the AMS Trex Device Communicator User Guide for any
restrictions associated with safe use.
Electrical shock can result in serious injury or death.
AMS Trex Device Communicator overview
4User Guide

2.2 Front view of the Trex unit
Front viewFigure 2-1:
A. Micro USB port (top)
B. Power button (side)
C. Strap connectors (side)
D. Touchscreen
E. Keypad
F. Charger port for the AC adapter (side)
Related information
LEDs on the power module
Touchscreen
2.2.1 Keypad
The Trex unit has a keypad that lets you navigate and select menus options. Use the four
arrow buttons to move across all selectable options on the screen, and use the checkmark
button to select an option.
The keypad also lets you enter text or numbers, based on the selected option or menu. An
onscreen keyboard is displayed. The four arrows let you navigate to a letter, number, or
symbol on the keyboard. Press the checkmark button or X button to select the option.
AMS Trex Device Communicator overview
User Guide 5

KeypadFigure 2-2:
A. Cancel any unsaved changes or close a menu. Similar to a Back button.
B. Move through the menus and icons in the applications. Press the up, down, right, and left arrow
keys to highlight a menu option on a screen. The right and left arrow keys also select items in a grid
or on a graph, but they do not let you navigate to the next level in a menu.
C. Open a menu item or accept any updates. Similar to an Enter button.
2.3 Touchscreen
The Trex unit has a resistive touchscreen that lets you select menu items and enter text.
Firmly press the screen to select an item. You need to apply more pressure than you would
for smart phones and tablets. If the touchscreen seems inaccurate, you can re-calibrate it.
All instructions in this manual are written for the touchscreen.
The touchscreen supports basic gestures, such as scroll up and scroll down. Multi-touch
gestures, such as pinch, are not supported.
AMS Trex Device Communicator overview
6User Guide

CAUTION!
The touchscreen display on the Trex unit could be damaged if directly impacted. To avoid
damaging the touchscreen:
•Use the Trex carrying case with the faceplate closed to protect the touchscreen and
prevent any damage when transporting or carrying the Trex unit.
•Do not let the touchscreen come in contact with other objects.
•Contact the touchscreen with blunt items only. Sharp instruments, such as screwdrivers,
can damage the touchscreen.
Repairing the touchscreen requires replacement of the entire display assembly, which is
possible only at an authorized service center.
CAUTION!
Do not use a screen protector on an IS-approved Trex unit. Static discharge is possible.
2.3.1 Supported gestures
The Trex unit uses a single-tap to select an item on the screen. You do not need to double-
tap an option on the screen.
Note
Multi-touch gestures, such as pinch, are not supported. Only single-touch gestures are supported.
Gesture Description
Tap.
Tapping a menu item opens another menu. For example, you
can tap a device description in the Field Communicator
application and a menu is displayed.
Press and hold.
Some menu items have a context menu associated with them.
Pressing and holding a menu item will activate the context
menu. For example, pressing and holding on a menu in the Field
Communicator application brings up a context menu that
allows access to help, or adding the item as a favorite.
Scroll down.
AMS Trex Device Communicator overview
User Guide 7

Gesture Description
Scroll up.
Scroll right.
Used to move right on graph or grid, or to view additional
columns/data on a screen.
Scroll left.
Used to move left on graph or grid.
2.3.2 Enter text, numbers, or special characters
If an option requires you to enter text, the application displays a keyboard with the
permitted characters. You can enter letters, numbers, punctuation, and special characters.
Tap the screen or use the four arrows keys on the keypad to enter the desired characters.
Tapping the Shift Key twice on the keyboard enables Shift Lock.
For screens that require passwords, text is hidden by default but can be revealed before
confirming by tapping the reveal icon.
2.3.3 Clean the touchscreen
Clean the touchscreen with a soft cloth with pH-neutral detergent or alcohol. When the
touchscreen is contaminated by chemicals, immediately wipe them off with caution to
avoid injury to the human body.
AMS Trex Device Communicator overview
8User Guide

2.4 Back view of the Trex unit
You can access the communication module, the stand, and the power module.
Back viewFigure 2-3:
A. Communication module
B. Stand
C. Power module
Related information
Communication modules
Replace the stand
Power module
2.4.1 Serial numbers
The Trex unit has a serial number for each part, including the main unit, power module,
and communication module. The label on each part lists the serial number. You may need
to provide a serial number if you work with technical support.
You can view the serial number from the Settings. (Tap Settings > About > CPU Board Serial
Number.) The serial number is located on the label on the bottom of the Trex unit, near the
power module LEDs.
AMS Trex Device Communicator overview
User Guide 9

2.5 Communication modules
The Trex unit has two communication modules.
Device Communicator communication module
The Device Communicator communication module can connect to and communicate with
HART and FOUNDATION fieldbus devices on an externally-powered HART loop or fieldbus
segment. The Device Communicator communication module has unique terminals for
both HART and FOUNDATION fieldbus devices.
Device Communicator communication moduleFigure 2-4:
A. Connect to externally-powered FOUNDATION fieldbus devices.
B. Connect to externally-powered HART devices.
Device Communicator Plus communication module
The Device Communicator Plus communication module can connect to HART and
FOUNDATION fieldbus devices, measure current and voltage, and power a device.
AMS Trex Device Communicator overview
10 User Guide

Device Communicator Plus communication moduleFigure 2-5:
A. Power a FOUNDATION fieldbus device. You need to connect the FOUNDATION fieldbus Power Plug
to the FF pwr and the positive FF terminals.
B. Connect to a FOUNDATION fieldbus device that is externally-powered or powered by the Trex unit.
C. Measure current on a 4-20 mA current loop.
D. Power and connect to a HART device. The HART+pwr terminals can measure the current output of a
connected transmitter or control the current input to a connected positioner. The terminals also
have a loop resistor for device communication.
E. Connect to an externally-powered HART device. The HART terminals also have an optional loop
resistor for enabling HART communications on 4-20 current loop and optional current control for
moving a positioner.
CAUTION!
•Before you insert or remove a communication module, ensure the Trex unit is powered
off.
•Ensure sufficient grounding. Ensure the personnel, working surfaces, and packaging are
sufficiently grounded when handling electrostatically sensitive parts.
•Avoid touching the pins on the connectors or components. Discharged energy can affect
the modules.
•When you insert/attach the communication module to the Trex unit, do not over tighten
the screws. Use 0.5Nm maximum torque load.
•Remove the USB cable from the Trex unit before connecting to a device.
AMS Trex Device Communicator overview
User Guide 11

WARNING!
•The Trex unit cannot power a 4-wire device. Do not connect Trex unit to the power
terminals of a 4-wire device. This can blow a fuse inside the Trex unit. The repair/
replacement will need to be completed at an authorized service center.
•Do not connect lead sets to the HART and HART + pwr terminals at the same time. If the
lead sets are connected to devices, this increases the chance of wiring mistakes and
could create a short in the HART loop.
•Do not add any external power to the device when the Trex unit is powering the device.
This can blow a fuse inside the Trex unit. The repair/replacement will need to be
completed at an authorized service center. Ensure the device is disconnected from the
loop/segment and no other wires are connected to the device before providing power
from the Trex unit.
•Do not use the Trex unit to power a WirelessHART device. Providing power to a
WirelessHART device may damage the device.
•Do not connect the mA terminals (ammeter) in parallel with a powered 4-20 mA current
loop. Ammeters have low resistance. This can disrupt the loop and cause devices to
report incorrect values or positioners to move unexpectedly.
•Do not connect the mA terminals on the Trex unit to a power supply that is not current
limited to 250 mA. This can blow a fuse inside the Trex unit. The repair/replacement will
need to be completed at an authorized service center.
2.5.1 Ammeter on the Device Communicator Plus
communication module
The Device Communicator Plus communication module has several ammeters for reading
current:
1. Ammeter in the mA terminals. This ammeter is intended for quick measurements
and is for reference only.
2. Ammeter in the HART + pwr terminals. This ammeter is used when the Trex unit is
powering a transmitter. This ammeter is intended for tasks including digital-to-
analog trims where a higher accuracy ammeter is required.
3. Ammeter in the HART + pwr and HART terminals. This ammeter is used when the
Trex unit is controlling current or is powering a positioner. The ammeter is intended
to give feedback on the output current from the Trex unit and is for reference only.
WARNING!
•Do not use the HART + pwr and mA terminals in series when the Trex unit powers a
device.
•Do not connect the mA terminals (ammeter) in parallel with a powered 4-20 mA current
loop. Ammeters have low resistance. This can disrupt the loop and cause devices to
report incorrect values or positioners to move unexpectedly.
•Do not connect the mA terminals on the Trex unit to a power supply that is not current
limited to 250 mA. This can blow a fuse inside the Trex unit. The repair/replacement will
need to be completed at an authorized service center.
For best results when using the mA terminals, do the following:
AMS Trex Device Communicator overview
12 User Guide
Other manuals for AMS Trex
1
Table of contents
Other Emerson Cell Phone manuals

Emerson
Emerson AMS Trex User manual

Emerson
Emerson AMS Trex Device Communicator User manual

Emerson
Emerson 475 Manual

Emerson
Emerson 475 User manual

Emerson
Emerson Rosemount 375 User manual

Emerson
Emerson Rosemount 375 User manual

Emerson
Emerson Rosemount 375 User manual

Emerson
Emerson Rosemount 375 User manual

Emerson
Emerson 475 User manual

Emerson
Emerson Rosemount 375 User manual