emimikos H.264 User manual

303Z
AC798_796_792_CD541_Quick_V1.1
H.264 Network DVR
Quick Start
Please read instructions thoroughly before operation and retain it for future reference.
For the actual display & operation, please refer to your DVR in hand.

1. FRONT AND REAR PANELS
1.1 Front Panel
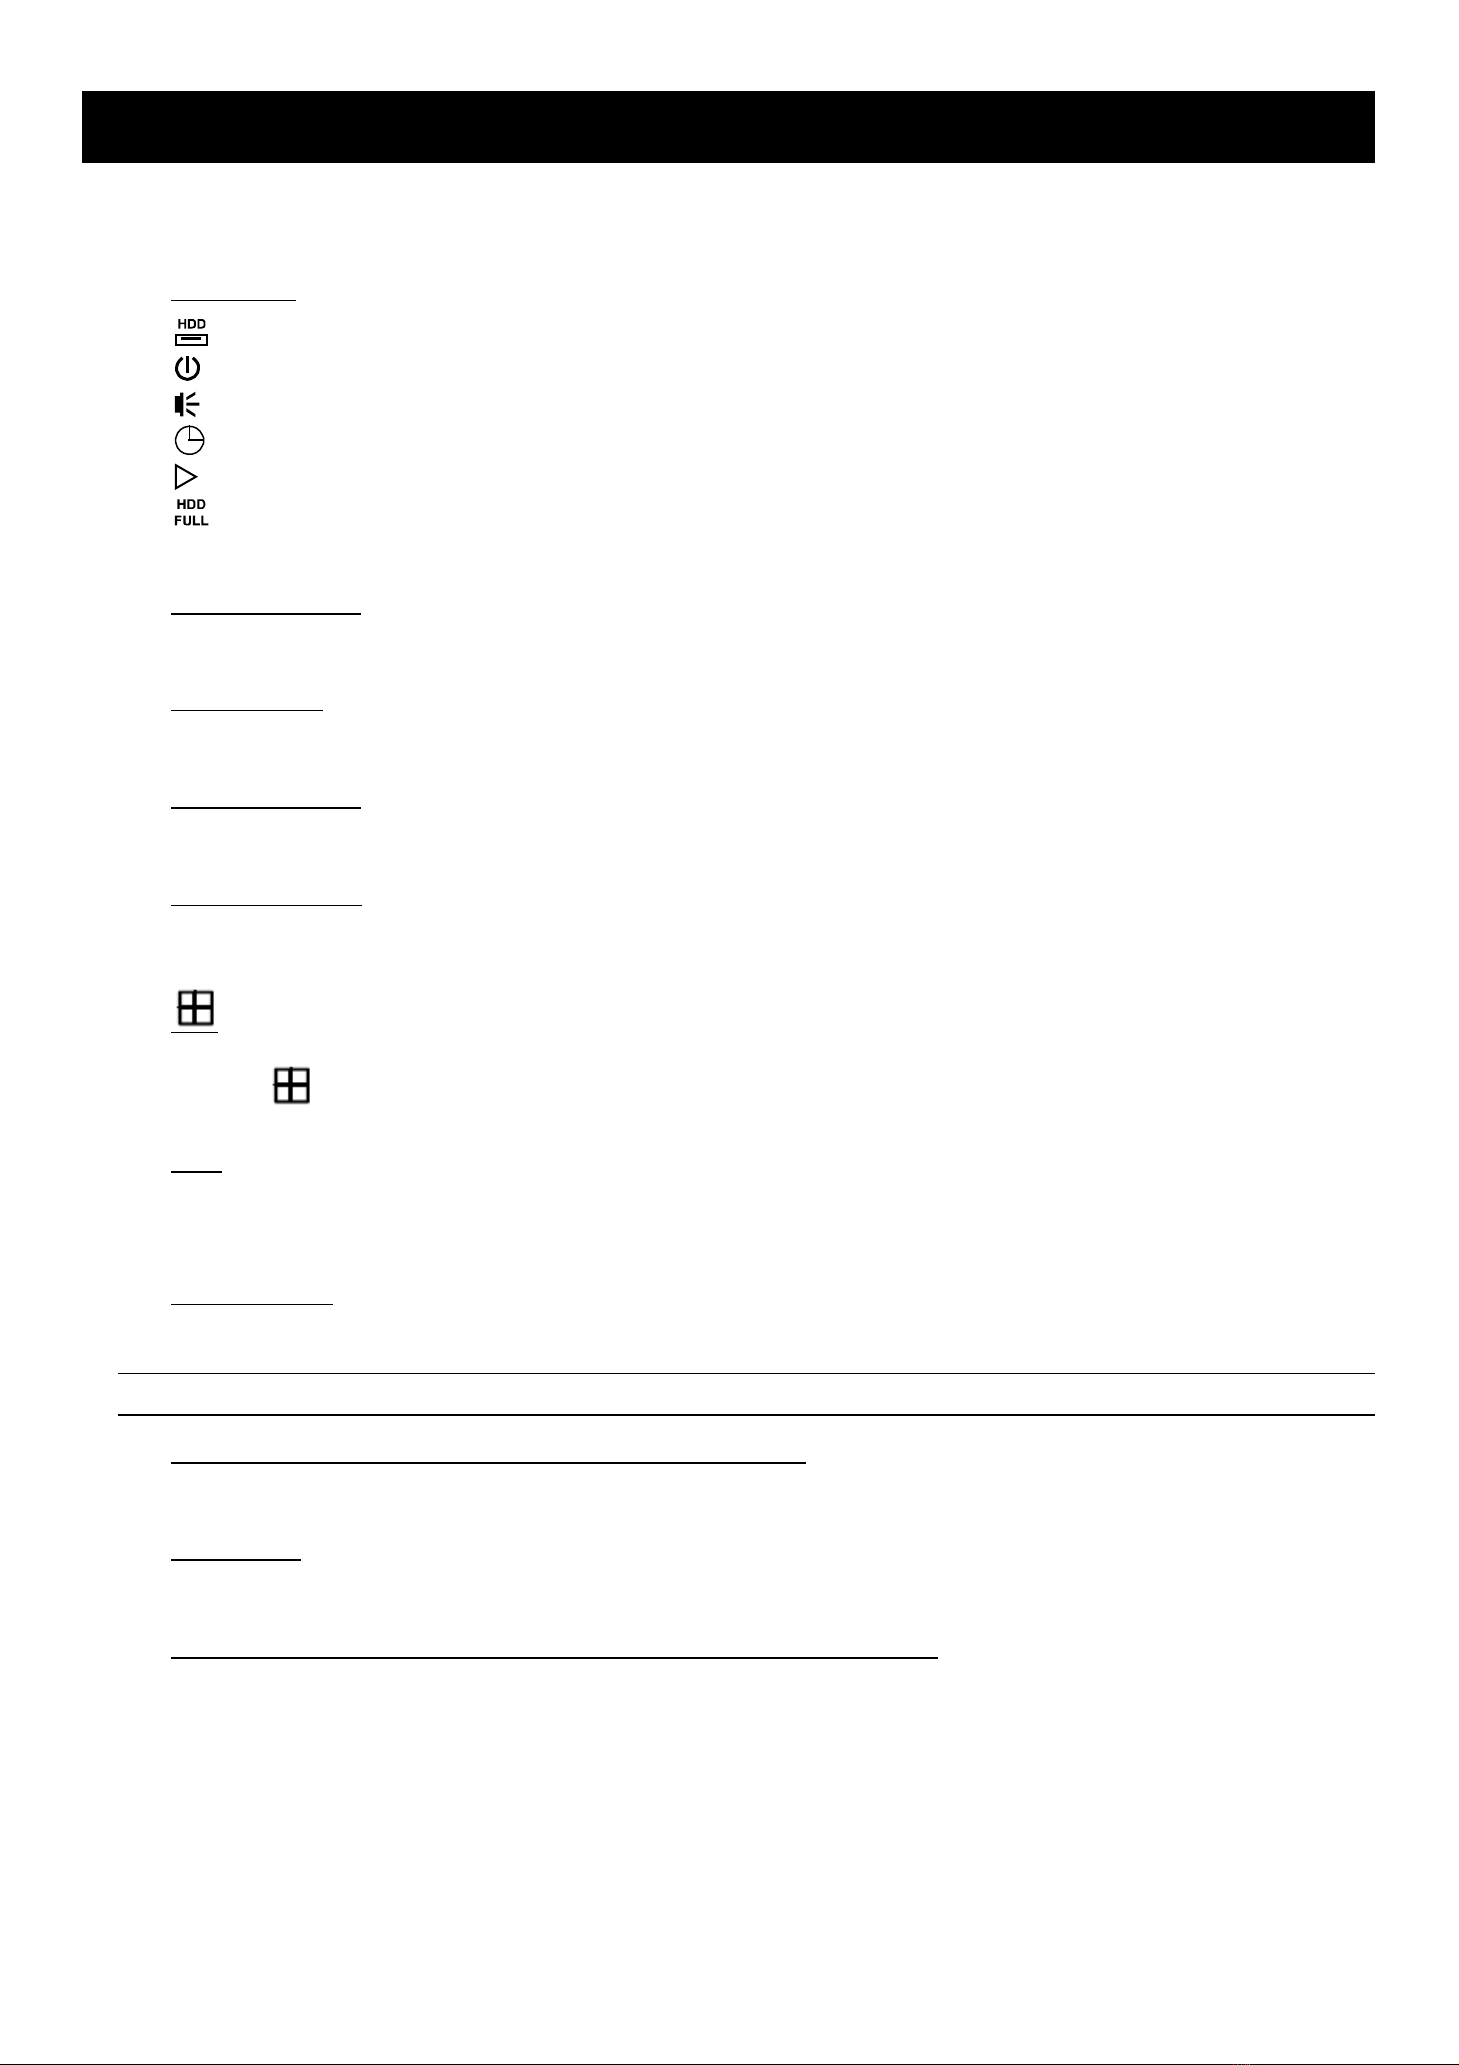
1) LED Indicators
HDD is reading or recording.
DVR is powered on.
An alarm is triggered.
Timer recording is on.
Under playback status (For 4CH model only).
HDD is full (For 16CH / 8CH models only).
2) MENU
Press “MENU” to enter the main menu.
3) ENTER
Press “ENTER” to confirm the setting.
4) SLOW
Under the playback mode, press “SLOW“ to show slow playback.
5) ZOOM
Press “ZOOM” to enlarge the picture of selected channel (under the live mode).
6)
Press “ “ to show the 4 channel display mode.
7) SEQ
Press “SEQ” to activate the call monitor function and press “SEQ” again to escape the call monitor mode.
8) POWER
Press to turn on / off the DVR.
(Under the recording mode, please stop recording before turning off the DVR).
9) CH1 ~ 16 / CH1 ~ 8 / CH1 ~ 4
Press the channel number buttons to select the channel to display.
10) PLAY
Press to playback the recorded data.
11) ▲(PAUSE/+) / ▼(STOP/-) / ◄(REW) / ►(FF)
Press ▲/ ▼/ ◄/ ►to move the cursor up / down / left / right.
Under the playback mode, press “ PAUSE” to pause playback.
Under the playback mode, press “ STOP” to stop playback.
Under the playback mode, press “FF“ to fast forward.
Under the playback mode, press “REW“ to fast rewind.

-3-
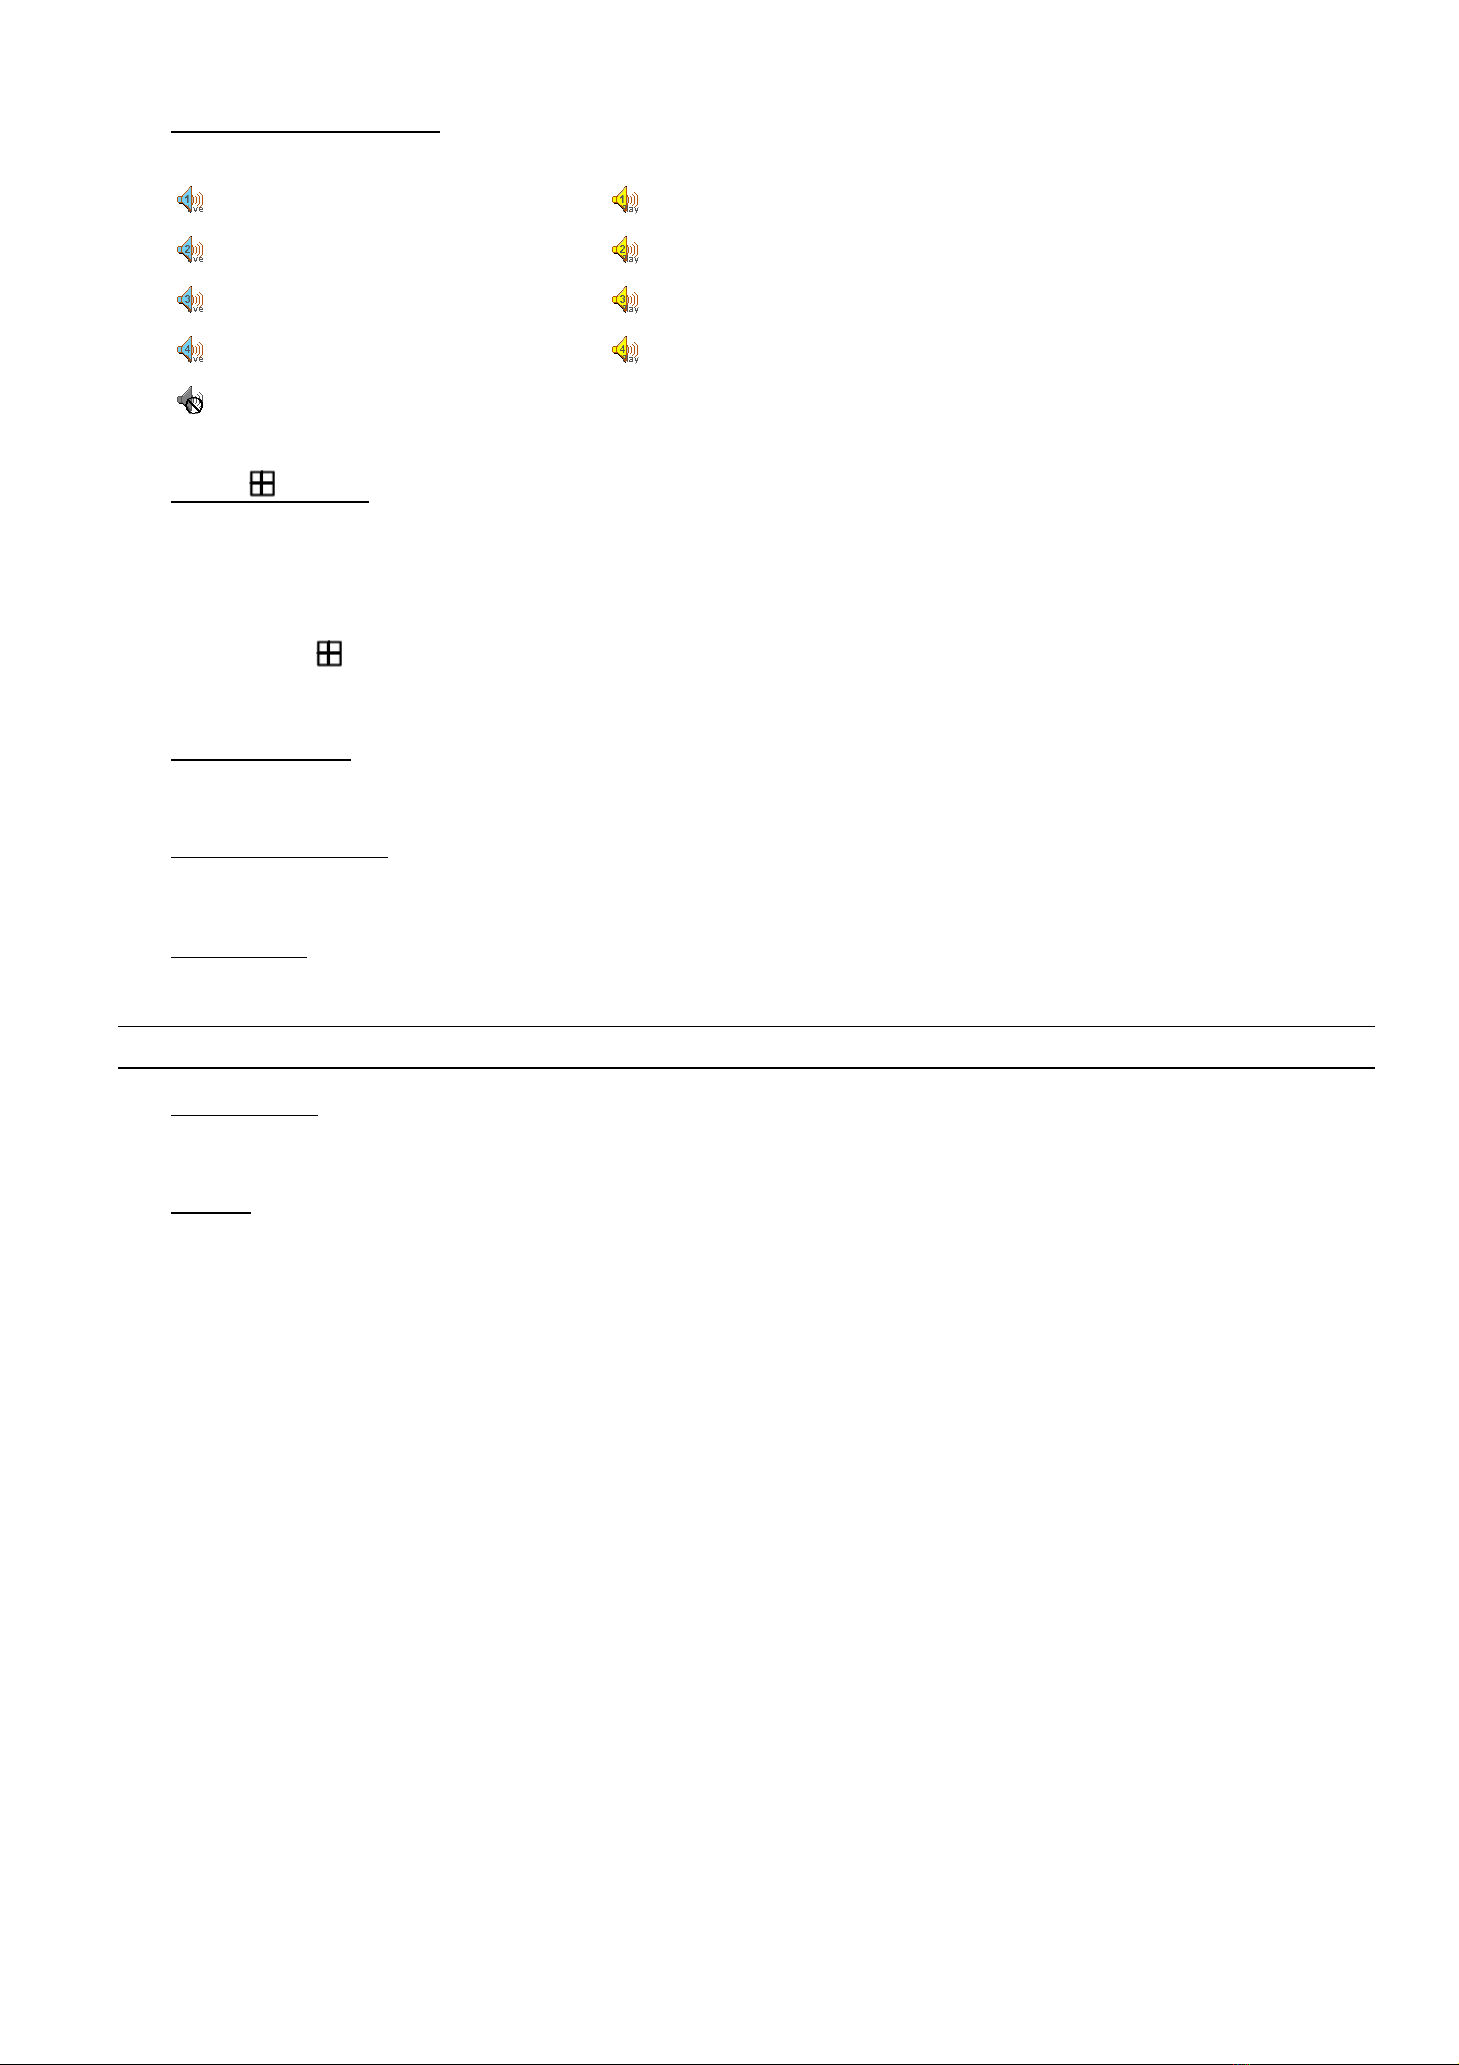
12) AUDIO (SLOW + ZOOM)
Press “SLOW” + “ZOOM” to select live or playback sounds of the audio channels.
Live audio of the 1st audio channel Playback audio of the 1st audio channel
Live audio of the 2nd audio channel Playback audio of the 2nd audio channel
Live audio of the 3rd audio channel Playback audio of the 3rd audio channel
Live audio of the 4th audio channel Playback audio of the 4th audio channel
The audio channel is not selected.
13) P.T.Z. ( + SEQ)
Press “ ” + “SEQ” at the same time to enter / exit the PTZ control mode.
In the PTZ control mode,
* Zoom in: Press "SEQ"
* Zoom out: Press " "
* Adjust PTZ angle: Press ▲/ ▼/ ◄/ ►
14) MENU + ENTER
Press “MENU” + “ENTER” on the DVR front panel to lock keys and to log in another username.
15) LIST (Event List Search)
To quick search the recorded files by event, press to show all types of the event lists.
16) SNAP
Press “SNAP” to take a snapshot.
Note: Before taking a snapshot, insert a compatible USB flash drive into the DVR USB port for snapshot
saving. For the compatible USB flash drive list, please refer to “APPENDIX 3 COMPATIBLE USB
FLASH DRIVE” in the user manual.
17) EJECT (Selected Models Only)
Press “EJECT” to open / close the DVD Writer.
18) USB
Supports firmware / OSD upgrade and file backup.

-4-
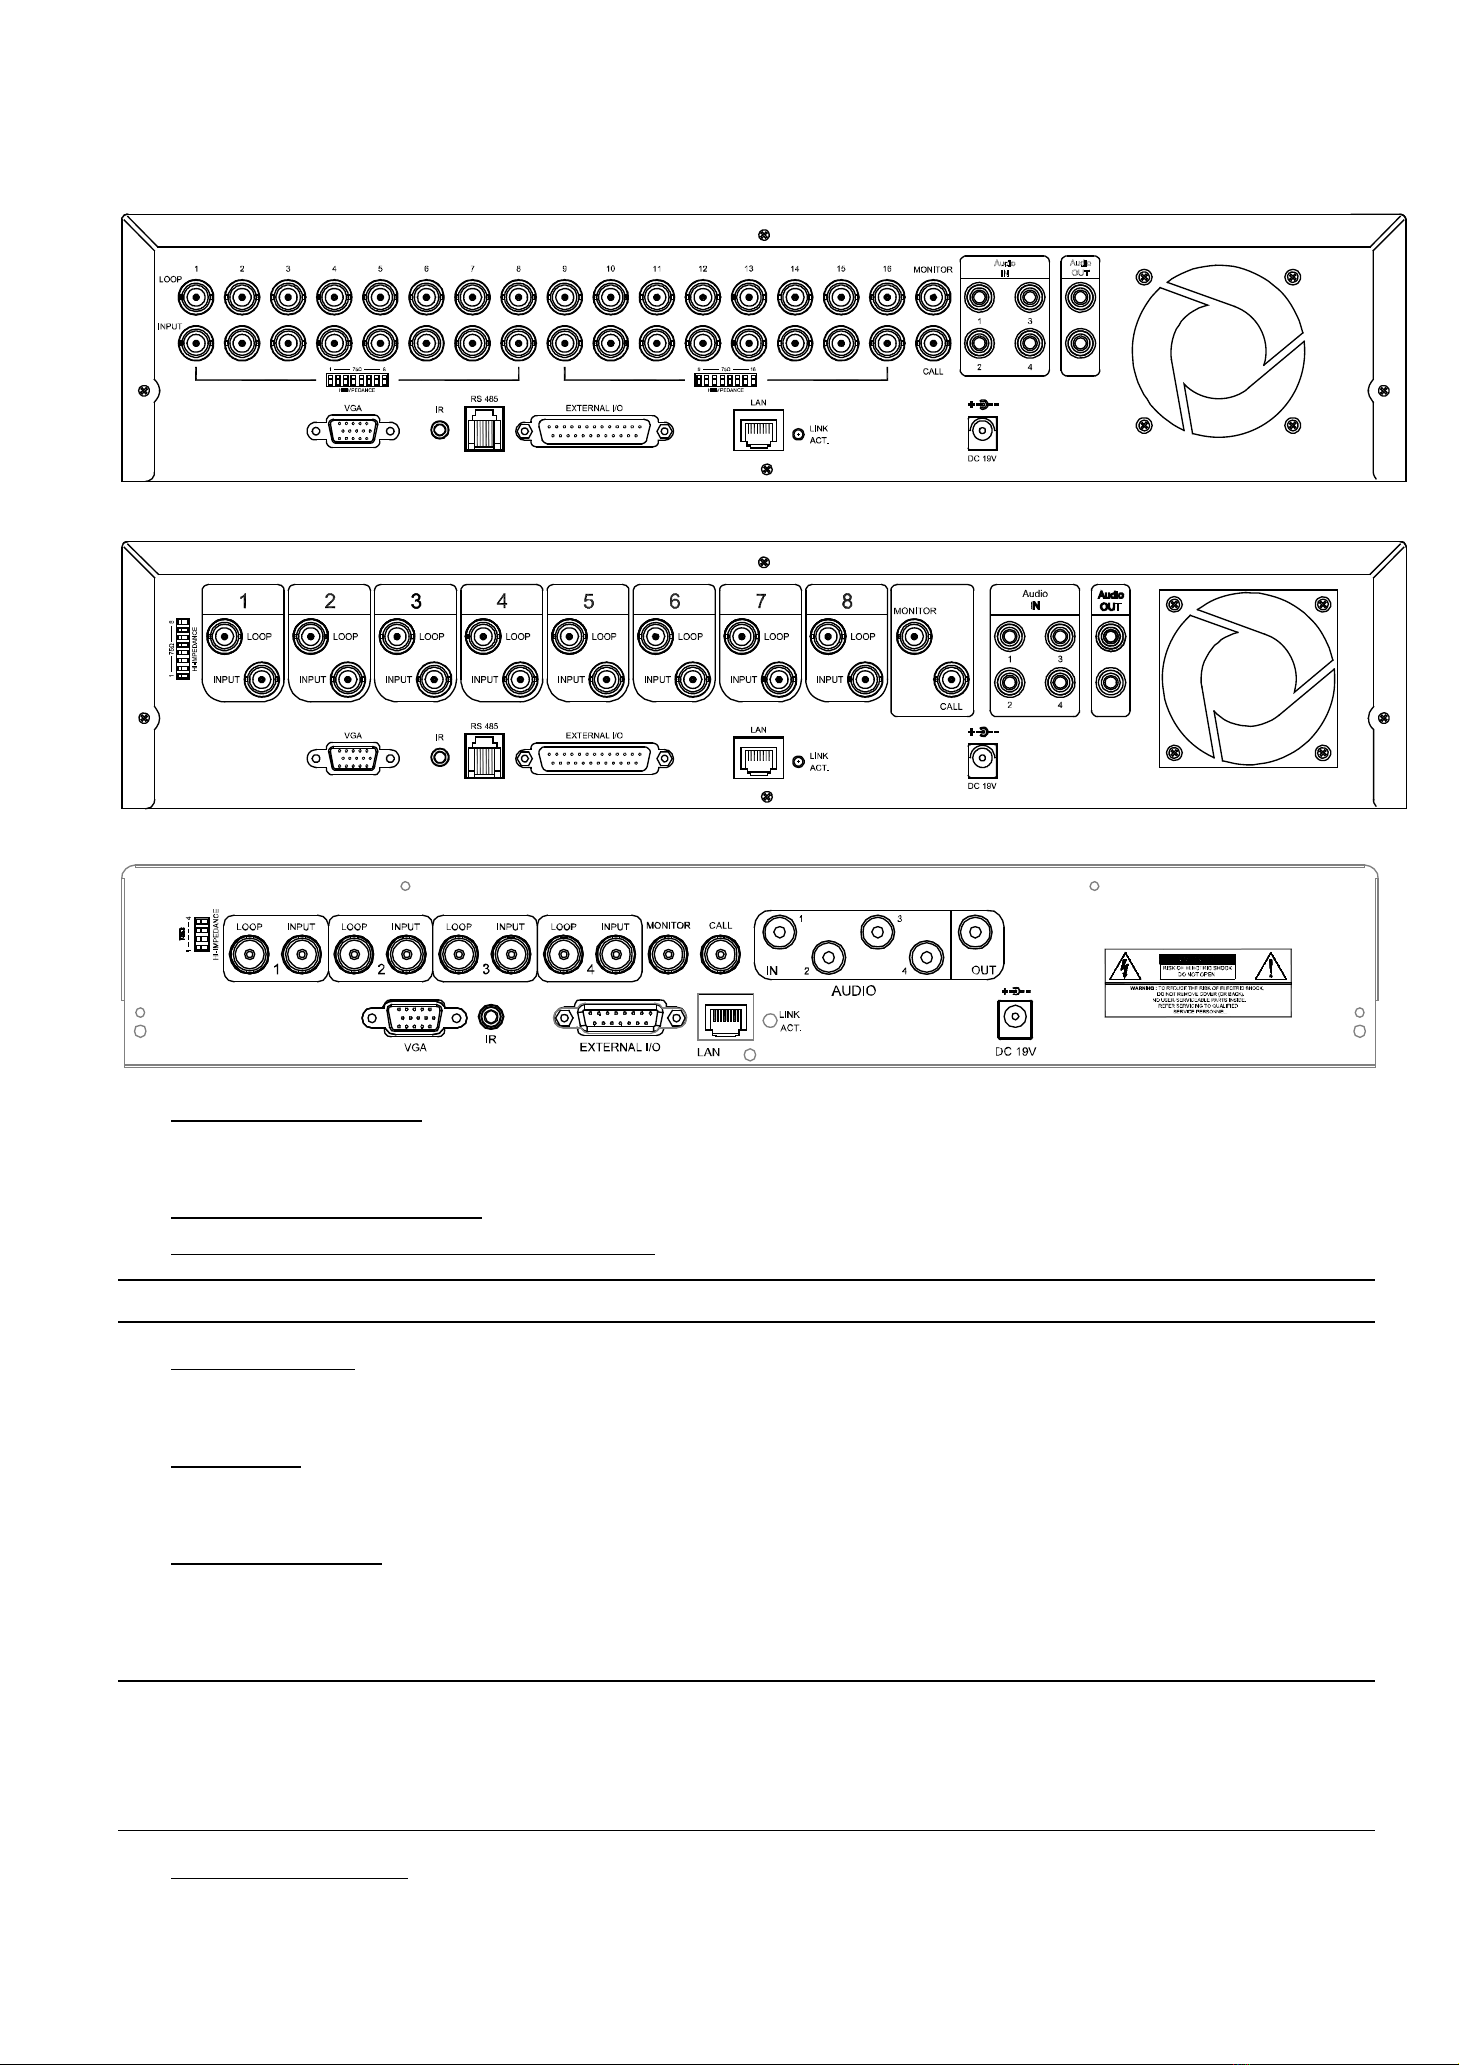
1.2 Rear Panel
‧ 16CH
‧ 8CH
‧ 4CH
19) 75Ω/ HI-IMPEDANCE
When using Loop function, please switch to HI-IMPEDANCE. When you don’t use Loop function, please switch to
75Ω.
20) INPUT (1 ~ 16 / 1 ~ 8 / 1 ~ 4): Connect to video sources, such as cameras.
LOOP (1 ~ 16 / 1 ~ 8 / 1 ~ 4): Video output connector.
Note: The DVR will automatically detect the video system of the camera, please make sure that the
cameras are properly connected to the DVR and power-supplied before the DVR is turned on.
21) MONITOR
Connect to a CRT monitor for video output.
22) CALL
Connect to a call monitor.
23) Audio IN
Connect to audio sources, such as cameras equipped with the audio function.
When users start recording, the audio input will also be recorded with corresponding video channel.
Note: The audio source connected to the “Audio 1” will be recorded with the video of the “CH1”.
The audio source connected to the “Audio 2” will be recorded with the video of the “CH2”.
The audio source connected to the “Audio 3” will be recorded with the video of the “CH3”.
The audio source connected to the “Audio 4” will be recorded with the video of the “CH4”.
-5-
24) Audio OUT
Connect to a monitor or speaker with 1 mono audio output.
25) VGA
Connect to a LCD monitor directly.
26) IR
Connect the IR receiver extension line for remote control.
27) RS485 (For 16CH & 8CH Models Only)
Connect to external devices (such as speed dome cameras) with RS485-A and RS485-B wires.
28) EXTERNAL I/O
Insert the supplied 15 / 25 PIN DSUB to this port for connecting external devices (external alarm, etc).
For detailed I/O port PIN configuration, please refer to “APPENDIX 1 PIN CONFIGURATION” in the user manual.
29) LAN
Connect to Internet by LAN cable.
30) LINK / ACT LED light:
When the Internet is activated, the LED light will be on.
31) DC 19V
Connect to the supplied adapter.
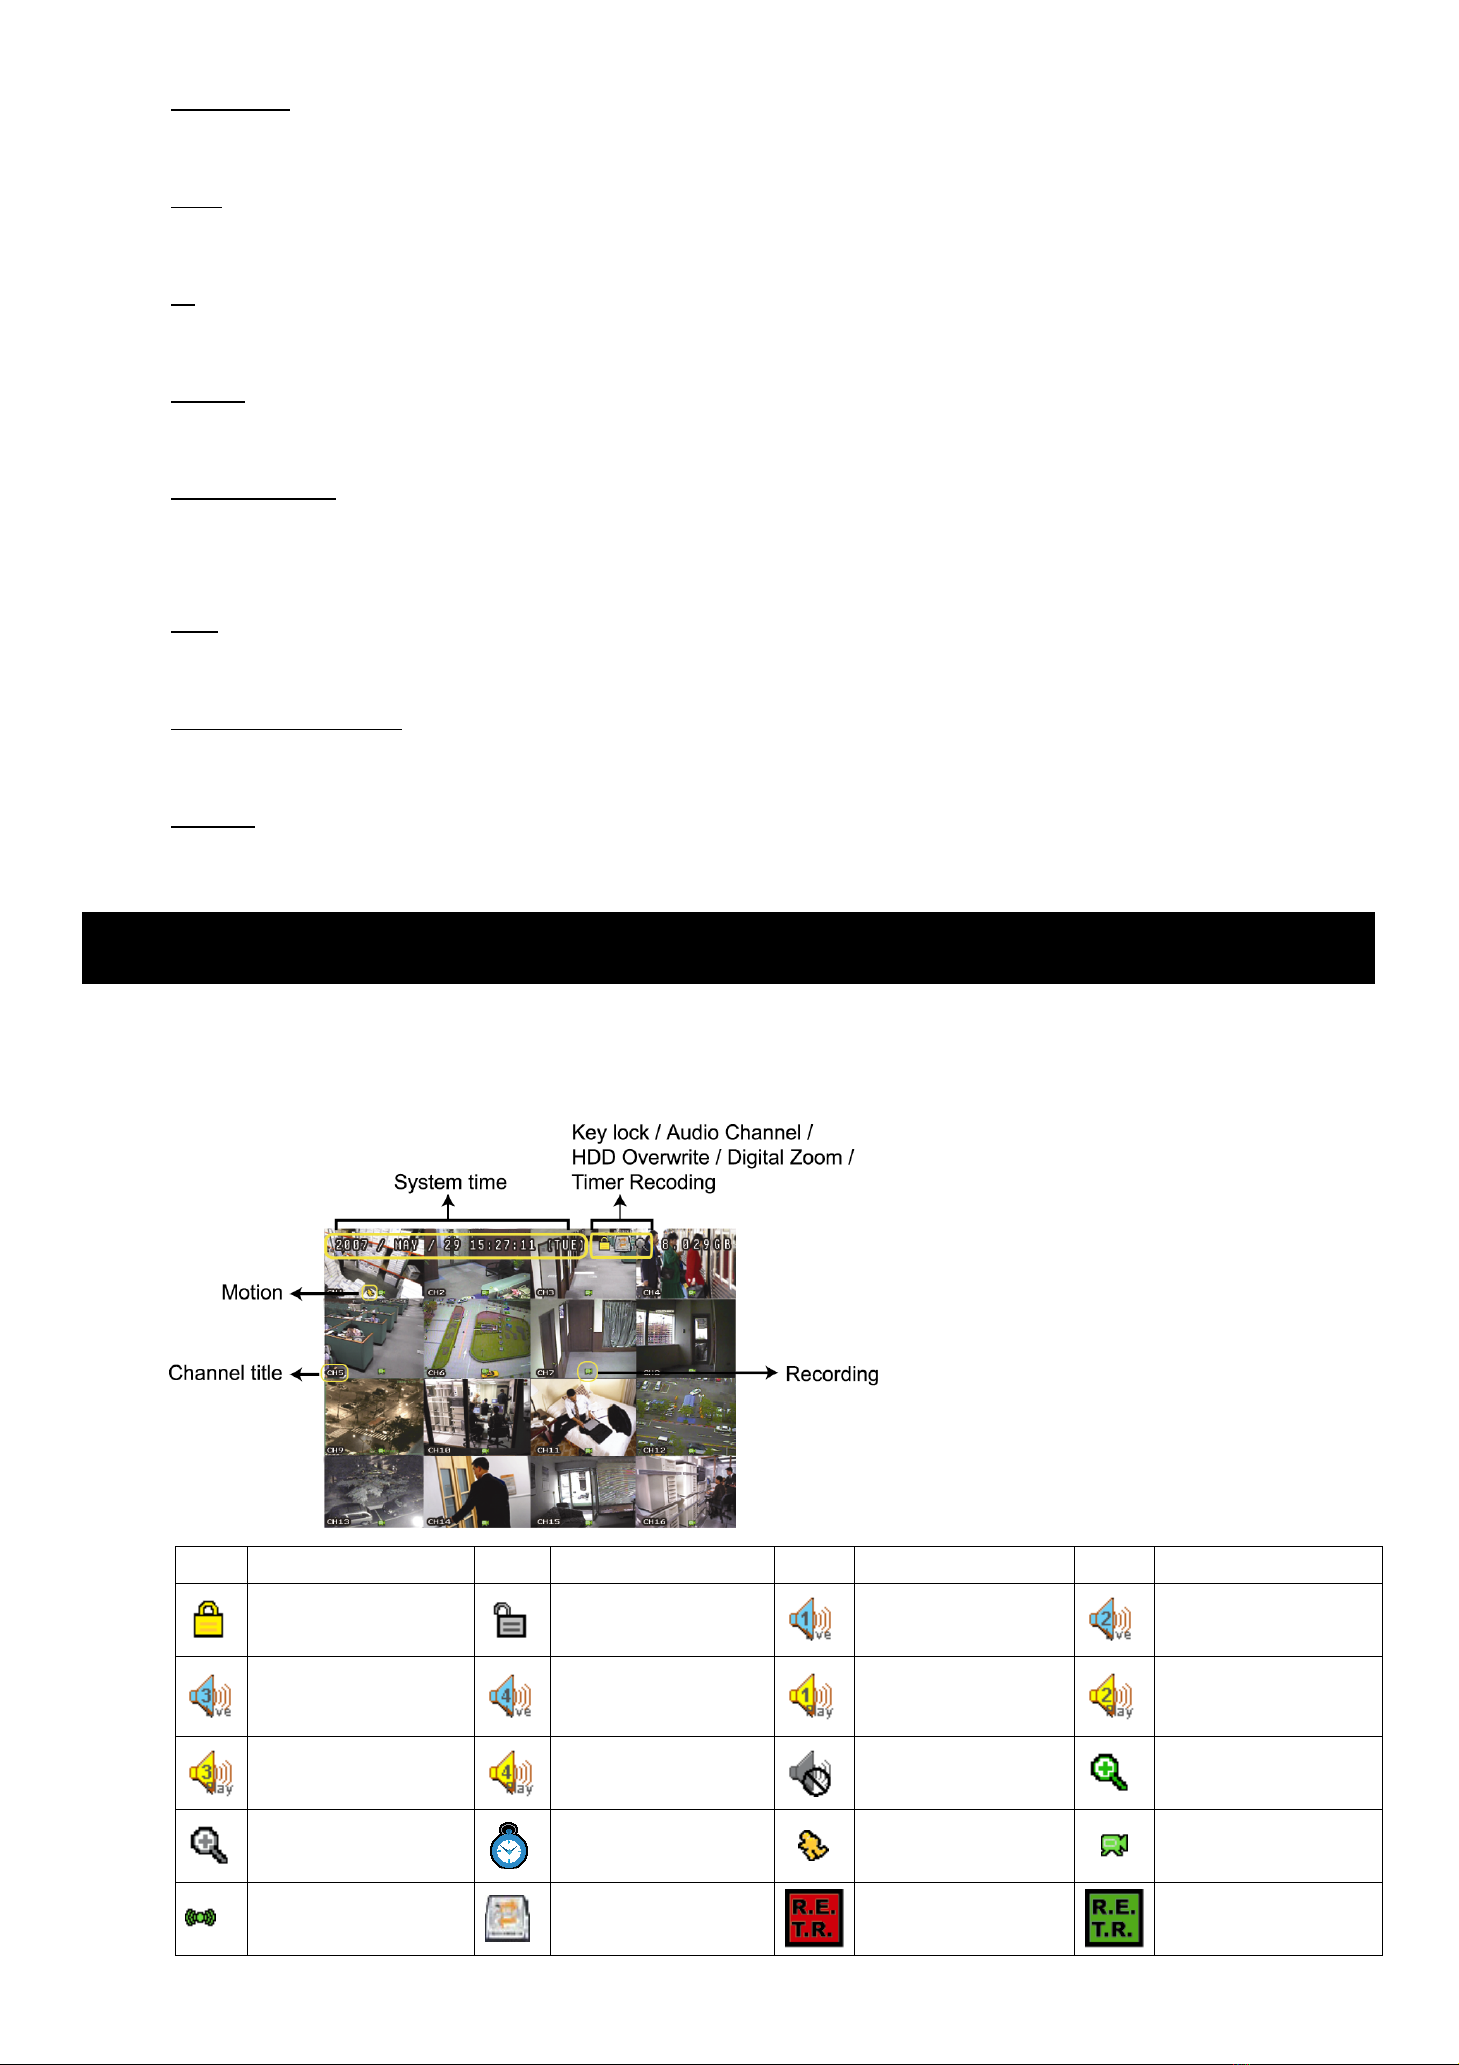
2. BASIC OPERATION
2.1 Live Page
In this live page of the DVR, you can see the live viewing of 1- / 4- / 9- / 16-cut screen.
Icon Function Icon Function Icon Function Icon Function
Key lock Key unlock
1st live audio
channel
2nd live audio
channel
3rd live audio
channel
4th live audio
channel
1st playback audio
channel
2nd playback audio
channel
3rd playback audio
channel
4th playback audio
channel
Audio channel
unselected Digital zoom mode
Digital zoom
unselected Timer recording Motion Recording
Alarm HDD overwrite R.E.T.R. ON R.E.T.R. Delay

-6-
2.2 Recording
When the HDD overwrite function is activated, this device will overwrite 8GB data from the oldest for continuous
recording without notice.
1) Continuous Recording Icon
When the DVR is properly connected with camera, you can see the icon “ ” (recording) on the screen.
2) Event Recording Icon
When the motion / alarm detection is activated, once motion or external alarm happens, you will see the icon
“ ” (motion) or “ ” (external alarm) on the screen.
3) Timer Recording Icon
When the timer record is activated, you will see the icon “ ” (timer) on the screen.
Note: The audio source connected to the “Audio 1” will be recorded with the video of the “CH1”.
The audio source connected to the “Audio 2” will be recorded with the video of the “CH2”.
The audio source connected to the “Audio 3” will be recorded with the video of the “CH3”.
The audio source connected to the “Audio 4” will be recorded with the video of the “CH4”
Note: A new log will be added in the system log when the HDD data is overwritten or the recording starts
after DVR reboots.
4) HDD Overwritten Icon
The HDD overwritten function can be set to ON / OFF. When this function is enabled (ON), the icon will display
on the monitor screen.
2.3 Playback
Press “PLAY” on the DVR control panel, and the device will playback the latest recorded video.
Note: There must be at least 8192 images of recorded data for playback to work properly. If not, the
device will stop playback. For example, if the IPS is set to 30, the recording time should be at least
273 seconds (8192 images / 30 IPS) for the playback to work properly.
Note: The playback at the local site might not be so smooth if there’s any remote surveillance
simultaneously going on.
1) Fast Forward / Fast Rewind
You can increase the speed for fast forward and rewind on this device. In the playback mode:
Press “FF” once to get 4X speed forward and press twice to get 8X speed, etc. And the maximum speed is 32X.
Press “REW” once to get 4X speed rewind and press twice to get 8X speed, etc. And the maximum speed is 32X.
Note: During playback, the image size of the recording (FRAME, FIELD or CIF) will be shown on the
screen.
2) Pause / Image Jog
Press “PAUSE/+” to pause the playback.
In the Pause mode:
Press “FF” once to get one frame forward.
Press “REW” once to get one frame rewind.
3) Stop
Press “STOP” under playback mode, and the screen will return to live monitoring mode.

-7-
4) Slow Playback
Press “SLOW” to get 1/4X speed playback and press twice to get 1/8X speed playback.
5) Audio Playback (SLOW + ZOOM)
Use “SLOW” + “ZOOM” to select the live or playback sound of the audio channels.
Live audio of the 1st audio channel Playback audio of the 1st audio channel
Live audio of the 2nd audio channel Playback audio of the 2nd audio channel
Live audio of the 3rd audio channel Playback audio of the 3rd audio channel
Live audio of the 4th audio channel Playback audio of the 4th audio channel
The audio channel is not selected.
Note: If you want to make a video backup with audio, please connect audio cameras to the channels
which support the audio function (CH1, CH2, CH3 and CH4).
2.4 Key Lock and Unlock
1) Key Lock On
Press “MENU” + “ENTER” on the DVR front panel to lock keys.
Or set the time-out after which the key lock function is activated (Never / 10 SEC / 30 SEC / 60 SEC). Please refer
to “7.2 System Info” in the user manual..
2) Key Lock Off
Enter the DVR password to exit “Key Lock” mode.
2.5 Upgrade
‧ Firmware / Multilanguage OSD Upgrade
1) Use USB to upgrade firmware or OSD
Step 1. Format the USB memory device as FAT 32 format first.
Step 2. Get the upgrade files from your distributor, and save the upgrade files in your USB flash device (do not
change the file name).
Step 3. Insert your USB flash drive into the USB port. Wait till the DVR detects your USB flash drive.
Step 3. Press “MENU”, and move to “ADVANCE” l“ ” (SYSTEM INFO). Select “UPGRADE” l“START”, and
press “ENTER”.
Step 4. Select “YES”, and press “ENTER” to confirm the upgrade.
2) Use AP software to remotely upgrade firmware or OSD
Step 1. Save the upgrade files at your PC (do not change the file name), and log into the Video Viewer.
Step 2. Click “ ” (Miscellaneous Control) to show the miscellaneous control panel. In the miscellaneous control
panel, click “ ” (Tools) on the miscellaneous control panel to enter the upgrade window.
Step 3. Enter the user name, password, IP address and port number of the DVR.
Step 4. Click “Firmware” or “Language” tab as needed, and click “Add” to select the firmware or OSD files to
upgrade.
Step 5. Click “Update Firmware” or “Update Language” button to start the upgrade.

-8-
2.6 Search
1) Search by List
Press “LIST” on the DVR control panel to show the list for all types of the recorded files. Choose the item you
want to view, and press “ENTER” to start playback.
2) Search by Time
In the “ ” (EVENT INFO) menu list, move to “QUICK SEARCH”, and press “ENTER” to enter the quick search
menu. You can search any specific events by time (Year / Month / Day / Hour / Min) and directly play the file you
find.

263Z
Chinese_AV798_796_792_CD541_quick_V1.1
H.264
網路監控
DVR
系列
快速使用指南
在使用本機前請務必詳細閱讀安全須知及操作說明,並保存此手冊以備後續參考。
產品畫面顯示與操作請以實機為主。
1. 面板解說與背板解說
1.1 面板
1) LED 顯示燈
硬碟正在讀取資料或錄影中。
DVR 已開機。
已觸發警報。
已啟動預約錄影。
DVR 處於回放模式下 (限4CH 型號)。
硬碟已滿 (限16CH / 8CH 型號)。
2) MENU (目錄選單)
按此按鍵可進入 / 跳出快速選單。
3) ENTER (輸入)
按下此按鍵確認設定。
4) SLOW (慢速回放)
在回放模式中,按此按鍵慢速回放錄影檔案。
5) ZOOM (數位變焦)
按此按鍵將選取頻道的影像數位放大。
6)
按此鍵 “ “ 可顯示 4分割頻道顯示模式。
7) SEQ
當DVR 進入單一頻道顯示模式時,按 “SEQ” 鍵後,DVR 就會進入單一頻道跳台模式。再按一次即可退出跳台模
式。
8) POWER (電源)
按住 “POWER” 按鍵直到啟動/關閉 DVR。
註:錄影模式下,在關掉 DVR 之前,請先停止錄影。
9) 1 ~ 16 (限16 路機種) / 1~8 (限8路機種) / 1~4 (限4路機種)
按其中一個按鍵來顯示該頻道畫面。
10) PLAY (播放)
按此按鍵可回放錄影影片。
11) ▲(暫停 / 上/ +) / ▼(停止 / 下/ -) / ◄(倒帶 / 左) / ►(快轉 / 右)
按這四個按鍵 ▲/ ▼/ ◄/ ►可移動游標上 / 下/ 左/ 右。
在回放模式下,按 “ PAUSE” 可暫停回放的影片。
在回放模式下,按 “ STOP” 可停止回放的影片。
在回放模式下,按 “FF“ 可快轉回放的影片。
在回放模式下,按 “REW“ 可倒帶回放的影片。
12) AUDIO (SLOW + ZOOM)
使用此兩個按鍵選擇聲音頻道的即時或回放聲音。
第一個聲音頻道的即時聲音 第一個聲音頻道的回放聲音
第二個聲音頻道的即時聲音 第二個聲音頻道的回放聲音
第三個聲音頻道的即時聲音 第三個聲音頻道的回放聲音
第四個聲音頻道的即時聲音 第四個聲音頻道的回放聲音
聲音頻道未被選取
13) P.T.Z. ( + SEQ)
同時按住此兩個按鍵,可進入/跳出 PTZ 控制模式。
在PTZ 控制模式下:
* 放大:按 "SEQ"
* 縮小:按 " "
* 調整 PTZ 角度:按 ▲/ ▼/ ◄/ ►
14) MENU + ENTER
同時按住 DVR 面板上的 “MENU” 與“ENTER” 按鍵,即可啟動按鍵鎖。
15) LIST (事件清單搜尋)
快速藉由事件清單尋找錄影檔案,按此按鍵顯示各種類型的事件清單。
16) SNAP (快照)
按此按鍵拍下目前螢幕上的圖片。
註:選擇快照功能之前,請先將 USB 隨身碟插入 USB 埠。相容的 USB 隨身碟清單,請參考使用手冊的 “附錄 2”。
17) EJECT (退出)(
僅特定機種
)
按此按鍵可開啟 / 關閉 DVR 燒錄機。
18) USB 埠
快速備份或申級韌體 / OSD。
1.2 背板
‧ 16 路
‧ 8路
‧ 4路
1) 75Ω/ HI-IMPEDANCE
當使用回路功能時,請將 DVR 背板的阻抗切換至 HI-IMPEDANCE 以降低干擾。否則,請切換至 75Ω。
2) INPUT (1 ~ 16 / 1 ~ 8 / 1 ~ 4):連接到影像來源,如攝影機。
LOOP (影像迴路輸出) (1 ~ 16 / 1 ~ 8 / 1 ~ 4) :影像輸出接頭。
註:DVR 會自動偵測攝影機的影像系統,請確認攝影機正確連接至 DVR,並且在 DVR 開機之前,先將攝影機上電。
3) MONITOR (螢幕)
連接至 CRT 螢幕以輸出影像。
4) CALL (跳台)
連接跳台螢幕。可展示單一頻道的跳台畫面。
5) Audio IN (聲音輸入)
連接到聲音來源,如支援收音功能的攝影機。
當使用者開始錄影,聲音輸入會與相對應頻道的影像錄在一起。
註:連接至 “Audio 1” 的音源輸入會與 “CH1” 的影像錄在一起。
連接至 “Audio 2” 的音源輸入會與 “CH2” 的影像錄在一起。
連接至 “Audio 3” 的音源輸入會與 “CH3” 的影像錄在一起。
連接至 “Audio 4” 的音源輸入會與 “CH4” 的影像錄在一起。
6) Audio OUT (聲音輸出)
連接到螢幕或擴音器。(一個聲音輸出)
7) VGA
直接連接至 LCD 螢幕以輸出影像。
8) 遙控器(IR)
連接到 IR 接收線,以 IR 遙控器進行遙控。
9) RS485 (
僅
16
路與
8
路機種
)
連接到有 RS485-A 及RS485-B 線的外部裝置 (如球形攝影機)
10) EXTERNAL I/O
插入產品包裝所附的 DSUB PIN 轉接頭,以連接外部設備 (例如警報感應器、外部警報器、PTZ 攝影機、中控設備
等)。
詳細的 I/O 埠的 PIN 解說,請參閱使用手冊的 “附錄 1”。
11) LAN (網路)
以網路線來連上網際網路。
12) LINK / ACT LED 燈
LED 燈亮時代表網際網路在連線狀態。
13) DC 19V
連接到電源變壓器 (包裝盒內附)。
2. 基本操作
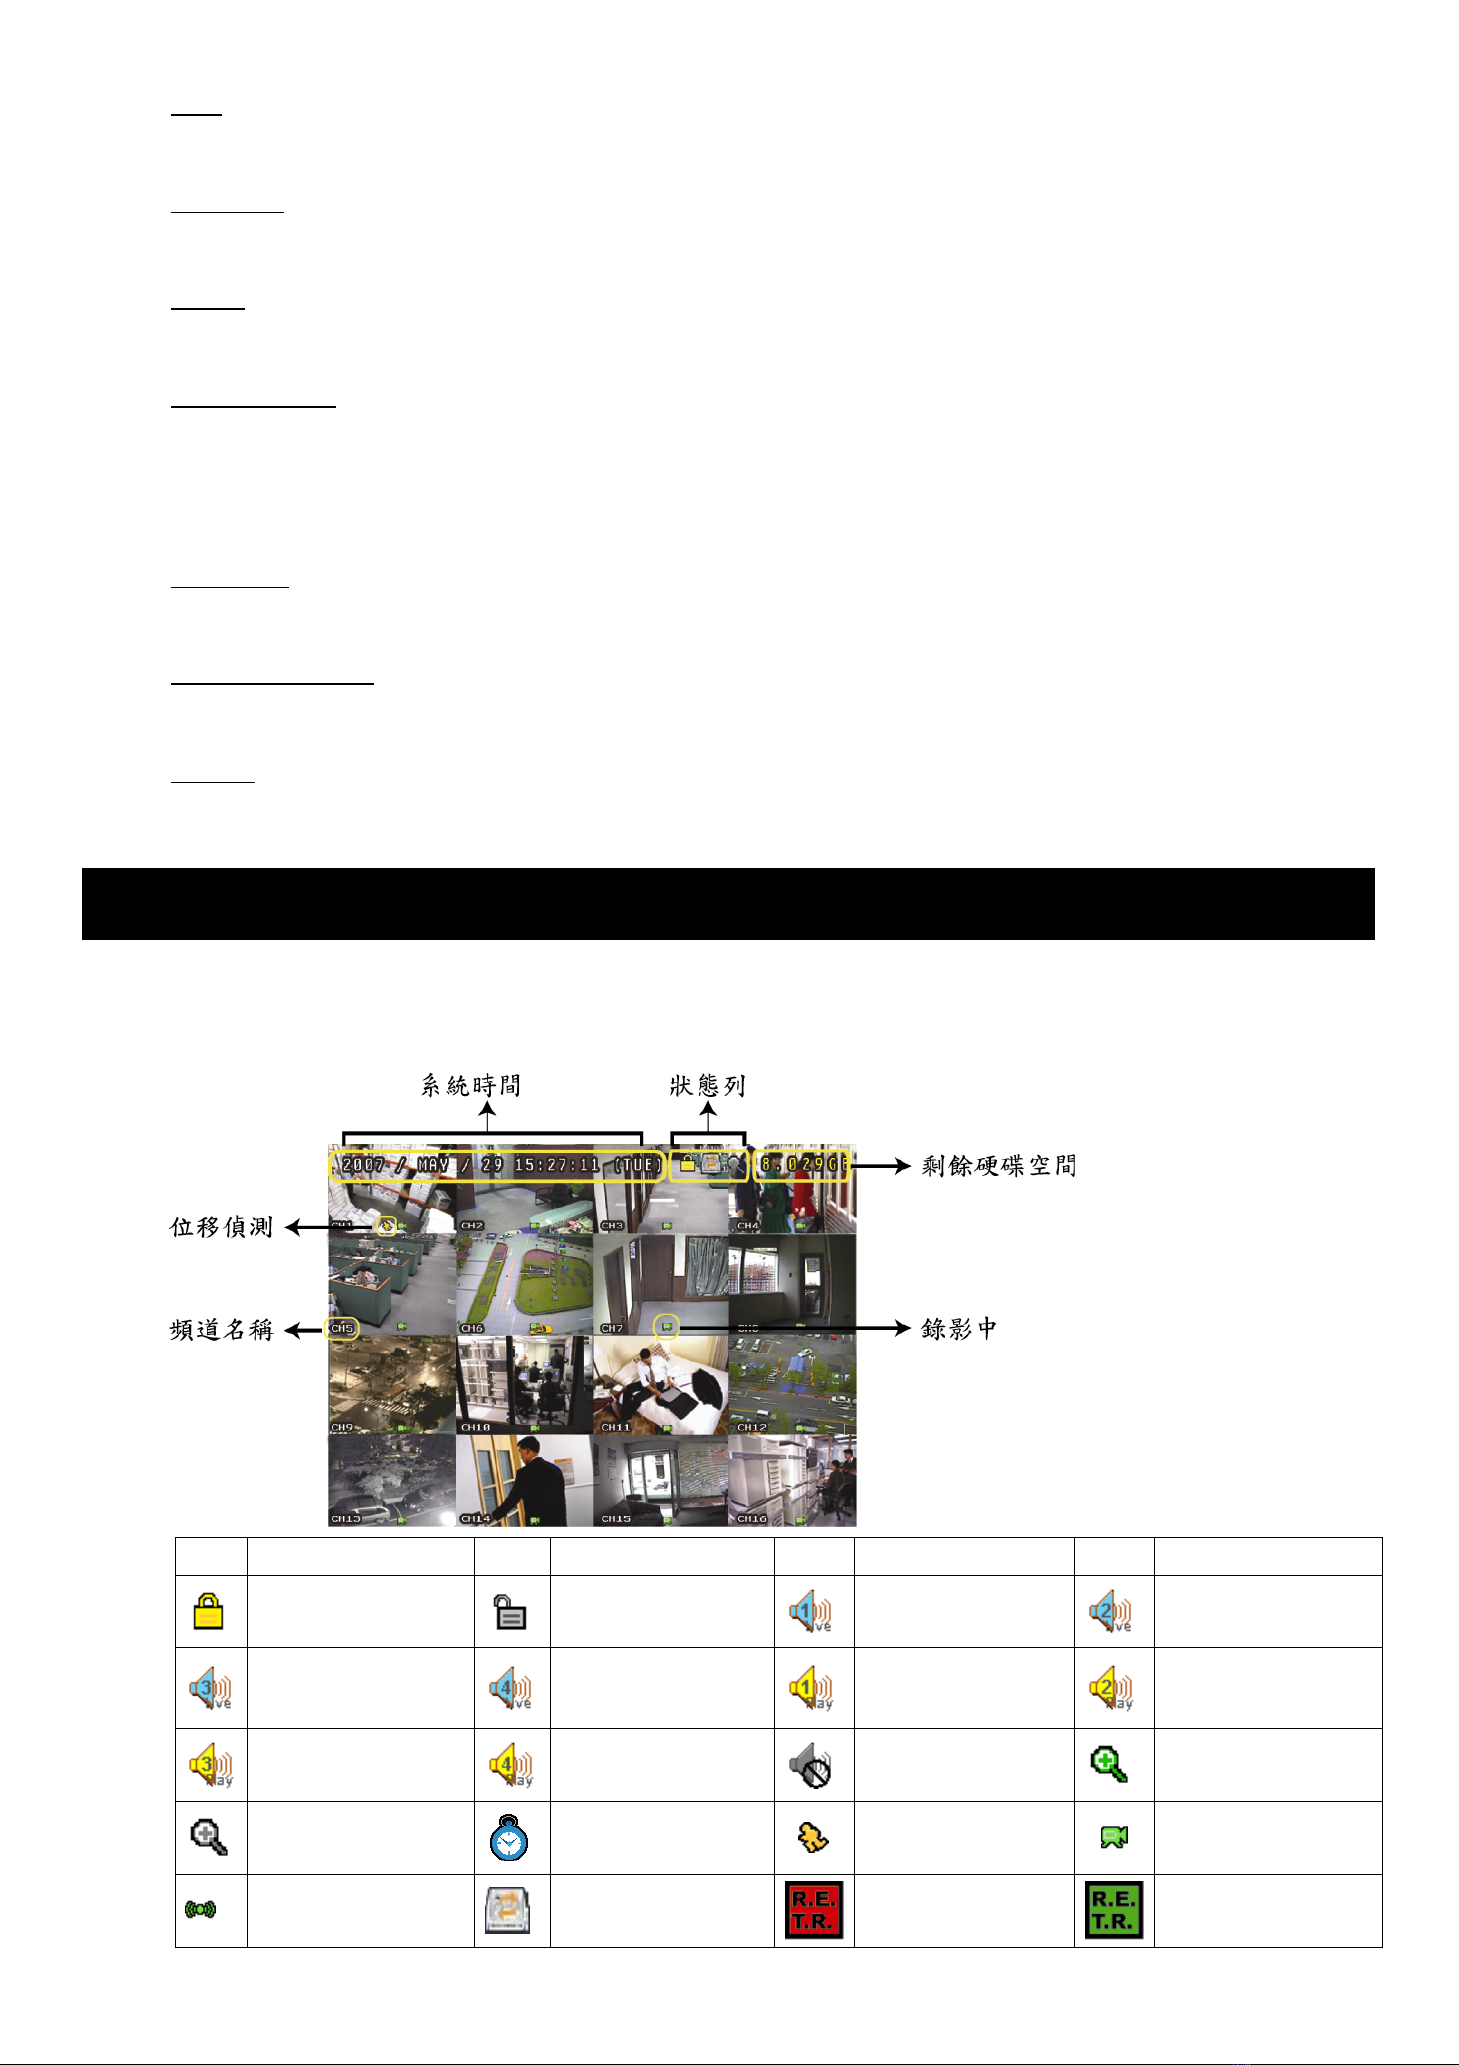
2.1 即時畫面
DVR 的即時畫面可以看見 1、4、9或16 分割的畫面。
圖示 功能 圖示 功能 圖示 功能 圖示 功能
按鍵鎖 按鍵解鎖 第一個聲音頻道的
即時聲音 第二個聲音頻道的
即時聲音
第三個聲音頻道的
即時聲音 第四個聲音頻道的
即時聲音 第一個聲音頻道的
回放聲音 第二個聲音頻道的
回放聲音
第三個聲音頻道的
回放聲音 第四個聲音頻道的
回放聲音 未選取任何聲音頻
道數位變焦模式
未選取數位變焦
模式 預約錄影 位移偵測 錄影中
警報 硬碟覆寫 R.E.T.R. 啟動 R.E.T.R. 延遲

2.2 錄影
當錄影和警報前錄影的功能啟動且硬碟已滿時,本裝置會自動從最舊的資料開始覆寫 8GB 的錄影資料,讓錄影能持
續進行,不另行通知。
1) 持續錄影圖示
當DVR 與攝影機正確的連接,並有安裝硬碟時,您可以看見螢幕上出現 “ ” (錄影中) 的符號。
2) 事件錄影圖示
當位移偵測 / 警報偵測被觸發時,您會看見螢幕上出現 “ ” (位移偵測) 或“ ” (外接警報) 的圖示。
3) 預約錄影圖示
當預約錄影啟動時,您會看見螢幕上出現 “ ” (預約錄影) 的圖示。
註:連接至 “Audio 1” 的音源輸入會與 “CH1” 的影像錄在一起。
連接至 “Audio 2” 的音源輸入會與 “CH2” 的影像錄在一起。
連接至 “Audio 3” 的音源輸入會與 “CH3” 的影像錄在一起。
連接至 “Audio 4” 的音源輸入會與 “CH4” 的影像錄在一起
註:當硬碟在執行覆寫,或 DVR 重新開機後系統開始錄影時,均會在事件紀錄裡添加一筆紀錄。
4) 硬碟覆寫圖示
使用者可設定開啟或關閉硬碟覆寫功能。啟動覆寫功能 (ON) 後,螢幕上會顯示 圖示。
2.3 影像回放
按DVR 控制面板上的 “PLAY” 後,DVR 就會開始回放最後一筆的錄影資料。
註:若要能正常回放錄影檔案,請至少必須錄超過 8192 張畫面。如果您尚未錄滿 8192 畫面就進行回放動作,DVR 將
會停止回放。例如,如果您將 IPS 設為 30,若要正常回放檔案,則錄影時間至少必須超過 273 秒 (8192 張影像
/ 30 IPS)。
註:若在本機端回放影像時,同時有遠端監控正在進行中,回放的影像也許會有些延遲。
1) 快轉 / 倒轉
您可以加快 DVR 快轉與倒轉的速度。在回放模式下:
按“FF” 按鍵一次,DVR 會以 4倍的速度回放快轉畫面,按兩次,DVR 會以 8倍的速度…以此類推。最高速的快
轉速度為 32 倍。
按“REW” 按鍵一次,DVR 會以 4倍的速度回放倒轉畫面,按兩次,DVR 會以 8倍的速度…以此類推。最高速的
倒轉速度為 32 倍。
註:在回放影像時,螢幕會顯示錄影的影像大小 (Frame、FIELD 或CIF)。
2) 暫停 / 影像格放
按“PAUSE“ 按鍵暫停回放。
在暫停回放的模式下:
按“FF” 按鍵一次,可以格放前進一張圖框影像。
按“REW” 按鍵一次,可以格放倒退一張圖框影像。
3) 停止
在回放模式下,按 “STOP” 按鍵,DVR 的螢幕會回到即時監控模式。
4) 慢速回放
在回放模式下,按一下 “SLOW” 按鍵可以 1/4X 速度慢速回放錄影影片,按兩下可以 1/8X 速度慢速回放。
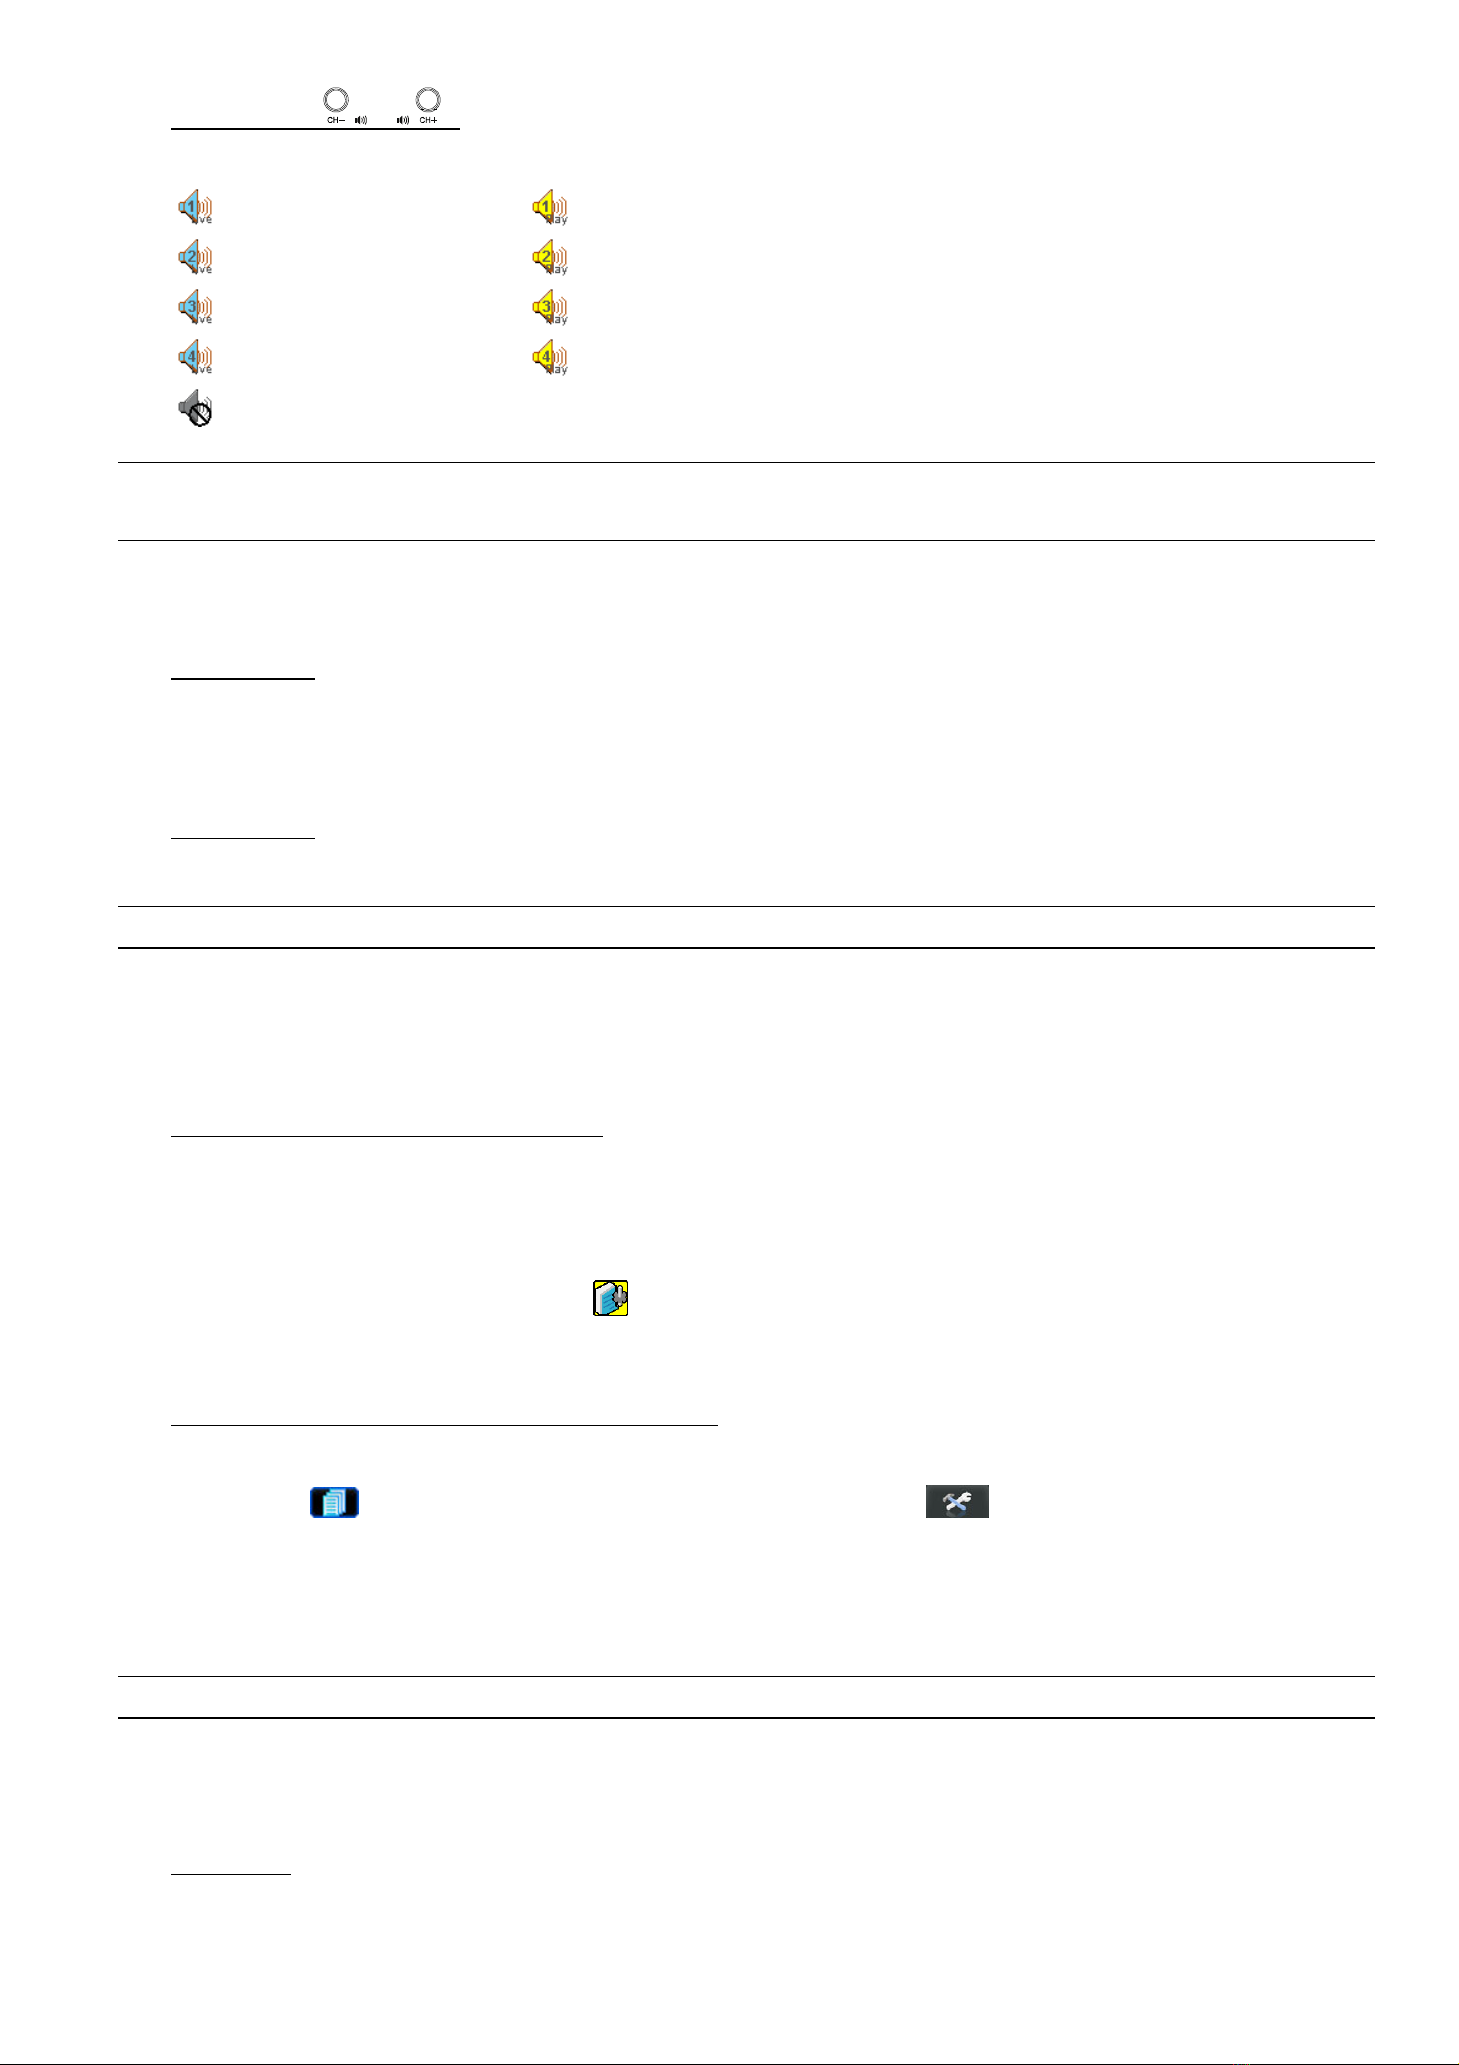
5) 聲音頻道回放(/ )
使用此兩個按鍵選擇聲音頻道的即時或回放聲音。
第一個聲音頻道的即時聲音 第一個聲音頻道的回放聲音
第二個聲音頻道的即時聲音 第二個聲音頻道的回放聲音
第三個聲音頻道的即時聲音 第三個聲音頻道的回放聲音
第四個聲音頻道的即時聲音 第四個聲音頻道的回放聲音
聲音頻道未被選取
註:如果您想要備份有聲音的錄影檔案,請將有收音功能的攝影機連接到支援聲音錄影的頻道 (CH1、CH2、CH3 與
CH4)。
2.4 按鍵鎖啟動與按鍵鎖解除
1) 按鍵鎖啟動:
同時按住 DVR 面板上的 “MENU” 與“ENTER” 按鍵,即可啟動按鍵鎖。
或者,您可以設定 DVR 在未經使用過一段時間後自動啟動按鍵鎖 (停用 / 10 秒/ 30 秒/ 60 秒)。詳情請參閱使用
手冊的 “7.2 系統資訊”。
2) 按鍵鎖解除:
輸入 DVR 的密碼後跳出 “按鍵鎖” 模式。
註:有關密碼的設定,請參閱使用手冊的 “3.5 密碼設定”。
2.5 升級
‧ 韌體 / 多國語言 OSD 升級
1) 使用 USB 隨身碟進行升級韌體或 OSD。
步驟 1:先將 USB 隨身碟格式化成 FAT32 的格式。
步驟 2:從您的經銷商取得升級的檔案,並將升級檔案存放在您的 USB 隨身碟中 (請勿變更檔名)。
步驟 3:將 USB 隨身碟插入 USB 埠,待 DVR 偵測您的裝置。
步驟 4:按 “MENU”,進入目錄選單的 (系統資訊),移至 “升級”,l“開始”,再按 “ENTER” 確認。
步驟 5:選擇 “是”,並再按 “ENTER” 按鍵確認進行升級。
2) 使用 Video Viewer 軟體進行遠端升級韌體或 OSD:
步驟 1:將升級檔案存放至您的電腦 (請勿變更檔名),然後登入 Video Viewer。
步驟 2:按 “ ” 按鈕顯示其他功能控制面板。在此控制面板中,按 “ ” 按鈕進入 Video Viewer 升級視窗。
步驟 3:輸入 DVR 的使用者名稱、密碼、IP 位址與埠號。
步驟 4:視要升級的檔案按 “韌體”、“語言” 或”開機畫面” 標籤,然後按 “新增” 選擇所提供的韌體或 OSD 檔案來
升級。
註:如需得知關於遠端升級的詳細資訊,請參閱使用手冊的 “工具” 一節。
2.6 搜尋
1) 依清單搜尋
按DVR 正面板上的 “LIST” 按鍵顯示各類型錄影檔案的清單。選擇欲觀看的項目,然後按 “ENTER” 按鍵開始回
放。

2) 依時間搜尋
在“ ” (事件資訊) 目錄選單中,移動游標至 “快速搜尋”,然後按 “ENTER” 按鈕進入快速搜尋選單。您可以依
時間搜尋特定事件 (年/ 月/ 日/ 時/ 分) 並直接回放搜尋到的檔案。

314Z
French_AC798_796_792_CD541_Quick_V1.1
H.264 DVR Réseau
Démarrage rapide
Veuillez lire attentivement ces instructions avant de faire fonctionner l’appareil. Manuel à conserver.

1. FACES AVANT ET ARRIÈRE
1.1 Face avant
1) Témoins LED
Le HDD est en cours de lecture ou d’enregistrement
L’appareil est sous tension
Lorsqu’une alarme est déclenchée
Lorsque l’enregistrement programmé est en cours
En cours de lecture (4CH)
Le HDD est plein (16CH / 8CH)
2) MENU
Appuyez sur « MENU » pour entrer dans le menu principal.
3) ENTER
Appuyez sur « ENTER » pour confirmer le réglage.
4) SLOW
En mode lecture, appuyez sur « SLOW » pour ralentir la lecture.
5) ZOOM
Appuyez sur « ZOOM » afin d’agrandir l’image du canal sélectionné (en mode direct).
6)
Appuyez sur « » pour le mode d’affichage sur 4 canaux.
7) SEQ
Appuyez sur « SEQ » pour activer la fonction moniteur et appuyez à nouveau sur « SEQ » pour quitter le mode.
8) POWER
Appuyez pour allumer / éteindre le DVR.
(En mode d’enregistrement, veuillez arrêter l’enregistrement avant d’éteindre le DVR.)
9) CH1 ~ 16 / CH1 ~ 8 / CH1 ~ 4
Appuyez sur le bouton du numéro du canal à afficher.
10) PLAY
Appuyez pour lire les données enregistrées.
11) ▲(PAUSE/+) / ▼(STOP/-) / ◄(REW) / ►(FF)
Appuyez sur ▲/ ▼/ ◄/ ►pour déplacer le curseur vers le haut / le bas / la gauche / la droite.
En mode lecture, appuyez sur « PAUSE » pour suspendre la lecture.
En mode lecture, appuyez sur « STOP » pour arrêter la lecture.
En mode lecture, appuyez sur « FF » pour accélérer la lecture.
En mode lecture, appuyez sur « REW » pour inverser la lecture.

-3-
12) AUDIO (SLOW + ZOOM)
Appuyez sur ces deux boutons pour sélectionner le son en Direct ou en Différé des canaux audio.
L’audio en direct du 1er canal audio Lecture audio du 1er canal audio
L’audio en direct du 2ème canal audio Lecture audio du 2ème canal audio
L’audio en direct du 3ème canal audio Lecture audio du 3ème canal audio
L’audio en direct du 4ème canal audio Lecture audio du 4ème canal audio
Le canal audio n’est pas sélectionné.
13) P.T.Z. ( + SEQ)
Appuyez sur ces deux boutons en même temps pour entrer / quitter le mode de commande PTZ.
Dans le mode de commande PTZ,
* Zoom avant : Appuyer sur « SEQ »
* Zoom arrière : Appuyer sur « »
* Ajuster l’angle PTZ : Appuyez sur ▲/ ▼/ ◄/ ►
14) MENU + ENTER
Appuyez sur « MENU » + « ENTER » situés sur la façade avant du DVR afin de verrouiller les touches et se
connecter sous un autre utilisateur.
15) LIST (recherche de la liste des évènements)
Pour effectuer une recherche rapide des fichiers enregistrés via une liste d’évènements, appuyez sur ce bouton
et tous les types de listes d’évènements s’affichent.
16) SNAP
Appuyez sur « SNAP » pour effectuer une capture.
Remarque : Avant d’effectuer une capture, insérez un lecteur flash USB compatible dans le port USB du
DVR afin d’enregistrer la capture. Pour obtenir la liste des lecteurs flash USB compatibles,
consultez « l’ANNEXE 3 MARQUE DES LECTEURS FLASH USB COMPATIBLE » du mode
d’emploi.
17) EJECT (modèles sélectionnés uniquement)
Appuyez sur « EJECT » pour ouvrir / fermer le graveur DVD.
18) USB
Supporte la mise à jour du firmware / de l’OSD et la sauvegarde de fichier.

-4-
1.2 Face arrière
‧ 16CH
‧ 8CH
‧ 4CH
1) 75Ω/ HI-IMPEDANCE
Lorsque vous utilisez la fonction Loop, veuillez basculer en HI-IMPEDANCE. Veuillez sélectionner 75Ωsi la
fonction Boucle n’est pas utilisée.
2) INPUT (1 ~ 16 / 1 ~ 8 / 1 ~ 4) : Pour brancher des sources vidéo, comme des caméras.
LOOP (1 ~ 16 / 1 ~ 8 / 1 ~ 4) : Connecteur de sortie vidéo.
Remarque : Le DVR va automatiquement détecter le système vidéo de la caméra. La connexion des
caméras au DVR doit être correctement réalisée, ainsi que le branchement d’alimentation,
avant de mettre le DVR sous tension.
3) MONITOR
Pour brancher un moniteur CRT pour la sortie vidéo.
4) CALL
Connexion à un écran.
5) Audio IN
Pour brancher des sources audio, telles que des caméras équipées de la fonction audio.
Lorsque l’utilisateur démarre l’enregistrement, l’entrée audio est également enregistrée avec le canal vidéo
correspondant.
Remarque : La source audio connectée à « Audio 1 » sera enregistrée avec la vidéo du canal « CH1 ».
La source audio connectée à « Audio 2 » sera enregistrée avec la vidéo du canal « CH2 ».
La source audio connectée à « Audio 3 » sera enregistrée avec la vidéo du canal « CH3 ».
La source audio connectée à « Audio 4 » sera enregistrée avec la vidéo du canal « CH4 ».
Table of contents
Languages:
Popular DVR manuals by other brands


Vista
Vista SmartDisc 4/10 VLS-04DR-Series Installation instructions manual

Verizon
Verizon FiOS TV installation guide

Lorex
Lorex QLR-0440 Series quick start guide

First Alert
First Alert PRO-DC8810-520 Quick install guide

Daewoo
Daewoo PROline VR516 operating instructions

Leitch
Leitch DVR-3901 Neo Installation and operation manual