EMSCAN EMxpert EHX User manual

EMxpert EHX
User Manual

2
Notices
© EMSCAN Corporation
No part of this user manual may be reproduced in any form or by any means (including but not limited to
electronic storage and retrieval or translation into a foreign language) without prior consent from EMSCAN
Corporation as governed by Canada and international copyright laws.
Trademark Acknowledgements
Adobe Acrobat ® and Reader ® are U.S. registered trademarks of Adobe Systems Incorporated.
Windows ® is U.S. registered trademarks of Microsoft Corporation.
Warranty
The material contained in this user manual is provided “as is” and is subject to being changed, without
notice, in future editions. Further to the maximum extent permitted by applicable law, EMSCAN disclaims
all warranties, either expressed or implied, with regard to this user manual and any information contained
herein, including but not limited to the implied warranties of merchantability and fitness for a particular
purpose. EMSCAN shall not be liable for errors or for incidental or consequential damages in connection
with the furnishing, use, or performance of this document or any information contained herein. Should
EMSCAN and the user have a separate written agreement with warranty terms covering the material in
this document that conflict with these terms, the warranty terms in the separate agreement shall control.
Safety Notices
Caution
A CAUTION notice denotes a hazard. It calls attention to operating procedure, practice, or the like that,
if not correctly performed or adhered to, could result in damage to the product or loss of important data.
Do not proceed beyond a CAUTION notice until the indicated conditions are fully understood and met.
Warning
A WARNING notice denotes a hazard. It calls attention to an operating procedure, practice, or the like
that, if not correctly performed or adhered to, could result in personal injury or death. Do not proceed
beyond a WARNING notice until the indicated conditions are fully understood and met.
Notices
Safety Notices

3
Warranty
EMSCAN warrants to its customers that any EMxpert from the date of delivery will perform substantially in
accordance with the specifications provided, when properly installed, operated, maintained and repaired
for the duration of warranty purchased by the customer.
During the warranty period, EMSCAN will at its option either repair or replace, at no charge, EMxpert
products or parts thereof which do not perform in accordance with the specifications.
For warranty service or repair, EMxpert must be returned to EMSCAN. EMSCAN will pay shipping charges
to and from EMSCAN if Buyer is under warranty, original or extended. You can extend your original
warranty by purchasing option 3000-1810 or 3000-1811 (Additional One Year Customer Care Package).
Is your document and EMxpert software up-to-date?
Periodically, we update the documents and EMxpert software. You may access to the latest versions from
below links:
User manual: http://www.emscan.com/emxpert/EMx_userManuals.cfm
Training manual: http://www.emscan.com/emxpert/EMx_trainingManual.cfm
Software release notes: http://www.emscan.com/emxpert/EMx_softwrRelease.cfm
Technical bulletins: http://www.emscan.com/emxpert/EMx_TechnicalBulletins.cfm
FAQ: http://www.emscan.com/emxpert/EMx_FAQ.cfm
Warranty
Software Updates

4
Table of Contents
Contact Information
............................................................................
6
About the EMxpert Products
...................................................................
7
Minimum System Requirements
...............................................................
7
Cables and Component Checklist
.............................................................
8
Connection Overview
..........................................................................
9
Option and Accessories
.......................................................................
10
Option and Accessories
.......................................................................
11
Quick Installation and Checklist
..............................................................
12
Hardware Setup
................................................................................
15
Software Installation
..........................................................................
17
External Spectrum Analyzer Setup for EHX
.................................................
25
Setup and Modes of Operation
...............................................................
29
Menu Bar
.......................................................................................
31
Quick Facts about Menu Bar
.....................................................................
32
Viewing Scan Results
.........................................................................
33
Spectral View
....................................................................................
33
Spaal View
.....................................................................................
34
Nodes
...........................................................................................
36
How to Add a Node?
.............................................................................
36
How to Name a Node?
...........................................................................
36
How to View a Node?
...........................................................................
36
How to Delete a Node?
..........................................................................
37
How to Export Data?
.............................................................................
37
Preferences: Analyzer and Display Opons
.......................................................
37
Project Node Sengs
............................................................................
38
Overlay Editor (How to Superimpose Graphical Image of a DUT)
..................................
40
Report Generator
..............................................................................
44
Scan Types
.....................................................................................
45
Spectral Scan
..................................................................................
46
Spatial Scan
....................................................................................
50
Table of Contents

5
Spectral/Spatial Scan
..........................................................................
54
Handheld Probe Scan
........................................................................
62
Spectral Overlay
...............................................................................
66
Spectral Comparison
..........................................................................
67
Spatial Blind Spot Reduction
.................................................................
68
Spatial Comparison
...........................................................................
72
Measurement Tips
.............................................................................
73
Scanning a PCB
..................................................................................
73
Scanning a System Level Device
..................................................................
74
Appendix - Frequently Asked Questions (FAQ)
.............................................
75
Appendix - Error Messages
...................................................................
80
Appendix - Regulatory Compliance
..........................................................
82
Safety and Regulatory Informaon
...............................................................
82
FCC Class B Noce
...............................................................................
83
CSA Cercaon
.................................................................................
84
CE mark
.........................................................................................
84
Notes
...........................................................................................
85
Table of Contents

6
Contact Information
Contact EMSCAN Technical Support for your questions. Have your unit’s serial number, software and
rmware versions available as well as your PC Windows OS version when you contact EMSCAN
Technical Support.
Phone:
Toll Free (North America Only): +1-877-367-2261
International: +1-403-291-0313 ext 2
Fax:
+1-403-250-8786
E-mail:
Website:
www.emscan.com
Address:
EMSCAN Corporation
#1, 1715 27th Avenue N.E.
Calgary, Alberta, Canada T2E 7E1
The serial number is located at the bottom of the scanner.
Start EMxpert software and click to access to software and rmware versions:
Contact Information
Serial Number and Software Version

7
About the EMxpert Products
EMxpert product family provides board-level design teams with world-leading fast very-near-eld magnetic
data to help diagnose EMC design issues. EMxpert product line consists of EHX (high-frequency scanner)
and ERX (high-resolution scanner). These instruments capture and display visual images of spectral and
spatial scan results in seconds. This allows the design team to immediately analyze and compare design
iterations. PCB designers can scan any board to identify both constant and time-based emission sources
in the range of 150 kHz to 8 GHz.
EHX consists of a patented scanner and compact adaptor, and a customer-supplied spectrum analyzer
and PC running EMxpert software. Free Keysight IO software application must also be installed on the
customer-supplied PC. The patented scanner consists of 1,218 H-eld (magnetic) probes spaced every
7.5 mm into an electronically switched array, which provides an effective 3.75 mm resolution. The system
operates from 150 kHz to 4 GHz or 150 kHz to 8 GHz; the upgrade from 4 GHz to 8 GHz is enabled with
an optional software license key.
EHX+ is a self-contained very-near-eld scanning device which uses the EHX scanner along with a
built-in spectrum analyzer. Simply connect the EHX+ into the PC with an Ethernet connection, install the
EMxpert software on the customer-supplied PC and begin measurements. The system operates from
150 kHz to 8 GHz.
ERX+ is a self-contained high-resolution very-near-eld scanning device which uses the EHX scanner
mounted on X and Y stepper motors with 0.12 mm incremental measurement steps. It also has a
built-in spectrum analyzer. Simply connect the ERX+ into the PC with an Ethernet connection, install the
EMxpert software on the customer-supplied PC and begin measurements. The system operates from
150 kHz to 8 GHz.
Minimum System Requirements
• CPU 333 MHz or faster
• 128 MB RAM recommended for EHX
• 8 MB Video or more
• Windows XP/Vista/Windows 7/8/8.1 OS
• 10/100 Network Card
About EMxpert
EHX | EHX+ | ERX+

8
Cables and Component Checklist
Components Supplied with the EHX System
1. EHX adaptor
2. EMSCAN’s patented scanner
3. RF SMA to type N coaxial cable: It is referred as the RF cable in this manual. It connects
the scanner to the spectrum analyzer and has a SMA connector for the scanner and a
N connector for the spectrum analyzer 50 ohm input port. It transmits RF output of the
patented scanner to the spectrum analyzer.
4. Micro-D control cable: It connects the adapter to the scanner to enable control of the
EMSCAN’s patented scanner’s switched probes and to power the scanner.
5. USB Cable: It connects the PC (laptop or desktop) to the EHX adaptor. The USB Cable
provided with the system has ferrites on both ends of the cable
6. SMB-BNC Trigger Cable: It connects EHX adaptor to the spectrum analyzer.
7. Surface wave absorber: is only provided with the EMxpert EHX 8 GHz versions to test
above 6 GHz. (part numbers: 3000-1806 and 3000-1808)
8. EMxpert USB Drive includes the EMxpert software installation program and User Manual.
Customer Provided Components
1. SpectrumAnalyzer: It must include the necessary options to work with the EMxpert EHX (see Supported
Spectrum Analyzers). It measures the radio frequency (RF) signal received from the EMSCAN’s
patented scanner, generated by the very-near-eld emissions of an
adjacent activated PCB and it outputs the data to the PC.
2. PC (Laptop / Desktop): It must support a LAN 10/100 connection to the
spectrum analyzer and a USB connection (version 2.0 or higher) to the
adaptor or two USB connections, one for the spectrum analyzer and
one for the adaptor. It runs the EMxpert software and receives data,
which it can display and manipulate immediately or store for future data
presentation.
3. Ethernet or USB cable: It connects PC (laptop or desktop) to the spectrum analyzer.
About EMxpert
Cables and Component Checklist
Note:
Spectrum Analyzer,
Personal Computer (PC)
connected with Ethernet
cable must comply CE
emission requirements

9
Connection Overview
EHX Adaptor
EMSCAN’s Patented Scanner
Item Number Description
1SMB trigger cable port
2LED light shows three stages:
Red: Boot mode (this stage is fast; you may not even notice it)
Orange: Initiation mode (checking adaptor’s rmware)
Green: User mode (adaptor is connected and ready)
3USB connection port
4Micro-D control cable connection
5Micro-D control cable connection
6RF output port
About EMxpert
Connection Overview
1 32
4
Caution:
The surface of the scanner is made of Gorilla®glass. It may shatter if a sharp object is
dropped from a distance.
5 6

10
Option and Accessories
Part Number Description
3000-0216 LNA (frequency range: 10 kHz - 2.5 GHz)
3000-0815 Hard Transit Case to carry EHX with customized insert
3000-0817 Large Hard Transit Case to carry FieldFox and EHX with customized insert
3000-0818 Hard Transit Case EHX+, ERX and ERX+ with customized insert
3000-0104 Trade-in of any EMX to an EHX 8 GHz, EHX+, ERX or ERX+
3000-1801 EHX 4 GHz - 8 GHz Frequency range extension
3000-0304 DVT Solutions Far-Field Application
Predict the Open Area Test Site (OATS) or Semi Anechoic Chamber (SAC) radiated
EMI levels of a printed circuit board (PCB). Far-Field application supports 30 MHz
- 1 GHz regulatory compliance limits Class A or Class B FCC, CISPR and Industry
Canada, 10 m, 3 m and 1 m test distances
TWO-YEAR WARRANTY AND SUPPORT DIRECTLY FROM MANUFACTURER
Includes scanner absorber pad from EMSCAN
3000-1810 Additional one year Customer Care Package for the EHX. Includes:
- Parts & labour
- Software updates
- Free shipping to factory for repair and return
- Same day technical support
- Two 30 minute web training sessions per year
3000-1811 Additional one year Customer Care Package for the EHX+, ERX and ERX+. Includes:
- Parts & labour
- Software updates
- Free shipping to factory for repair and return
- Same day technical support
- Two 30 minute web training sessions per year
3000-1910 Calibration Assurance Plan for the EHX+ and ERX+ / Return to EMSCAN / 3 years
- Annual single calibration event included
- Freight to/from EMSCAN factory not included unless unit under original or extended
warranty
3000-1911 Calibration Assurance Plan for the EHX+ and ERX+ / Return to EMSCAN / 5 years
- Annual single calibration event included
- Freight to/from EMSCAN factory not included unless unit under original or extended
warranty
3000-0814 NRE Charge for custom development of a driver for any spectrum analyzer provided it
has the following conguration: Gated sweep, Pre-amplier, LAN or USB Port, External
Trigger Port with BNC Connector and VISA support
Customer to loan specic spectrum analyzer for 2 weeks
3000-0816 NRE Charge for custom development of a driver for any spectrum analyzer provided it
has the following conguration: Gated sweep, Pre-amplier, LAN or USB Port, External
Trigger Port with BNC Connector and VISA support
Equipment rental included provided it is available from rental companies
About EMxpert
Option and Accessories
11
Option and Accessories
Part Number Description
3000-0900 On-Site customer training per day. Cost of instructor’s travel and accommodation
additional (inside continental North America p/n 3000-0902 or outside continental North
America p/n 3000-0901). Maximum number of participants is 10; participants are to
bring their own EMSCAN equipment.
3000-0901 Trainer’s travel, accommodations and expenses for travel outside the Continental USA
and Canada.
3000-0902 Trainer’s travel, accommodations and expenses for travel within the Continental USA
and Canada.
3000-0903 Training at EMSCAN’s Education Center per participant per day. EMSCAN will provide
equipment for the hands-on training, materials and lunch each day. Course scheduling
will be determined based on a minimum of 3 conrmed registrants. Participants are
responsible for their own travel and accommodation expenses. Every effort will be made
to customize the course curriculum to meet participant needs.
About EMxpert
Option and Accessories
12
Quick Installation and Checklist
1. Install latest version of Keysight IO
Click here to open the website to download the latest version. On the website click on the Download
button and follow the steps.
2. Install the EMxpert software application by double clicking on the Setup application icon. The
application must always be installed on the C: drive.
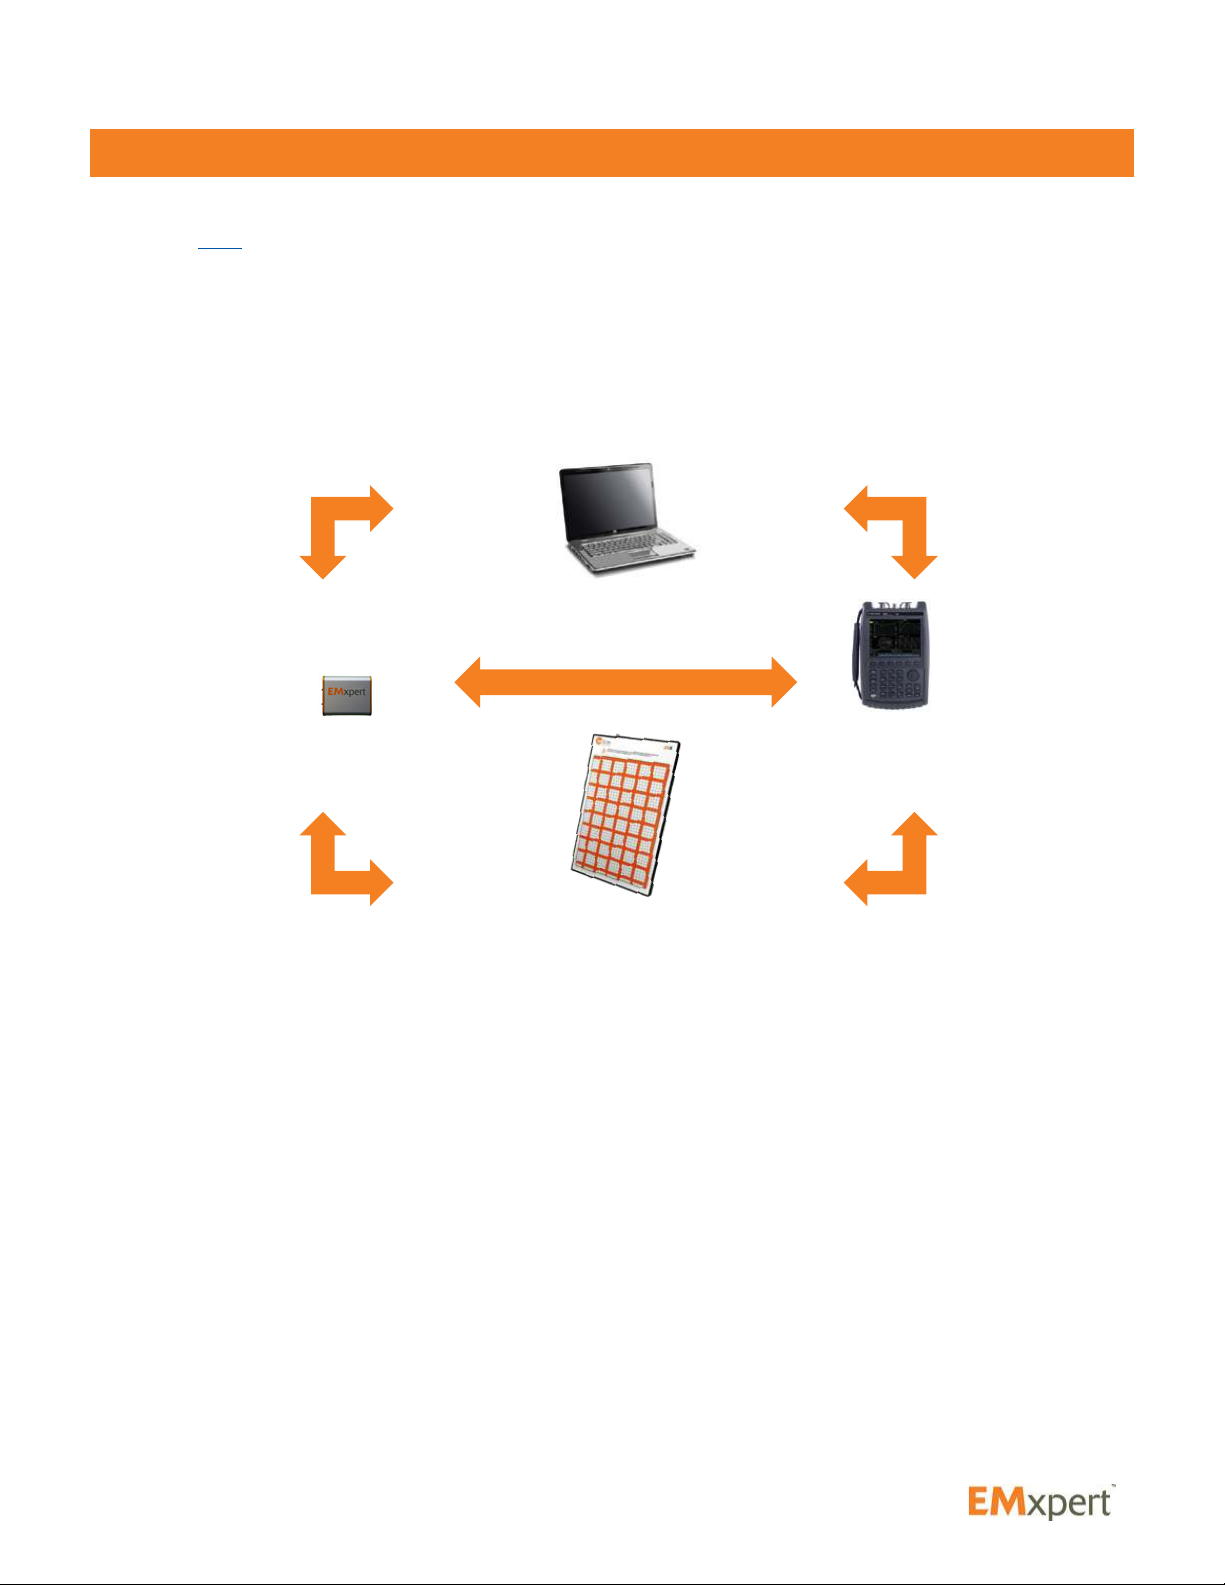
3. Connect PC, scanner, adapter and spectrum analyzer as per the diagram below. If you are using
Ethernet between the PC and the spectrum analyzer, use a crossover Ethernet cable.
If the spectrum analyzer has multiple trigger ports, always connect to Trigger 1 IN.
4. If you are using an USB cable to connect the PC to the spectrum analyzer, go to Step 5.
If you are using an Ethernet crossover cable rst set up your IP address as follows:
Set your spectrum analyzer to the static IP address 172.16.1.148/255.255.0.0; you will probably
have to restart your analyzer.
Set your PC with static IP address 172.16.1.99/255.255.0.0
Best is to set it up in Alternate Conguration in the Local Area Connection Properties /
Internet Protocol Version 4 (TCP/IPv4) / Properties path [in Windows 7 or equivalent path
for other Windows OS]
If you want to use another pair of IP addresses (PC + Spectrum Analyzer) you need to discontinue
the heartbeat function that is today only able to ping 172.16.1.148. Please make the following
change to ‘EMxpert.ini’ in the directory where EMxpert.exe is: C:\Program Files (x86)\EMSCAN
Corporation\EMxpert 5.
Open this le by using notepad; there is the following section at the end:
[EMxpert Info]
Spectrum Analyzer Detecting = 1
Scanner Detecting = 1
About EMxpert
Quick Installation and Checklist
USB LAN/USB
External Trigger
EMxpert EHX Adapter
EMxpert Applicaon
EMxpert EHX Scanner
Spectrum Analyzer
Control RF

13
Just change into:
[EMxpert Info]
Spectrum Analyzer Detecting = 0
Scanner Detecting = 1
5. Install the EMxpert USB driver
Go to Control Panel / Hardware and Sound / Devices and Printers / Device Manager [in
Windows 7 or equivalent path for other Windows OS]
Expand “USB Custom Driver” and look for EMxpert USB Driver (C) 2014
If it says 2010 or if there is a yellow triangle, right click and select Update driver and then
browse to the “EMSCAN EMxpert USB Driver” folder in the install folder on the CD, hard disk or
key.
Click on the “EMSCAN EMxpert USB Driver” folder and press OK. Proceed with the installation
steps.
Note that you may have to repeat this procedure if you connect the USB cable between the
adapter and the PC to another USB port at another occasion.
Note as well that not all USB ports are equal; some are less than others and may not work with
the EMxpert adapter. Try various ports until you nd one working properly.
The EMxpert driver is a third-party Microsoft approved driver. If the installation fails you must
disable the third-party driver enforcement of Windows 8 and 8.1 as follows:
Windows 8.0
On the side START bar, click on “Settings”
Click on “Change PC settings”
In PC Settings, click on “General”
Scroll down to “Advanced startup”
Click on “Restart now”
In “Choose an option”, click on “Troubleshoot”
In “Troubleshoot”, click on “Advanced options”
In “Advanced options”, click on “Startup Settings”
In “Startup settings”, click on “Restart”
In “Startup settings”, press number 7 on your keyboard to select “Disable driver signature
enforcement”
Windows 8.1
On the side START bar, click on “Settings”
Click on “Change PC settings”
In PC settings, click on “Update and recovery”
In “Update and recovery” select “Recovery”
In “Recovery” go to “Advanced startup”
About EMxpert
Quick Installation and Checklist
14
Click on “Restart now”
In “Choose an option”, click on “Troubleshoot”
In “Troubleshoot”, click on “Advanced options”
In “Advanced options”, click on “Startup Settings”
In “Startup settings”, click on “Restart”
In “Startup settings”, press number 7 on your keyboard to select “Disable driver signature enforcement”
6. Open Keysight IO
Look at the bottom right of the Keysight IO window and see if it says PRIMARY VISA
If it does not, go to Control Panel / Programs / Select Keysight IO / Change / Modify / Select
PRIMARY [in Windows 7 or equivalent path for other Windows OS]
When using a FSH 4 or FHS 8 connected via USB to the PC, go to the install folder on the CD, hard
disk or key, open the folder USBDriverFSH8 and run the FSH4_V2_11.exe in order for the Keysight
IO library to recognize the FSH.
Keysight IO is good at auto-discovering and conguring. If it is connected properly you will see in
the bottom section Messages the following two lines:
Instruments are already discovered and congured
User interface session started
If there is a connection issue, mostly with LAN, select Manual Conguration and then LAN
Instrument
In Set LAN Address / Hostname or IP Address
Enter the IP address 172.16.1.148
In Verify Connection
Click on Test this VISA Address
Then click on Accept
If there is still no connection, disable your PC rewall or set it up to allow trafc to/from
172.16.1.148 and repeat the steps above.
If you are using a Keysight X series spectrum analyzer, please refer to Technical Bulletin #9
for additional help in connecting the analyzer.
7. Close Keysight IO
If you are using an Keysight X series spectrum analyzer, please
refer to Technical Bulletin #9 for specic settings before closing
Keysight IO.
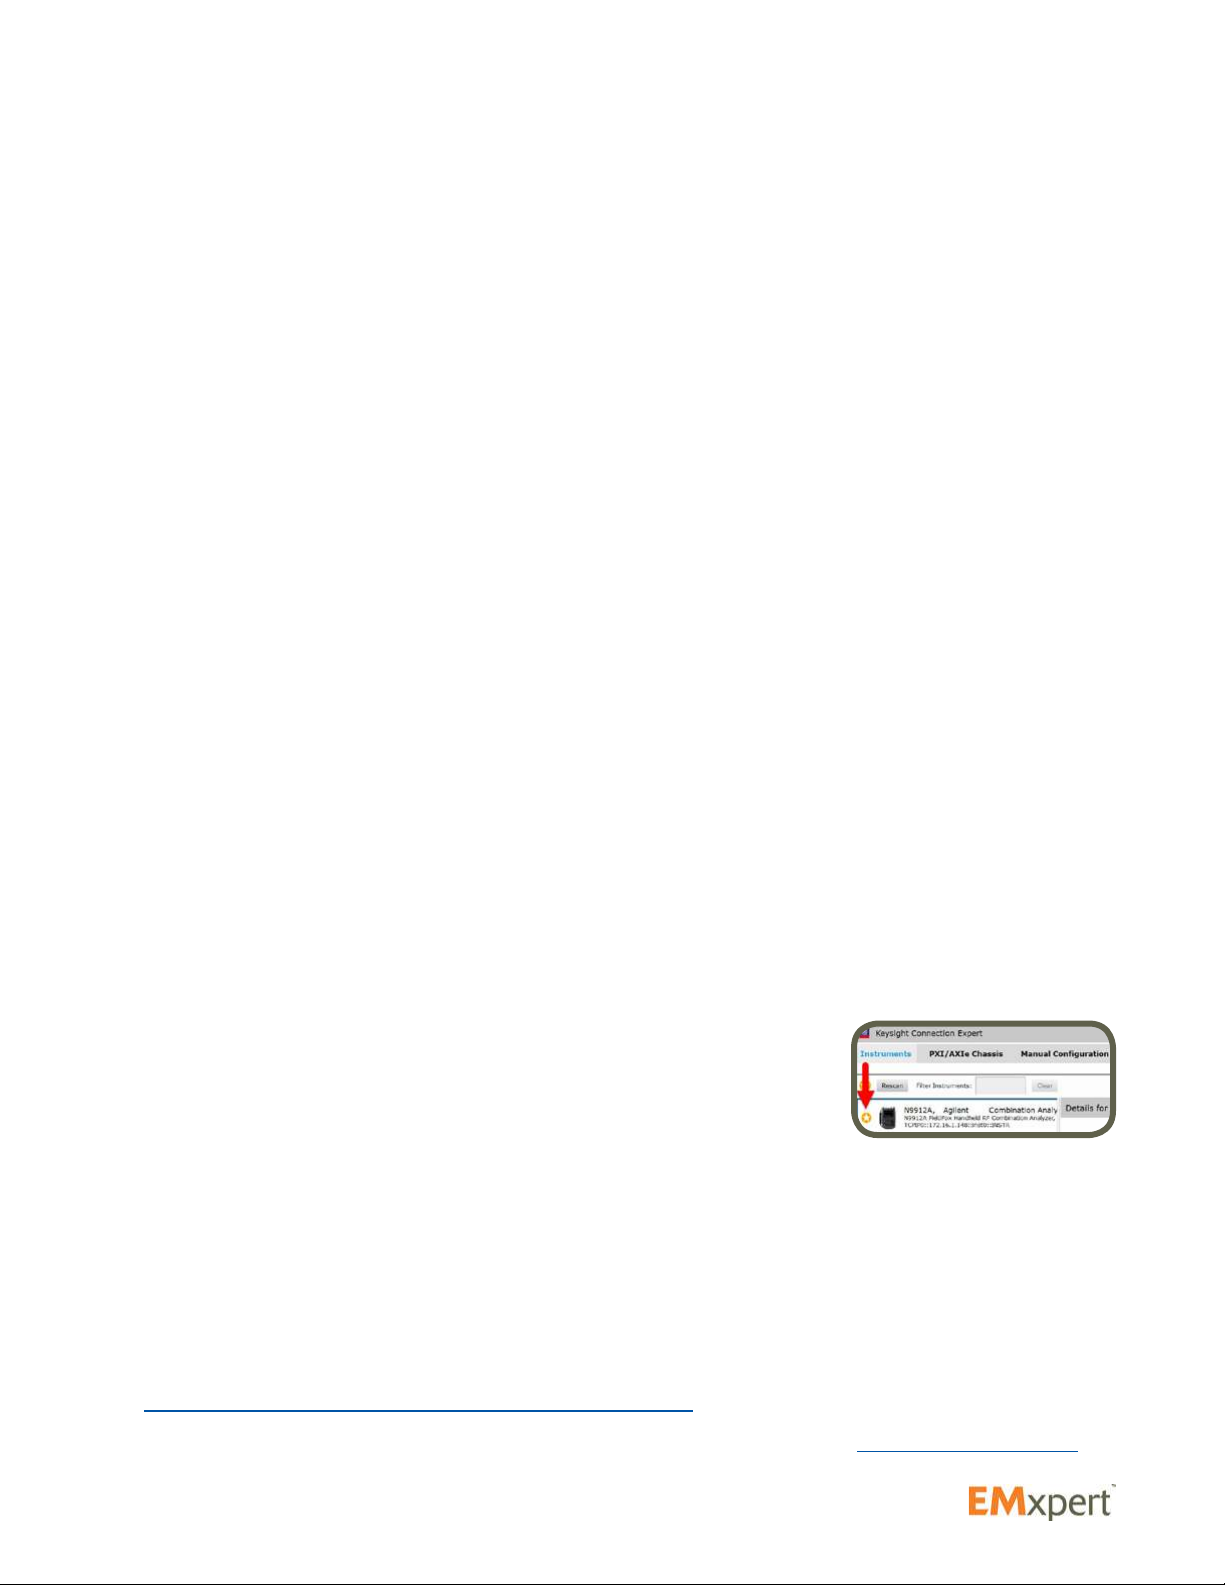
Once connected, set the analyzer as a favorite. Click on the grey star and it will turn yellow.
8. Double click on the EMxpert5 icon
Look at the bottom left of the EMxpert application and wait until it shows “Connected to the
Scanner and Spectrum Analyzer”.
Get ready to scan!
If you have any issue, verify that you are using a compatible spectrum analyzer with the right hardware,
rmware and software version:
http://www.emscan.com/emxpert/EMx_supportedSA.cfm
call +1-403-291-0313 ext. 2
About EMxpert
Quick Installation and Checklist

15
Hardware Setup
1. Connect the SMB connector to the EHX Adapter and the BNC connector to the external trigger port
on the rear panel of the spectrum analyzer
2. Connect the B-end of the USB cable to the USB port on the EHX Adaptor and A-end to any USB port
on the computer.
The LED light shows three stages:
• Red: Boot mode (this stage is fast; you may not even notice it)
• Orange: Initiation mode (checking adaptor’s firmware)
• Green: User mode (adaptor is connected and ready)
Getting Started
Hardware Setup

16
3. Connect one end of the Micro-D control cable to the Micro-D control port on the EMSCAN’S patented
scanner and the other end of the Micro-D control cable to the EHX Adaptor.
4. Connect the SMA end of the RF cable (RF SMA to type N coaxial cable) to the RF Output port of the
patented scanner and the other end to the RF Input port (front) of the spectrum analyzer.
5. Connect Crossover Ethernet cable between the spectrum analyzer (SA) and the PC.
6. Setup the IP address of the SA to 172.16.1.148
7. Setup the Static IP address of the PC to 172.16.1.99
Getting Started
Hardware Setup

17
Software Installation
1. Plug-in the EMxpert USB drive. Select the software folder and double click on Setup.exe le
2. When you are prompted “Do you want to allow the following program from an unknown publisher to
make changes to this computer” click Yes
3. Click Next
4. Click Next
Getting Started
Software Installation

18
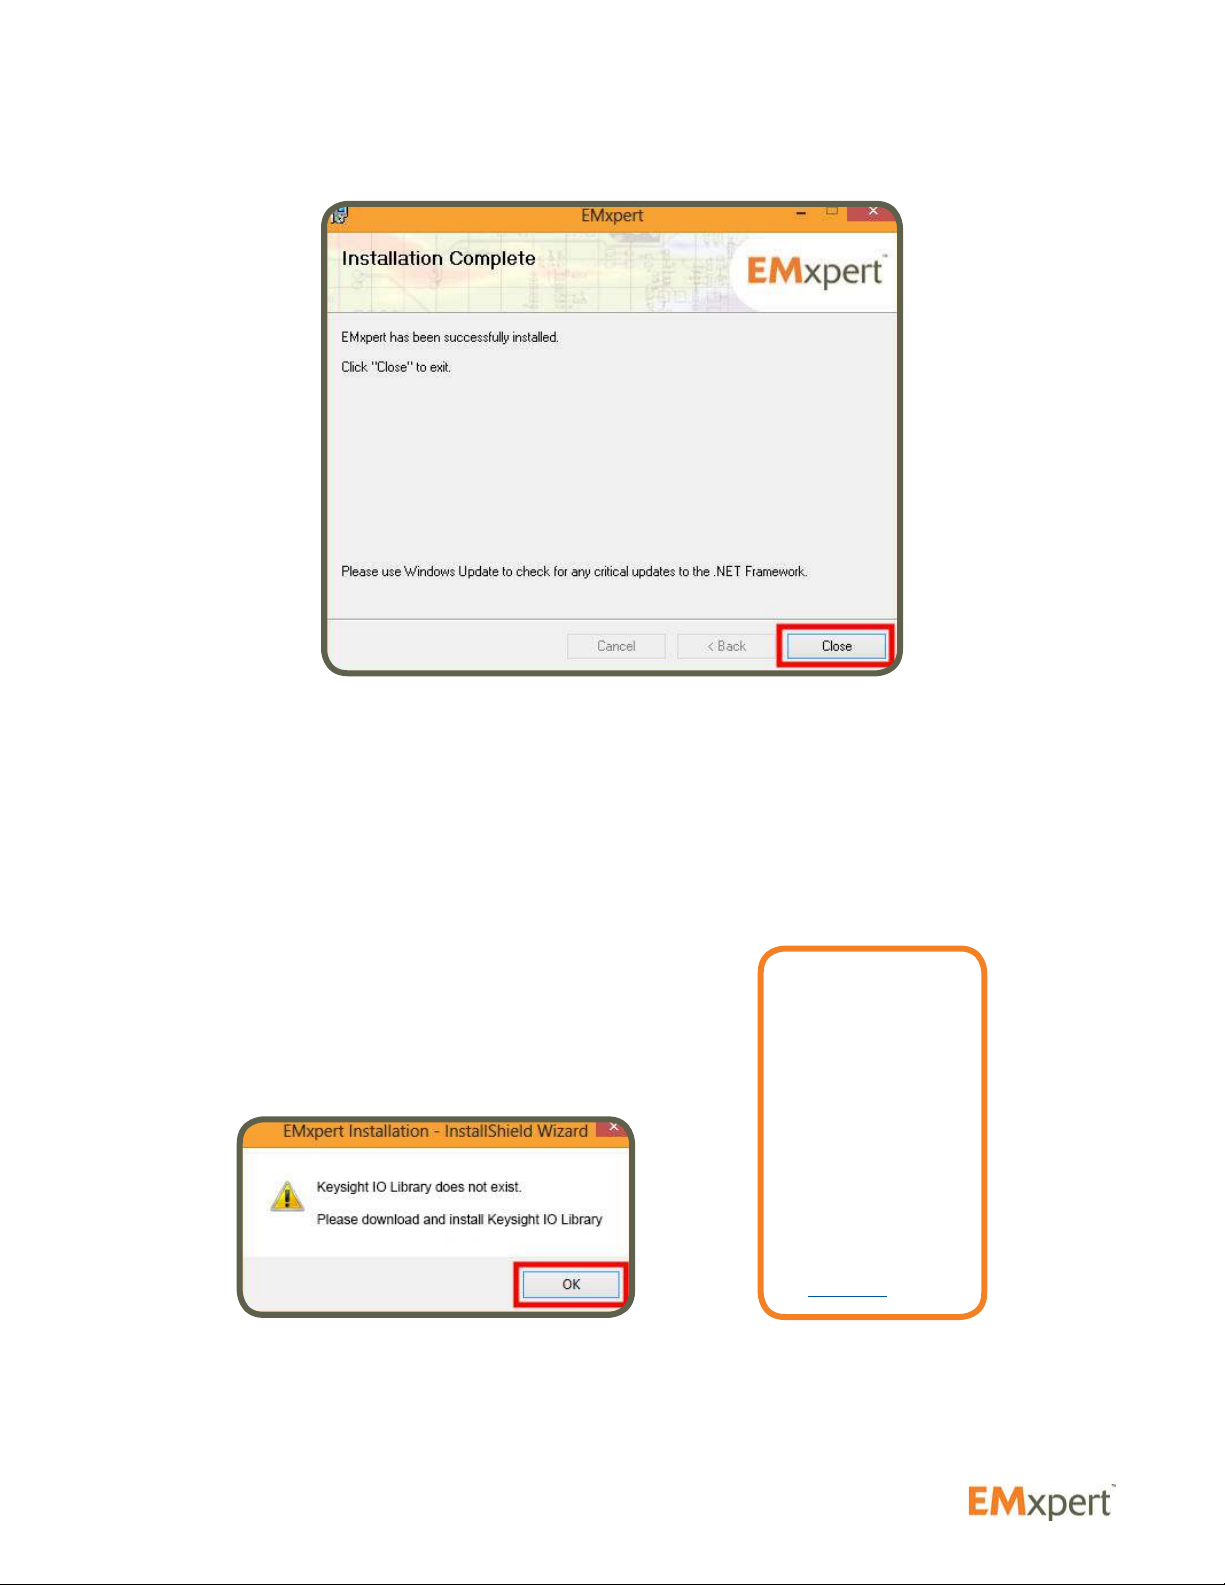
5. Select I Agree and click Next
6. Below screen will be displayed
Getting Started
Software Installation
19
7. Click Close
8. If Keysight IO Library is already installed on your PC, you can start using EMxpert software. Otherwise
please follow the next steps to install it. You need an internet connection to download Keysight IO
Library.
Getting Started
Software Installation
Note:
Several visa
libraries may
already be installed
on your PC. After
installing Keysight
Visa Library,
ensure that it is set
as primary VISA.
You will be guided
through the steps
on page 25.

20
9. Once you are directed to the Keysight website click on the Download button and follow the steps. When
the download is complete, open the Downloads folder and double click IOLibSuite_17_1_19313.
10. The folder will be unzipped.
11. Click Next.
Getting Started
Software Installation
Table of contents
Other EMSCAN Scanner manuals

Popular Scanner manuals by other brands


Wolverine
Wolverine F2D Super Plus user manual

UMAX Technologies
UMAX Technologies Astra 2100U owner's guide

VuPoint
VuPoint Magic InstaScan PRO PDSWF-ST48-VP user manual

Fujitsu
Fujitsu FI-5015C Consumable replacement and cleaning instructionsmable replacement and cleaning instructions

Linea
Linea Link HS user manual

Kodak
Kodak I780 - Document Scanner instruction manual


