EMYCSA RealSimulator RUSBA User manual
ELECTRONICA, MECANICA Y CONTROL, S.A.
RealSimulator
User Guide
RUSBA
Rudder USB Adapter

RUSBA-UserGuidev1.03.1
EMYCSA - RealSimulator
Avda. Manoteras, 22 –nave 42
28050 –Madrid (Spain)
Phone: (+34) 91 383 83 25
Email: technic@realsimulator.com

Contents
Overview 4
Package Content and Technical Data 6
Package content 6
Technical data 6
RUSBA RandB firmware 7
RUSBA Rudder firmware 7
RUSBA GamePort firmware 8
First Connection 9
Tools Installation 11
Firmware Update 17
RUSBA Set Up (RandB and Rudder) 21
Pairing 23
Axes calibration overview 24
Brakes calibration 26
Rudder calibration 27
Manually configure Raw Axes 30
Game Port Calibration 33
Revision History 37
FAQ 38
I have just received my RealSimulator device and I want to install it, but I do not find the drivers in anyplace. 39
I can’t update the firmware of my device with DCC. 39
I want to install a new version of DCC or RS_HID_DEV_TOOL, but I cannot uninstall the older one. 39
My rudder is in the central position but their associated DX measure is not centred. 40
When I move an analog axis, I have spikes in the measure. 40
I have connected my Simped F-16 rudder pedals to RUSBA and the toe brakes work fine but there is no response from the
rudder movement. 40
My device has suddenly stopped working after connecting it or turning on the computer. 41

4 / 42
EMYCSA
RealSimulator
Overview
Date: 26/06/2018
Version: 1.03
PICTURE
DESCRIPTION
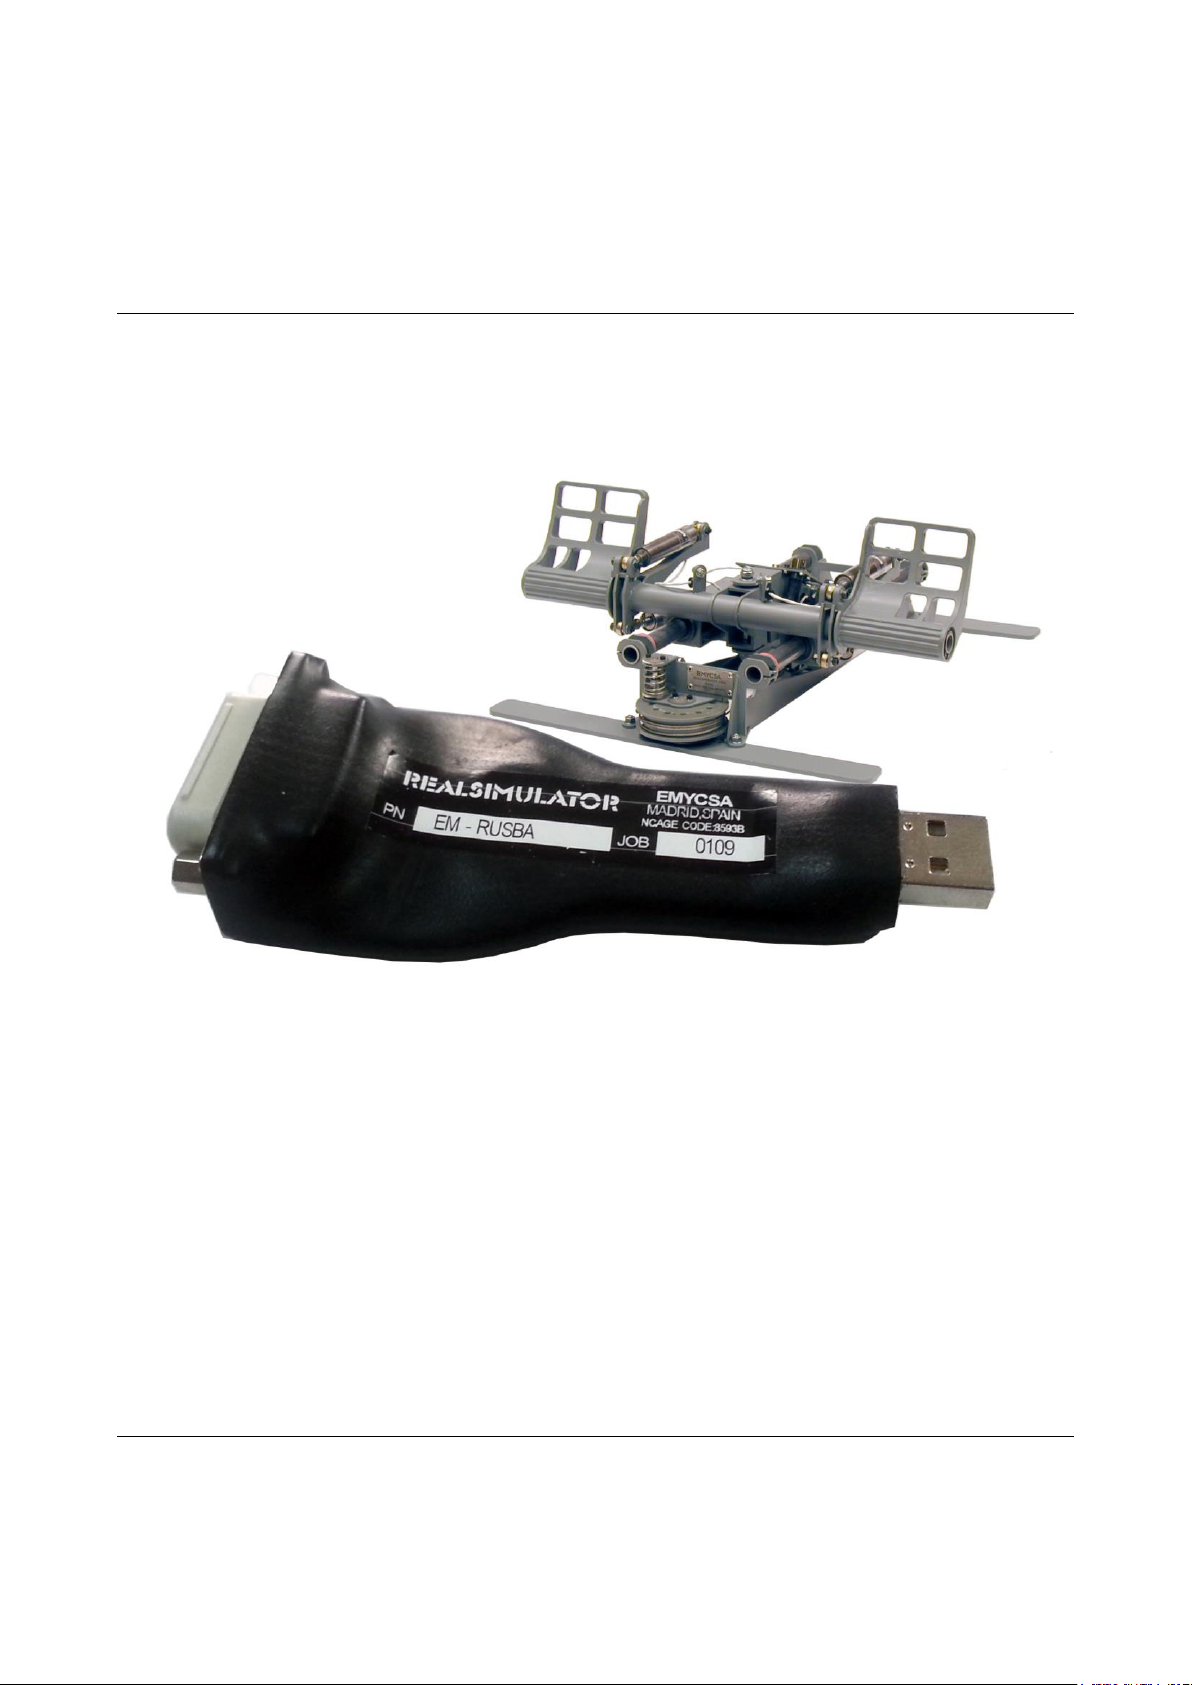
R.USB.A is the acronym for Rudder USB Adapter. This special version has been
designed for the game port rudders and let you connect your loved and well done old
rudders to any standard USB socket.
RUSBA uses standard HID drivers included in your installed operating system, no
matter if x32 or x64, XP, W7 or other higher MS operating system, RUSBA will work in
all situations.
RUSBA has been designed with state of the art last generation microcomputer and has
been adjusted to improve the accuracy and precision of your hardware, giving you a
full free noise 12 bit resolution (4096 steps) in all analog variables.
RUSBA is only available in one model: the full re-programmable one.
Additionally, as RUSBA has a D-sub 15 pin connector can be used as Game Port
adapter, this is not the main purpose of RUSBA but thanks to the full configurable
system, you only need to install the GamePort firmware and your Rudder adapter will
let you connect to your new USB socket any of your loved old game port joysticks.
As well as FSSB R3, RUSBA R2 and FUSBA, RUSBA is firmware upgradeable. We
supply RUSBA with 3 different firmwares:

5 / 42
RUSBA RandB (rudder and brakes).
RUSBA GP (game port).
RUSBA Rudder.
Beside the above characteristics, the product is supplied with a firmware update tool
(DCC) to install new versions of firmware and a GUI application (RS_HID_DEV_TOOL)
to configure and calibrate the device. Both tools can be downloaded from the product’s
website.
http://www.realsimulator.com/html/rusba.html
6 / 42
EMYCSA
RealSimulator
Package Content and Technical Data
Date: 26/06/2018
Version: 1.02
PICTURE
DESCRIPTION
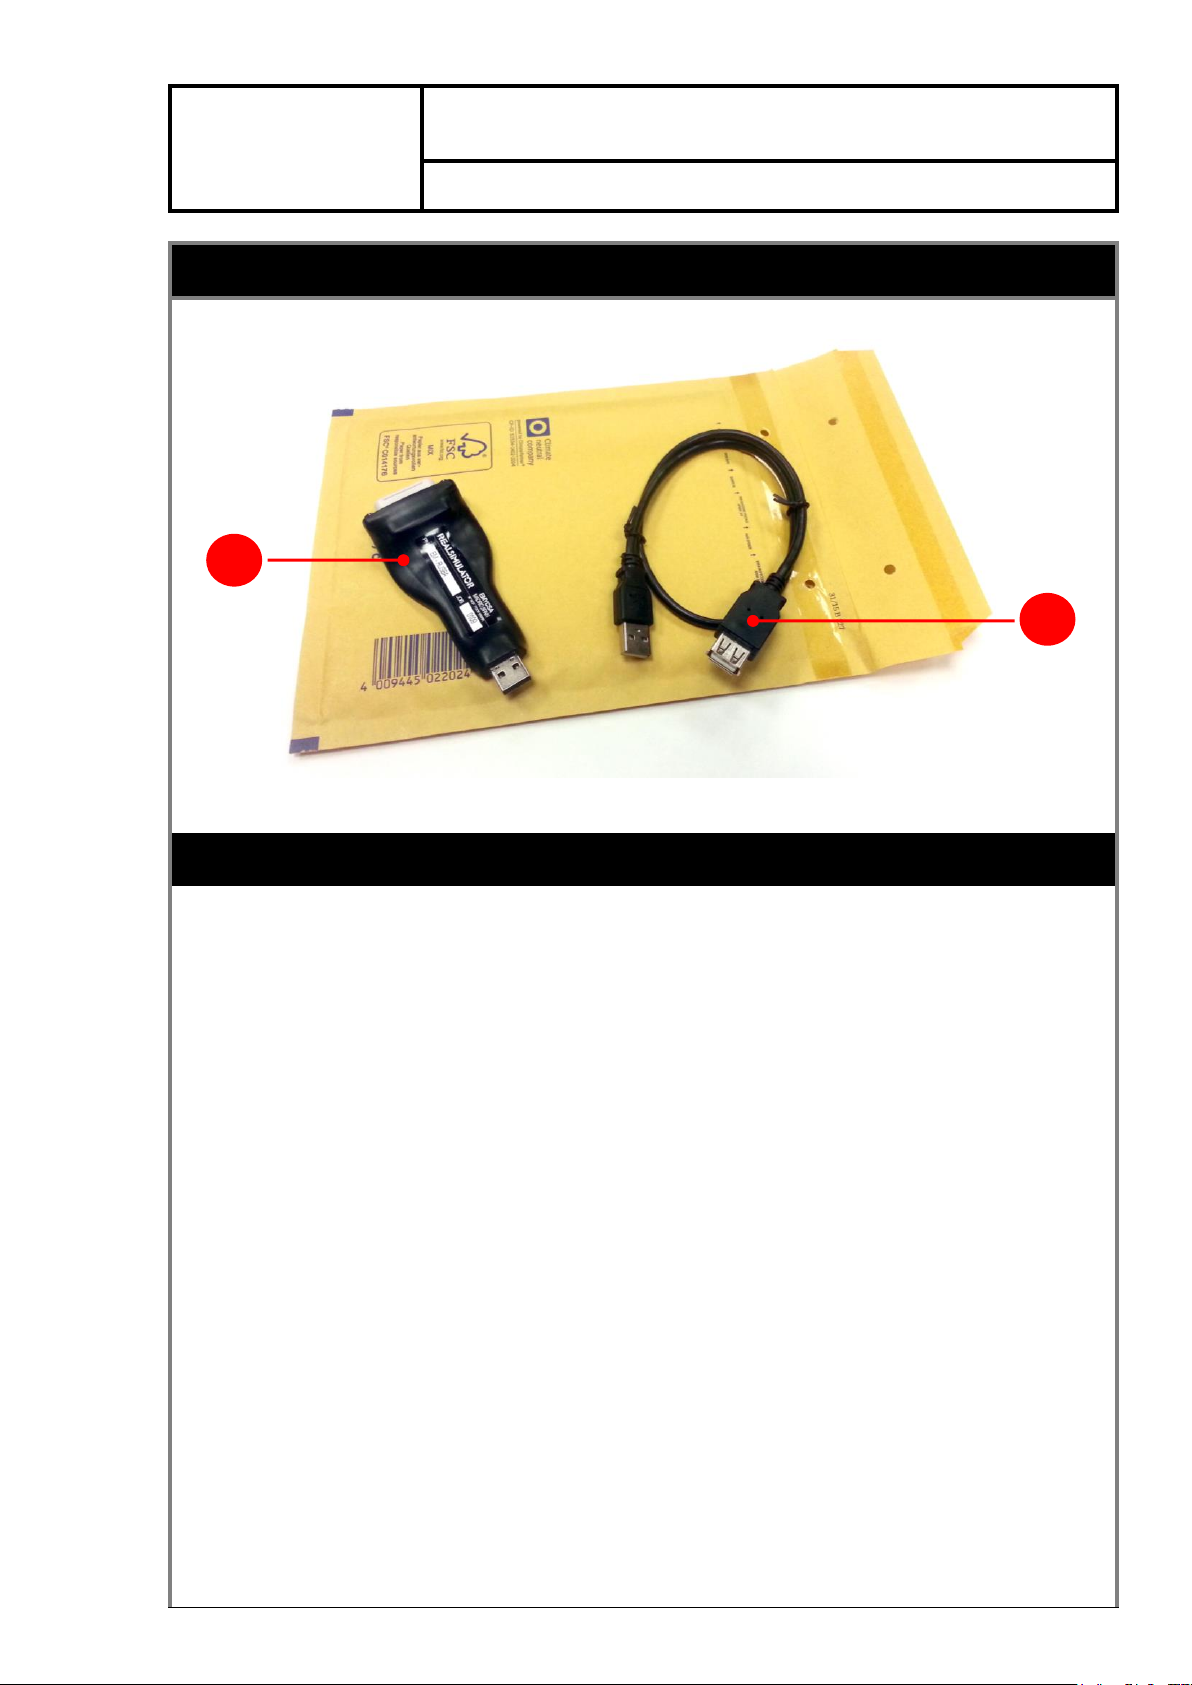
Package content
RUSBA is supplied as a plug and play device with no necessary hardware installation
or drivers. The package, showed in the before picture, contains the following
components:
RUSBA adapter.
USB type A extension cable 0,5m.
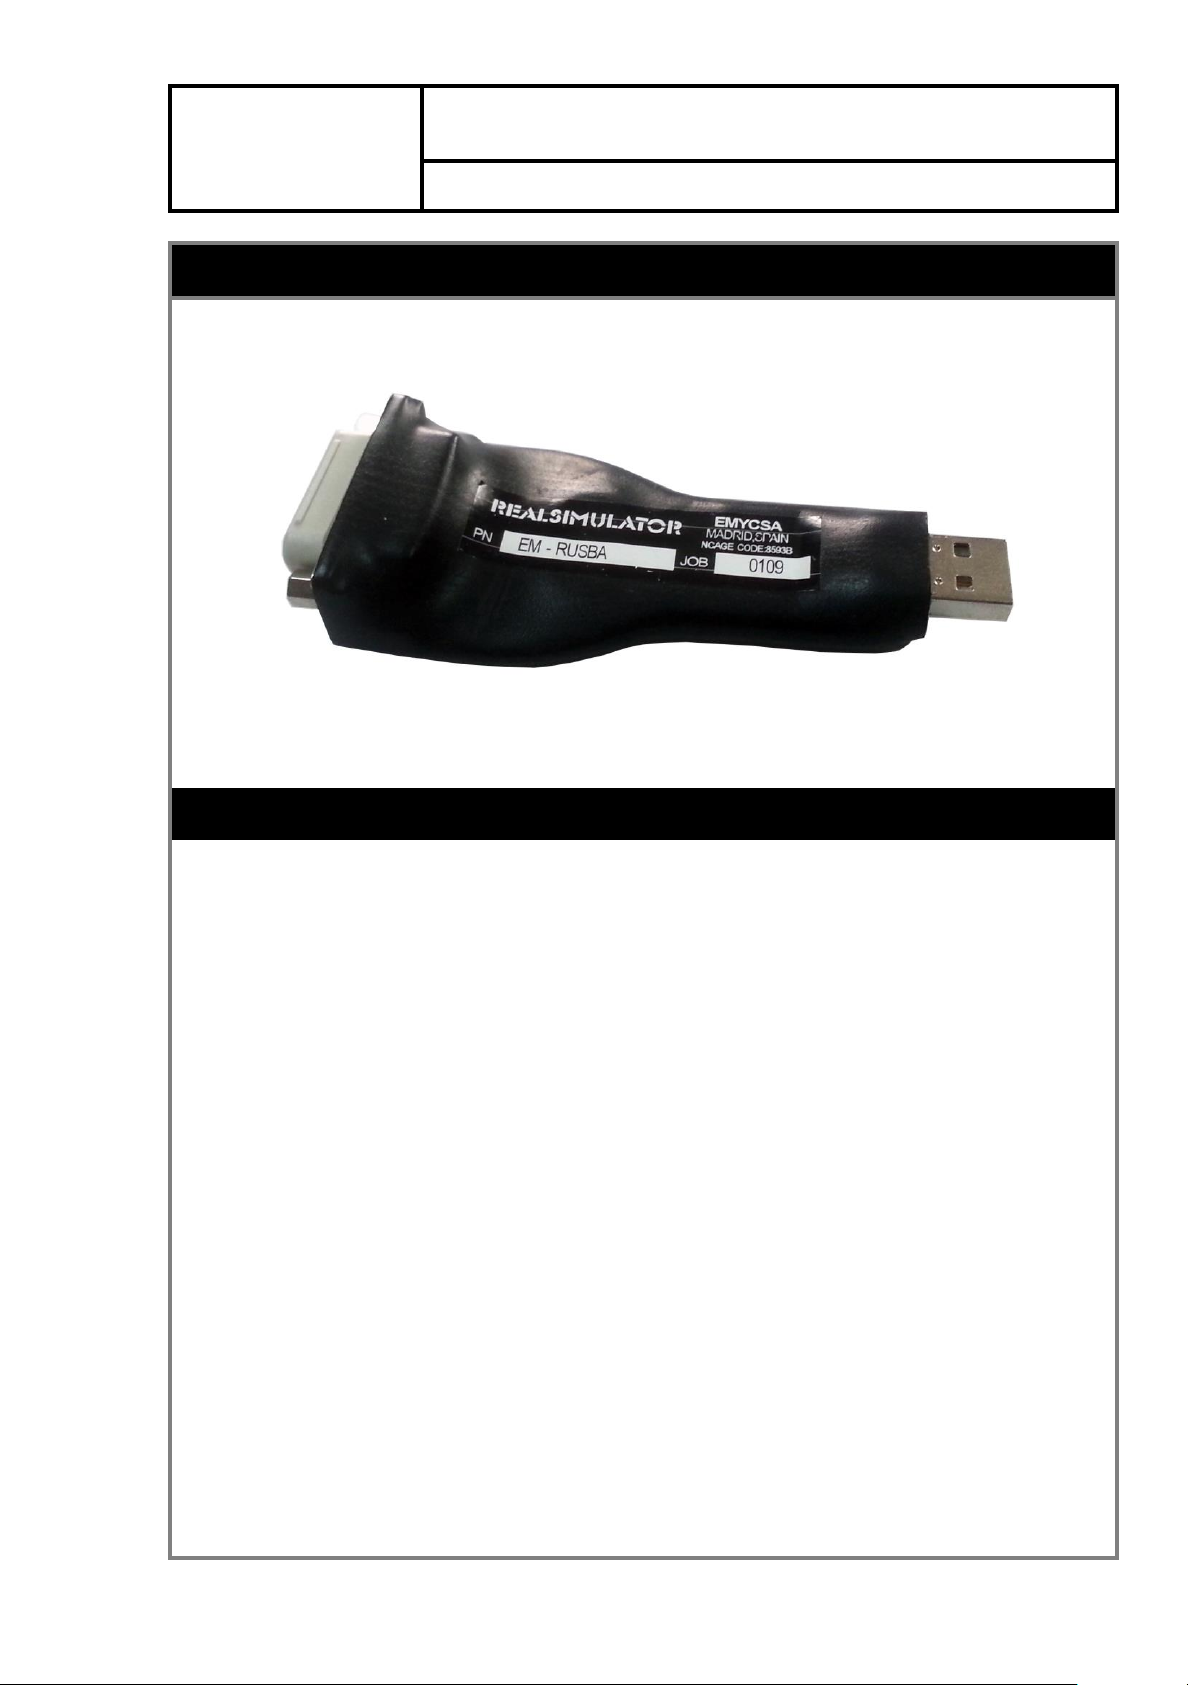
Technical data
D-sub 15 female socket.
USB - A male plug.
Plastic sealed cover.
14 bits analog conversion and 12 bit measures full free noise.
Low pass filter (Glitch Reject).
1, 3 or 4 analog channels (in function of firmware version).
4 DX buttons (in function of firmware version).
Compliance with Windows XP, W7 or other higher MS operating system, x32
1
2

7 / 42
and x64 versions.
Firmware upgradeable.
There are three available firmwares:
oRUSBA RandB (rudder and brakes).
oRUSBA Rudder.
oRUSBA GP (game port).
Weight: 90 gr.
RUSBA RandB firmware
This firmware is designed to support all the rudders with toe brakes compatible with the
HOTAS Cougar. If they work on it, they work on RUSBA.
This firmware has the next axes configuration:
- Axis Z: rudder.
- Rotation X: left brake.
- Rotation Y: right brake.
Electrically, the rudder pedals with toe brakes corresponds to the next wiring.
RUSBA Rudder firmware
This firmware is designed to support all the old analog rudders with game port
connector.
This firmware has the next axis configuration:
- Axis Z: rudder.
Electrically, the rudder pedals corresponds to the next wiring.

8 / 42
RUSBA GamePort firmware
As we said before, this is not the main purpose of RUSBA, and must be understand as
a gift or additional functionality. As the GamePort joystick has the same D-sub 15 pins,
we can configure RUSBA to convert the 4 axes and 4 buttons available in most of the
game port joysticks and convert them to an USB compatible signal.
This firmware is designed to support all the old joysticks with a game port connection.
But of course it cannot work with the mouse, keyboard or other custom functionality of
these joysticks, because this information is not provided through the game port
connection.
This firmware has the next axes and buttons configuration:
- Axis X: analog 0.
- Axis Y: analog 1.
- Axis Z: analog 2.
- Axis Rot. X: analog 3.
- Button 1: digital 4.
- Button 2: digital 5.
- Button 3: digital 6.
- Button 4: digital 7.
Electrically, this configuration corresponds to the following wiring.
9 / 42
EMYCSA
RealSimulator
First Connection
Date: 26/06/2018
Version: 1.03
PICTURE
DESCRIPTION
The first time that you connect your RUSBA in your computer, you will take notice
about really your RUSBA are several devices living in the same hardware. In fact,
inside your RUSBA there are:
- A Boot system, to allow you to update RUSBA with new firmware.
- A HID Game Device, to let you communicate RUSBA directly with MS operating
system and let you control your simulator or some other game with DX axes and
buttons.
- Two additional comms ports for special comms with the device.
As soon as you connect RUSBA, MS operating system will detect it and will start
looking in its data base to install the appropriate drivers for it. As you know, from the
FSSB R3 we have avoided custom drivers or additional special system in order not to
have any problems in the future with new MS operating systems. Just as you know,
every time MS improve its OS, all of us have a headshake with incompatibilities,
drivers, etc. so we have learnt from the past, that the best is to use the own legacy MS
drivers for comms and this is what we have done in the RUSBA system, use only MS
drivers, so when you connect your RUSBA to the computer, MS will look in its data
base for the best MS driver for it, in fact its own HID drivers.
The first device to look for drivers is the RUSBA Boot system, and a few seconds after
taking comms with MS, the RUSBA Boot will left the system and will be disconnect to
allow working the Game device and additional Comms ports. You will see as this USB

10 / 42
input device will be showed in red (have a look to the next picture). And as soon as the
Boot goes out a USB Composite Device with 3 USB Input Devices will start looking for
drivers.
As these HID devices will not go out from your system, after a few second or minutes
you will see as your MS OS will found the drivers and install them in your computer
and the USB Composite device and the 3 USB Input devices will be tick in green.
This picture is what you normally will have if you are running W7 64bits, perhaps it will
look different in other OS, but it will be similar.
About the first USB Input Device, ticked in RED, don’t worry it will be connected the
next time you upgrade your system with the DCC software. Not necessary now.

11 / 42
EMYCSA
RealSimulator
Tools Installation
Date: 26/06/2018
Version: 1.03
PICTURE
DESCRIPTION
The product is supplied with two software tools, a firmware update (DCC) to allow
installing new versions of firmware in the device and a GUI application
(RS_HID_DEV_TOOL) to configure the device.
Both tools can be downloaded from the download’s website inside the same package.
The package also includes the RealSimulator device metadata files, latest firmwares
and the product User Guide.
To download the tools, please, go to the RealSimulator download’s website by clicking
the next hyperlink:
http://www.realsimulator.com/html/download.html
and download the latest version of RS_TOOLS and save it where you prefer.
NOTE: If you have a previous version installed in your computer, please, uninstall the
older version prior to install the newer one.
System requirements are Windows XP sp3 and above MS operating systems and
Microsoft .NET 4.5 or above.
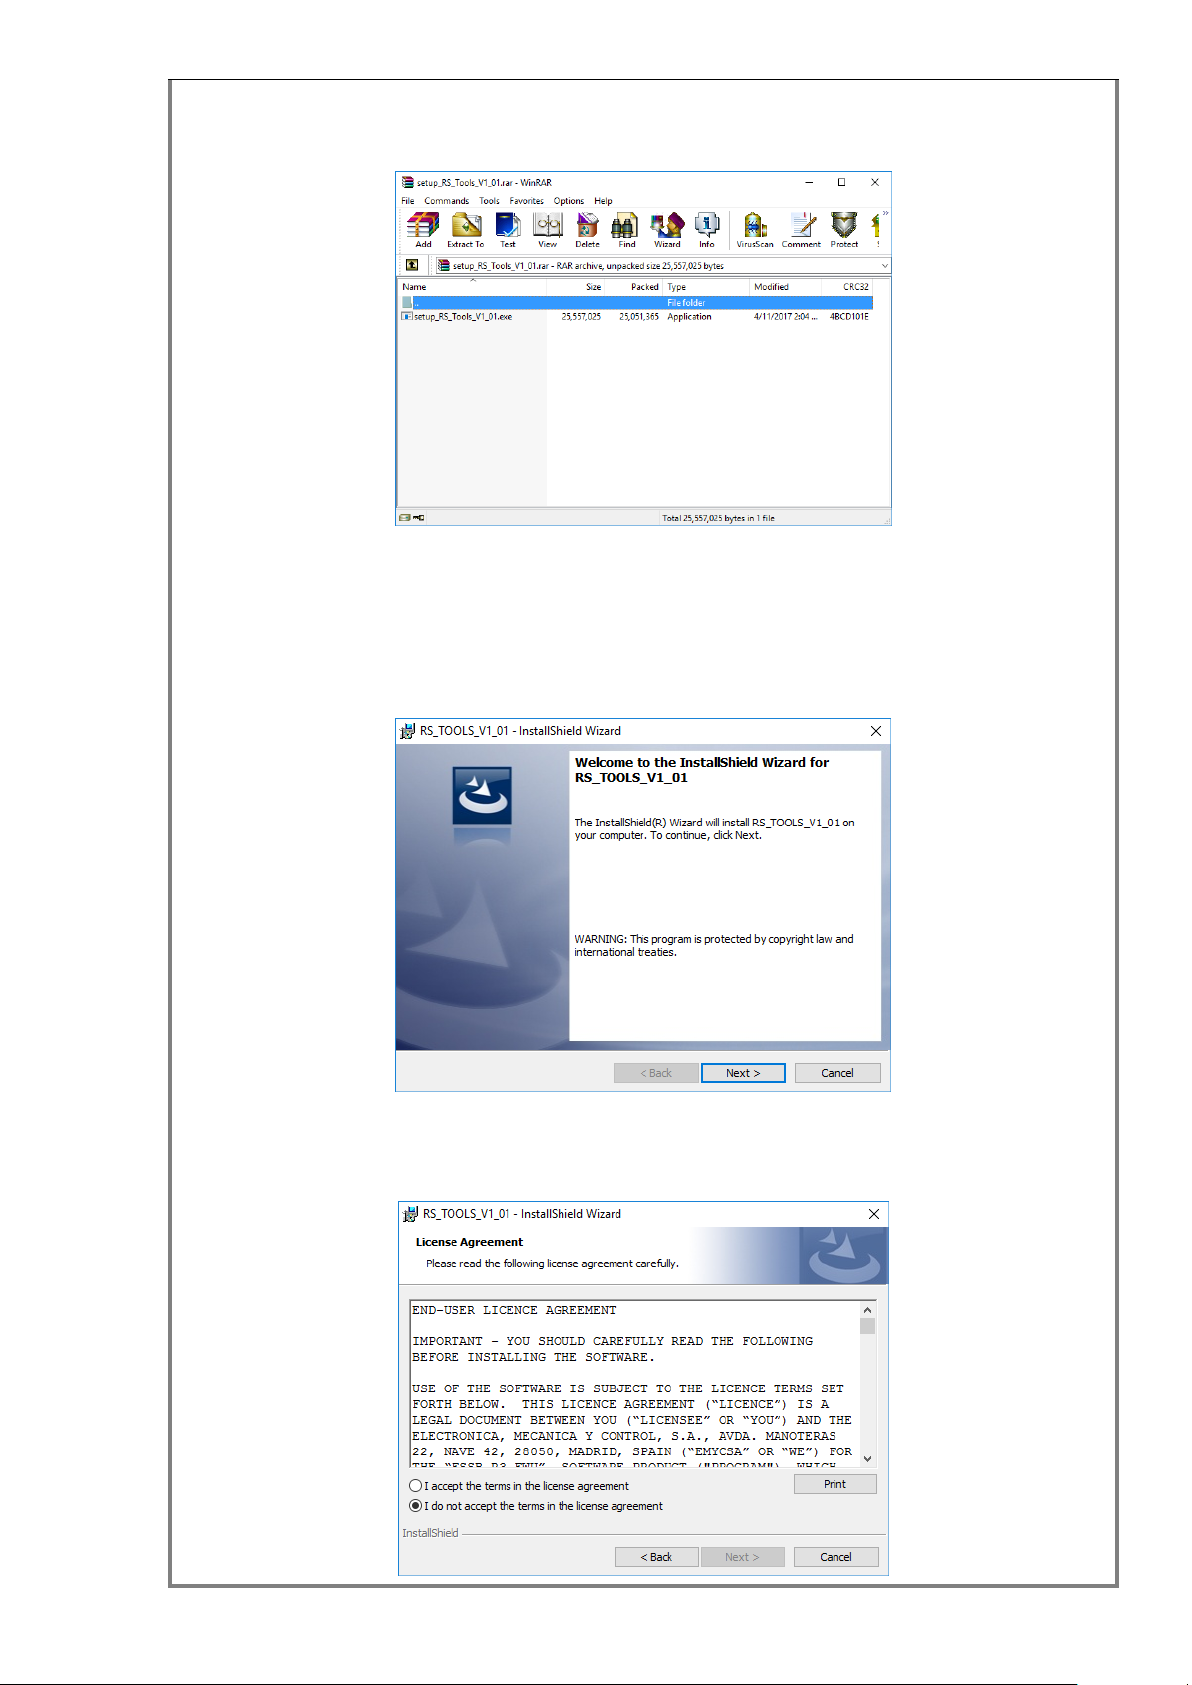
To install it, please, run the downloaded program by double-click on the file icon, at this
moment “setup_RS_Tools_V1_01.rar”although the procedure is equal if there is other
newer version.
12 / 42
Any case, you should have a window like this one.
where setup_RS_Tools_V1_01.exe is the tools installer. To install it, please, run the
file with a double click on the file name.
After some seconds extracting and decompressing the package the installation wizard
will launch, then select Next to continue.
A standard licensing agreement must be accepted before moving on. Choose I accept
the terms of the license agreement and click Next.

13 / 42
If you want to install all program features (DCC, RS_HID_DEV_TOOL, Metadata files,
firmwares and User Guide) select the Complete setup type and click Next to continue.
Or select Custom if you want to choose the features to install and click Next to
continue. Select the features to install and click Next.
The wizard is now ready to start the installation process. Please, click on Install.
14 / 42
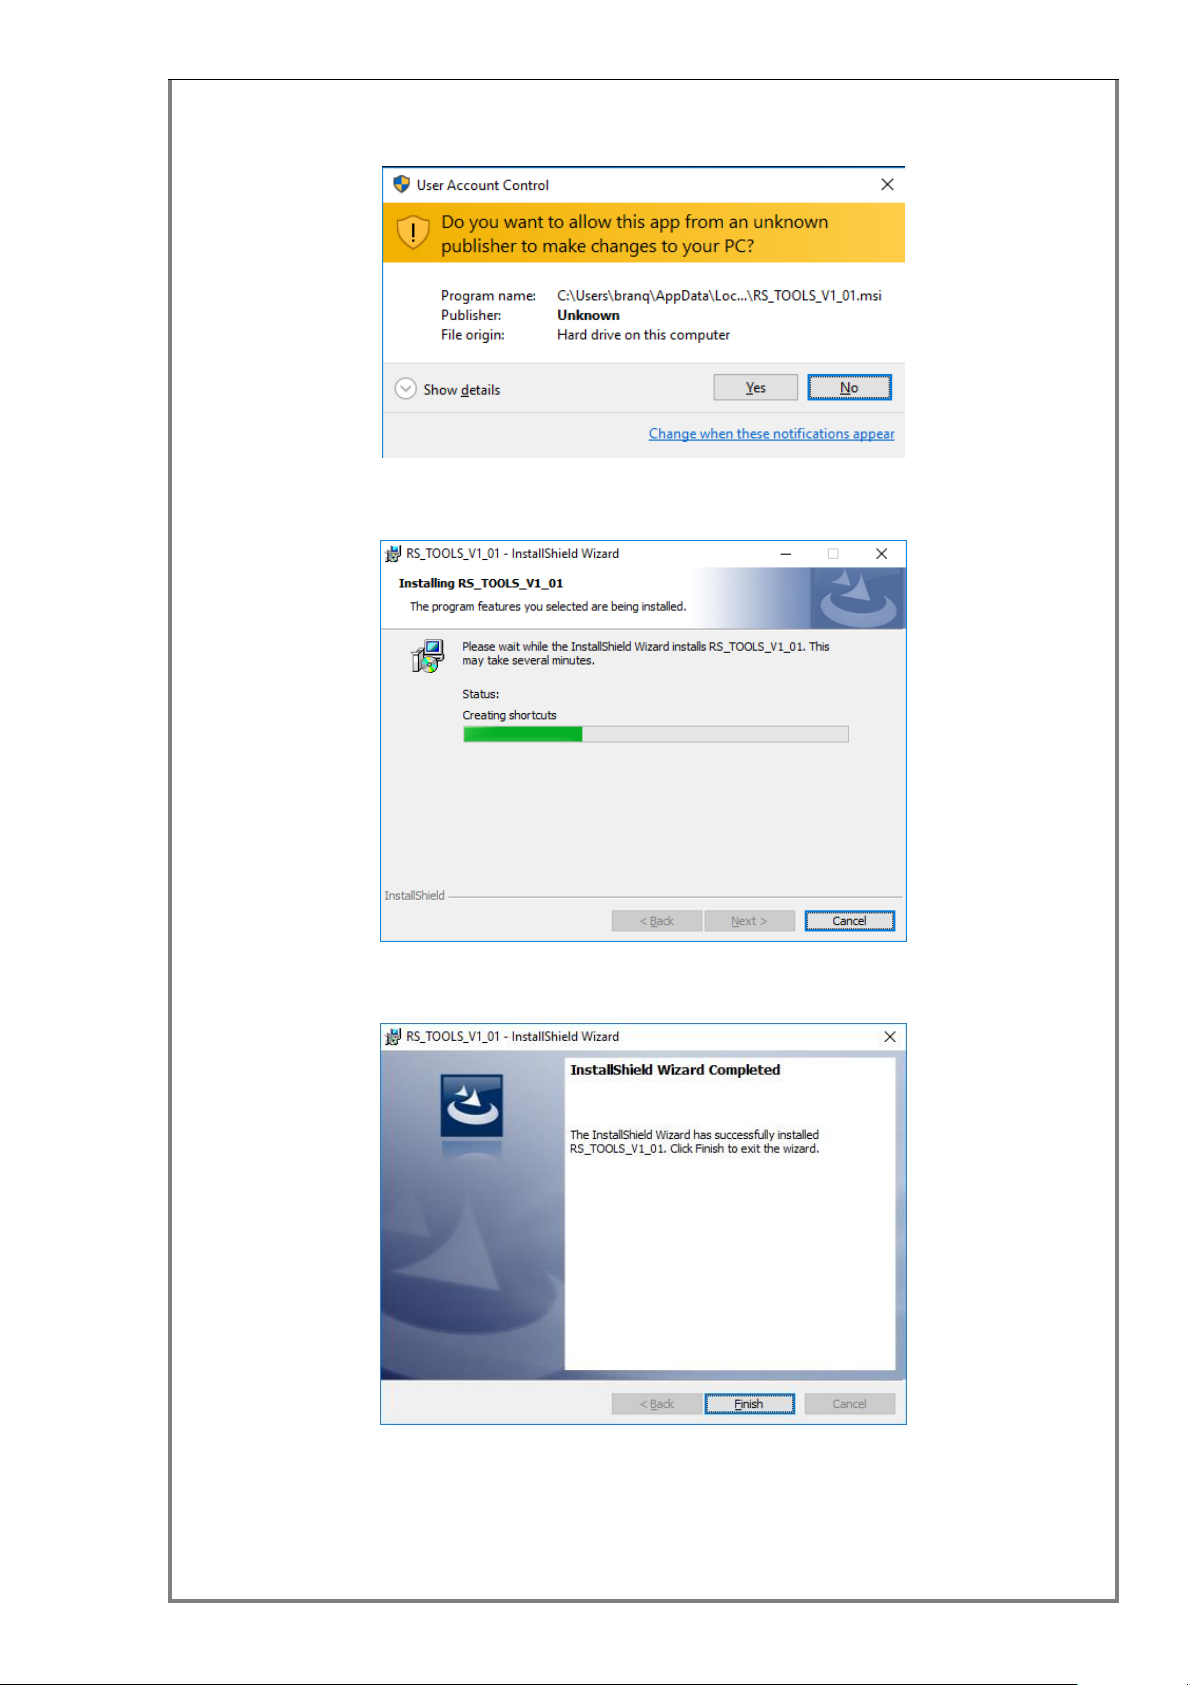
If the User Account Control window appears click the Yes button to continue.
The installation of RS_TOOLS_V1_01 may take several minutes to complete.
Wait until the wizard finishes the installation and click Finish.
The installation is now finished, if you have connected to the PC your flight controls
with the RUSBA kit installed you can see a new device image in the Devices and
Printers window.

15 / 42
For this, click in the windows START button and select Devices and Printers. You
should see an icon device like these in function of firmware installed in RUSBA
NOTE: sometimes Windows does not update immediately the icon device and you see
the standard game device icon, in those occasions press the F5 key to force windows
to update the icon devices cache.
Also, after the installation you will find in your desktop, two new icons: DCC and
RS_HID_DEV_TOOL application shortcuts.
Finally, if you press the windows START button and look the All App section in the R
letter you will find in the Realsimulator folder shortcuts to the DCC and
RS_HID_DEV_TOOL programs, RealSimulator devices User Guide and the FSSB R3
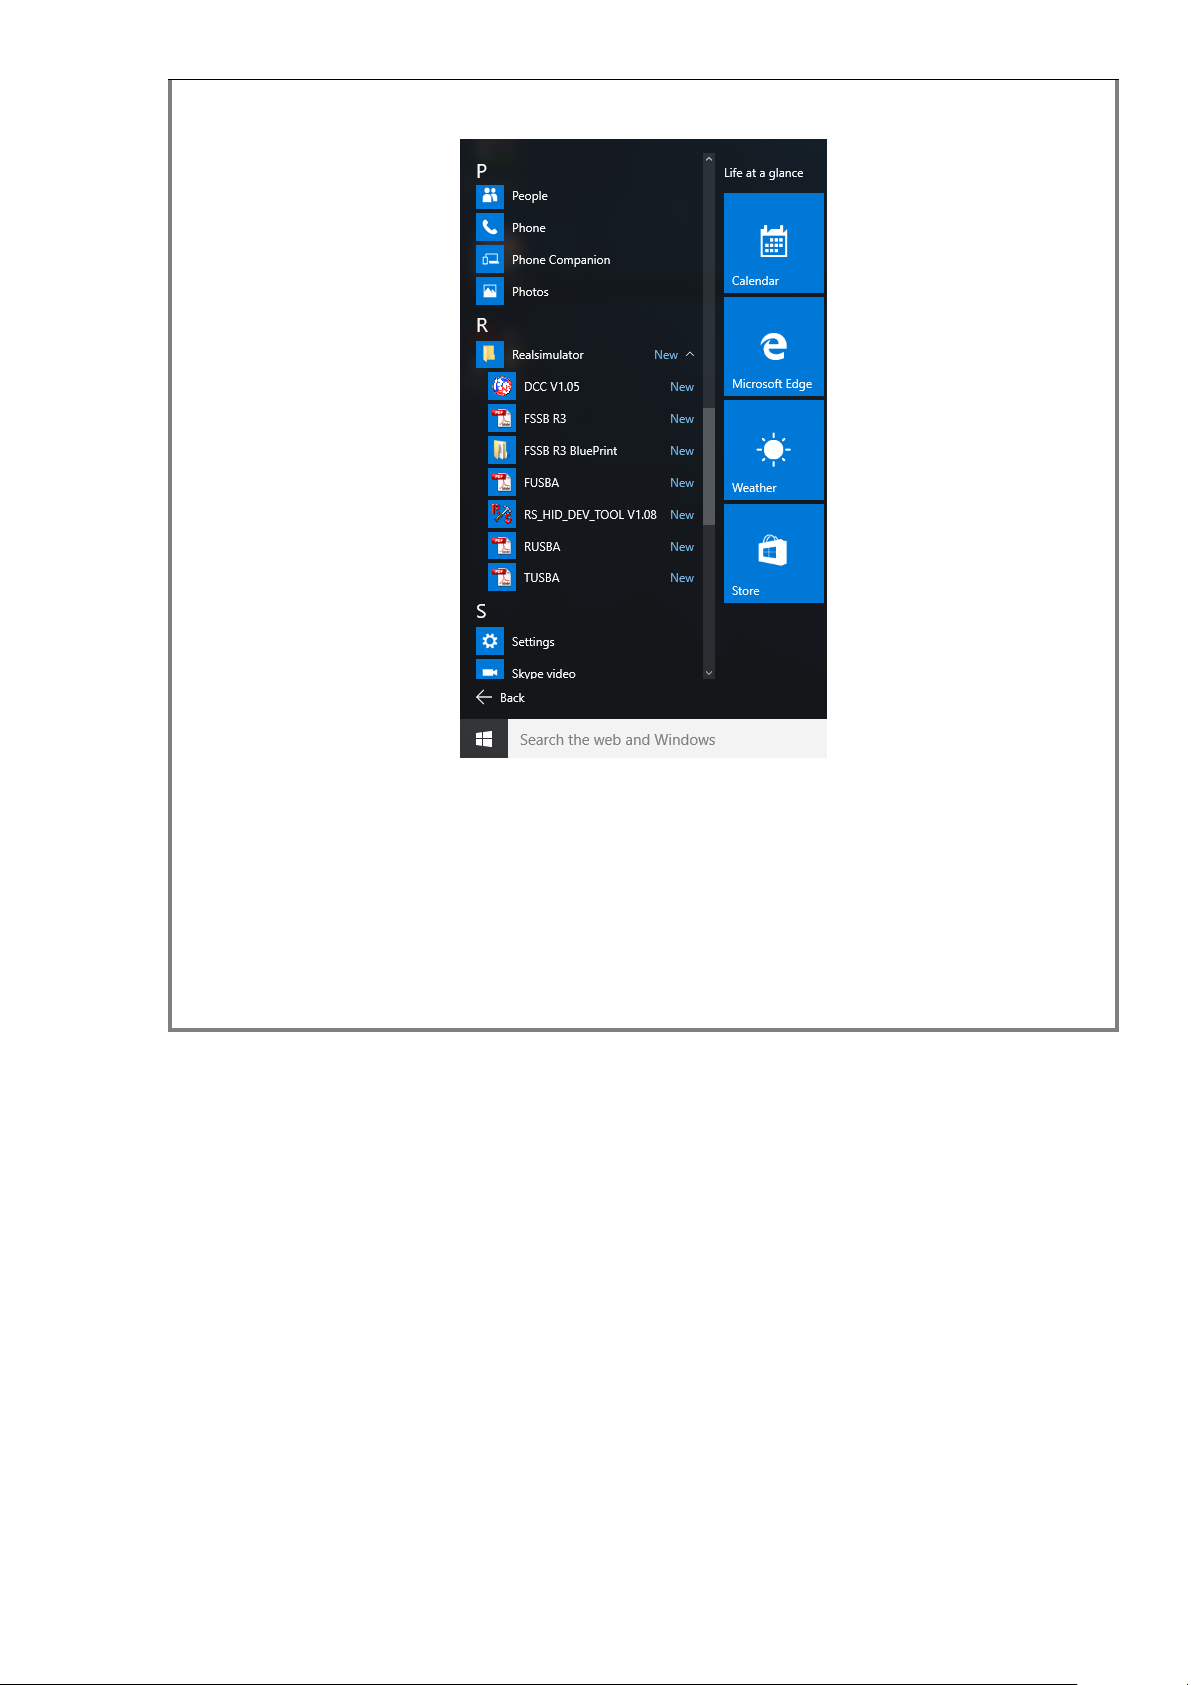
16 / 42
BluePrint.
As general information, here it is the default directories where the installer saves programs:
C:\Program Files (x86)\RealSimulator Code\DCC
C:\Program Files (x86)\RealSimulator Code\RS_HID_DEV_TOOL
And, the User Guide, Metadata, Firmware and BluePrint files on:
%APPDATA%\Realsimulator Data\

17 / 42
EMYCSA
RealSimulator
Firmware Update
Date: 26/06/2018
Version: 1.03
PICTURE
DESCRIPTION
Usually you will receive your RealSimulator device with the last firmware version
installed, so it will not be necessary to use DCC to update your device immediately
after its reception.
If you check the product’s website periodically you could find new versions with
enhancements and issues fixed, so you will need to use the DCC program.
To start the DCC program, launch by double click the DCC desktop icon or click in the
windows START button and select All Program > Realsimulator > DCC > Launch
DCC.exe. If the User Account Control window appears click YES to continue.
Select the tab labelled as RUSBA and follow the instructions given in the groupbox

18 / 42
Instructions to update the device.
Unplug the device from USB extension cable supplied or computer port.
As you can see in the next picture, Status groupbox shows a light device image, it is
normal, this image will only be in normal colour when the device is running the
bootloader program, in other cases, with the device unplugged or in normal operation
the image will be light.
At first, the Select the firmware to update message will be blinking in red, so click the
Load button to open the Open Firmware File window to select the new firmware to
install, select the desire file clicking the filename and click the Open button to close the
window.

19 / 42
Second, with the previous message in green, the following message Connect your
RUSBA will blink in red.
To start the updating we must plug in the previously unplugged device, which will
launch the bootloader for some seconds and DCC program will start the
communications with the device sending the new firmware. During this data
transference we will be able to see the progress in the Progress bar and the status
image in normal colour.
Finally, when the update finishes the device will exit from the bootloader program and
will run the new firmware.
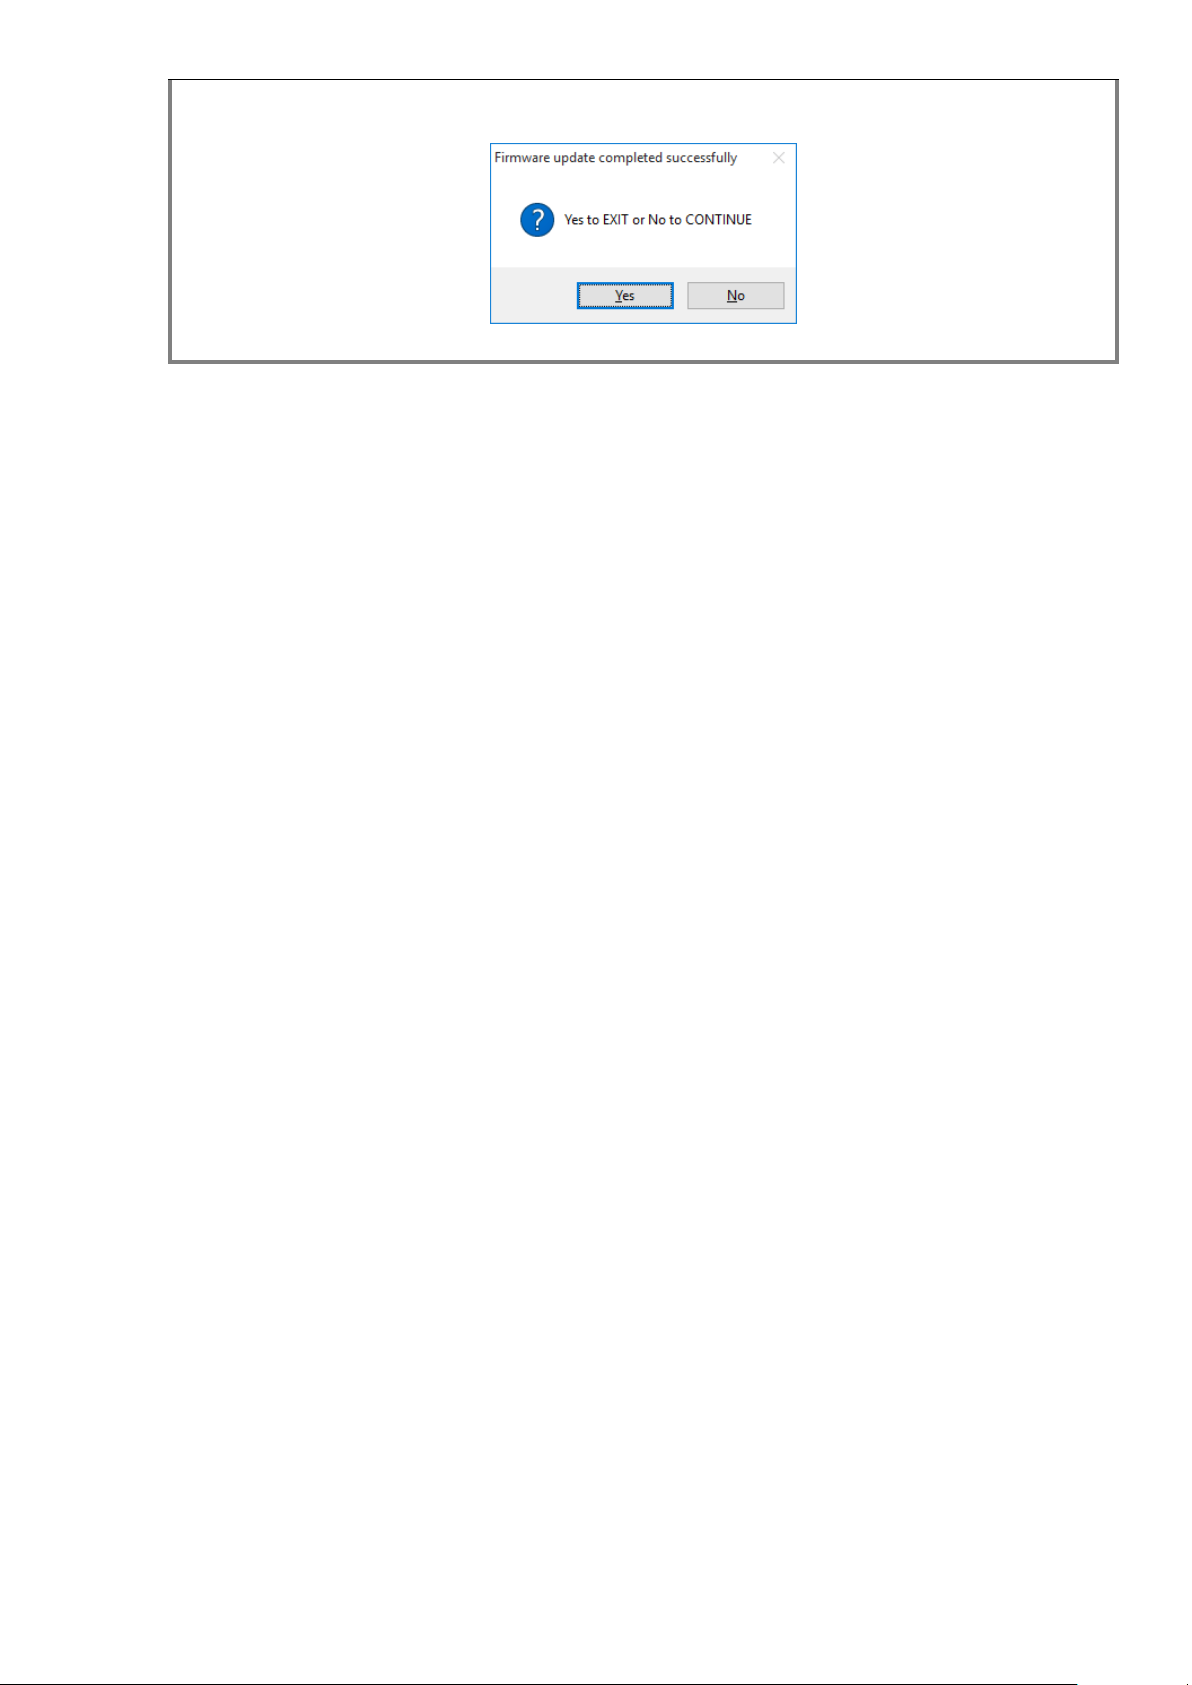
DCC program will show a new window to confirm the firmware update completed
successfully and it will ask you to continue with other device or exit.
20 / 42
Click Yes to exit.
Table of contents
Popular Adapter manuals by other brands


rollease acmeda
rollease acmeda AUTOMATE ARC READER quick start guide

TRENDnet
TRENDnet TEW-648UB - 150Mbps Mini Wireless N USB 2.0... user guide

LevelOne
LevelOne USB-0301 Brochure & specs

Superlux
Superlux E901i quick start guide

NexusLink
NexusLink GPL-1200-KIT user manual

D-Link
D-Link dlinkgo GO-USB-N150 user manual