ENLIF FG20 User manual

FG20
ENLiF cordless floor cleaning robot
This manual mainly instructs you on how
to use the equipment properly, please
read the manual carefully before use.
Thanks for choosing
ENLiF cordless floor cleaning robot
ENLiF cordless floor cleaning robot, Smart’s Enjoyment of Life
The instructions can be checked by the URL:www.enlif.net
wish you a happy to use
The nozzle sprayed with fan-shaped
water mist can wet the ground evenly,
the high-speed rotating rags can clean
tiles, marble, wooden floor quickly and
easily.
Special cleaning rags and waxing rags
could sweep the floor speedily and
evenly, which can wipe and maintain the
floor easily and effectively.

Product description
switch
adjustable
telescopic rod
spray water
handle
nozzle
water filling hole
round rags velcro
01
charging port
· Product description
· Parts list / Precautions / Cleaning pads Using
· Installation
· Instructions
· Product specification
· Fault resolution
· The content and name of harmful
substancesin the product
· Security Information
01
02
03
04-05
06
07
08
09
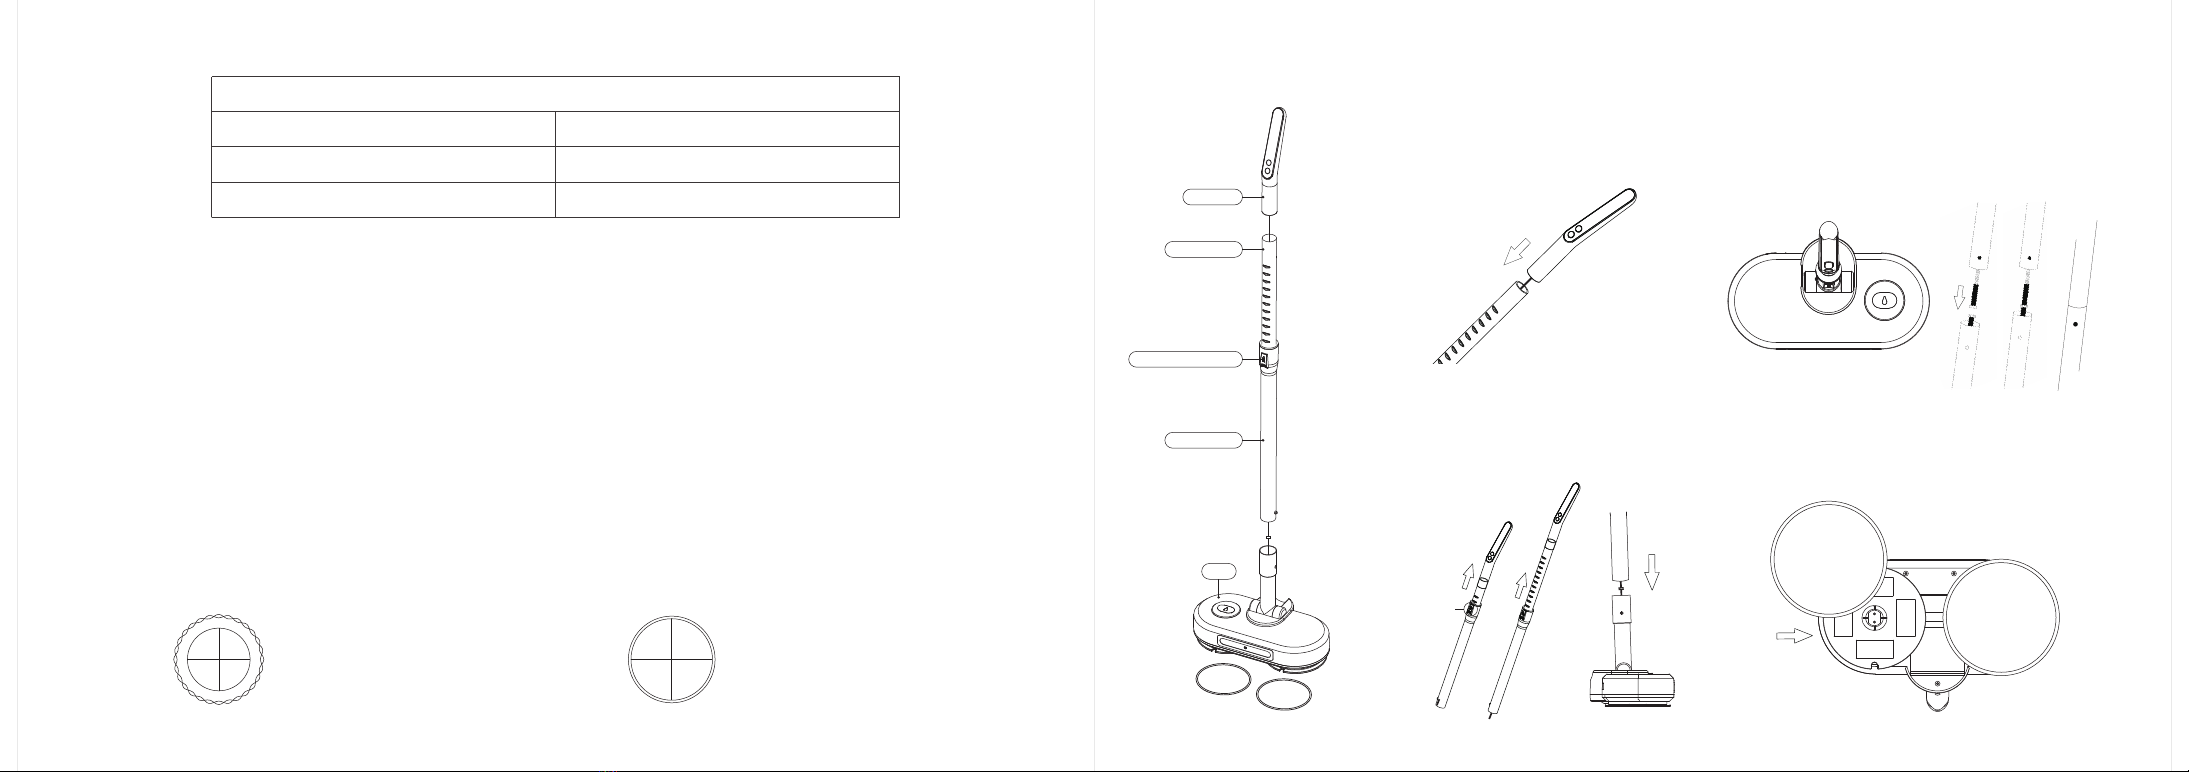
Parts list
Precautions
·Host*1pc
·Handle*1pc
·Connecting rod*1pc
·Adapter*1pc ·Manual*1pc
·Round cleaning rag*2pcs
·Round waxing rag*2pcs
0302
1
After being used for many times, the Velcro may adhere to fibers and other debris, causing a drop in
viscosity. Please clean it with a soft brush.
Velcro
2
After use, remove the rags to clean and air-dry in time, or use the disposable rags. But the disposable
rags is eco-friendly material, it will reduce the effect of use if repeatedly reuse.
Rags
3
The tank should be filled with impurity-free liquid and empty the tank after use.If add essential oils,
you need to clean the tank several times after use and empty it.
Water tank
Installation
Handle
Metal tube
Metal tube
Host
Adjustment button
43
1Press the latch on the metal tube
to link the metal tube to the handle.
Note: If the latch does not pop up,
turn the metal tube left and right.
Attach the cleaning rags to the bottom of
the host.
Note: Please align the center point of the round
rags with the center point of the bottom disk.
Press the
adjustment button
2Place the host on the ground, push the
active connecting rod on the host from
horizontal to vertical. Connect the power
cable in the metal tube.
Note: The active connecting rod is slightly laborious
when folded, please operate with confidence.
Press the adjustment button on the
metal tube to stretch the tube to the
longest, then insert it into the active
connecting rod of the host vertically.
Cleaning pads
1Unedged cleaning pad
Suitable for floor mopping cleaning
2
Note: It will be better to add detergent
Waxing cleaning pad
Suitable for floor waxing
Note: Need to use with waxing oil
InstructionsInstructions
0504
1Add Water
Open the lid of water tank and fixed by hand. Use a measuring cup to add water into the water tank.
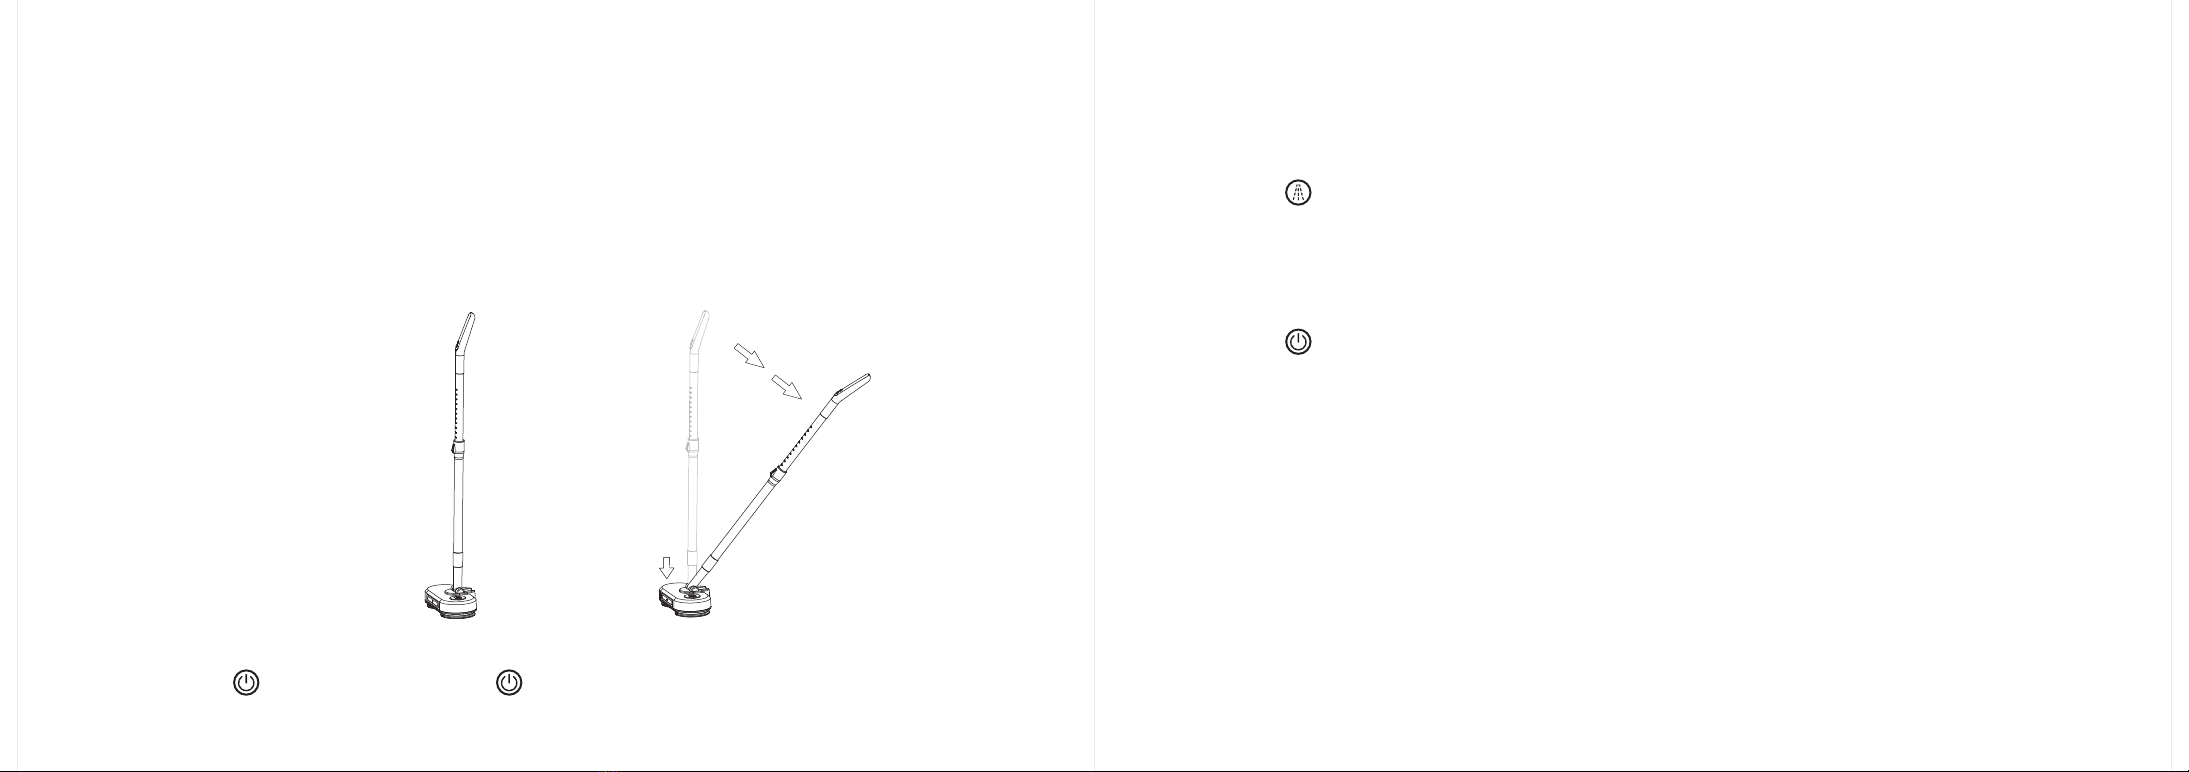
2Prepare
After installation, placing the machine vertically on the horizontal floor, and keeping machine body
steady to press down the adjusting rod in a state of <80° with groud.
2Battery indicator
The 3 indicators shows the power at the condition, 80%-100%; 50%-80%; 10%-50%.
when the third indicator flashes, the battery power will run out, please charge it in time.
5Cleaning pads replacement
lift the machine to tear it off, Put the dirty pads in the washing machine or wash it by hand. wash and
dry, and use it repeatedly.
6After cleaning
After cleaning, standing the machine up, and place at the wall corner to avoid falling down.
4Charging
Pulling the rubber out and exposing the charging port completely on the lower right coner of machine.
plug charging cable into the machine port. When charging, 0%-50% power; the lights up one by one
at the lower voltage; 50%-80% power, the 3rd indicator lights up; 80%-99% power, the 2nd & 3rd
indicator lights up and 1st indicator flashing; and all the 3 indicators lights up shows fully charge.
Note: Charging only on the power off condition, and please use original adapter to charge.
Before Working Using
Installation complete
① ②
Stabilize the
machine body
3Power On/Off
Press shortly to switch on; press shortly to switch off.
Note: Alternate use of inward & outward rotation can enhance the cleaning effect.
3Wire winding Situation
Press 1 second after machine working, the machine motor will get into outward rotation in 1 second
later. Which is using for wire winding situation betterly.
1Water Spray
Press to spray water when power on.

Product
specification
0706
Model
Name
Net weight
Gross weight
Package size
LED spotlight
Adaptors input
Adaptorrs output
Power
Switch
Battery capacity
Charging time
Working time
Power indicator
Water box
Height
Function
FG20
Electric mop
2.3kg
3.27kg
580*280*110(mm)
No
100-240V 50/60Hz 0.5A
18V--0.8A
50w
Hand-held
2000mAh
3.5-4h
40-50min
Yes
300ml
90-118cm,adjustable
dry-wiping,wet-wiping,waxing,decontaminating
Fault resolution
When the host operation is abnormal, please refer to the following table to solve the problem
The host does not start:
1.Low battery, please charge before use.
2.Whether it is in charging state, it cannot be turned on during charging.
The nozzle does not spray water:
1.Check whether there is water in the tank.
2.This product must be started before spraying water.
It feels heavy when mopping:
1.Check whether the power enough.
2.There is too much water on the rags.
Water stain on the floor:
1.Excessive water spray.
2.Wipe by day rags.
Working noise <50db
Outward and
Inward rotation Yes
Vertical Placement Yes
Special Function Motor water cooling design

0908
Parts name
Harmful Substance
Pb Hg Cd Cr(VI) PBB PBDE
Circuit
board
Metallic
parts
Case
Rechargeable
Battery
The environmental protection use period of the rechargeable battery used of the product is 5 years
X
○
○
X
○
○
○
○
○
○
○
○
○
○
○
○
○
○
○
○
○
X
○
○
The content and name of harmful substances in the product
This form is based on the provisions of SJ/T11364.
○: Indicates that the content of the hazardous substance in all homogeneous materials of the
component is below the limit requirements specified in GB/T 26572.
X: Indicates that the content of the hazardous substance in at least one of the homogeneous
materials of the component exceeds the limit specified in GB/T 26572.
(All parts marked with X in the table are in compliance with the EU RoHS directive or cannot
be replaced due to global technical limitations)
(This table shows that these hazardous substances are present in our products, not all of the
above components)
Use restrictions
1.Before use, you need to remove large-size garbage. This product has no sweeping and dust collection function.
2.This product is not waterproof. It can not be water shower and can not clean Waterlogged or thick floor.
3.Avoid jamming of the moving parts of the robot when wiping small spaces. If this happens, first close the product
and then remove it.
4.Do not increase the load on the host.
5.Please clean the appearance of the product in the off state.
6.Do not stress the metal rod or shoulder the product.
7.Carefully wax the wooden floor and pay attention to safety.
8.Please use this product according to the instruction of the manual. Any loss or injury caused by improper use will
be borne by the user.
Battery and charging
Security Information
1.Do not use any third-party battery, power adapter.
2.Do not dismantle, repair, modify battery or power adapter.
3.Do not place the power adapter near a heat source.
4.Do not wipe the power adapter with a damp cloth or wet hands.
5.Do not throw away discarded batteries at random. Handle them with professional recycling agencies.
6.If the power cord of the adapter power is broken, stop using it immediately and contact customer service.
7.If you need to transport the product, please make sure the host is turned off and it is recommended to use the
original packaging.
8.If you do not use this product for a long time, please turn off the main unit after it is fully charged and place it in
a cool and dry place. Charge it at least once every three months to avoid overdischarge.
Table of contents


