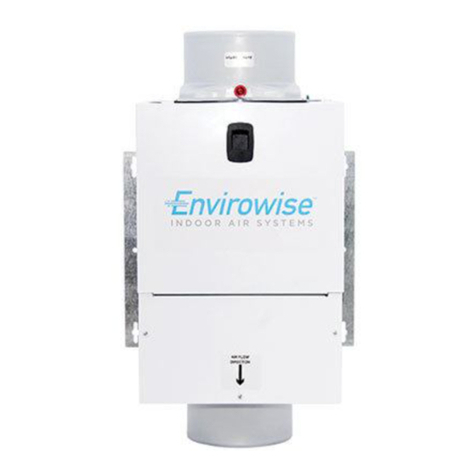
Envirowise EQMD6 User manual

IMPORTANT INSTRUCTIONS -
OPERATING MANUAL
SAVE THESE INSTRUCTIONS
6727927 Rev. A 9-17 1 of 2
Motorized Damper
EQMD6
Installing Contractor:
Installation Date:
Model Number: EQMD6
READ AND SAVE THESE INSTRUCTIONS
READ CAREFULLY BEFORE ATTEMPTING TO ASSEMBLE, INSTALL, OPERATE OR MAINTAIN
THE PRODUCT DESCRIBED. PROTECT YOURSELF AND OTHERS BY OBSERVING ALL SAFETY
INFORMATION. FAILURE TO COMPLY WITH INSTRUCTIONS COULD RESULT IN PERSONAL
INJURY AND/OR PROPERTY DAMAGE!
RETAIN INSTRUCTIONS FOR FUTURE REFERENCE.
GENERAL SAFETY INFORMATION
When using electrical appliances, basic precautions should
always be followed to reduce the risk of fire, electric shock and
injury to person, including the following:
WARNING:TO REDUCE THE RISK
OF FIRE, ELECTRIC SHOCK AND INJURY TO
PERSON, OBSERVE THE FOLLOWING:
a) Use this unit only in the manner intended by the manufacturer. If you
have questions, contact the manufacturer.
b) Before servicing or cleaning the unit, switch power off at service
panel and lock the service disconnecting means to prevent power
from being switched on accidentally. When the service disconnecting
means cannot be locked, securely fasten a prominent warning
device, such as a tag, to the service panel.
WARNING:TO REDUCE THE RISK
OF FIRE, ELECTRIC SHOCK AND INJURY TO
PERSON, OBSERVE THE FOLLOWING:
a) Installation work and electrical wiring must be done by qualified
person(s) in accordance with all applicable codes and standards,
including fire-related construction.
b) Sufficient air is needed for proper combustion and exhausting of
gases through the flue (chimney) of fuel burning equipment to prevent
back drafting. Follow the heating equipment manufacturer’s guideline
and safety standards such as those published by the National Fire
Protection Association (NFPA) and the American Society for Heating,
Refrigeration, and Air Conditioning Engineers (ASHRAE), and the local
code authorities.
c) When cutting or drilling into wall or ceiling, do not damage electrical
wiring and other hidden utilities.
CAUTION:FOR GENERAL VENTILATING USE
ONLY. DO NOT USE TO EXHAUST HAZARDOUS OR
EXPLOSIVE MATERIALS AND VAPORS.
d) This unit must be grounded.
e) To avoid motor bearing damage and noisy and/or unbalanced impellers,
keep drywall spray, construction dust, etc. off power unit.
f) Read all instructions before installing or using exhaust fan.
g) For residential installations only.
h) Must use suitable weather hood with insect screen to protect air
intake.
WARNING:TO REDUCE THE RISK OF
FIRE, ELECTRIC SHOCK, DO NOT USE THIS FAN
WITH ANY SOLID-STATE SPEED CONTROL
DEVICE.
a) Must be connected to a GFCI (ground fault circuit interrupter)
protected branch circuit.
WARNING:DO NOT USE IN KITCHENS.
WARNING: THE DUCTING FROM THIS FAN HAS A
STRONG EFFECT ON THE AIR FLOW, NOISE AND ENERGY
USE OF THE FAN. USE THE SHORTEST, STRAIGHTEST DUCT ROUTING
POSSIBLE FOR BEST PERFORMANCE, AND AVOID INSTALLING THE FAN
WITH SMALLER DUCTS THAN RECOMMENDED. INSULATION AROUND
THE DUCTS CAN REDUCE ENERGY LOSS AND INHIBIT MOLD GROWTH.
18-HE121D1-1-EN

INSTALLATION INSTRUCTIONS
CAUTION: MAKE SURE POWER IS SWITCHED OFF AT
SERVICE PANEL BEFORE STARTING INSTALLATION.
CAUTION: MAKE SURE THE MAIN UNIT IS INSTALLED
ACCORDING TO ALL INSTRUCTIONS INCLUDED WITH THE UNIT.
WARNING: THIS UNIT IS TO BE USED ONLY WITH QUFRESH BY
ENVIROWISE MODELS CAPABLY OF ACCEPTING THE 24V TRANSFORMER.
SECTION 1
Preparing the Fan
1. Unpack unit from the carton and confirm that all pieces are present. In addition to the
motorized damper you should have:
1 - 24V transformer
1 - Plastic Bushing
1 - Cable Tie
1 - Instruction/Safety Sheet
SECTION 2
Installation
1. Install the motorized damper to the outlet (discharge) side of the unit using 6" rigid
ducting and seal with appropriately rated tape. Use screws or suitable clamps to secure
in place. If any additional ducting will be installed to the outlet side of the motorized
damper (as with an inline installation) repeat the same procedure as above (Figure 1).
2. Remove the screw securing the access
panel cover in place and open the cover
by pulling back on the plastic latch
(Figure 2).
3. Remove the plastic plug from the body
of the main unit and install the included
plastic bushing into the hole (Figure 2).
CAUTION:
MAKE SURE POWER
IS SWITCHED OFF AT SERVICE PANEL
BEFORE STARTING INSTALLATION.
6727927 Rev. A 9-17 2 of 2
CAUTION:
ALL ELECTRICAL
CONNECTIONS MUST BE MADE IN
ACCORDANCE WITH LOCAL CODES,
ORDINANCES, OR NATIONAL ELECTRICAL
CODE. IF YOU ARE UNFAMILIAR WITH
METHODS OF INSTALLING ELECTRICAL
WIRING, SECURE THE SERVICES OF A
QUALIFIED ELECTRICIAN.
4. Remove the plastic cover from the
receptacle inside the main unit housing.
Plug the included 24VAC transformer
into the receptacle and run the lead
wires to the motorize damper. Make the
electrical connections to the motorized
damper by connecting the wires from the
damper to the pre installed ends (Figure
3).
NOTE: Make sure the wires running to the
transformer are not in the direct path of the
incoming air. This could cause a “rattling” noise.
Use a small piece of ducting tape to secure the
wires to the fan housing if necessary. If your
unit includes a 24V Relay Controller, the wires
can be fastened to the side of the control box
using the included wire tie. To do so, slide the
wire tie into the slot of the holder on the back
side of the relay box. To access to the holder,
this will need to be done before the relay box is
installed.
5. Close the access panel and reinstall the
screw holding the access panel in place.
6. Restore power and test your installation.
SECTION 3
Operation
1. The receptacle inside the unit will be energized anytime the fan is running. This will in
turn open the motorized damper. When the unit stops running, the damper will close.
CALIFORNIA RESIDENTS ONLY:
WARNING: THIS PRODUCT CAN EXPOSE YOU TO A CHEMICAL
[OR CHEMICALS] KNOWN TO THE STATE OF CALIFORNIA TO CAUSE
CANCER.
WARNING: THIS PRODUCT CAN EXPOSE YOU TO A CHEMICAL [OR
CHEMICALS] KNOWN TO THE STATE OF CALIFORNIA TO CAUSE REPRODUCTIVE
TOXICITY.
Figure 1
Air Flow
Outlet
Motorized Damper
Ducting
Bushing
Screw
Figure 2
Latch
Receptacle
Transformer
Figure 3
Connectors
18-HE121D1-1-EN
Other Envirowise Fan manuals
Popular Fan manuals by other brands
Regency
Regency OASIS owner's manual
emerio
emerio CFH-212922.1 instruction manual
Mitsubishi Electric
Mitsubishi Electric VL-100ZSKRT-E operating instructions
Panasonic
Panasonic FV-04VE1 instructions
Girard Products
Girard Products sMart Vent owner's manual

Valor
Valor Legend G4 Series Installation and operating instructions
