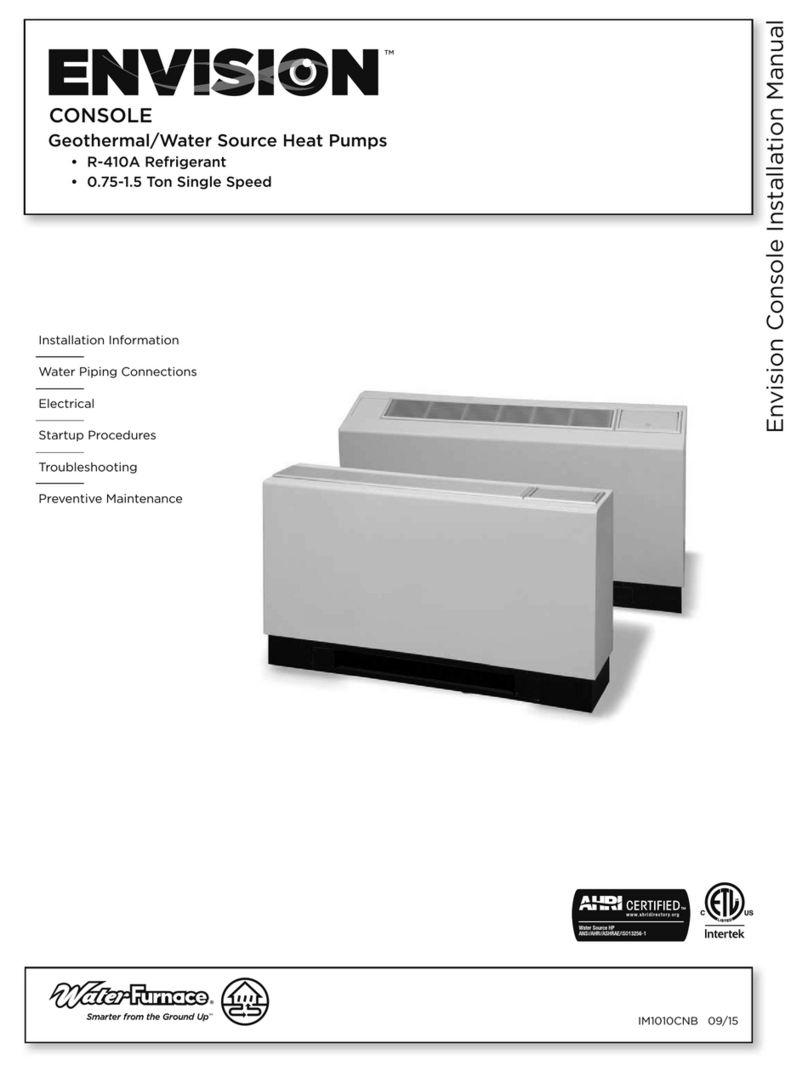
Envision R-410A Residential User manual

IM1585 12/08
Installation Information
Water Piping Connections
Desuperheater Connections
Electrical
Startup Procedures
Troubleshooting
Preventive Maintenance
Envision Residential Installation Manual
Geothermal/Water Source Heat Pumps
• R-410A Refrigerant
• 2, 2.5, 3, 3.5, 4, 5, 6 Ton Single Speed
• 2, 3, 4, 5, 6 Ton Dual Capacity
RESIDENTIAL

2
ENVISION RESIDENTIAL INSTALLATION MANUAL
Model Nomenclature
N D V 049 A 1 1 1 C T L
Model Type Return Air Configuration
N= Envision L= Left
R= Right
Compressor Type
D= Dual Capacity Discharge Air Configuration
S= Single Speed B= Bottom
T= To p
Cabinet Configuration S= Side
V= Vertical E= End
H= Horizontal Coax Options
Unit Capacity C= Copper
N= Cupronickel
Vintage
A= Current Fan Option
0= PSC
Voltage 1= ECM
1= 208-230/60/1 2= Oversized ECM Blower Option
(036,038,042,048,049)
3= Oversized PSC Blower Option
(022,030,036,042,048)
Hot Water Option
0= None
1= Hot Water Generation with
factory installed pump
Notes: PSC Motor - Single Speed Only

3
ENVISION RESIDENTIAL INSTALLATION MANUAL
Table of Contents
General Installation Information 4-8
Closed Loop Ground Source Systems 9
Open Loop Ground Water Systems 10
Desuperheater Connection & Startup 11-12
Electrical Connections 13-14
Electronic Thermostat Installation 14
Auxiliary Heat Ratings 14
Unit Electrical Data 15
Fan Performance Table 16-17
Setting Fan Speed 16-17
Vertical Dimensional Data 18
Horizontal Dimensional Data 19
Vertical Bottomow Dimensional Data 20
Physical Data 21-22
Wiring Schematics 23-27
Microprocessor Control 28-32
Unit Startup 33
Operation Logic 34
Unit Operating Parameters 35-36
Pressure Drop & Recommended Flow Rates 37
Troubleshooting 38
Preventive Maintenance 39
Replacement Procedures 39

4
ENVISION RESIDENTIAL INSTALLATION MANUAL
Moving and Storage
Move units in the normal “up” orientation. Horizontal units may be moved and stored per the information on the packag-
ing. Do not stack more than three units in total height. Vertical units may be stored one upon another to a maximum height
of two units. Do not attempt to move units while stacked. When the equipment is received, all items should be carefully
checked against the bill of lading to be sure all crates and cartons have been received. Examine units for shipping damage,
removing the units from the packaging if necessary. Units in question should also be internally inspected. If any damage is
noted, the carrier should make the proper notation on the delivery receipt, acknowledging the damage.
Unit Location
Locatetheunitinanindoorareathatallowsforeasyremovalofthelterandaccesspanels.Locationshouldhave
enoughspaceforservicepersonneltoperformmaintenanceorrepair.Providesufcientroomtomakewater,electrical
andductconnection(s).Iftheunitislocatedinaconnedspace,suchasacloset,provisionsmustbemadeforreturnair
tofreelyenterthespacebymeansofalouvereddoor,etc.Anyaccesspanelscrewsthatwouldbedifculttoremoveafter
the unit is installed should be removed prior to setting the unit. On horizontal units, allow adequate room below the unit for
a condensate drain trap and do not locate the unit above supply piping. Care should be taken when units are located in
unconditioned spaces to prevent damage from frozen water lines and excessive heat that could damage electrical
components.
Installing Vertical Units
Prior to setting the unit in place, remove and discard the compressor hold down
shipping bolt located at the front of the compressor mounting bracket.
Verticalunitsareavailableinleftorrightairreturncongurations.Topairdis-
charge vertical units should be mounted level on a vibration absorbing pad slightly
largerthanthebasetoprovideisolationbetweentheunitandtheoor.Itisnot
necessarytoanchortheunittotheoor(seeright).
Bottomowunitsshouldbemountedlevelandsealedwelltooortopreventair
leakage.Bottomowunitsrequirethesupplyairopeningtobecutatleast1/2˝larger
thantheunit’sairoutlet.Protecttheedgesofcombustibleooringwithsheetmetal
over-wrap or other non-combustible material.
WARNING: Before performing service or maintenance operations on a system, turn off main
power switches to the indoor unit. If applicable, turn off the accessory heater power switch.
Electrical shock could cause personal injury.
Installing and servicing heating and air conditioning equipment can be hazardous due to system pressure and electrical
components.Onlytrainedandqualiedservicepersonnelshouldinstall,repairorserviceheatingandairconditioningequip-
ment.Untrainedpersonnelcanperformthebasicmaintenancefunctionsofcleaningcoilsandcleaningandreplacinglters.
All other operations should be performed by trained service personnel. When working on heating and air conditioning equip-
ment, observe precautions in the literature, tags and labels attached to the unit and other safety precautions that may apply.
Follow all safety codes. Wear safety glasses and work gloves. Use a quenching cloth for brazing operations and have a
reextinguisheravailable.
Safety Considerations
General Installation Information
Figure 1: Vertical Unit Mounting
2” Extruded
Polystyrene

5
ENVISION RESIDENTIAL INSTALLATION MANUAL
Installing Horizontal Units
Remove and discard the compressor hold down shipping bolt located at the front of the compressor mounting bracket
prior to setting the unit in place. Horizontal units are available with side or end discharge. Horizontal units are normally sus-
pendedfromaceilingbysix3/8-inchdiameterthreadedrods.Therodsareusuallyattachedtotheunitbyhangerbracket
kits furnished with each unit.
Lay out the threaded rods per the dimensions below. Assemble the hangers to the unit as shown. Securely tighten the
brackets to the unit using the weld nuts located on the underside of the bottom panel. When attaching the hanger rods to
thebracket,adoublenutisrequiredsincevibrationcouldloosenasinglenut.Toallowlteraccess,onebracketonthelter
sideshouldbeinstalled180°fromthepositionshowninthegurebelow.Theunitshouldbepitchedapproximately1/4-inch
towards the drain in both directions to facilitate the removal of condensate. Use only the bolts provided in the kit to attach
hanger brackets. The use of longer bolts could damage internal parts.
Someresidentialapplicationsrequiretheinstallationofhorizontalunitsonanatticoor.Inthiscase,theunitshould
be set in a full size secondary drain pan on top of a vibration absorbing pad. The secondary drain pan prevents possible
condensateoveroworwaterleakagedamagetotheceiling.Thesecondarydrainpanisusuallyplacedonaplywoodbase
isolated from the ceiling joists by additional layers of vibration absorbing material.
Insulate supply
plenum and use
at least one 90
elbow to
reduce noise
Electrical
Disconnect
Flexible Duct
Collar
Threaded Rods
Line Voltage
Ball Valves
Hose
Kits
T o Line
Power
T o
Thermostat
Hanging
Brackets
(Included)
Building Water Loop
O
Figure 2: Horizontal Unit Mounting
CAUTION: Do not use rods smaller than 3/8-inch diameter since they may not be strong enough to
support the unit. The rods must be securely anchored to the ceiling.
Figure 3: Hanger Location and Assembly
C
FB
Air Coil
Air Coil
D
E
A
Vibration Isolator
Washer
Hex Nuts
(not supplied)
Bolt and
Lockwasher
3/8
Threaded Rod
(not supplied)
Model A B C D E F
022 - 030 24.8
27.8
27.8
27.8
63.4 21.1 38.1 25.3 1.1
036 - 038 72.4 24.1 43.1 29.3 1.1
042 - 049 77.4 24.1 48.1 29.3 1.1
060 - 072 82.4 24.1 53.1 29.3 1.1

6
ENVISION RESIDENTIAL INSTALLATION MANUAL
Duct System
An air outlet collar is provided on vertical top air discharge units and all horizontal units to facilitate a duct connection
(verticalbottomowunitshavenocollar).Aexibleconnectorisrecommendedfordischargeandreturnairductconnec-
tionsonmetalductsystems.Uninsulatedductshouldbeinsulatedwithaminimumof1-inchductinsulation.Applicationof
the unit to uninsulated ductwork in an unconditioned space is not recommended as the unit’s performance will be adversely
affected.
If the unit is connected to existing ductwork, check the duct system to ensure that it has the capacity to accommodate
the air required for the unit application. If the duct is too small, as in the replacement of heating only systems, larger duct-
work should be installed. All existing ductwork should be checked for leaks and repaired if necessary.
Theductsystemshouldbesizedtohandlethedesignairowquietlyandefciently.Tomaximizesoundattenuationof
theunitblower,thesupplyandreturnplenumsshouldincludeaninternalductlinerofberglassorconstructedofductboard
fortherstfewfeet.Onsystemsemployingasheetmetalductsystem,canvasconnectorsshouldbeusedbetweenthe
unitandtheductwork.Ifairnoiseorexcessiveairowisaproblem,theblowerspeedcanbechanged.
Water Piping
Theproperwaterowmustbeprovidedtoeachunitwheneverthe
unitoperates.Toassureproperow,usepressure/temperatureports
todeterminetheowrate.Theseportsshouldbelocatedatthesupply
andreturnwaterconnectionsontheunit.Theproperowratecannot
be accurately set without measuring the water pressure drop through
the refrigerant-to-water heat exchanger.
Allsourcewaterconnectionsoncommercialunitsarettingsthat
accept a male pipe thread (MPT). Insert the connectors by hand, then
tightenthettingwithawrenchtoprovidealeakproofjoint.Whencon-
necting to an open loop (groundwater) system, thread any copper MPT
ttingintotheconnectorandtighteninthesamemannerasdescribed
above.
All source water connections on residential units are swivel piping
ttings(seeFigure4)thataccepta1-inchmalepipethread(MPT).
The swivel connector has a rubber gasket seal similar to a rubber hose
gasket,whichwhenmatedtotheushendofany1-inchthreaded
pipe provides a leak-free seal without the need for thread sealing tape
or compound. Check to ensure that the rubber seal is in the swivel
connector prior to attempting any connection. The rubber seals are
shipped attached to the waterline. To make the connection to a ground
loopsystem,matethebrassconnector(suppliedinCK4Lconnectorkit)
against the rubber gasket in the swivel connector and thread the female
locking ring onto the pipe threads, while maintaining the brass connec-
tor in the desired direction. Tighten the connectors by hand, then gently
snugthettingwithplierstoprovidealeak-proofjoint.Whenconnectingtoanopenloop(groundwater)system,threadany
1-inchMPTtting(SCH80PVCorcopper)intotheswivelconnectorandtighteninthesamemannerasnotedabove.The
openandclosedlooppipingsystemshouldincludepressure/temperaturetapsforserviceability.
Neveruseexiblehosessmallerthan1-inchinsidediameterontheunit.Limithoselengthto10feetperconnection.
Check carefully for water leaks.
Figure 4: Swivel Connections
(Residential Units)
Locking
Ring
Stainless
Steel
Snap Ring
Gasket
Support
Sleeve
Gasket
Material
CAUTION: Be sure to remove the shipping material from the blower discharge before con-
necting ductwork.

7
ENVISION RESIDENTIAL INSTALLATION MANUAL
Water Quality
In ground water situations where scaling could be heavy or where biological growth such as iron bacteria will be pres-
ent, a closed loop system is recommended. The heat exchanger coils in ground water systems may, over a period of time,
loseheatexchangecapabilitiesduetoabuildupofmineraldepositsinside.Thesecanbecleaned,butonlybyaqualied
service mechanic, as special solutions and pumping equipment are required. Desuperheater coils can likewise become
scaled and possibly plugged. In areas with extremely hard water, the owner should be informed that the heat exchanger
mayrequireoccasionalushing.
Units with cupronickel heat exchangers are recommended for open loop applications due to the increased resistance to
build-up and corrosion, along with reduced wear caused by acid cleaning.

8
ENVISION RESIDENTIAL INSTALLATION MANUAL
1/2'' Pitch
Drain
1.5" 1.5"
3/4” PVC tube stub
3/4" PVC
Coupling
Vent (if needed)
3/4" PVC
1/8" per foot
Figure 6: Unit Pitch for Drain
Figure 5: Horizontal Drain Connection
Freeze Protection
SetthefreezesensingswitchSW2-2ontheprintedcircuitboardforapplicationsusingaclosedloopantifreezesolution
to“LOOP”.Onapplicationsusinganopenloop/groundwatersystem(orclosedloopnoantifreeze),setthisdipswitchto
“WELL”,thefactorydefaultsetting.(RefertotheDipSwitchFieldSelectiontableonpage24.)
Condensate Drain
On vertical units, the internal condensate drain assembly consists of a drain tube which is connected to the drain pan, a
3/4-inchPVCfemaleadapterandaexibleconnectinghose.Thefemaleadaptermayexiteitherthefrontorthesideofthe
cabinet.Theadaptershouldbegluedtotheeld-installedPVCcondensatepiping.Onverticalupowunits,acondensate
hose is inside all cabinets as a trapping loop; therefore, an external trap is not necessary.
On horizontal units, a PVC stub is provided for condensate drain piping connection. An external trap is required (see
below).Ifaventisnecessary,anopenstandpipemaybeappliedtoateeintheeld-installedcondensatepiping.

9
ENVISION RESIDENTIAL INSTALLATION MANUAL
Figure 7: Closed Loop Ground Source Application
Closed Loop Ground Source Systems
Note: Forclosedloopsystemswithantifreezeprotection,setSW2-2tothe“loop”position(seetableonpage28).
Oncepipingiscompletedbetweentheunit,pumpsandthegroundloop(seegurebelow),nalpurgingandcharging
oftheloopisrequired.Aushcart(ora1.5HPpumpminimum)isneededtoachieveadequateowvelocityintheloopto
purge air and dirt particles from the loop itself. Antifreeze solution is used in most areas to prevent freezing. Flush the sys-
temadequatelytoremoveasmuchairaspossiblethenpressurizethelooptoastaticpressureof40-50PSI(summer)or
50-75PSI(winter).Thisisnormallyadequateforgoodsystemoperation.Loopstaticpressurewilluctuatewiththe
seasons.Pressureswillbehigherinthewintermonthsthanduringthecoolingseason.Thisuctuationisnormalandshould
be considered when initially charging the system.
Afterpressurization,besuretoopentheplug1turnintheendofthelooppumpmotor(s)(ifapplicable)toallowtrapped
airtobedischargedandtoensurethatthemotorhousinghasbeenooded.Ensurethatthelooppumpsprovideadequate
owthroughtheunit(s)bycheckingthepressuredropacrosstheheatexchangerandcomparingittotheunitcapacitydata
inthespecicationcatalog.2.5to3GPMofowpertonofcoolingcapacityisrecommendedinearthloopapplications.
Multiple Units on
One Flow Center
When two units are connected to
one loop pumping system, pump control is
automatically achieved by connecting the
SLterminalsonconnectorP2inbothunits
with2-wirethermostatwire.Theseterminals
arepolaritydependant(seeFigure8).The
loop pump(s) may be powered from either
unit, whichever is more convenient. If either
unit calls, the loop pump(s) will automati-
callystart.Theuseoftwounitsononeow
centerisgenerallylimitedtoatotalof20
GPMcapacity.
Envision to
Electromechanical Units
Shut
Down CC
SL1
In
SL1
Out
Envision Unit #1
To Electromechanical Unit
CS
Shut
Down CC
Shut
Down CC
SL1
In
SL1
Out
SL1
In
SL1
Out
Single Speed
Envision Unit #1
With pump
wired to Unit 1
With pump
wired to
Unit 2
Envision to Envision
Microprocessor Units
Envision Unit #2
Single Speed
With pump
wired to Unit 1
With pump
wired to
Unit 2
Shut
Down CC
Shut
Down CC
SL1
In
SL1
Out
SL1
In
SL1
Out
Dual Capacity
Envision Unit #1
Envision Unit #2
Dual Capacity
Envision to Envision
Microprocessor Units
Figure 8: Primary/Secondary Hook-up
Flexible Duct
Collar
Vibration Absorbing Pad
P/T Plugs
Drain
Desuperheater
Connections
Auxiliary
Heater
Knockout
Low
Voltage to
Thermostat
Unit Supply
Auxiliary Heat
Supply
Insulated piping
or hose kit
Disconnects
(If Applicable)
Unit Power
P/T
TO
LOOP
GeoLink
®
Flow
Center
GeoLink®
Polyethylene w/
Armaflex®
Insulation
Note: Additional information can be found
inFlowCenterinstallationmanual(IM1961)
andFlushCartmanual(WFS302).

10
ENVISION RESIDENTIAL INSTALLATION MANUAL
Open Loop Ground Water Systems
Typical open loop piping is shown below. Always maintain water pressure in the heat exchanger by placing water control
valves at the outlet of the unit to prevent mineral precipitation. Use a closed, bladder-type expansion tank to minimize
mineralformationduetoairexposure.Insureproperwaterowthroughtheunitbycheckingpressuredropacrosstheheat
exchangerandcomparingittotheguresinunitcapacitydatatablesinthespecicationcatalog.1.5-2GPMofowperton
of cooling capacity is recommended in open loop applications.
Discharge water from the unit is not contaminated in any manner and can be disposed of in various ways, depending
onlocalcodes,i.e.rechargewell,stormsewer,draineld,adjacentstreamorpond,etc.Mostlocalcodesforbidtheuseof
sanitary sewer for disposal. Consult your local building and zoning departments to assure compliance in your area.
Note:Foropenloop/groundwatersystemsorsystemsthatdonotcontainanantifreezesolution,setSW2-Switch#2tothe
“WELL”position.(Refertothetableonpage28.)Slowopening/closingsolenoidvalves(typeVM)arerecommendedtoeliminate
water hammer.
Acc Com
Acc NC
Acc NO
1
2
3
C
R
P1
P3
SV
Solenoid
Valve
CC-GND
CC
CCHI
Comfort
Alert
Y1
Y2
Logic Board
Violet(3)
Blk(1)
Wht(4)
VM valve
Violet(2)
CC
SV
High Speed
Figure 9b: Open Loop Solenoid Valve Connection Option
Typical slow operating external 24V water solenoid valve
(type VM) wiring.
Figure 9a: Open Loop Solenoid Valve Connection Option
Typical quick operating external 24V water solenoid valve
(type PPV100 or BPV100) wiring.
Flexible
Duct Collar
Vibration
Absorbing Pad
P/T Plugs
Drain
Desuperheater
Connections
Auxiliary
Heater
Knockout
Low Voltage
to Thermostat
and Valve
Unit Supply
Aux. Heat Supply
Water Out
Water In
Shut Off Valves
Boiler Drains
For HX Flushing
Disconnects
(IfApplicable)
Rubber Bladder
Expansion Tank
Solenoid
Valve
Shut Off Valves
(to isolate solenoid
valve while acid flushing)
Strainer
Flow Control
Valve
(on outlet of
Solenoid Valve)
Compressor
Line Voltage
Figure 10: Open System - Groundwater Application
Note: SW2-3 should be in the Comp “ON” position.

11
ENVISION RESIDENTIAL INSTALLATION MANUAL
Desuperheater Connections
Tomaximizethebenetsofthedesuperheateraminimum50-gallonwaterheaterisrecommended.Forhigher
demandapplications,usean80-gallonwaterheaterortwo50-gallonwaterheatersconnectedinaseriesasshown
below. Electric water heaters are recommended. Make sure all local electrical and plumbing codes are met for installing
a desuperheater.
Residentialunitswithdesuperheaterscontainaninternalcirculatorandttings.
Note: Under certain conditions, Envision dual capacity units operate with very low refrigerant discharge temperatures,
producing little or no water heating capability. This scenario occurs when the unit is operating with cold entering source
water (loop or well). Allowing the desuperheater pump to operate during these conditions actually removes heat from the
DHW circulating through the unit. To overcome this, Envision unit microprocessors have been programmed to disengage
the desuperheater pump during such conditions. (During low capacity cooling operation, the pump will operate only if
theDHWtemperatureenteringtheunitislessthantheliquidlinetemperatureplus35ºF.Duringhighcapacitycooling
operation,thepumpwilloperateonlyiftheDHWtemperatureislessthantheliquidlinetemperatureplus60ºF.)Using
apreheattank,asshowninFigure12,willmaximizedesuperheatercapabilities.
Figure 11: Typical Desuperheater Installation
CAUTION: Elements will burn out if energized dry.
Figure 12: Desuperheater Installation In Preheat Tank
In
Venting Waste Valve
or Vent Coupling
3/4" x 3/4" x 1/2"
tee
Cold
Water In
Hot
Water Out
P/T Relief
Valve
P/T Relief
Valve
DHW
Water In
DHW
Water Out
Drain ValveDrain Valve
Water Tank Preparation
To install a unit with desuperheater, follow these installation guidelines.
Turn off the power to the water heater.1.
Attach a water hose to the water tank drain connection and run the other end of the hose to an open drain or2.
outdoors.
Close the cold water inlet valve to the water heater tank.3.
Drain the tank by opening the valve on the bottom of the tank, then open the pressure relief valve or hot water4.
faucet.
Flush the tank by opening the cold water inlet valve to the water heater to free the tank of sediments. Close when5.
draining water is clear.
Disconnect the garden hose and remove the drain valve from the water heater.6.
RefertoPlumbingInstallationandDesuperheaterStartuponpage12.7.
Note: Thiscongurationmaximizesdesuperheatercapability.
Drain Valve
In
P/T Relief
Valve
Cold
Water In Hot
Water Out
DHW
Water In
DHW
Water Out
Venting Waste
Valve or Vent
Coupling
3/4 x 3/4 x 1/2 tee

12
ENVISION RESIDENTIAL INSTALLATION MANUAL
Plumbing Installation
1. Inspectthediptubeinthewaterheatercoldinletforacheckvalve.Ifacheckvalveispresentitmustberemoved
or damage to the desuperheater circulator will occur.
2. Removedrainvalveandtting.
3. Threadthe3/4-inchNPTx3-1/2-inchbrassnippleintothewaterheaterdrainport.
4. Attachthecenterportofthe3/4-inchFPTteetotheoppositeendofthebrassnipple.
5. Attachthe1/2-inchcopperto3/4-inchNPTadaptortothesideoftheteeclosesttotheunit.
6. Installthedrainvalveontheteeoppositetheadaptor.
7. RuninterconnectingtubingfromtheteetoDHWwaterout.
8. Cutthecoldwater“IN”linegoingtothewaterheater.
9. Insertthereducingsolderteeinlinewithcoldwater“IN”lineasshown.
10. RuninterconnectingcoppertubingbetweentheunitDHWwater“IN”andthetee(1/2-inchnominal).
Therecommendedmaximumdistanceis50feet.
11. Topreventairentrapmentinthesystem,installaventcouplingatthehighestpointoftheinterconnectinglines.
12. Insulateallexposedsurfacesofbothconnectingwaterlineswith3/8-inchwallclosedcellinsulation.
Note: All plumbing and piping connections must comply with local plumbing codes
.
Desuperheater Startup
1. Closethedrainvalvetothewaterheater.
2. Openthecoldwatersupplytothetank.
3. Open a hot water faucet in the building to bleed air from the system. Close when full.
4. Openthepressurereliefvalvetobleedanyremainingairfromthetank,thenclose.
5. Ifsoequipped,unscrewtheindicatorplug1turnonthemotorendofthepumpuntilallairispurgedfromthepump,
then tighten the plug. Use vent couplings to bleed air from the lines.
6. Carefullyinspectallplumbingforwaterleaksandcorrectasrequired.
7. Beforerestoringelectricalsupplytothewaterheater,adjustthetemperaturesettingonthetank.
• Ontankswithbothupperandlowerelements,thelowerelementshouldbeturneddowntothelowestsetting,
approximately100°F.Theupperelementshouldbeadjustedto120°Fto130°F.Dependinguponthespecic
needs of the customer, you may want to adjust the upper element differently.
• Ontankswithasingleelement,lowerthethermostatsettingto120°F.
8. Afterthethermostat(s)isadjusted,replacetheaccesscoverandrestoreelectricalsupplytothewaterheater.
9. Makesurethatanyvalvesinthedesuperheaterwatercirculatingcircuitareopen.
10. Turnontheunittorststageheating.
11. TheDHWpumpshouldberunning.Whenthepumpisrststarted,opentheinspectionport1turn(ifequipped)until
waterdribblesout,thenreplace.Allowthepumptorunforatleastveminutestoensurethatwaterhaslledthe
circulatorproperly.BesuretheswitchfortheDHWpump(SW4)is“ON”.TheDHW“OFF”LEDontheunitshouldnot
be illuminated.
12. Thetemperaturedifferencebetweenthewaterenteringandleavingthedesuperheatershouldbe5°Fto15°F.The
waterowshouldbeapproximately0.4GPMpertonofnominalcooling.
13. Allowtheunittoheatwaterfor15to20minutestobesureoperationisnormal.
CAUTION: Never operate the DHW circulating pump while dry. If the unit is placed in operation
before the desuperheater piping is connected, be sure that the pump switch is set to the OFF
position.

13
ENVISION RESIDENTIAL INSTALLATION MANUAL
Electrical Connections
General
Be sure the available power is the same voltage and phase as that shown on the unit serial plate. Line and low voltage
wiring must be done in accordance with local codes or the National Electric Code, whichever is applicable.
Unit Power Connection
ConnecttheincominglinevoltagewirestoL1andL2ofthecontactorasshowninFigure13Cforsingle-phaseunit.Consult
theUnitElectricalDataintheSpecicationCatalogforcorrectfusesizes.
Openlowerfrontaccesspanel.Removegroundfastenerfrombottomofcontrolbox(Figure13B).Swingopencontrolbox
(Figure13A).Insertpowerwiresthroughknockoutsonlowerleftsideofcabinet.Routewiresthroughleftsideofcontrolbox
andconnecttocontactorandground(Figure13C).Closecontrolboxandreplacegroundingfastenerbeforeunitstart-up.
Accessory Relay
A set of “dry” contacts has been provided to control accessory devices, such as water solenoid valves on open loop instal-
lations,electronicaircleaners,humidiers,etc.Thisrelaycontactshouldbeusedonlywith24voltsignalsandnotlinevoltage
power. The relay has both normally open and normally closed contacts and can operate with either the fan or the compressor.
UseDIPswitchSW2-3tocycletherelaywithfanorcompressor.Therelaycontactsareavailableonterminals#2and#3of
P3.
208 Volt Operation
AllEnvision208/230unitsarefactorywiredfor230voltoperation.For208voltoperation,theredandbluetransformer
wires must be switched on terminal strip PS.
GroundFastenerWire Insert
Location
Figure 13C:
LineVoltage208-230/60/1controlbox
L1
L2
Figure 13B:
Wire access (control box closed)
Figure 13A:
Wire access (control box open)

14
ENVISION RESIDENTIAL INSTALLATION MANUAL
Auxiliary Heat Ratings
KW BTU/HR Min Envision Series Compatibility
Model 208V 230V Stages 208V 230V CFM 022 026 - 030 036 - 049 060 - 072
EAM(H)5 3.6 4.8 1 12,300 16,300 450 • •
EAM(H)8 5.7 7.6 2 19,400 25,900 550 • •
EAM(H)10 7.2 9.6 2 24,600 32,700 650 •
EAL(H)10 7.2 9.6 2 24,600 32,700 1100 • •
EAL(H)15 10.8 14.4 3 36,900 49,100 1250 • •
EAL(H)15-3 10.8 14.4 3 36,900 49,100 1250 • •
EAL(H)20 14.4 19.2 4 49,200 65,500 1500 •
"H" is used in part number for horizontal units
Electrical Connections (cont.)
Pump Wiring
SeeFigure14forelectricalconnections
from control box to pumps.
Electronic Thermostat
Position the thermostat subbase against the wall so that it is level and the
thermostat wires protrude through the middle of the subbase. Mark the position
ofthesubbasemountingholesanddrillholeswitha3/16-inchbit.Installsupplied
anchorsandsecurebasetothewall.Thermostatwiremustbe8-conductor,18-
AWGwire.Stripthewiresback1/4-inch(longerstriplengthsmaycauseshorts)
and insert the thermostat wires into the connector as shown. Tighten the screws
to insure secure connections. The thermostat has the same type connectors,
requiring the same wiring. See instructions enclosed in the thermostat for detailed
installation and operation information.
Note: DIPswitchSW2-8isrequiredtobeinthe“OFF”positionforthecontrol
tooperatewithFaultFlashorComforTalkthermostats.SW2-8inthe“ON”positionconguresthecontroltooperatewith
typicalthermostats(continuouslockoutsignal).TheremustbeawireconnectingY2onthemicroprocessorcontrollerto2nd
stage compressor on the thermostat for proper operation.
Figure 14: Pump Wiring 208-230/60/1
Figure 15: Thermostat Wiring
R
Y1
C
W
O
G
L
24VAC (Hot)
24VAC (Common)
Compressor (1st Stage)
Aux. Heat
Reversing Valve
Blower Relay
System Monitor
Microprocessor Controller
Thermostat Connection
Y2
Compressor (2nd Stage)

15
ENVISION RESIDENTIAL INSTALLATION MANUAL
Unit Electrical Data
Single speed with ECM motor
HWG Ext Fan Total Min Max
Pump Loop Motor Unit Circ Fuse/
MCC RLA LRA FLA FLA FLA FLA Amp HACR
14.0 9.0 48.0 0.4 5.4 4.0 18.8 21.0 30
20.0 12.8 58.3 0.4 5.4 4.0 22.6 25.8 35
22.0 14.1 73.0 0.4 5.4 4.0 23.9 27.4 40
22.0 14.1 73.0 0.4 5.4 7.0 26.9 30.4 40
26.0 16.6 79.0 0.4 5.4 4.0 26.4 30.6 45
26.0 16.6 79.0 0.4 5.4 7.0 29.4 33.6 50
31.0 19.8 109.0 0.4 5.4 4.0 29.6 34.6 50
31.0 19.8 109.0 0.4 5.4 7.0 32.6 37.6 50
41.2 26.4 134.0 0.4 5.4 7.0 39.2 45.8 70
47.0 30.1 158.0 0.4 5.4 7.0 42.9 50.4 80
Single speed with PSC Motor
*With optional over-sized blower 2/20/07
Dual Capacity
HWG Ext Fan Total Min Max
Pump Loop Motor Unit Circ Fuse/
MCC RLA LRA FLA FLA FLA FLA Amp HACR
16.0 10.2 52.0 0.4 5.4 4.0 20.0 22.6 30
26.0 16.6 82.0 0.4 5.4 4.0 26.4 30.6 45
26.0 16.6 82.0 0.4 5.4 7.0 29.4 33.6 50
33.0 21.1 96.0 0.4 5.4 4.0 30.9 36.2 50
33.0 21.1 96.0 0.4 5.4 7.0 33.9 39.2 60
40.0 25.6 118.0 0.4 5.4 7.0 38.4 44.8 70
42.5 27.2 150.0 0.4 5.4 7.0 40.0 46.8 70
5/30/06
Model Voltage
MIN/MAX
Compressor
*With optional 1 HP ECM2 motor
208-230/60/1 197/253
NOTE: HACR circuit breaker in USA only. All fuses Class RK-5
*With optional 1 HP ECM2 motor
Model Rated
Voltage
Rated
Voltage
Voltage
MIN/MAX
208-230/60/1 197/253
Compressor
Rated Voltage Compressor HWG Ext Fan Total Min Max
Model Voltage Min/Max Pump Loop Motor Unit Circ Fuse/
MCC RLA LRA FLA FLA FLA FLA Amp HACR
14.0 9.0 48.0 0.4 5.4 1.2 16.0 18.2 25
14.0 9.0 48.0 0.4 5.4 1.5 16.3 18.5 25
20.0 12.8 58.3 0.4 5.4 1.5 20.1 23.3 35
20.0 12.8 58.3 0.4 5.4 2.2 20.8 24.0 35
22.0 14.1 73.0 0.4 5.4 2.8 22.7 26.2 40
22.0 14.1 73.0 0.4 5.4 3.5 23.4 26.9 40
26.0 16.6 79.0 0.4 5.4 3.5 25.9 30.1 45
26.0 16.6 79.0 0.4 5.4 4.6 27.0 31.2 45
31.0 19.8 109.0 0.4 5.4 3.5 29.1 34.1 50
31.0 19.8 109.0 0.4 5.4 4.6 30.2 35.2 50
41.2 26.4 134.0 0.4 5.4 5.9 38.1 44.7 70
47.0 30.1 158.0 0.4 5.4 5.9 41.8 49.3 70
208-230/60/1 197/253
022
022*
030
030*
036
036*
042
042*
048
048*
060
070
022
030
036
036*
042
042*
048
048*
060
070
026
038
038*
049
049*
064
072

16
ENVISION RESIDENTIAL INSTALLATION MANUAL
Setting Fan Speed - PSC
CAUTION: Disconnect all power before
performing this operation.
Fan Performance Data - PSC
PSC FAN MOTOR BODY
HIGH LOWMEDIUM
F
A
N
S
P
E
E
D
W
I
R
E
Standard PSC Motor
Fan Blower Motor Airflow (cfm) at External Static Pressure (in. wg)
Model Spd Size HP 0 0.05 0.10 0.15 0.20 0.25 0.30 0.35 0.40 0.45 0.50 0.60 0.70 0.80 0.90 1.00
H1110 1095 1080 1065 1045 1020 995 970 945 915 880 810 - - - -
M9 x 7 1/5 850 845 835 825 815 805 795 775 755 735 715 - - - - -
L 750 745 740 735 725 715 700 685 670 650 630 - - - - -
H 1290 1270 1245 1220 1190 1160 1125 1090 1055 1020 985 880 760 - - -
M9 x 7 1/3 1100 1090 1075 1060 1045 1020 995 970 940 910 875 785 625 - - -
L 910 905 900 895 885 875 865 850 835 810 780 710 560 - - -
H 1665 1640 1610 1580 1550 1515 1480 1450 1415 1315 1215 1090 980 - - -
M9 x 7 1/2 1465 1445 1425 1400 1375 1350 1325 1260 1190 1140 1090 990 890 - - -
L 1130 1115 1100 1090 1075 1035 995 965 930 895 860 795 730 - - -
H 2010 1975 1940 1905 1870 1825 1780 1735 1690 1640 1590 1470 1210 - - -
M10 x 10 1/2 1670 1650 1630 1610 1590 1560 1530 1495 1460 1425 1390 1190 1080 - - -
L 1220 1215 1210 1295 1200 1180 1160 1130 1100 1060 1020 930 - - - -
H 2010 1975 1940 1905 1870 1825 1780 1735 1690 1640 1590 1470 1210 - -
M10 x 10 1/2 1670 1650 1630 1610 1590 1560 1530 1495 1460 1425 1390 1190 1080 - - -
L 1220 1215 1210 1295 1200 1180 1160 1130 1100 1060 1020 930 - - - -
H 2430 2400 2365 2330 2290 2255 2215 2180 2140 2095 2045 1945 1835 1715 1510 1330
M11 x 10 1 2265 2235 2205 2175 2145 2110 2070 2035 2000 1960 1915 1825 1730 1605 1440 1260
L 2075 2050 2020 1995 1965 1940 1915 1885 1850 1820 1785 1720 1610 1505 1335 1175
H 2430 2400 2365 2330 2290 2255 2215 2180 2140 2095 2045 1945 1835 1715 1510 1330
M11 x 10 1 2265 2235 2205 2175 2145 2110 2070 2035 2000 1960 1915 1825 1730 1605 1440 1260
L 2075 2050 2020 1995 1965 1940 1915 1885 1850 1820 1785 1720 1610 1505 1335 1175
Optional High Static PSC Motor
Fan Blower Motor Airflow (cfm) at External Static Pressure (in. wg)
Model Spd Size HP 0 0.05 0.10 0.15 0.20 0.25 0.30 0.35 0.40 0.45 0.50 0.60 0.70 0.80 0.90 1.00
H 1290 1270 1245 1220 1190 1160 1125 1090 1055 1020 985 880 760 - - -
M9 x 7 1/3 1100 1090 1075 1060 1045 1020 995 970 940 910 875 785 625 - - -
L 910 905 900 895 885 875 865 850 835 810 780 710 560 - - -
H 1365 1340 1325 1305 1280 1250 1215 1180 1140 1100 1055 960 850 - - -
M9 x 7 1/2 1040 1040 1035 1030 1020 1005 990 970 945 915 885 810 735 - - -
L 880 880 880 880 875 870 860 840 820 800 775 730 480 - - -
H 1930 1905 1875 1840 1805 1765 1725 1680 1635 1530 1425 1270 1150 1025 - -
M9 x 7 1/2 1635 1620 1600 1580 1555 1530 1505 1465 1425 1335 1240 1135 1035 775 - -
L 1230 1230 1225 1215 1200 1165 1130 1095 1060 1035 1005 935 795 675 - -
H 2115 2075 2035 1980 1920 1900 1880 1840 1795 1730 1660 1390 1225 1070
1070
- -
M10 x 10 3/4 2005 1980 1950 1910 1865 1815 1765 1725 1685 1585 1485 1315 1140 1025 - -
L 1860 1835 1805 1780 1750 1715 1675 1635 1590 1540 1490 1260 1115 980 - -
H 2115 2075 2035 1980 1920 1900 1880 1840 1795 1730 1660 1390 1225 - -
M10 x 10 3/4 2005 1980 1950 1910 1865 1815 1765 1725 1685 1585 1485 1315 1140 1025 - -
L 1860 1835 1805 1780 1750 1715 1675 1635 1590 1540 1490 1260 1115 980 - -
Factory settings are in Bold
High-Static option not available for 060 and 070
Air flow values are with dry coil and standard filter
For wet coil performance first calculate the face velocity of the air coil (Face Velocity [fpm] = Airflow [cfm] / Face Area [sq ft]).
Then for velocities of 200 fpm reduce the static capability by 0.03 in. wg, 300 fpm by 0.08 in. wg, 400 fpm by 0.12in. wg.
and 500 fpm by 0.16 in. wg.
022
030
036
042
048
060
070
022
030
036
042
048
Standard PSC Motor
Optional High Static PSC Motor

17
ENVISION RESIDENTIAL INSTALLATION MANUAL
Setting Fan Speed - ECM
ECM2fanmotorshavea12-speedselectordipswitchonthelogicboard(SW1)andarefactorysetforoptimumperfor-
mance.Tochangespeeds,selecttheappropriatespeedsondipswitchSW1.ConsulttheECM2fanperformancetable
belowforspecicairowandswitchinformation.
CAUTION: Disconnect all power before performing this operation.
Fan Performance Data - ECM
ECM2
1
2
3
4
5
6
7
8
9
10
11
12
SW1
OnOff
A12-positionDIPswitchpackageonthecontrolallowstheairowlevelstobesetforlow,medium,andhigh
speedwhenusingtheECM2blowermotor.OnlythreeoftheDIPswitchescanbeinthe"on"position.
Therst"on"switch(thelowestpositionnumber)determinesthelowspeedfansetting.•
Thesecond"on"switchdeterminesthemediumspeedfansetting.•
Thethird"on"switchdeterminesthehighspeedfansetting.•
TheexampletotherightshowsSW1onthecontrolboardconguredforthefollowingNS042airowsettings.
LowSpeedFan:900CFM•
MediumSpeedFan:1150CFM•
HighSpeedFan:1450CFM•
Single Speed
Dual Capacity
MAX AIR FLOW DIP SWITCH SETTINGS
ESP 1 2 3 4 5 6 7 8 9 10 11 12
400 500 600 700 800 900 1000 1100 1200
LMH
400 500 600 700 800 900 1000 1100 1200
LMH
650 750 850 1000 1100 1200 1300 1400 1500
LM H
036 800 1000 1100 1300 1500 1600 1800
w/1hp* LM H
650 800 900 1050 1150 1250 1350 1450 1550
LM H
042 800 900 1000 1200 1400 1600 1700 1850 2000 2200 2300 2400
w/1hp* LMH
650 800 900 1050 1150 1250 1350 1450 1550
LM H
048 800 900 1000 1200 1400 1600 1700 1850 2000 2200 2300 2400
w/1hp* LM H
800 950 1100 1300 1500 1750 1950 2100 2300
LM H
800 950 1100 1300 1500 1750 1950 2100 2300
LM H
5/30/06
Factory settings are at recommended L-M-H DIP switch locations CFM is controlled within ±5% up to the maximum ESP
M-H settings MUST be located within boldface CFM range Max ESP includes allowance for wet coil and standard filter
Lowest and Highest DIP switch settings are assumed to be L and H respectively
MAX AIR FLOW DIP SWITCH SETTINGS
ESP 1 2 3 4 5 6 7 8 9 10 11 12
400 500 600 700 800 900 1000 1100 1200
LMH
650 750 850 1000 1100 1200 1300 1400 1500
LM H
038 800 1000 1100 1300 1500 1600 1800
w/1hp* LM H
650 800 900 1050 1150 1250 1350 1450 1550
LM H
049 800 900 1000 1200 1400 1600 1700 1850 2000 2200 2300 2400
w/1hp* LM H
800 950 1100 1300 1500 1750 1950 2100 2300
LMH
800 950 1100 1300 1500 1750 1950 2100 2300
LM H
5/30/06
Factory settings are at recommended L-M-H DIP switch locations CFM is controlled within ±5% up to the maximum ESP
M-H settings MUST be located within boldface CFM range Max ESP includes allowance for wet coil and standard filter
Lowest and Highest DIP switch settings are assumed to be L and H respectively
MODEL
022 0.50
026 0.50
0.75
030 0.50
036 0.50
0.75
042 0.50
0.75
048 0.50
MODEL
070 0.75
060 0.75
049 0.50
0.75
038 0.50
0.75
072 0.75
064 0.75

18
ENVISION RESIDENTIAL INSTALLATION MANUAL
Vertical Dimensional Data
Top Air Discharge
LEFT RETURN RIGHT RETURN
ENVISION DIMENSIONAL DATA V1-V4
FRONT
TOP
2ft [61cm]
Primary Service Access
TOP
ADEHFKJIG
1.9in
[4.8cm]
1.9in
[4.8cm]
M
R
Q
N
O
L
R
N
O
L
PQ
RIGHT SIDE
B
C
B
LEFT SIDE
S
T
S
T
C
Overall Cabinet Water ConnectionsElectrical Knockouts Return Connection
Vertical IJKusing std deluxe filter rack (±0.10 in)
Models ABCDEFGH
Loop 1/2" cond 1/2" cond 3/4" cond LMNOPQRST
Width Depth Height* In OutHWG In HWG
Out
Cond-
ensate Water FPTHWG FPT Low
Voltage Ext Pump Power
Supply
Supply
Width
Supply
Depth
Return
Depth
Return
Height
022-030 in. 22.5 26.5 48.5 2.0 7.0 13.5 16.5 10.2 1" Swivel 1" Swivel 8.5 10.4 11.8 6.1 0.8 14.0 14.0 4.4 1.7 22.2 26.0 1.7
cm. 57.2 67.2 123.2 5.0 17.7 34.2 41.8 26.0 21.6 26.4 29.8 15.5 2.1 35.6 35.6 11.1 4.2 56.3 66.0 4.4
036-038 in. 25.6 31.6 50.4 2.3 7.3 15.9 18.9 10.6 1" Swivel 1" Swivel 8.0 11.3 12.8 6.9 1.1 18.0 18.0 3.8 1.7 28.1 26.0 1.7
cm. 65.0 80.2 128.0 5.7 18.4 40.3 47.9 26.8 20.3 28.6 32.4 17.5 2.8 45.7 45.7 9.6 4.4 71.2 66.0 4.3
042-049 in. 25.6 31.6 54.4 2.3 7.3 15.9 18.9 10.6 1" Swivel 1" Swivel 8.0 11.3 12.8 6.9 1.1 18.0 18.0 3.8 1.7 28.1 30.0 1.7
cm. 65.0 80.2 138.2 5.7 18.4 40.3 47.9 26.8 20.3 28.6 32.4 17.5 2.8 45.7 45.7 9.6 4.4 71.2 76.2 4.3
060-072 in. 25.6 31.6 58.4 2.3 7.3 15.9 18.9 10.6 1" Swivel 1" Swivel 8.0 11.3 12.8 6.9 1.1 18.0 18.0 3.8 1.7 28.1 34.0 1.7
cm. 65.0 80.2 148.3 5.7 18.4 40.3 47.9 26.8 20.3 28.6 32.4 17.5 2.8 45.7 45.7 9.6 4.4 71.2 86.4 4.3
Rev.: 07/19/06 B
Vertical unit shipped with deluxe 2" (field adjustable to 1") duct collar/filter rack extending from unit 3.25" and is suitable for duct connection.
Discharge flange is field installed and extends 1" [25.4 mm] from cabinet
Decorative molding and water connections extend 1.2" [30.5mm] beyond front of cabinet.
Discharge Connection
duct flange installed (±0.10 in)
Condensate is 3/4" PVC female glue socket and is switchable from side to front

19
ENVISION RESIDENTIAL INSTALLATION MANUAL
Horizontal Dimensional Data
2ft [61cm]
Primary Service Access
B
C
2.1in [5.4cm]
H
L
O
N
M
S
R
QP
MOUNT (2) HANGER BRACKETS
AS SHOWN TO ALLOW ACCESS
TO FILTER
AS SHOWN LR UNIT (RR UNIT ON OPPOSITE SIDE—SAME DIMENSIONS)
SIDE DISHCARGE VIEW END VIEW
TOP VIEW
A
S
FRONT VIEW
DEFG
KJI
1.9in
[4.8cm]
O
L
Overall Cabinet Water Connections Electrical Knockouts Return Connection
Horizontal
DEFGH
IJKusing std deluxe filter rack (±0.10 in)
Models ABCLoop 1/2" cond 1/2" cond 3/4" cond LMNOPQRS
Width Depth Height* In Out HWG In HWG
Out
Cond-
ensate Water FPT HWG FPT Low
Voltage Ext Pump Power
Supply
Supply
Height
Supply
Depth
Return
Depth
Return
Height
022-030 in. 22.5 63.0 19.3 2.0 7.0 13.5 16.5 0.8 1" Swivel 1" Swivel 8.89.4 11 .8 2.3 10.5 9.4 5.8 2.8 30.516.9 1.3
cm. 57.2 160.0 49.0 5.0 17.7 34.2 41.8 2.1 22.2 24.0 30.05.8 26.5 23.8 14.7 7.0 77.342.9 3.3
036-038 in. 25.6 72.0 21.3 2.3 7.3 15.9 18.9 0.8 1" Swivel 1" Swivel 8.89.4 11 .8 SEE
CHART
SEE
CHART
SEE
CHART
SEE
CHART
SEE
CHART
SEE
CHART
13.6 13.2 2.8 35.518.9 1.3
cm. 65.0 182.9 54.1 5.7 18.4 40.3 47.9 2.1 22.2 24.0 30.0 34.6 33.5 7.0 90.047.9 3.3
042-049 in. 25.6 77.0 21.3 2.3 7.3 15.9 18.9 0.8 1" Swivel 1" Swivel 8.89.4 11 .8 13.6 13.2 2.8 40.418.9 1.3
cm. 65.0 195.6 54.1 5.7 18.4 40.3 47.9 2.1 22.2 24.0 30.0 34.6 33.5 7.0 102.5 47.9 3.3
060-072 in. 25.6 82.0 21.3 2.3 7.3 15.9 18.9 0.8 1" Swivel 1" Swivel 8.89.4 11 .8 13.6 13.2 2.8 45.418.9 1.3
cm. 65.0 208.3 54.1 5.7 18.4 40.3 47.9 2.1 22.2 24.0 30.0 34.6 33.5 7.0 115.2 47.9 3.3
Rev.: 07/18/06 B
Discharge Connection
duct flange installed (±0.10 in)
Condensate is 3/4" PVC female glue socket and is switchable from side to front
Horizontal unit shipped with deluxe 2" (field adjustable to 1") duct collar/filter rack extending from unit 2.88" and is suitable for duct connection.
Discharge flange is field installed and extends 1" [25.4 mm] from cabinet
Decorative molding and water connections extend 1.2" [30.5mm] beyond front of cabinet.
LUnits Not Shown Above O
in. 2.8 4.6
cm. 7.1 11 .8
in. 4.9 6.9
cm. 12.4 17.5
in. 4.9 7.6
cm. 12.4 19.4
in. 2.8 6.9
cm. 7.1 17.5
Right Return End Discharge
Right Return Side Discharge
Left Return End Discharge
Left Return Side Discharge

20
ENVISION RESIDENTIAL INSTALLATION MANUAL
Vertical Dimensional Data
2ft [61cm]
Primary Service Access
LEFT SIDE RIGHT SIDE
B
C
S
T
B
C
S
T
LEFT RETURN RIGHT RETURN
R Q
LN
OP
A
FRONT
D
E
FG
H
I
J
K
1.90
(4.7 cm)
1.70
(4.3 cm)
1
2
3
4
5
RIGHT BOTTOM DISCHARGE
FLOOR FOOT PRINT
R
O
N
L
M
LEFT BOTTOM DISCHARGE
FLOORFOOT PRINT
Q
Return Connection
Bottomflow KJI54321
using std delux e filter rack (±0.10 in)
Models A B C D E F G H Loop1/2" cond 1/2" cond 3/4" condL M N O P Q R S T
Width Depth Height In Out HWG In HWG Out Condensate Water FPT HWG
FPT
Low
Voltage Ext Pump Power
Supply
Supply
Width
Supply
Depth
Return
Depth
Return
Height
022-030.66.81.546.349.146.37.947.642.043.535.255.625.22.ni 0 9.3 10.5 1.0 2.2 22.2 26.0 5.6
4117.0114.6011.92.6216.8111.2017.984.3313.762.75.mc .6 21.8 15.2 23.6 26.7 2.5 5.6 56.4 66.0 14.2
036-072.41.92.258.059.846.30.060.754.844.345.265.135.52.ni 8 13.4 13.6 1.5 1.8 28.1 34.0 5.6
310.9212.4211.94.2518.4419.2212.0118.8510.088.46.mc 2.6 23.1 12.2 34.0 34.5 3.8 4.6 71.4 86.4 14.2
Condensate is 3/4" PVC female glue socket and is switchable from side to front Rev .: 09/27/07
Vertical bottomflow unit shipped with deluxe 2" (field adjustable to 1") duct collar/filter rack extending from unit 3.25" and is suitable for duct connection.
Decorative molding and water connections extend 1.2" (30.5mm) beyond front of cabinet.
1" Swivel
1" Swivel 1" Swivel
1" Swivel
duct flange installed (±0.10 in)
snoitcennoCretaWtenibaCllarevO Electrical Knockouts Discharge Connection
Bottomow
Other manuals for R-410A Residential
3
Table of contents
Other Envision Heat Pump manuals
Popular Heat Pump manuals by other brands

Nobel
Nobel R290 Installation, maintenance & use instructions
York
York LX series Technical guide
iDM
iDM AERO ILM 2-7 Technical documentation installation instructions
Carrier
Carrier 50TCQD14 installation instructions

Daikin
Daikin Urusara 7 FTXZ-N Series engineering data
Goodman
Goodman DSX18 Technical manual

Goodman
Goodman GPH1524M41 installation guide

Ideal Heating
Ideal Heating ECOMOD AHP60 26 kW Installation and servicing

NDE Pool
NDE Pool MASTER PLUS NDE-08-DCP User and service manual
Mitsubishi Electric
Mitsubishi Electric PUZ-WM AA Series installation manual
Johnson Controls
Johnson Controls BUQ024 installation manual
Luxaire
Luxaire FHP180 installation manual

