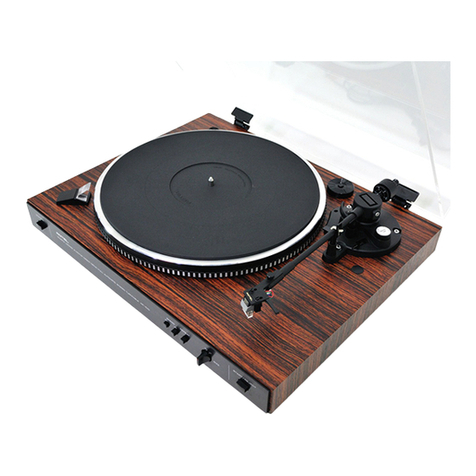
envivo 1547 User manual

User Manual
Wooden Turntable
10/2018 87488


3
CONTENTS
INTRODUCTION ......................................................................................................................................................................................4
GENERAL INFORMATION AND SAFETY INSTRUCTIONS.........................................................................................................4
Warning....................................................................................................................................................................................................4
CONTENT ...................................................................................................................................................................................................5
TURNTABLE OVERVIEW........................................................................................................................................................................6
Front side.................................................................................................................................................................................................7
Rear side .................................................................................................................................................................................................7
GETTING STARTED ................................................................................................................................................................................8
Fitting the dust cover..........................................................................................................................................................................8
Power........................................................................................................................................................................................................8
RCA out ....................................................................................................................................................................................................8
Headphone connection.....................................................................................................................................................................9
AUX in.......................................................................................................................................................................................................9
USB CONNECTION TO INSTALL SOFTWARE TO PC............................................................................................................. 10
PLAYING A RECORD ........................................................................................................................................................................... 10
MAINTENANCE .................................................................................................................................................................................... 11
Replacing the cartridge ................................................................................................................................................................. 11
Replacing the stylus ......................................................................................................................................................................... 11
When transporting your record player do not forget to: ................................................................................................... 12
AUDACITY QUICK GUIDE.................................................................................................................................................................. 12
Installing Software............................................................................................................................................................................ 12
Software Configuration................................................................................................................................................................... 12
Setting recording sound level ...................................................................................................................................................... 13
Windows............................................................................................................................................................................................... 13
Making a recording........................................................................................................................................................................... 14
Editing your recording .................................................................................................................................................................... 14
Audio Levels........................................................................................................................................................................................ 14
Noise Reduction ................................................................................................................................................................................ 16
Toolbars................................................................................................................................................................................................. 17
Audio Control Buttons..................................................................................................................................................................... 17
Edit Toolbar.......................................................................................................................................................................................... 18
Saving a project ................................................................................................................................................................................. 19
Save project......................................................................................................................................................................................... 19
Save project as .................................................................................................................................................................................. 20
Export as WAV.................................................................................................................................................................................... 20
Export as MP3 .................................................................................................................................................................................... 20
Export as Ogg Vobis ........................................................................................................................................................................ 20
TIPS FOR BETTER TURNTABLE PERFORMANCE....................................................................................................................... 21
FAQ ............................................................................................................................................................................................................ 21
SYMBOL EXPLANATION.................................................................................................................................................................... 22
DISPOSAL................................................................................................................................................................................................ 22
WARRANTY CARD................................................................................................................................................................................ 24

4
INTRODUCTION
This Turntable makes digitizing vinyl records a breeze. Convert vinyl records into digital
format in a few minutes to your PC.
GENERAL INFORMATION AND SAFETY INSTRUCTIONS
Read all safety information below and operating instruction before using this USB
Turntable Converter to avoid any damages to your device.
Warning
The symbol is intended to alert the user to the presence of important
operating and maintenance (servicing) instructions in the literature
accompanying the appliance
The symbol is intended to alert the user to the presence of uninsulated
”dangerous voltage”within the products enclosure that may be sufficient
magnitude to constitute a risk of electric shock to persons.
Any changes or modifications to the construction of this product, which are not
expressly approved by the person responsible for compliance, could void the warranty.
1. Do not drop, disassemble, open, crush, bend, deform, puncture, shred, microwave,
incinerate, paint, or insert foreign objects into this device.
2. Do not expose the Turntable to moisture or submerge it in liquid.
Keep it dry at all times.
3. The charger and product are not intended for use by persons (including children) with
reduced physical, sensory or mental capabilities, or lack of experience and knowledge,
unless they have been given supervision or instruction concerning use of the
appliance by a person responsible for their safety.
4. Never operate the equipment if it has a damaged core, a damaged plug, or if it has
been damaged by or exposed to water.
5. Check that all used mains sockets are always accessible so that the power supply
can be quickly interrupted if necessary. The device can be disconnected from the
mains by pulling out the plug from the main socket.

5
CONTENT
Turntable with dust cover
RCA cable
Turntable mat
Power Adapter
+ power cable
CD software
Manual
USB converting cable
45 RPM Adapter
Warranty Card

6
TURNTABLE OVERVIEW
1. 45 RPM Adapter Holder – Place the included 45 RPM adapter here when not in use.
2. Lift lever – Use this lever to raise or lower the tone arm.
3. Auto Stop on/off control- control the Auto stop function of the platter.
4. 33.3 / 45/ 78 RPM Switch – This switch controls the RPM of the turntable platter.
5. Tone arm – The turntable comes with a ready-to-use pre-balanced tone arm and
cartridge. The tone arm can be raised and lowered by hand, or by using the raise /
lower lever. Please note that the tone arm needs to be moved away from resting
position (on the arm clip) for the turntable motor to activate if auto stop is activated.
6. Cartridge & protector – Please remove the plastic cartridge protector before
placing the cartridge on a record by sliding it forward.
7. Platter – Place your record here. Please use the 45 RPM adapter, if the spindle is
the incorrect size.
8. Speakers – 2 built-in speakers.

7
Front side
Rear side
9. Headphone jack 3.5mm Audio out. Connect your headphone (not included) to
listen to your vinyl.
10. Power & volume control knob – Rotate the knob to power ON/OFF the turntable
and adjust the volume of the built-in speakers.
11. Power light. Lights red when power is on.
12. USB port – connect to PC for converting music to PC
13. Aux input. You can connect your smartphone, tablet or other audio device using a
3.5mm Audio cable. Use it to play music through the turntable speakers from your
connected device or to record the sound from you connected device.
14. Left and Right RCA channel.
15. DC power port.

8
GETTING STARTED
Fitting the dust cover
Refer to the diagram below to attach the plastic dust cover.
Note: Take care when fitting, do not press down too hard. Remove the dust cover in the
same manner but pull the cover upwards. Take extra care when removing the cover so
you do not break the pins holding the cover in place.
Power
Insert the included power cable into the included power adapter. Insert the cable into
the Turntable and the power adapter into a power plug.
RCA out
The Turntable can be connected, using the included RCA cable, to the amplifier or
speakers through RCA sockets at the back.
• Red plug into right channel input
• White plug into left channel input

9
Headphone connection
Insert the headphones into the headphone jack 3.5mm output port to enjoy music
through your headphones.
AUX in
Connect a smartphone, tablet or other audio device using a 3.5mm audio cable. Play or
record sound from you connect audio device through the turntable.

10
USB CONNECTION – TO INSTALL SOFTWARE TO PC
1. Insert the included CD into your PC CD player.
2. Run the file “audacity.exe”to install the Audacity software.
3. Once installed, run the Audacity program.
4. Plug your turntable to an AC outlet and connect the USB port on the turntable to
the USB port of your computer using the included USB cable.
5. Turn on the power switch on your turntable and open the Audacity program that
you have installed.
6. You are now ready to record vinyl records to your PC.
Note: For more detailed installation, setup and use instructions please see the Audacity
Quick guide section.
PLAYING A RECORD
1. Open the dust cover on the turntable.
2. Place the record of your choice on the turntable. If it is a 45 RPM record, place the 45
RPM adapter on the record spindle before placing the record.
3. Select the speed of record: 33.3, 45 or 78 RPM according to vinyl to be played.
4. Turn on the turntable by rotating the POWER/VOL knob.
5. Flick the AUTO STOP switch to the desired function ON or OFF. When the switch is at the
ON position the turntable will automatically stop once the record is finished. When it
is at the OFF position it will not stop automatically, this can help to play long-recorded
vinyl’s that cannot be played to the end when AUTO STOP is set to ON.
6. Remove the stylus protection.
7. Release the tone arm lock and lift the tone arm. You can use the lift lever to raise and
lower the tone arm.
8. Place the cartridge gently on the record, and the record will be played.
9. Rotate the POWER/VOL knob to set desired sound level.
10. When records comes to the end, record will stop automatically if the AUTO STOP knob
is set to ON.
Note: If the Auto Stop knob is set to OFF, the record will rotate all the way when
finished. Don’t leave the turntable unattended when Auto Stop is set to the OFF
position as the record, with the needle on it, will continue to rotate until manually
stopped.
After playing a record please do the following
- Lift up the tone arm and put it in the rest position.
- Place the protective cap on the stylus and close the tone arm lock.
- Turn off the power.

11
MAINTENANCE
Replacing the cartridge
- Refer to the figures 1-8
Push the arm lock to
release the tone-arm.
Remove the plastic cap
to access the stylus.
Separate the cartridge
from the socket lightly.
Take off the audio-line
from the cartridge.
To fit a new cartridge, carry out the actions in reverse: Insert the audio line accordingly
and gently install the cartridge.
Replacing the stylus
- Refer to the figures 1-7
Push the arm lock to
release the tone-arm.
Remove the plastic cap
to access the stylus.
Separate the cartridge
from the socket lightly.
Take off the audio-line
from the cartridge.
To fit a new stylus, carry out the actions in reverse: Mount the new stylus on the
cartridge and gently install the cartridge.
NOTES
• We advise you to clean your records with an anti-static cloth to gain maximum

12
enjoyment from them and to ensure they last.
• We would also point out that for the same reason your stylus should be replaced
periodically (approximately every 250 hours)
• Dust the stylus from time to time using a very soft brush dipped in alcohol
(brushing the tone arm head from back to front).
• If the sound is bad or the music jumps, then try and carefully bend the stylus head
down to make sure it has full contact with the LP.
When transporting your record player do not forget to:
• Put the protective cap on the stylus.
• Lock the tone arm using the tone arm lock.
AUDACITY QUICK GUIDE
For the complete and latest manual, as well as the latest version of software, go to the
following website: https://www.audacityteam.org/
Click on help and documentation to obtain the manual.
Before recording and editing the music, please install the supplied Software or the
latest version from the website.
Please note: The appearance and functionality of the software may be altered through
the various versions available from the website. This manual was correct as of Audacity
version 1.2.6.
Installing Software
1. Insert the enclosed software CD.
2. Your computer will auto-run the program. Follow the instructions to complete the
installation. If your computer does not auto run, select “File Explorer”, choose the
CD located on your computer and run “Setup.exe”.
3. Run the Audacity program. Double-click on the Audacity program and the
Audacity interface window should be displayed on your computer screen.
Software Configuration
1. Select the “Edit” menu and then “Preferences”.
2. Select the “Microsoft Sound Mapper - Input” under the “Recording”selection.
3. Click the “Software Playthrough” checkbox to hear the audio while recording
4. Click the OK button to save settings.

13
5. Adjust the output and input volume in Audacity.
Note: The turntable may show up with a different name in Windows. This may depend
on your computer model and operating system. In this situation the best option is to
choose each different option until you find the correct one.
Setting recording sound level
It is VERY important that the sound levels are set correctly in Windows, otherwise the
sound recorded through Audacity will be disorted or very low.
Windows XP
Click the start menu, go to control panel, select sounds and sound levels, select sound
units. Under Sound recording, click volume.
Set the volume very low, e.g 2 or 3 to begin with, start playback of a record and adjust
the sound level so that the sound is not distorted.

14
Windows Vista
Click the start bubble, go to control panel, select hardware and sound, select sound,
select recording, select the turntable input, normally USB PnP Audio Device and click
on properties Click on levels
Set the volume very low, e.g. 2 or 3 to begin with, start playback of a record and adjust
the sound level so that the sound is not distorted.
Windows 7
Click the start bubble, go to control panel, select hardware and sound, select Sound,
select recording, select the turntable input, normally Microphone, 2 USB PnP Audio
Device and click on properties. Click on levels, set the volume very low, e.g. 2 or 3 to
begin with, start playback of a record and adjust the sound level so that the sound is
not distorted. If no sound is heard when the playback is started, please click on listen,
select listen to this unit, select apply and try again.
Windows 10
Click on the start bubble, search for Control Panel and select it. Select sound, select
recoding, select the turntable input (normally USB Microphone) and click properties.
Click on levels, start on a low volume to begin with, start playback of record and adjust
level so that the sound is not distorted. If no sound is heard when the playback is
started, please click on listen, select listen to this unit, select apply and try again.
After you complete the above settings, you are ready to start recording.
Making a recording
1. With the software installed, you can record vinyl records to your PC.
2. Plug in your turntable to an AC outlet and connect the USB port on the turntable
to an USB port on your computer.
3. Power on your turntable (power on the turntable before starting up Audacity
software).
4. Open the Audacity program.
5. Press the record button on the toolbar to start recording while your record is
playing.
6. You will see the waveform of the audio on the screen as it is recording. You will
hear the audio coming from the output of your computers soundcard. (Make
sure Software Playthrough is selected in the settings. Please see chapter Software
Configuration)
7. Press the stop button on the toolbar to stop recording.
Editing your recording
Audio Levels
Select your entire recording by selecting “Edit,”then “Select…”then click “All.”

15
Select the “Effect”menu and choose the desired effect. There are various types of
effects which are described further on Audacity’s website.
Selecting “Normalize”can be used to enable Audacity to auto-correct the volume on
the recording.

16
Noise Reduction
Drag your cursor over a portion of the audio track that contains unwanted noise. We
recommend using the beginning or end of a track where there is no music and only noise.
- Select “Effect”and then “Noise Removal” from the drop down menu to bring up the
“Noise Removal Window”.
- Click “Get Noise Profile”and the window will close automatically.
- Select the entire track of audio you wish to remove noise from (Edit -> Select… -> All).
- Open up the Noise Removal window again (Effect -> Noise Removal..).
- Adjust the amount of audio that you would like to filter by moving the slider in the
“Noise Removal” window. We recommend using the minimum noise removal for
optimum sound.
Note: You can preview the audio before removing the noise by clicking on ‘Preview’.
- Click on ‘Remove Noise’.

17
Toolbars
Selection tool – used for selecting a range of audio you want to edit or listen to.
Envelope tool – used for charging the volume over time.
Draw tool – used for modifying individual samples.
Zoom tool – used for zooming in and out.
Timeshift tool – used for sliding tracks left and right.
Multi tool – please see the manual for further instructions.
Audio Control Buttons
Skip to Start – moves the cursor to the start of the project. If you press Play,
your project will play from the beginning.
Play – starts playing audio at the cursor position. If a part of the project is
selected, only the selection is played.
Loop – if you hold down the Shift key, the Play button changes to a Loop
button, which lets you keep playing the selection.
Record – starts recording.
Pause – temporarily stops recording or playback until you press pause again.
Stop – stops recording or playback. You must do this before applying any
effects, saving exporting.
Skip to End – moves the cursor to the end of the last track.

18
Edit Toolbar
Cut – removes selected audio data and places it on the clipboard.
Copy – copies the selected audio data to the clipboard without removing it from
the track.
Paste – pastes whatever is in the clipboard into the track at the position of the
selection cursor.
Trim - the audio outside the selection will be deleted.
Silence – replaces the current selection with silence instead of removing it
completely.
Undo – undo the last editing operation performed.
Redo – redo any editing operations that were just undone.
Zoom in – zooms in on displayed tracks displaying less time and giving a more
detailed view of the track.
Zoom out – zooms out displaying more time and a less detailed view of tracks.
Fit selection – fits selected audio into the width of the screen to show the selection
in more detail.
Fit project – shows entire project on one screen.
Before editing, you must make a selection of the recording you would like to cut or
copy. This will trim any music from the previous track, or any silence on the record
between tracks.
- To select the part you wish to cut, copy or paste, use the selection tool. If it is not
activated, do so by clicking on it in the toolbar.
- Press and hold the left mouse button while you drag the mouse to a marked area.
- This area is darker than the surrounding area of the clip. Note, even though you
can mark an area larger than or extending beyond the actual audio clip in the
track, the operations will only work on the actual clip. Playback however will work
outside the clip.
- Press the space bar to listen to the audio in the marked area.

19
- To extend or contract your selection, hold down the SHIFT button and click on the
area you wish your selection to extend or contract to.
- If you click on a spot that is on the right hand side from the middle of the current
selection, you will set the right hand boundary of your new selection.
Now you can cut your selection. Select “Cut” from the “Edit” menu.
Before the Cut After the Cut
Create a new file and paste your cut into the new file.
For additional software information, please refer http://audacityteam.org/ for
detailed operating instructions.
Saving a project
There are 5 ways of saving a project.
Save project
This saves the project to your hard drive in a format (AUP) recognized only by Audacity.
This can be done for a work in progress.

20
Save project as
This saves the project to your hard drive in a format (AUP) recognized only by Audacity.
This can be done for a work in progress.
Export as WAV
This saves the project to your hard drive as a WAV file that is playable by several players.
Please note that WAV files are big files that take up a lot of space on the hard drive.
Export as MP3
This saves the project to your hard drive as an MP3 file that is playable by most players.
Please note that MP3 conversion requires the LAME codec. To install the LAME codec,
please see the Help section of the Audacity website listed in the start of the Audacity
quick guide.
Export as Ogg Vobis
This saves the project to your hard drive as an ogg file.
Table of contents
Popular Turntable manuals by other brands

boytone
boytone TR-18CD Operating instructions manual
Xiaomi
Xiaomi Mi TV Stick manual
Pro-Ject Audio Systems
Pro-Ject Audio Systems 1 Xpression Carbon Classic Instructions for use
Marquant
Marquant 920-538 operating instructions
THORENS
THORENS TD160 Fitting instructions manual
Dual
Dual HS 31 operating instructions
