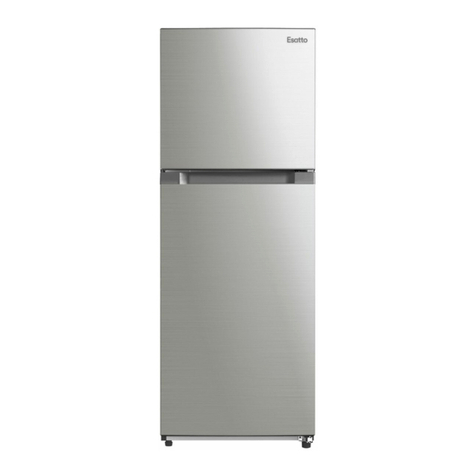
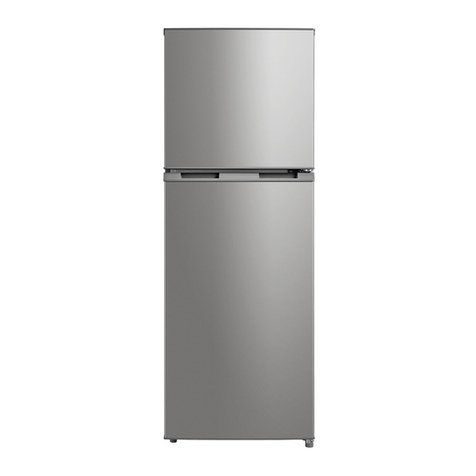
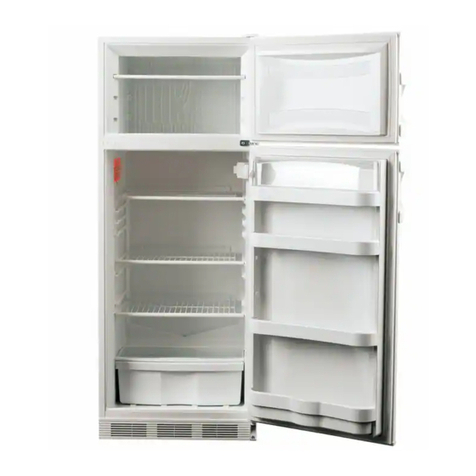
Esatto ETM203W User manual

User Mnul
Exctly wht
you need
Model Code/s:
ETM203W
ETM203S
Online:
esatto.house
Product:
203L Top Mount
Refrigertor
Version:
V1.0 0621

User Manual
2
Applinces
Exctly wht
you need

esatto.house
3
Page 4
Welcome
Page 5
Safety Warnings
Page 8
Product Overview
Page 9
Getting Started
Page 9
Installation
Page 11
Using Your
Fridge
Page 12
Usage Tips
Page 12
Energy
Saving Tips
Page 13
Maintenance
and Cleaning
Page 18
FAQs and
Troubleshooting
Page 19
Specications
Page 2 0
Purchase Details
Page 20
Your Receipt
Page 22
Warranty
Information
Contents

User Manual
4
Welcome
Congratulations on purchasing your new fridge. The Esatto brand is proudly distributed
within Australia by Residentia Group Pty Ltd.
Please refer to the warranty card at the rear of this manual for information regarding your
product’s parts and labour warranty, or visit us online at: www.residentiagroup.com.au
At Residentia Group, we are customer obsessed and our Support Team are there to
ensure you get the most out of your appliance. Should you want to learn more about your
unit such as the various temperature guides or importantly taking care of the appliance,
our Support Team are here to help.
You can use our online Support Centre at any time by visiting:
→ http://support.residentiagroup.com.au
Or you can contact us via phone by dialling: 1300 11 HELP (4357).
It is important that you read through the following use and care manual thoroughly to
familiarise yourself with the installation and operation requirements of your appliance
to ensure optimum performance.
Again, thank you for choosing Esatto and we look forward to being of service to you.
Kind Regards,
The Residentia Team
Residentia Group
—
Head Office
165 Barkly Avenue
Burnley Victoria
Australia 3121
—
ACN
600 546 656
—
Online
residentia.group
www.esatto.house
@esatto.house
—
Postage
PO Box 5177
Burnley
VIC 3121 Australia
—
Telephone
1300 11 4357
—
Email
suppor[email protected]

esatto.house
5
IMPORTANT SAFETY INSTRUCTIONS
READ CAREFULLY AND KEEP FOR FUTURE REFERENCE
Read this manual thoroughly before rst use, even if you are familiar with this type of product. The safety
precautions enclosed herein reduce the risk of re, electric shock and injury when correctly adhered to.
Make sure you understand all instructions and warnings.
Keep the manual in a safe place for future reference, along with the completed warranty card and purchase
receipt. If you sell or transfer ownership of this product, pass on these instructions to the new owner.
Always follow basic safety precautions and accident prevention measures when using an electrical
appliance, including the following:
IMPORTANT: Pay particular attention to messages that contain the words DANGER, WARNING or
CAUTION. These words are used to alert you to a potential hazard that can seriously injure you and others.
The instructions will tell you how to reduce the chance of injury and let you know what can happen if the
instructions are not followed.
CAUTION
RISK OF FIRE
This symbol alerts you to take care as this appliance contains a ammable
refrigerant (isobutane) and insulation blowing gas (cyclopentane). Do not expose
it to high heat, sparks and open ames.
The refrigerant isobutane (R600a) is contained within the refrigerant circuit of
the appliance, a gas with a high level of environmental compatibility, which is
nevertheless ammable. During transportation and installation of the appliance,
ensure that none of the components of the refrigerant circuit become damaged.
WARNING: Do not damage the refrigerant circuit! Never use an appliance with a damaged refrigerant
circuit! If the refrigerant circuit becomes damaged, avoid proximity to open res and all types of heat and
ignition sources. Thoroughly ventilate the room in which the appliance is located.
DANGER: It is hazardous for anyone other than an authorised service person to service this appliance.
In Queensland, the authorised service person MUST hold a Gas Work Authorisation for hydrocarbon
refrigerants to carry out servicing or repairs which involve the removal of covers.
The room for installing the appliance must be at least 1m³ per 8g of refrigerant. The amount and type of
refrigerant in the appliance can be found in the Technical Specications on page 17 and on the rating plate,
found on the appliance.
Usage Conditions and Restrictions
• Domestic use only: This appliance is intended for indoor household use only. It is not intended for
commercial, industrial or outdoor use. It is not intended for use in a recreational vehicle.
• Purpose: Do not use this appliance for anything other than its intended purpose. Other uses are not
recommended and may cause re, electric shock or personal injury.
• Attachments: The use of attachments is not recommended by the appliance manufacturer and distributor
as they may be hazardous.
• Improper use: Damage due to improper use, or repairs made by unqualied personnel will void
your warranty. We assume no liability for any eventual damages caused by misuse of the product or
noncompliance with these instructions.
Sfety Wrnings

User Manual
6
General Safety Instructions Cont.
• WARNING: Do not use mechanical devices or other means to accelerate the defrosting process, other
than those recommended by the manufacturer.
• Usage restriction: This appliance is not intended for use by persons (including children) with reduced
physical, sensory or mental capabilities, or lack of experience and knowledge, unless they have been
given supervision or instructions concerning use of the appliance by a person responsible for their safety.
• Children: Supervise young children to ensure they do not play with the appliance. Never allow children to
operate, play with or crawl inside the appliance.
• WARNING: Do not use electrical appliances inside the appliance, unless they are of the type
recommended by the manufacturer.
• Explosive or ammable substances: Do not store explosive substances such as aerosol cans with a
ammable propellant in this appliance. Do not store or use petrol or any other ammable vapours and
liquids in the vicinity of this or any other appliance. Do not use such substances for cleaning the appliance.
The fumes can create a re hazard or an explosion.
• Damage: Do not use the appliance if the power cord, plug or the appliance itself is damaged. If the cord is
damaged, contact the after sales support line and have the cord replaced by qualied personnel in order
to avoid a hazard.
• WARNING: Do not damage the refrigerant circuit.
• Do not modify: Do not attempt to alter or modify this appliance in any way.
• Repair: Do not attempt to repair or replace any part of this appliance unless it is specically
recommended in this manual. All other servicing should be referred to a qualied technician. Contact the
after sales support line for advice.
• WARNING: Do not locate multiple portable socket-outlets or portable power supplies at the rear of the appliance
Electrical Safety
• Voltage: Before connecting and turning on the appliance, ensure the electrical voltage and circuit
frequency correspond to that indicated on the appliance rating label.
• Earthing: This appliance should be properly earthed for your safety. The power cord of this appliance is
equipped with a three-prong plug for use in standard wall outlets to minimise the possibility of electrical
shock. Do not modify the cord and/or plug provided with the appliance. Improper use of the earthed plug
can result in the risk of electric shock.
• Connection: This appliance requires a standard 220-240 V AC 50Hz electrical outlet. Do not overload the
electrical circuit.
• Power cord: Do not kink or damage the power cord; do not leave it exposed or dangling. Secure it at the
back of the appliance so no one steps on or places anything on the cord or against it. Keep the cord out of
reach of children. When moving the appliance, make sure not to damage the power cord.
• WARNING: When positioning the appliance, ensure the supply cord is not trapped or damaged.
• Auxiliary Items: Do not use an inverter, adaptor or extension cord with this appliance. If the cord is too
short, have a qualied electrician install an outlet near the appliance. Use of an extension cord and an
inverter can negatively aect the performance of the unit.
• Protect from moisture: To protect against the risk of electric shock, do not immerse the unit, cord or plug
in water or spray it with any other liquid. Do not connect or disconnect the electric plug when your hands
are wet. Turn the power switch o before removing the plug from the socket.
• WARNING: Disconnect! To reduce the risk of re, electric shock or personal injury, always unplug the
appliance from the socket when not in use, when moving and before cleaning or servicing. Never unplug
the unit by pulling the power cord. Always grip the plug rmly and pull straight out from the power point.
• Electrical work: Any electrical work required for the installation of this appliance should be carried out by
a qualied electrician.
Never use this appliance with a damaged refrigerant circuit! If the coolant circuit becomes damaged, avoid
proximity to open res and all types of heat sources. The room in which the appliance is located should be
ventilated for a few minutes.
Sfety Wrnings (Continued)

esatto.house
7
General Safety Instructions Cont.
Installation
Heavy: This appliance is heavy, take care when moving it. To avoid back or other injury, consider a two
person lift or mechanical aid when installing it. Failure to do so can result in back or other injury.
Damage: When unpacking, check the appliance carefully for damage. If it is damaged, do not install the
appliance. Contact our after sales support centre on 1300 43 57 for advice on examination or return of the
damaged appliance.
Protect from moisture: Install the appliance in an indoor area protected from wind, rain, water spray or
drips.
Protect from heat: Do not install the appliance next to an oven, grill or other source of high heat, or where it
will be exposed to direct sunlight for prolonged periods of time.
WARNING: Ventilation: To ensure proper ventilation, keep any ventilation openings, in the appliance
enclosure or in the built-in structure, clear of obstructions. Ensure adequate air circulation around the
appliance to prevent overheating.
Level: Install the appliance level in order to ensure proper operation.
Cleaning and Maintenance
Disconnect: Unplug the appliance before cleaning or servicing. Failure to do so can result in electric shock,
injury or death. Do not connect or disconnect the plug when your hands are wet.
Flames: Do not let open ames or ignition sources enter the appliance.
Flammable/explosive substances: Never clean this appliance with ammable uids. Do not store or use
volatile, ammable or explosive propellants or liquids in or close to this or any other appliance. The fumes
can create a re hazard or explosion.
Solvents: Do not use solvent based cleaning agents or abrasives on the interior as these may damage or
discolour the surfaces of the appliances.
WARNING! Do not use mechanical devices or other means to accelerate the defrosting process. Never use a
sharp or metal instrument to remove frost or clean the appliance. Use a plastic scraper, if necessary.
Service: Do not attempt to repair, modify or replace any part of the appliance unless specically
recommended in this manual. Refer all other servicing to a qualied technician, or contact the after sales
support line for advice on examination or repair of the appliance.
Responsible disposal
Note: At the end of its working life, do not throw this appliance out with your household rubbish. Electrical
and electronic products contain substances that can have a detrimental eect on the environment and
human health if disposed of inappropriately. Observe any local regulations regarding the disposal of
electrical consumer goods and dispose of it appropriately for recycling and recovery of the refrigerant and
blowing agent. Contact your municipal authorities for advice on recycling facilities in your area.
WARNING! This refrigeration appliance contains ammable refrigerants and insulation blowing gases,
which must be removed before disposal. Contact your municipal authorities for any codes or regulations
concerning the disposal of such materials.

User Manual
8
Product Overview
Your Top Mount Fridge
Adjusting procedures:
a. Turn the feet clockwise to raise
the refrigerator;
b. Turn the feet counterclockwise
to lower the refrigerator;
c. Adjust the right and left feet
based on the procedures above to
a horizontal level.
Fig. 1

esatto.house
9
Getting Strted
Instlltion
Unpacking
• Packaging materials: This appliance has been packaged to protect it against transportation damage.
Remove all packaging materials from around and inside the appliance and keep the original packaging
carton and materials in a safe place. It will help prevent any damage if the product needs to be
transported in the future, and you can use it to store the appliance when it is not in use. In the event the
carton is to be disposed of, please recycle all packaging materials where possible.
• Suocation: Plastic wrapping can be a suocation hazard for babies and young children, so ensure all
packaging materials are out of their reach and disposed of safely.
• Power cord: Unwind the power cord to its full length and inspect it for damage. Do not use the appliance
if it or its cord have been damaged or are not working properly. In case of damage, contact our after sales
support line for advice on examination, repair or return of the damaged product.
• Read the manual: Read this manual to familiarise yourself with the appliance. Pay particular attention to
the safety instructions on the previous pages.
• Clean: To remove any dust from transit and storage, clean the interior and exterior surfaces of the
appliance with lukewarm water and a soft cloth. Dry thoroughly. Important: do not use harsh or abrasive
detergents or powders as these will damage the nish.
• Two person installation: Use two or more people to move and install the appliance. Failure to do so can
result in back or other injury.
• Freestanding design: This appliance is designed to be freestanding only, and should not be recessed or
built-in.
• Floor surface: This appliance must be properly positioned on a dry, sturdy, level surface that is strong
enough to support it when it is fully loaded.
• Ambient temperature: The ambient temperatures must correspond to the climate class (
T) indicated on
the rating plate of the appliance: 16°C – 38°C
• Clearances: Ensure that air can circulate freely around the back of the cabinet, which is necessary to cool
the compressor and condenser. Allow at least 10cm clear space at the back, 10cm at the sides of the unit
and 20cm between the top and any surface above (i.e. a bench top). If you are installing your refrigerator
next to a xed wall, leave sucient space on the hinge side to allow for the door to swing open.
Do NOT install/use the appliance in the following locations/situations:
• In moist areas or areas of high humidity.
• In a recreational vehicle, or for use with an inverter.
• In direct sunlight, near heat sources, next to an open ame, cooking or heating appliance, or near any
other source of high heat.
• Direct sunlight may aect the acrylic coating and heat sources may increase the unit’s power
consumption. For best energy eciency install the appliance in the coolest area of the room.
• In an area with extreme cold ambient temperatures.
• In an area with excessive moisture and high humidity. Make sure it is protected from elements such as
wind, rain, water spray or drips.
• In an area where petrol or other explosive and/or ammable liquids or fumes are used or stored.
The fumes can create a re hazard or explosion.
Levelling the Fridge (see Fig. 1)
a. Turn the feet clockwise to raise the refrigerator;
b. Turn the feet counterclockwise to lower the refrigerator;
c. Adjust both feet so the refrigerator is level.

User Manual
10
Installation Cont.
Electrical connection
• WARNING! It must be possible to disconnect the appliance from the mains power supply; the plug must
therefore be easily accessible after installation.
• Before plugging in your new fridge, let it stand upright for at least 2 hours. This will allow the refrigerant
gases to settle into the compressor and reduce the possibility of a malfunction in the cooling system.
• The appliance must be earthed. The plug of the power supply cord is equipped with a contact for this
purpose. Do not under any circumstances cut or remove the third (earth) prong from the power cord.
If the plug does not t your outlet, consult a licensed electrician for advice to have the outlet changed.
• Plug the unit into a dedicated, properly earthed wall outlet. Ensure that your outlet voltage and circuit
frequency correspond to the voltage stated on the rating label.
• Secure the fridge’s supply cord behind the unit. Do not leave it exposed or dangling to prevent injury and
accidental disconnection from the power supply.
• Adjust the temperature control as described below.
• When rst starting up, and after a period out of use, allow the unit to cool down for at least 2–3 hours
(4 hours if starting up during warm weather in summer) before placing food in the fridge.
Instlltion (Continued)
esatto.house
11
The temperature controls are located on the inside of the refrigerator.
The Thermostat Controls
A) Setting: Use the button to cycle through the temperature settings: 1, 2, 3, 4, 5
• 1: The warmest temperature setting
• 2–3: Normal operation (adequate for most situations)
• 4: The coldest setting for daily operation
• 5: Super Cool is used to get to a colder temperature in a quicker timeframe
Note: During high ambient temperatures (I.e. on hot summer days) it may be necessary to set the
thermostat to the coolest setting (position 5).This may cause the compressor to run continuously in order
to maintain a low temperature.
Damper Adjusting Slider
The initial position of the damper adjusting slider is on the far right side.
For better user experience, it is recommended to push the slider to the right position and turn the SETTING
KEY to MID position. If it is not enough cool inside the refrigerator compartment, please check whether the
slider is in left position,turn the slider to the right side.
Using for the First Time
When you install your appliance, set the thermostat to setting 3. Give your refrigerator time to cool down
completely before adding food. It is the best to wait 24 hours before adding food.
IMPORTANT: Once the unit has started, continuous operation is recommended. Please try and avoid turning
the unit o and on as this may aect the service life.
Using Your Fridge

User Manual
12
• Do not store food uncovered in the fridge. Always use good quality, fridge-proof packaging to maintain
food quality. Remove air from packages of solid food and seal bags tightly before freezing.
• Keep portions small to ensure they are frozen (and subsequently defrosted) rapidly.
• Make sure that fresh, unfrozen food packages do not touch food that is already frozen, thus avoiding a
temperature rise in the frozen food.
• When freezing food, do not push food together too much, leave some space for air to circulate around
each item. Do not place packages directly against the back wall.
• When buying frozen food, only buy quantities that you can store straight away; use an insulated container
for your shopping and when you get home, place the food in the chilling compartment immediately.
• When storing pre-packed, commercially frozen food, follow the food manufacturer’s instructions for
storing the food in a home fridge or freezer. Do not exceed any storage times listed on the packaging.
• Once you have opened a packet of frozen food, re-wrap it airtight to prevent surface evaporation which
causes drying or freezer burn.
• Do not place carbonated liquids such as bottles of zzy drink in the chilling compartment as the container
could explode under pressure and damage the chiller.
• Do not refreeze food once it has been defrosted.
• Frozen food which has thawed accidentally should either be used immediately or thrown away.
Alternatively, if the food is uncooked and has not been completely defrosted, it may be cooked and then
refrozen.
• CAUTION! Do not remove items from the chilling compartment if your hands are damp or wet as this
could cause skin abrasions.
• The appliance should be placed in the coolest area of the room, away from heat producing appliances or
heating ducts. Please avoid placement in direct sunlight.
• Let hot foods cool to room temperature before placing them in the appliance.
• Do not overload the appliance with unfrozen food as this may cause it to freeze slowly and risk food spoilage.
• Be sure to wrap foods properly and wipe containers dry before placing them in the appliance. This cuts
down on frost building up inside in the unit.
• Please do not wrap items in aluminium foil, wax paper or paper towel. This materials interfere with cold air
circulation, making the appliance less ecient.
• Organise and label food to reduce door openings and extended searches. Remove as many items as needed
at one time, ensuring the unit is opened as few times as possible.
Usge Tips
Energy Sving Tips

esatto.house
13
Defrosting
The refrigerator has an automatic defrosting function. Frost formed due to change of season or temperature
may also be manually removed by disconnecting the appliance from power supply. Alternatively, wipe the
surface with a dry towel.
Cleaning
WARNING
Before cleaning the appliance, make sure it is switched o and disconnected from the power supply.
Failure to do so can result in electric shock or injury.
• Wash the inside surfaces and the interior accessories with a damp, warm cloth moistened in a water and
baking soda solution. The solution should be about 2 tablespoons of baking soda to 1 litre of water. Rinse
and wipe dry with a soft cloth.
• Clean the outside of the unit with a damp, well wrung out cloth, keeping the area of the controls dry. Keep
the lid gasket (seal) clean.
• Never use boiling water to accelerate defrosting as it may damage the plastic components.
• Regularly check the appliance for defrost water. If necessary, clean the drain. If the drain is blocked, water
will collect in the base of the appliance.
• After cleaning/defrosting, push the drain plug in.
• After everything is dry, place appliance back into service.
• Allow approximately 1–2 hours for the cabinet to cool down again (depending on the length of time the
appliance was disconnected from the power).
WARNING
Never clean the unit with an abrasive, acid, oil or solvent based cleaning agent. Never use ammable uids
or sprays for cleaning as the fumes from these substances can create a re hazard or Explosion.
Mintennce nd Clening

User Manual
14
Maintenance and Cleaning Cont.
Service, repair and spare parts
Do not attempt to alter or modify this appliance in any way, or to repair or replace any part unless it is
specically recommended in this manual. All other servicing should be referred to a qualied technician.
Contact our after sales support on 1300 11 43 57 for advice.
Our after sales support centre stocks a selection of spare parts for the Esatto 129L Fridge.
Power Failure
Most power failures are corrected within a few hours and should not aect the temperature of your appli-
ance if you minimise the number of times the door is opened. If the power is going to be o for a longer
period of time, take proper steps to protect the contents.
Reversing the Door
Please power o this appliance before reversing the door. Remove all food from door shelves.
1. Remove hole cover and the upper hinge cover.
2. Next, remove the screws of the upper hinge and then the upper hinge.
3. You can now lift the freezer door until it is separated from cabinet completely.
Mintennce nd Clening (Continued)

esatto.house
15
Maintenance and Cleaning: Reversing the Door Cont.
4. Unscrew the middle hinge screws to remove the middle hinge.
5. Next, remove the two hole plugs.
6. Remove the screw cap to remove the screw on the middle beam.
7. Now remove the refrigerator door.
8. Remove the adjusting feet, lower hinge screw and lower hinge assembly.
9. Now install the lower hinge assembly on the opposite side of the unit and reinstall install the adjusting
feet.

User Manual
16
Maintenance and Cleaning: Reversing the Door Cont.
10. Dismantle the limit blocks and screws on the lower cover of both refrigerator door and freezer door.
11. Install the limit blocks on the other side of both doors
12. Then install the sleeve pipe on the upper cover of the refrigerator door on the other side.
13. Install the compartment door on the lower hinge and then install Refrigerator the middle hinge
and hole caps.
Mintennce nd Clening (Continued)

esatto.house
17
Maintenance and Cleaning: Reversing the Door Cont.
14. Finally, install the freezer door on the middle hinge and install the upper hinge, hinge cover and hole cover
to nish.

User Manual
18
Problem Possible Cause Possible Solution
The appliance
does not
operate.
• The appliance is not plugged in.
• The appliance is turned o.
• The circuit breaker tripped or a
blown fuse.
• Plug in the appliance.
• Turn on power point.
• Reset circuit breaker/replace fuse.
The appliance
is not cold
enough.
• Check the temperature control
setting.
• The door is opened too often, or is
kept open for too long; the door is
not closed completely; hot food has
been placed inside.
• The appliance has recently been
disconnected for a period of time.
• Reduce the temperature.
• Do not open door for 2+ hours; Check
that the door is closed properly and for
any obstructions preventing the door
closing properly; Remove hot food and
let it cool rst before replacing it.
• Plug in the appliance.
The appliance
has an odd
odour.
• Food may not be wrapped properly.
• Food may be rotten.
• The interior may not be clean.
• Check that the food is wrapped tightly.
• Check for rotten food and remove.
• Clean the interior of the appliance.
The internal
light does not
illuminate.
• The appliance is not plugged in.
• The appliance is turned o.
• The circuit breaker tripped or a
blown fuse.
• The light is damaged.
• Plug in the appliance.
• Turn on power point.
• Reset circuit breaker/replace fuse.
• Please contact after sales support.
The door
will not close
properly.
• The appliance is not level.
• The gasket is dirty.
• Food is stacked too high.
• Level the appliance.
• Clean gasket with warm water and
a soft cloth.
• Re-position food so it does not obstruct.
The door
is dicult
to open.
• A dierence in pressure between the
air inside and outside of the unit.
• This is a normal phenomenon and
cannot be avoided.
Moisture forms
on the inside
appliance
walls.
• Hot and humid weather increases
the internal rate of frost build-up.
• The lid is slightly open.
• The lid is kept open too long, or is
opened too frequently.
• This is normal.
• Close the door.
• Open the door less often
Moisture
forms on the
outside of the
appliance.
• The door is slightly open, causing
cold air from inside the appliance
to meet warm, moist air from the
outside.
• Close the door or check for obstructions.
There are
vibrations.
• The appliance is not level.
• The floor is uneven or weak.
• The appliance is touching the wall.
• Level the appliance.
• Be sure your floor can adequately
support the appliance.
• Move the appliance away from the wall
and check it is level.
FAQs nd Troubleshooting

esatto.house
19
Model: ETM203W, ETM203S
Product Dimensions: W: 545mm, D: 610mm, H: 1372mm
Weight: 43kg
Net Capacity: 203L
Energy Rating: 3 Stars MEPS
Standards
This product complies with AS/NZS 60335.1 and AS/NZS 60335.2.24 electrical safety, and with
EN 55014-1:2006+A1:2009 A2:2011 for electromagnetic compatibility.
Specictions

User Manual
20
Purchse Detils
For your records, please record details of your purchase
below and staple your receipt on the opposite page.
Your serial number can be found on the rear
of your refrigerator.
STORE DETAILS
STORE NAME
|
ADDRESS
|
TELEPHONE
|
PURCHASE DATE
|
PRODUCT DETAILS
MODEL NO.
|
SERIAL NO.*
|
This manual suits for next models
1
Table of contents
Other Esatto Refrigerator manuals

Esatto
Esatto EBF91B User manual

Esatto
Esatto ETM314X User manual

Esatto
Esatto EBF196W User manual

Esatto
Esatto EBF129W User manual

Esatto
Esatto RTM400W User manual

Esatto
Esatto ETM236S User manual

Esatto
Esatto ESBS460S User manual

Esatto
Esatto EUF268W User manual

Esatto
Esatto ETM413X User manual

Esatto
Esatto ECF142WE User manual

Esatto
Esatto EBF112W User manual

Esatto
Esatto EBF112S User manual

Esatto
Esatto EUF268W User manual

Esatto
Esatto EBM325W User manual

Esatto
Esatto EMF87B User manual

Esatto
Esatto EUL237W User manual

Esatto
Esatto ECF142WE User manual

Esatto
Esatto ETF366W User manual

Esatto
Esatto EBF129W User manual

Esatto
Esatto ECF198WE User manual