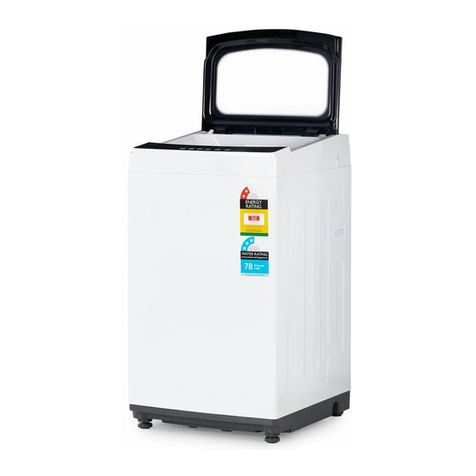
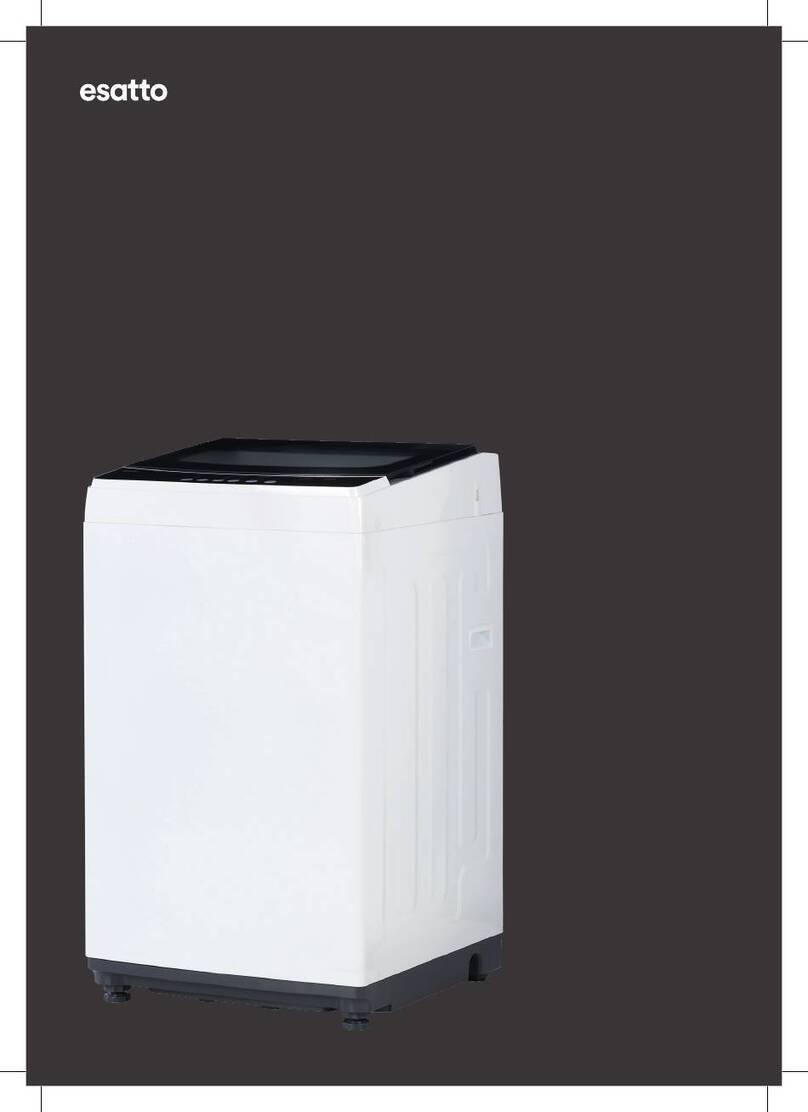
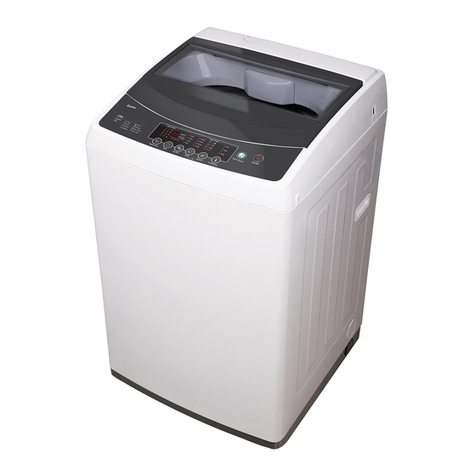
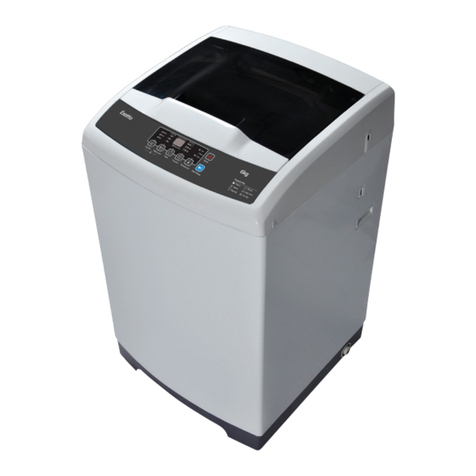
Esatto ETLW72B User manual

Version
V6.0 1223
Everything you need
for your Top Lod
Wshing Mchine
is in this User Mnul
Model/s
ETLW55B
ETLW72B
ETLW80B
ETLW102B

User Manual
02
Welcome
Congrtultions on purchsing your new Top Lod Wshing
Mchine. The Estto brnd is proudly distributed within Austrli
by Residenti Group Pty Ltd.
Plese refer to the wrrnty crd t the rer of this mnul for
informtion regrding your product’s prts nd lbour wrrnty,
or visit us online t: www.residenti.group
At Residenti Group, we re customer obsessed nd our Support
Tem re there to ensure you get the most out of your pplince.
Should you wnt to lern more bout your new pplince, it's
fetures or importntly tking cre of the pplince, our Support
Tem re here to help.
You cn use our online Support Centre t nytime by visiting:
http://support.residentigroup.com.u
Or you cn contct us vi phone by diling: 1300 11 HELP (4357).
It is importnt tht you red through the following use nd cre
mnul thoroughly to fmilirise yourself with the instlltion
nd opertion requirements of your pplince to ensure the most
optimum performnce.
Agin, thnk you for choosing n Estto pplince nd we look
forwrd to being of service to you.
Kind Regrds,
The Residenti Tem
Residenti roup
—
Head Office
165 Brkly Avenue
Burnley, Victori
Austrli 3121
—
ACN
600 546 656
—
Online
residenti.group
www.estto.house
@estto.house
—
Postage
PO Box 5177
Burnley, Victori
Austrli 3121
—
Telephone
1300 11 4357
www.estto.house

esatto.house
03
Pge 04
Sfety
Informtion
Pge 06
Product
Overview
Pge 07
Instlltion
Instructions
Pge 10
Operting
Instructions
Pge 16
Clening
Cre
Pge 18
Troubleshooting
Tips
Pge 20
Technicl
Informtion
Pge 21
Purchse
Detils
Pge 21
Your Receipt
Pge 22
Wrrnty
Contents

User Manual
04
For your sfety, the informtion in this mnul must be
followed to minimize the risk of re or explosion, electric
shock, or to prevent property dmge, personl injury or
loss of life.
• This pplince is not intended for use by
persons(including children) with reduced physicl,
sensory or mentl cpbilities or lck of experience nd
knowledge unless they hve been given supervision or
instruction concerning use of the pplince by person
responsible for their sfety.
• Children should be supervised to ensure tht they do
not ply with the pplince.
• If the supply cord is dmged, it must be replced by
the mnufcturer, its service gent or similrly qulied
persons in order to void hzrd.
• The new hose-sets supplied with the pplince re to be
used nd tht old hose-sets should not be reused.
• The openings must not be obstructed by crpet.
Model Washing
Capacity
Standard Water
Pressure
ETLW55B 5.5kg 0.03MPa~0.8MPa
ETLW70B 7.0kg 0.03MPa~0.8MPa
ETLW80B 8.0kg 0.03MPa~0.8MPa
ETLW100B 10.0kg 0.03MPa~0.8MPa
Explntion of the following signl words:
WARNING!
This signl word indictes potentilly dngerous sitution
which my result in deth or serious injuries unless it’s
voided.
CAUTION!
This signl word indictes potentilly dngerous sitution
which my result in slight or minor injuries or dmge to
property nd the environment.
NOTE!
This signl word indictes potentilly dngerous sitution
which my result in slight or minor injuries.
Sfety Informtion

esatto.house
05
WARNING!
POTENTIAL ELECTRIC SHOCK
• This pplince is for indoor use only.
• Do not position wshing mchine in humid plce.
• Do not insert your hnds into running spin-dry tub.
• If the spin-dry tub does not stop within 15 seconds fter
opening the cover, plese stop using the mchine nd
hve it repired.
• Before performing ny mintennce on the device,
unplug the pplince from the mins.
• Alwys unplug the mchine nd turn o the wter
supply fter use. The mx. inlet wter pressure, in
pscls. The min. inlet wter pressure, in pscls.
• To ensure your sfety, power plug must be inserted into
n erthed three-pole socket. Check crefully nd mke
sure tht your socket is properly nd relibly erthed.
• Mke sure tht the wter nd electricl devices must
be connected by qulied technicin in ccordnce
with the mnufcturer's instructions nd locl sfety
regultions.
RISK TO CHILDREN
• The pplince cn be used by children ged from 8
yers n d bove nd persons with reduced physicl,
sensory or mentl cpbilities or lck of experience
nd knowledge if they hve been given supervision or
instruction concerning use of the pplince in sfe
wy nd understnd the hzrds involved. Children
shll not ply with the pplince. Clening nd user
mintennce shll not be mde by children without
supervision.
• Animls nd children my climb into the mchine.
Check the mchine before every opertion.
• Young children should be supervised tht they do not
ply with the pplince.
• Mchine my be very hot during the opertion. Keep
kids nd pets fr wy from the mchine during the
opertion very wet rooms s well s in the rooms with
explosive or custic gs.
• Remove ll pckging before using the pplince.
Otherwise, serious dmge my result.
• The wshing mchine with single inlet vlve only cn be
connected to the cold wter supply. The product with
double inlet vlves should be correctly connected to the
hot wter nd cold wter supply.
• Plug must be ccessible fter instlltion.
RISK OF EXPLOSION
• Do not wsh or dry rticles tht hve been clened in,
wshed in, soked in, or dbbed with combustible or
explosive substnces( such s wx, oil, pint, gsoline,
degresers, dry-clening solvents, kerosene, etc.) This
my result in re or explosion.
• Before hnd thoroughly rinse items of wshing by hnd.
CAUTION!
INSTALLING THE PRODUCT
• This wshing mchine is for indoor use only.
• It isn't intended to be built-in using.
• The openings must not be obstructed by crpet.
• Wshing mchine shll not be instlled in bth room or
very wet rooms s well s in the rooms with explosive or
custic gses.
• Remove ll pckging before using the pplince.
Otherwise, serious dmge my result.
• The wshing mchine with single inlet vlve only cn be
connected to the cold wter supply. The product with
double inlet vlves should be correctly connected to the
hot wter nd cold wter supply.
• Plug must be ccessible fter instlltion.
RISK OF DAMAGING THE APPLIANCE
• Your product is only for home use nd is only designed
for the textiles suitble for mchine wshing.
• Do not climb up nd sit on top cover of the mchine.
• Do not len ginst mchine door.
• Cutions during Hndling Mchine:
1. The ccumulted wter shll be drined out of
the mchine.
2. Hndle the mchine crefully. Never hold ech
protruded prt on the mchine while lifting.
Mchine door cn not be used s the hndle during
the conveynce.
3. This pplince is hevy. Trnsport with cre.
• Plese do not close the door with excessive force.
• Do not wsh crpets.
OPERATING THE APPLIANCE
• Before wshing the clothes t rst time, the product
should be operted in one round of the whole
procedures without the clothes inside.
• Do not wsh mmble nd explosive or toxic solvents.
• Do not use gsoline nd lcohol etc. s detergents.
• Plese only select the detergents suitble for mchine
wshing, especilly for drum.
• Mke sure tht ll pockets re emptied. Shrp nd rigid
items such s coin, brooch, nil, screw or stone etc.
my cuse serious dmges to this mchine.
• Plese check whether the wter inside the drum hs
been drined before opening its door.
Plese do not open the door if there is ny wter visible.
• Be creful of burning when the product drins hot
wshing wter.
• Never rell the wter by hnd during wshing.
• After the progrm is completed, Plese wit for two
minutes to open the door.
Sfety Informtion
User Manual
06
PRODUCT DESCRIPTION
NOTE!
The product line chrt is for reference only, plese refer to rel product s stndrd.
ACCESSORIES
NOTE!
If the drin hose is lredy instlled on the mchine, then there is no spring clmper nd drin hose in the ccessories.
Top lid Wter inlet vlve
Hndle
Drin hoseAdjustble feet
Power cord nd plug
Frme
Inlet hose
ssembly
Cbinet
bsebord
User
mnul
Screw Spring
clmper
Drin hose
Control pnel
Cbinet
Product Overview

esatto.house
07
INSTALLATION INSTRUCTIONS
It’s recommended to use the wshing mchine on its own dedicted power outlet
for both convenience nd sfety. The power outlet must be grounded.
IMPORTANT!
If the power cord is dmged, it must be replced by Residenti Group or one of
it’s uthorised service representtives. Plese contct 1300 11 HELP (4357) nd
ensure the pplince is completely disconnected from the power supply.
WARNING!
• Stbility is importnt to prevent the product from moving!
• Mke sure tht the product should not stnd on the power cord.
Before instlling the mchine, the loction must be:
1. Rigid, dry, nd level surfce
2. Avoiding direct sunlight
3. Sucient ventiltion
4. Room temperture is bove 0 °C
5. Kept fr wy from the het resources such s col or gs.
UNPACKING THE WASHING MACHINE
WARNING!
• Pckging mteril (e.g. Films, Styrofom) cn be dngerous for children.
• There is risk of suoction! Keep ll pckging well wy from children.
1. Remove the crdbord box nd styrofom pcking.
2. Lift the wshing mchine nd remove the bse pcking.
3. Remove the tpe securing the power supply cord nd drin hose.
4. Remove the inlet hose from the drum.
INSTALLATION OF THE DRAIN HOSE
Drin hose inserted
into the drin
Clmping spring
Instlltion Instructions

User Manual
08
WARNING!
To prevent lekge or wter dmge, follow the instructions in this chpter crefully:
• Do not kink, crush, modify, sever or protrct the inlet hose or drin hose.
• Position drin hose properly ,otherwise dmge might result of wter lekge.
• If drin hose is too long, do not force it into wshing mchine s it will cuse bnorml noises.
Use n upper drin system to plce the end of drin hose:
LEVELLING THE WASHING MACHINE
WARNING!
The lock nuts on ll four feet must be screwed tightly ginst the housing.
1. Check if the legs re closely ttched to the cbinet. If not, plese turn them to their originl
positions tighten the nuts.
2. Check lignment of the product with spirit level nd if required, correct.
3. Loosen the lock nut nd turn the feet until it closely contcts with to the oor.
4. After being locked properly, press four corners gin to mke sure tht they hs been
djusted properly.
Instlltion Instructions

esatto.house
09
SELECTION OF TAP
Plese select pproprite tp.
CONNECTION OF INLET HOSE, TAP AND WASHING MACHINE
1. Connection between ordinry tp nd inlet hose.
2. Connection between screw tp nd inlet hose.
Ordinry fucet
) Loosen clmp
nut to show
5mm thred
tp with threds nd inlet hose
e) Press slide bushing,
insert inlet hose into
connecting bse
b) Loosen four bolts
specil tp for wshing mchine
f) Connection nished
c) Set connecting bse
on tp nd tighten
bolts evenly
g) After connection nd instlltion,
check if there is wter lekge
d) Tighten clmp nut
Screw tp Specil wshing
mchine tp
Instlltion Instructions

User Manual
10
PREPARATION BEFORE WASHING
CAUTION!
• Before wshing, plese mke sure it’s instlled properly.
• Before wshing it t rst time, the wshing mchine shll be operted in one round of the whole
procedures without clothes in s follows.
WASHING
NOTE!
• If defult is selected, step 2, 3 cn be skipped.
AFTER WASHING
Buzzer will beep fter wshing nished nd the power supply will be cut o utomticlly.
Then unlod the lundry.
Plug in
Power On
Open tp
Select Progrm
Lod nd Close door
Select Wter Level
Add detergent
Strt up
Operting Instructions

esatto.house
11
WASHING MATTERS NEEDING ATTENTION
• The working condition of the wsher should be(0-40)°C. If used under 0°C, the inlet vlve nd drining system
my be dmged. If the mchine is plced under condition of 0°C or less, then it should be trnsferred to
norml mbient temperture to ensure the wter supply hose nd drin hose re not frozen before use.
• Plese check the lbels nd the explntion of using detergent before wsh. Use non-foming or less-foming
detergent suitble for mchine wshing properly.
WARNING!
• When wshing single clothes, it my esily cuse gret eccentricity nd give lrm due to gret unblnce.
Therefore it is suggested to dd one or two more clothes to be wshed together so tht drining cn be
done smoothly.
• Don’t wshing the clothes touching with kerosene, gsoline, lcohol nd other mmble mterils.
THE USAGE OF DETERGENT AND WASHING POWDER
• Add liquid detergent to the left comprtment of the detergent drwer.
• Add power detergent to the right side comprtment of the detergent drwer.
• As for the gglomerted or ropy detergent or dditive, before they re poured into the detergent box, it
is suggested to use some wter for dilution to prevent the inlet of detergent box from being blocked nd
overowing while lling wter.
• Plese choose suitble type of detergent for the vrious wshing temperture to get the best wshing
performnce with less wter nd energy consumption.
Check the lbel
Put smll clothes into the
pillow slip
Tke out the items out of
the pockets
Turn esy-pilling nd
long-pile fbric inside out
Knot the long strips,zip or
button
Seprte clothes with
dierent textures
Operting Instructions

User Manual
12
Select wter level ccording to clothing ctegories, degree
of soiling nd wshing hbits of customers.
Press this button to set your Wter Level,
where 1 is low nd 8 is high.
A solid indictor light indictes the wter levels
to the left (1, 3, 5, 7) nd shing indictor light
indictes the wter levels to the right (2, 4, 6, 8).
Press this button to select your
wsh function. I.e. Sok, Wsh,
Rinse or Spin, or combintion
of these.
After selecting Progrm, press the Dely button to choose
delyed strt time. Press Strt/Puse to commense the dely
opertion.
To switch the delyed strt o, simply press the
button until the dely light is o. If the progrm hs lredy
strted, press the Power button to reset the progrm.
WATER LEVEL:
DELAY:
WASH FUNCTION:
The disply shows the settings, estimted time
remining, options, nd sttus messges for
your wsher. The disply will remin on through
the cycle.
When LED shing, it mens the time tht dely
to strt the mchine. When LED lighting, it
mens the progrm time tht remining.
CAUTION!
• If there is ny brek in the power supply while
the mchine is operting, specil memory
stores the selected progrm nd when the
power is restrted.
DISPLAY:
Operting Instructions

esatto.house
13
Simultneously press the Rinse nd
Mode buttons to ctivte the child
lock. Repet this process to
dectivte the child lock.
NOTE!
• The Child Lock function will
lock ll buttons except Power.
CHILD LOCK:
Quick Clen cn sve between
20-40% of your cycle time by
strengthening the wshing bets.
Simultneously press the Mode
nd Temperture buttons to
ctivte Quick Clen.
Repet this process to dectivte
Quick Clen.
QUICK CLEAN:
Press this button to
turn your wshing
mchine On or O.
Press this button to
select your desired
mount of times
to rinse.
Press this button to select your
wter temperture. When both the
Hot nd Cold indictors re lit, your
wshing mchine will be set to use
Wrm wter.
Press this button to select your
wsh mode. A solid indictor
indictes the modes to the left,
wheres shing indictor
indictes the modes to the right.
NOTE!
• This digrm is for explntory
purposes only. Your progrms
my pper in dierent order.
After selecting your desired wsh
settings, press this button to strt
your wsh cycle.
You cn lso use this button to
puse the wshing mchine during
opertion.
POWER:
RINSE:
MODE:
START/PAUSE:
WATER TEMPERATURE:

User Manual
14
PERSONALISED WASH MODE SETTING
Users cn select wshing progrm ccording to ctul demnd, set rinsing times, wter volume nd dely mount.
OPERATIONS OF WASHING PROCESS
Users cn set single process or combintions of wshing, rinsing nd spinning freely ccording to demnd.
Detiled opertions s follows for dierent models:
ONE TOUCH SMART WASH
SPIN
WASH + RINSE + SPIN
NOTE!
• There re other process combintions just like the bove.
Power On
Power On
Power On
Power On
→
→
→
→→ →
→
→
→
→ →→
→
Mode Wter Level Wsh Type
Keep pressing the Wsh Type button
until the Spin light is the only one on
Keep pressing the Wsh Type
button until the Wsh, Rinse
nd Spin lights re ll on
Rinse
Press Rinse seprtely,
set desired setting
Temperture Dely Strt
Strt
Strt
Strt
TEMP.
DELAY
Operting Instructions

esatto.house
15
WASHING MODES
• MIX
Suitble to wsh cotton, linen, x. jute clothes
• NORMAL STANDARD
Stndrd fbric wshing progrm, suitble to wsh rmie cotton fbric. Wsh for once, rinsing for
twice, the spin time is little long.
• JEANS
Suitble to wsh hevy stined/werble clothes, prticulrly denim.
• SOFT
The tempo is soft, slow wshing nd spinning speed,
to mke the lightest wer nd deformtion.
• STRONG
The wsh time is longer, the strem is stronger, so the wshing eect is better.
• HEAVY
Suitble to wsh hevy stined/werble clothes.
• QUICK 15'
Suitble to wsh light stined clothes nd summer clothes.
• QUICK CLEAN
Strt up Quick Clen: Power on, select "Norml", "Soft", "Mix", "Strong", "Jens" progrm, then
press the Quick Clen button combintions.
Cncelltion of Quick Clen function:
The function cn be cncelled by pressing Quick Clen combintion buttons
(Mode nd Temperture) or Power o.
• FUZZY WEIGHTING
The wshing mchine will select the wter level utomticlly ccording to the lod weight.
1. When there's wter in the tub, this function is not vilble;
2. Before press [Strt/Puse] button, if consumer selected the wter level, there will be no fuzzy
weighting function;
3. After press [Strt/Puse] button, the wshing mchine will run the fuzzy weighting function.
Consumer cn lso select the wter level to set the wter level s needed.
Operting Instructions

User Manual
16
CLEANING AND CARE
WARNING!
• Before you begin mintennce, plese unplug the mchine nd close the tp.
CLEANING THE CABINET
Proper mintennce on the wshing mchine cn extend its working life. The surfce cn be clened
with diluted non-brsive neutrl detergents when necessry. If there is ny wter overow, use the
wet cloth to wipe it o immeditely. No shrp items re llowed.
NOTE!
• Formic cid nd its diluted solvents or equivlent re forbidden, such s lcohol, solvents or
chemicl products, etc.
CLEANING THE INLET FILTER
NOTE!
• Inlet lter must be clened if there is less wter.
Wshing the lter in wshing mchine:
1. Screw o the inlet pipe from the rer of the mchine.
2. Pull out the lter with long pliers nd reinstll it bck fter being wshed.
3. Use brush to clen the lter.
4. Reconnect the inlet pipe.
Lint lter clen:
1. There is built-in lint lter in your wsher. It cn help to collect lint during
wshing cycle.
2. It is suggested to clen the lint lter every 10 cycles.
3. Tke it out nd clen the lter with wter. Then plce it bck into the wsher.
Mgic lter
Norml lter
Clening Cre

esatto.house
17
CLEANING THE DRAIN PUMP FILTER NOT APPLICABLE FOR MODEL ETLW55B
WARNING!
• Be creful of the hot wter!
• Allow detergent solution to cool down.
• Unplug the mchine to void electricl shock before wshing.
• Drin pump lter cn lter the yrns nd smll foreign mtters from the wshing.
• Clen the lter periodiclly to ensure the norml opertion of wshing mchine.
CAUTION!
• Mke sure tht vlve cp nd emergency drin hose re reinstlled properly, cp pltes should be
inserted ligning to hole pltes otherwise wter my lek;
• Some mchines don’t hve emergency drin hose, so step 2 nd step 3 cn be skipped.
Rotte lower cover cp directly to mke wter run into bsin.
• When the pplince is in use nd depending on the progrm selected there cn be hot wter in
the pump. Never remove the pump cover during wsh cycle, lwys wit until the pplince hs
nished the cycle, nd is empty. When replcing the cover, ensure it is securely re-tightened.
Drin the wter out
of the pump, using
continer to collect
Clen the lter
Open the lter by turning
to the counter clockwise
Restore it nd djust the
convex plce to lign t the
pump hole
Remove foreign objects
Tighten the pump
cover clockwise
Clening Cre

User Manual
18
OPERATION IN CASE OF EMERGENCY
In the event of n emergency you should:
• Switch o ll controls.
• Switch the wshing mchine o t the power point or t the fuse box.
• Cll the Residenti Support Tem on 1300 11 HELP (4357).
Some minor fults cn be xed by referring to the instructions given in the Troubleshooting section
below. There is lso self-help section online t https://support.residentigroup.com.u/
DESCRIPTION INSPECTION ITEMS
No washing
• If the power is o or the fuse is burned out.
• If the power supply voltage is too low.
• If the water amount reaches to the required water level.
(The washer will not work if the water amount does not reach the required
water level)
• If it is set to "Delay" washing mode. (It will only start to work until the
reservation time reached)
No water flows in
• If the power is o or the fuse is burned out.
• If the water supply is cut o or the water pressure too low.
• If the inlet hose is properly connected and the water tap is opened.
• If the filtering screen of inlet valve is blocked by dirt.
• If the coil of inlet valve is damaged. (The slight electromagnetic sound is normal
phenomenon when the inlet valve is switched on)
• If the "Start/ Pause" button is pressed after the power switch is pressed.
Abnormal draining
• If the water drain hose is placed very high.
• If the end of water drain hose is sealed in pond.
• If the internal rubber ring of drain valve is blocked by dirt.
Abnormal spin
• If the door lid is closed.
• If all clothing piled largely at one side of barrel or the clothing is
excessively placed.
• If the washer is not placed in stable condition or it is placed in inclination state.
(The ground is not flat).
• If the motor belt is loosened.
Troubleshooting Tips

esatto.house
19
When the wshing mchine experiences fult, plese contct the Residenti Group support tem on:
Telephone: 1300 11 HELP (4357).
WARNING! Never dismntle the wshing mchine.
ERROR MESSAGES AND SOLUTIONS
INDICATION REASON SOLUTION
"E1" displays Alarm for
abnormal water intake.
Check the water tap is opened
or not
"E2" displays Alarm for water drain
has not finished.
Check the water level
sensor and drain pump
"E3" displays Alarm for lid not closed
before wash and spin.
Close the lid, Press "Start" button
"E4" displays
Alarm for washing stay
at one side.
Manually balance clothes
in the barrel by hand.
Other If problems still occur, please contact
the support team with the number at
the top of this page.
Troubleshooting Tips

User Manual
20
Below outlines the technicl specictions for your Estto Wshing Mchine.
ETLW55B ETLW72B ETLW80B ETLW102B
Size 515w 525d 910h
(mm)
550w 570d 940h
(mm)
580w 596d 968h
(mm)
601w 630d 1000h
(mm)
Net Weight 31kg 38kg 39kg 45kg
Rated Input Power 400W 550W 480W 600W
Rated Capacity of
Wash and Spin
5.5kg
(dry clothes)
7.0kg
(dry clothes)
8.0kg
(dry clothes)
10.0kg
(dry clothes)
Rated Voltage 230-240V~ 230-240V~ 230-240V~ 230-240V~
Rated Frequency 50Hz 50Hz 50Hz 50Hz
Maximum water
pressure permitted in
the water inlet
0.03MPa 0.03MPa 0.03MPa 0.03MPa
Minimum water
pressure permitted in
the water inlet
0.8MPa 0.8MPa 0.8MPa 0.8MPa
NOTE:
This product is subject to continuous improvement, speciction re subject to chnge without prior notice.
This product ws tested in ccordnce with AS/NZS 2040.2 nd AS/NZS6400 using progrm: Stndrd, which is the
progrm recommended for normlly soiled cotton lod t rted cpcity.
Technicl Informtion
This manual suits for next models
3
Table of contents
Other Esatto Washer manuals

Esatto
Esatto ETL8 .1 User manual

Esatto
Esatto EFLW1000 User manual

Esatto
Esatto GGSTLW55B User manual

Esatto
Esatto ETLW100B.1 User manual

Esatto
Esatto ETLW55B User manual

Esatto
Esatto ETLW55 User manual

Esatto
Esatto ETL6.1 User manual

Esatto
Esatto EFLW800 User manual

Esatto
Esatto EFLW6 User manual

Esatto
Esatto EFLW1000 User manual

Esatto
Esatto EFLW10W User manual

Esatto
Esatto EFLW75 User manual

Esatto
Esatto EFLW500 User manual

Esatto
Esatto ETLW7 User manual

Esatto
Esatto ETLW55B User manual

Esatto
Esatto EFLW10W User manual

Esatto
Esatto EFLW9 User manual

Esatto
Esatto EFLW800 User manual

Esatto
Esatto ETL95 User manual

Esatto
Esatto ETLW70B.1 User manual