ESDMAN DC0601C User manual
Point of Use Ionizing Blower_DC0601C
Do not disassemble the product without permission.
Do not use in dangerous environment.(such as flammable and explosive)
Do not use in place with plenty of oil or water,high temperature and humidity,
especially in places with condensation.
Thank you very much for purchasing our products, please read the manual in its entirety before
use.
Specification
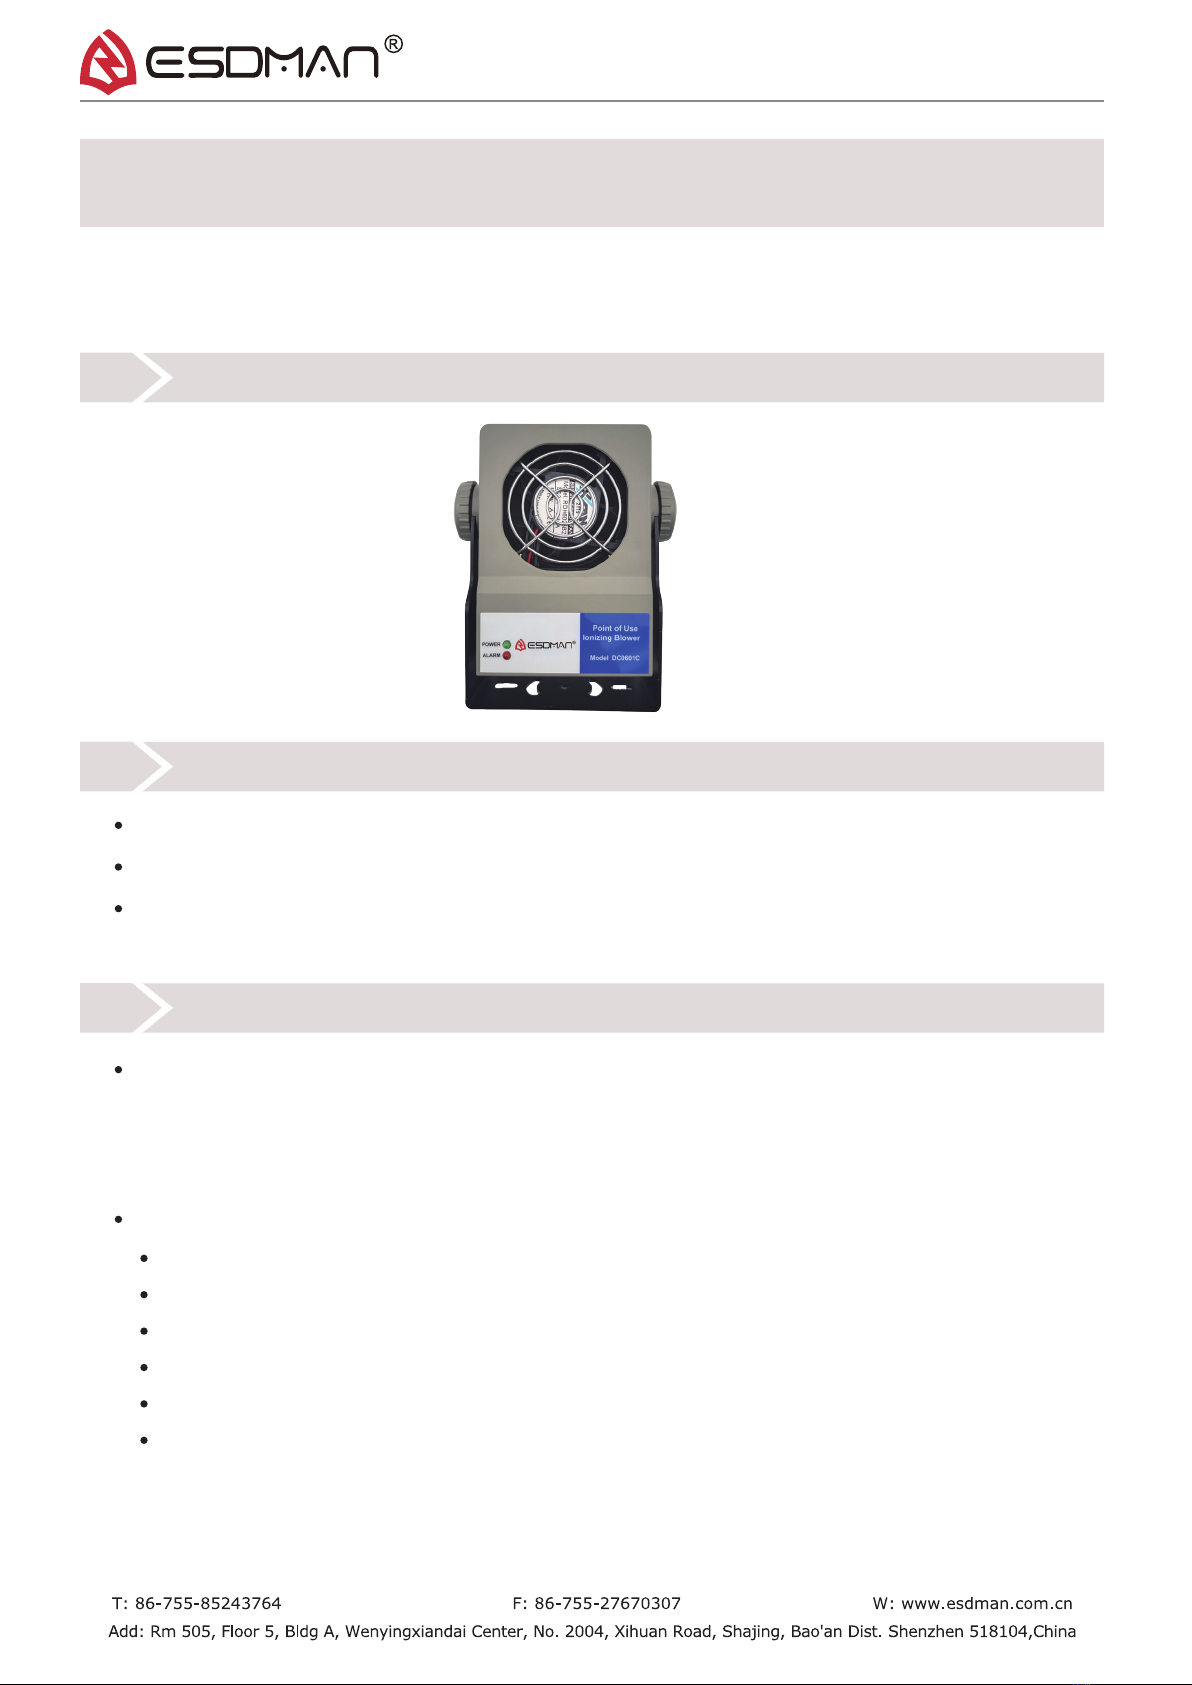
01 Product Picture
02 Safety
Adopting steady-state DC ionization technology, it is generally used to deal with static
electricity problems during assembly, testing, and packaging. It can also be installed in
equipment to provide rapid static elimination in a limited space to solve static electricity
generated during high-end manufacturing processes.
Steady-state DC ionization technology has the following advantages:
Compact body design, light weight,
Both sides buckles design, can lock the blowing angle,
Stable ion balance,
Longer cleaning and maintenance intervals,
No need for grounding, easy installation,
The emitter tip has high-voltage shielding technology to avoid electric field induction charging,
In the case of low wind speed, it can provide faster static dissipation speed, low wind speed and
low noise, which will not cause much noise to the production environment, making the operator
more comfortable.
03 Product Description
04 Specifications
Model
Input Voltage
Operating Power
Decay Time
Ion Balance
Technology
Emitter Material
Alarm Display
Signal output
Air volume
Ozone
Operating Env.
Dimension
Net weight
Case material
Warranty
Certification
DC0601C
DC24V±5%
Approx. 4.5W
Approx 2.0s ( 30 cm distance, maximum air volume, No dust filter)
±10V
±20V 30CM Distance
Steady-state DC ionization technology
Tungsten
Operation indicator, high voltage normal indicator, high voltage
abnormal indicator, red indicator
When the high voltage is abnormal, the red light will be on, and the
DC24V signal will be output.
0.7m³/min
Below 0.004ppm (distance 150mm)
0-40°C 20-75%RH(non condensing)
117*83*64mm Without bracket 138*115*64mmWith bracket H*W*D
Aprpox 0.4Kg
ABS Shell + aluminum alloy oxide bracket
One year
Compact Ionizer
Eliminate static electricity speed 30CM<3.0sec
±20V ion balance, 30cm distance
Suction type design (fan at the front and
discharge emitter at the back)
Both sides buckles design
The discharge emitter can be cleaned with
alcohol cotton through the rear grille
Tungsten material discharge needle
Alarm and equipment monitoring interface
DC24V Input
Meet cleanliness requirements
Features
Small size provides fast static elimination in
limited space
Fast elimination speed
Automatic balance, no need to adjust
Positive and negative ions are more evenly
distributed
The blowing angle can be locked to prevent the
fuselage from sliding to change the blowing angle
Easy maintenance
longer service life
When the high voltage is abnormal, the red light
will be on and the buzzer will sound and output
DC24V signal
Can be powered by device power
Small space is required, reducing the impact on
laminar wind
Benefits
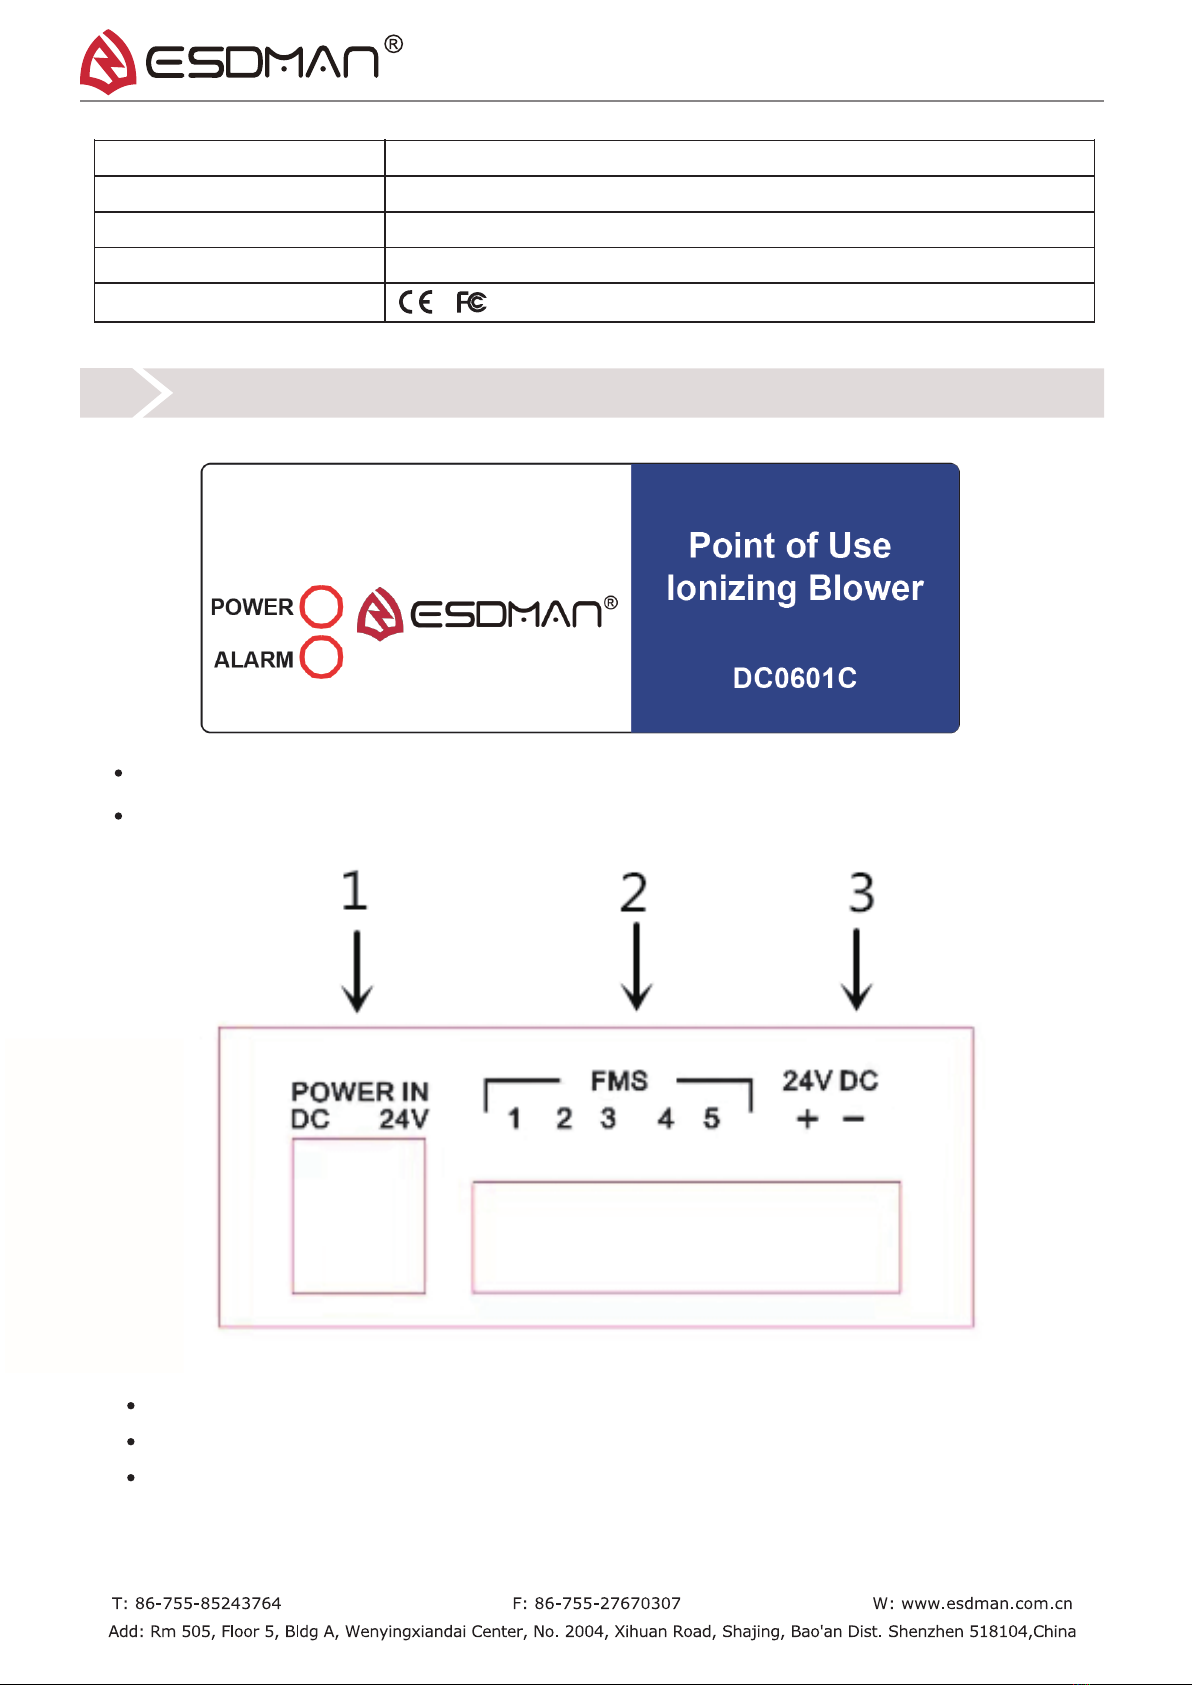
1. DC24V power interface
2. FMS interface
3. The device comes with a DC24V interface
05 Operation Panel Diagram
Model
Input Voltage
Operating Power
Decay Time
Ion Balance
Technology
Emitter Material
Alarm Display
Signal output
Air volume
Ozone
Operating Env.
Dimension
Net weight
Case material
Warranty
Certification
DC0601C
DC24V±5%
Approx. 4.5W
Approx 2.0s ( 30 cm distance, maximum air volume, No dust filter)
±10V
±20V 30CM Distance
Steady-state DC ionization technology
Tungsten
Operation indicator, high voltage normal indicator, high voltage
abnormal indicator, red indicator
When the high voltage is abnormal, the red light will be on, and the
DC24V signal will be output.
0.7m³/min
Below 0.004ppm (distance 150mm)
0-40°C 20-75%RH(non condensing)
117*83*64mm Without bracket 138*115*64mmWith bracket H*W*D
Aprpox 0.4Kg
ABS Shell + aluminum alloy oxide bracket
One year
POWER Operation indicator
ALARM Alarm Indicator
Insert the DC head of the attached power adapter into the power port on the back of the
instrument, connect the power adapter to the AC110-220V socket, the POWER green indicator
light is on, and the instrument is running normally.
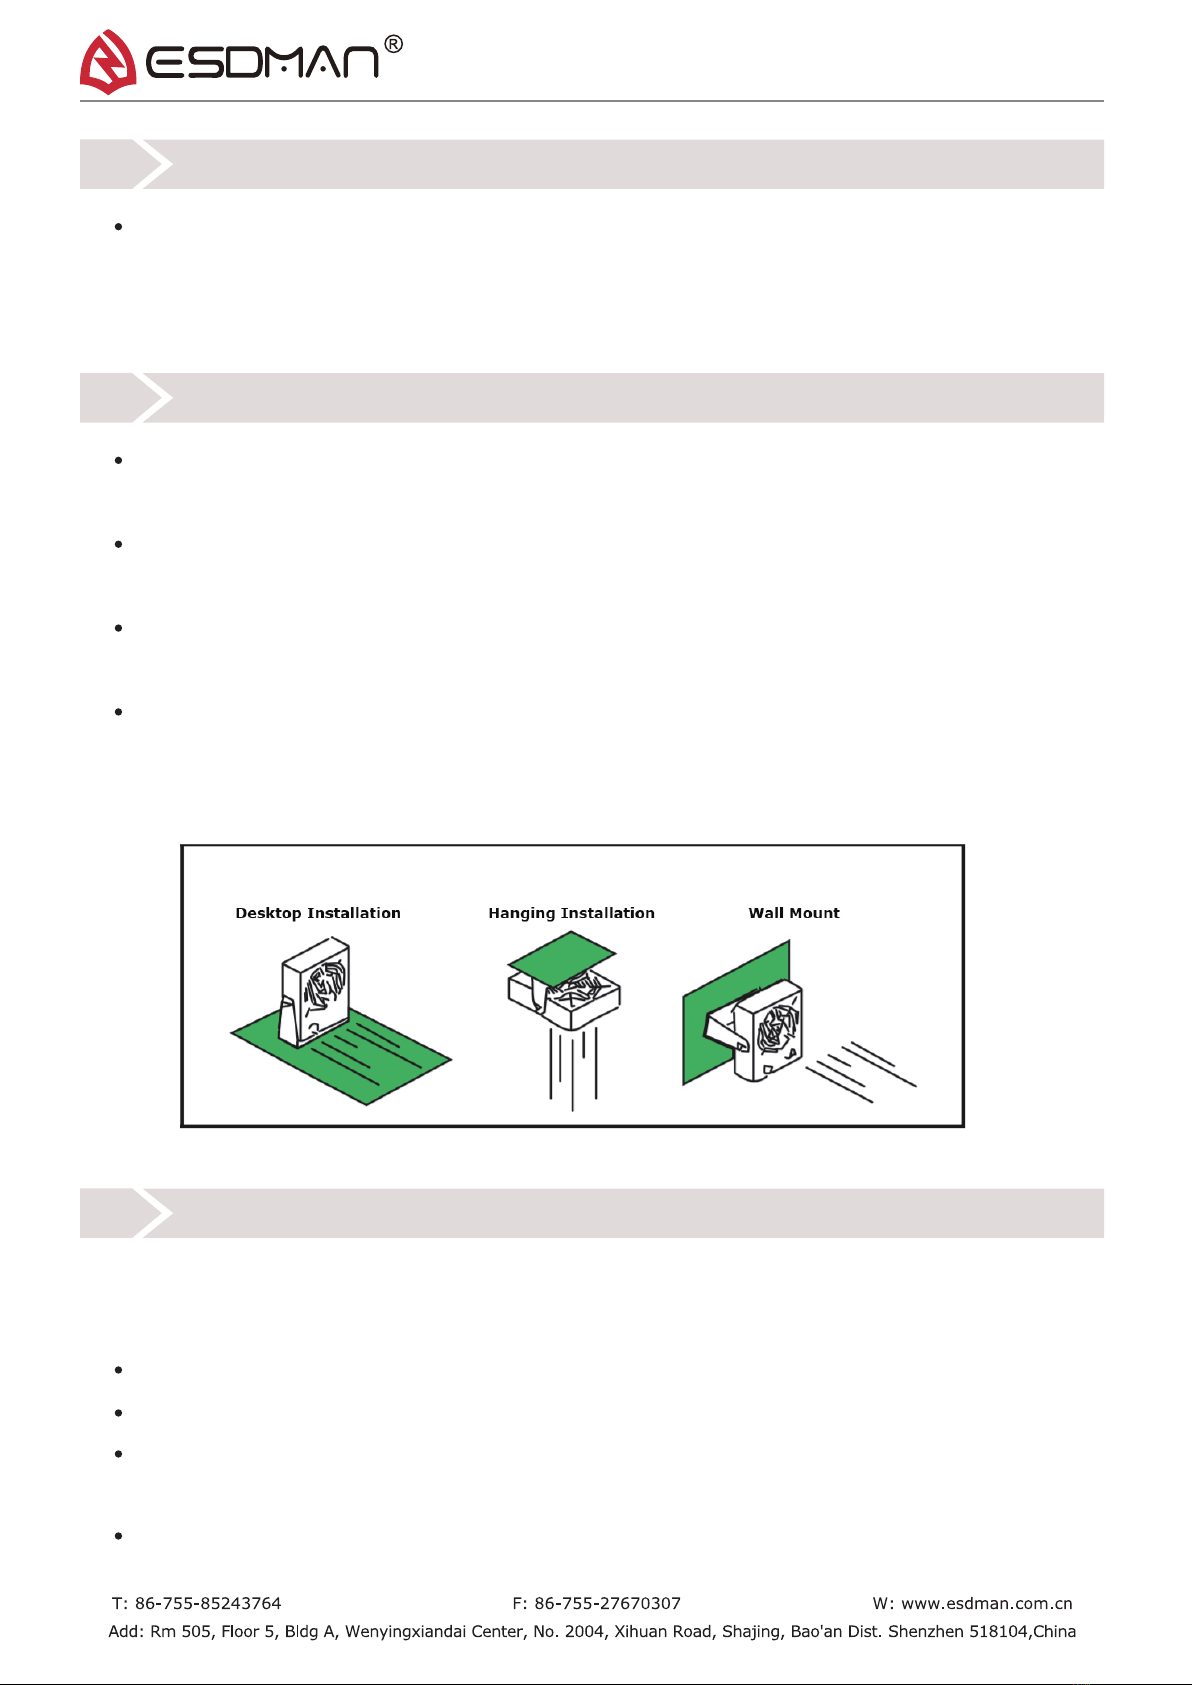
06 Installation
Use M6 screws and nuts to fix the bottom bracket of the fan at an appropriate position that
needs to eliminate static electricity.
When using more than two ionizers, make sure to keep a distance of at least 100mm between
the two.
The distance from the air outlet needs to be at least 100mm away from static objects, and
reverse charging may occur within 100mm.
The ionizer is at least 300mm away from the metal conductor, and the air inlet is at least
150mm away from the wall and other objects.
07 Installation Method
Notice: Ionizer has to be ground properly to make sure ion output automatic balance
Installation Diagram
08 Testing Method
Equipment name: The company uses ME-288B rechargeable flat panel tester (CPM).
The test instrument must be well grounded, and the ionizer under test must be well grounded.
The ion blowing port of the desktop ionizer is centered on the flat tester and tested at different
distances such as 30cm, 60cm, and 90cm.
The test is carried out at maximum air volume and no dust filter.
Test the two performance parameters of bias voltage and dissipation time.
Factory test method:

Field test method:
Test Schematic
During on-site testing, the test panel of the instrument should be placed where the ESD
sensitive components are actually operated.
The specific test method is subject to the instructions of different test instruments.
09 Static Elimination Performance
Operating Voltage: DC24V
Test Voltage ±1000V-±100V
Positive
Negative
Positive
Negative
Distance(mm)
Static elimination
time
Residual voltage
Measurement method: use 20PF, 150mm static elimination monitor to measure.
When the air volume is maximum, the dissipation time from ±1000V---±100V.
Different environment test results are different, the above is the reference data, please test
according to the actual use environment.
±20V
300
2.5S
3.0S
600
7.5S
8.9S
900
15.5S
17.6S
Temperature23±3OC
Humidity50%±5%
After the discharge emitter is used for a long time, there will be dust and other pollutants in and
around the discharge emitter.
Use cotton swabs to remove contaminants.
The discharge emitter should be cleaned regularly (approximately 100 hours of use need to
be cleaned once). When the pollution is serious, the cotton swab can be cleaned with alcohol.
Be careful not to damage the discharge emitter when cleaning.
Cleaning of the discharge emitter
10 Routine Maintenance

When the high pressure is abnormal, the red light of ALARM will prompt the operator to
overhaul the fan.
11 Abnormal Alarm
12 Warranty
ESDMAN's products have undergone strict factory inspection. In case of failure, please contact
the nearest ESDMAN office and provide details of the failure.
The warranty period is one year, starting from the day the product is delivered to the place
designated by the purchaser.
This product is inspected and qualified by our company. During normal use during the warranty
period, such as damage or malfunction due to poor design and manufacturing, free maintenance
will be provided.
Warranty
Warranty Period
The discharge emitter is a consumable part and is not covered by the warranty.
Breakage, breakage or malfunction due to abnormal use.
Failure caused by changes or disassembly and maintenance by non-maintenance personnel of
our company.
Failures caused by natural force majeure factors such as fires, natural disasters, floods, and
earthquakes.
Failure caused by external factors such as abnormal voltage.
The following conditions are not covered by the warranty
13 Standard Components (Packing List)
After unpacking, please confirm the package contents first
DC0601C
Power Adapter
Bracket
Fixed Handle
User's Guide
Factory Report
1 Set
1 Unit
1 Unit
2 Units
1 Unit
1 Unit
Table of contents


