Esma E889 User manual

1
Automated Ultrasonic Wash Equipment
P.O. Box 734
450 Taft Drive
South Holland, IL 0473
800-276-2466
www.esmainc.com
Email: sales@esmainc.com
18 Gallon Automatic
Ultrasonic Equipment
Completely closed, modular system
incorporating integrated heated
storage containment tanks with a
self-contained, automatic ultra-
sonic washer

2
3
Esma Inc.
PO Box 734 450 W. Taft Drive
South Holland, IL 60473
708-331-1855 800-276-2466 FAX 708-331-8919
Instructions for
Models E889 and E992
Ultrasonic Washers

4
Introduction
The E889 unit has one rinse solenoid (primary) for connection to a
hot water source. The model E992 has two input solenoids (primary and
secondary) for rinses from multiple sources.
The units automatically perform a cleaning cycle the major steps
of which are:
1 - Ultrasonic cleaning
2 - Ultrasonic rinsing (hot tap water)
2a - Ultrasonic rinsing (deionized water) - E992 unit only
3 - Hot Air Drying
The result: a finished product ready for the next step (sterilizing
packaging assembly storage).
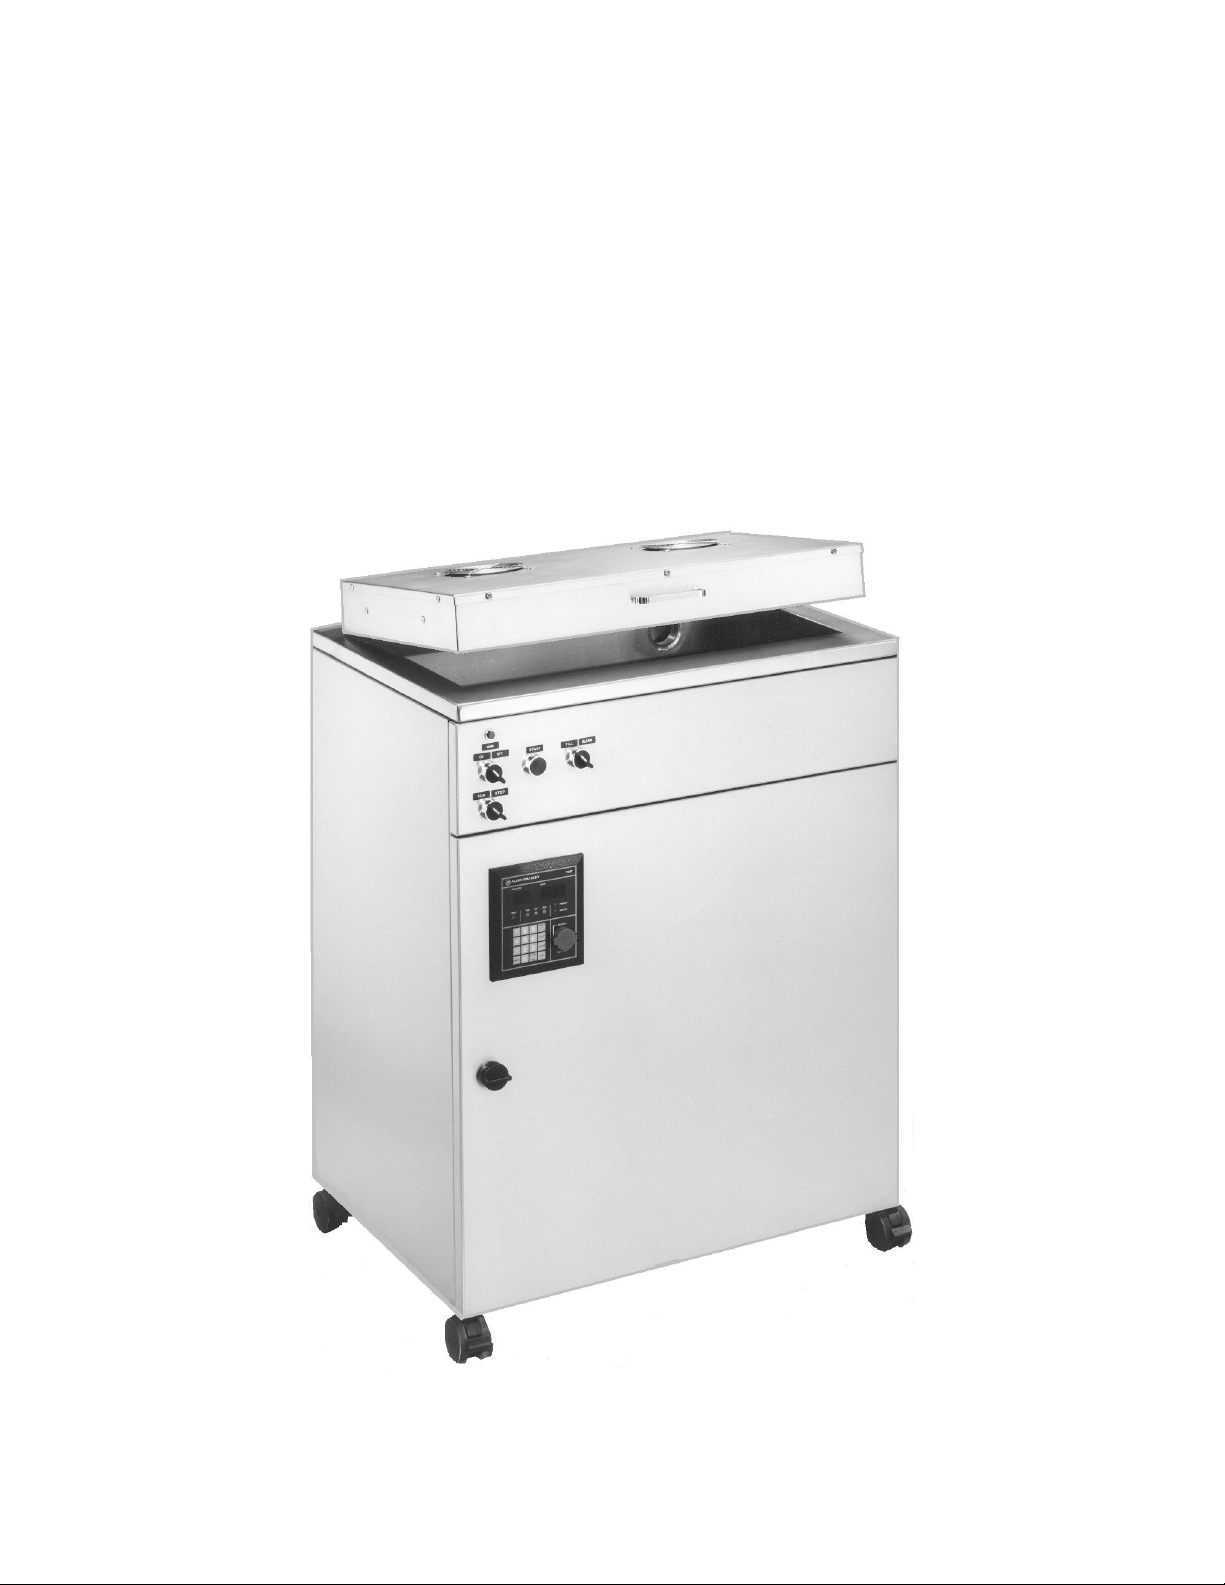
The unit is housed in a 304 stainless steel (SS) console. The tank
is manufactured from SS 316 with 36 double potting transducers
mounted on the bottom. The tank is fitted with a SS hinged cover which
houses the fans and heaters for hot air-drying.
Inside the console are Power Relays with accessible fuses for the
115VAC and 230VAC lines Power Module boxes 1 and 2 and pumps.
The Power Modules contain self-tuning modular circuit boards a
programmable controller high velocity fans to cool the electronics and
an RFI filters to eliminate any high frequency interference.
On the door of the console is mounted a Omron Programming
Console which allows access to the Programmed Sequencer data and
enables the monitoring of the “on-line” operation and the modifying of
the times of the operation. The programmer is a hand held device and
need not be mounted on door.
PLEASE READ THESE INSTRUCTIONS THOROUGHLY BEFORE
INSTALLATION AND OPERATION. CALL (800) 276-2466 IF YOU HAVE
ANY QUESTIONS.
Installation

5
When unit is removed from crate the supplied casters must be
installed on bottom of unit. Place casters with locking brakes on front
corners of unit.
The unit has been thoroughly bench-tested and is shipped to the
Customer ready to operate. Move the unit into position and lock Caster
wheels. Once the position of the unit has been established the electrical
and plumbing requirements must be completed by the user.
The power modules inside the unit have been bolted to the bottom
of chassis for shipping. They can remain bolted. However if they have
to be removed for any reason the filter screen door on the back of the
unit has to be opened. Once the filter is removed the screws and bolts
(2’’ in each bracket) in hold-down brackets can be removed. These need
not be replaced for normal use and movement of unit. Leave hold-down
bracket fixed to power modules.
1. Plumbing Hook-Up
A. Water Input
The primary solenoid should be connected to a hot water source.
The hot water input solenoid (primary) has a ¾’’ NH male fitting
(supplied) to be connected to the high-
pressure hose and filter screen (supplied).
Inside the unit there is a 5.0 GPM flow
regulator. A valve for emergency shut off
should be installed at the water source. This
valve should not restrict the flow more than
5.0 GPM.
Also depending on local regulations a
back flow regulator should be attached to
your water source. The valve and back flow
regulator are not supplied. On E992 units
deionized water is normally connected to the
Secondary solenoid (not pictured) located below the Primary solenoid.
The ¾’’ NH male fitting high-pressure hose and filter are also supplied
for this hookup.
CAUTION: MAKE SURE EXCESS TEFLON TAPE OR PIPE JOINT
COMPOUND DOES NOT GET INTO SOLENOID.
B. Water Output

6
Two pumps have been installed in the unit. One pump is used for
the normal draining of tank and the second pump is used with the
overflow drain during the cascading rinse. On the outside of the console
you will find a ¾” NPT bulkhead coupling which extends through the
back of the cabinet. This fitting comes from the internal pumps and
must be adapted to your drain plumbing using ¾” ID or larger tubing.
2. Electrical
The unit is wired for both 120VAC and
230VAC lines. The ratings are 1850 watts
120VAC 50/60 HZ and 3000 watts 230VAC
60 HZ single phase. The power cords are
supplied for plugging in to your electricity
source. The 230 volt line is supplied with an
NEMA 6-20P plug. The 230V supply must
utilize a third wire as a ground and not a
current carrier. The 120V power cord must
be connected to a three-way grounded outlet.
DO NOT OPERATE UNIT WITHOUT PROPER
GROUNDING. The 230V line is fused at 15 AMP and the 120 volt line at
20 AMP. These fuses are located inside unit on Power Relay enclosure.
3. Control Function
A) Main Switch: When unit is ready for operation turn the main
switch to ON and the indicator light will be ON.
B) Run Stop Switch: Located below the main switch it must be in
the RUN position for the programmable controller to operate. If
during the program cycle you want to stop the process turn
switch to STOP position and program will start over at the
beginning of the cycle when START button is pushed. Use Run
Stop switch only for emergency stopping of unit or to STOP the
program and begin at the beginning. Use the Main switch if you
wish to stop the unit and have the program remain where it is.
4. Selector Switch

7
FILL - Push START button and tank will fill with warm water.
Once the tank is filled instruments or parts can be added to soak.
During prolonged periods of soaking DO NOT CLOSE COVER OF TANK.
CLEAN - When tank is filled with instruments or parts close cover
on tank move switch to CLEAN push START button and the cleaning
cycle will begin. The cleaning cycle can not be started if the fill cycle is
not completed. This is a safety precaution so the ultrasonics will not
operate without water in the tank.
FILL-CLEAN - In this position the cleaning cycle automatically
follows the fill cycle for a full cycle operation. Instruments parts and
any cleaning materials are to be added to an empty tank. Close tank
cover and push START for full cycle operation.
5. Start Switch
With main switch ON and RUN STOP SWITCH set at RUN push
start button and the process will begin.
6. Programming Console
The Programming Console (C200H-PR027-E) manufactured by
Omron is mounted on the front door of cabinet. The programmer is on
whenever the main power is on. The programmer when set properly will
indicate the times of the various processes during the cycle.
Leave the programmer in the run mode and clear the viewing
screen by pressing the monitor clear and monitor buttons in
succession. Now press the clear time 1 and monitor keys and the
timing of each programming step can be monitored.
If a certain function within the program needs to be changed a key
(provided) is inserted into programmer and switched to the program
made and changes can be made in cleaning cycle. ESMA should be
notified and a step by step procedure will be given to simplify any
necessary changes.

8
7. Preliminary Start-Up
After plumbing is completed conduct the following test to
determine if there are any leaks in the system.
CAUTION: On the E992 unit deionized or regular water must be
connected to the secondary solenoid or damage will result to the unit if
no water enters the tank during the second rinse cycle.
A) Turn main power ON
B) RUN-STOP switch must be ON
C) Close cover
D) Turn selector switch to FILL
Push START button and hot water should enter the tank. The unit
has a flow control valve which allows 5.0 GPM so it is important that
the shutoff valve does not restrict the flow to less than 5.0 GPM or the fill
time will have to be increased.
After 150 seconds (or other programmed fill time) the fill solenoid
will close and the water will be up to the overflow drain opening. At this
time shut main power off disconnect electrical plugs from outlets open
cabinet and check for leaks.
Leave selector switch in FILL position push START and hot water
will enter the already full tank and begin to cascade through the overflow
drain. After 150 seconds the FILL solenoid will close.
If no leaks are detected connect power turn main switch ON
move selector switch to CLEAN push START and the cleaning cycle will
begin.
After the ultrasonic cleaning step the tank will drain (with pump).
When the tank is empty (after 150 seconds) shut main off disconnect
power and check for leaks in drain-pump line.
If no leaks are detected connect power turn main ON and
program will complete to finish. Check at each fill stage that water is
coming into tank.
8. Operation
The basic principle of operation is the enhancement and
acceleration of the cleaning action through ultrasonic cavitations.
Instruments or parts to be cleaned are placed in the basket (or cassette
racks) and lowered into the tank.
NEVER PLACE PARTS DIRECTLY ON THE BOTTOM OF THE TANK.
The baskets and cassette racks that can be purchased from ESMA Inc.
have rubber supports to keep parts off bottom of tank.

9
9. Procedure
-Turn main power ON.
-Turn RUN-STOP switch to RUN. (RUN-STOP Switch Should
remain in RUN position at all times).
-Set selector switch to either FILL or FILL-CLEAN positions.
-Add cleaning agent to empty tank (see section on cleaning agents).
-Lower basket with instruments or parts on support rack.
-Close cover.
-Push START button and the selected cleaning program will
automatically proceed.
(Details on selected program are given in Figure 1 depending on setting
of selector switch)
10. Water Consumption
In the progress for E889 12.5 gallons are used on the initial fill
cycle with an additional 22.5 gallons used in the subsequent fill or
rinse—for a total of 35 gallons of hot water used per cycle.
In the program for E992 an additional 22 gallons of deionized
water is used in the secondary rinse.
11. Drying
In the drying portion of the programs the incoming air is heated in
the tank cover to 160-180 degrees F. and forced by the fan through the
tank cover. CAUTION: Do not touch the cover during the drying cycle
because some areas of the cover will be hot.
NEVER place any towel or obstruction over the fan intake on cover.
After 7 minutes of hot air drying a buzzer sounds the end of the
program. The air temperature during the Hot Air Drying can be
increased or decreased by adjusting two thermoswitches located in cover
at hot air exit.

10
12. Cleaning Agent
It is recommended to use a liquid cleaning agent because some
powders take too long to go into solution. ESMA Inc. has liquid cleaners
E589 E882 E484 etc. where it is recommended to use 2 to 4 cups per
tank load. Some general-purpose detergents may be all that is required
to clean your items. Depending on types of parts and debris to be
removed some experimentation will be required with type of cleaners
and concentrations. Remember: Adding too much cleaning agent can
cause a problem with final rinsing of parts.
13. Power Modules 1 and 2
The Power Modules contain the six circuit boards programmable
controller fans relays RFI filters etc. There are six lights one per
circuit board (two on PM1 and four on PM2) to indicate if circuit boards
are operating. To check if all circuit boards are operating open door
slightly when unit is ultrasonically cleaning: all indicator lights must be
ON. If a light is out the corresponding circuit board will have to be
repaired.
14. Programmable Controller
An Omron CPM 1 programmable controller is used to control the
process. The unit has a flash memory backup without a battery.
The controller has indicator lights for inputs and outputs which
are lit during process. The outputs are as follows:
Output Controls
00 Primary solenoid
01 Ultrasonics
02 Drain solenoid
03 Dryer
04 Overflow Pump
05 Buzzer
06 Drain Pump
07 Secondary Solenoid
The Programming Console on cabinet door can be used to monitor
these outputs or change their values. To change their values ESMA
should be notified.
This manual suits for next models
1
Table of contents
Other Esma Washer manuals


Popular Washer manuals by other brands

Tricity Bendix
Tricity Bendix AW 1000 W Operating & installation instructions

Panasonic
Panasonic NA-F60L5WRB operating instructions

GE
GE WSLP1500 Dimensions and installation information

Electrolux
Electrolux EWF1284EDW Service manual

Bosch
Bosch WAN2829BSN User manual and installation instructions

LG
LG TV2516DV3B owner's manual


