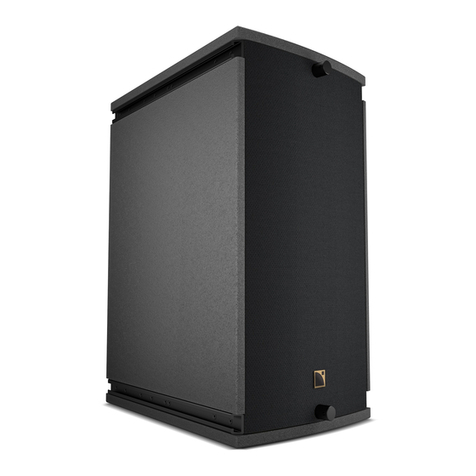
Esoteric Esoteric MG-10 User manual

9A10515500
Loudspeaker System
OWNER’S MANUAL
MG-10/MG-20

2
Thank you for choosing Esoteric. Read this manual
carefully to get the best performance from this unit.
<Choose the installation location of your unit carefully. Avoid
placing it in direct sunlight or close to a source of heat. Also
avoid locations subject to vibrations and excessive dust, heat,
cold or moisture.
<Keep this manual in a safe place for future reference.
MG-10
This model is designed to be placed on a loudspeaker stand.
A specially made Esoteric loudspeaker stand is available from
your dealer. This stand is supplied with fixing bolts and has
fixing holes in the top plate which match up with threaded
inserts in the bottom of the MG-10. Screw the loudspeaker
firmly to the stand using the fixing bolts and washers
provided. Do not overtighten the bolts. If using an alternative
loudspeaker stand the height of the stand should be chosen
so that the ears of people in the normal listening position are
at approximately the same height as the centre of the
tweeter. The loudspeaker should be secured to the top plate
of the stand by suitable adhesive pads or small balls of Blu-
Tack, or by the method recommended by the stand
manufacturer.
MG-20
This model is designed for floor mounting on carpet or bare
wooden floors. Screw the four carpet piercing spikes
(supplied in the accessory pack) into the bottom panel of each
cabinet to get the best sound quality, adjusting the length of
the spike to ensure stability on uneven floors. Lock the spikes
with the locknuts supplied. The spikes are designed to avoid
damage to the carpet as they penetrate the woven backing of
the carpet. For bare wooden floors the spikes should rest on
the metal cups provided to protect the floor. The ideal
listening position is where the listener’s ears are at
approximately the same height as the centre of the tweeter.
MG-20 Optional Accessory Plinth
A specially designed Esoteric Performance Platform is available
from your dealer for model MG-20 to improve stability and
sound quality. The Platform bolts onto the bottom of the
loudspeaker using the threaded inserts provided for the
spikes.
Before Use Initial Positioning
Initial Set Up
Amplifier Matching
Locate the loudspeakers so that the favourite listening position is
approximately 15° from the front to back axis of each cabinet.
The axes of both cabinets should intersect at a point slightly in
front of the listening position. Remember that the proximity of
the loudspeakers to walls and corners will affect the sound.
Some experimentation will probably be needed to fine-tune the
stereo image depth and low frequency sound quality.
Loudspeaker positions which are close to walls or in room
corners have the effect of increasing and unbalancing low
frequency sound energy and adjacent reflective walls may upset
the stereo image accuracy and width by causing unwanted
reflections.
The loudspeakers are designed to be used at least 1m from any
sidewall or reflective surface and at least 0.5m away from a rear
wall. Only at these distances or greater from side and rear walls
will their exceptional stereo image depth capabilities be realised.
Consult the product specification page as this clearly shows the
acceptable power range for amplifier matching to your
loudspeakers. The high peak power handling of Esoteric
loudspeakers permits responsible use with more powerful
amplifiers.
As with all loudspeaker systems, power handling is a function of
voice coil thermal capacity. Care should be taken to avoid
overdriving or overloading the amplifier as this will cause
“clipping” or distortion of the output signal. If overload
distortion or clipping lasts for any extended period it will cause
damage to the loudspeakers.
Generally an amplifier of higher power that is operating well
within its power limit and therefore free from distortion will do
much less damage to the loudspeaker than a lower power
amplifier operating at its power limit producing clipping
distortion. Also, a high powered amplifier running at less than
50% to 90% of output power generally sounds a great deal
better than a lower powered example struggling to achieve
100%. An amplifier with insufficient drive capability will not
allow the full performance of the loudspeakers to be realised.

3
Cable Choice Connecting your Loudspeakers
Terminal Panel
FIG. 1
FIG. 2
Always use the best quality of cable available within your
budget. High quality audio signals passing from the amplifier to
the loudspeaker are unusual in their demands on the cable.
Wide dynamic ranges of greater than 100dB and frequency
bandwidth information ranging over 9 octaves have to coexist
with the ability to transmit peak currents of at least 10 amps, all
without incurring any loss or signal impairment. This is one
reason why the sound quality of the information reproduced by
the loudspeakers is so dependant on the physical properties of
the cables connecting them to the amplifier.
Another reason for special loudspeaker cables concerns Radio
Frequency Interference (RFI). There are many very strong Naval
and Maritime radio signals availabe nearly everywhere in the
world and these can be tuned by simple loudspeaker cables in
combination with passive crossover components and voice coil
inductance. RFI energy can be fed back into the amplifier output
stage circuits, demodulated and find its way into the feedback
loop causing considerable loss of sound quality.
MG-10 and MG-20 loudspeakers have special internal wiring
which connects the grounding terminal on the rear terminal
panel to the metal chassis and magnet system of the drive units,
thereby screening the voice coils. This effectively shields the voice
coils and any interfering RFI picked up inside the loudspeaker. To
take advantage of the driver grounding feature and to optimise
performance, use a low capacitance shielded or screened
loudspeaker cable. The screening termination or drain wire
should be connected to the “ground” (green) terminal at the
loudspeaker end of the cable and to the ground or chassis
connection at the amplifier end of the cable (Figure 1).
If you are not using a screened loudspeaker cable but wish to
benefit from the grounding facility, run a single cable between
the “ground” (green) terminal on the loudspeaker to the ground
or chassis connection on the amplifier.
Connection in Single Wire Mode
<Locate the 2 wire links in the accessory pack. Each link has a
4mm sleeve at each end. Referring to Figure 2, Link the HF+
and LF+ terminals and HF- and LF- terminals as shown.
<Take hold of the loudspeaker cable from the amplifier and fit
the red (positive) lead into the red (positive) high frequency
(HF+) terminal on the loudspeaker.
<The cable at the other (amplifier) end of the lead should be
connected to the red (positive) terminal on the amplifier.
<Repeat this operation at the loudspeaker end of the cable for
the black (negative) high frequency (HF-) terminal, and then
at the other end of the cable connect to the black (negative)
terminal on the amplifier.
<Repeat the whole operation for the other loudspeaker.
<Check all connections carefully making sure that red cable
connects to red terminal, black to black. If your cable is not
colour coded make sure that the positive terminal from the
amplifier connects through the appropriate part of the cable
to the positive (HF+) terminal on the loudspeaker and the
negative terminal on the amplifier connects through the cable
to the negative (HF-) terminal on the loudspeaker.
Choosing the HF terminals for single wire mode has been found
to give the best sound quality. Note that most loudspeaker
cables have directional properties and give their best sound
quality when arrows printed on the cable point from the
amplifier to the loudspeaker.
Select a signal source, such as a CD player; switch on the
amplifier and slowly turn up the volume control to check that
both loudspeakers are reproducing bass and treble information
by listening closely to the woofer and then the tweeter at a low
volume setting.
To avoid potential damage to your loudspeaker, ensure that the
amplifier is switched OFF prior to connecting or disconnecting
any cables. Before switching on double check that all
connections are secure and that polarity is correct.
HF-
LF-
HF+
LF+
|
High Frequency
Positive (+) Terminal
Low Frequency
Positive (+) Terminal
“Earth” or “Ground” Terminal
High Frequency
Negative (–) Terminal
Low Frequency
Negative (–) Terminal
HF-
LF-
HF+
LF+
|
POWER AMPLIFIER
To “Ground” or
“Earth” Connection
on Amplifier (Optional)
To Right
Speaker
LR
+– +–

4
Connection in Bi-Wire Mode
Note: The link cables in the accessory pack are not used for Bi-
wire mode.
<Be sure that the amplifier is switched OFF and then prepare
the two sets of cabling for each “side” of the system
separately.
<Measure and cut four lengths of cable, two lengths for each
loudspeaker. Label two of the cable lengths Left LF and Left
HF (low frequency and high frequency) then repeat this
process with two lengths of cable for the right side, Right LF
and Right HF.
<If your amplifier is not equipped with separate output
terminals for bass and treble information then, at the
amplifier end of the cables, twist the Left LF+ (positive) and
the Left HF+ (positive) conductors together. Connect these to
the amplifier Left channel positive terminal marked + (plus) or
coloured red. Next, twist the Left LF- (negative) and the HF-
(negative) cables together and connect them to the amplifier
Left channel negative terminal marked - (minus) or coloured
black. At the loudspeaker end connect the cables labelled Left
LF+ and Left LF- to the left hand loudspeaker LF terminals,
ensuring that you note the polarity markings on the cable
sheathing. Then proceed to connect the Left HF+ and Left HF-
to the HF terminals on the same loudspeaker.
<Repeat this process to connect the right hand loudspeaker to
the amplifier right channel output, once again ensuring that
polarity is correct throughout.
Switch the amplifier on with the volume control set at its lowest
setting. Select a favourite source and slowly turn up the volume
to a low level. Check that bass and treble information is being
reproduced from both loudspeakers by listening closely to the
woofer and then the tweeter at a low volume setting. If there is
a problem, switch off the amplifier and recheck the connections.
Connecting your Loudspeakers
Connection in Bi-Amp Mode
Note: The link cables in the accessory pack are not used for Bi-
amp mode. If you are converting from Single-wire mode, remove
the link cables now, otherwise amplifier damage could result.
Bi-Amping extends the principle of bi-wiring one stage further.
In this connection option separate power amplifiers are used for
bass and treble signals in each loudspeaker. Four mono (or two
stereo) amplifiers of the same type and identical electronic
design are required for a stereo pair of loudspeakers operating in
Bi-amp mode.
<Ensure that any cable links between the loudspeaker HF+ and
LF+ or HF- and LF- terminals are removed or amplifier damage
may result.
<Ensure that correct polarity is maintained throughout.
<If two stereo amplifiers are used (instead of 4 separate
amplifiers), it is recommended that one amplifier supply bass
information to left and right loudspeakers and the other, the
treble information.
<Avoid potential damage to your amplifier - ensure that all
connections are secure and the polarity is correct in all wiring.
HF-
LF-
HF+
LF+
|
POWER AMPLIFIER
To 'Ground' or
'Earth' Connection
on Amplifier (Optional)
Links Removed
To Right
Speaker
LR
+– +–
HF-
LF-
HF+
LF+
|
High Frequency
POWER AMPLIFIER
Low Frequency
POWER AMPLIFIER
To “Ground” or
“Earth” Connection
on High Frequency
Amplifier (Optional)
Links Removed
LR
+– +–
LR
+– +–
To Right
Speaker
To Right
Speaker
FIG. 4
FIG. 3

5
Grille Removal
Special acoustically transparent cloth is used in the grille
assembly. However for the very best performance, you may wish
to remove the grilles. The grille is fixed to the cabinet by dowel
pegs mounted in the back face of the grille and sockets
mounted in the front of the loudspeaker. The MG-10 has 2 pairs
of dowel pegs, top and bottom. The MG-20 has 3 pairs of dowel
pegs, top, lower middle and bottom. To remove the grille pull
gently on the grill close to each pair of dowel pegs and when
movement is detected, move to another pair of dowel pegs.
Repeat this operation until all the grille pegs have disengaged
with their respective sockets.
Proximity to Televisions & Monitors
The Low Frequency Section
Running In
The High Frequency Section
Loudspeaker drive units contain powerful magnets. These are
capable of generating a substantial magnetic field extending a
considerable distance beyond the sidewalls of the loudspeaker
enclosure. This field can cause picture distortion if the
loudspeakers are placed too close to a television or monitor
using a Cathode Ray Tube (CRT).
For this reason, the MG-10 or MG-20 should be placed no closer
than 1.0m (3.25 ft.) from a television or monitor using a CRT. If
a CRT television or monitor is accidently placed too close to a
loudspeaker and the colour values are upset, carry out the de-
gaussing procedure by referring to the television or monitor
instruction manual. Plasma and LCD screens are not affected by
magnetic fields and do not have this problem.
Like all loudspeakers, the drive units in your Esoteric
loudspeakers will take a while to reach optimum performance,
as the stresses created in the materials during manufacturing
processes relax - especially in the suspension systems. For this
reason, it is beneficial to run the system at fairly high levels at
normal room temperature, for approximately 20 hours to
achieve best results.
The high frequency diaphragm is a similar high temperature
deep draw Magnesium pressing but 10 times thinner resulting in
an ultra lightweight structure of immense stiffness. The
diaphragm is suspended by a miniature roll surround for good
damping and low free air resonant frequency and coupled to a
rigid aluminium voice coil suspended in a high flux magnetic gap
provided by a neodymium magnet structure. The rear of the
diaphragm vents through to a damped rear chamber to define
the low frequency response of the HF unit and which absorbs
the rear acoustic radiation to prevent interference with the main
forward facing acoustic energy pattern.
Extraordinary new developments in high temperature deep
drawing and pressing of Magnesium foil have led to the
development of a cone piston and dust cap of near perfect
acoustic qualities. Magnesium offers optimised mass, internal
damping, rigidity and a selective speed of sound through the
material to give a superb standard of reproduction which is
immediately obvious from the first audition of the loudspeaker.
In addition the Magnesium components are treated with a high
temperature resistant coating to protect them from oxidation
and to enhance the acoustic characteristics. The permanent
magnet motor drive system is fitted with two sets of flux control
devices which linearise the voice coil inductance and reduce odd
order distortion components. Complementary linear front and
rear suspension systems complete the low frequency drive unit
which is housed in a rigid diecast chassis and connected through
a selectively absorbent damping mechanism through to the
cabinet bracing structure. The cabinet volume is ported to
provide ideal damping and low frequency extension resulting in
a very fast and detailed bass response.

6
During the design of the crossover network the acoustic,
mechanical and electrical interactions of the high and low
frequency sections have been fully analysed. The crossover is
therefore an integral part of the design of the system. The
crossover network provides complex equalisation in both
amplitude and phase for both LF and HF drive unit and fully
integrates the response at the crossover point.
All components are high precision, low-loss and thermally stable.
Very high quality specially damped and treated audio grade
polypropylene capacitors are used for the high frequency feed.
Large, low hysteresis laminated iron core inductors avoid
distortion and saturation effects. The individually hard wired
components are laid out to minimise inter component coupling
and are placed well away from the driver magnetic field. Van
den Hul high purity silver-plated copper wiring is used
throughout the internal connections in the loudspeaker.
The Crossover Network
The cabinet carcass is constructed from 15mm birch plywood
with a 30mm birch plywood front baffle. Carefully selected solid
hardwood mouldings and veneers have been hand finished to
exacting standards. The wood should only be cleaned with a dry
cloth or with a light application of quality non-silicone furniture
polish, taking care not to get polish on the grille cloth or any
part of the HF and LF drive units.
In common with all solid wood furniture, exposure to extremes
of heat, cold and varying humidity will cause the wood to ease
slightly. Therefore it is recommended that the loudspeaker is
protected from environmental extremes to guard against any
such occurrence. Any wood will change colour when subjected
to the UV content of ambient light. Although the cabinet is
protected by an anti ultra violet lacquer, a light veneer such a
Cherry will darken naturally over time to a rich natural golden
colour.
Care of the Cabinet
Faultfinding
Esoteric loudspeakers are designed and manufactured to be
reliable. When a fault occurs in a hi-fi system the effect is always
heard through the loudspeakers although they may not be the
source of the fault. It is important to trace the cause of the
problem as accurately as possible. A fault heard on one source
only (for example CD or Phono for instance) is most unlikely to
be a loudspeaker problem. Loudspeakers do not in themselves
generate hum, hiss or rumble although high quality, wide
bandwidth loudspeakers may emphasise such problems.
Quality
The manufacture of Esoteric loudspeakers follows a policy of
stringent quality control procedures using sophisticated
measurement facilities. All drive units are designed and
manufactured specifically for the MG-10 and MG-20 models. All
incoming parts are thoroughly tested to ensure that they are as
specified. Not only is all data computerised, but rigorous testing
procedures during construction ensure every loudspeaker meets
or exceeds our exacting standards.
Caution
The high peak power handling of Esoteric loudspeakers will
allow responsible use with larger amplifiers on wide dynamic
range material. Take care with any amplifier, irrespective of
power output, to avoid abnormal conditions such as switch on
surges or output overload (clipping) that may result in peaks of
power measuring greatly over the rated output.

7
Technical Specifications
MG-10
Dimensions (H x W x D) . . . . . . . . . . . . . 440 x 216 x 271 mm
(17-5/16 x 8-1/2 x 10-11/16”)
Enclosure Volume. . . . . . . . . . . . . . . . . . . 13 litre (7/16 cu.ft.)
Enclosure Type . . . . . . . . . . . . . . . . . . . . . . . . . . . . . . . Reflex
Enclosure Weight . . . . . . . . . . . . . . . . . . . 7.5 kg (16-1/2 lbs)
Cabinet Construction . . . . . . . . . . High density birch plywood
Internally crossbraced and heavily damped
Recommended Amplifier Power . . 20 to 120 watt per channel
Power Rating . . . . . . . . . . . . . . . . . . . . . . . . . . . 75 watt RMS
300 watt peak
Sensitivity . . . . . . . . . . . . . . . . . . . . . . 87.5 dB for 2.83 volt at
1 metre, half space
Nominal Impedance . . . . . . . . . . . . . . . . . . . . . . . . . . . 6 ohm
Minimum Impedance . . . . . . . . . . . . . . . . . . . . . . . . 3.8 ohm
Frequency Response (-6dB) . . . . . . . . . . . . . . . 41 Hz - 44 kHz
Crossovere Frequency. . . . . . . . . . . . . . . . . . . . . . . . . 1.9 kHz
Crossover Type . . . . . . . . . . . . . . . . 2nd order LF, 3rd order HF.
Bi-Wired, Hard-Wired passive, low loss.
Driver Type . . . . . . . . . . 165mm (6-1/2”) magnesium cone LF
25mm (1/2”) magnesium dome HF
MG-20
Dimensions (H x W x D) . . . . . . . . . . . . 1060 x 216 x 271 mm
(41-3/4 x 8-1/2 x 10-11/16”)
Enclosure Volume . . . . . . . . . . . . . . . . . . 21.5 litre (3/4 cu.ft.)
Enclosure Type . . . . . . . . . . . . . . . . . . . . . . . . . . . . . . . Reflex
Enclosure Weight . . . . . . . . . . . . . . . . . . . . . . . 15 kg (33 lbs)
Cabinet Construction . . . . . . . . . . High density birch plywood
Internally crossbraced and heavily damped
Recommended Amplifier Power . . 20 to 170 watt per channel
Power Rating . . . . . . . . . . . . . . . . . . . . . . . . . . . 90 watt RMS
360 watt peak
Sensitivity . . . . . . . . . . . . . . . . . . . . . . . 89 dB for 2.83 volt at
1 metre, half space
Nominal Impedance . . . . . . . . . . . . . . . . . . . . . . . . . . . 6 ohm
Minimum Impedance . . . . . . . . . . . . . . . . . . . . . . . . 3.7 ohm
Frequency Response (-6dB) . . . . . . . . . . . . . . . 38 Hz - 44 kHz
Crossovere Frequency. . . . . . . . . . . . . . . . . . . . . . . . . 1.9 kHz
Crossover Type . . . . . . . . . . . . . . . . 2nd order LF, 3rd order HF.
Bi-Wired, Hard-Wired passive, low loss.
Driver Type. . . . . . . . 2 x 165mm (6-1/2”) magnesium cone LF
25mm (1/2”) magnesium dome HF
For European Customers
Disposal of your old appliance
1. When this crossed-out wheeled bin
symbol is attached to a product it
means the product is covered by the
European Directive 2002/96/EC.
2. All electrical and electronic products should be disposed of
separately from the municipal waste stream via designated
collection facilities appointed by the government or the
local authorities.
3. The correct disposal of your old appliance will help prevent
potential negative consequences for the environment and
human health.
4. For more detailed information about disposal of your old
appliance, please contact your city office, waste disposal
service or the shop where you purchased the product.

0207.MA-1204A
This appliance has a serial number located on the rear panel. Please record
the model number and serial number and retain them for your records.
Model number Serial number
TEAC ESOTERIC COMPANY 3-7-3, Nakacho, Musashino-shi, Tokyo 180-8550, Japan Phone: (0422) 52-5132 e-mail: [email protected]
TEAC AMERICA, INC. 7733 Telegraph Road, Montebello, California 90640 Phone: (323) 726-0303
TEAC CANADA LTD. 5939 Wallace Street, Mississauga, Ontario L4Z 1Z8, Canada Phone: (905) 890-8008
TEAC MEXICO, S.A. De C.V Campesinos N°184, Colonia Granjas Esmeralda, Delegacion Iztapalapa, CP 09810, México DF Phone: (525) 581-5500
TEAC UK LIMITED Unit 19 & 20, The Courtyards, Hatters Lane, Watford, Hertfordshire, WD18 8TE, U.K. Phone: (0845) 130-2511
TEAC EUROPE GmbH Bahnstrasse 12, 65205 Wiesbaden-Erbenheim, Germany Phone: 0611-71580
Other manuals for Esoteric MG-10
3
This manual suits for next models
3
Table of contents

