Esscom FIDELITY 1150 User manual

FIDELITY 1150
USER GUIDE
HANDLEIDING
MANUEL D’UTILISATEUR
BEDIENUNGSANLEITUNG
V 1.0-06/08
Important
To use ‘Caller ID’ (display caller), this service has to be activated on your phone line.
Normally you need a separate subscription from your telephone company to activate this
function. If you don’t have the Caller ID function on your phone line, the incoming telephone
numbers will NOT be shown on the display of your telephone.
Belangrijk
Om de ‘Nummerweergave’ te kunnen gebruiken, moet deze dienst geactiveerd zijn op uw
telefoonlijn. Om deze dienst te activeren, hebt U hiervoor meestal een apart abonnement van
uw telefoonmaatschappij nodig. Indien U geen nummerweergavefunctie hebt op uw
telefoonlijn, zullen de inkomende telefoonnummers NIET op de display van uw toestel
verschijnen.
Important
Pour utiliser la fonction ‘Caller ID/Clip’ (affichage de l’appelant), ce service doit être activé sur
votre ligne téléphonique. Généralement, vous avez besoin d’un abonnement séparé de votre
compagnie de téléphone pour activer cette fonction. Si vous n’avez pas la fonction ‘Caller ID
- Affichage Appelant’ sur votre ligne téléphonique, les numéros de téléphone entrants
n’apparaîtront PAS sur l’écran de votre téléphone.
Wichtig
Zur Verwendung der ‘Rufnummernanzeige’ muss dieser Dienst erst für Ihre Telefonleitung
freigegeben werden. Zur Aktivierung dieser Dienstleistung benötigen Sie meistens ein
separates Abonnement Ihrer Telefongesellschaft.Wenn Sie für Ihre Telefonleitung keine
Rufnummernanzeigefunktion haben, erscheinen die eingehenden Telefonnummern NICHT
im Display Ihres Gerätes.
UK The features described in this manual are published with reservation to
modifications.
NL De in deze handleiding beschreven mogelijkheden worden gepubliceerd
onder voorbehoud van wijzigingen.
FR Les possibilités décrites dans ce manuel sont publiées sous réserve de
modifications.
DE Die in dieser Bedienungsanleitung umschriebenen Möglichkeiten, werden
vorbehaltlich Änderungen publiziert.
1
2
1 2 3
6
7
8
9
11
13
14
12
15
19
161718
20
4 5
21
23
22
10
24
25
26 27 28
2931 30
2Esscom Fidelity 1150
Esscom Fidelity 1150
1 Before Initial use
Thank you for purchasing this new desktop caller
ID telephone.
1.1 Intended Purpose
This product is intend to be connected indoor to
an analogue PSTN telephone line.
1.2 Caller ID
1.3 Connection
This device has been designed and manufactured
to comply with the 98/482/EC rule, referent to the
Pan European connection of a terminal to the
Public Switching Telephone Network (PSTN) and
following the established guidelines by the 1999/
5/EC Directive about radio electric equipments
and the reciprocal acknowledge of their conformi-
ty. However, due to the fact that there are some
differences in the PSTNs from one country to an-
other, the verifying measurements by themselves
do not set up an unconditional guarantee for an
optimal working in every connection point to the
PSTN of any country .If any problem comes up,
get in touch firstly with the distributor.
In any case, use conditions for which the product
has been created should be respected as well as
avoid its use in public or private networks with
technical requirements clearly different to those
established in the EU.
2 Safety instructions
• Do not place the basic unit in a damp room or
at a distance of less than 1.5 m away from a
water source. Keep water away from the
telephone.
• Do not use the telephone in environments
where there is a risk of explosions.
• Dispose of the batteries and maintain the
telephone in an environment-friendly manner.
3 Cleaning
Clean the telephone with a slightly damp cloth or
with an anti-static cloth. Never use cleaning
agents or abrasive solvents.
4 Disposal of the device
(environment)
At the end of the product lifecycle,
you should not throw this product
into the normal household garbage
but bring the product to a collection
point for the recycling of electrical
and electronic equipments. The
symbol on the product, user guide and/or box in-
dicate this.
Some of the product materials can be re-used if
you bring them to a recycling point. By re-using
some parts or raw materials from used products
you make an important contribution to the protec-
tion of the environment.
Please contact your local authorities in case you
need more information on the collection points in
your area.
To use ‘Caller ID’ (display caller), this
service has to be activated on your
phone line. Normally you need a separate
subscription from your telephone
company to activate this function. If you
don’t have the Caller ID function on your
phone line, the incoming telephone
numbers will NOT be shown on the
display of your telephone.
The CE symbol indicates that the unit
complies with the essential
requirements of the R&TTE directive.
Please read carefully through the
following information concerning safety
and proper use. Make yourself familiar
with all the functions of the equipment.
Be careful to keep these advice notes
and if necessary pass them on to a third
party.

Esscom Fidelity 1150 3
Esscom Fidelity 1150
ENGLISH
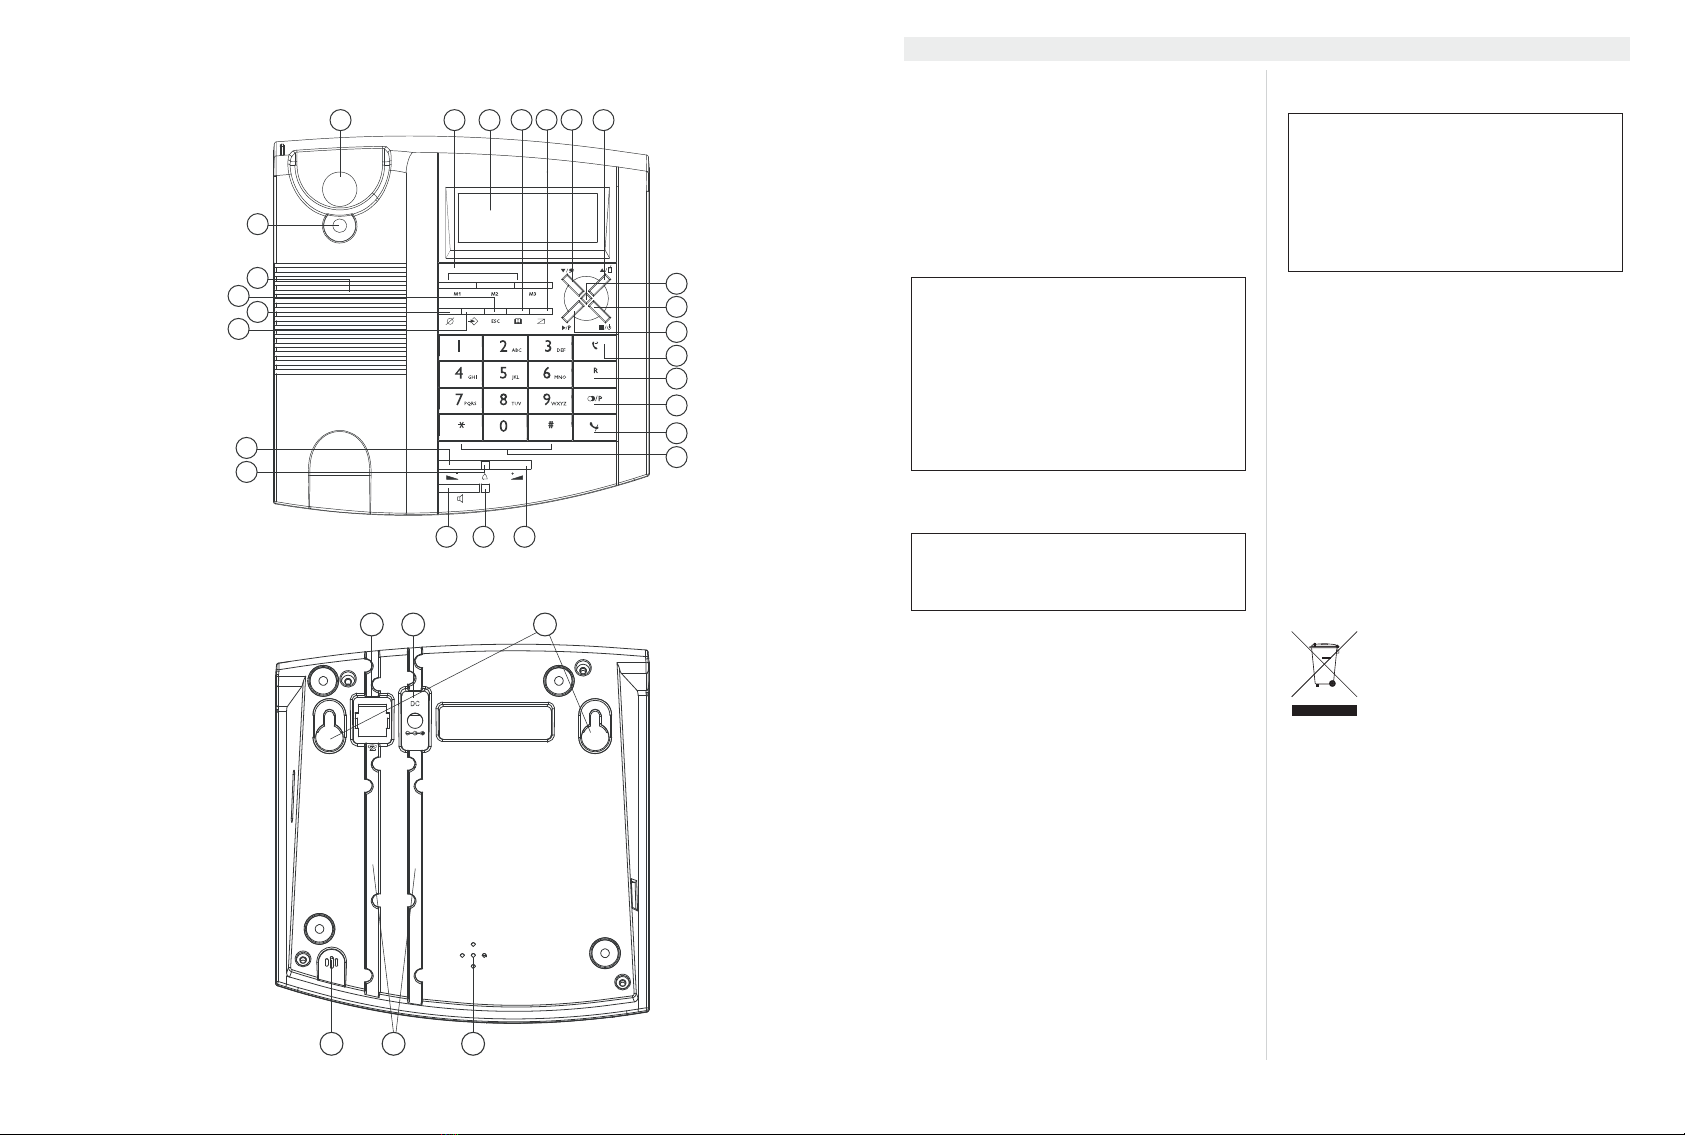
5 Buttons
(See picture 1 and 2 on folded cover page)
1. Hook Switch
2. Direct Memory buttons (M1-M3)
3. LCD display
4. Phonebook button ‘ ‘
5. Menu botton ‘ ‘
6. Call List button
7. Up button ‘ ’ / OGM button
8. Down button ‘ ’ / Memo button
9. TAD On LED
10. Stop /
11. Call back button ‘ ’
12. Flash button ’R’
13. Redial button / Pauze button ‘P’
14. Mute button ‘ ’
15. Alphanumerical keypad
16. Volume Down button ‘ ’
17. Handsfree LED
18. Handsfree button
19. Ringer LED
20. Volume Down button ‘ ’
21. Menu button
22. Delete button ‘ ’
23. Escape button ‘ESC’
24. Handsfree speaker
25. Wall mounting hook
26. Line cord connector
27. Power adapter connector
28. Wall mounting locations
29. Ringer
30. Cable slots
31. Microphone
6 Installation
To activate the telephone, it must be connected to
the main power.
• Plug one end of the supplied adapter into the
electric socket and the other end into the
connector on the bottom of the desktop
telephone (27).
• Connect one end of the line cord to the
telephone line wall socket and the other end
to the bottom of the phone (26).
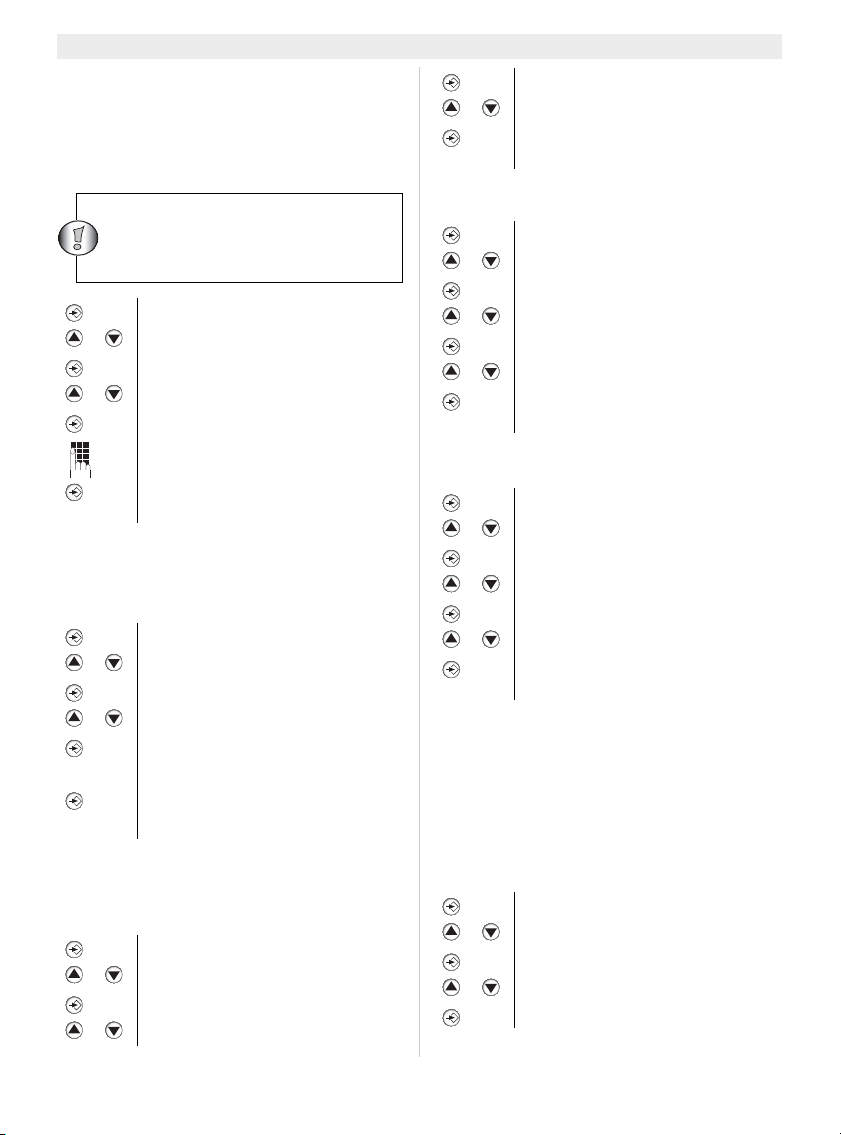
7 Telephone settings
7.1 Introduction
• Press to enter the menu. ‘AUDIO’ is
displayed.
• Use or to scroll though the settings or
to change the setting value.
• Press to enter a submenu.
•PressESC to leave the setting menu at any
time.
• If no button is pressed within 10 seconds, the
unit will return to standby mode.
7.2 Setting display language and
voice prompt language
7.3 Setting the display contrast
SET
Enter the menu
Select ‘Setting’
Enter setting menu
‘Language’
‘English’
Select desired language
To confirm
ESC 2 X To leave the menu
Enter the menu
Select ‘Setting’
Enter setting menu
‘Contrast’
‘Contrast-x’
Select desired display contrast (1-5)
To confirm
ESC 2 X To leave the menu
The voice prompt language of internal
digital answering machine, will be the
same as the display language.
4Esscom Fidelity 1150
Esscom Fidelity 1150
7.4 Setting the date and time
When you have a subscription to the Caller ID
service and your telephone provider sends the
date and time together with the telephone
number, the phone’s clock will be set automatical-
ly. The year must always be set manually.
7.5 Reset
To bring the telephone in its initial status, you
have to reset the phone.
8 Audio settings
8.1 Ring tone
8.2 Ring loudness
8.3 Key Tone
9PABXsettings
9.1 Dial prefix
When you dial out a telephone number from the
Call list or Phonebook, the programmed prefix will
be added in front of the telephone number. This
function is usefull when you have a PABX where
you have to dial a prefix to take the external line.
Enter the menu
Select ‘Setting’
Enter setting menu
‘Date/Time’
‘02/05-06 1226’
Enter the day, month, year and time
(4digits) using the numerical keypad
To confirm
ESC 2 X To leave the menu
Enter the menu
Select ‘Setting’
Enter setting menu
‘Reset’
To confirm.’Sure?’ is displayed
All settings will be reset and the
stored information (including the
recorded messages) will be
erased.
Enter the menu
Select ‘Audio’
Enter the audio setting menu
‘Ring Tone’
To record the date and time stamp to
the recorded message on the
answering machine, the time must be
set.
Confirm
Select the desired ring tone (1-5)
Confirm the ring tone
ESC 2 X To leave the menu
Enter the menu
Select ‘Audio’
Enter the audio setting menu
‘Ring Loudness’
To confirm
Select the desired ring loudness.
To confirm
ESC 2 X To leave the menu
Enter the menu
Select ‘Audio’
Enter the audio setting menu
‘Key Tone’
Confirm
Select Keytone-On or -Off
To confirm
ESC 2 X To leave the menu
Enter the menu
Select ‘PABX setting’
Enter the menu
Select ‘Dial Pref’
To confirm
Esscom Fidelity 1150 5
Esscom Fidelity 1150
ENGLISH
9.2 Dialing mode (Tone/Pulse)
9.3 Flash time
Press to use certain services as ‘Call Waiting’
(if this service is provided by your telephone com-
pany); or to transfer phone calls when you are us-
ing a telephone exchange (PABX).
The flash time can be selected (100/300/600ms).
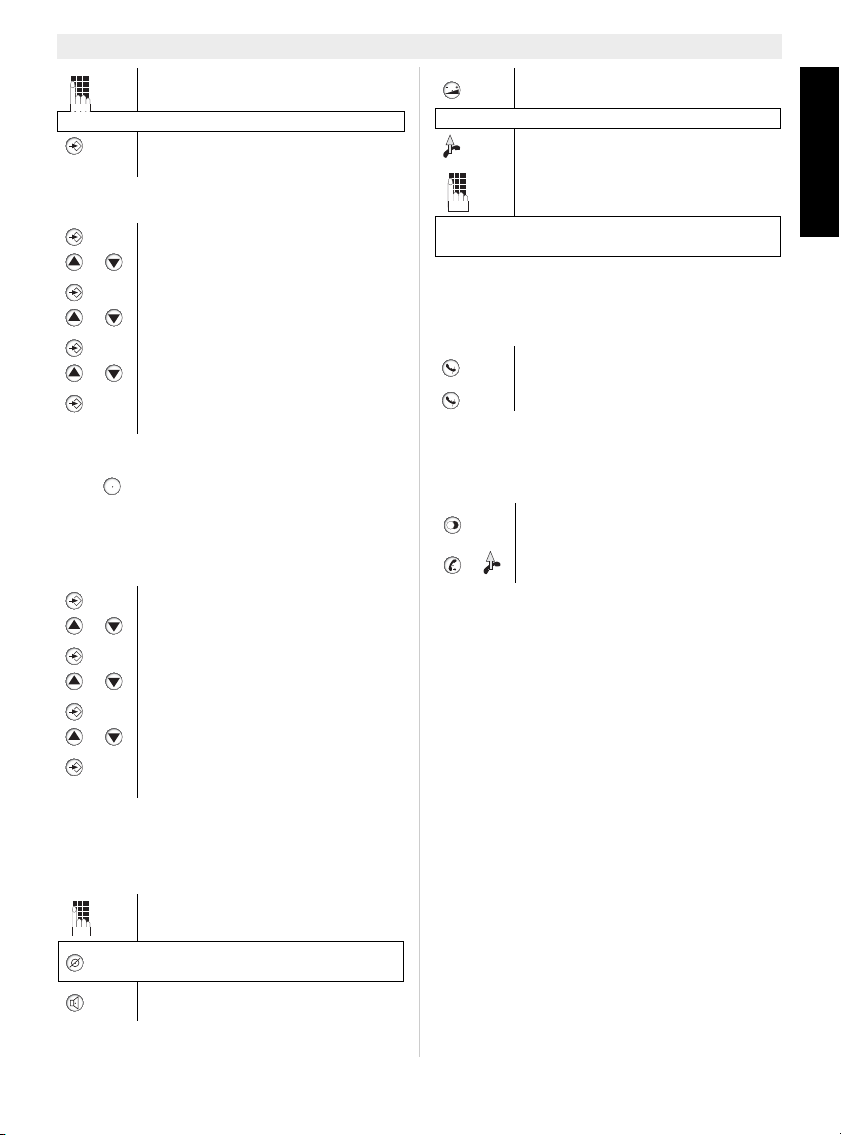
10 Getting started
10.1 Making a phone call
10.2 Deactivating the microphone
(mute)
During conversation
10.3 Redial list
To last 5 called telephone numbers including the
conversation time are stored in the redial list.
11 Caller ID
11.1 General information
When you have a subscription to the Caller ID
service, the caller’s phone number and name
(when supported by the network) will appear on
the display. If you saved the telephone number
with the name in the Phone Book, the pro-
grammed name will be shown on the display
(name tagging function).
11.2 Call list
The Fidelity 1150 can store up to 30 numbers and
names.
The display shows the total number and new re-
ceived calls in stand-by ‘CLIP 00-00’
Enter the dial prefix
To enter a Pause, press the pause button ‘P’
Confirm
ESC 2 X To leave the menu
Enter the menu
Select ‘PABX setting’
Enter the menu
Select ‘Dialing mode’
To confirm
Select ‘Tone’ or ‘Pulse’
Confirm
ESC 2 X To leave the menu
Enter the menu
Select ‘PABX setting’
Enter the menu
Select ‘Flash Time’
To confirm
Select ‘100’, ‘300’ or ‘600’ ms
Confirm
ESC 2 X To leave the menu
Enter the telephone number
Press the delete button briefly to
delete a wrongly entered number
To phone number will be dialled
automatically in hands free
R
Press the volume button to change
the speaker volume
OR
Pick up the handset
Enter the telephone number
The call duration timer is shown on the 2e line of
the display [mm:ss].
You can now talk freely without the
caller hearing you.
You can resume your conversation
XPress the redial list button repeatedly
to scroll through the redial list
The telephone number will be dialled
automatically

6Esscom Fidelity 1150
Esscom Fidelity 1150
11.2.1 Scrolling through the Call List
11.2.2 Calling a number from the Call List
11.2.3 Erasing numbers from the Call
List
a)Erasing one number
b) Erasing the entire Call List
11.3 Voice mail
When you have received a voice mail message in
your Personal Voice Mail Box, the Voice Mail sym-
bol appears on the display. As soon as you
have listened to the messages in the mail box, the
symbol disappears.
* Check with your network operator if this is
available on your line.
12 Phone Book
The Fidelity 1150 can store 50 telephone numbers
with name.
12.1 Use of the alphanumerical key
pad
Use the alphanumerical key pad to enter text. To
select a letter, press the corresponding button.
For example:
Press button ‘2’ twice to select the letter ‘B’. If you
want to select ‘A’ as well as ‘B’, press
button ‘2’ once to select ‘A’, wait for 2 seconds un-
til the cursor has moved to the next location and
press then button ‘2’ twice to select ‘B’. To add a
space, press 0. Wrong entered characters can be
erased by pressing .
Available characters:
Press the New Message button
To scroll through the call list
Press the New Message button
Scroll through the call list until you
have found the desired telephone
number
The phone number will be dialled
automatically
Press the New Message button
Scroll through the call list until you
have found the desired telephone
number
Press the delete button briefly to
delete the selected number
To confirm
Press the New Message button
To enter the call list
3SEC Press and hold the delete button for
3 seconds to delete the entire call list
To confirm.’Sure?’ is displayed
The complete Call List will be
erased
*
#
0
1
2 (Upper Case)
3 (Upper Case)
4 (Upper Case)
5 (Upper Case)
6 (Upper Case)
7 (Upper Case)
8 (Upper Case)
9 (Upper Case)
2 (Lower Case)
3 (Lower Case)
4 (Lower Case)
5 (Lower Case)
6 (Lower Case)
7 (Lower Case)
8 (Lower Case)
9 (Lower Case)
Upper or Lower Case switch
à á â Ç
+ & @ 0 / % * # $ £ ¥ § ¿ ¡
"Space" - ? ! 1 , . : ; " ' < = > ( )
{ } _
A B C 2 Ä Æ Å à á â Ç
D E F 3 è É ê ë
G H I 4 ì í î ï
J K L 5 €
M N O 6 ñ ö ò ó ô
P Q R S 7 ß
T U V 8 ù ú û Ü
W X Y Z 9
a b c 2 ä æ å à á â ç
d e f 3 è é ê ë
g h I 4 ì í î ï
j k l 5 €
m n o 6 ñ ö ò ó ô
p q r s 7 ß
t u v 8 ù ú û ü
w x y z 9

Esscom Fidelity 1150 7
Esscom Fidelity 1150
ENGLISH
12.2 Adding a number to the Phone
Book
12.3 Selecting and calling a number
from the Phone Book
12.4 Changing a number and name
from the Phone Book
12.5 Erasing a number and name from
the Phone Book
12.6 Copying a number from the call
list to the Phone Book
Enter Phonebook Menu
1X ‘New’
To confirm
Enter the telephone number
Press the delete button briefly to
delete a wrongly entered number.
To confirm
Enter the name by using the
alphanumerical key pad (see chapter
12.1)
To confirm
Follow the previous steps for adding another
number or press ESC to leave the setting.
Enter Phonebook Menu. ‘Review’ is
displayed.
To confirm
Enter the first letter of the desired
name by using the alphanumerical
key pad.
Scroll through the phone book until
you have found the desired
telephone number
Press hands free or pick up the
handset to dial out the number
Enter Phonebook Menu
To confirm
Enter the first letter of the desired
name by using the alphanumerical
key pad
Scroll through the phone book until
you have found the desired
telephone number
To confirm
Press the delete button briefly to
delete a wrongly entered number.
Modify the telephone number
To confirm
Modify the name by using the
alphanumerical key pad (see chapter
12.1)
To confirm
Select the desired telephonenumber as
described in chapter 12.3.
Press the delete button briefly to
delete the number
To confirm
Press the New Message button
Scroll through the call list until you
have found the desired telephone
number
To confirm
Select ‘Store to Book’
To confirm.
Modify the telephone number if
necessary
Press the delete button briefly to
delete a wrong numbers
To confirm
Modify the name by using the
alphanumerical key pad (see chapter
12.1)
To confirm
8Esscom Fidelity 1150
Esscom Fidelity 1150
13 Memory numbers
You can program 3 Direct numbers (max 24 num-
bers and 16 characters). These memory numbers
can be dialled by pressing M1-M3.
13.1 Adding a number to a Direct
Memory
13.2 Calling a Direct Memory number
13.3 Deleting a Direct Memory number
13.4 Copying a number from the call
list to a direct memory button
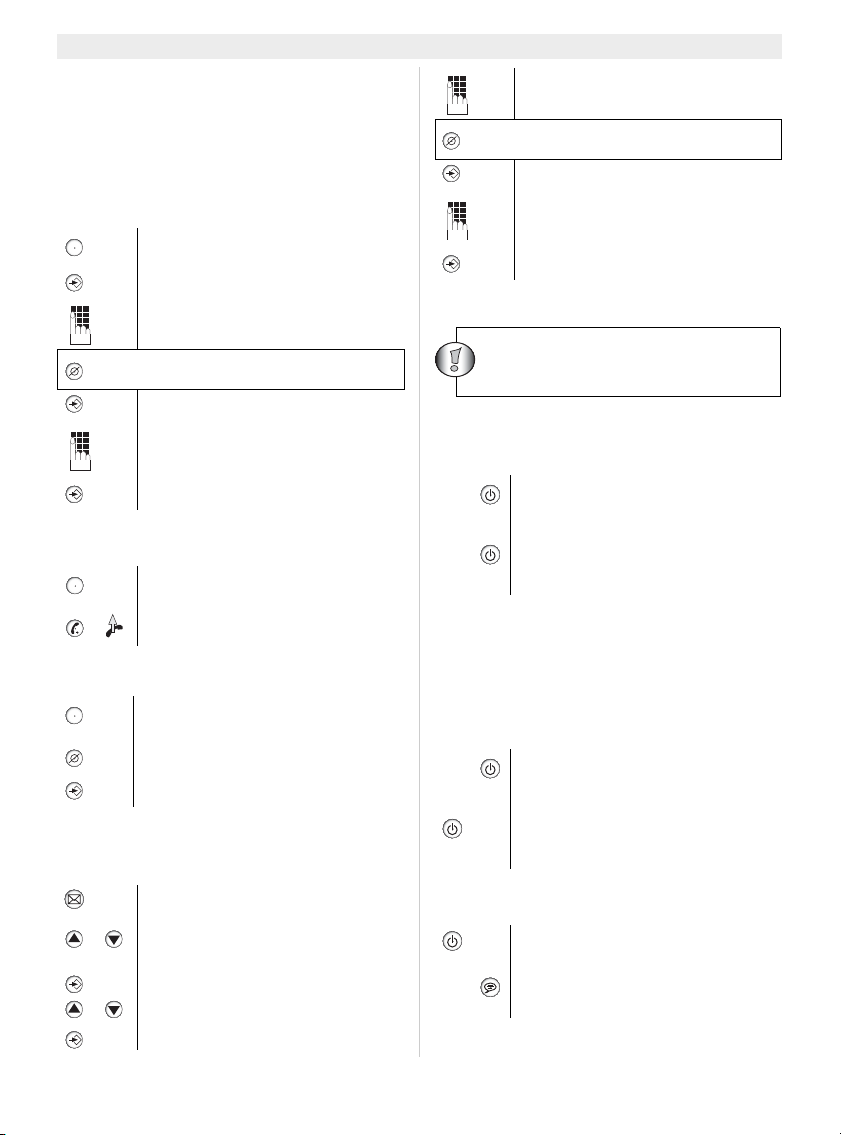
14 Telephone answering device
14.1 Activating/Deactivating the Anwer
Machine
14.2 Selecting the outgoing messages
(OGM1 or OGM2)
There are 2 different outgoing messages:
OGM1 (A1): The unit shall record a message.
OGM2 (A2): The unit will not record a message af-
ter the call has been answered.
14.3 To record an Outgoing Message
Press the desired Direct Memory
(M1-M3). ‘New’ is displayed
To confirm
Enter the telephone number
Press the delete button briefly to
delete a wrongly entered number
To confirm
Enter the name by using the
alphanumerical key pad (see chapter
12.1)
To confirm
Press the desired Direct Memory
(M1-M3)
The phone number will be dialed
automatically
Press the desired Direct Memory
(M1-M3)
Press the delete button briefly to
delete the number
To confirm
Press the New Message button
Scroll through the call list until you
have found the desired telephone
number
To confirm
Select ‘STORE TO M1- M3’
To confirm.
M?
M?
M?
Modify the telephone number if
necessary
Press the delete button briefly to
delete a wrong numbers
To confirm
Modify the name by using the
alphanumerical key pad (see chapter
12.1)
To confirm
2SEC The answering machine shall turn Off
The ‘TAD On LED’ shall turn off
2SEC
The answering machine shall turn On
The LED shall burn.
The Voice will prompt the selected
OGM (see chapter 14.2)
2SEC Activate the anwering machine. The
selected OGM will be prompted
Switch between OGM1 and OGM2.
The selected OGM will be prompted
and displayed on the 2 line of the dis-
play (A1 or A2)
Select OGM1 or OGM2
3SEC
After you hear a beep, release the
button and start saying your outgoing
message (max 2 minutes)
The voice prompt language of the in-
ternal digital answering machine, will
be the same as the display language.
Esscom Fidelity 1150 9
Esscom Fidelity 1150
ENGLISH
14.4 To delete an OGM
14.5 TAD Setting
14.5.1 Selecting OGM1 or OGM2
In of the TAD setting menu, you can also select
the outgoing message.
14.5.2 Select the number of rings
To select the number of rings before the TAD an-
wswers the call:
14.5.3 Setting the remote PIN code
This code is necessary for remote operation (see
chapter 14.11)
14.5.4 Call Screen Mode
When there is an incomming call you can listen to
the recording without picking up the handset.You
can enable or disable this function.
If the OGM is less than 3 seconds, the recording
is not valid.
To stop the recording. The message
will be playbacked
To replay the recorded OGM
Select OGM1 or OGM2.
To replay the recorded OGM
Press the delete button during
playback. The pre-recorded message
is prompted
Enter the menu
Select ‘TAD Setting’
Enter the submenu
Select ‘Answering’
To confirm
Select ‘Answering-A1’ (OGM1) or
‘Answering-A2’ (OGM2)
Confirm
ESC 2 X To leave the menu
Enter the menu
Select ‘TAD Setting’
Enter the submenu
Select ‘TAD Rings’
To confirm
Select 2 to 9 or select T/S
Confirm
ESC 2 X To leave the menu
T/S is ‘Toll Saver’. The TAD will answer a call
after 4 rings if there are no new messages, and
after 2 rings if there are new messages. If there
are no new messages and you call your
machine to check your messages remotely, you
can hang up after the 2nd ring. You do not need
to pay connection fees and you know that you
do not have any new messages.
Enter the menu
Select ‘TAD Setting’
Enter the submenu
Select ‘TAD Pin’
To confirm
Enter the new PIN code (3 numbers)
Confirm
ESC 2 X To leave the menu
Enter the menu
Select ‘TAD Setting’
Enter the submenu
Select ‘Call Screen’
To confirm
Select ‘Call Screen - On’ or ‘Call
Screen - Off’
Confirm
ESC 2 X To leave the menu
10 Esscom Fidelity 1150
Esscom Fidelity 1150
14.6 Incoming messages
After the set number of rings the TAD will answer
the call, the caller will hear your outgoing mes-
sage (OGM).If OGM1 is selected, he can record a
message (max 2 minutes) after the beep. As soon
as you have new messages the number of new
messages will be displayed. The recording will be
interrupted when it detect silence for 6 seconds or
when you pick up the handset.
14.7 Memo message recording
To record a Memo message
Memo messages will be stored together with the
incoming call recordings.
14.8 Playing recorded messages
In idle mode:
After all messages have been played, press to
re-play all messages.
14.9 Deleting one messages
During playback of the message.
14.10 Deleting all messages
During playback of the last message.
14.11 Remote control
The answering machine can be operated remote-
ly using a touch-tone phone (DTMF tone selection
system).
• Call your machine. You will hear the OGM
message.
• After the beep, slowly dial the Security code,
you will hear one short beeps for
confirmation.
• Enter the next codes to use the desired
function.
If no button is pressed within 10 seconds, the
unit will return to standby mode.
During playback, the unit will stop every 168
seconds. If no button is pressed, the unit will
stop and hang up.
When pressing ‘2’ the message playback is
paused for 30 seconds. If no button is pressed
the unit will hang up.
3SEC
After you hear a beep, release the
button and start saying your Memo
message (max 2 minutes)
To stop the recording
The unit shall play the new
messages
Every time a message is recorded, the date and
time will also be stored if the date and time is set
(see chapter 7.4). When playing back a
message, the date and time of the recording will
be announced before the message.
To pause the playback
<1s To replay the message
2 X To skip to the previous message
To skip to the next message
To stop playback
‘DELETE?’ will be displayed
To confirm and delete the message
If no button is pressed in 30 seconds, the unit
will continue playing the messages
2SEC ‘DELETE ALL?’ will be displayed
To confirm and delete all messages
If no button is pressed in 30 seconds, the unit
will continue playing the messages
1
1(1)
2
3
4
5
6
7
8
9
0
#
Replay the message
Play the previous message
Play/Pause
Play the next message
To play the outgoing message
To record a new outgoing message
Stop playback or recording
Delete playing message
Answering off
Answering on / Toggle OGM1 or
OGM2
Delete all, old messages
Record Memo

Esscom Fidelity 1150 11
Esscom Fidelity 1150
ENGLISH
14.12 Remote activation
If the answering machine is OFF, the user can
wake-up the device remotely by dialing the
number and wait for 12 rings.
The machine will answer with OGM2.
Enter the remote code and follow the instructions
explained in chapter 14.11.
14.13 Memory Full
There are 2 kinds of Memory Full situations.
1. During Memo/OGM/ICM recording, the memo-
ry is full.
2. The memory is full and somebody is trying to
record a message.
The unit shall play a message indicating the mem-
ory is full.
When OGM 1 was selected, the device will switch
automatically to OGM2 (see chapter 14.2).
15 Wall mounting
Pull out and rotate the wall mounting hook (25).
Put it back in position.
Measure and mark the wall mounting locations
(28).
Drill holes, fit wall plugs and screw in screws.
The cable of the telephone can be fixed in the slot
(30) on the backside of the phone depending on
the telephone connection position.
Mount the telephone on the screws.
16 Technical Data
Dialling options: DTMF (tone)/PULSE
Flash:100/300/600ms
Power adapter: Input 230VAC 50Hz / Output
9VDC 200 mA
17 Warranty
17.1 Warranty period
The devices have a 36-month warranty period.
The warranty period starts on the day the new unit
is purchased. There is no warranty on standard or
rechargeable batteries (AA/AAA type).
Consumables or defects causing a negligible
effect on operation or value of the equipment are
not covered.
The warranty has to be proven by presentation of
the original or copy of the purchase receipt, on
which the date of purchase and the unit-model are
indicated.
17.2 Warranty handling
A faulty unit needs to be returned to an authorized
service centre including a valid purchase note and
a filled in service card.
If the unit develops a fault during the warranty
period, the service centre will repair any defects
caused by material or manufacturing faults free of
charge, by either repairing or exchanging the
faulty units or parts of the faulty units. In case of
replacement, colour and model can be different
from the original purchased unit.
The initial purchase date shall determine the start
of the warranty period. The warranty period is not
extended if the unit is exchanged or repaired by
the service centre.
17.3 Warranty exclusions
Damage or defects caused by incorrect treatment
or operation and damage resulting from use of
non-original parts or accessories are not covered
by the warranty.
The warranty does not cover damage caused by
outside factors, such as lightning, water and fire,
nor any damage caused during transportation.
No warranty can be claimed if the serial number
on the units has been changed, removed or
rendered illegible.
Any warranty claims will be invalid if the unit has
been repaired, altered or modified by the buyer.
12 Esscom Fidelity 1150
Esscom Fidelity 1150
1 Vóór ingebruikneming
We danken u voor uw aankoop van deze nieuwe
desktop telefoon met nummerweergave.
1.1 Gebruiksdoel
Dit product moet binnenshuis worden aangeslo-
ten op een analoge PSTN-telefoonlijn.
1.2 Nummerweergave oproeper
1.3 Connection
Dit toestel werd ontworpen en vervaardigd
conform de EU-regel 98/482/EC inzake de pan-
Europese aansluiting van een terminal op het
PSTN-netwerk en in naleving van de gevestigde
richtlijnen uit de EU-richtlijn 1999/5/EC inzake
elektrische radioapparatuur en de reciproque
erkenning van hun conformiteit. Maar omdat de
PSTN’s van land tot land kunnen verschillen,
bieden de verificatiemaatregelen op zich geen
onvoorwaardelijke garantie voor een optimale
werking in elk aansluitpunt van het PSTN in elk
land. Mocht zich een probleem voordoen, neem
dan eerst contact op met de verdeler.
In ieder geval dienen de gebruiksvoorwaarden
waarvoor het product werd ontwikkeld te worden
gerespecteerd. Vermijd ook het toestel te gebruik-
en in openbare of privé-netwerken met technische
vereisten die duidelijk afwijken van die die zijn
vastgelegd in de EU.
2 Belangrijke
veiligheidsvoorschriften
• Het basisstation niet opstellen in vochtige
ruimten en niet op minder dan 1,5 m van een
waterbron. De telefoon niet in aanraking
brengen met water.
• De telefoon niet gebruiken in explosieve
omgevingen.
• Ontdoe u op een milieuvriendelijke wijze van
de batterijen en de telefoon.
3 Reiniging
Veeg de telefoon met een licht vochtige doek of
met een antistatische doek af. Gebruik nooit
reinigingsmiddelen of agressieve oplosmiddelen.
4 Het toestel vernietigen (milieu)
Op het einde van de levenscyclus
van het product mag u dit product
niet bij het normale huishoudelijke
afval gooien, maar moet u het naar
een inzamelpunt brengen voor de
recyclage van elektrische en elekt-
ronische apparatuur. Dit wordt aangeduid door
het symbool op het product, in de handleiding en/
of op de verpakking.
Sommige materialen van het product kunnen
worden hergebruikt als u ze naar een inzamelpunt
brengt. Door onderdelen of grondstoffen van ge-
bruikte producten te hergebruiken, levert u een
belangrijke bijdrage tot de bescherming van het
milieu.
Wend u tot uw lokale overheid voor meer informa-
tie over de inzamelpunten in uw buurt.
Om de ’Nummerweergave’ (beller
weergeven) te kunnen gebruiken, moet
deze dienst geactiveerd zijn op uw
telefoonlijn. Om deze dienst te activeren,
hebt u hiervoor meestal een apart
abonnement van uw
telefoonmaatschappij nodig. Indien U
geen nummerweergavefunctie hebt op
uw telefoonlijn, zullen de inkomende
telefoonnummers NIET op de display van
uw toestel verschijnen.
Het toestel voldoet aan de basiseisen van
de R&TTE-richtlijn.
Dit wordt bevestigd door de CE-markering.
Onderstaande veiligheidsvoorschriften
moeten bij het gebruik van elektrische
apparaten in ieder geval worden
opgevolgd.
Lees de onderstaande informatie in
verband met veiligheid en correct
gebruik aandachtig. Maak u vertrouwd
met alle functies van het toestel. Bewaar
deze handleiding zorgvuldig en geef
deze zo nodig aan anderen door.

Esscom Fidelity 1150 13
Esscom Fidelity 1150
NEDERLANDS
5Toetsen
(Zie Afbeelding 1 en 2 op de flap van het voorblad)
1. Haak-schakelaar
2. Toetsen Direct Geheugen (M1-M3)
3. LCD display
4. Telefoonboek ’ ’
5. Menu-toets ’ ’
6. Toets Oproeplijst
7. Omlaag-toets ’ ’ / Toets meldtekst
8. Omhoog-toets ’ ’ / MEMO-toets
9. LED "Antwoordapparaat aan"
10. Stop /
11. Terugbel-toets ’ ’
12. Flash-toets ’R’
13. Nummerherhaling / Pauze ’P’
14. Mute-toets ’ ’
15. Alfanumeriek toetsenbord
16. Toets om volume te verlagen ’ ’
17. Handenvrij LED
18. Handenvrij-toets
19. LED beltoon
20. Toets om volume te verlagen ’ ’
21. MENU-toets
22. Wis-toets ’ ’
23. Escape-toets ’ESC’
24. Handenvrij-luidspreker
25. Haak voor wandmontage
26. Aansluiting netsnoer
27. Aansluiting netadapter
28. Boringen voor wandmontage
29. Beltoon
30. Kabelsleuven
31. Microfoon
6 Installatie
Om de telefoon te activeren, moet hij zijn aanges-
loten op het elektriciteitsnet.
• Steek het ene uiteinde van de meegeleverde
adapter in het stopcontact en het andere in
de aansluiting op de achterkant van de
telefoon (27).
• Steek één uiteinde van het snoer in de
telefooncontactdoos en het andere uiteinde
in de onderkant van de telefoon (26).
7 Telefooninstellingen
7.1 Inleiding
• Druk op om naar het menu te gaan.
’AUDIO’ wordt weergegeven.
• Met of kunt u door de instellingen
scrollen of de ingestelde waarde wijzigen.
• Druk op om naar een submenu te gaan.
• Druk op ESC om het instelmenu te verlaten.
• Als er geen toets wordt ingedrukt binnen de
10 seconden, keert het toestel terug naar de
standby-modus.
7.2 De schermtaal en de taal van de
interne stem instellen
7.3 Het schermcontrast instellen.
SET
Ga naar het menu
Selecteer ’Setting’
Ga naar het instelmenu
’Language’
’English’
Selecteer de gewenste taal
Om te bevestigen
ESC 2 X Om het menu te verlaten
Ga naar het menu
Selecteer ’Setting’
Ga naar het instelmenu
’Contrast’
’Contrast-x’
Selecteer het gewenste
schermcontrast (1-5)
Om te bevestigen
ESC 2 X Om het menu te verlaten
De taal van de interne stem van het
ingebouwde digitale
antwoordapparaat zal dezelfde zijn als
de schermtaal.

14 Esscom Fidelity 1150
Esscom Fidelity 1150
7.4 Datum en uur instellen
Als u bent ingeschreven op de Caller ID-dienst en
uw telefoonmaatschappij de datum en het uur sa-
men met het telefoonnummer doorstuurt, wordt
de telefoonklok automatisch ingesteld. Het jaar
moet altijd manueel worden ingesteld.
7.5 Reset
Om terug te keren naar de standaardinstellingen
van de telefoon, moet u de telefoon resetten.
8 Audio-instellingen
8.1 Beltoon
8.2 Belvolume
8.3 Toetstoon
9 PABX-instellingen
9.1 Prefix
Als u een telefoonnummer belt uit de Oproeplijst
of het Telefoonboek, wordt het geprogrammeerde
prefix vóór het telefoonnummer toegevoegd.
Deze functie is handig wanneer u een PABX heeft
waarbij u een prefix moet invoeren voor een
buitenlijn.
Ga naar het menu
Selecteer ’Setting’
Ga naar het instelmenu
’DATE/TIME’
’02/05-06 1226’
Voer de dag, de maand, het jaar en
het uur (4 cijfers) in met behulp van
het numerieke toetsenbord.
Om te bevestigen
ESC 2 X Om het menu te verlaten
Ga naar het menu
Selecteer ’Setting’
Ga naar het instelmenu
’Reset’
Om te bevestigen.’Sure?’ verschijnt
op de display
Alle instellingen worden gereset
en de opgeslagen informatie (incl.
de opgenomen berichten) worden
gewist.
Ga naar het menu
Selecteer ’Audio’
Ga naar het audio-instelmenu
Om de datum en het tijdstip te
registeren bij het opgenomen bericht
op het antwoordapparaat, moet de tijd
worden ingesteld.
’Ring Tone’
Bevestig
Selecteer de gewenste beltoon (1-5)
Bevestig de beltoon
ESC 2 X Om het menu te verlaten
Ga naar het menu
Selecteer ’Audio’
Ga naar het audio-instelmenu
’Ring Loudness’
Om te bevestigen
Selecteer het gewenste belvolume.
Om te bevestigen
ESC 2 X Om het menu te verlaten
Ga naar het menu
Selecteer ’Audio’
Ga naar het audio-instelmenu
’Key Tone’
Bevestig
Selecteer Keytone-On (Aan) of
Keytone-On Off (Uit)
Om te bevestigen
ESC 2 X Om het menu te verlaten
Ga naar het menu
Selecteer ’PABX setting’
Ga naar het menu

Esscom Fidelity 1150 15
Esscom Fidelity 1150
NEDERLANDS
9.2 Kiesmodus (Toon/Puls)
9.3 Doorschakeltijd (Flash)
Druk op om gebruik te maken van bepaalde di-
ensten zoals "2e oproep" (als deze dienst door uw
telefoonmaatschappij wordt aangeboden); of om
oproepen door te verbinden als u een binnenhuis-
centrale (PABX) gebruikt.
U kunt de doorschakeltijd selecteren (100/300/
600ms).
10 Van start gaan
10.1 Bellen
10.2 De microfoon deactiveren (mute)
Tijdens gesprek
10.3 Lijst nummerherhaling
De laatste 5 gebelde telefoonnummers zijn
opgeslagen in de lijst nummerherhaling, samen
met de gespreksduur.
11 Nummerweergave oproeper
11.1 Algemene informatie
Als u bent geabonneerd op de Caller ID-dienst
verschijnt het telefoonnummer en de naam van de
oproeper op de display (indien ondersteund door
het netwerk). Als u het telefoonnummer met naam
in het telefoonboek heeft opgeslagen, verschijnt
de geprogrammeerde naam op de display (naam-
functie).
Selecteer ’Dial Pref’
Om te bevestigen
Voer het prefix (kengetal) in
Om een pauze in te lassen, drukt u op de
pauze-toets ’P’
Bevestig
ESC 2 X Om het menu te verlaten
Ga naar het menu
Selecteer ’PABX setting’
Ga naar het menu
Selecteer ’Dialing mode’
Om te bevestigen
Selecteer ’Tone’ of ’Pulse’
Bevestig
ESC 2 X Om het menu te verlaten
Ga naar het menu
Selecteer ’PABX setting’
Ga naar het menu
Selecteer ’Flash Time’
Om te bevestigen
Selecteer ’100’, ’300’ of ’600’ ms
Bevestig
ESC 2 X Om het menu te verlaten
R
Voer het telefoonnummer in.
Druk kort op de Wis-toets om een
verkeerd ingevoerd nummer te
wissen.
Het telefoonnummer zal automatisch
worden gevormd in handenvrij-
modus.
Druk op de volumetoets om het
luidsprekervolume te wijzigen
of
Neem de handset op.
Voer het telefoonnummer in.
De oproepduur wordt weergegeven op de 2e
regel van de display [mm:ss].
U kunt nu vrijuit praten zonder dat de
oproeper u hoort.
U kunt uw gesprek voortzetten.
X
Druk meermaals op de toets num-
merherhaling om door de lijst num-
merherhaling te scrollen.
Het telefoonnummer wordt automa-
tisch gevormd.
16 Esscom Fidelity 1150
Esscom Fidelity 1150
11.2 Oproeplijst
In de Fidelity 1150 kunt u maximaal 30 nummers
en namen opslaan.
In standby-modus, verschijnen op de display het
totale aantal en de nieuwe ontvangen oproepen
’CLIP 00-00’
11.2.1 Door de oproeplijst scrollen
11.2.2 Een nummer bellen uit de
oproeplijst
11.2.3 Nummers uit de oproeplijst
wissen
a)Één nummer wissen
b) De volledige oproeplijst wissen
11.3 Voicemail
Als u een voicemail-bericht heeft ontvangen in uw
persoonlijke mailbox, verschijnt het Voicemail-
symbool op de display. Zodra u de berichten in
de mailbox heeft beluisterd, verdwijnt het sym-
bool.
* Vraag aan uw telefoonmaatschappij of deze
functie beschikbaar is op uw lijn.
12 Telefoonboek
In de Fidelity 1150 kunt u 50 telefoonnummers
met naam opslaan.
12.1 Het alfanumerieke toetsenbord
gebruiken
Gebruik het alfanumerieke toetsenbord om tekst
in te voeren. Om een letter te selecteren, drukt u
op de overeenkomstige toets.
Bijvoorbeeld:
Druk twee keer op ’2’ om de letter ’B’ te selecter-
en. Als u ’A’ en ’B’ wilt selecteren, drukt u
één keer op ’2’ om ’A’ te selecteren, wacht dan 2
seconden tot de cursor zich heeft verplaatst naar
de volgende locatie en druk twee keer op ’2’ om
’B’ te selecteren. Om een spatie toe te voegen,
drukt u op 0. Foutief ingevoerde tekens kunnen
worden gewist door op te drukken. .
Beschikbare tekens:
Druk op de toets "Oproeplijst"
Door de oproeplijst scrollen
Druk op de toets "Oproeplijst"
Scroll door de oproeplijst tot u het
gewenste telefoonnummer heeft
gevonden.
Het telefoonnummer wordt
automatisch gevormd
Druk op de toets "Oproeplijst"
Scroll door de oproeplijst tot u het
gewenste telefoonnummer heeft
gevonden.
Druk kort op de Wis-toets om het
geselecteerde nummer te wissen
Om te bevestigen
Druk op de toets "Oproeplijst"
Om naar de oproeplijst te gaan
3
SEC
Houd de wis-toets 3 seconden
ingedrukt om de volledige oproeplijst
te wissen.
Om te bevestigen.’Sure?’ verschijnt
op de display
De volledige Oproeplijst wordt
gewist
*
#
0
1
2 (Hoofdletter)
3 (Hoofdletter)
4 (Hoofdletter)
5 (Hoofdletter)
6 (Hoofdletter)
7 (Hoofdletter)
8 (Hoofdletter)
9 (Hoofdletter)
2 (Kleine letter)
3 (Kleine letter)
4 (Kleine letter)
5 (Kleine letter)
6 (Kleine letter)
7 (Kleine letter)
8 (Kleine letter)
9 (Kleine letter)
Veranderen van kleine letter naar
hoofdletter en omgekeerd
à á â Ç
+ & @ 0 / % * # $ £ ¥ § ¿ ¡
"Spatie" - ? ! 1 , . : ; " ' < = > ( )
{ } _
A B C 2 Ä Æ Å à á â Ç
D E F 3 è É ê ë
G H I 4 ì í î ï
J K L 5 €
M N O 6 ñ ö ò ó ô
P Q R S 7 ß
T U V 8 ù ú û Ü
W X Y Z 9
a b c 2 ä æ å à á â ç
d e f 3 è é ê ë
g h I 4 ì í î ï
j k l 5 €
m n o 6 ñ ö ò ó ô
p q r s 7 ß
t u v 8 ù ú û ü
w x y z 9

Esscom Fidelity 1150 17
Esscom Fidelity 1150
NEDERLANDS
12.2 Een nummer toevoegen aan het
telefoonboek
12.3 Een nummer uit het telefoonboek
selecteren en bellen
12.4 Een naam en nummer in het
telefoonboek wijzigen
12.5 Een nummer en naam uit het
telefoonboek wissen
12.6 Een nummer uit de Oproeplijst
kopiëren naar het Telefoonboek
Ga naar Telefoonboek-menu
1X ’New’
Om te bevestigen
Voer het telefoonnummer in.
Druk kort op de Wis-toets om een
verkeerd ingevoerd nummer te
wissen.
Om te bevestigen
Voer de naam in met behulp van het
alfanumerieke toetsenbord (zie
hoofdstuk 12.1)
Om te bevestigen
Herhaal de vorige stappen om nog een nummer
toe te voegen of druk op ESC om het
instelmenu te verlaten.
Ga naar Telefoonboek-menu
’Review’ verschijnt op de display.
Om te bevestigen
Voer de eerste letter van de
gewenste naam in via het
alfanumerieke toetsenbord.
Scroll door het telefoonboek tot u het
gewenste telefoonnummer heeft
gevonden.
Druk op handenvrij of neem de hand-
set op om het nummer te bellen
Ga naar Telefoonboek-menu
Om te bevestigen
Voer de eerste letter van de
gewenste naam in via het
alfanumerieke toetsenbord.
Scroll door het telefoonboek tot u het
gewenste telefoonnummer heeft
gevonden.
Om te bevestigen
Druk kort op de Wis-toets om een
verkeerd ingevoerd nummer te
wissen.
Wijzig het telefoonnummer.
Om te bevestigen
Wijzig de naam met behulp van het
alfanumerieke toetsenbord (zie
hoofdstuk 12.1)
Om te bevestigen
Selecteer het gewenste telefoonnummer zoals
beschreven in hoofdstuk 12.3.
Druk kort op de Wis-toets om het
nummer te wissen.
Om te bevestigen
Druk op de toets "Nieuw Bericht"
(New Message)
Scroll door de oproeplijst tot u het
gewenste telefoonnummer heeft
gevonden.
Om te bevestigen
Selecteer ’Store to Book’
Om te bevestigen.
Wijzig het telefoonnummer indien
nodig
Druk kort op de Wis-toets om een
verkeerd ingevoerd nummer te
wissen
Om te bevestigen
Wijzig de naam met behulp van het
alfanumerieke toetsenbord (zie
hoofdstuk 12.1)

18 Esscom Fidelity 1150
Esscom Fidelity 1150
13 Geheugennummers
U kunt 3 directe nummers (max. 24 nummer en 16
tekens) programmeren. Die geheugennummers
kunt u bellen door op M1-M3 te drukken.
13.1 Een nummer toevoegen aan een
Direct Geheugen
13.2 Een nummer uit het directe
geheugen bellen
13.3 Een nummer uit het directe
geheugen wissen
13.4 Een nummer uit de Oproeplijst
opslaan onder een Direct-
Geheugentoets
14 Antwoordapparaat
14.1 Het antwoordapparaat activeren/
deactiveren
Om te bevestigen
Druk op het gewenste Directe
Geheugen (M1-M3) ’New’ verschijnt
op de display
Om te bevestigen
Voer het telefoonnummer in.
Druk kort op de Wis-toets om een
verkeerd ingevoerd nummer te
wissen.
Om te bevestigen
Voer de naam in met behulp van het
alfanumerieke toetsenbord (zie
hoofdstuk 12.1)
Om te bevestigen
Druk op het gewenste Direct
Geheugen (M1-M3)
Het telefoonnummer wordt
automatisch gevormd.
Druk op het gewenste Direct
Geheugen (M1-M3)
Druk kort op de Wis-toets om het
nummer te wissen.
Om te bevestigen
M?
M?
M?
Druk op de toets "Nieuw Bericht"
(New Message)
Scroll door de oproeplijst tot u het
gewenste telefoonnummer heeft
gevonden.
Om te bevestigen
Selecteer ’STORE TO M1 - M3’
Om te bevestigen.
Wijzig het telefoonnummer indien
nodig
Druk kort op de Wis-toets om een
verkeerd ingevoerd nummer te
wissen
Om te bevestigen
Wijzig de naam met behulp van het
alfanumerieke toetsenbord (zie
hoofdstuk 12.1)
Om te bevestigen
2
SEC
Het antwoordapparaat zal
uitschakelen. De LED ’TAD On’
(Antwoordapparaat aan) gaat uit
2
SEC
Het antwoordapparaat zal inschake-
len
De LED gaat branden.
De interne stem zal de geselecteerde
meldtekst (zie Hoofdstuk 14.2)
aankondigen
De taal van de interne stem van het
ingebouwde digitale
antwoordapparaat zal dezelfde zijn als
de schermtaal.

Esscom Fidelity 1150 19
Esscom Fidelity 1150
NEDERLANDS
14.2 Uitgaande berichten selecteren
(Meldtekst 1 of Meldtekst 2)
Er zijn 2 verschillende meldteksten:
MELDTEKST1 (A1): Het toestel zal een bericht
opnemen.
MELDTEKST2 (A2): Het toestel zal geen bericht
opnemen nadat de oproep is beantwoord.
14.3 Een meldtekst opnemen:
14.4 Een meldtekst wissen
14.5 Instellingen antwoordapparaat
14.5.1 Meldtekst1 of meldtekst2
selecteren
In het instelmenu van het antwoordapparaat kunt
u ook de meldtekst selecteren.
14.5.2 Selecteer het aantal beltonen
Om in te stellen hoeveel keer de telefoon moet
overgaan vooraleer het antwoordapparaat de
oproep beantwoordt:
14.5.3 De remote pincode instellen
Deze afstandscode heeft u nodig om het antwoor-
dapparaat van op afstand te kunnen bedienen
(zie hoofdstuk 14.11)
2
SEC
Activeer het antwoordapparaat. U
krijgt de geselecteerde meldtekst te
horen
Schakel tussen meldtekst1 en
meldtekst2.
U krijgt de geselecteerde meldtekst te
horen. Op de 2e regel van de display
wordt de meldtekst ook weergegeven
(A1 of A2)
Selecteer Meldtekst1 of Meldtekst2
3
SEC
Laat de toets los wanneer u een
pieptoon hoort en begin uw meldtekst
(max. 2 minuten) in te spreken.
Als de meldtekst korter is dan 3 seconden, is de
opname ongeldig.
De opname stoppen. Het bericht
wordt afgespeeld
De opgenomen meldtekst opnieuw
beluisteren
Selecteer Meldtekst1 of Meldtekst2.
De opgenomen meldtekst opnieuw
beluisteren
Druk op de wis-toets tijdens de
weergave. Het vooraf opgenomen
bericht wordt afgespeeld
Ga naar het menu
Selecteer ’TAD Setting’
Ga naar het submenu
Selecteer ’Answering’
Om te bevestigen
Selecteer ’Answering-A1’
(meldtekst1) of ’Answering-A2’
(meldtekst2)
Bevestig
ESC 2 X Om het menu te verlaten
Ga naar het menu
Selecteer ’TAD Setting’
Ga naar het submenu
Selecteer ’TAD Rings’
Om te bevestigen
Selecteer 2 tot 9 of selecteer T/S
Bevestig
ESC 2 X Om het menu te verlaten
T/S betekent ’Toll Saver’. Het toestel zal
antwoorden na 4 beltonen als er geen nieuwe
berichten zijn, en na 2 beltonen als er nieuwe
berichten zijn. Als er geen nieuwe berichten zijn
en u belt naar het toestel om van op afstand uw
berichten op te vragen, kunt u al na de 2e
beltoon inhaken. U hoeft geen
verbindingskosten te betalen en u weet dat er
geen nieuwe berichten zijn.
Ga naar het menu
Selecteer ’TAD Setting’
Ga naar het submenu
Selecteer ’TAD Pin’
Om te bevestigen
20 Esscom Fidelity 1150
Esscom Fidelity 1150
14.5.4 Oproepen screenen
Wanneer een oproep binnenkomt, kunt u de op-
name beluisteren zonder de handset op te
nemen.U kunt deze functie in- of uitschakelen.
14.6 Binnenkomende berichten
Na het ingestelde aantal beltonen zal het ant-
woordapparaat de oproep beantwoorden, de
oproeper krijgt uw meldtekst (meldtekst) te
horen.Als meldtekst1 is geselecteerd, kan hij een
bericht opnemen (max. 2 minuten) na de piep-
toon. Zodra u nieuwe berichten heeft, verschijnt
het aantal nieuwe berichten op de display. De op-
name wordt onderbroken wanneer het toestel een
stilte van 6 seconden detecteert of wanneer u de
handset opneemt.
14.7 Memo opnemen
Een memo opnemen
Memo’s worden opgeslagen samen met de opg-
enomen binnenkomende oproepen.
14.8 Opgenomen berichten afspelen
In IDLE-modus:
Nadat alle berichten zijn afgespeeld, drukt u op
om alle berichten opnieuw te beluisteren
14.9 Één bericht wissen
Terwijl het bericht wordt afgespeeld.
14.10 Alle berichten wissen
Terwijl het laatste bericht wordt afgespeeld.
14.11 Afstandsbediening
Het antwoordapparaat kan van op afstand worden
bediend via een telefoon met druktoetsen (DTMF
toonkiessysteem).
• Bel naar uw toestel. U hoort de meldtekst.
Voer de nieuwe PIN-code in (3
cijfers)
Bevestig
ESC 2 X Om het menu te verlaten
Ga naar het menu
Selecteer ’TAD Setting’
Ga naar het submenu
Selecteer ’Call Screen’
Om te bevestigen
Selecteer ’Call Screen ON’ of ’Call
Screen OFF’
Bevestig
ESC 2 X Om het menu te verlaten
3
SEC
Laat de toets los wanneer u een
pieptoon hoort en begin uw memo
(max. 2 minuten) in te spreken.
De opname stoppen
Het toestel zal de nieuwe berichten
afspelen
Telkens wanneer een bericht wordt opgenomen,
wordt ook de datum en het tijdstip opgeslagen
als de datum en de klok zijn ingesteld (zie
hoofdstuk 7.4). Bij het afspelen van een bericht
worden eerst de datum en het tijdstip van de
opname aangekondigd.
Om de weergave te pauzeren
<1s Om het bericht opnieuw af te spelen
2 X Om naar het vorige bericht te
springen
Om naar het volgende bericht te
springen
Om de weergave te stoppen
’WISSEN? (DELETE)?’ verschijnt op
de display
Om te bevestigen en het bericht te
wissen
Als er geen toets wordt ingedrukt binnen de 30
seconden, blijft het toestel de berichten afspelen
2
SEC
’DELETE ALL?’ verschijnt op de
display
Om te bevestigen en alle berichten
te wissen
Als er geen toets wordt ingedrukt binnen de 30
seconden, blijft het toestel de berichten afspelen
Table of contents
Languages:


SP user manual")


