ESSENCORE KLEVV User manual

OVERVIEW
BEFORE YOU BEGIN
SSD HANDLING PRECAUTIONS
DESKTOP INSTALLATION
- Install Migration Tool
- Migrate Your Data
- Swap or Install Your Drives
- Change the Boot Order of the Drives from BIOS
- Install Migration Tool
- Migrate Your Data
- Swap Your Drives
LAPTOP INSTALLATION
WARRANTY AND TECHNICAL SUPPORT
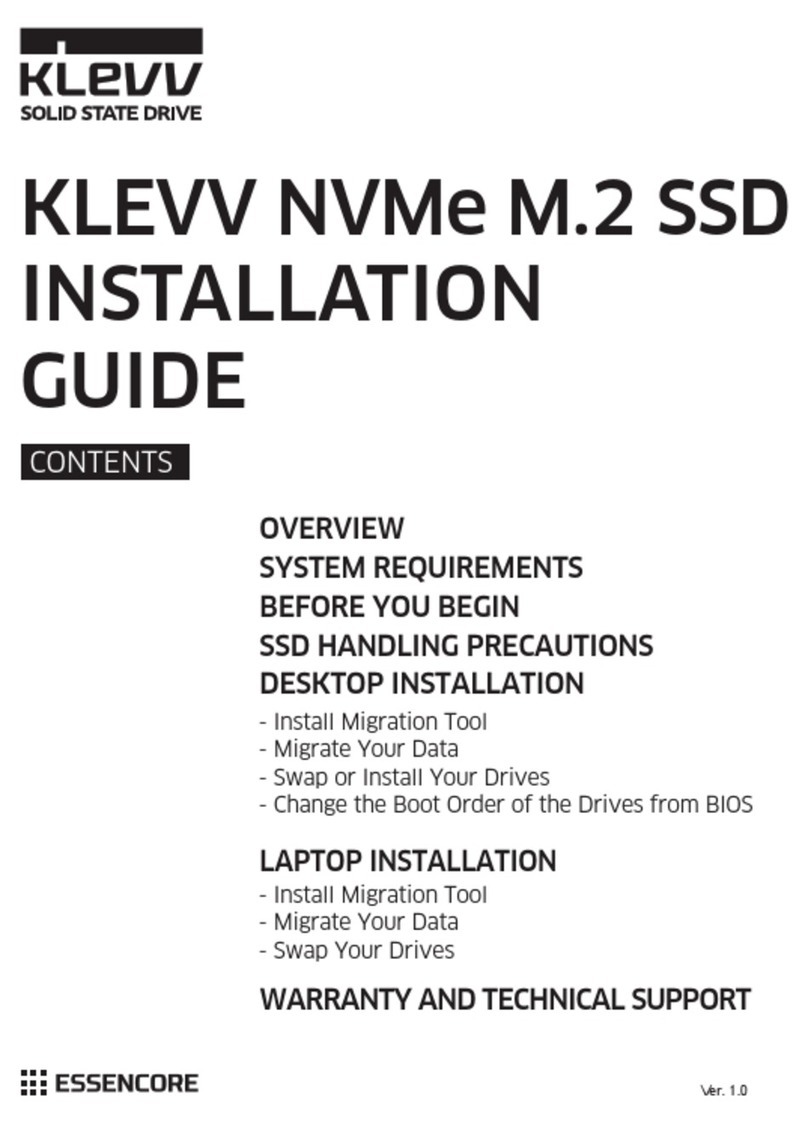
CONTENTS
KLEVV M.2 SSD
INSTALLATION
GUIDE
Ver. 1.0

Overview
This guide explains how to install a KLEVV Solid-State Drive (KLEVV SSD)
in a SATA-based desktop or notebook computer.
Observe the following before beginning the installation:
Handle the SSD with care. Do not touch the gold connectors.
To minimize static electricity, touch the computer case before handling the SSD.
Do not remove the encasement or disassemble the SSD
; these actions void the SSD warranty.
Hardware Item
1 USB to M.2 2280 SATA adaptor
and USB cable
2 Screwdriver
3 Screws
Laptop/desktop computers
to migrate your data
Laptop/desktop computers
Laptop/desktop computers
Required For
SSD Handling Precautions
Before You Begin
Conrm you have the following
hardware for installation
* These tools are not included in the package.
You may need to prepare by yourself.

Desktop Installation
Please make sure that you have installed the Migration Tool1.
2. Install the KLEVV M.2 SSD to the USB to M.2 2280 adaptor.
(You may need to consult the user manual of your USB to M.2 2280
adaptor)
Migrate Your Data
Swap or Install Your Drives
3.
Connect the KLEVV M.2 SSD to
your desktop using the USB to
M.2 2280 adaptor
* Please skip this step if you don’t need to migrate your data.
* You may also use your own software for the data migration.
Install Migraon Tool - Acronis True Image 2015
If your KLEVV SSD provides Migration Tool (Acronis True Image 2015),
please download the software and its user’s manual from the following
KLEVV website. (www.essencore.com or www.klevv.com)
1.
Follow the instructions to install the Migration Tool to your desktop.2.
Run the Migration Tool,
and follow the instructions
to migrate your operating .
4.
5.
6.
Safely remove your KLEVV M.2 SSD from USB when done.
Disconnect your KLEVV M.2 SSD from the USB to M.2 2280 adaptor.
Power off your desktop and disconnect the power cord.1.

Remove the existing M.2 SSD from the M.2 socket (if applicable).
Refer to your owner’s manual for how to safely remove the existing
M.2 drive.
4.
Align the notches on the KLEVV
M.2 SSD with the ridges in the
M.2 socket, then insert as shown.
5.
Hold KLEVV M.2 SSD along
the side edges and lower it
until it sits on top of the
support assembly.
6.
Insert screw into the support
assembly and securely
fasten the KLEVV
M.2 SSD in.
7.
Locate your computer’s M.2 socket on the motherboard (You may
need to consult your owner’s manual for the exact location)
3.
Open the cover of your computer.2.
* If needed please refer to the service
manual for your desktop to open the
cover safely.
Reattach the covers to your desktop.8.

Change the Boot Order of the Drives from BIOS
Migrate Your Data
Power on your computer.(You may also see a message prompting
you to update your system's conguration settings. Refer to your
owner's manual for instructions.)
While the computer is booting, press a special key such as ESC, F1,
or DELETE to enter the BIOS menu. Check your computer manufacturer’s
documentation for the correct key(s).
Go to the Boot or Startup screen and change the boot order so that
the KLEVV M.2 SSD appears before your old storage device.
Save the settings and exit the BIOS setup menu.
Restart the computer.
Now your computer boots to your KLEVV M.2 SSD.
1.
3.
4.
5.
6.
2.
Please make sure that you have installed the Migration Tool.1.
Install the KLEVV M.2 SSD to the USB to M.2 2280 adaptor.
(You may need to consult the usermanual of your USB to
M.2 2280 adaptor)
2.
Connect the KLEVV M.2 SSD to your desktop using the USB to
M.2 2280 adaptor
3.
Run the Migration Tool,
and follow
the instructions to
migrate your
operating system
and data to the
new KLEVV M.2 SSD.
4.
Safely remove your KLEVV M.2 SSD from USB when done.5.
Disconnect your KLEVV M.2 SSD from the USB to M.2 2280 adaptor.6.
If your KLEVV SSD provides Migration Tool (Acronis True Image 2015),
Please download the software and its user’s manual from the following
KLEVV website. (www.essencore.com or www.klevv.com)
1.
Follow the instructions to install the Migration Tool to your laptop.2.
* You may also use your own software for the data migration.
Laptop Installation
* Please skip this step if you don’t need to migrate your data.
Install Migraon Tool - Acronis True Image 2015

Power off your laptop.
Disconnect power cord
and remove the battery.
Remove the existing M.2 SSD from the M.2 socket (if applicable).
Refer to your owner’s manual for how to safely remove the existing
M.2 drive.
Align the notches on the KLEVV
M.2 SSD with the ridges in the
M.2 socket, then insert
as shown.
Hold KLEVV M.2 SSD
along the side edges
and lower it until it sits
on top of the support
assembly.
Insert screw into the support
assembly and securely
fasten the KLEVV M.2
SSD in.
Replace the cover and power on the computer
1.
2.
3.
4.
5.
6.
Swap Your Drives

KLEVV is a trademark of ESSENCORE Limited., registered in the United States and other countries.
© 2015 ESSENCORE Limited. All rights reserved. All trademarks are properties
of their respective owners.
KLEVV will not be responsible for providing free repairs if the product defect
is caused by any of the following factors:
– Damage caused by natural disaster or any inappropriate usage.
– Product has been repaired or taken apart by unauthorized technicians.
– Unauthorized modication of rmware.
– Serial number of product does not match or is not clear enough to be
identied.
– Products purchased from unauthorized agents.
This limited warranty covers only repairs or replacements of KLEVV products.
KLEVV is not liable for any loss of data or any cost incurred from determining
the source of system problems, removing, servicing or installing
KLEVV products.
For More information regarding the product warranty, please visit KLEVV
website for detailed terms.(www.essencore.com or www.klevv.com)
Limitaon of warranty
For more information about warranty, go to KLEVV website.
To apply for an RMA (Return Material Authorization), please contact
Warranty and Technical Support

INFORMACIÓN GENERAL
ANTES DE EMPEZAR
PRECAUCIONES A LA HORA DE MANIPULAR LA UNIDAD DE ESTADO SÓLIDO
INSTALACIÓN EN EQUIPO DE SOBREMESA
- Instalar la herramienta de migración
- Migrar los datos
- Intercambiar o instalar las unidades
-
Cambiar el orden de arranque de las unidades desde el BIOS
- Instalar la herramienta de migración
- Migrar los datos
- Intercambiar las unidades
INSTALACIÓN EN EQUIPO PORTÁTIL
GARANTÍA Y SOPORTE TÉCNICO
CONTENIDO
GUÍA DE INSTALACIÓN
DE LA UNIDAD DE
ESTADO SÓLIDO KLEVV

Información general
En esta guía se explica cómo instalar una unidad de estado sólido KLEVV (SSD KLEVV)
en un equipo de sobremesa o portátil basado en SATA.
Tenga en cuenta lo siguiente antes de iniciar la instalación:
Manipule la unidad de estado sólido con cuidado. No toque los conectores dorados.
Para minimizar la electricidad estática, toque la carcasa del equipo antes de manipular la unidad de estado sólido.
No quite la cubierta ni desmonte la unidad de estado sólido ya que, si lo hace,
la garantía de dicha unidad quedará anulada.
Antes de empezar
Asegúrese de que tiene las siguientes
herramientas y hardware para la instalación.
* Estas herramientas no se incluyen en el paquete.
Puede que necesite prepararlas usted mismo.
Elemento de hardware
1 Adaptador SATA USB a
M.2 2280 y cable USB
2 Destornillador
3 Tornillos
Equipos portáles y de sobremesa para
migrar los datos
Equipos portáles y de sobremesa
Equipos portáles y de sobremesa
Necesario para
Precauciones a la hora de manipular la unidad
de estado sólido

Instalación en equipo de sobremesa
Asegúrese de que ha instalado la herramienta de migración.1.
Instale la unidad de estado sólido KLEVV M.2 en el adaptador USB a M.2 2280.
(Necesita consultar el manual del usuario del adaptador USB a M.2 2280)
2.
Migrar los datos
Intercambiar o instalar las unidades
3.
Conecte la unidad de estado sólido
KLEVV M.2 al equipo de sobremesa
mediante el adaptador USB
a M.2 2280.
* Omita este paso si no tiene que migrar datos.
* También puede utilizar su propio software para la migración de datos.
Instalar la herramienta de migración - Acronis True Image 2015
Si la unidad de estado sólido KLEVV proporciona una herramienta de migración
(Acronis True Image 2015), descargue el software y su manual del usuario desde
el siguiente sitio web de KLEVV.
(www.essencore.com or www.klevv.com)
1.
Siga las instrucciones para instalar la herramienta de migración en el equipo
de sobremesa.
2.
Ejecute la herramienta de
migración y siga las instrucciones
para migrar el sistema operativo
y los datos a la nueva unidad
de estado sólido KLEVV M.2.
4.
Extraiga de forma segura la unidad de estado sólido KLEVV M.2
del puerto USB cuando haya terminado.
5.
Desconecte la unidad de estado sólido KLEVV M.2 del adaptador USB
a M.2 2280.
6.
Apague el equipo de sobremesa y desconecte el cable de alimentación.1.

Localice el zócalo M.2 del equipo en la placa base (es posible que necesite consultar
el manual del propietario para encontrar la localización exacta)
3.
Retire la unidad de estado sólido M.2 existente del zócalo M.2 (si procede). Consulte
el manual del propietario para obtener información sobre cómo quitar de forma
segura la unidad M.2 existente.
4.
Alinee las muestras de la unidad
de estado sólido KLEVV M.2 con
los salientes del zócalo M.2 y,
a continuación, insértela como
se muestra.
5.
Sostenga la unidad de estado
sólido KLEVV M.2 a lo largo de
los bordes laterales y bájela hasta
que se asiente en la parte superior
del ensamblaje de soporte.
6.
Inserte el tornillo en el ensamblaje
de soporte y je de forma segura
la unidad de estado sólido
KLEVV M.2 dentro.
7.
Vuelva a colocar las cubiertas en el equipo de sobremesa.
8.
Abra la cubierta del equipo.2.
*
Si es necesario, consulte el manual
de mantenimiento
del equipo
de sobremesa para abrir la cubierta
de forma segura.

* Omita este paso si no tiene que migrar datos.
* También puede utilizar su propio software para la migración de datos.
Instalar la herramienta de migración: Acronis True Image 2015
Si la unidad de estado sólido KLEVV proporciona una herramienta de migración
(Acronis True Image 2015), descargue el software y su manual del usuario desde
el siguiente sitio web de KLEVV.
(www.essencore.com or www.klevv.com)
1.
Siga las instrucciones para instalar la herramienta de migración en el equipo portátil.
2.
Cambiar el orden de arranque de las unidades desde el BIOS
Instalación en equipo portátil
Migrar los datos
Encienda el equipo. (También puede aparecer un mensaje que le pida que
actualice la conguración del sistema. Consulte el manual del propietario
para obtener instrucciones.)
1.
Mientras arranca el equipo, presione una tecla especial; como ESC, F1
o SUPR, para entrar en el menú del BIOS. Consulte la documentación
del fabricante del equipo para conocer la(s) tecla(s) correcta(s).
2.
Vaya a la pantalla de arranque o inicio y cambie el orden de arranque
de forma que la unidad de estado sólido KLEVV M.2 aparezca antes que
el dispositivo de almacenamiento antiguo.
3.
Guarde la conguración y salga del menú de conguración del BIOS.4.
Reinicie el equipo.5.
Ahora, el equipo arrancará con la unidad de estado sólido KLEVV M.2.6.
Asegúrese de que
ha instalado la
herramienta de migración.
1.
Instale la unidad de estado
sólido KLEVV M.2 en
el adaptador USB a M.2 2280.
(Necesita consultar el manual del usuario del adaptador USB a M.2 2280)
2.
Conecte la unidad de estado sólido KLEVV M.2 al equipo portátil mediante
el adaptador USB a M.2 2280.
3.
Ejecute la herramienta de migración y siga las instrucciones para migrar el sistema operativo y
los datos a la nueva unidad de estado sólido KLEVV M.2.
4.
Extraiga de forma segura la unidad de estado sólido KLEVV M.2 del puerto
USB cuando haya terminado.
5.

Alinee las muestras de la unidad
de estado sólido KLEVV M.2 con los
salientes del zócalo M.2 y,
a continuación, insértela como
se muestra.
3.
Retire la unidad de estado sólido M.2 existente del zócalo M.2 (si procede).
Consulte el manual del propietario para obtener información sobre cómo quitar
de forma segura la unidad M.2
existente.
2.
Vuelva a colocar la cubierta y encienda en el equipo.
6.
Sostenga la unidad de estado
sólido KLEVV M.2 a lo largo
de los bordes laterales y bájela
hasta que se asiente en la parte
superior del ensamblaje
de soporte.
4.
Inserte el tornillo en el ensamblaje
de soporte y je de forma segura
la unidad de estado sólido
KLEVV M.2 dentro.
5.
Apague el equipo portátil.
Desconecte el cable de
alimentación y quite
la batería.
1.
Intercambiar las unidades

KLEVV es una marca comercial de ESSENCORE Limited., registrada en los Estados Unidos y otros países.
© 2015 ESSENCORE Limited. Todos los derechos reservados. Todas las marcas comerciales son propiedad de sus respectivos propietarios.
KLEVV no asume ninguna responsabilidad por el suministro de piezas gratuitas si
el defecto del producto está causado por cualquiera de los siguientes factores:
– Daños provocados por desastres naturales o un uso inadecuado.
– Producto reparado o desmontado por técnicos no autorizados.
– Modicación no autorizada del rmware.
– Número de serie del producto que no coincide o no está lo sucientemente claro
como para poder identicarlo.
– Productos adquiridos a proveedores no autorizados.
Esta garantía limitada cubre solamente reparaciones o sustituciones de productos KLEVV.
KLEVV no asume ninguna responsabilidad por ninguna pérdida de datos o ningún coste
que resulte de determinar el origen de los problemas del sistema, la eliminación,
las reparaciones o la instalación de productos KLEVV.
Para obtener más información relacionada con la garantía del producto, visite el sitio web de KLEVV
para conocer los detalles de los términos.(www.essencore.com o www.klevv.com)
Limitación de la garana
Para obtener más información acerca de la garantía, vaya al sitio web de KLEVV.
Para solicitar una autorización de devolución de material
(RMA, Return Material Authorization),
póngase en contacto con el servicio de soporte técnico en
Garantía y soporte técnico

- Migrationssoftware installieren
- Daten migrieren
- Datenträger wechseln oder installieren
- Bootreihenfolge der Datenträger im BIOS ändern
- Migrationssoftware installieren
- Daten migrieren
- Datenträger wechseln
INSTALLATION AUF DEM NOTEBOOK-COMPUTER
GARANTIE UND TECHNISCHER SUPPORT
INHALT
KLEVV-SSD-LAUFWERK-
INSTALLATIONSANLEITUNG
ÜBERSICHT
ERSTE SCHRITTE
VORSICHTSMASSNAHMEN BEI DER
HANDHABUNG VON SSD-LAUFWERKEN
INSTALLATION AUF DEM DESKTOP-COMPUTER

Übersicht
Diese Anleitung beschreibt, wie Sie ein Solid-State-Drive von KLEVV
(KLEVV-SSD-Laufwerk)
in einem SATA-basierten Desktop- oder Notebook-Computer installieren.
Beachten Sie vor der Installation die folgenden Hinweise:
Gehen Sie vorsichtig mit dem SSD-Laufwerk um. Berühren Sie nicht die goldenen Kontakte.
Berühren Sie zur Ableitung statischer Elektrizität das Computergehäuse,
bevor Sie das SSD-Laufwerk anfassen.
Entfernen Sie das Gehäuse des SSD-Laufwerks nicht und demontieren Sie es nicht
; andernfalls erlischt die Garantie für das SSD-Laufwerk.
Erste Schritte
Vergewissern Sie sich, dass folgende
Hardware für die Installation bereit liegt.
* Diese Werkzeuge sind nicht im Lieferumfang
enthalten. Sie müssen sie sich selbst zulegen.
Hardware
1 USB-zu-M.2-2280
-SATA-Adapter
und USB-Kabel
2 Schraubendreher
3 Schrauben
Notebook-/Desktop-Computer für
die Datenmigraon
Notebook-/Desktop-Computer
Notebook-/Desktop-Computer
Benögt für
Vorsichtsmaßnahmen bei der Handhabung von SSD
-Laufwerken

Installation auf dem Desktop-Computer
Bitte stellen Sie sicher, dass Sie die Migrationssoftware installiert haben.
Installieren Sie das KLEVV-M.2-SSD-Laufwerk im USB-zu-M.2-2280-Adapter.
(Beachten Sie dazu die Bedienungsanleitung Ihres USB-zu-M.2-2280-Adapters)
1.
2.
Daten migrieren
Datenträger wechseln oder installieren
3.
Verbinden Sie das KLEVV-M.2-SSD
-Laufwerk über den USB-zu-M.2
-2280-Adapter mit Ihrem Desktop.
4.
Führen Sie die Migrationssoftware aus
und beachten Sie die Anweisungen
zur Migration Ihres Betriebssystems
und Ihrer Daten auf das neue
KLEVV-M.2-SSD-Laufwerk.
* Bitte überspringen Sie diesen Schritt, wenn Sie Ihre Daten nicht migrieren möchten.
* Sie können auch Ihre eigene Software für die Datenmigration verwenden.
Migraonssoware installieren – Acronis True Image 2015
Wenn Ihr KLEVV-SSD-Laufwerk die Migrationssoftware
(Acronis True Image 2015)
mit sich bringt, laden Sie die Software und ihre Bedienungsanleitung
bitte von der folgenden KLEVV-Webseite herunter
:
www.essencore.com or www.klevv.com
1.
Beachten Sie die Anweisungen zur Installation der Migrationssoftware auf Ihrem
Desktop-Computer.
2.
Trennen Sie Ihr KLEVV-M.2-SSD-Laufwerk anschließend auf sichere Weise vom
USB-Anschluss.
5.
Trennen Sie das KLEVV-M.2-SSD-Laufwerk vom USB-zu-M.2-2280-Adapter.
6.
Fahren Sie Ihren Desktop-Computer herunter und ziehen Sie das
Netzkabel ab.
1.

Suchen Sie am Motherboard nach dem M.2-Sockel Ihres Computers
(die exakte Position können Sie Ihrer Bedienungsanleitung entnehmen).
3.
Bringen Sie die Abdeckung wieder an Ihrem Desktop-Computer an.8.
Richten Sie die Kerben am
KLEVV-M.2-SSD-Laufwerk
an den Kanten im M.2-Sockel aus,
setzen Sie es dann wie
abgebildet ein.
5.
Halten Sie das KLEVV-M.2-SSD
-Laufwerk an den seitlichen
Rändern und senken Sie es,
bis es auf der Stützbaugruppe
aufsitzt.
6.
Stecken Sie die Schraube in die
Stützbaugruppe und befestigen
Sie das KLEVV-M.2-SSD
-Laufwerk sicher.
7.
Entfernen Sie das vorhandene M.2-SSD-Laufwerk aus dem M.2-Sockel
(falls zutreffend). Beachten Sie zum sicheren Entfernen des vorhandenen
M.2-Laufwerks die Bedienungsanleitung.
4.
Entfernen Sie die Abdeckung Ihres Computers.
2.
* Bitte beachten Sie gegebenenfalls die
Bedienungsanleitung Ihres Desktop-Computers,
um die Abdeckung auf sichere Weise zu entfernen.

* Bitte überspringen Sie diesen Schritt, wenn Sie Ihre Daten nicht migrieren möchten.
* Sie können auch Ihre eigene Software für die Datenmigration verwenden.
Migraonssoware installieren – Acronis True Image 2015
Wenn Ihr KLEVV-SSD-Laufwerk die Migrationssoftware
(Acronis True Image 2015)
mit sich bringt, laden Sie die Software und ihre Bedienungsanleitung bitte von
der folgenden KLEVV-Webseite herunter:
(www.essencore.com oder www.klevv.com)
1.
Beachten Sie die Anweisungen zur Installation der Migrationssoftware auf Ihrem
Notebook-Computer.
2.
Installation auf dem Notebook-Computer
Bootreihenfolge von Datenträgern im BIOS ändern
Daten migrieren
Schalten Sie Ihren Computer ein. (Möglicherweise werden Sie durch eine
Meldung zur Aktualisierung der Kongurationseinstellungen Ihres Systems
aufgefordert. Anweisungen dazu nden Sie in der Bedienungsanleitung.)
1.
Speichern Sie die Einstellungen und beenden Sie das BIOS-Menü.
4.
Starten Sie den Computer neu.
5.
Ihr Computer bootet jetzt von Ihrem KLEVV-M.2-SSD-Laufwerk.
6.
Drücken Sie während des Bootvorgangs die entsprechende Taste zur Anzeige
des BIOS-Menüs (z. B. Esc, F1 oder Entf). Die richtigen Tasten sind in der
Dokumentation Ihres Computerherstellers aufgeführt.
2.
Rufen Sie den Boot- oder Startbildschirm auf und ändern Sie die Bootreihenfolge,
sodass das KLEVV-M.2-SSD-Laufwerk noch vor Ihrem alten Speichergerät steht.
3.
Bitte stellen Sie sicher, dass Sie die Migrationssoftware installiert haben.1.
Installieren Sie das KLEVV-M.2-SSD-Laufwerk im USB-zu-M.2-2280
-Adapter. (Beachten Sie dazu die Bedienungsanleitung Ihres USB-zu
-M.2-2280-Adapters)
2.
Verbinden Sie das KLEVV-M.2-SSD-Laufwerk über den USB-zu-M.2-2280
-Adapter mit Ihrem Laptop.
3.
Führen Sie die
Migrationssoftware aus
und beachten Sie die
Anweisungen zur
Migration Ihres
Betriebssystems und
Ihrer Daten auf das
neue KLEVV-M.2-SSD-Laufwerk.
4.
Trennen Sie Ihr KLEVV-SSD-Laufwerk vom SATA-zu-USB-Adapter.5.
Trennen Sie das KLEVV-M.2-SSD-Laufwerk vom USB-zu-M.2-2280-Adapter.6.

Entfernen Sie das vorhandene M.2-SSD-Laufwerk aus dem
M.2-Sockel (falls zutreffend). Beachten Sie zum sicheren
Entfernen des vorhandenen M.2-Laufwerks die Bedienungsanleitung.
2.
Richten Sie die Kerben am
KLEVV-M.2-SSD-Laufwerk an
den Kanten im M.2-Sockel aus,
setzen Sie es dann wie
abgebildet ein.
3.
Halten Sie das KLEVV-M.2
-SSD-Laufwerk an den
seitlichen Rändern und
senken Sie es, bis es auf
der Stützbaugruppe aufsitzt.
4.
Stecken Sie die Schraube in
die Stützbaugruppe und
befestigen Sie das KLEVV-
M.2-SSD-Laufwerk sicher.
5.
Bringen Sie die Abdeckung wieder an und schalten Sie den Computer ein.
6.
Fahren Sie Ihren
Notebook-Computer herunter
.
Trennen Sie das Netzkabel
und entfernen Sie den Akku.
1.
Datenträger vertauschen
Table of contents
Languages:
Other ESSENCORE Storage manuals
Popular Storage manuals by other brands
Nexto Di
Nexto Di NVS2500 manual
Vanderbilt
Vanderbilt SPCX410 installation instructions
OWC
OWC Mercury Elite Pro Dual Assembly manual & user guide
Seagate
Seagate ST973401LC - Savvio 73.4 GB Hard Drive product manual

Sony
Sony SRR1000 installation manual

Overland Storage
Overland Storage SnapSAN S1000 quick start guide
