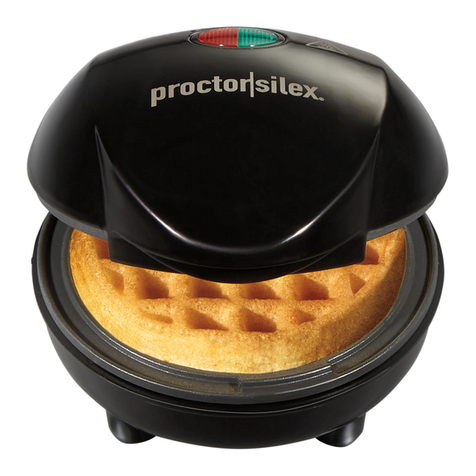
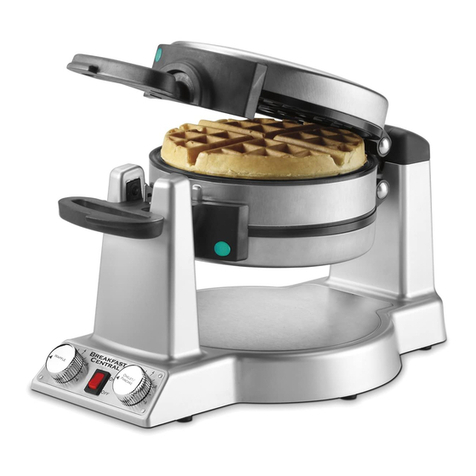
Estella 348WBMP1A User manual

USER MANUAL
www.EstellaEquipment.com 05/2023
#348WBMP1A
PRESS-STYLE
WAFFLE MAKER 5025815 5025815
CONFORMS TO UL STD. 197
CONFORMS TO NSF/ANSI STD. 4

www.EstellaEquipment.com2
USER MANUAL
INDEX
Serial Plate ..................................................... 2
Unboxing ........................................................ 2
Safety Precautions ................................... 3-4
Notes for First Time Use............................. 5
Changing Grids............................................. 5
Operation Instructions ................................ 6
Care & Cleaning.............................................7
Tips & Maintenance ......................................7
Troubleshooting............................................ 8
INTRODUCTION
Congratulations on your purchase of Estella Equipment. Estella Equipment takes pride in the design and quality
of our products. When used as intended and with proper care and maintenance, you will experience years
of reliable operation from this equipment. To ensure best results, it is important that you read and follow the
instructions in this manual carefully.
SERIAL PLATE
UNBOXING
Serial plate containing important electrical data,
certifications, and warnings is located on the
back of the unit.
All equipment should be examined for damage before and during unloading. The freight carrier has assumed
responsibility for its safe transit and delivery. If equipment is received damaged, either apparent or concealed,
a claim must be made with the delivering carrier.
A) Apparent damage or loss must be noted on the freight bill at the time of delivery. It must then be signed by
the carrier representative (Driver). If this is not done, the carrier may refuse the claim. The carrier can supply the
necessary forms.
B) If concealed damage is not apparent until after equipment is uncrated, a request for inspection must be
made to the carrier within 5 days. The carrier should arrange an inspection. Be certain to hold all contents and
packaging material.
Installation and service should be performed by a qualified installer who thoroughly reads, understands, and
follows these instructions.
If you have questions concerning the installation, operation, maintenance, or service of this product, visit Estella
Equipment www.estellaequipment.com.
IMMEDIATELY INSPECT FOR SHIPPING DAMAGE
ITEM:
348WBMP1A
PRODUCT DESCRIPTION:
BELGIAN, PRESS, SINGLE WAFFLE MAKER,
NON-STICK, DIGITAL
VOLTAGE:
120V | WATTAGE: 1340W
PHASE:
1 Phase | HERTZ: 60 Hertz
AMPERAGE:
11.2A | PLUG TYPE: 5-15P
SERIAL NUMBER:
CONFORMS TO UL STD. 197,
CONFORMS TO NSF/ANSI STD. 4
WARNING! Improper installation, adjustment, alteration, service or maintenance can
cause property damage, injury, or death. Read the installation, operating, and
maintenance instructions thoroughly before installing or servicing this equipment.
Commercial use only. WARNING! Disconnect from electric supply before adjustment,
alteration, servicing, or maintenance. Do not immerse in water. MADE IN CHINA
5025815 5025815

www.EstellaEquipment.com 3
USER MANUAL
SAFETY PRECAUTIONS
Potential hazard or unsafe practice, which could result in
serious injury or death.
Potential hazard or unsafe practice, which could result in
minor or moderate injury or product/property damage.
Information that needs special attention or must be fully understood,
even though not dangerous.
WARNING
CAUTION
NOTICE
• SHOCK HAZARD - Turn OFF all power to equipment before cleaning the equipment.
• FIRE HAZARD - For your safety, do not store or use gasoline or other flammable vapors or liquids
in the vicinity of this or any appliances. Keep the area free and clear of combustible materials.
(See ANSI Z83. 14B, 1991).
• Improper installation, adjustment, alteration, service, or maintenance can cause property damage, injury,
or death. Read the installation, operating, and maintenance instructions thoroughly before installing
or servicing this equipment.
• A factory authorized agent should handle all maintenance and repair. Before doing any maintenance
or repair, contact your authorized service representative.
• An earthing cable must connect the appliance to all other units in the complete installation and from
there to an independent earth connection.
• These models are designed, built, and sold for commercial use only. If these models are positioned so
the general public can use the equipment, make sure that cautions, warnings, and operating instructions
are clearly posted near each unit so that anyone using the equipment will use it correctly and not injure
themselves or harm the equipment.
• This product is intended for commercial use only. Not for household use.
• Local codes regarding installation vary greatly from one area to another. The National Fire Protection
Association, Inc., states in its NFPA96 latest edition that local codes are “Authority Having Jurisdiction”
when it comes to requirements for installation of equipment. Therefore, installation should comply with
all local codes.
• The unit when installed, must be electrically grounded and comply with local codes, or in the absence of
local codes, with the national electrical code ANSI/NFPA70- latest edition. Canadian installation must comply
with CSA-STANDARD C.22.2 Number 0 M1 982 General Requirements-Canadian Electrical Code Part ll,
109-M1981-Commercial Cooking Appliances. Do not use unit if the appliance malfunctions or if the appliance,
cord, or plug has been damaged in any manner.
WARNING: TO REDUCE THE RISK OF FIRE OR ELECTRIC SHOCK, DO NOT REMOVE UNIT'S COVER. NO USER-
SERVICEABLE PARTS INSIDE. REPAIR SHOULD BE DONE BY AUTHORIZED SERVICE PERSONNEL ONLY

www.EstellaEquipment.com4
USER MANUAL
SAFETY PRECAUTIONS
The following safety precautions must be observed when using this product:
1. Read the relevant instructions carefully before using this product.
2. DO NOT share the same power source with other high-power appliances to avoid excessive power load
and other dangers.
3. The surface temperature of this product is very hot during operation. Burns may be caused by contact
with hot parts.
4. Keep machine away from children and non-authorized personnel. DO NOT permit them to go near the
machine or its working area.
5. DO NOT allow this product to be used unattended.
6. DO NOT touch the power cord with sharp objects or high-temperature surfaces to avoid damage to
the power cord.
7. ALWAYS check that the machine is not damaged prior to each use. Frequently check whether the power
cord and plug aren't damaged. Carefully check that all safety devices are working, that the removable parts
are not blocked, there are no parts damaged, that all the parts have been set up correctly, and that all
conditions that could influence the regular function of the machine are in working order. If the machine is
damaged or there are issues during its use, turn o the machine immediately and contact the manufacturer
for assistance or repair. Repairs should only be made by qualified technicians, using the correct
manufacturer parts. Non-compliance with these rules may void the warranty.
8. After use, press the power button to close and pull out the plug from the socket to avoid leakage or shock
due to aging insulation.
9. DO NOT submerge or saturate with water. Unit is not waterproof. DO NOT steam clean or use excessive
water on unit. DO NOT use a pressure washer. DO NOT operate if unit has been submerged or saturated
with water. ALWAYS unplug the power cord and remove, check, or clean the product after it has cooled
completely.
10. DO NOT plug or unplug the power cord with wet hands to avoid electric shock.
11. DO NOT use this unit for other than its intended use.
12. DO NOT use outdoors.
13. ALWAYS cook on a firm, dry, and level surface.
14. High temperatures will cause scalding. DO NOT touch the outer grid or grid while in operation.
15. DO NOT modify unit. This may void the warranty.

www.EstellaEquipment.com 5
USER MANUAL
NOTES FOR FIRST TIME USE
1. Read the manual carefully.
2. Check that all switches are in the OFF position.
3. Check all the accessories are complete.
4. Remove the protective film on the surface of the product, then wipe clean the rust-preventing oil on the
surface of the product with a dry cloth.
5. The supply voltage must match the voltage specified on this machine.
6. Smoke is normal during first use, as it’s caused from the oil inside the machine which helps to protect it from
rusting during transit.
7. These units are suitable for installation on non-combustible surfaces only. Do not install near any
combustible surfaces or any other equipment. Do not store or use gasoline or other flammable vapors and
liquids in the vicinity of this or any other equipment.
Improper installation, adjustment, alteration, service, or maintenance can cause property damage, injury,
or death. Read the installation, operating, and maintenance instructions thoroughly before installing or
servicing this equipment.
CHANGING GRIDS
Additional grid styles are available. See product page for more details.
1. Use the wrench included to remove the (4) bolts for the upper grid
and the (4) bolts for the lower grid.
2. Carefully remove grid without damaging the heating element or
other components.
3. To install the new grid, align the bolt holes, and then tighten the
bolts gently. Do not over tighten and thread the holes.

www.EstellaEquipment.com6
USER MANUAL
7. When the unit beeps and
the timer display shows END,
the wae is ready.
8. Open the grid and remove
the wae with tongs.
9. Keep the grid closed between
baking periods for best
performance. Allow the unit to
return to it's target temperature
before cooking the next wae.
Power
T
emperature
Timer
Star t
Stop
Power
T
emperature
Timer
Star t
Stop
OPERATION INSTRUCTIONS
1. Press the POWER button to turn
ON the unit. The unit is preset
to the recommended settings
for waes:
Preset cook time is 3 minutes.
Preset temperature is 365°F.
2. To change the temperature set
point and/or cook time, press
the UP (▲) or DOWN (▼) arrows
next to the respective display.
3. With grids open, allow 30-45
minutes for unit to preheat.
4. While the unit is preheating,
prepare the wae mix
according to the instructions
on the product. For best
performance, always use
fresh batter and do not allow
it to warm too much.
Cook times vary based on
the mix that is used.
5. Once the unit has come to
temperature, it will beep once.
Pour the desired amount of
batter evenly into the center of
the lower grid.
Note: Be careful not to overfill
the grid with batter.
6. Close the top grid and press
the START/STOP button.
DO NOT remove the wae
before the timer ends.
Power
T
emperature
Timer
Star t
Stop
Note: The temperature display will show both the set point and the current temperature reading. When cold
batter is added to a plate, there will be a drop in temperature dierence between the set point and current
temperature reading. This is normal and will not aect baking. Under normal conditions, please allow 15-25
seconds for current temperature to recover to set point.
Note: DO NOT use metallic utensils as they will damage the non-stick coating. It is recommended to use a
soft-bristled, high-heat brush to remove any residue and crumbs from the grids to prevent burning.

www.EstellaEquipment.com 7
USER MANUAL
TIPS & MAINTENANCE
CARE & CLEANING
1. Unplug the power cable and ensure that the product is cooled completely before cleaning.
2. Clean the grids with a soft cloth or sponge dampened in a mild detergent and warm water.
ONLY use "safe for aluminum" cleaners or permanent damage may result.
3. Rinse and wipe dry to ensure no detergent residue is left on the grids.
4. For end of day or deep cleaning, remove the grids using instructions above. Then, soak grids in hot soapy
water or mild detergent. Wash with soft plastic brush. Rinse thoroughly and wipe dry. Plates MUST be
completely dry before reinstalling on unit.
5. For daily exterior cleaning, wipe the frame of the unit with a non-abrasive cloth dampened in warm water
and mild soap. Stubborn stains may be removed with a good stainless steel cleaner. Hard-to-reach areas
should be cleaned with a small soft bristle brush. We recommend using Noble Chemical Excel Stainless
Steel Cleaner for exterior cleaning.
6. Remove the drip tray and clean with a soft cloth or sponge and mild detergent.
Note: The drip tray is dishwasher safe.
• Grids MUST be open when pre-heating. If closed, the temperature inside the grid is much higher than
when open. Long periods of high temperature is not good for non-stick coating. Please allow 30-45
minutes for pre-heating from a cold start. 356-400°F is optimal operational temperature.
• If maker is not being used for periods of 20-30 minutes between use, we recommend either turning
OFF the unit OR reducing the set temperature to 175°F.
• The unit is equipped with a temperature limiter, which will shut o the unit automatically if the temperature
reaches above 554°F.
• DO NOT use any metal tool to remove wae, use wooden or plastic utensils. It's recommended to use a
high-temp soft bristle brush to remove crumbs in between uses to avoid burning.
• If black flakes appear on waes or the surface, it’s recommended to stop using the unit and not serve
customers. This indicates the non-stick coating is damaged. Please replace the grids before continuing use.
• With non-stick grids, it’s not necessary to use oil or non-stick spray directly on the grid. However, if sticking
begins to occur, use a soft bristle or silicone brush to evenly coat grids with cooking oil.
• For high volume application, it may be necessary to replace wae grids every 3-4 months. Wae grids are
not dishwasher safe.
• DO NOT use a wire brush, sti brush, or other corrosive liquids to clean the grids to avoid damage
to the surface coating.
• DO NOT use an abrasive cleanser or harsh pad.
• DO NOT clean the product with a pressure washer or immerse the unit in water.
• DO NOT place damp or wet grids back into the unit.

www.EstellaEquipment.com8
USER MANUAL
TROUBLESHOOTING
ERROR CODE CAUSE SOLUTION
E-1 Thermocouple open circuit Check whether the thermocouple is in good contact
E-2 Thermocouple overheated Check whether the heater temperature is normal
E-3 After heating 4 minutes, the
temperature is below 158°F Check whether the heating line is properly connected
E-4 NTC open circuit Check whether NTC is damaged
E-5 NTC short circuit Check whether NTC is damaged
E-6 EEPROM error Replace IC
PROBLEM CAUSE SOLUTION
Unit stops heating
High limit tripped Unplug and let the unit cool
for 10 minutes
Circuit breaker tripped Check circuit breaker
One side of grid assembly stops
working
Heating element is broken
Contact customer service
Loose/broken wire connection
Black flakes in batter/wae
Too much heat or abrasive
utensil use has caused damaged
to non-stick coating
Immediately stop cooking waes
and serving to customers.
Replace grids before continuing.
Controls stop working Buttons damaged or PCB damage Contact customer service
Digital Board Errors
General Problems
Table of contents


