manuals.online logo
Brands
  1. Home
  2. •
  3. Brands
  4. •
  5. Eterna
  6. •
  7. Dryer
  8. •
  9. Eterna HDA-1800 Setup guide

Eterna HDA-1800 Setup guide

Eventually, you may wanttoreplace thislightfitting:
When yourlight fittingcomestotheendofitslifeor you choosetoupdateor upgrade itby
replacingit,pleasedonotdisposeofitwithyour normalhouseholdwaste,pleaserecycle
where facilitiesexist. When youneed todisposeofthisfitting,check withyourretaileror
localauthorityforsuitableoptions.Newregulationsrequire the recyclingofWastefrom
ElectricalandElectronicEquipment(European “WEEEDirective”effectiveAugust2005—
UKWEEERegulationseffective2nd January2007 ).
EnvironmentAgencyRegistered Producer:WEE/GA0248QZ
Ifyou experience problems:
IfyourHand dryerisdefectiveor developsafault,pleasereturnittothe placewhere you boughtit.You
can callour Helpline for advice.TheHelpline will gladlygiveadviceonanyaspectofanyEterna
Lightingproduct butmaynot beabletogivespecificinstructionsregardingindividualinstallations.
Ifindoubt, consultaqualifiedelectrician.
Helpline:
Tel:01933 673 144 Fax: 01933 678 083 Email: sales@eterna-lighting.co.uk
For answerstofrequentlyasked questions(FAQs)and other information visit ourweb-site
www.eterna-lighting.co.uk
Specification:
Voltage:240V50 Hz
Rated Power:1800W
Current: 8.0A
Ingress protection:IPX1
Volumeof airmovement:2.6m³/min
Dimensions:250 x225 x195mm
Unit Weight:3.75 kg
Cleaning:
> Disconnectthe power and clean theexterior onlyofthisfittingwithamoist(not wet)cloth.
> Donot useanychemicalor abrasivecleaners.
PLEASE READ THESE INSTRUCTIONSBEFORE
INSTALLING YOUR NEWFITTING
--
PLEASE RETAINFORFUTUREREFERENCE
1.8KWAutomatic
Hand Dryer
Model(s)
HDA-1800
Pack contents:
Hand dryer 1
Fixing kit 1
Safetymarkings:
Readthisfirst:
> Thisfittingmustbeinstalledin
accordance withtheBuilding
Regulations. Thesemaybeobtained
fromHMSOorviewedand downloaded
from www.odpm.gov.uk followingthe
link forBuildingRegulations.
> Ifinanydoubt,consultaqualified
electrician.
> Switch offthemainsbefore
commencinginstallation andremove
the appropriatecircuitfuse.
> Donotuse the dryerwithoutthe front
coverfitted.
> Disconnectthehanddryerfromthe
electricalsupplybeforeflash or
high voltage testing.
> Suitableforindooruseonly.
> WARNING:Thisproduct
becomes hot!
> Thisproductisnotintendedto
be used by children andpersons with
sensory,physicaland/ormental
impairmentsthatwouldpreventthem
fromusingit safely.
> Thisproductissuitableforinstallation
on surfaces withnormalflammability
(indicated bythe"F"inatriangle)e.g.
wood,plasterboard,masonry.Itisnot
suitableforuse on highlyflammable
surfaces (e.g. polystyrene,textiles ).
> Beforemakingfixinghole(s),checkthat
thereareno obstructions hidden
beneaththe mounting surface such as
pipes orcables.
> The chosen location ofyournewfitting
shouldallowfortheproducttobe
securelymountedand safelyconnected
tothe mains supply.
> The dryermustbepositionedsothat
thereisatleast0.8m(800 mm)
betweentheairoutletandthesurface
beneath.
> Ifthelocation ofyournewfitting
requires the provision ofanew
electricalsupply,the supplymust
conformwiththe requirementsofthe
BuildingRegulations.
> Thisproductisdesignedforpermanent
connection tofixedwiringviaafused
spur(witha13 Ampfuse ).We
recommend thatthesupply
incorporates aswitchforease of
operation.
> Make connections totheelectrical
supplyinaccordance withthefollowing
code:
Live -BrownorRed
Neutral -BlueorBlack
Earth-Greenand Yellow
> Thisproductmustbe connected to
Earth.
> You areadvisedateverystage ofyour
installation todouble-check any
electricalconnections youhavemade.
Afteryou havecompletedyour
installation thereareelectricalteststhat
shouldbe carried out:these testsare
specifiedintheWiringRegulations
(BS7671 )referred tointhe Building
Regulations.Ifindoubt,consulta
qualified electrician.
IPX1
Installation:
1)Selectthe location ofyournewdryerwith
consideration tothe conditions opposite.
2)Remove the twocase screwsfromthe
bottomofthedryerand removethe
case.
3)Markthelocationofthefixingholes
using theback ofthe dryeras a
template.
4)Securethe backofthedryertothewall
using the fixingssupplied.Ifthefixings
supplied arenotappropriatetoyour
installation,please selectsuitable
alternatives.
5)Make the supplyconnections according
tothe colourcodeopposite.
6)Temporarilyrestorethepower
supply-bewarepartsofthe
motorthatareliveandthatare
accessibletotouch.
7)Move yourhandsbeneaththesensorto
replicatehanddryingmovement..The
dryershouldoperatewhen you move
yourhands beneaththe sensorandstop
when yourhands arewithdrawn.
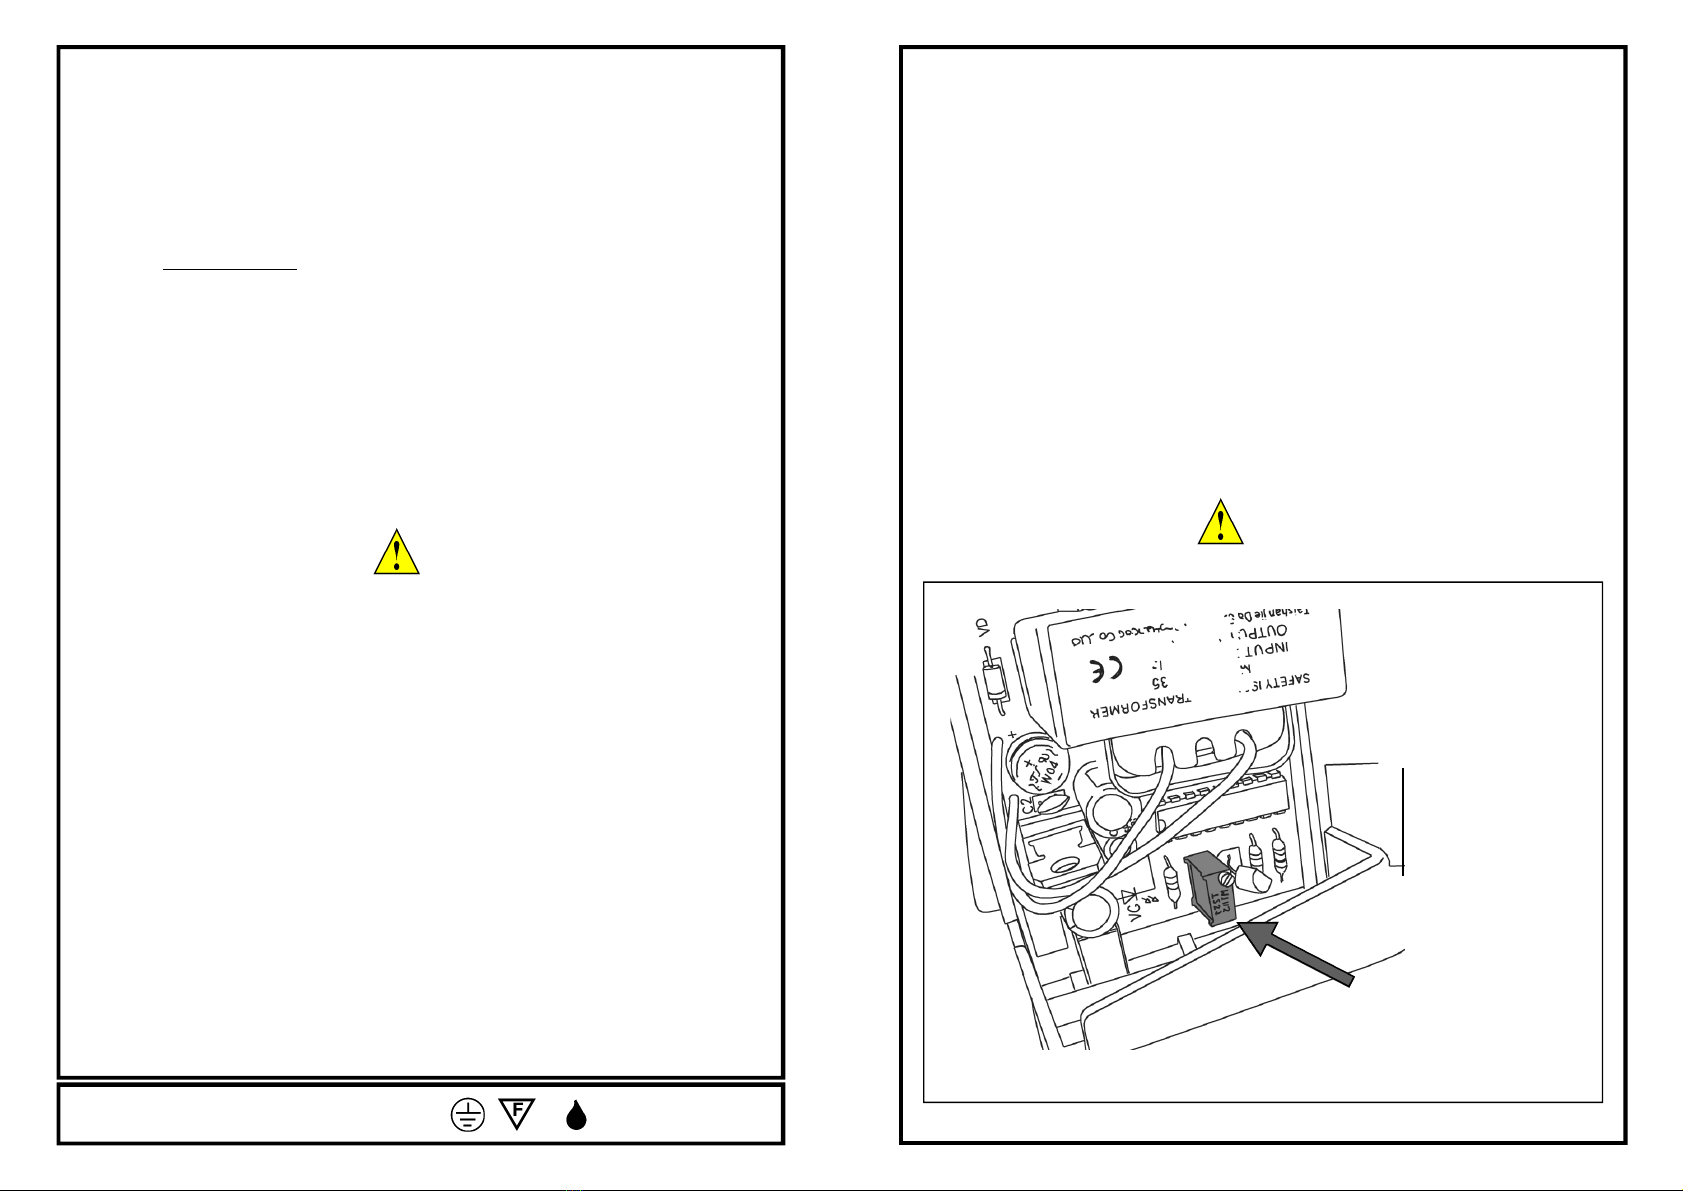
8)If the dryerdoes notrespond correctly,
you canadjustthesensitivityofthe
sensorby turningthescrewasshown
below.
9)Turnoffthepoweratthe mains.
10)Replace the coverandrefitthe two
screwson the undersideensuringthey
aretight.
11)Restorethepower.
HDA-1800– 1.8KW Automatic Hand Dryer 080716PA
Toadjustsensitivityuseasmall
flat bladescrewdriver and turn
the screwon the square shaped,
blue potentiometer

Other Eterna Dryer manuals

Eterna HDSS165 User manual

Eterna

Eterna HDSS165 User manual

Eterna HD900W User manual

Eterna

Eterna HD900W User manual

Eterna HDP165 User manual

Eterna

Eterna HDP165 User manual

Popular Dryer manuals by other brands

Beko DS 7139 TX user manual

Beko

Beko DS 7139 TX user manual

Asko DC7784HP user manual

Asko

Asko DC7784HP user manual

Whirlpool AZA9791 Instructions for use

Whirlpool

Whirlpool AZA9791 Instructions for use

Miele PT 5136 OS Operating and installation instructions

Miele

Miele PT 5136 OS Operating and installation instructions

Homa HCD-100 instruction manual

Homa

Homa HCD-100 instruction manual

Bosch WTWH759PSN Installation and operating instructions

Bosch

Bosch WTWH759PSN Installation and operating instructions

Siemens WT47G240ES Installation and operating instructions

Siemens

Siemens WT47G240ES Installation and operating instructions

Maytag MDE18PD User instructions

Maytag

Maytag MDE18PD User instructions

Haier RDE350AW - 6.5 Cu. Ft. Electric Dryer Service manual

Haier

Haier RDE350AW - 6.5 Cu. Ft. Electric Dryer Service manual

Crosley 134539400 (0503 operating instructions

Crosley

Crosley 134539400 (0503 operating instructions

GE GTD45EBMR owner's manual

GE

GE GTD45EBMR owner's manual

Elba ED-B7610ES(WH) owner's manual

Elba

Elba ED-B7610ES(WH) owner's manual

Kenmore ELITE 63932 Features

Kenmore

Kenmore ELITE 63932 Features

Kenmore 9781 - 27 in. Laundry Center operating instructions

Kenmore

Kenmore 9781 - 27 in. Laundry Center operating instructions

Alliance Laundry Systems AES17AWF Service

Alliance Laundry Systems

Alliance Laundry Systems AES17AWF Service

Wilkerson X06 Installation & service instructions

Wilkerson

Wilkerson X06 Installation & service instructions

GE DTSR495EF Dimensions and installation information

GE

GE DTSR495EF Dimensions and installation information

LG DLEX0001TM Specifications

LG

LG DLEX0001TM Specifications

manuals.online logo
manuals.online logoBrands
  • About & Mission
  • Contact us
  • Privacy Policy
  • Terms and Conditions

Copyright 2025 Manuals.Online. All Rights Reserved.