ETouch ETM-G01E User manual
MEM Test Mode
mg/dL
mmol/L
PBGFBG
Body Status
Normal
Pre-Diabetes
Type 2 Diabetes
AM
PM
ETM-G01E
(mg/dL)
Non-Invasive Blood Glucose Meter
User Manual

ETM-G01E(mg/dL) | Non-invasive Blood Glucose Meter User Manual 32 ETM-G01E(mg/dL) | Non-invasive Blood Glucose Meter User Manual
The ETM-G01E is a true non-invasive blood glucose
meter that does not require fingerpricks for testing
blood sugar levels. Blood sugar levels can be accurately
measured by lightly pressing the four sensing discs on
the ETM-G01E device with the thumb and index finger
of both hands. This eliminates the pain caused by daily
fingerpricks for testing and the risk of wound infection.
Furthermore, there is no need to buy expensive and
short-lasting blood glucose test strips. It is an ideal
solution for patients with diabetes and people who
want to know their blood glucose levels at any time.
Our hope is that all users can test their blood glucose
daily in a way that is easy, painless and free of the risk
of infection.
Non-Invasive Blood Glucose Meter, ETM-G01E is
intended to replace fingerstick blood glucose testing
for the quantitative measurement of glucose.
It is intended for self-testing by patients with type 2
diabetes, prediabetic patients or people with normal
blood glucose at home as an aid to monitor the
effectiveness of diabetes control. It should not be
used for the diagnosis of or screening of diabetes. It
is not for use in neonates.
1. Patients with renal disease
2. Patients undergoing dialysis
3. Those with palmar hyperhidrosis
4. Patients with implanted electrical stimulation
devices (e.g., pacemakers or ICU patients)
5. Those with impaired thumbs or index fingers
6. After the ETM-G01E blood glucose meter is used
to test blood glucose levels, “Lo” or “Hi” indicate
that blood glucose levels are, respectively, “too
low” and “too high” and taking proper medical
measures is recommended.
Indications:
Contraindications:
**The ETM-G01E is not suitable for patients
with the conditions listed above.
Precautions:
1. The patient is the intended operator of the ETM-G01E
2. Do not proceed with maintenance and repair when using the ETM-G01E
3. Patients are allowed to replace battery pack by themselves
4. When the ETM-G01E is connected with a mobile phone's Bluetooth, do not activate more than two non-in-
vasive blood glucose meters
5. Users are not allowed to disassemble and modify the ETM-G01E without the consent of manufacturer
6. Please remove battery pack to avoid battery leakage if the ETM-G01E is not in use for a long period of time
7. When the ETM-G01E is functioning abnormally, please long press AS key to resume to the factory default mode
8. The non-invasive blood glucose meter, the ETM-G01E, can measure blood glucose ranged from
50~400 mg/dL (3~22 mmol/L)
9.
Be sure to clean your fingers and the four sensing discs each time you use the ETM-G01E blood glucose meter
10.
Do not touch your hand with the other hand during the process of testing and keep your body away from
other metal objects
11.
When using the ETM-G01E to measure your blood glucose, please keep away from the equipments such as
microwave oven, atomizer, or any heat source that might interfere with your measurements
Warnings :
1. Other cables and accessories may negatively affect EMC performance
2. Please keep the ETM-G01E isolated from other stack devices
3. To use of other accessories results in non-compliance of ETM-G01E
4. Please stay at least 30 cm (12 inches) away from other medical device or systems when using the ETM-G01E.
(Note: the Bluetooth signal generated by the ETM-G01E may interfere with other electronic medical devices.)
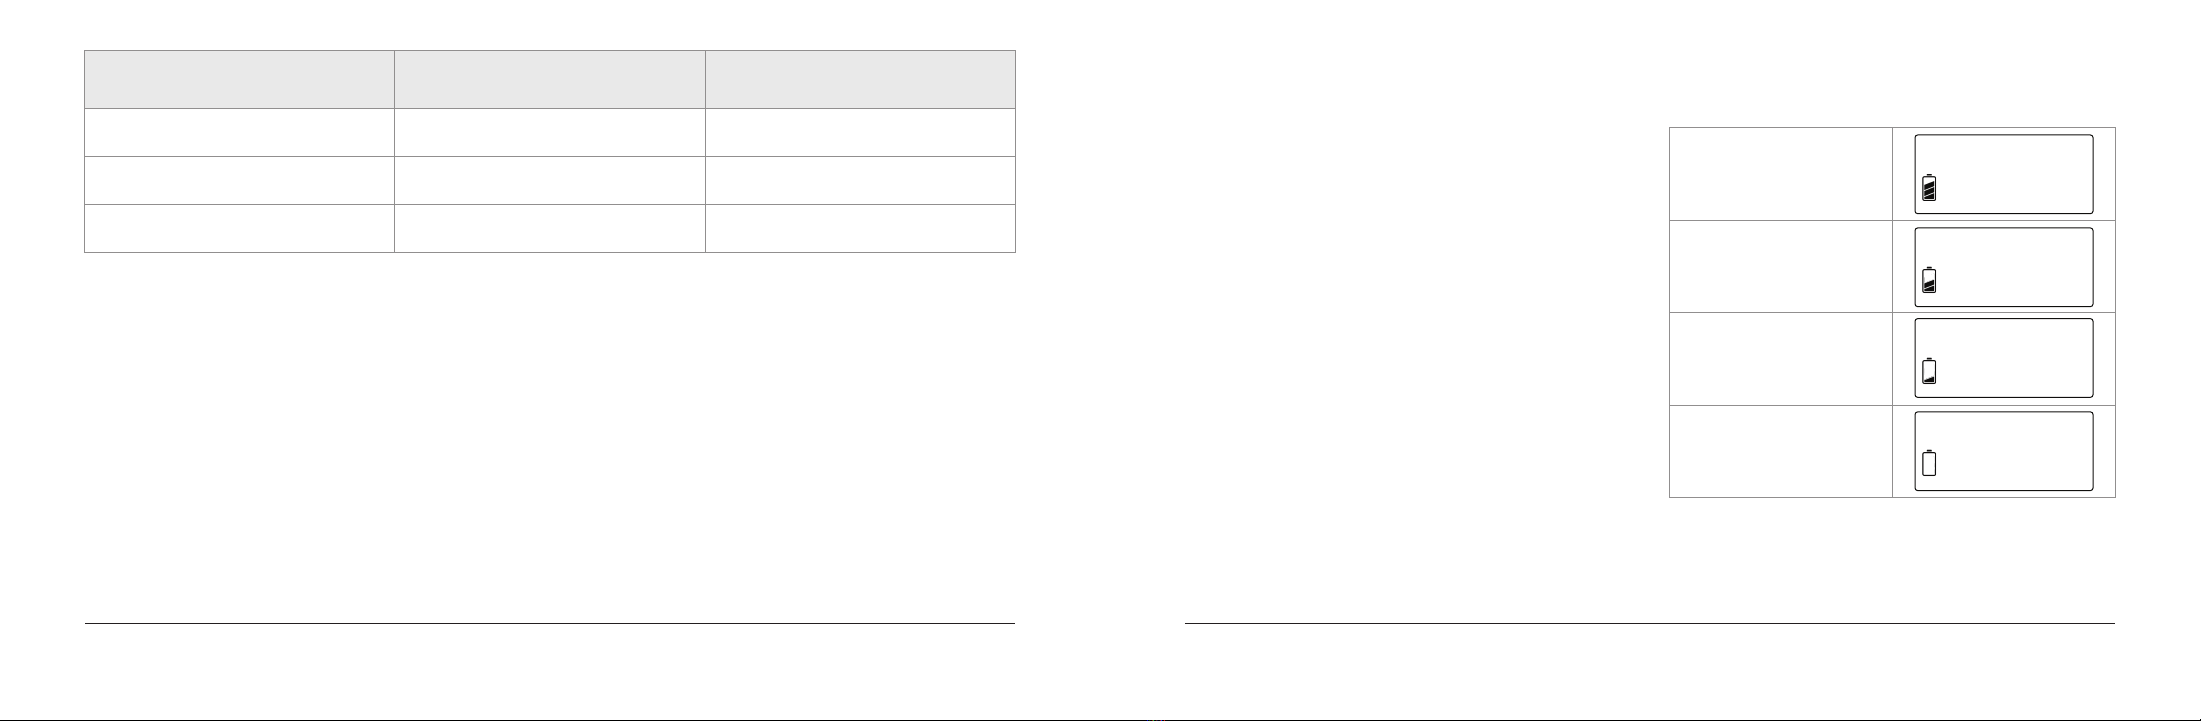
544
100%~75%
75%~50%
50%~25%
25%~0%
ETM-G01E(mg/dL) | Non-invasive Blood Glucose Meter User ManualETM-G01E(mg/dL) | Non-invasive Blood Glucose Meter User Manual
FBG stomach: Eight hours after the last meal (only water is allowed for the 8 hours after the meal, all other
beverages are considered food)
PBG: After 2 hours from the first mouthful of the last time you started eating (the meal must be finished
within 15 minutes for that particular test)
Remarks:
Source of the Blood Glucose values in the table above is from “American Diabetes Association”. eTouch
medical Inc. adopts the values and create this table.
mg/dL
(mmol/L)
FBG stomach
(Fasting Blood Glucose)
PBG
(Postprandial Blood Glucose)
Normal 80 ~ 100 ( 4.4 ~ 5.6 ) 120 ~ 140 ( 6.7 ~ 7.8 )
Pre-Diabetes 100 ~ 125 ( 5.6 ~ 6.9 ) 140 ~ 200 ( 7.8 ~ 11.1 )
Type 2 Diabetes 125 + ( 7.0+ ) 200 + ( 11.2 + )
7. Battery capacity figures shown as below1. Palmtop size: 92x86x24 mm
2. Power supply: 2AAA batteries (to prevent
damage from leakage, use of alkaline batteries is
not recommended)
3. Low power consumption: Can typically test
600-1000 times.
4. Measuring range: 50~400 mg/dL (3~22 mmol/L)
The non-invasive blood glucose meter, the
ETM-G01E, can measure blood glucose ranged
from 50~400 mg/dL (3~22 mmol/L)
5. Operation conditions: 5°C to 40°C; 15% to 90%;
700hPa to 1060hPa
6. Storage and Transport conditions: -25°C to 70°C;
15% to 90%; 700hPa to 1060hPa
I. PRODUCT SPECIFICATIONS
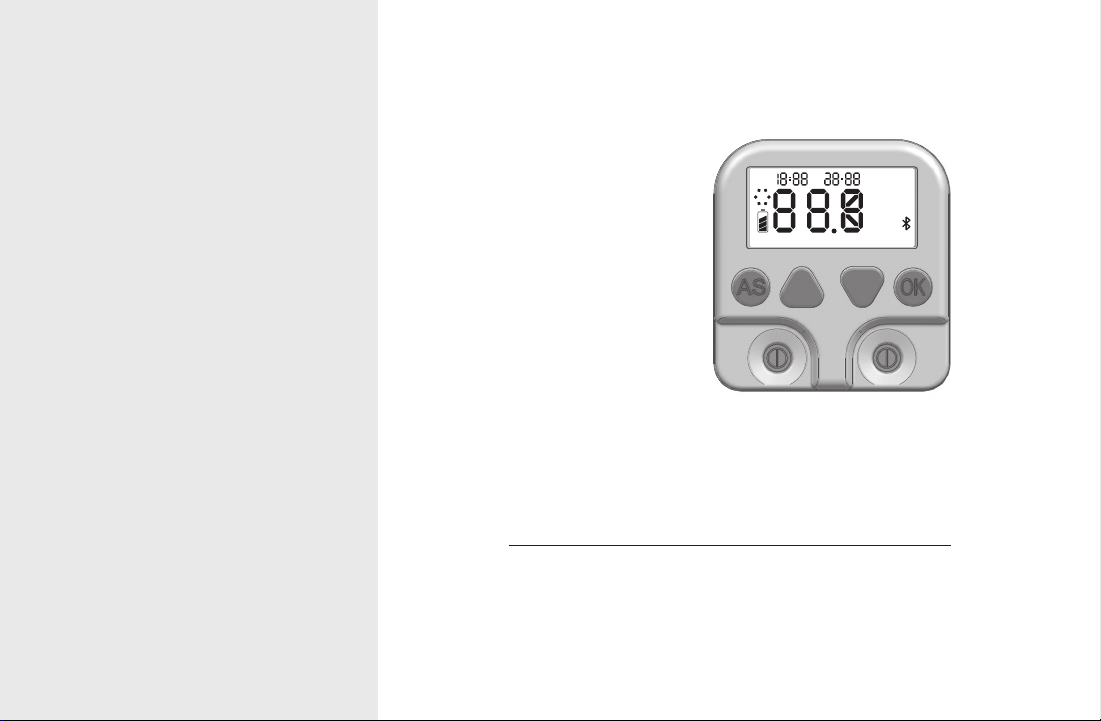
8. Monochromatic display without backlight
9. Powers off automatically after 2 minutes idle
10.
The detailed functions of each key are shown in
the figures on the next page.
76
MEM Test Mode
mg/dL
mmol/L
PBGFBG
Body Status
Normal
Pre-Diabetes
Type 2 Diabetes
AM
PM
ETM-G01E(mg/dL) | Non-invasive Blood Glucose Meter User ManualETM-G01E(mg/dL) | Non-invasive Blood Glucose Meter User Manual
** Reminder:
1. Users of ETM-G01E must download the
“Glucose Test Assistant” APP to log in,
register, unlock and activate ETM-G01E before
it can be used normally.
2. The “Glucose Test Assistant” APP is used
only for unlocking and activating the
ETM-G01E. The APP itself cannot perform
blood glucose testing.
3. The link to the tutorial video is as follows:
Android users:
https://www.youtube.com/watch?v=jBLPdu7mqZI
Apple users:
https://www.youtube.com/watch?v=OUWWzwQoJ4M
Setup procedures are as follows:
1. Download and install the APP to your mobile
phone:
II. Registration, login, unlocking and activation of the ETM-G01E blood glucose meter
After turning on the ETM-G01E blood glucose meter for the first time, you must download the companion APP
to your mobile phone and then use the APP to register, login, unlock and activate the ETM-G01E blood glucose
meter.
** Reminder: Make sure your mobile phone is
connected to the Internet.
1) Android users:
Mobile site for users: Download and install the
“Glucose Test Assistant” APP from
ottv.co/etmg01e, or search for “Glucose Test
Assistant” in Google Play and install the APP on
your mobile phone. After installation, users can
use the “Glucose Test Assistant” APP to
register, login, unlock and activate the ETM-G01E
Blood glucose meter onwards.
2) Apple users:
Search for “Glucose Test Assistant” in the App
Store and install the APP. After installation, users
can use the “Glucose Test Assistant” APP to
register, login, unlock and activate the ETM-G01E
Blood glucose meter onwards.
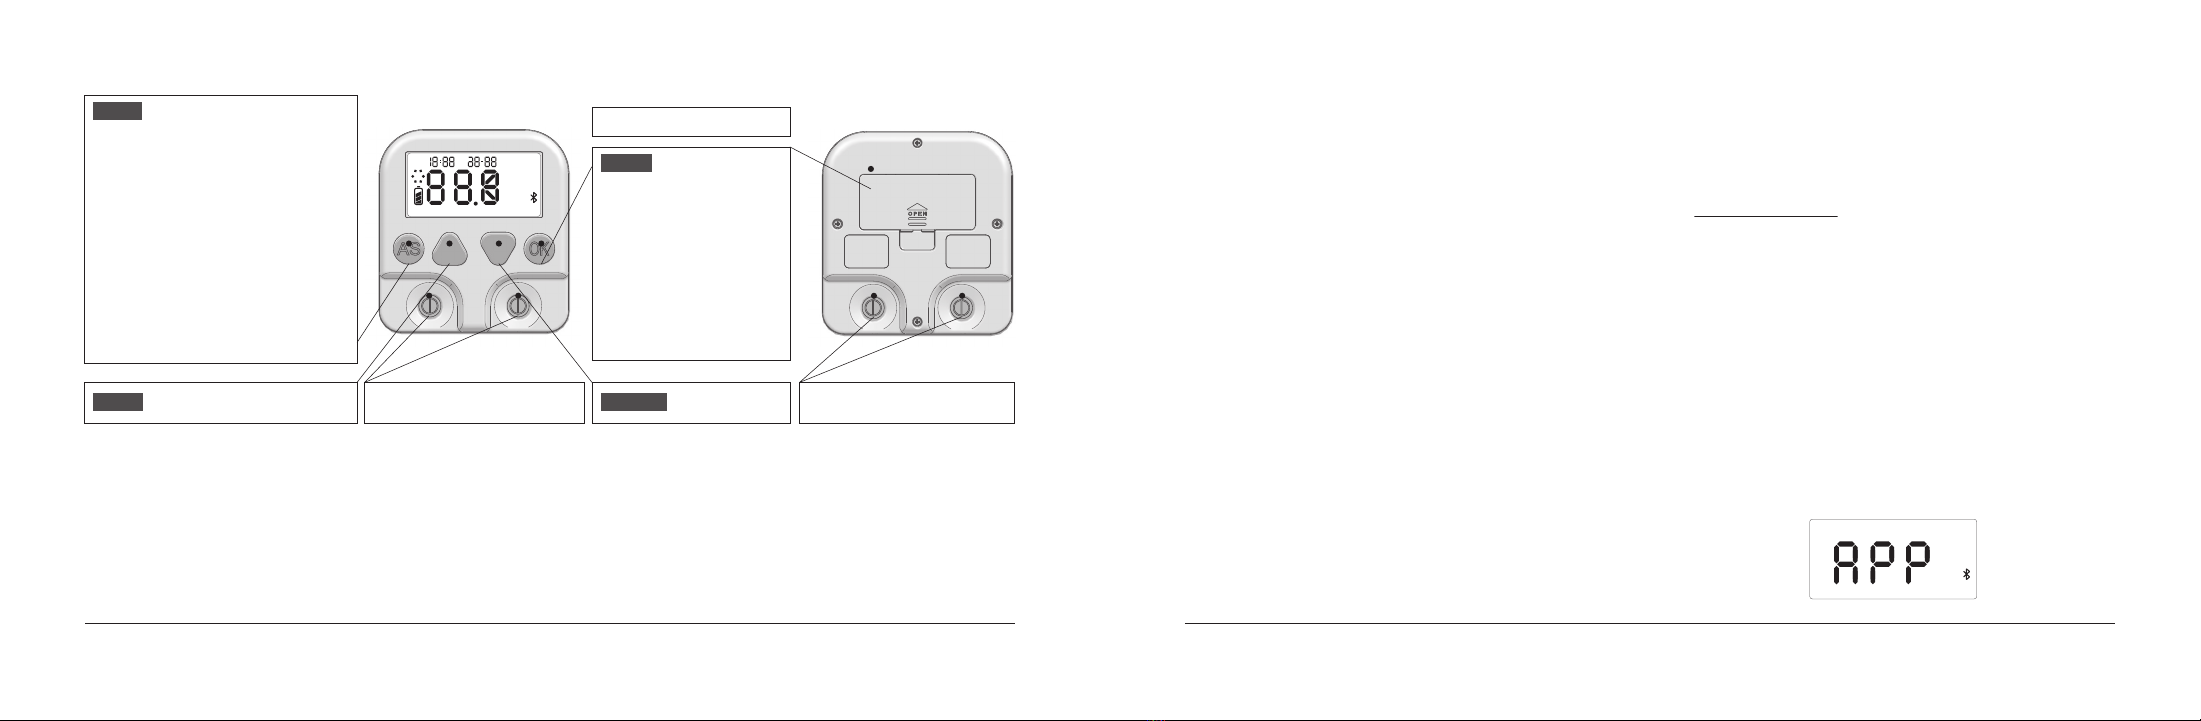
- Press once along with the OK key, select
“y” to enter the Advanced Setting Mode.
- After entering the Advanced Settings
mode:
Press 1 time: Set time
Press 2 times: Set measurement units
Press 3 times: Access memory bank
Press 4 times: Delete memory bank
Press 5 times: Blood glucose calibration
function
- Press and hold for 5 seconds to return to
the factory default mode. Re-registra-
tion and re-activation will be required.
- Press and hold for 5 sec.:
Turn on the device
- Press once: Confirm
selection
- Press once: End blood
glucose testing
Advanced Setting Perform Key
Left, +Up key
AS key
OK key
Battery cover
Applied part: SenSing disk with
gold plated back Right, -
Down key Applied part: SenSing disk with
gold plated back
98
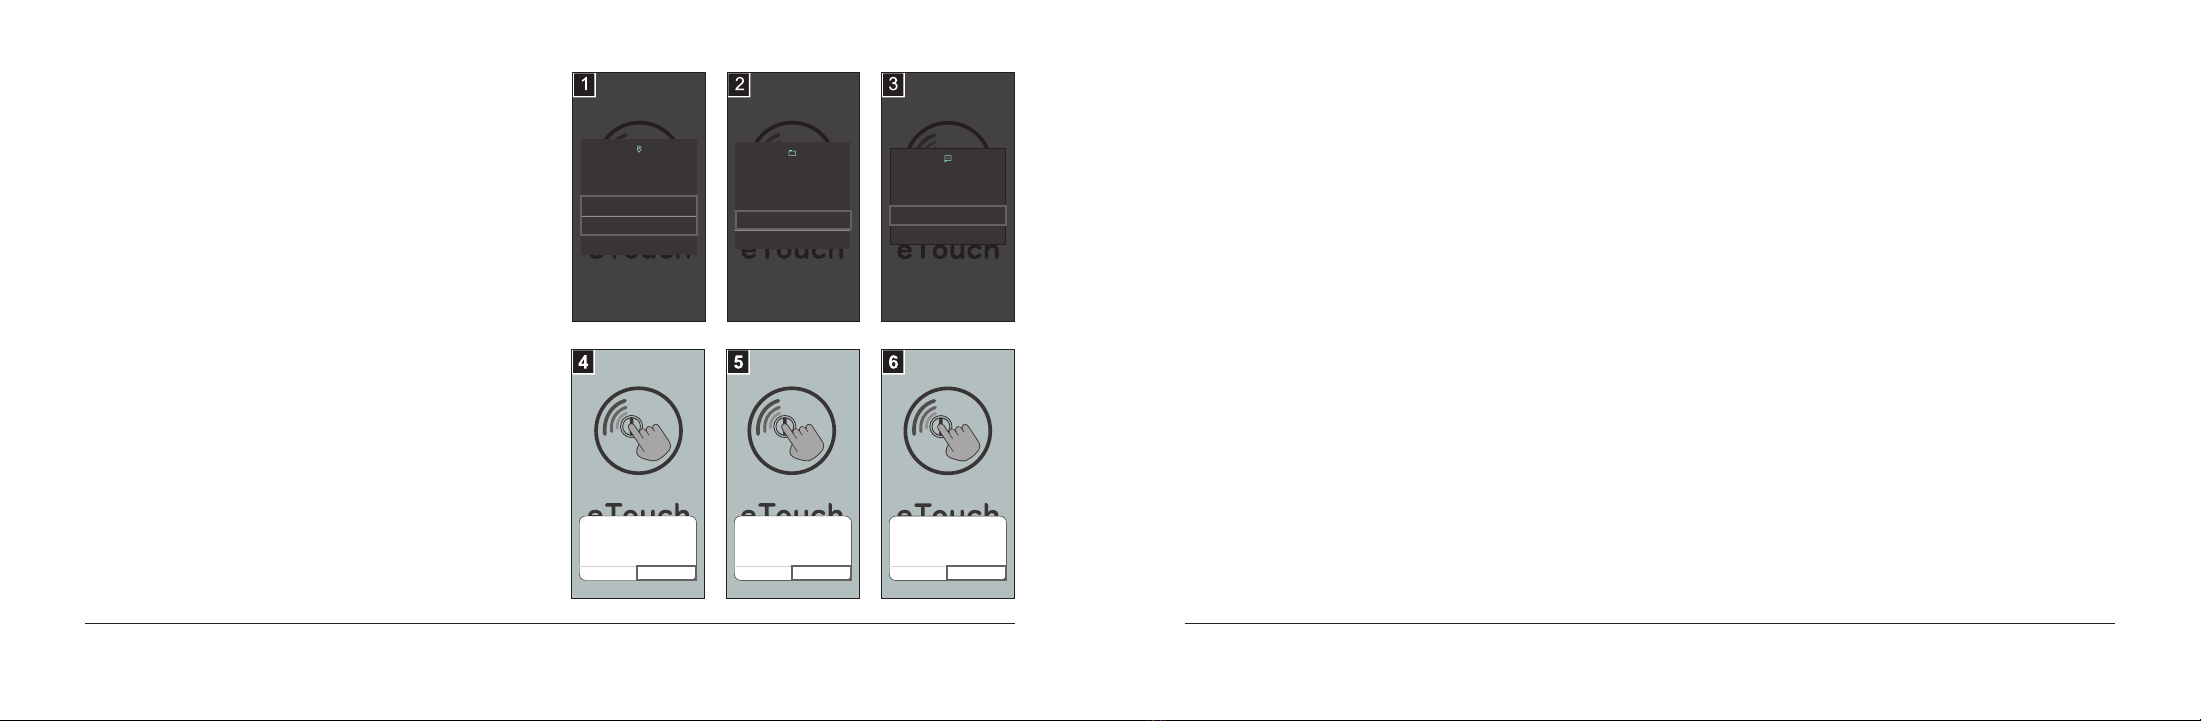
Allow Blood glucose test
assist... to send and view
SMS messages?
ALLOW
DENY
Allow Blood glucose test
assist... to access photos,
media, and files on your
device?
ALLOW
DENY
Allow Blood glucose test
assist... to access this
device’s location?
ALLOW ALL THE TIME
ALLOW ONLY WHILE USING THE APP
DENY
Allow Blood glucose test
assist to send and view
SMS messages?
Don’t Allow OK
Allow Blood glucose test
assist to access photos,
media, and files on your
device?
Don’t Allow OK
Allow Blood glucose test
assist to access this
device’s location?
Don’t Allow OK
ETM-G01E(mg/dL) | Non-invasive Blood Glucose Meter User ManualETM-G01E(mg/dL) | Non-invasive Blood Glucose Meter User Manual
2. Use the “Glucose Test Assistant” APP on your
mobile phone to register, log in, unlock and
activate the ETM-G01E blood glucose meter.
** Reminder: Before using the Blood Glucose
Testing Help APP, your mobile phone must
have Bluetooth and Internet access enabled.
1) Android users: Follow Figures 1 to 3, select the
“Allow-Allow-Allow” option for each step to
enable APP authorization.
2) Apple users: Follow Figures 4 to 6, select the
“OK-OK-OK” option for each step to enable
APP authorization.
3) Registration and login of the ETM-G01E blood
glucose meter: (The procedures below are
identical for both Android and Apple
users).Follow Figures 7 to 8:
a. Enter your mobile phone number with “+”
(country code) in the first blank and select
“Get verification code”. Your mobile
phone should receive an SMS with a
verification code and auto-fill the second
blank after approximately 5 seconds.
If it doesn’t auto-fill, tap the blank space and
input the verification code, then press
“Login”.
b. At this point, the mobile phone will have
completed the registration and login
procedures of the ETM-G01E. Users can then
edit their personal information or return to
the main screen.
4) Unlocking and activation of the ETM-G01E
Blood Glucose meter:
Follow Figures 9 to 12.
a. Select “Connect device” and wait until your
mobile phone displays “Connected”.
b. Select “Device is not Activated” on the
screen.
c. Enter your mobile phone number when
prompted and select “Get verification
code”, the mobile phone should receive an
SMS with a verification code and auto-fill the
second blank after approximately 5 seconds.
If it doesn’t auto-fill, manually enter the
verification code on the mobile phone until
“Device is activated” is displayed on the
screen.
If the ETM-G01E’s turns off and does not display
anything, this means that the device has been
activated and is ready for use!
3. The ETM-G01E needs to be re-registered and
re-activated every 3 months, every time the
mode is switched from Advanced Settings to
default, every time the battery is replaced, or
every time the battery is removed and
reinstalled. After turning on the device, an APP
message will appear on the screen of the
ETM-G01E. Users should perform the procedures
stated in item 2 on page 6 one the installed
“Glucose Test Assistant” APP on the phone:
Registration, login, unlocking and activation of
the ETM-G01E blood glucose meter, return to the
factory default mode of blood glucose testing
function.
Other manuals for ETM-G01E
2
Table of contents
Other ETouch Blood Glucose Meter manuals


