Images are for illustrative purposes.
We reserve the right to make changes. RDM-066-0323 5
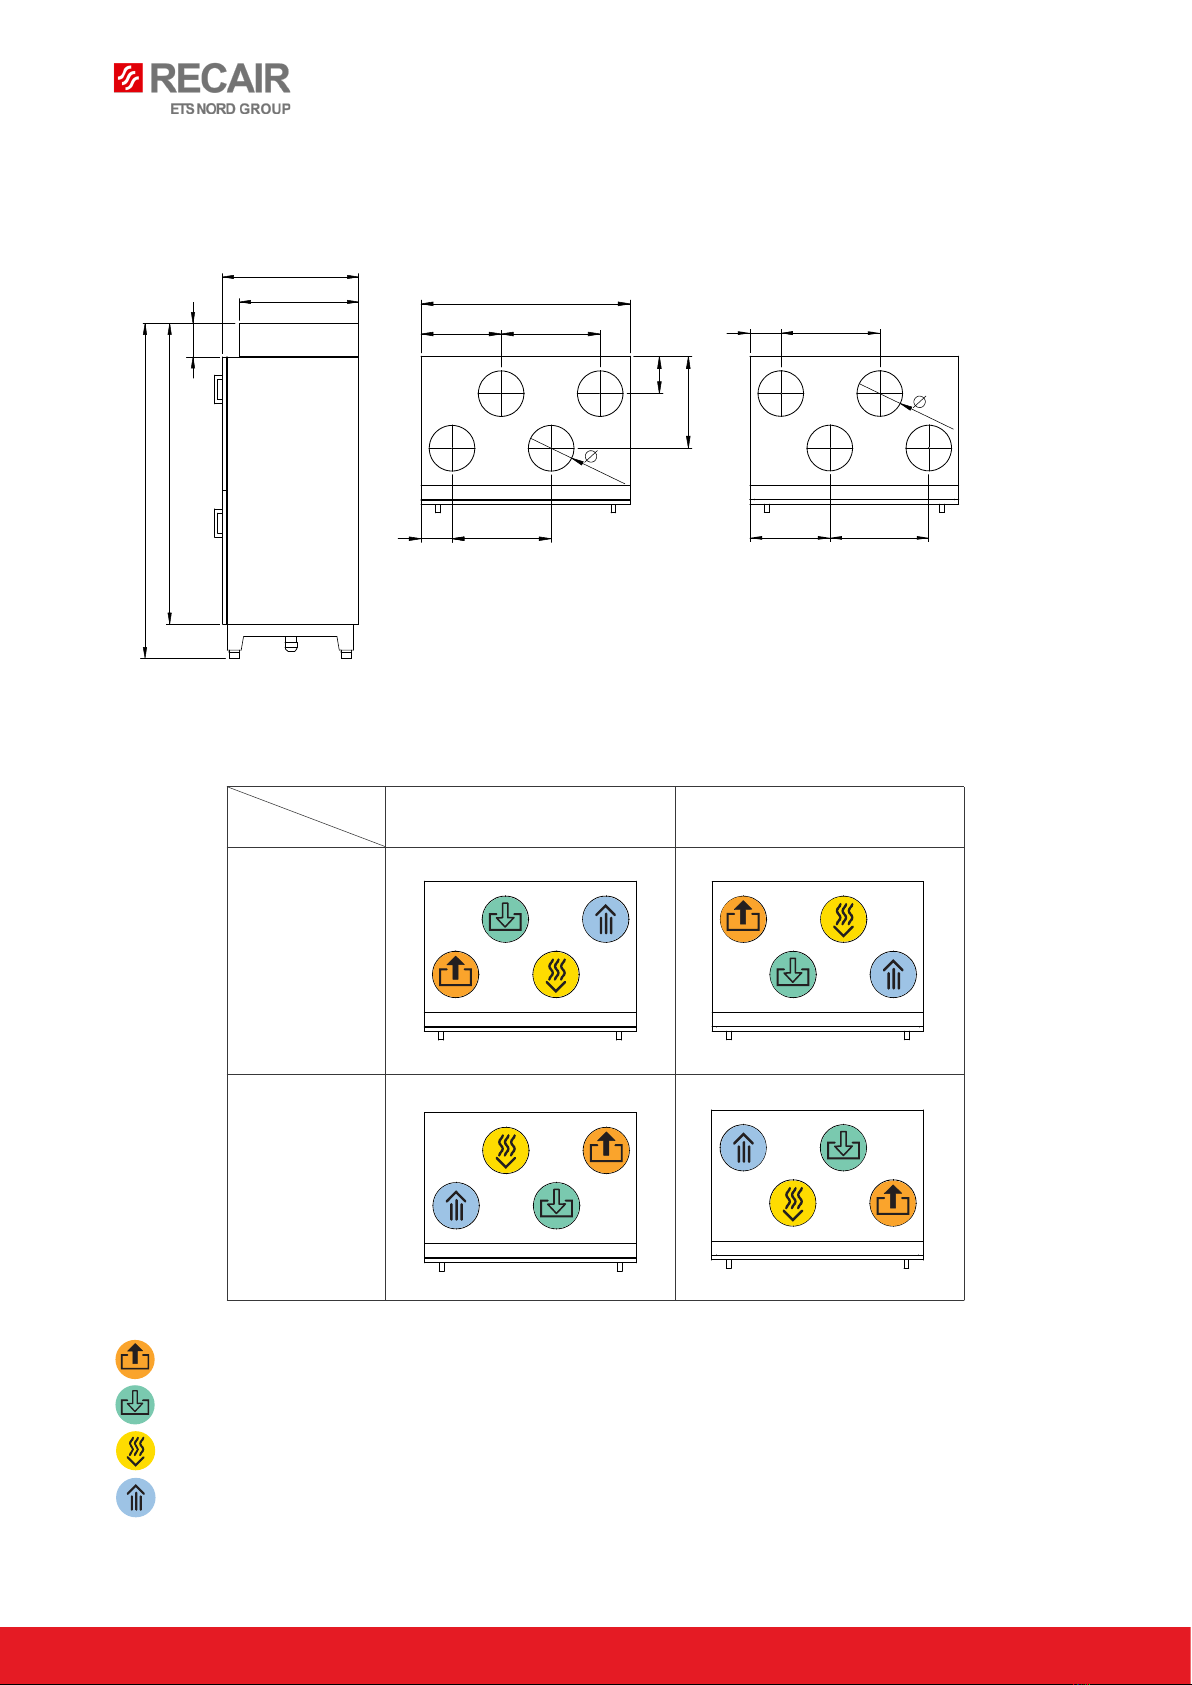
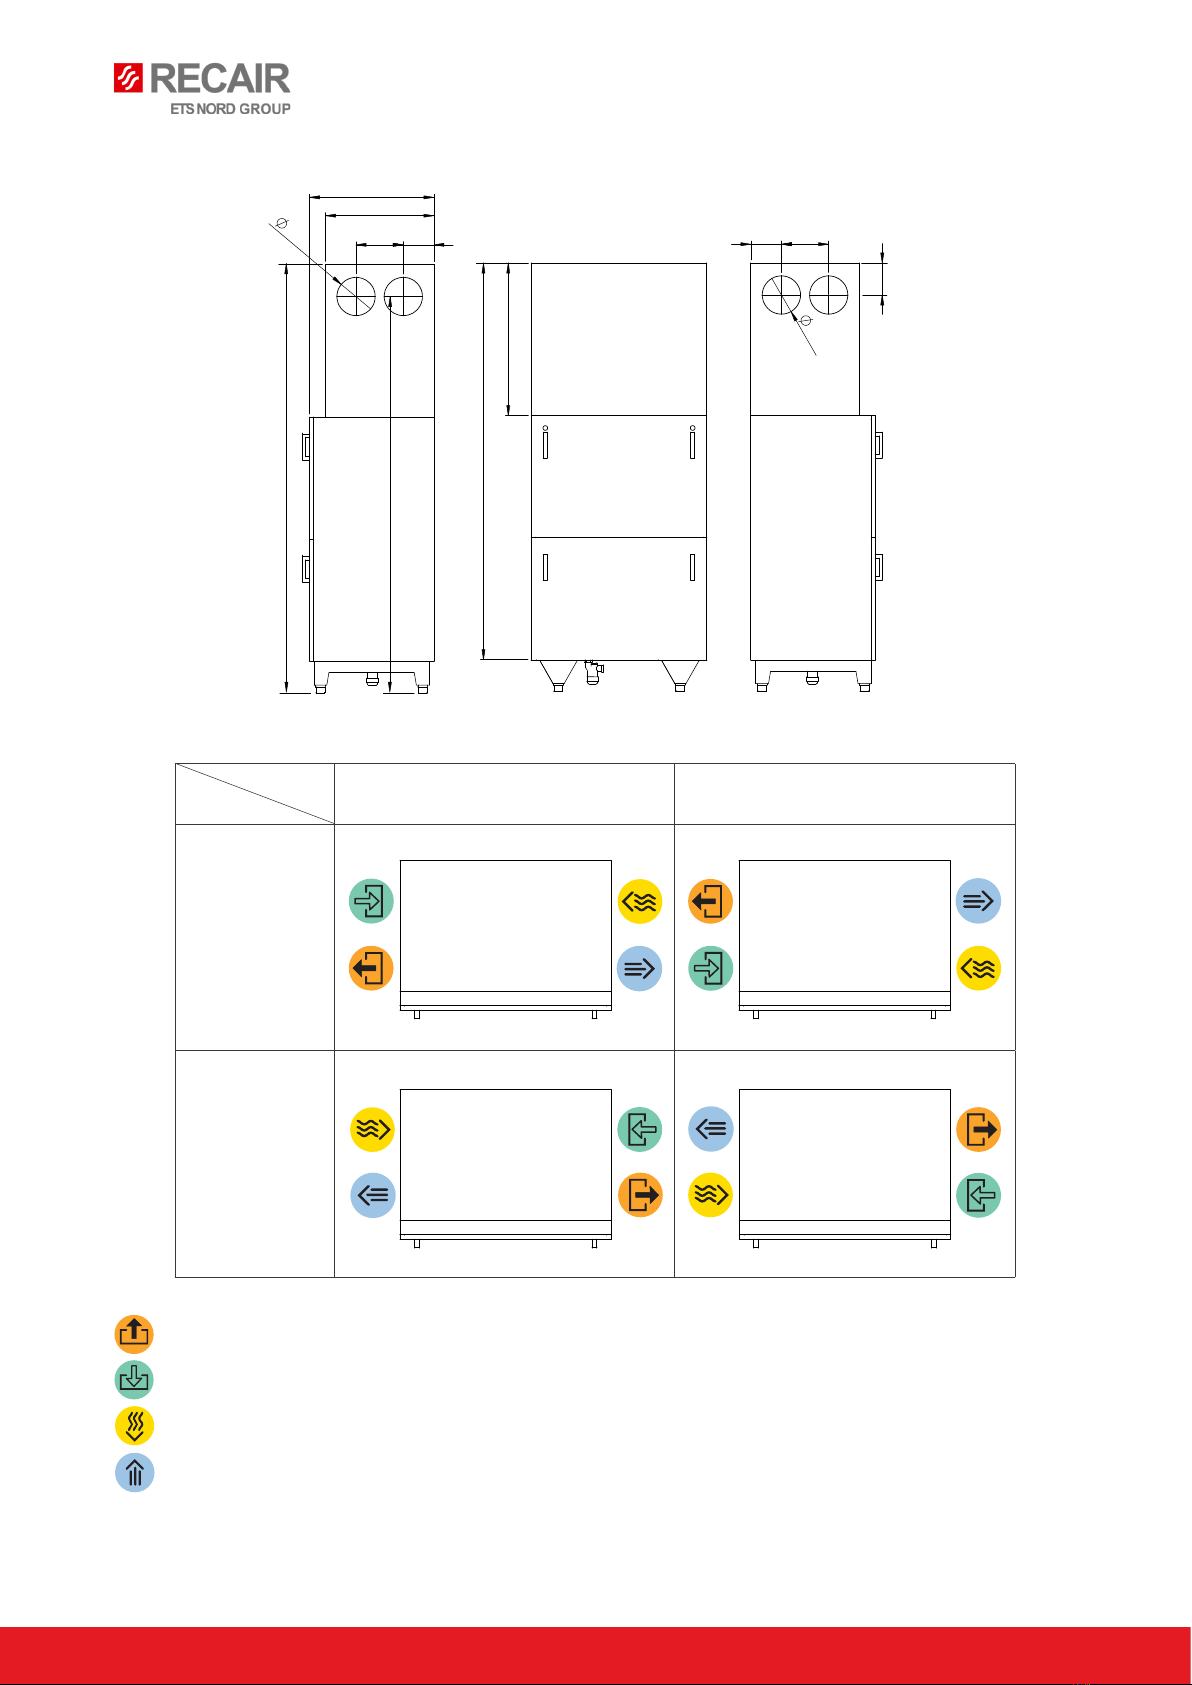
Compact R300 |Installation and maintenance
Safety
• To avoid injury, read all documentation before using the unit.
• The unit is designed for home and commercial building ventilation. The unit must not be used to ventilate
flammable and combustible gases.
• All electrical connections must be carried out by a qualified electrician.
• It is the installer’s responsibility to carry out a full safety assessment of the installed ventilation unit.
• All electrical and mechanical safety devices must be installed before turning on the ventilation unit.
• The electrical power of the unit must be disconnected before service and maintenance.
• Do not open the unit door when the ventilation unit is operational.
Disclaimer
The manufacturer may not be held liable for any damage made to property or people caused by improper
installation, start-up, use of the unit or failure to implement the procedures and instructions included in this
manual.
Warranty
Warranty conditions:
• General warranty conditions can be found on manufacturers homepage
• The new device is covered by a 2-year warranty against defects and manufacturing defects, if:
- the installation and commissioning of the device has been performed by authorized personnel
- maintenance is carried out accordingly to the maintenance manual.
- specified components (eg filters) have been replaced as required
• The warranty for a new device covers the repair or replacement of a defective part
• The warranty for replacement parts for manufacturing defects is valid for ninety (90) days from the
installation of the replacement part
• The warranty is valid from the date of commissioning.
• Warranty will be disregarded if any modifications are implemented without manufacturer’s authorization.
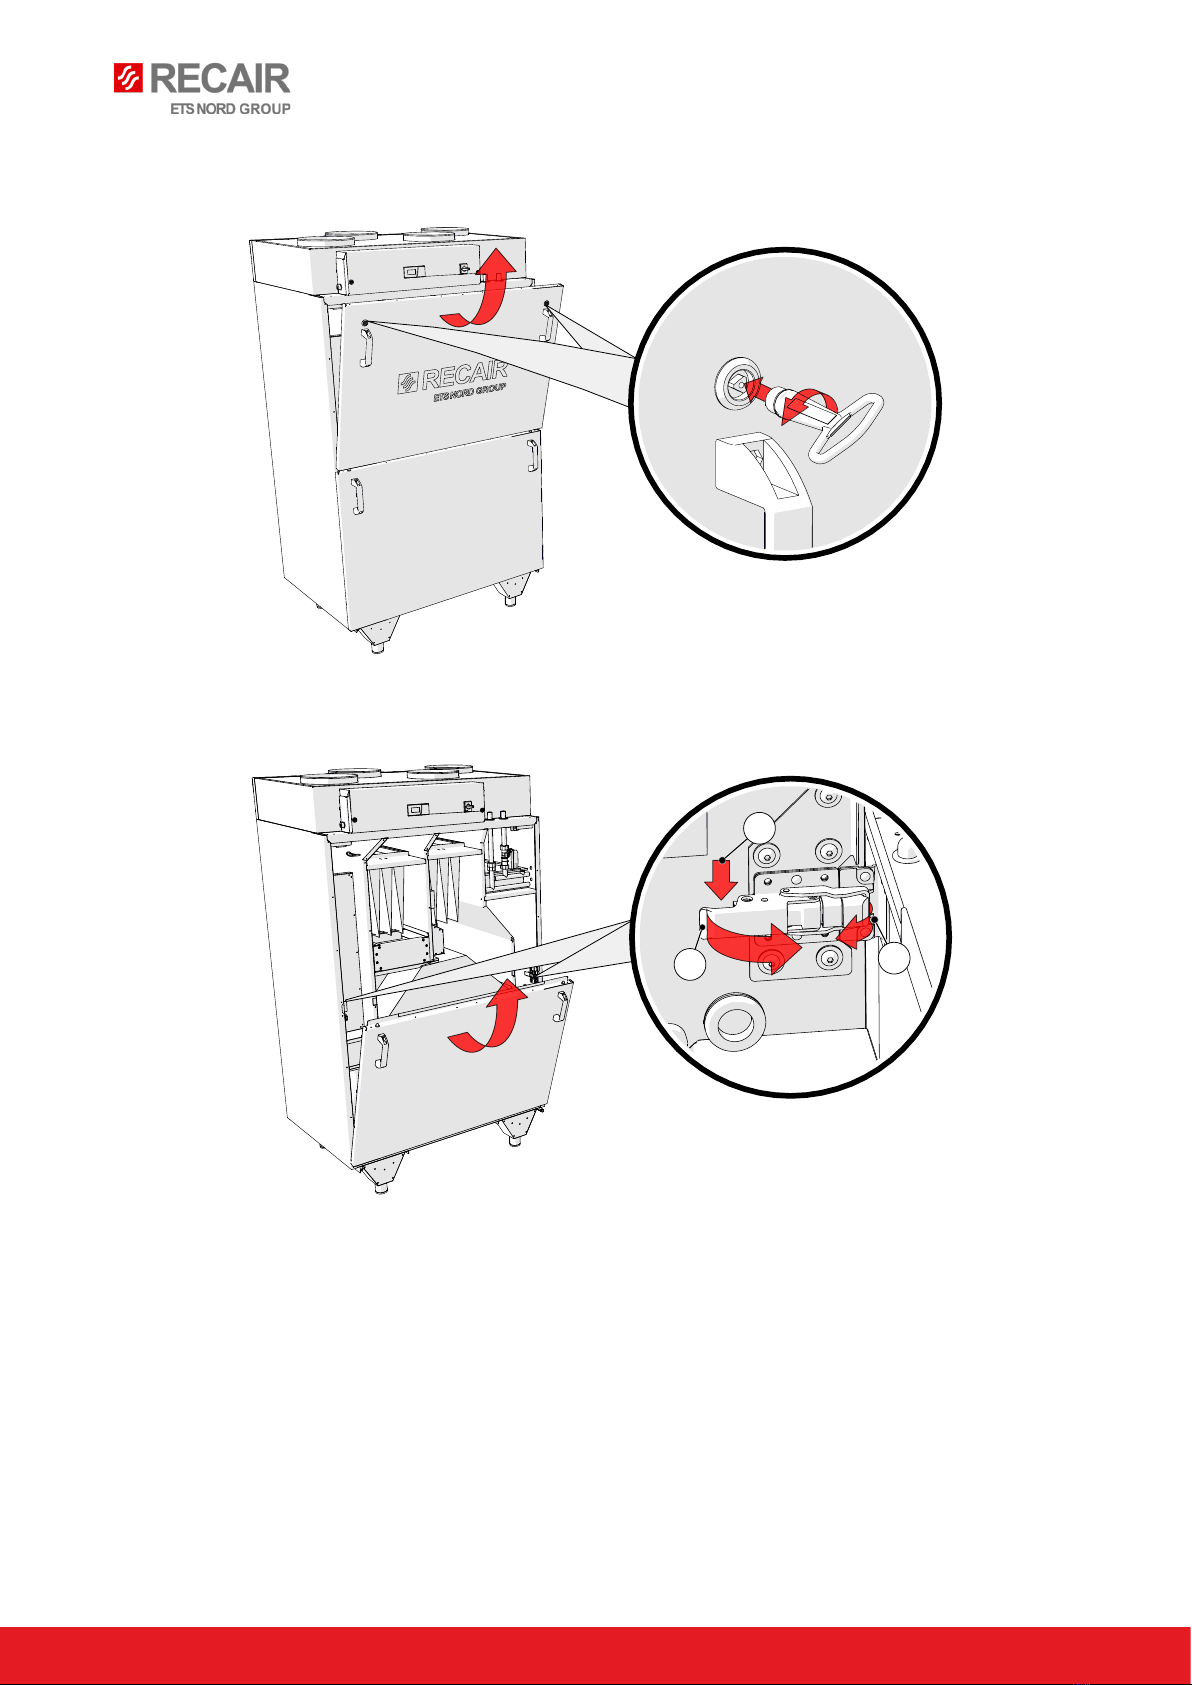
Installation may be carried out only by qualified personnel.
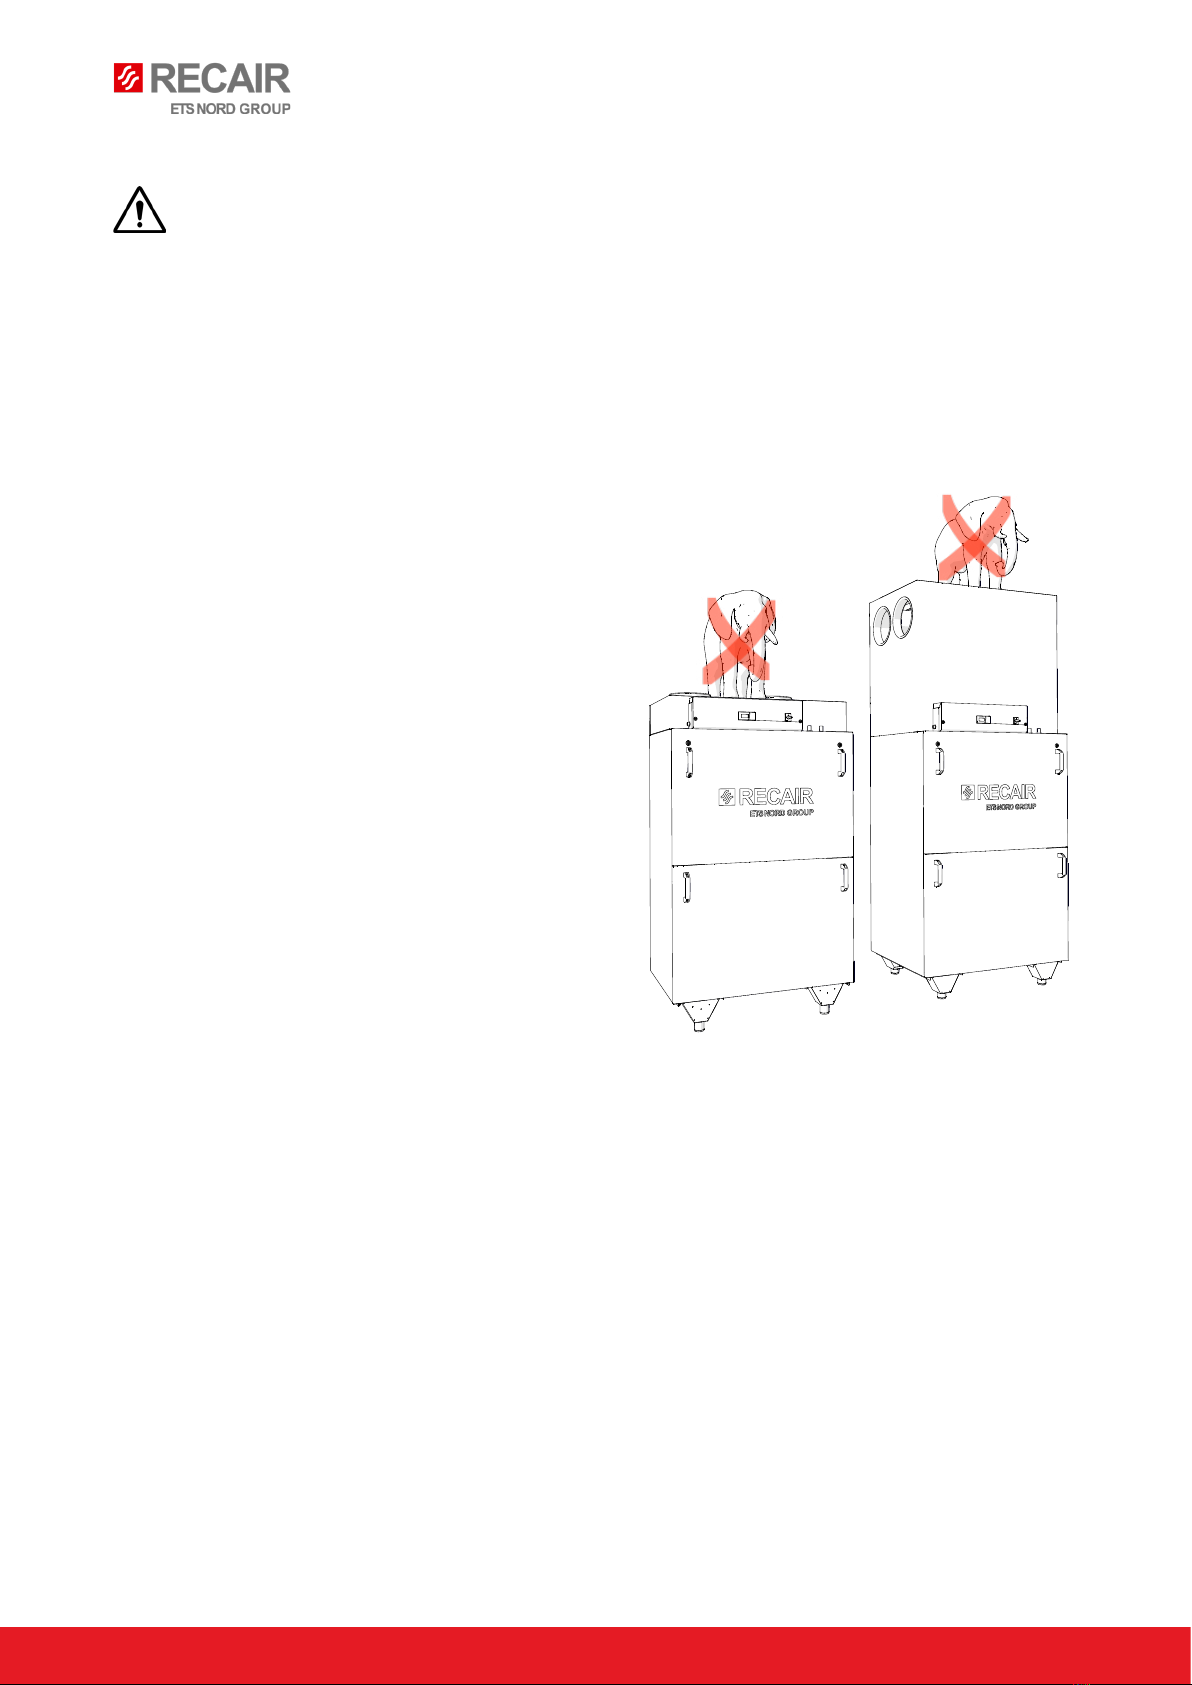
It is prohibited to place any additional items of
weight on the top of the unit.