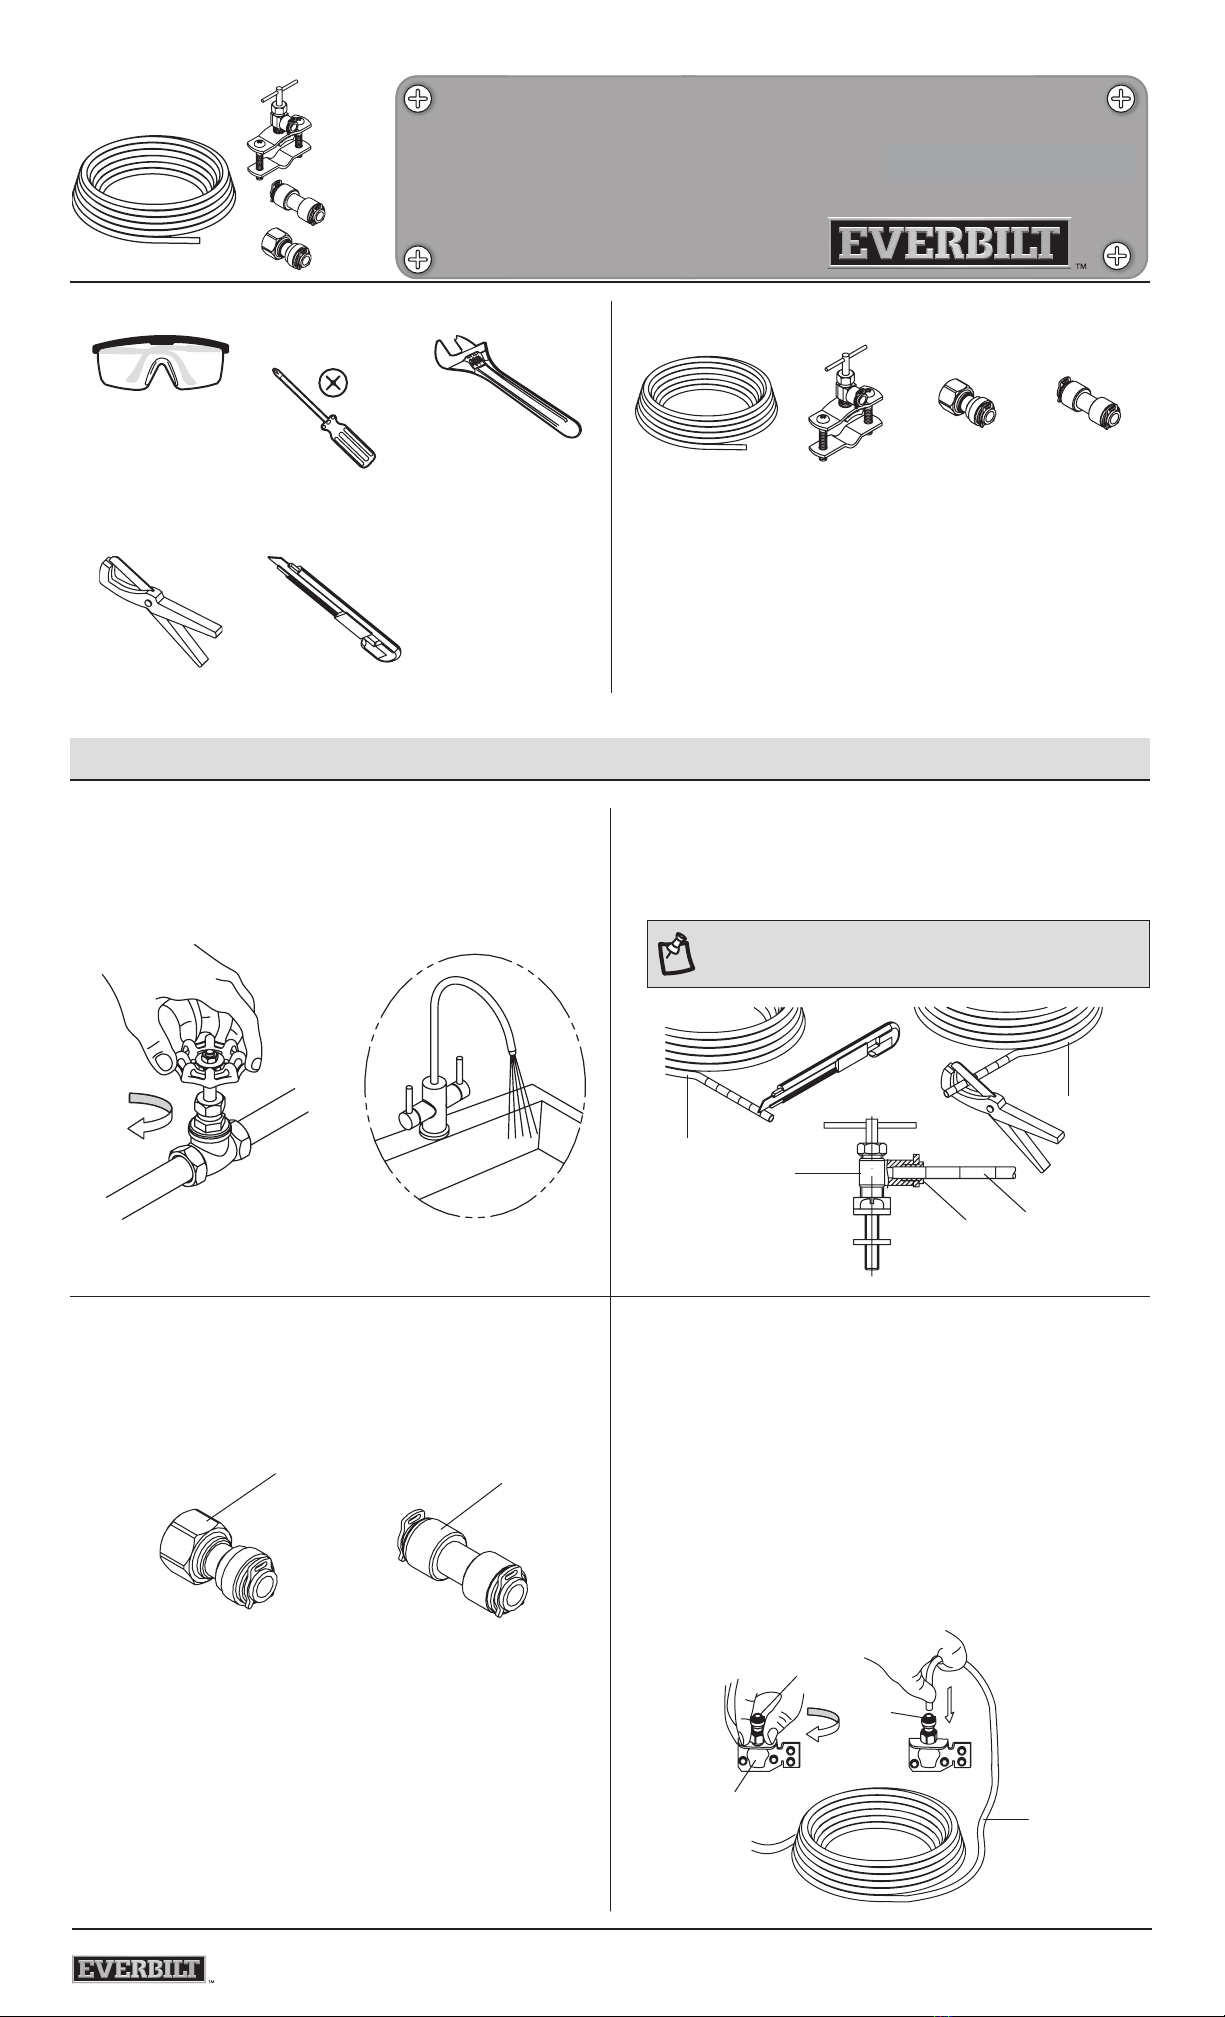
Everbilt 7252-25-14-PTC-EB User manual

HOMEDEPOT.com
Please contact 1-800-305-1726 for further assistance.
Installation
1PREPARING FOR INSTALLATION 2CUTTING THE TUBING
ƑSelect a cold water supply pipe located as closely as possible to the
appliance. Close the main water shut-off valve.
ƑOpen a faucet located near the installation to relieve pressure
in the line.
ƑUsing a utility knife or tube cutter, cut the polyethylene tubing (A) at one of
the marked locations.
2.1
A
A
A
B
3DETERMINING THE WATER INLET TYPE 4CONNECTING TO A THREADED INLET
ƑIf a threaded connection is required, use the threaded quick-connect
adapter (C) and skip to step 4.
ƑIf a polyethylene connection is required, use the quick-connect
coupling (D) and skip to step 5.
CD
ƑConnect the threaded quick-connect adapter (C) onto the water inlet (4.1)
on the back of the refrigerator by threading the adapter onto the water
inlet. Hand tighten and then tighten a quarter turn with a wrench. Do not
overtighten.
ƑInsert one end of the polyethylene tubing (A) into the threaded
quick-connect adapter (C) over the captive stiffener. Push the
polyethylene tubing (A) all the way in until the tubing bottoms out.
ƑCoil at least 8 ft. of polyethylene tubing (A) behind the refrigerator
to allow the refrigerator to be moved away from the wall for cleaning
and servicing.
ƑRun the free end of the polyethylene tubing (A) to the cold water
supply pipe.
4.1
C
C
A
NOTE: When properly cut, the marked line on the tubing (2.1) will be
ush with the push-to-connect opening after it is inserted into the
saddle valve (B).
Use and Care Guide
Polyethylene Ice Maker
Supply Line Kit
Item 0000 000 000
Model 7252-25-14-PTC-EB
TOOLS REQUIRED PACKAGE CONTENTS
Safety goggles Phillips screwdriver Adjustable wrench A - 1/4 in. OD x 25 ft.
Polyethylene tubing
B - Quick-connect
saddle valve
C - Threaded
quick-connect
adapter
D - Quick-connect
coupling
Tube cutter Utility knife

HOMEDEPOT.com
Please contact 1-800-305-1726 for further assistance.
Installation (continued)
5CONNECTING TO A POLYETHYLENE INLET 6CONNECTING THE SADDLE VALVE
ƑInsert one end of the polyethylene tubing (A) into one end of the
quick-connect coupling (D) over the captive stiffener. Push the
polyethylene tubing (A) all the way in until the tubing bottoms out.
ƑConnect the other end of the quick-connect coupling (D) onto the water
inlet on the back of the refrigerator by pushing the refrigerator connection
into the quick-connect coupling (D) over the captive stiffener. Push the
polyethylene tubing (A) all the way in until the tubing bottoms out.
ƑCoil at least 8 ft. of polyethylene tubing (A) behind the refrigerator to
allow the refrigerator to be moved away from the wall for cleaning and
servicing.
ƑRun the free end of the polyethylene tubing (A) to the cold water
supply pipe.
A
D
ƑThe quick-connect saddle valve (B) should be attached to the top section
of the clamp (6.1). Place the rubber gasket (6.2) around the saddle valve
piercing pin. The gasket (6.2) should t perfectly into the curve of the
clamp (6.1).
ƑBack up the piercing pin all the way by turning the saddle valve
handle (6.3) counterclockwise. Insert the other end of the polyethylene
tubing (A) into the quick-connect saddle valve (B) over the captive
stiffener. Push the polyethylene tubing (A) all the way in until the
tubing bottoms out.
A
B
6.3
6.1
6.2
7ASSEMBLING THE SADDLE VALVE 8TAPPING THE LINE
ƑConnect one side of the bottom clamp (7.1) to the top clamp (7.2)
attached to the saddle valve (B) with a bolt.
ƑPlace the saddle valve (B) onto the cold water pipe. Position the saddle
valve (B) so the handle is accessible. Holding onto the top and bottom
parts of the clamp with one hand, insert the second bolt with the other.
Hand tighten both bolts evenly until the bottom clamp (7.1) and the top
clamp (7.2) both rmly touch the pipe.
ƑTighten with a screwdriver for the nal few turns. When the rubber
gasket (7.3) on the saddle valve (B) is slightly compressed, stop
tightening the bolts.
B
A
7.3
B
7.2
7.2
7.1 7.1
ƑTurn the handle (8.1) on the saddle valve (B) clockwise. You will feel
some resistance when penetrating the pipe wall (8.2), but continue
until the handle cannot be turned anymore. This is the “closed”
position of the saddle valve (B).
A
8.2
B
8.1
9TURNING ON THE WATER SUPPLY 10 DISCONNECTING THE TUBING
ƑOpen the main water shut-off valve.
ƑTurn the handle (9.1) on the saddle valve (B) slowly in a counterclockwise
direction until it is fully open.
ƑCheck for leaks at the saddle valve (B) and at the connection on the
back of the refrigerator.
9.1
B
ƑMake sure the water is turned off at the main water supply or the
saddle valve (B) is completely closed. If you need to disconnect the
polyethylene tubing (A) from the refrigerator, connector or saddle valve (B),
remove the locking clip (10.1) by pulling it upward. Retain this piece
for later use.
ƑDepress the push-to-connect release collar (10.2) and gently pull out the
line. Place the locking clip (10.1) back into the quick-connect outlet on
the saddle valve (B) and quick-connect coupling (D) or quick-connect
adapter (C).
C
B
PUSH
10.1
10.2
D
PUSH PUSH
10.1
10.2
10.1
NOTE: One of the line markings on the polyethylene tubing (A) will
be ush with the quick-connect saddle valve (B) when inserted fully
and properly.

HOMEDEPOT.com
Comuníquese al 1-800-305-1726 para solicitar asistencia.
Instalación
1PREVIO A LA INSTALACIÓN 2CORTAR EL TUBO
ƑSeleccione una tubería de suministro de agua fría ubicada lo más cerca
posible del aparato. Cierre la llave principal de suministro de agua. Abra el
grifo ubicado cerca de la instalación para aliviar la presión en la tubería.
ƑUsando un cuchillo o cortatubos, corte el tubo de polietileno (A) en una de
las ubicaciones marcadas.
2.1
A
A
A
B
3DETERMINAR EL TIPO DE ENTRADA DE AGUA 4CONECTAR A UNA ENTRADA ROSCADA
ƑSi se requiere una conexión roscada, use el adaptador de conexión rápida
roscado (C) y vaya al paso 4.
ƑSi se requiere una conexión de polietileno, use el acoplamiento rápido (D)
y vaya al paso 5.
CD
ƑConecte la conexión rápida roscada (C) en la entrada de agua (4.1) en la
parte posterior del refrigerador enroscando el adaptador en la entrada
de agua. Apriete a mano, más un cuarto de vuelta con una llave. No
apriete demasiado.
ƑInserte un extremo del tubo de polietileno (A) en el adaptador de conexión
rápida roscado (C) sobre el refuerzo cautivo. Empuje el tubo de
polietileno (A) hasta el fondo hasta que el tubo de polietileno (A) toque
fondo.
ƑEnrolle al menos 8 pies del tubo de polietileno (A) detrás del refrigerador
para permitir que el refrigerador sea movido lejos de la pared para su
limpieza y mantenemiento.
ƑPase el extremo libre del tubo de polietileno (A) hacia la tubería de
suministro de agua fría.
4.1
C
C
A
NOTA: Cuando se corta correctamente, la línea marcada en el
tubo (2.1) quedará al ras con la abertura tipo empuje para conectar
después de insertarla en la válvula de asiento (B).
Guía de Uso y Cuidados
Kit de Tubería de Polietileno
para Máquina de Hielo
Artículo 0000 000 000
Modelo 7252-25-14-PTC-EB
HERRAMIENTAS NECESARIAS CONTENIDO DEL PAQUETE
Gafas de seguridad Destornillador
de estrella
Llave ajustable A - Tubería de
polietileno
1/4 pulg. D.E. x 25 pies
B - Válvula de
asiento de
conexión rápida
C - Adaptador
de conexión
rápida roscado
D - Acoplamiento
rápido
Cortatubos Cuchillo de uso

HOMEDEPOT.com
Comuníquese al 1-800-305-1726 para solicitar asistencia.
Instalación (continuación)
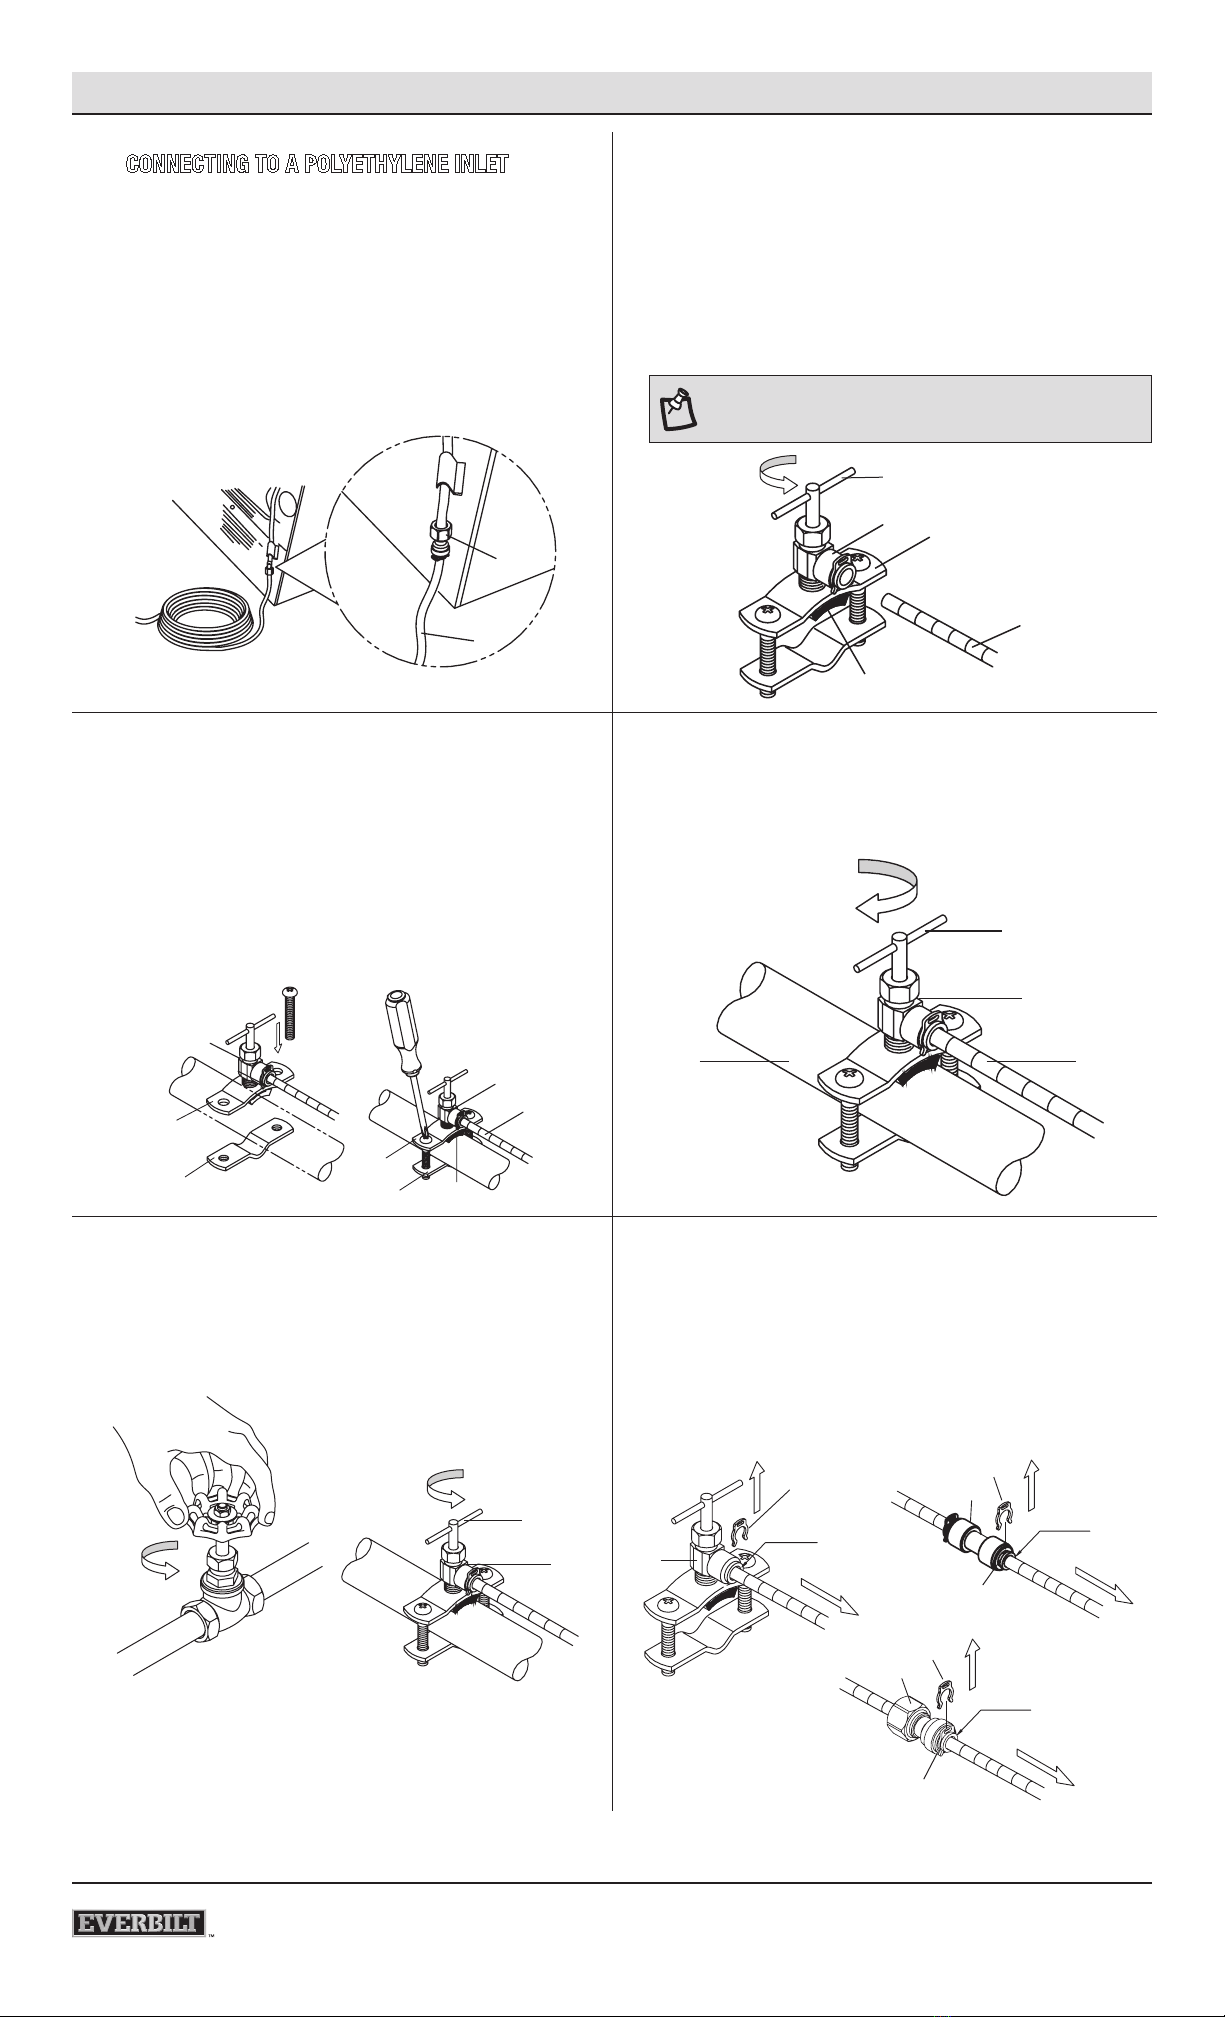
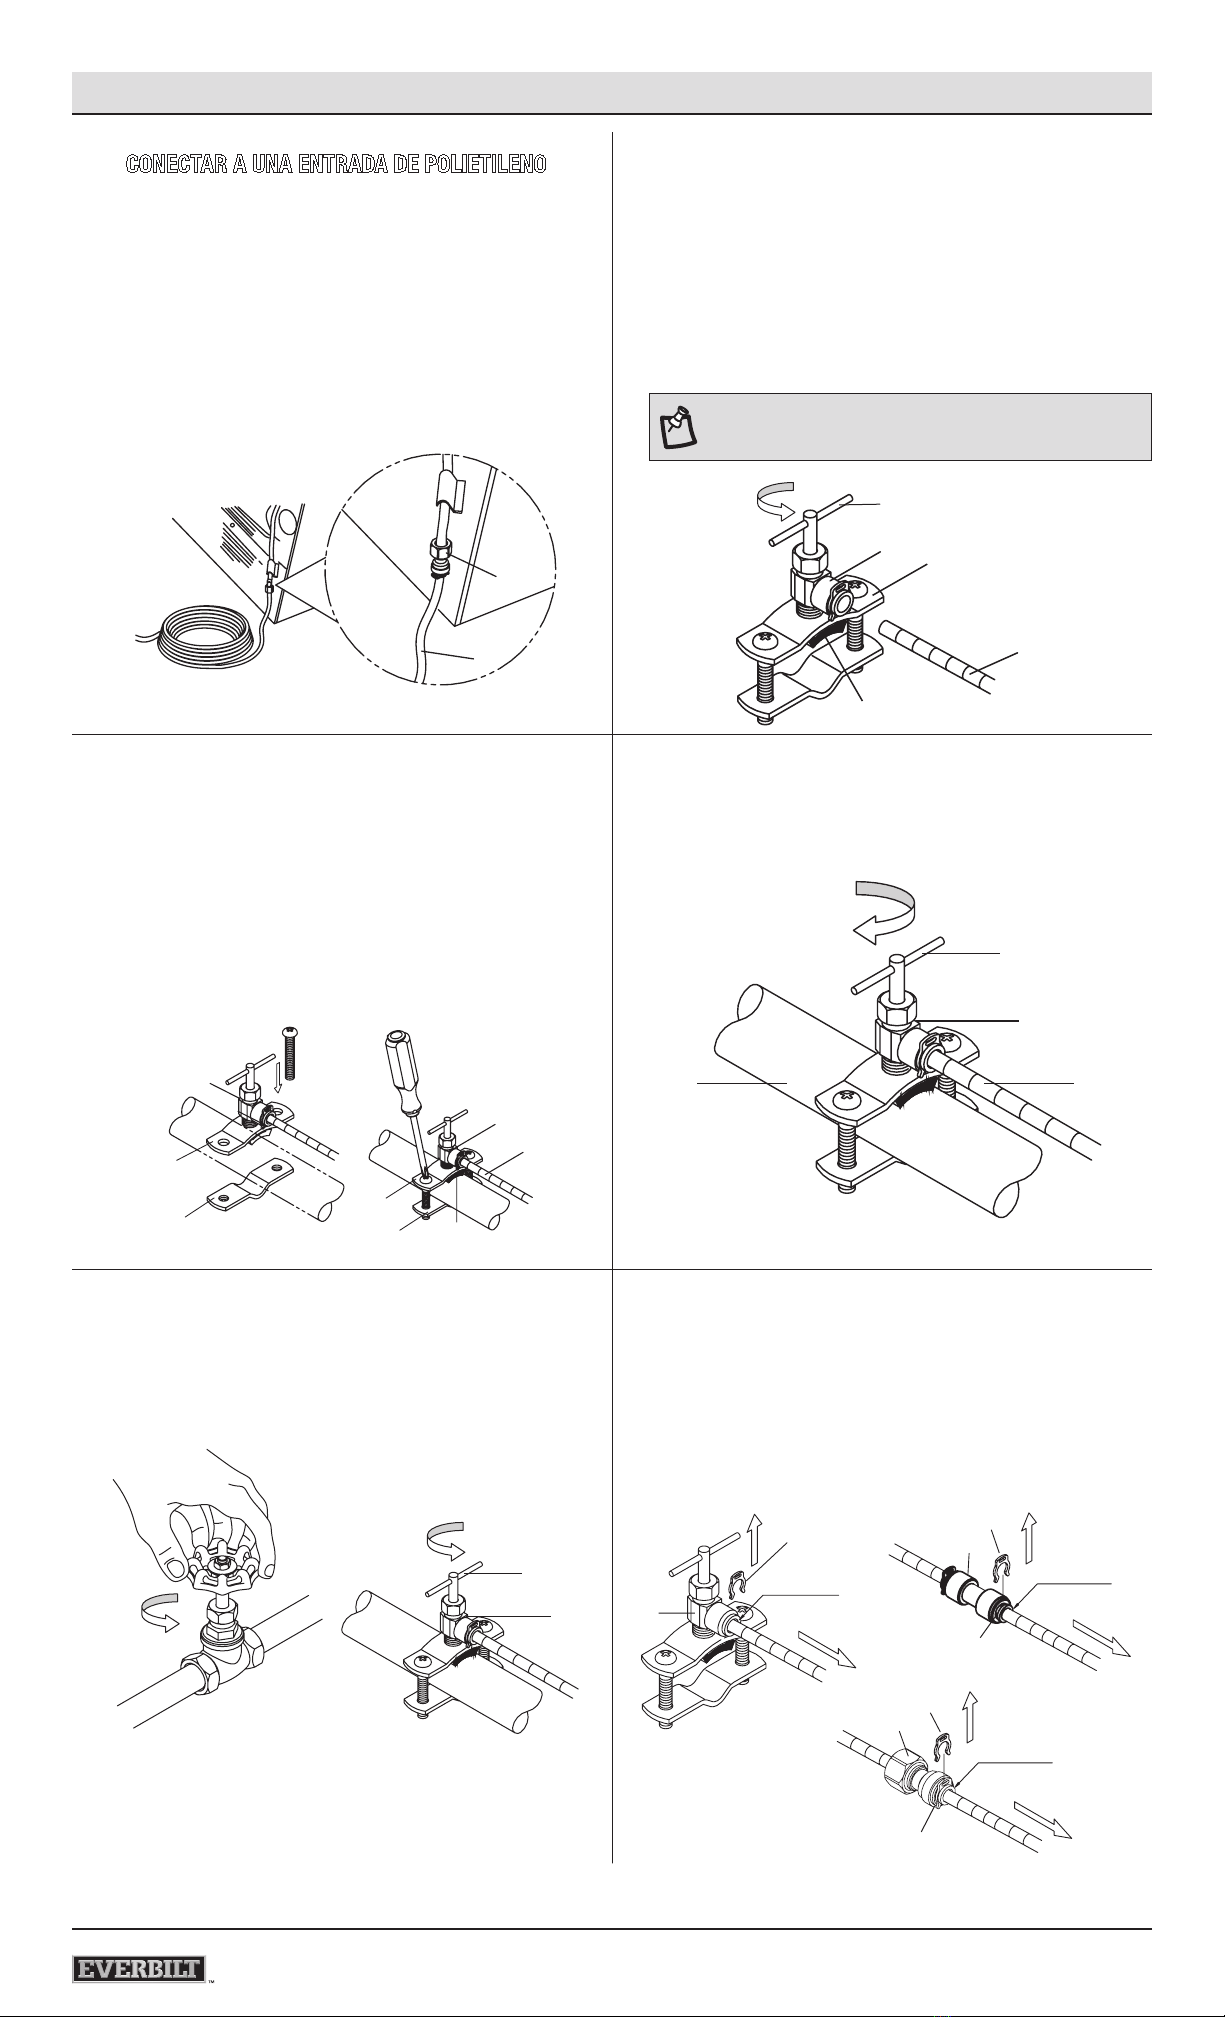
5CONECTAR A UNA ENTRADA DE POLIETILENO 6CONECTAR LA VÁLVULA DE ASIENTO
ƑInserte un extremo del tubo de polietileno (A) en un extremo del
acoplamiento rápido (D) sobre el refuerzo cautivo. Empuje el tubo de
polietileno (A) hasta el fondo hasta que el tubo toque fondo.
ƑConecte el otro extremo del acoplamiento rápido (D) en la entrada de
agua en la parte posterior del refrigerador empujando la conexión del
refrigerador dentro del acoplamiento rápido (D) sobre el refuerzo cautivo.
Empuje el tubo de polietileno (A) hasta el fondo hasta que el tubo de
polietileno (A) toque fondo.
ƑEnrolle al menos 8 pies del tubo de polietileno (A) detrás del refrigerador
para permitir que el refrigerador sea movido lejos de la pared para su
limpieza y mantenimiento.
ƑPase el extremo libre del tubo de polietileno (A) hacia la tubería de
suministro de agua fría.
A
D
ƑLa válvula de asiento de conexión rápida (B) debe estar unida a la sección
superior de la abrazadera (6.1). Coloque la junta de goma alrededor del
pasador de perforación de la válvula de asiento. La junta (6.2) debe
encajar perfectamente en la curva de la abrazadera (6.1).
ƑRetroceda el pasador de perforación completamente hacia arriba
girando la manija (6.3) de la válvula de asiento en sentido antihorario.
Inserte el otro extremo del tubo de polietileno (A) en la válvula de
asiento de conexión rápida (B) sobre el refuerzo cautivo. Empuje el
tubo de polietileno (A) hasta el fondo hasta que el tubo de polietileno (A)
toque fondo.
A
B
6.3
6.1
6.2
7ASEMBLAR LA VÁLVULA DE ASIENTO 8TOCAR LA LÍNEA
ƑConecte un lado de la abrazadera inferior (7.1) a la abrazadera
superior (7.2) unida a la válvula de asiento (B) con un perno.
ƑColoque la válvula de asiento (B) en la tubería de agua fría. Coloque
la válvula de asiento (B) de modo que se pueda acceder a la manija.
Sosteniendo las partes superior e inferior de la abrazadera con una
mano, inserte el segundo perno con la otra. Apriete a mano ambos
pernos de manera uniforme hasta que la abrazadera inferior (7.1)
y la abrazadera superior (7.2) toquen rmemente el tubo.
ƑApriete con un destornillador para las últimas pocas vueltas. Cuando
la junta de goma (7.3) en la válvula de asiento (B) esté ligeramente
comprimida, deje de apretar los pernos.
B
A
7.3
B
7.2
7.2
7.1 7.1
ƑGire la manija (8.1) en la válvula de asiento (B) en sentido horario.
Sentirá cierta resistencia al penetrar la pared de la tubería (8.2),
pero continúe hasta que la manija ya no se pueda girar. Esta es la
posición “cerrada” de la válvula de asiento (B).
A
8.2
B
8.1
9ABRAR EL SUMINISTRO DE AGUA 10 DESCONECTAR LA TUBERÍA
ƑAbra la llave de paso de agua.
ƑGire lentamente la manija (9.1) de la válvula de asiento (B) en sentido
antihorario hasta que esté completamente abierta.
ƑVerique si hay fugas en la válvula de asiento (B) y en la conexión
en la parte posterior del refrigerador.
9.1
B
ƑAsegúrese de que el agua esté cerrada en la llave de paso de agua o
que la válvula de asiento (B) esté completamente cerrada. Si necesita
desconectar el tubo de polietileno (A) del refrigerador, conector o
válvula de asiento (B), retire el clip de bloqueo (10.1) tirando de él
hacia arriba. Conserve esta pieza para su uso posterior.
ƑPresione el collar de desenganche rápido (10.2) y tire suavemente de la
línea. Vuelva a colocar el clip de bloqueo (10.1) en la salida de conexión
rápida de la válvula de asiento (B) y el acoplamiento rápido (D) o el
adaptador de conexión rápida (C).
C
B
EMPUJE
10.1
10.2
D
EMPUJE EMPUJE
10.1
10.2
10.1
NOTA: Una de las marcas de línea en el tubo de polietileno (A) estará
al ras con la válvula de asiento de conexión rápida (B) cuando se
inserte completamente y correctamente.
Table of contents
Languages:
Other Everbilt Ice Maker manuals
Popular Ice Maker manuals by other brands

Frigidaire
Frigidaire EFIC236-WHITE use & care

Klarstein
Klarstein 10028097 manual

Follett
Follett Horizon Elite Installation instructions manual

Ice-O-Matic
Ice-O-Matic ELEVATION Series Installation guide and owner's manual

Hoshizaki
Hoshizaki DCM-450 Service manual

Ice-O-Matic
Ice-O-Matic Pearl Ice GEM0650R' Pearl Ice GEM0655A Service and installation manual