IMPORTANT: DO NOT leave the humidifier plugged in for prolonged periods (i.e. several days or more) without use.
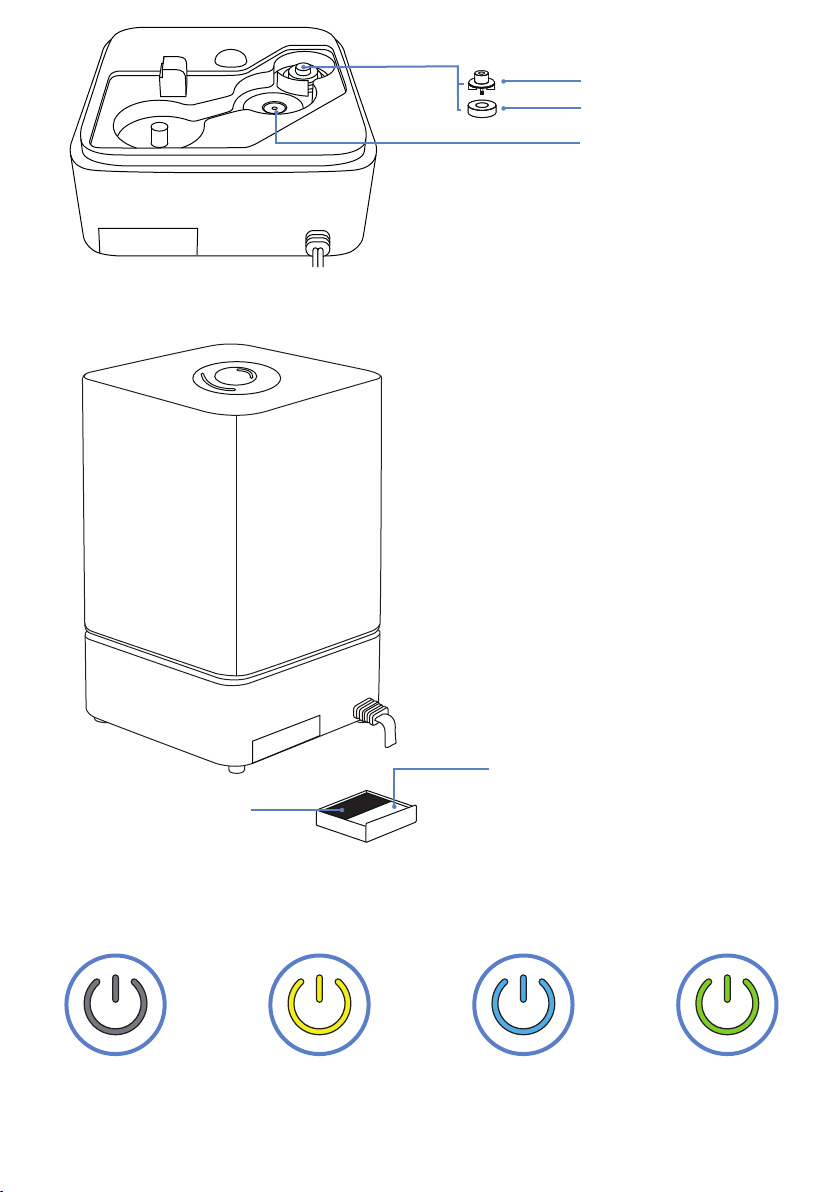
This causes premature failure of the circuitry. When the humidifier is not in use, press the control button until the
light goes off, then UNPLUG it.
CONSEIL IMPORTANT: Ne laissez pas l'humidificateur branché pendant de longues périodes (c'est-à-dire plusieurs
jours ou plus) sans utilisation. Cela provoque une défaillance prématurée des circuits. Lorsque l'humidificateur n'est
pas utilisé, appuyez sur le bouton de commande jusqu'à ce que le voyant s'éteigne, puis débranchez-le.
Thoroughly inspect the unit in its entirety for any cracks, chips, or damage which could cause the unit to leak. DO NOT
USE if damage is found.
Only a professional or authorized repairman should repair this appliance.
If the power supply cord is damaged, it must be replaced by the manufacturer, a certified service agent or a similarly
qualified person to avoid hazards and electrocution.
If the unit has an abnormal sound or odor while in operation, please shut it down immediately and disconnect the
power plug. Any repairs must be done by a professional repairman.
Please hold the water tank using two hands when adding water to avoid dropping the water tank.
When the unit is on, DO NOT remove the water tank.
DO NOT operate the unit when the water tank is empty.
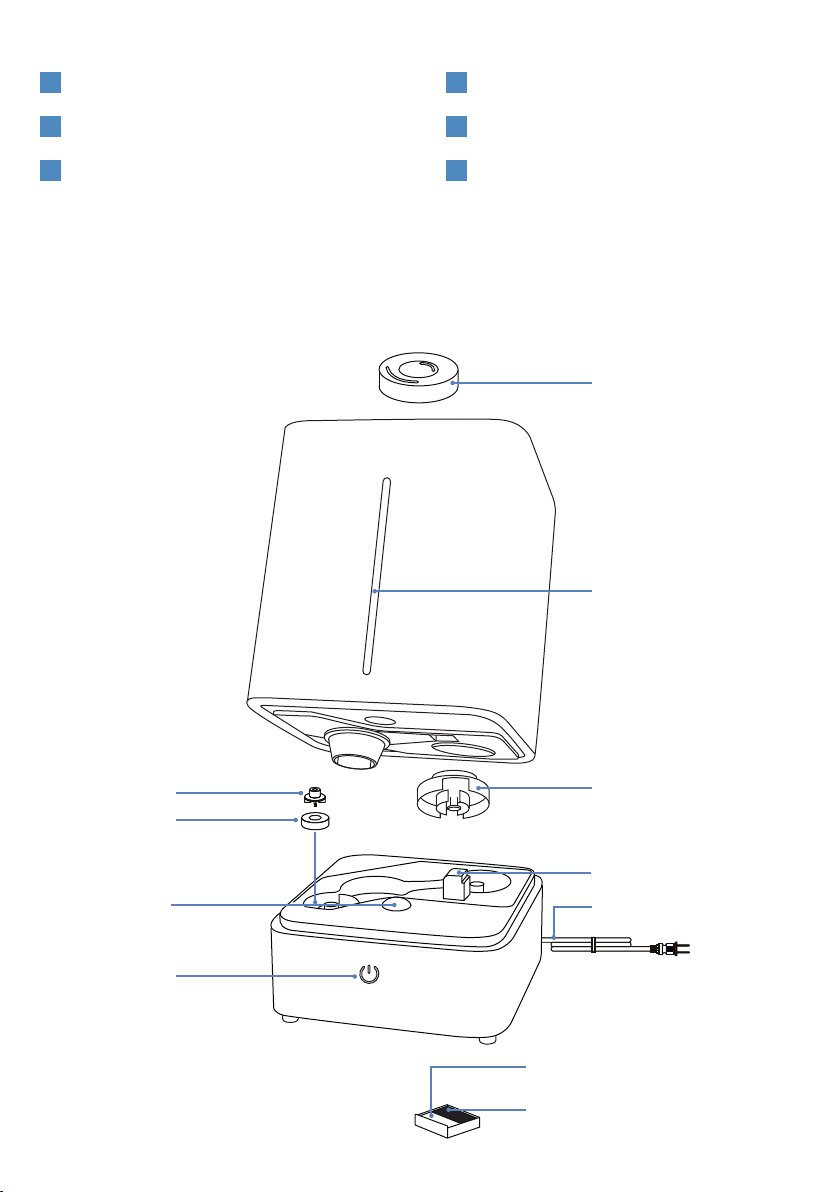
Do not add any chemical agents to the base or water tank. Do not add essential oils to the base or water tank. Only
add essential oils to the specified essential oil tray as outlined in this manual. (See Fig. 3 Exploded Diagram)
Before cleaning or moving the unit, turn off and disconnect the plug from its power source.
When in operation, never place your hand inside the base or near the atomizer as it is dangerous and may cause
electrocution.
Do not add hot water above 104°F to the water tank to avoid discoloration and distortion.
After refilling the water tank with water, make sure the valve is tightened firmly before placing it back onto the base.
Do not plug the unit into any type of power source with wet hands to avoid the risk of electric shock.
Connect only the electric plug to a secure wall socket.
IMPORTANT: Using tap water with a high mineral content aka “hard water” with any humidifier can cause a fine white
dust to be emitted. To avoid this, use distilled or demineralized water.
Do not place any metals, chemicals or detergents into the water tank or base; it may cause poor atomization.
Never pour out the remaining water from the water base without unplugging and powering down the unit (power
turned to OFF), otherwise, the atomizer will burn out causing risk of fire.
2. SAFETY (PLEASE READ CAREFULLY BEFORE USE)
1
2
3
4
5
6
7
8
9
11
12
13
14
15
16
17
18
This humidifier is intended for indoor use only.
Ideal operating environment: Temperature: 41-104°F, Humidity: <65% RH.
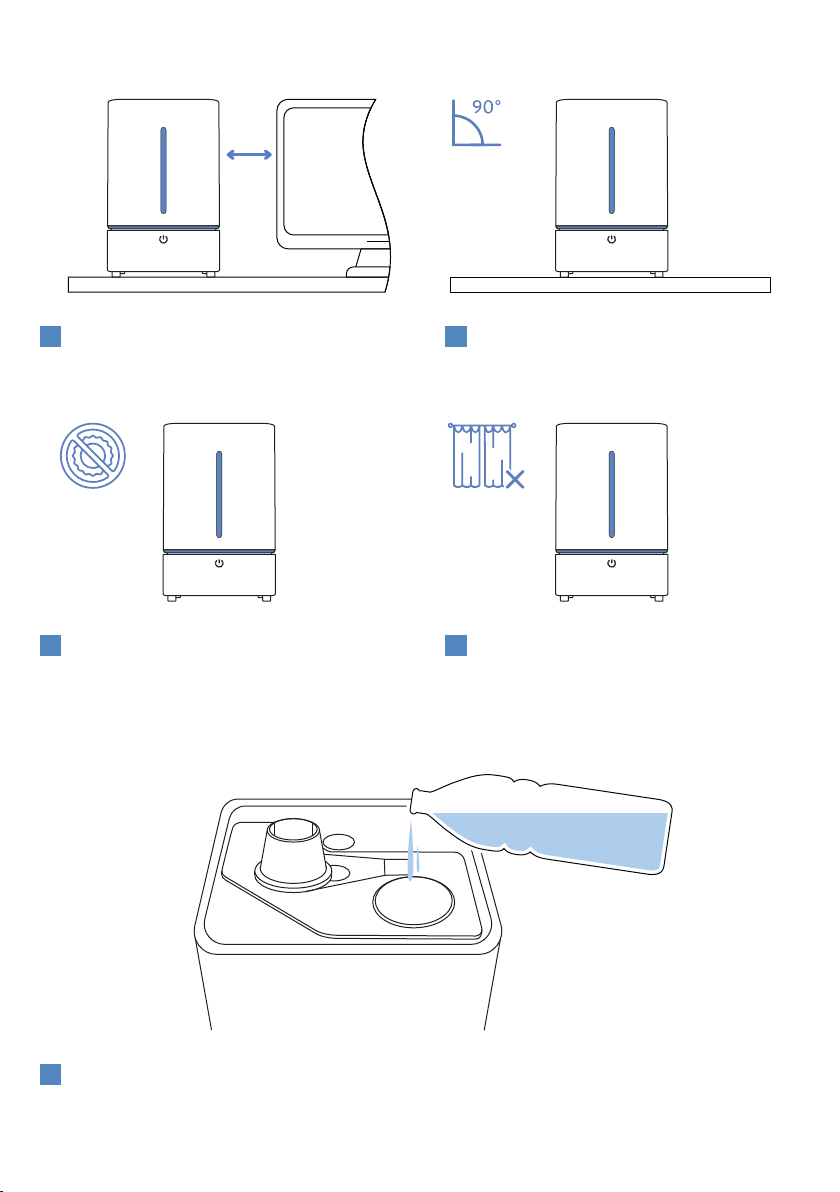
Place the unit on a firm, flat and dry surface.
Keep humidifier away from children and infants.
DO NOT use this appliance in any kind of inflammable environment.
Keep unit away from any heat source, i.e. heaters, furnaces, and avoid direct sunlight.
Keep the unit in normal room temperatures. Do not operate the unit in freezing temperatures.
Direct nozzle to spray mist away from furniture and electric appliances, as they may become damp or be left with a white
powder-like residue.
Please follow the recommendations in the illustrations on the next page to properly operate your humidifier in your home.
OPERATING ENVIRONMENT
1
2
3
4
5
6
7
8
9
10