Everyday Essentials PC22A User manual
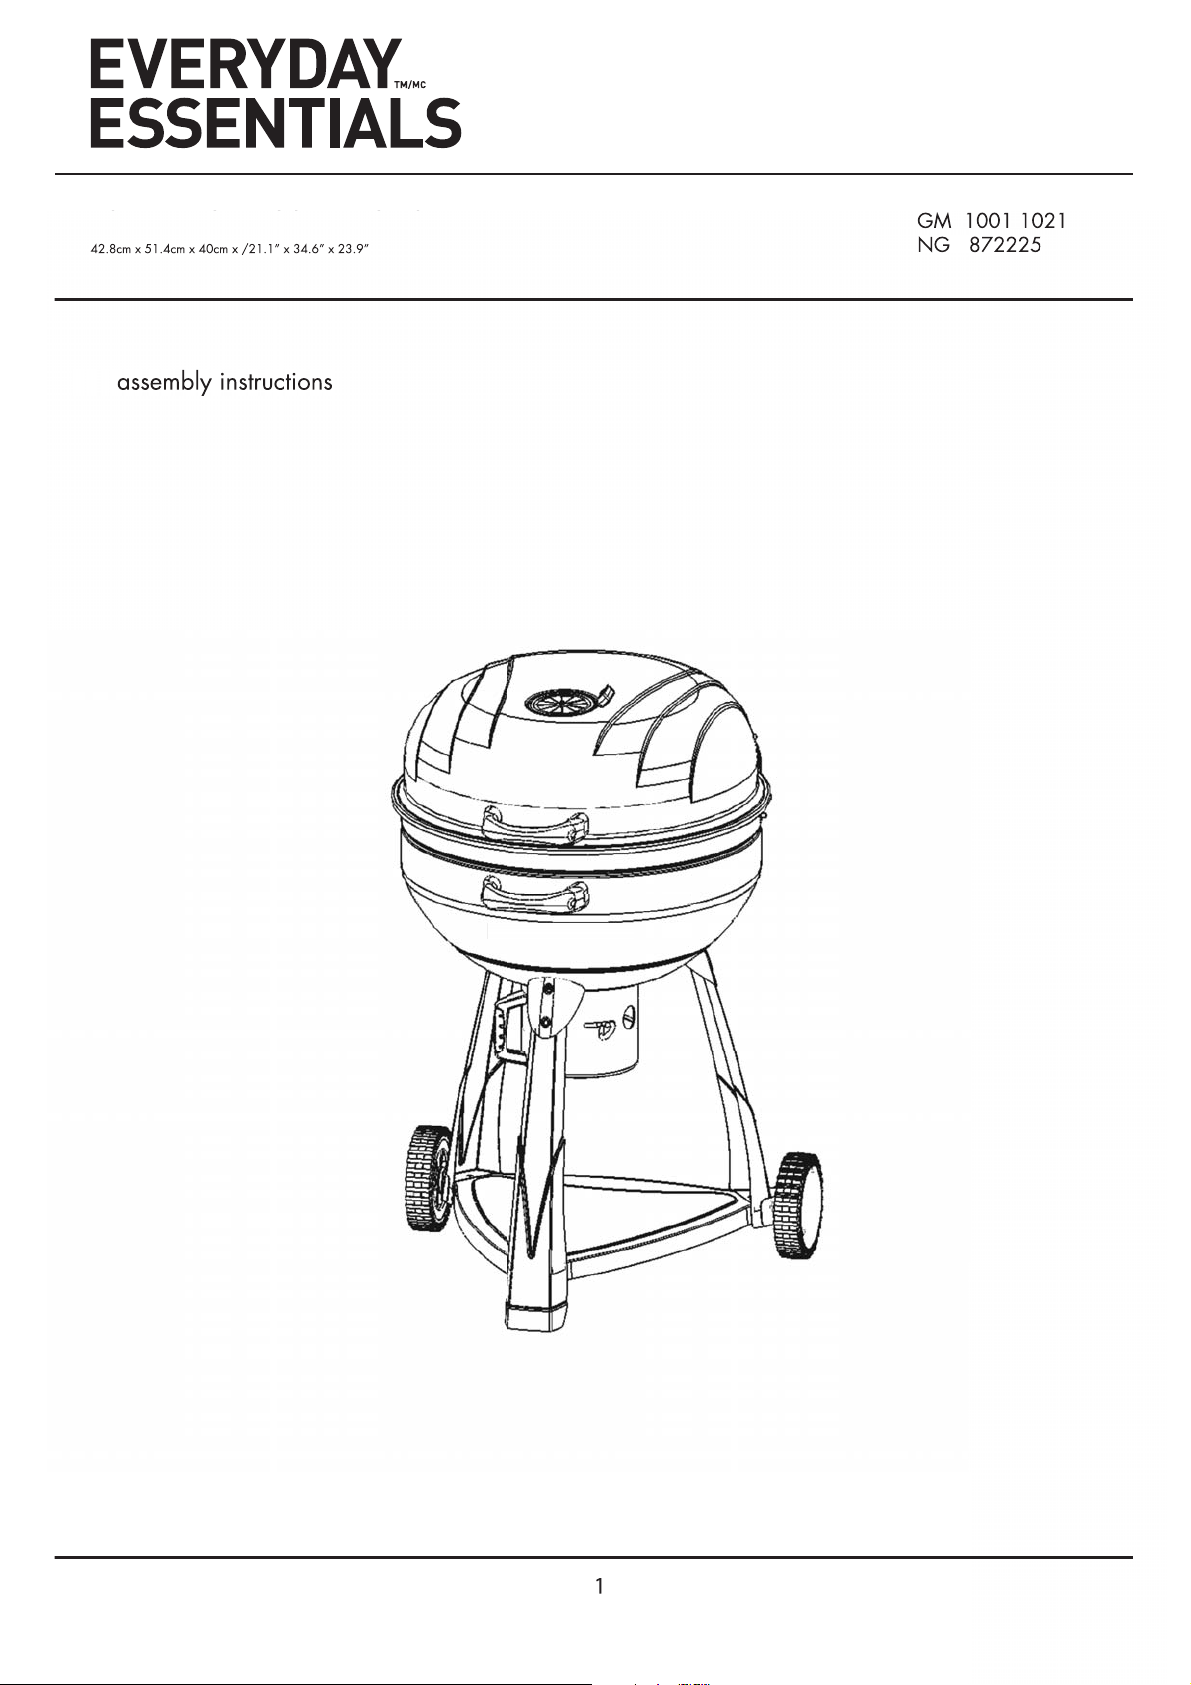
PORTABLE CHARCOAL DECK GRILL
42.8cm x 51.4cm x 40cm x /21.1” x 34.6” x 23.9”
GM 1001 1021
NG 872225
assembly instructions
IMAGE OF PRODUCT
LINE DRAWING
1

PORTABLE CHARCOAL
DECK GRILL
DANGER!
Do not use charcal briquettes for
indoor cooking or heating.
TOXIC carbon monoxide fumes
can
accumulate and cause
asphyxiation.
DO NOT USE on boats or
recreational vehicles. Live hot
charcoal could create a fire
hazard.
WARNING
FOR YOUR SAFETY :
For Outdoor Use Only
(outside any enclosure)
WARNING:
Improper installation, adjustment,
alteration, service or maintenance
can cause injury or property
damage.
Read the installation, operation
and maintenance instructions
thoroughly before installing or
servicing this equipment.
DANGER:
Failure to follow these
instructions could result in fire or
explosion that could cause
property damage, personal
injury or death.
2
Table of Contents
For Your Safety.......................................................................................................................3
Hardware list .................................................................................................................. .......4
Illustrated Parts List....................................................................................................................5
Assembly Instructions.................................................................................................................6
Lighting Your Grill.....................................................................................................................11
Award- Winning Barbecue Recipes...............................................12
Warranty Program......................................................................13
WARNING
1. This grill is for outside use only, and should not be used in a building, garage or any other enclosed area.
2. This grill is for use with charcoal only.
3. The use of alcohol, prescription or non-prescription drugs may impair the user's ability to properly assemble or safely operate
the appliance.
4. Do not use gasoline, kerosene or alcohol for lighting. This grill is not intended to be installed in or on recreation vehicles
and/or boats.
5. Always open grill lid carefully and slowly as heat and steam trapped within the grill could cause severe burns.
6. Always place your grill on a hard and level surface far away from combustible materials. An asphalt or blacktop surface may
not be acceptable.
7. Do not attempt to move the grill while it is lit.
8. Do not leave a lit grill unattended. Keep children and pets away from the grill at all times.
9. Do not use grill in high winds.
10. Do not use the grill until it is
COMPLETELY
assembled and all parts are securely fastened and tightened.
11. Keep all combustible items and surfaces at least 12 inches (30 cm) away from the grill at all times.
12. DO NOT use this grill or any charcoal product under any enclosure near any unprotected combustible constructions.
13.DO NOT store or use gasoline or other flammable vapors and liquids within 25 feet (8m) of this or any other appliance.
CAUTION
1. Do not touch metal parts of grill until it has completely cooled (at least 30 minutes) to avoid burns, unless you are wearing
protective gear (pot holders, gloves, BBQ mittens, etc.).
2. Do not use in an explosive atmosphere. Keep grill area clear and free from combustible materials, gasoline and other
flammable vapors and liquids.
3. Do not alter grill in any manner.
4. Do not repair or replace any part of the grill unless specifically recommended in this manual. All other service should be
referred to a qualified technician
For Your Safety
3
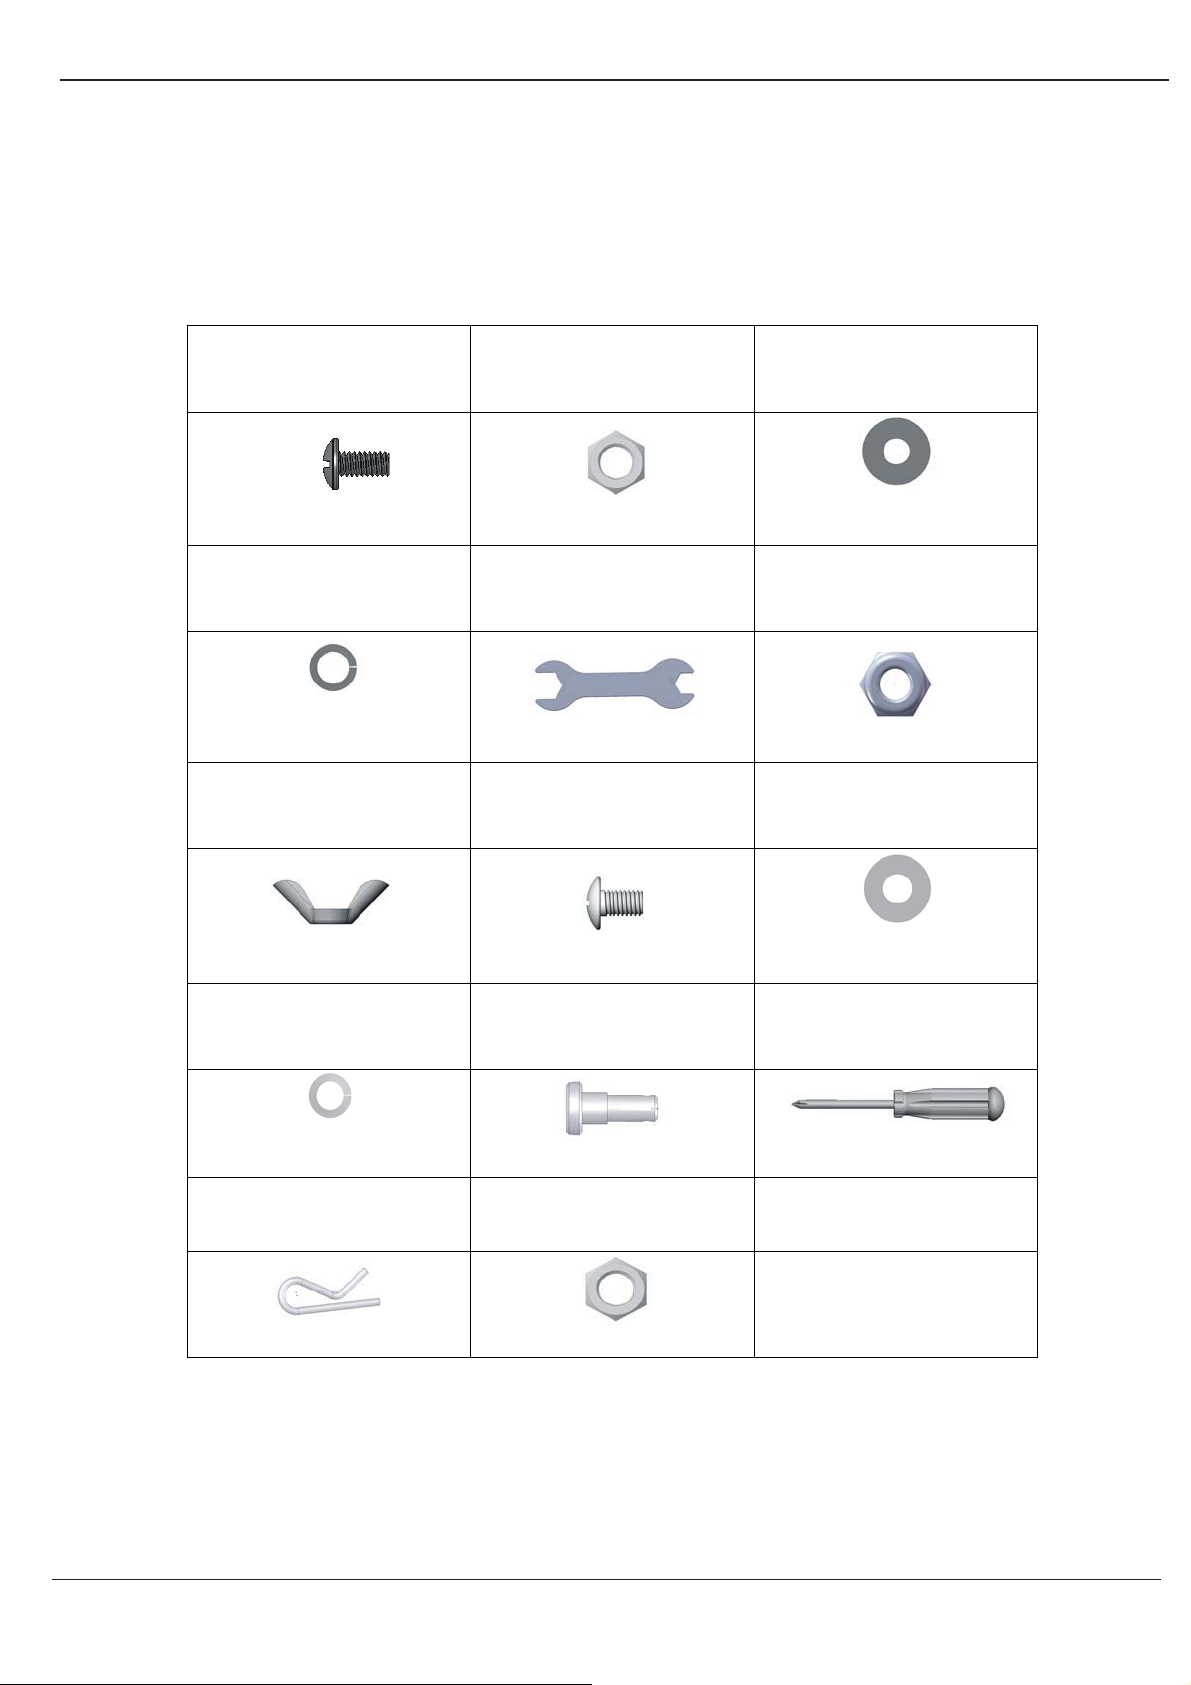
PC22A Hardware list
AA˖26PCS BB˖18PCS CC˖30PCS
M6×12 Bolt M6 Nut 6.2×12×1.0
Flat Washer
DD:30PCS EE:2PCS FF:2PCS
6.2×9×1.2
Spring Washer Wrench M8 Nut
CP1:IICP1:HHCP1:GG
M5 Nut M5×12 Bolt 5.2×12×1.0
Flat Washer
CP1:LLSCP2:KKCP1:JJ
5.2×8×1.2
Spring Washer Hair pin Screw driver
SCP2:NNSCP2:MM
Lid pin M5 Nut
Hardware shown above is not to scale.
4

A Lid vent…........…1pc H Cooking grid……1pc O Right back leg…1pc
cp1……ylbmessageltnorfPcp1……dirglaocrahCIcp1……diLB
C Right up hinge……1 pc J Left down hinge……1pc Q Caster ……2pcs
D Left up hinge……1 pc K Right down hinge…1pc R Caster cap……2pcs
E Lid handle……2 pcs L Firebox ……1pc S Axle……1pc
F Warming rack……1pc M Ash pail ……1pc T Cart bottom plate…1pc
G Warming rack support…1pc N Left back leg…1pc U lid vent base……1pc
5
Assembly Instructions
For Best Results
ϥRemove all contents from packaging and make sure all parts are present before attempting to assemble.
ϥTighten all bolt connections by hand first. Once the grill is fully assembled, go back and tighten with
screwdriver.
ϥEstimated Assembly Time: Approximately 10 to 15 minutes.
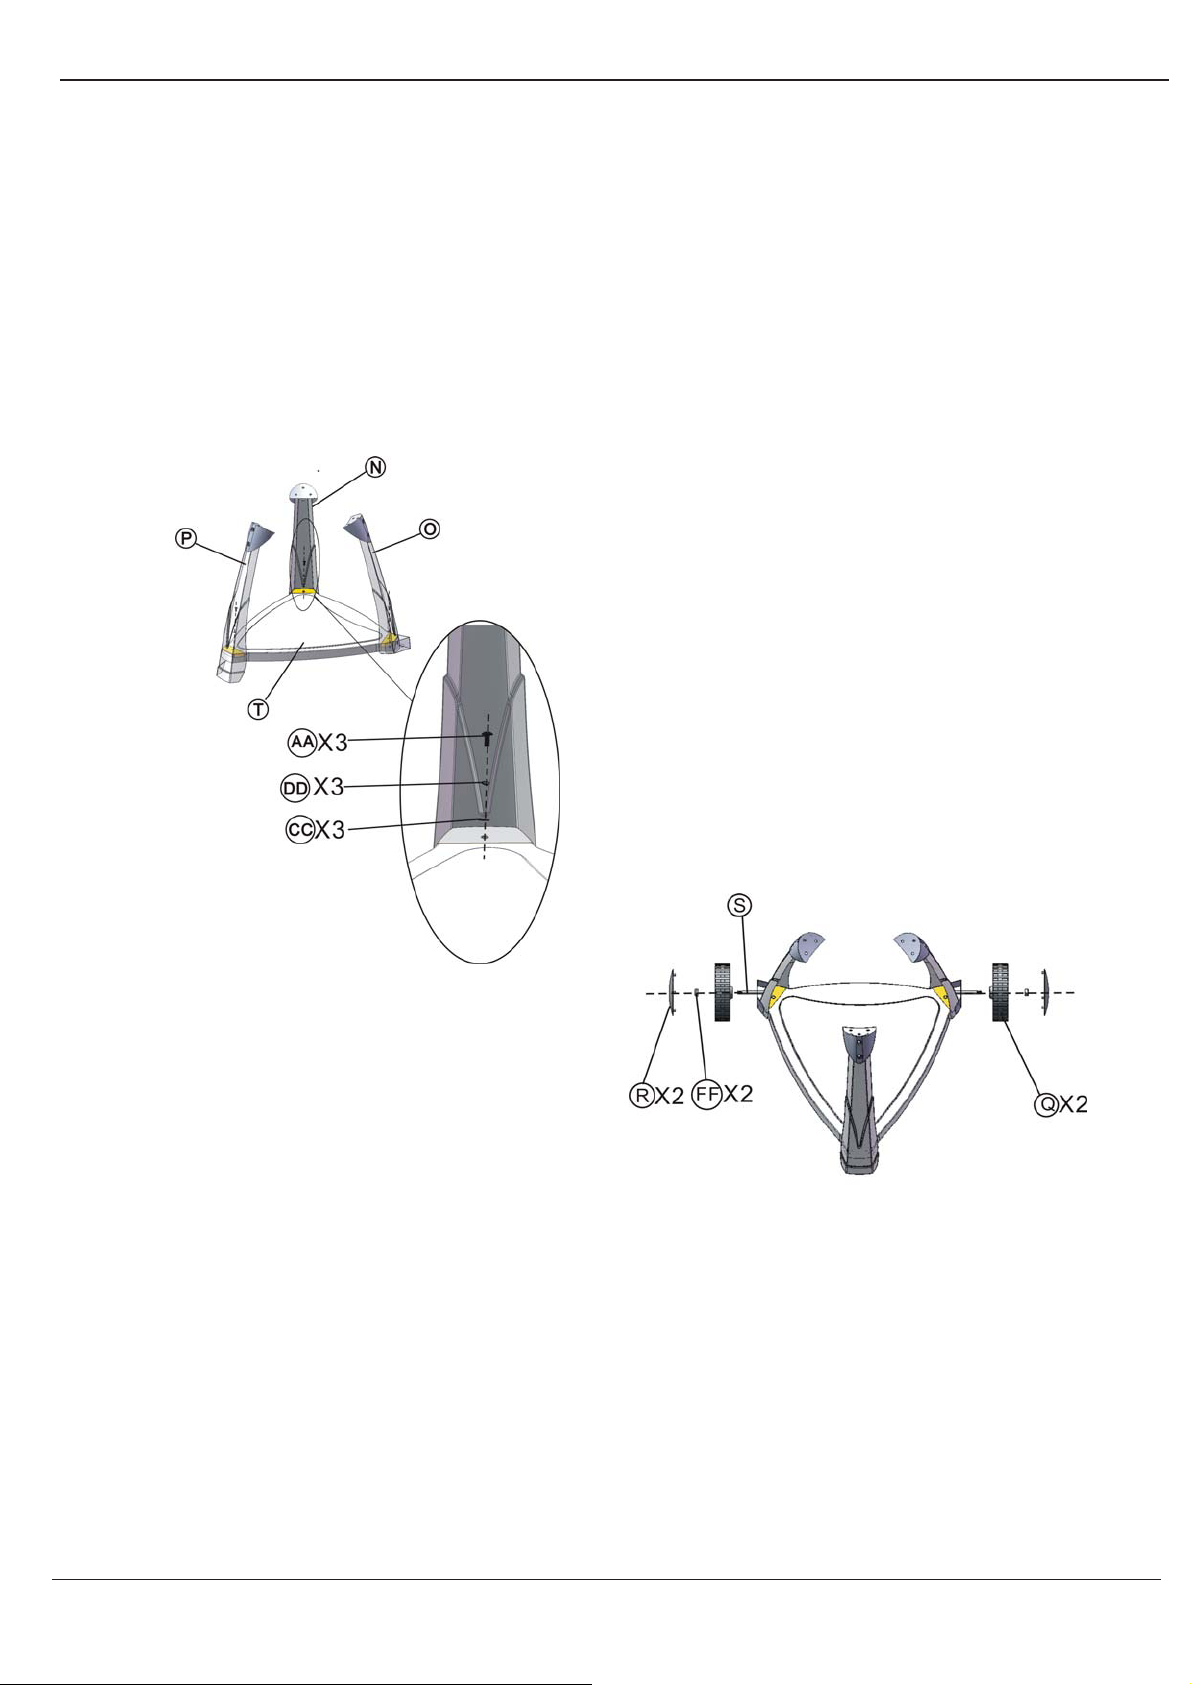
Step 1
1. Align three legs, front leg (P), right back
leg (O) and left back leg (N) with the
holes on the cart bottom panel (T) as left
shown.
2. Insert one M6x12 bolt (AA), flat washer
(CC) and spring washer (DD) into each
pre-drilled holes
Step 2
1. Put axle (S) through right back leg (O)
and left back leg (N)
2. Insert caster (Q), M8 nut (FF) and caster
cap (R) into axle (S) as right shown,
keeping it tighter by screwdriver
6
Step 3
1. Put the firebox (L) onto top of
three legs.
2. Align the holes on the firebox
(L) with the holes on the top
of three legs.
3. Insert one M6x12 bolt (AA),
flat washer (CC) and spring
washer (DD) into each pre-
drilled holes by hand
4. Go back tighten all the bolts
using screwdriver provided.
Step 4
1. Hook the ash pail (M) to the bottom
of firebox ( L) as right shown
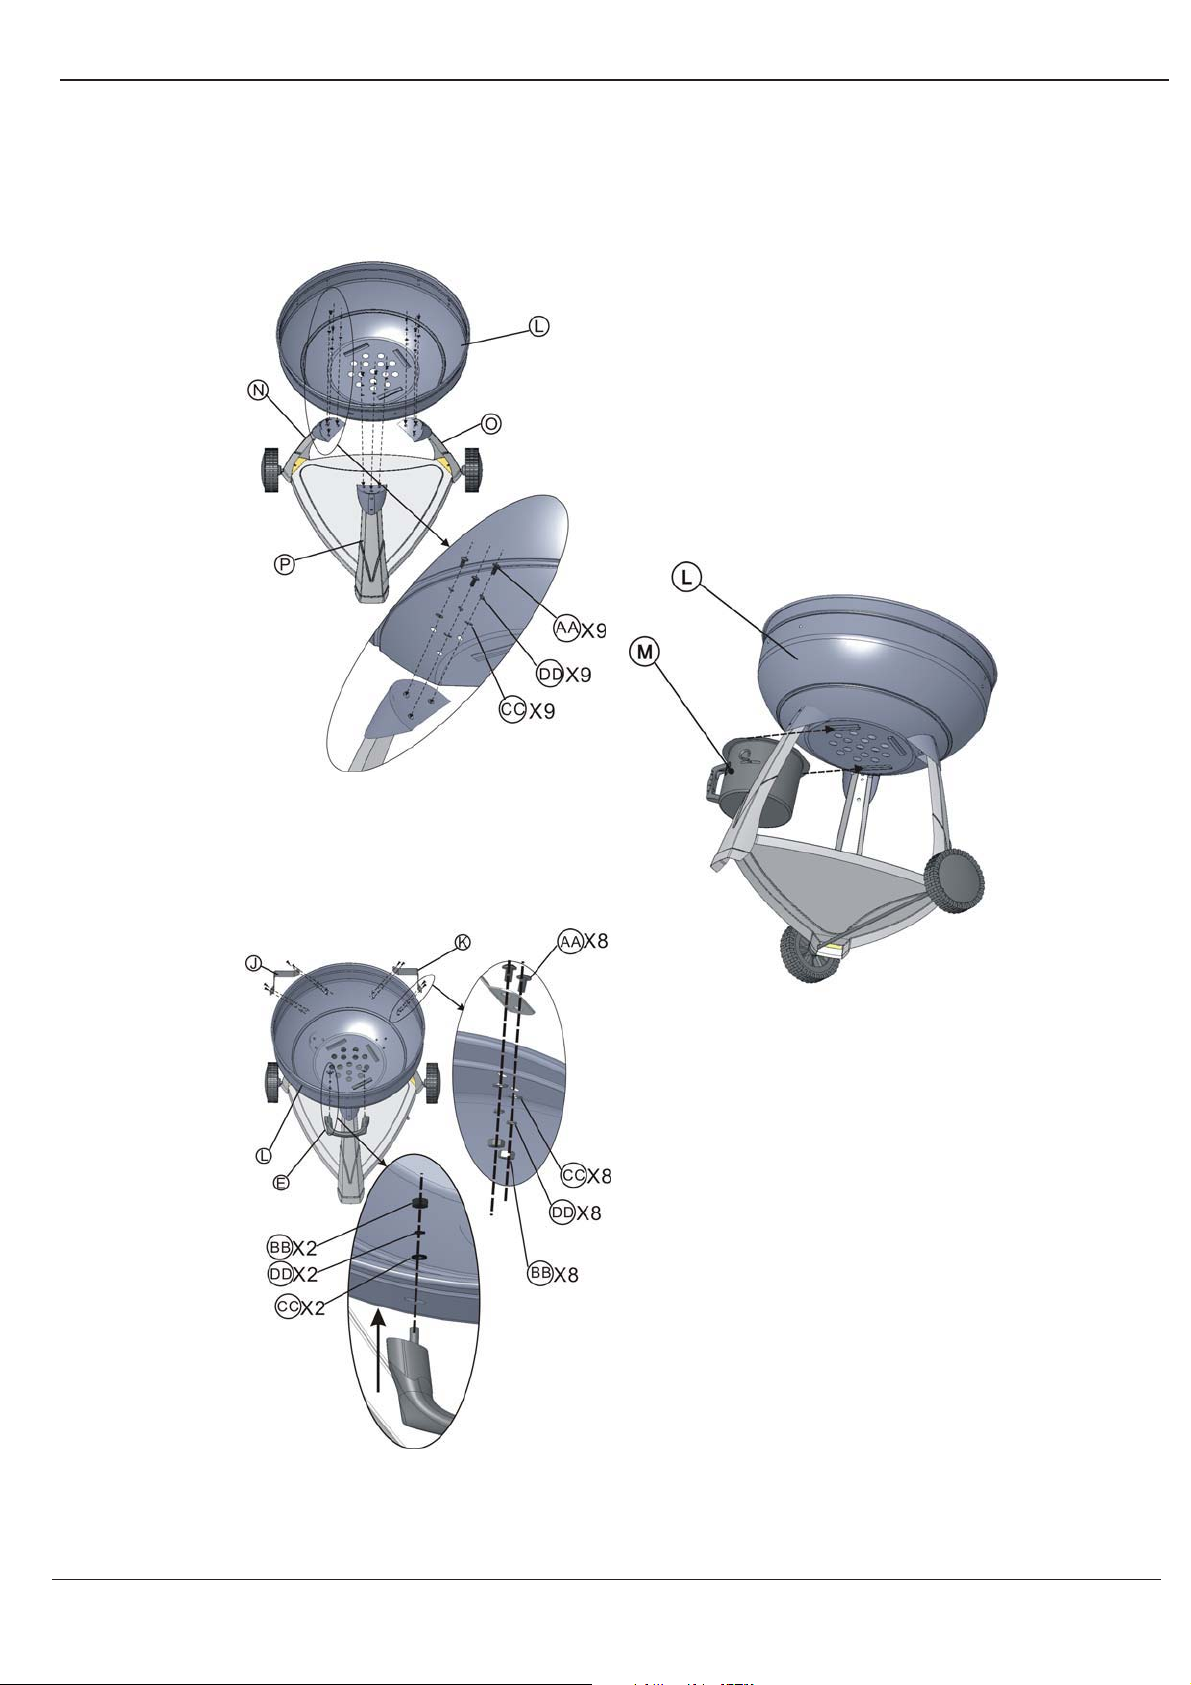
Step 5
1. Align the holes on the lid handle(E) with
the holes on the wall of firebox (E).
2. Insert one M6 nut (BB), flat washer
(CC) and spring washer (DD) into each
pre-drilled holes by hand
3. Align the holes on left down hinge (J)
and right down hinge (K) with the holes
on the wall of fire box (E)
4. Insert one M6x12 bolt (AA), M6 nut
(BB), flat washer (CC) and spring
washer (DD) into each pre-drilled holes
by hand
5. Go back tighten all the bolts using
screwdriver
p
rovided.
7
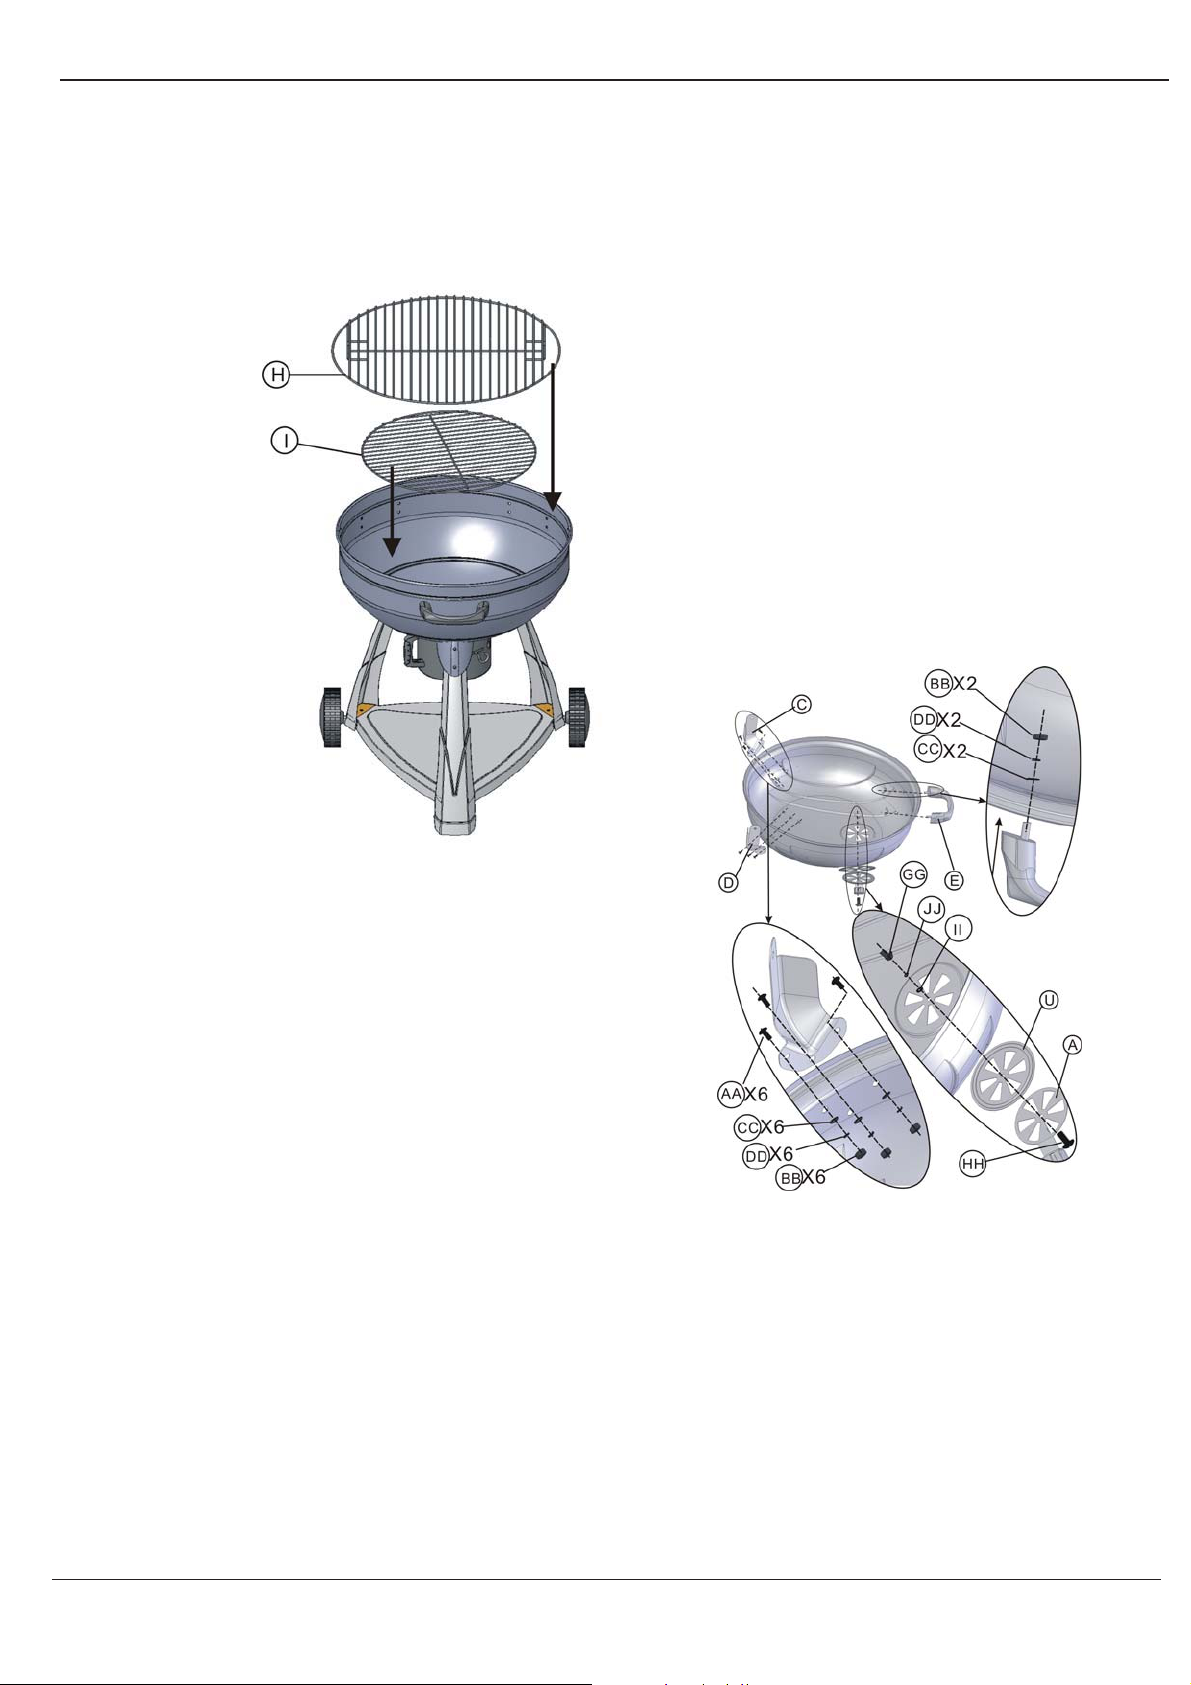
Step 6
1. Place charcoal grid (I) into fireboex (E)
2. Place cooking grid (H) onto charcoal
grid (I)
Step 7
1. Align the holes on the lid handle(E) with the
holes on the lid (B)
2. Insert one M6 nut (BB), flat washer (CC) and
spring washer (DD) into each pre-drilled holes
by hand
3. Aligh the holes on right up hinge (C) and left
up hinge (D) with the holes on the lid (B)
4. Insert one M6x12 bolt (AA), M6 nut (BB), flat
washer (CC) and spring washer (DD) into
each pre-drilled holes by hand
5. Attached lid vent base (U) and lid vent (A)
onto lid (B)
6. Insert M5 nut , flat waher (II) , spring washer
(JJ) and M5 x 12 bolt (HH) into each pre-
drilled holes
7. Go back tighen all the bolts using screwdriver
provided
8

Step 8
Insert hair pin (KK), lid pin(MM) and
M5 nut (NN).into each pre-drilled holes
as lest shown, keeping firebox (E) and
lid (B) connect together
Step 9.
1. Place warning rack support (G) onto
firebox (E)
2. Insert tip of the warmning rack onto
wall of lid (B) and firebox (E)
9
Step 10.
Open the lid (B)
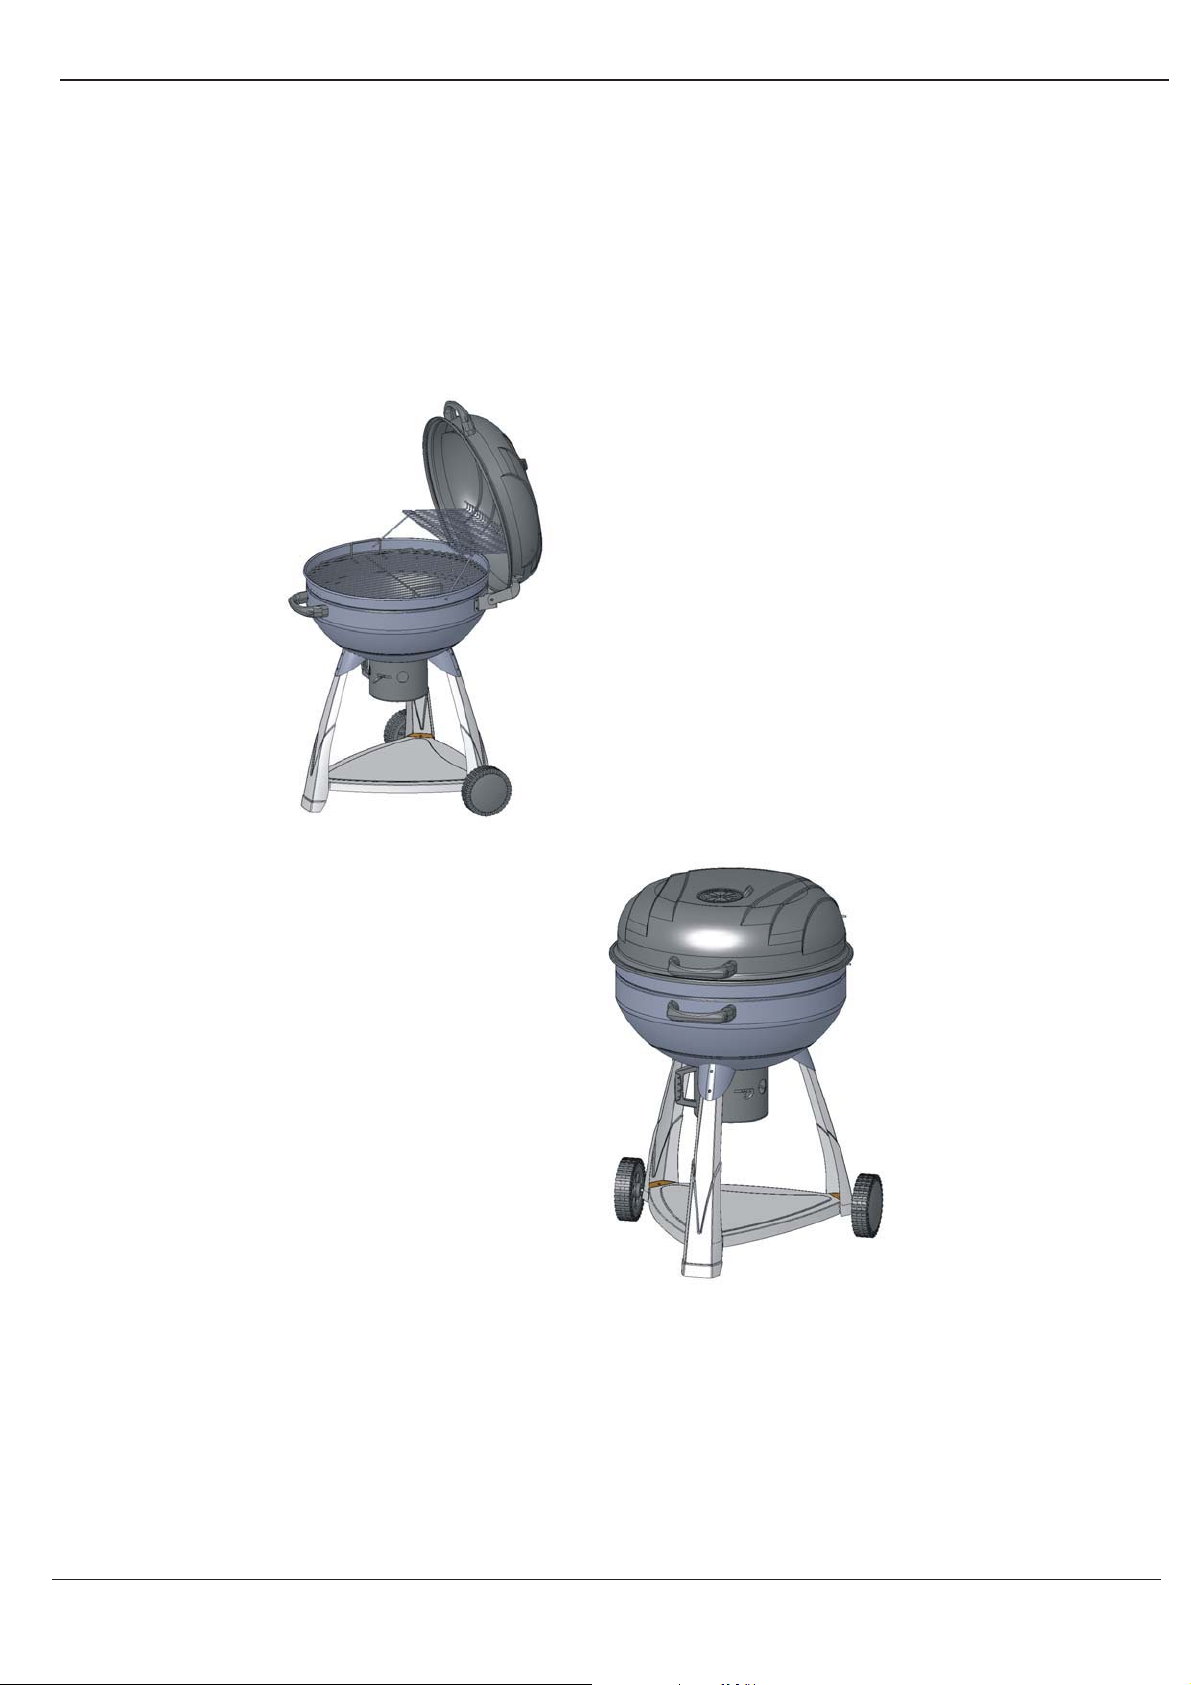
Step 11
All full assembly
10
Table of contents
Other Everyday Essentials Grill manuals

Popular Grill manuals by other brands


Kenmore
Kenmore 415.16123800 Use and care guide

Camp Chef
Camp Chef PG24CLAU Warning & instruction booklet

Tucker Barbecues
Tucker Barbecues GTR Series Assembly, installation and operating instructions

Monogram
Monogram ZGG540NCP1SS owner's manual

Equipex
Equipex Sodir Savoy Operation manual

Gaggenau
Gaggenau VR 414 610 use and care manual


