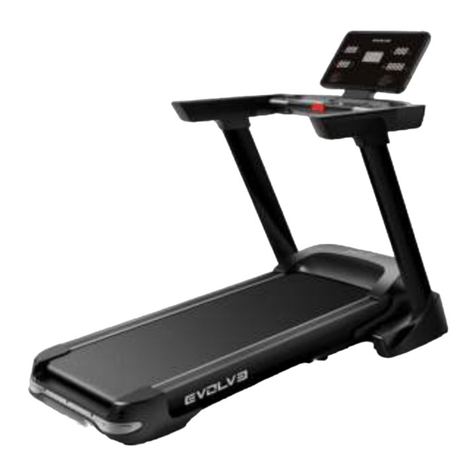
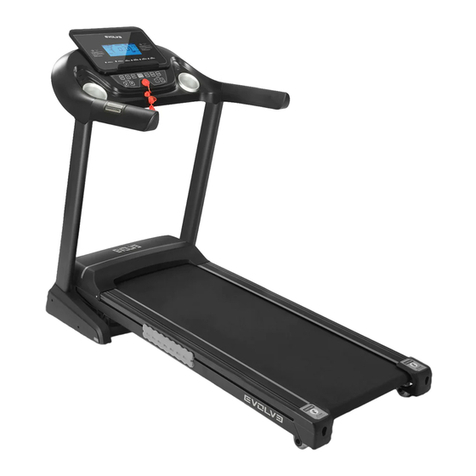
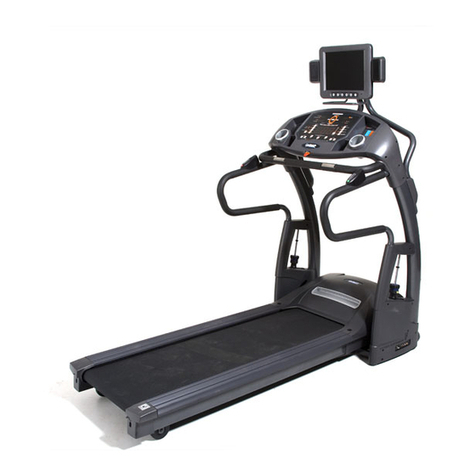
Evolve GTS9 User manual


Product Outline 03
Safety Instructions 09
InstallationInstrucions 11
OperationInstructios 13
Daily Maintenance 36
Warm-up Demonstration 38
CONTENTS
Warranty 42
........................................
........................................
........................................
........................................
........................................
........................................
........................................

3VOOJOH#FMU%FDPSBUJWFFEHF)BOESBJM4UPSBHF#PY4DSFFO)BOESBJM%FDPSBUJWFFEHF,OPC#VUUPO4UPSBHF#PY4BGFUZ,FZ1PXFS4XJUDIծ'VODUJPO*OEJDBUPS%JBHSBN
3www.evolve-fitness.eu

ծ"DDFTTPSJFT-JTU1BSUT/BNF(SBQIJDT25:4BGFUZ,FZ4QFDJDBUJPOT5IFXIPMFNBDIJOF4JMJDPOF0JM4DSFX,JU
www.evolve-fitness.eu 4

ծ4QFDJDBUJPOT$BUFHPSZ3FGFSFODFHSBQIJD.BYVTFSXFJHIU4QFFESBOHF1FBLIPSTFQPXFS4UBOEJOHTJ[F'PMEFETJ[F3VOOJOHCFMU/FUXFJHIU$PMPS)5,(LNI)1NNNNNN,(#MBDL
5www.evolve-fitness.eu

www.evolve-fitness.eu 6

/,67Serial
number
name Quantity Serial
number
name Quantity
1 pedestal 1 31 Power Switch 1
2 Left Column 2 32 Concave type socket 1
3 Right Column 1 33 Power Line 1
4 Ascension frame 1 34 Magnetic loop 1
5 Main Frame 1 35 Top cover of meter 1
6 Motor Support 1 36 Bottom cover of meter 1
7 electronic meter stand 1 37 Top cover of board 1
8 table core frame 1 38 Bottom cover of board 1
9 packaging stator 1 39 Rear trim cover 1
10 Running board 1 40 The speaker cap 1
11 Running belt 1 41 Button Fixing Cover 1
12 Front Roller 1 42 Button perspective cover 1
13 Rear Roller 1 43 Safety Lock Block 1
14 ribbed belt 1 44 The bottle holder 8
15 Gas Spring 1 45 The holder spacer 1
16 DC Motor 1 46 top cover of armrest-R/L 2
17 Incline Motor 1 47 Outer armrest cover-R/L 2
18 Compression Spring 1 48 Inner of armrest cover-R/L 2
19 PCB 1 49 Left Side Cover 1
20 Lower Controller 1 50 Right Side Cover 1
21 Grip Pulse 2 51 Top Cover of the Motor 1
22 Inclination Device 2 52 Bottom Cover of the Motor 1
23 MP3 Connection 1 53 Motor front cover 1
24 Safety Key 1 54 plastic regula 2
25 Communication line segment 1 55 side strip-L/R 2
26 Offline communication segment 1 56 Silicone Tank 1
27 Single Branch Line 150MM 2 57 Oil Filling Pipe 2
28 Single Branch Line 300MM 2 58 Oil Pipe Lining 1
29 Grounding Wire 300MM 1 59 R line buckle 4
30 circuit breaker 1 60 Rear protective Corner 1
7www.evolve-fitness.eu

Serial
number
name Quantity Serial
number
name Quantity
61 Interior trim cover of the rear protective
corner
1 91 Hexagon socket screw with half round
head M8*55
6
62 Side trim cover of the rear protective
corner R/L
2 92 Hexagonal socket screw with cylindrical
head M8*70
1
63 Adjustable Foot Pad 4 93 Hexagonal socket screw with cylindrical
head M8*60
3
64 Rubber Gasket 2 94 Hexagonal socket screw with cylindrical
head M8*12
2
65 Round cushion 2 95 Countersunk socket head screw M8*25 8
66 wheels for mobility 2 96 Cross large flat head screw M5*30 4
67 Adjustable Foot Pad 2 97 Cross head tapping screw ST3.0*8 14
68 Round cushion 8 98 Cross head tapping screw ST4.0*13 6
69 25*50 Square inner pipe plug 25*50 2 99 Cross head tapping screw ST4.0*16 73
70 Square inner pipe plug 30*70 2 100 Cross head tapping screw ST4.0*25 8
71 Plastic parts Sleeve 6 101 Cross head tapping screw ST4.0*30 6
72 edge buckle 8 102 Cross head tapping screw ST4.0*16 35
73 Thicker edge buckle 8 103 Cross head tapping screw ST4.0*16 18
74 M4 Flat gasket 7 104 Cross head tapping screw ST2.3*4 2
75 M8 Flat gasket 38 105 Cross large flat head screw M4*15 4
76 M10 Flat gasket 6 106 Hexagon socket screw with half round
head M6*15
1
77 M8 Spring Cushion 6 107 Hexagon socket screw with half round
head M6*30
4
78 M8 Lock nut 14 108 M6 Lock Nut 2
79 rotation shaft sleeve 1 109 M6 flat cushion 6
80 Corrugated pad 1 110 reinforcement plate of left bottle holder 1
81 Cross set screw 1 111 reinforcement plate of right bottle holder 1
82 Hexagon socket screw with half round
head M10*40
1 112 Meter Display PCB Board 1
83 Hexagon socket screw with half round
head M10*25
4 113 Oil connector Cover 1
84 Hexagon socket screw with half round
head M10*55
1 114 Oil refueling box 2
85 Hexagon socket screw with half round
head M8*20
10 115 M5 hexagon wrench 1
86 Hexagon socket screw with half round
head M8*30
1 116 M6 hexagon wrench 1
87 M10 Lock nut 6 117 Cross open spanner 1
88 Hexagon socket screw with half round
head M8*40
2 118 Silicone Oil 1
89 Hexagon socket screw with half round
head M8*45
1 119 Instruction Manual 1
90 Hexagon socket screw with half round
head M8*15 6 120
www.evolve-fitness.eu 8

Tips
Many safety issues are WDNHQLQWRFRQVLGHUDWLRQWKURXJKRXW design and
manufacturLQJSURFHVVof this product3lease follow the instructions
below, just in case:e will not bear any consequences caused by
abnormal operation.To ensure your safety and avoid accidents, please
read the instruction manual carefully before use.
1.1.When you start training with this product, please consider your physical condi-
tion, and train appropriately and regularly to ensure that you have enough physical
strength for training. Wrong or excessive training will not benefit your health.
1.2.This product is not suitable for children to use, nor is it suitable for people who
feel physically or mentally impaired or lack common sense in using it; unless they
get the person responsible for their safety and use the product under the supervi-
sion of the person in charge, children should Be supervised to ensure that they
will not play with the equipment to avoid accidents.
1.3.This product is suitable for home use, not suitable for professional training and
testing, and cannot be used for medical purposes.
1.4.If the power cord is damaged, it must be replaced by the manufacturer or
professional maintenance personnel in order to avoid danger.
1.5.Please check all parts before use to ensure that the screws and nuts are
locked.
1.6.Please wear comfortable tight-fitting clothes during use to avoid clothes being
hung by the machine; avoid all rotating parts with your hands, and it is forbidden
to put your hands and feet in the gaps under the running belt to avoid pinching.
1.7.Please put the product in a place with dry air, clean environment and flat
ground, avoid sunlight exposure, and do not place it in a humid or dusty place.
1.8.When the product is not in use for a long time, please VWRUH the product prop-
erly, and keep it DZD\IURPsun, moisture and LQDVDIHSODFH.
1.9.This product is for one person only when it is running.
1.10.If the product has a heart rate display, the heart rate display is a simulated
parameter for reference only and cannot be used as clinical medical data.
9www.evolve-fitness.eu

1.11.The safety lock is an emergency stop device, which acts as an emergency
stop when the product is in use. When the treadmill is not in use. Please place
the safety lock to prevent children and people who are not suitable for using the
treadmill from causing danger.
1.12.When using the treadmill in an emergency situation such as incorrect
speed or too fast, you should quickly pull down the rope clamped on the clothes
and connected to the machine safety lock, hold the handrails and jump off the
running belt, step on the treadmill to prevent slipSLQJ over the side strips.
1.13.Before using the treadmill, please ensure a safe distance of 2000x1000mm
behind the equipment.
1.14.Please use the accessories provided by the original factory, and it is strictly
forbidden to replace WKHP without permission.
1.15.This product is an HC grade product, and the maximum user weight is
150KG.
1.16.Executive standard: GB17498.1-2008 GB17498.6-2008.
4QFDJBMTBGFUZJOTUSVDUJPOT2.1. Put the treadmill in a place where the plug can be inserted into the socket,
and insert it into the socket without looseness.
2.2. Please use qualified sockets to avoid the danger caused by this.
2.3. If the plug and the socket are not compatible, please do not move the plug
and ask an electrician to handle it.
2.4. The voltage used is 220V-240V power supply.
2.5. Please do not let the power cord contact the drum, do not put the power
supply on the running belt, and do not use damaged plugs.
2.6. Please pull out the plug from the socket before cleaning and maintenance.
2.7. Warning: Failure to unplug the plug may cause personal injury and damage to
the equipment.
2.8. Please check each part before use.
2.9. Please do not use this product outdoors, under high humidity and sunlight.
2.10. Please turn off and unplug when leaving.
2.11. For your safety, the power plug of the machine must be grounded.
www.evolve-fitness.eu 10

1. Take the treadmill, instrument and accessories out of the packing box (Figure
1), and then remove the two fixing screws while holding the column and slowly pull
them to the fixing screw holes (Figure 2). Fix the column on the base with M8*20
screws, M8*55 screws and M8 flat washers (Figure 3). Use M8*20 screws and M8
flat washers to fix the electronic watch on the column (Figure 4).
&MFDUSPOJDXBUDIJOTUBMMBUJPOJOTUSVDUJPOT'JHVSF'JHVSF'JHVSF'JHVSF.TDSFXT.BUXBTIFST.TDSFXT.BUXBTIFST.TDSFXT.BUXBTIFST
11 www.evolve-fitness.eu

1. Remove the packaging fixing piece that fixes the frame and the base, being careful
not to injure people when the frame bounces. Use M4*15 screws to fix the left and right
side covers on both sides of the base and need to be locked (Figure 1).
$PMVNOBOEMFGUBOESJHIUTJEFDPWFSBTTFNCMZ.TDSFXT3.1 The safety lock is placed on the yellow position of the
electronic watch.
3.2 The assembly is completed (Figure 5).
3.3 Finally, after all the accessories are assembled,
Please make sure all screws have been tightened before
can use.
0UIFSQBSUTBTTFNCMZ'JHVSF
www.evolve-fitness.eu 12

1.1. First place the treadmill on a horizontal open ground.
1.2. Turn on the power, turn on the power switch, the power switch indicator will
light up, and then the buzzer will sound once.
1.3. Check whether there is any abnormality in the data displayed on the screen,
and stand on the non-slip edge strip before clicking Start to prevent accidental falls.
1.4. Place the safety lock in the designated position on the meter, and clip the
safety lock clip to \RXU clothes (note: Dposition where the safety lock rope is not
easy to touch when the hands swing GXULQJ running), and then prepare to start the
treadmill.
1.5. Start button: While still, press the middle knob to start the treadmill, the display
window will bounce and display the number 3 times WR startWKH preparation, and the
buzzer will beep every time:KHQ the motor VWDUWVrunning, the machine startV.
(Note: If the armrest area of the model you purchased has a "start button", it is
equivalent to the start button on the button panel)
1.6. Stop button: During running, press the middle knob to stop the treadmill, and
the treadmill speed will decrease from your current maximum speed to Dstop.
(Note: If the armrest area of the model you purchased has a "stop button", it is
equivalent to the button panel stop button)
1.7. Speed adjustment key: Turn the middle knob to adjust the speed, the clock-
wise GLUHFWLRQ will add the speed to your suitable speed range, the counterclockwise
GLUHFWLRQ can reduce the speed to your suitable speed range (Note: as the armrest
of the model you purchased There are "speed plus and minus buttons" in the area,
which is equivalent to the speed plus and minus buttons on the panel)
1.8. ,QFOLQH adjustment key: press theLQFOLQHplus minus key to adjust the slope
size, press the LQFOLQH plus key to increase theLQFOLQH to your suitable slope range,
and press the LQFOLQH minus key to reduce the LQFOLQH to your suitable slope range
(Note : If the armrest area of the model you purchased has "up and down buttons",
it is equivalent to the speed up and speed down buttons on the button panel)
1.9. Red safety lock: any time the red safety lock is pulled off, the treadmill will stop
immediately
#BTJDPQFSBUJPOJOTUSVDUJPOTWhen you are using the treadmill, for your safety, you must use a ground-
ed power outlet.
13 www.evolve-fitness.eu

2.1. Stand on the running belt and start the treadmill.
2.2. Start the treadmill without using the safety lock correctly.
2.3. After starting, jump on the running belt that is rotating.
2.3. When the treadmill is running at high speed, enter the treadmill to run.
2.4. Treadmills are used by minors, persons with limited mobility or other persons
who are not suitable for treadmill use.
8SPOHTUBSUVQNFUIPE3.1. Please read the insert instructions to connect the mobile APP to the treadmill
(only for some models with this function).
"11DPOOFDUJPONFUIPENo. Mark Function Description
Volume -φReduce the volume of music or videoȾ
Slope plus or minusφAdjustable range of 0-15 segments Adjustment amplitude value is 1 SDUDJUDSKWLPH. Hold for more than 0.5 seconds, automatic continuous increment/decrement.
Last φPlay the previous piece of music or video
Volume +φIncrease the volume of music or videoȾ
NextφPlay the next music or video
Home: Can be returned from any interface to the main
interfaceδ([FHSt main LQWHUIDFHε
Back: Can be returned to the previous level interface
INCLINE
HOME RUTURN
0QFSBUJPOJOTUSVDUJPOTGPSQBOFMLFZT2
1
5
76
3
4
www.evolve-fitness.eu 14

15 www.evolve-fitness.eu

www.evolve-fitness.eu 16

17 www.evolve-fitness.eu

Quality Guarantee Commitment
Song1
Greenindicatesthe
White
indicatesthesongtobe
selected
Start playing music Play music according to the
song list
Stop play music Random play of the song list
Play the previous Loop
Play the next Move the bar to the left or
right to change the progress
of the music.
Press
ƒ
Control directory
Play the previous video Click on the video
being played to full
www.evolve-fitness.eu 18

19 www.evolve-fitness.eu
Table of contents
Other Evolve Treadmill manuals
