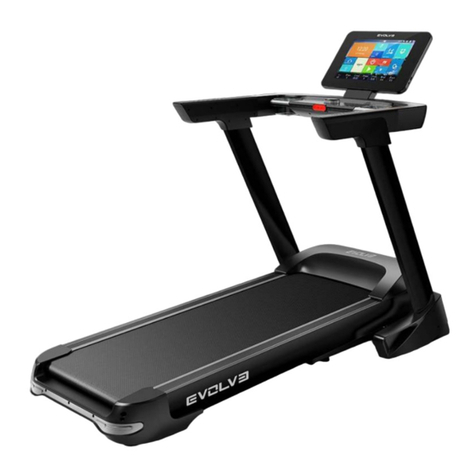
Evolve HT-200 User manual


CONTENT
9ZX[IZ[XKUL6XUJ[IZY
9GLKZ_/TYZX[IZOUTY
9ZKVYUL'YYKSHR_
5VKXGZOTM/TYZX[IZOUTY
*GOR_3GOTZKTGTIK
=GXSOTM;V
7[GROZ_-[GXGTZKK)USSOZSKTZ
················
················
················
················
················
················
01
06
08
10
12
13
18

9ZX[IZ[XKUL6XUJ[IZY
1.Product Outline
Screen
Bottle Holder
Emergency Key
HandrailV
Running Belt
Side rail
Bottle Holder
HandrailV
Side rail
1 www.evolve-fitness.eu

1
1
1
1
2
2
2.Configuration List
QuantityPictureName
Complete machine
Instruction
Emergency Key
Screws Bag
Silicone oil
Side cover
2 www.evolve-fitness.eu

Net Weight
Running Area
Folded Size
Expand Size
Peak Motor
Speed Range
Maximum Load
Pictures
3.Product Parameters
62KG
450*1280mm
1010*770*1355mm
1660*770*1290mm
3.5HP
1-14.8km/h
120KG
Single-function
Black
Category
Product Color
3 www.evolve-fitness.eu

ExploGHG Diagram
0XOWLIXQFWLRQDOLWHPVDUHQRWLQFOXGHG
4 www.evolve-fitness.eu

List of Explosion Diagram
6KJKYZGR 8KJ')IUTTKIZOUTROTK 9OJKHGXH[IQRK
2KLZ)UR[ST ')IUTTKIZOUTROTK /TYZGRRGZOUTULX[HHKXVGXZY
)UR[ST 6GTKRULKRKIZXUTOISKZKX 8Z_VKIRGSV
9GLKZ_RUIQ (UTKLUGS
3GOTLXGSK '[JOUIGHRK .GRLXU[TJNKGJNK^GMUTYUIQKZNKGJIGVYIXK]3
+RKIZXUTOISKZKXYZGTJ +RKIZXUTOI]GZINOTYKXZ ƶZ灤GZVGJ
9[VOTKY[VVUXZ 1K_HUGXJ ƶZYVXOTMVGJ
9[VVUXZULeSGYYGMKX NUXT 3IXUYYIUSHOTGZOUTYIXK]]OZNYVXOTM]GYNKXGTJ灤GZ
]GYNKX
)USS[TOIGZOUTROTK 3RUIQT[Z
)USS[TOIGZOUTROTKNURJOTMNKGXZXGZK
ROTK 3RUIQT[Z
2OLZSUZUX IUTZXURRKX .GRLXU[TJNKGJNK^GMUTYUIQKZNKGJIGVYIXK]3
:UVIU\KXULKRKIZXUTOI]GZIN .GRLXU[TJNKGJNK^GMUTYUIQKZNKGJIGVYIXK]3
8[TTOTMHUGXJ 2U]KXIU\KXULKRKIZXUTOI]GZIN .GRLXU[TJNKGJNK^GMUTYUIQKZNKGJIGVYIXK]3
,XUTZJX[S =GZINIUXK[VVKXIU\KX 3ZNXKGJRKTMZNYKSOIOXI[RGXNKGJNK^GMUTYIXK]
8KGXJX[S 2U]KXIU\KXUL]GZINIUXK 3ZNXKGJRKTMZNYKSOIOXI[RGXNKGJNK^GMUTYIXK]
/6GJHXGIQKZ 3ZNXKGJRKTMZNYKSOIOXI[RGXNKGJNK^GMUTYIXK]
J[SHHKRR 2KLZ6[GXSXKYZ 3ZNXKGJRKTMZNYKSOIOXI[RGXNKGJNK^GMUTYIXK]
SS2YNGVKJNK^GMUT]XKTIN 8OMNZ6[GXSXKYZ 3ZNXKGJRKTMZNYKSOIOXI[RGXNKGJNK^GMUTYIXK]
SS2YNGVKJNK^GMUT]XKTIN )UR[STRKLZIU\KX 3ZNXKGJRKTMZNYKSOIOXI[RGXNKGJNK^GMUTYIXK]
)XUYYUVKTKTJ]XKTIN )UR[STXOMNZIU\KX XU[TJNKGJNK^GMUTYUIQKZNKGJIGVYIXK]3
3UZUX[VVKXIU\KX XU[TJNKGJNK^GMUTYUIQKZNKGJIGVYIXK]3
8[TTOTMHKRZ 3UZUXRU]KXIU\KX 3L[RRZUUZNIU[TZKXY[TQNKGJNK^GMUTYIXK]
3[RZOMXUU\KHKRZ 2KLZXKGXIUXTKXM[GXJ 9ZIXUYYMXUU\KVGTNKGJZGVVOTMYIXK]
˟˟GJP[YZGHRKLUUZVGJ 8OMNZXKGXIUXTKXM[GXJ 9ZIXUYYMXUU\KVGTNKGJZGVVOTMYIXK]
˟3XU[TJI[YNOUT 6RGYZOIKJMOTM 9ZIXUYYMXUU\KVGTNKGJZGVVOTMYIXK]
8[HHKXYW[GXKMGYQKZ 9ZIXUYYMXUU\KVGTNKGJZGVVOTMYIXK]
,XGSKJGSVOTMVGJ 2[SHGXJOYI 9ZIXUYYRGXMK灤GZNKGJYKRLJXORROTMYIXK]]OZNVGJ
3GMTKZOIXOTM +W[OVVKJ ]OZN ˟ Z XU[TJ VOVK
VR[M 9ZIXUYYRGXMK灤GZNKGJYKRLJXORROTMYIXK]]OZNVGJ
6U]KXe +W[OVVKJ]OZNZYW[GXKVOVK
6GXZ4U 4GSK 7Z_ 6GXZ4U 4GSK 7Z_ 6GXZ4U 4GSK 7Z_
(RGIQ
8OMNZ
2OLZOTMLXGSK
3UZUXY[VVUXZ
3UZUX
3GYYGMKX
-GYYVXOTM
.KGXZXGZKYZKKR
.KGXZXGZKMXOV
)UXJ (UZZRKJYOROIUTKUOR
OTYZX[IZOUTY
VR[M
6U]KXIUXJH[IQRK ˟˟IX_YZGR]NKKR
5\KXRUGJVXUZKIZUX ˟˟SUHORK]NKKR
8UIQKXY]OZIN 6RGYZOIYVGIKXYRKK\K
5 www.evolve-fitness.eu

9GLKZ_/TYZX[IZOUT
1.Safety Instruction
Many safety problems are WDNHQLQWRconsiderDWLRQ WKURXJKRXW design and manufacturing SURFHVV, but please
still operateaccording to the instruction below just in case. We are not responsible for any consequences
caused by abnormal operation.
1.1.Please consider your physical condition when training with the product, and train in an appropriate and regular
way to ensure that you have enough physical strength. Wrong or excessLYH training will be harmful to your health.
1.2.This product is unsuitable for children. Those that feel unwell or are mentally defective and lack common sense
of use shall not use the product unless under guardianship or guidance of people responsible for their safety. Chil-
dren shall be prevented from fiddling with the equipment.
1.3.This product is suitable for home use DQGQRWIRU professional trainingtest or medical treatment.
1.4.The damaged power line must be replaced by manufacturer or professional maintenance personnel to prevent
danger.
1.5.Please inspect all components and ensure that screws and nuts are tightened before use.
1.6.Please wear comfortable tight clothes when using the product to prevent the clothes from being hooked by the
machine. Don’t let kids or pets play nearby to avoid accidents.
1.7.Please place the product on smooth, clean and flat ground, ensure that there is nothing sharp nearby and don’t
use it near Dsource of water and heat.
1.8.Please place the product properly, and NHHSLWDZD\ from GLUHFWsunOLJKW, KXPLGDUHDV.HHSLWLQD safe storage
SODFH when the product is not used for a long time.
6 www.evolve-fitness.eu

1.9.This product can only be used by one person DWDWLPH.
1.10.Heart rate display of this product does not provide data for clinical medicine.
1.11.The emergency key will act as an emergency stop when the product is using. Please place the key when the
treadmill is not used to prevent children and people who are not suitable for using the treadmill from causing
danger.
1.12.Please quickly pull down the rope clamped on the clothes and connected to the machine when the treadmill in
an emergency situation such as incorrect speed or too fast. Then please jump off the running belt and step on the
anti-skid edges on the left and right sides of the treadmill by holding the handrails.
1.13.Please ensure a safe DUHD of 2000x1000mm behind the treadmill.
1.14.Please use accessories provided by the factory and don’t replace them without permission.
1.15.This product is HC product. The weight of user is not more than 120kg.
1.16.Executive standard:GB17498.1-2008 GB17498.6-2008。
2.Special Safety Instruction
2.1.Place the treadmill where the plug can reach the socket. ,nsert the power line GLUHFWO\into socket and keep it firm.
2.2.Please use qualified socket to avoid consequential danger.
2.3.Please ask the electrician to deal with it instead of moving the plug if the plug and socket are incompatible.
2.4.220V—240VAC power source is used.
2.5.Please keep power line away from roller, and don’t place power source on running belt or use damaged plug.
2.6.Please pull the plug out from the socket before cleaning and maintenance.
2.7.Warning: failing to pull out the plug may cause personal injury and damage to equipment.
2.8.Please inspect each component before use.
2.9.Please don’t use the product outdoors, at high humidity and in the sunshine。
2.10.Please turn off the machine and pull out the plug when leaving.
2.11.The power plug must be grounded.
7 www.evolve-fitness.eu

Picture 4
9ZKVYUL'YYKSHR_
1.Assembly of single-function
1.Take it out of the box (picture 1); hold the electronic meter and slowly lift it to fixed screw hole (picture 2); fix
M8*20 screw and M8 flat gasket on left and right columns (picture 2).
Picture 1 Picture 2 M8*20 screw M8 flat gasket
2.Lift electronic meter (picture 3); Fix electronic meter onto column with M8*20 screw and M8 flat gasket; Fix column
onto pedestal with M8*55 screw and M8 flat gasket; Fix left and right side covers on both sides of columns.( picture 4)
Picture 3
M8*20 screw
M8 flat gasket
M8*55 screw
M8 flat gasket
4.2*16 screw
Left side cover
Right side cover
4.2*16 screw
8 www.evolve-fitness.eu

5VKXGZOTM/TYZX[IZOUT
1.Operating instructionVof treadmill
Power socket with ground line must be used for your safety when you use the treadmill.
1.1.Place the treadmill on a level open ground.
1.2. Insert power plug into socket and turn on power switch a (light turns red). You will hear “beep” and window on
instrument panel displays;
1.3.Check whether the data displayed on the screen is abnormal,and stand on the anti-slip side rail before
clicking start to prevent accidental falls.
1.4.Place emergency key at yellow position of instrument panel and clamp the emergency key onto your clothes,
(Notes:The position where the emergency key clamped is not easy to be touched when running)then start the
treadmill.
9 www.evolve-fitness.eu

1.5. “START” button: Press this button to start the treadmill. The display window bounces to show the number of
starting preparation 3 times, and the buzzer will beep every time when it is subtracted, after that the motor runs and
the machine starts. (Notes: If the handrail area of the model you purchased has a "start” button, it is equivalent to
the start button on the panel)
1.6. “STOP” button: Press this button to stop the machine and then the machine will stop smoothly. The speed will
decrease from your current maximum speed to stop. (Notes: If the handrail area of the model you purchased has a
"stop” button, it is equivalent to the stop button on the panel)
1.7. “SPEED” button: Adjust the speed. Press the speed plus button to increase the speed and press the speed
minus button to reduce the speed. (Notes: If the handrail area of the model you purchased has "speed” buttons,
they are equivalent to the buttons on the panel)
1.9. SPEED (3,6,9,12): Adjust the speed quickly.
2.Wrong operation
2.1.Start the treadmill when you are standing on the belt.
2.2.Start the treadmill before connecting emergency key correctly.
2.3.Jump on the treadmill after starting the treadmill.
2.4.Start to run when the treadmill is running quickly.
2.4.The treadmill is not suitable for minors, disableGpeople or those who are not fit to use treadmill.
10 www.evolve-fitness.eu

*GOR_3GOTZKTGTIK
1.Adjustment of running belt
1.1 Adjustment of running belt is equipped with two functions: adjustment of degree of tightness and central
position of running belt. The running belt has been adjusted when leaving the factory, but it will beFRPH stretched
after use to deviate from central position to cause damage by wearing trim strip and rear protecting cover. It is
normal to stretch the running belt in use.If the running belt is slip or not smooth when you use the treadmill, you
can improve it by adjusting degree of tightness of running belt.
1.2 How to adjust running belt
1) Insert 5mm hexagon wrench into the regulating screw on the left of running belt, and turn the wrench by 1/4 of a
circle clockwise to regulate the rear roller to tighten the running belt.
2) Repeat step 1 to adjust the screw on the right. Ensure that the regulating screw is turned by the same distance to
make the rear roller parallel with the frame.
3) Repeat step 1 and 2 until the running belt does not slip.
4) Note: the running belt shall not be too tight, which will damage the running belt, roller bearing, etc., increase
pressure of front/rear roller, and bring abnormal sound or other problems. To reduce tension of running belt, please
turn the wrench anticlockwise by same distance on both sides.
Notes:
Please don’t clean the treadmill with sandpaper or solvent. The controller of treadmill shall not be
directly exposed to sunlight or dampQHVV to prevent damage.
Don’t expose electronic elements to sunlight or dampQHVV.
Frequently inspect and lock all parts of treadmill and immediately replace the damaged parts.
11 www.evolve-fitness.eu

2. Adjust running belt to the middle
2.1 When you use the treadmill, the force of feet is different, and pressure on running belt is unbalanced, which
makes the running belt deviate from the center. Such deviation is normal. It will return to the center when nobody is
running on the running belt. You need to adjust it to the center if it fails to return to the center.
2.2.How to adjust running belt to the middle?
1) Keep the treadmill in no-load running and adjust speed to 6KM/H.
2) Observe the distance from running belt to left and right side rail.
If the running belt tilts towards the left, turn the left screw by 1/4 of a circle clockwise with Allen wrench;
If the running belt tilts towards the right, turn the right screw by 1/4 of a circle clockwise with Allen wrench;
If the running belt is still not in the middle, repeat the above steps until it is in the middle。
3)Adjust speed to 16KM/H after adjusting running belt to the middle, and observe deviation of running belt and
smoothness of running. Repeat steps of adjustment in case of deviation.
4)Warning! Please don’t tighten the roller excessively! This will cause permanent damage to the bearing!
You need to tighten the running belt again if the above steps fail to reach the effect.
Notes: The running belt is the most easily worn part in operation. Please immediately replace the damaged parts.
=GXSOTM;V
1.The importance of warming up before exercise:
1.1 A successful exercise plan must include warm-up, aerobic and soothing exercises; exercise intensity should be
performed at least two or three times a week and exercise one day and rest one day. After a few months, you can
increase the exercise intensity to four or five days each week.
1.2 Dynamic stretching is a kind of stretching that approximates the body movement mode, which is beneficial to
the improvement of the overall condition of the body, and has the functions of activating muscles, improving muscle
elasticity and excitability.
12 www.evolve-fitness.eu

1.3 Lack of stretching can lead to muscle tension and decreased elasticity,resulting in increased local pressure,
local inflammatory factors, metabolic waste can not be discharged in time, making fatigue recovery slower. The
body always wears fatigue and then carries out the next training, which is easy to cause fatigue accumulation and
cause pain.
2.Warm up before exercise:
2.1 Stand upright and step:
This action will make you feel stretched. straighten your back and put your arms on both
sides of your body. Step forward, raise your left and right knees to the waist height and lift
your arms up. Take 20 steps forward each time. Rest for 1 minutes, then repeat 2 times.
2.2 Dive forward and bend your elbow to the instep:
The left foot with a big bow step forward, while keeping the right knee off the ground. Put
your right hand on the ground, then move your left elbow to your left instep. Move your left
hand to the outside of your left foot and place your hands on the floor, make your hips up.
Then move your right foot forward and get up. Do 10 times on each leg.
2.3 Rotate your hips and knees:
Lying flat, knees bent, feet on the ground, arms stretched out on both sides. Rotate to the
left and keep your legs bent until the left knee touches the ground. Then rotate to the right
until the right knee touches the ground. Repeat 10 times on each side.
13 www.evolve-fitness.eu

3. Stretch after exercise:
2.4 90/90 degree stretch:
This action can stretch the torso and back muscles, the body facing the left side, legs
close together, knees at a 90 degree angle. A towel is placed between the knees and the
arms are stretched out. Then, keep your knees and hips still, rotate your torso and right
arm backwards, and try to land your right shoulder. Exhale for 2 seconds and then return
to the initial position. Do 10 times on both sides.
2.5 Walking with both hands:
Straighten your legs, bend over, and put your hands flat on the floor. Take your abdomen
and let your hands move forward. At this time, both legs can not bend, hands on the
ground, and feet forward a few steps(the knees can't bend). Do it for 1 minute in a row.
This exercise will exercise the tendons, lower back, rear gluteal muscles and calf mus-
cles.
3.1 Shoulder stretch:
This is a simple and effective stretching exercise, especially stretching the muscles
around the shoulder joint. Practice: Standing with your feet at the same width as your hips
and slightly bend your knees. Turn your left hand over your body and bend your elbow
slightly. Fixed to the left elbow with your right hand, then lean your left arm against your
body until you feel the muscles of your shoulders are tight. Repeat the same action on the
other side.
14 www.evolve-fitness.eu

3.2 Stretch the triceps muscle of arm::
Action points: bend the left arm behind the head, the right palm to hold the left elbow, and
use the force slightly to pull the left elbow to the right as much as possible. Feel the
stretch of the triceps on the posterior side of the left arm.
3.3 chest stretch:
This action is mainly to stretch the muscles on the upper edge of the chest, which can
relax the muscles and increase the softness. Practice: Stand next to a stable upright sup-
port. After placing one hand on the support, keep the upper arm and shoulder at the same
level. Push your body forward slowly until your chest muscles stretch.
3.4 calf stretch:
Practice: Take a standing position about a large step in front of the wall, push the wall with
your hands, and stand with your feet at the same width as your hips. Stretch your left leg
forward and bend your knees, and keep your left knee directly above your feet, do not
skew to one side. You will feel that the right calf muscles are stretched. Change the other
side to stretch the left calf.
15 www.evolve-fitness.eu

3.5 Quadriceps stretching
Action essentials: Stand firm, lift the other foot back, use the same side of the hand to
gently support the ankle, slowly close the calf to the thigh, gently touch the hip. After
about 10 seconds, change the other foot to stretch. During the process, the upper body is
straight and the lower limbs are bent gently to avoid the knees stretching too much
3.6 Back muscle stretching
Action essentials: The two feet are close together and stand one meter away from the
support surface. The hip is the same height as the shoulder. Extend your arms to your
head. Keep your arms and legs straight, bend your hips, and stretch your back. Grab the
support surface with your hands, exhale, push down on the support surface to form the
back bow. Hold for 10 seconds and do 4 sets of actions.
16 www.evolve-fitness.eu

7[GROZ_-[GXGTZKK)USSOZSKTZ
Notes: Please don’t send the product to our company before our customer service personnel confirm. We
refuse to bear any expenses if you send back the product without permission.
Warranty:
We ensure that this product is made from high-quality materials.We will repair the product if it has problems in normal
use.Warranty period is 1 year (from the date of purchase). If the product you purchase has quality problems, please
contact with our customer service in 12 months. Please don’t deal with the problems without permission. Weare
responsible for repair of the following accessories: frame, wires, foam on armrest, motor, moving wheels, etc.
The following cases are beyond the scope of warranty:
2.1 Damage for external reasonV
2.2 Use RInon-original accessories
2.3 ,QFRUUHFWKDQGOLQJ by yourself
2.4 FailLQJ to operate as instructed
2.5 Quick-wear parts will not be repaired or replaced iQFDVHRIQRUPDOZHDUDQGWHDU, such as running belt, etc.
Please contact with our customer service personnel to buy accessories beyond scope of warranty and provide the
information below when ordering:
3.1 Instruction.
3.2 Model of treadmill.
3.3 Serial number of accessory.
3.4 Proof of date of purchase
17 www.evolve-fitness.eu

Table of contents
Other Evolve Treadmill manuals
Popular Treadmill manuals by other brands

Coopers of Stortford
Coopers of Stortford J218 Instructions for use
Christopeit Sport
Christopeit Sport TM550S Assembly and exercise instructions
NordicTrack
NordicTrack T5.7 NTL61011.1 user manual

FYC
FYC JK30F-9 manual

Beny Sports
Beny Sports Xer-Fit Assembly & user manual
Nautilus
Nautilus T684 Assembly and owner's manual

Paramount Fitness
Paramount Fitness 7.55T owner's manual

SPORTS ART
SPORTS ART T645L owner's manual
Christopeit Sport
Christopeit Sport TM 5000S Assembly and exercise instructions
KingSmith
KingSmith WalkingPad R1 user manual
Bodyworx
Bodyworx JX325 operating instructions

Stairmaster
Stairmaster ClubTrack 510 user guide
