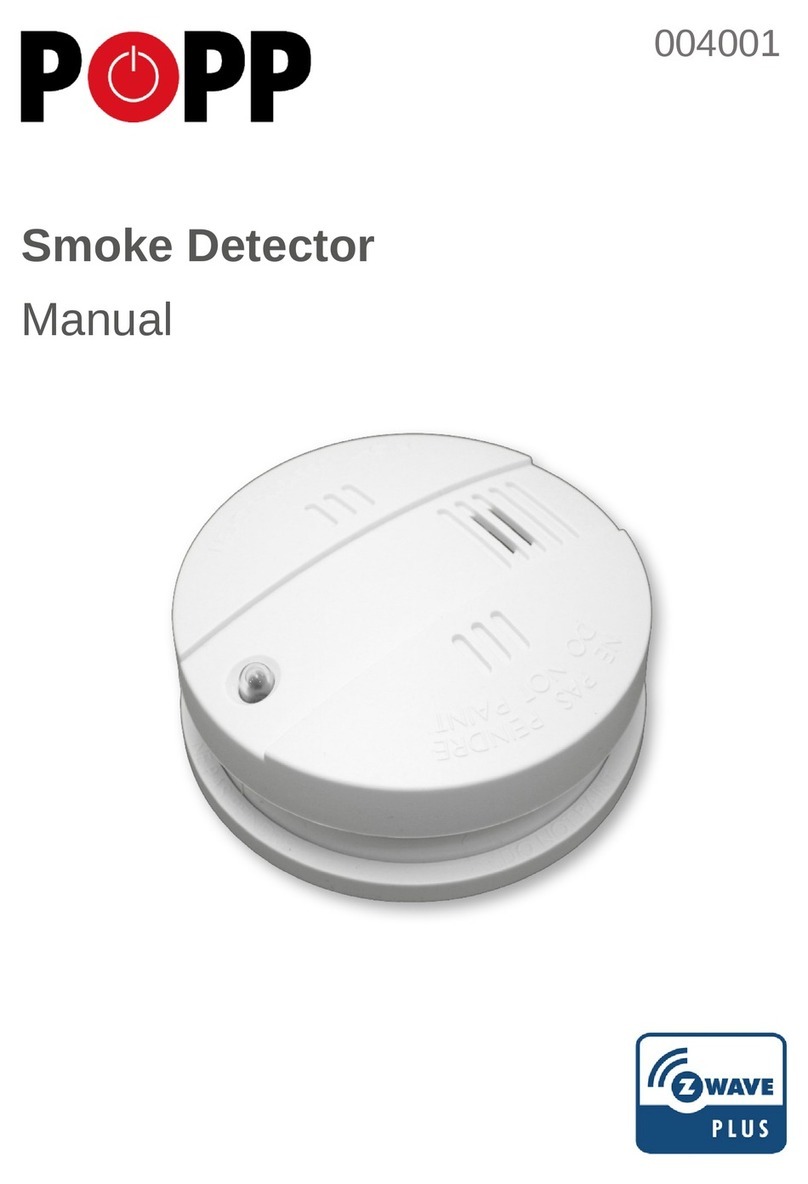
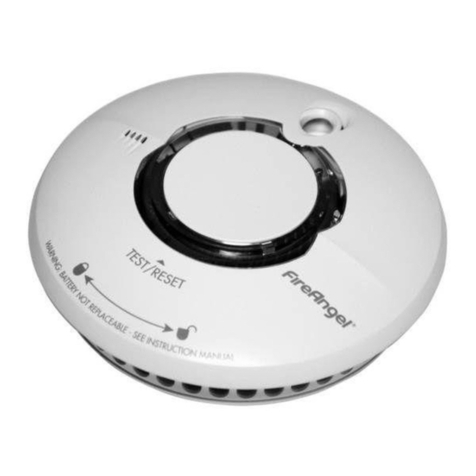
Exigent EX20 SMK User manual

1
Combination Alarm
• Photoelectric Smoke Sensing
• Rate of Rise Temperature Sensing
• Fixed Temperature Sensing
• with multiLINX Wireless Connectivity
MADE IN THE U.S.A.
SIGNALING
LISTED
EX20 SMK
Instruction Manual
DRAFT ONLY
Smoke Manual with FCC and IC Statement.indd 1 8/5/2013 11:59:10 AM

23
What Makes the Exigent Alarm Different?
About Your New Dual Sensor Photoelectric Smoke Alarm
Thank you for purchasing the Exigent EX20 SMK Smoke Alarm. Smoke alarms
play an important role in protecting your family and home from the dangers of
fire. Please carefully read and follow the information in this booklet to ensure
that your alarms operate properly and are located in the areas best suited for
activation.
Illuminated status
icons for Power,
Warning, Radio, and
Fire
Two modes of electronic
temperature sensing for a
very fast response
Dual functioning test
and silence button
Easy to access and
clean smoke chamber
with bug screen
Attractive and durable
materials for a sturdy,
high-quality alarm
General Information About Your New Dual Detector Smoke Alarm ............ page 3
Contents of your Kit ................................................................................... page 4
Recommended Locations for Your Smoke Alarm ......................................... page 5
Areas Not Appropriate for Smoke Alarms ................................................... page 6
National Fire Protection Association Standards ........................................... page 7
Complete Home Fire Protection .................................................................. page 8
Acceptable multiLINX Alarm Spacing .......................................................... page 8
Alarm Features and Functions .............................................................. page 9 - 10
Deactivating your EX20 Smoke Alarm ....................................................... page 11
Creating Your multiLINX Network ............................................................. page 12
Adding an Alarm to Your multiLINX Network............................................ page 13
Removing an Alarm from Your multiLINX Network ................................... page 14
Choosing the Mounting Location in a Room ............................................ page 15
How to Mount the Battery Powered Smoke Alarm ............................ page 16 - 17
How to Wire and Mount the AC Powered Alarm ...................................... page 18
Cleaning the Alarm ................................................................................... page 19
Alarm Specifications ................................................................................. page 20
Important Fire/Emergency Safety Information ......................................... page 21
Warning! Limitations on Smoke Alarms .................................................... page 22
Limited Warranty ...................................................................................... page 23
Replacement Guarantees .......................................................................... page 24
Exigent recommends a combination of early-detecting Smoke Alarms, CO
Alarms and reliable Heat Alarms installed in their appropriate locations
throughout the home.
Heat and Smoke Alarms are not a substitute for an adequate homeowner’s
fire insurance policy.
Table of Contents
Frequency hopping
for superior radio
communication
Smoke Manual with FCC and IC Statement.indd 2-3 8/5/2013 11:59:27 AM

45
AC
Version
Only
Contents of Your Kit
Please make sure the following is included in your kit:
Alarm
Instruction
Manual
Mounting Bracket
Wire Harness
Wire Nuts
Key Features
• The latest photoelectric smoke sensing technology.
• Electronic temperature sensing with Rate of Rise and Fixed Temperature triggers.
• Radio communication that connects all EX20 alarms into a mulitLINX Network.
• Powered by a sealed, long-life Lithium Manganese battery.
• Easy maintenance with a quick-twist removable smoke chamber design.
• Four illuminated icons to demonstrate alarm status.
• Multi-function button to allow for testing and silencing of unwanted triggering.
• Uniquely loud horn to notify occupants of fire danger.
• Top quality construction to ensure beautiful appearance and durability.
Battery
Version
Only
Plastic Anchors (2)
1” Screws (2)
Bedrooms. A major threat from fire occurs
at night when people are sleeping. Smoke
alarms are required protection in all sleeping
rooms.
Living Rooms. To enhance safety, a smoke
alarm should be located in the living room of
a home.
Recommended Locations for your Smoke Alarm
Recreation and Dining Rooms. For
additional protection, a smoke alarm can
be located in the other living spaces of the
home.
Hallways. A principal threat to people
sleeping in bedrooms comes from fires
elsewhere in the home. A smoke alarm
is required to be located outside of each
sleeping area, and on every level of the home.
Basements. A smoke alarm is required
on every level of the house, including the
basement near the stairway leading to the
floor above.
Smoke Manual with FCC and IC Statement.indd 4-5 8/5/2013 11:59:28 AM

67
Areas Not Appropriate for Smoke Alarms
Kitchens. Do not install near kitchen
appliances. Steam and by-products of
cooking might cause nuisance alarms.
Garages. Do not install in garages.
Exhaust gases from vehicles can trigger
the smoke alarm.
Attics. Do not install in attics. A
smoke alarm can be affected by dust,
small insects or high temperatures. Do
not install the alarm in areas where
the normal ambient temperature can
exceed 100°F (38°C).
Utility and Furnace Rooms. Do not
install close to equipment that can create
steam and gas. Steam and gas can
trigger the smoke alarm.
National Fire Protection Association Standards
This equipment should be installed in accordance with the National Fire
Protection Association’s Standard 72 (National Fire Protection Association,
Batterymarch Park, Quincy, MA 02269).
For your information, the National Fire Protection Association’s Standard 72,
2013 Edition, Section 29.5.1 covering required protection in One- and Two-
Family Dwelling Units, reads as follows:
29.5.1.1 Required Detection. Where required by other governing laws, codes,
or standards for a specific type of occupancy, approved single- and multiple-
station smoke alarms shall be installed as follows:
(1) In all sleeping rooms and guest rooms.
(2) Outside each separate dwelling unit sleeping area, within 21 ft (6.4 m) of
any door to a sleeping room, with the distance measured along a path
of travel.
(3) On every level of the dwelling unit, including basements.
(4) On every level of a residential board and care occupancy (small facility),
including basements and excluding crawl spaces and unfinished attics.
(5) In the living area(s) of a guest suite.
(6) In the living areas(s) of a residential board and care occupancy (small
facility).
A.29.5.1 (NFPA 72 2013 Edition) “Are More Smoke Detectors Desirable?
The required number of smoke detectors might not provide reliable early
warning protection for those areas separated by a door from the areas protected
by the required smoke detectors. For this reason, it is recommended that the
householder consider the use of additional smoke detectors for those areas for
increased protection. The additional areas include the basement, bedrooms,
dining room, furnance room, utility room, and hallways not protected by the
required smoke detectors. The installation of smoke detectors in kitchens,
attics (finished or unfinished), or garages is not normally recommended as
these locations occasionally experience conditions that can result in improper
operation.”
Note: Applicable building codes or other local laws may require the installation
of additional fire alarms in addition to the minimum recommended by the NFPA.
Smoke Manual with FCC and IC Statement.indd 6-7 8/5/2013 11:59:29 AM

89
S
H
CO
H
H
H
H
H
H
SS
SS S
SSS
S
CO
CO
CO
CO
CO
Complete Home Fire Protection
Single Story Homes Two Story Homes
Key
Minimum Required Smoke Alarms
Minimum Required CO Alarms
Recommended Heat Alarms
Required Interconnections
Attic
Kitchen Living Room Bedroom Hall Bedroom
Crawl Space
Attic
Bedroom BedroomHall
Living Room Kitchen
Utility Room
Basement
Acceptable multiLINX Alarm Spacing
Each alarm will also act as a repeating
station, so any signal received by an alarm
will be rebroadcast.
After final installation, test all alarms
for proper multiLINX radio connection.
Simply press and release the test
button of an alarm while having a
helper observe the remote alarms.
Maximum
Spacing in
Open Area
200’ (70m)
The multiLINX network communicates using
radio frequencies 905.2MHz - 911.2MHz. The
range of the radio has been tested to 200 feet
(70m) in open area distance testing.
Exigent Sensors recommends complete home fire protection. This can
be achieved by installing a combination of smoke, CO and heat alarms in
their appropriate locations in every room of the house.
Alarm Features and Functions
Power Indicator Light (Green)
On the EX20 SMK (battery-only powered), the POWER
icon will briefly flash every 30 seconds when the
alarm has been activated.
RADIO will flash once per second to indicate the
multiLINX network is open to accept additional alarms
into the network.
Radio Networking Light (Blue)
Warning Light (Yellow)
WARNING will flash yellow every 30 seconds,
accompanied by the horn chip to indicate the smoke
chamber needs to be removed and cleaned.
FIRE will flash when the alarm detects sufficient
quantities of smoke or heat. This is accompanied by the
sounding of the horn.
FIRE will stay on continuously if the alarm was triggered
remotely by another alarm on the multiLINX network.
Fire Warning Light (Red)
RADIO will cease to flash one minute after the last alarm
has been added to the network or immediately after the
button has been pressed.
On the EX20-AC SMK (AC with battery backup), the
POWER icon will run continuously while AC powered.
FIRE will continue to flash twice per minute (without the
horn) for three days after exiting an alarm condition, or
until the front button has been pressed and released.
WARNING can also be activated by a remote signal
from a CO Alarm. In this case, WARNING will be
solid red accompanied by 4 beeps of the horn.
Warning Light (Red)
WARNING will flash red every 30 seconds
accompanied by the horn chirp, for a minimum of 7
days, to indicate Low Battery. Replace the alarm.
WARNING will double flash red every 30 seconds
accompanied by the horn chirp, to indicate that the
alarm’s smoke sensor has reached its End-of-Life.
Replace the alarm.
(RED)
(YELLOW)
Smoke Manual with FCC and IC Statement.indd 8-9 8/5/2013 11:59:29 AM

10 11
Silencing Nuisance Alarms
Alarm Features and Functions
Testing the Alarm
Every alarm should be tested weekly to ensure proper operation.
To test the alarm, press and release the button on
the front face.
The alarm will sound with 3 beeps and FIRE will flash
rapidly.
All four icons will strobe to indicate a successful
test.
The alarm will then send out a network test
command and all other alarms on the network will
perform the steps above.
If the alarm fails, the horn will sound. Clean the
alarm (as described in this manual) and retest. If the
alarm still fails, contact the manufacturer.
The Exigent family of alarms is equipped with a silence feature that will decrease
the sensitivity of the alarm and silence nuisance alarms.
If in the course of normal activity, cooking smoke,
steam or other gases cause the alarm to activate,
the alarm can be silenced for ten minutes by
pressing the button on the front face of the
alarm.
The silence feature will also silence any alarms
that were triggered remotely. However, the
initiating alarm must be silenced directly.
If the quantity of smoke is too great, the
alarm will not silence until the air has
cleared sufficiently.
O
F
F
Deactivating the EX20 SMK Alarm
When the alarm’s End-of-Life signal occurs, the alarm must be deactivated and
disposed of properly. Be sure and have a replacement alarm available.
To deactivate the alarm, insert a pin or bent
paperclip into the deactivation lock-out hole.
Hold the pin down firmly.
When the switch is fully positioned the word
“OFF” will be exposed.
The switch will lock permanently into place. The
alarm cannot be reactivated!
After the deactivation switch has been thrown,
WARNING icon will light up. This will deplete
any remaining battery power over a period of a
few hours.
After the light has gone out, responsibly dispose
of the alarm and replace with a new smoke
alarm!
With the pin still pressed firmly in place, slide the
switch in the direction indicated by the arrow in
the drawing.
If the alarm’s End-of-Life signal has begun,
remove the alarm from its bracket.
Locate the slide switch and the deactivation
lock-out hole on the back surface of the alarm.
slide
switch
lock-out hole
Smoke Manual with FCC and IC Statement.indd 10-11 8/5/2013 11:59:30 AM

12 13
Creating Your multiLINX Network
The EX20 SMK Alarm communicates on its own private multiLINX network. This
network is created simply by powering up new alarms one at a time.
General Note: The multiLINX network is limited
to 18 total units. Only 12 of these units may be
smoke alarms, the remaining units can be CO and
heat alarms.
The blue RADIO light will begin to flash slowly.
While the blue RADIO light is flashing, additional
alarms may be added to your network.
Activate your next alarm by moving its slide
switch as shown above.
This alarm has been added to
your network!
Activate your first alarm by moving the slide
switch located on the back side of the alarm in
the direction indicated by the arrow.
One minute after activating the last alarm, the
RADIO light will stop flashing on the original
alarm, and it will join the network. The network
is now closed.
Continue activating each new alarm, one alarm
at a time, until all alarms have been added to the
network. This should include CO and heat alarms
as well.
General Note: It is easiest to first create the
multiLINX network while all alarms are located
together, such as on a table.
The blue RADIO light will flash briefly, then the
alarm will chirp twice and all four of the lighted
icons will strobe on in succession.
Note: This switch is connected to a lock-out
mechanism that will prevent installation on the
bracket until activated.
Adding an Alarm to Your multiLINX Network
To add an alarm(s) to an existing multiLINX network, perform the following steps.
Select any alarm on the existing network. Press
and hold the button on the front cover of the
alarm. The red FIRE light (WARNING if CO alarm)
will flash rapidly and the alarm will sound three
tones.
Next, the yellow WARNING light will flash slowly.
Count to 5 flashes of the yellow WARNING light
and release the button.
If done correctly, the blue RADIO light will now
slowly pulse, indicating the network is again ready
to receive additional alarms.
The alarm has been successfully added to
your network!
To add a new alarm, simply slide the switch
located on the back side of the new alarm in
the direction indicated by the white arrow. It
will lock into place when fully positioned.
The blue RADIO light will flash briefly, then the
alarm will chirp twice and all four of the lighted
icons will strobe on in succession.
Continue holding the button down.
If not, wait about 15 seconds and carefully repeat
these steps.
If the alarm being added was previously used,
follow the steps on Page 14 to erase its multiLINX
data. Then re-open this alarm’s radio function using
steps 1-2 in this section.
Press the button on the original alarm and the
RADIO light will stop flashing, or after one minute
the RADIO light will stop flashing automatically
and the network will close.
The slide switch will lock into place when fully
positioned.
Smoke Manual with FCC and IC Statement.indd 12-13 8/5/2013 11:59:30 AM

14 15
12” (30cm)
Choosing the Mounting Location in a Room
BEST
Center on ceiling.
ACCEPTABLE
On ceiling
ACCEPTABLE
On wall, the top of the alarm must be no more
than 12” (30 cm) from the ceiling (if local
codes permit wall mounting).
ACCEPTABLE
On peaked ceilings or roofs, mount at least 4”
(10cm) from the upper corner, but high enough to
allow a maximum of 36” (91cm) of horizontal air
space as measured off the peak.
4” (10cm)
36” (91cm) 36” (91cm)
ACCEPTABLE
On sloped ceilings, at least 4” (10cm) from
the upper corner, but high enough to allow
a maximum of 36” (91cm) of horizontal air
space as measured off the peak.
36” (91cm)
4” (10cm)
OK
Install on exposed face of joist or rafter.
NO!
Do not install between joists or rafters.
Do not mount alarm between joists or rafters;
mount on the exposed surface of the joist.
Note: Avoid placement of the alarms close to
ceiling fans or heating/air conditioning vents.
Removing an Alarm from a multiLINX Network
In the event that an alarm must be removed from your network, the alarm’s
multiLINX data must be erased.
Press and hold the button on the front cover of
the alarm. The red FIRE light will flash rapidly
and the alarm will sound three tones.
Continue holding the button down.
Next, the WARNING light will begin to flash
yellow. Count 10 flashes of the yellow
WARNING light and release the button.
The alarm will chirp twice and all four of the
lighted icons will strobe on.
All multiLINX data has been erased from
the alarm. It will now perform as a single
station alarm or it can be joined to a new
network.
Smoke Manual with FCC and IC Statement.indd 14-15 8/5/2013 11:59:31 AM

16 17
How to Mount the Battery Powered Alarm
Drywall
Plastic Anchors
Mounting Bracket
1” Screws
Situation B: No Wood
If no wood is present, use a Phillips
screwdriver to screw the two plastic
wall anchors into the pre-drilled holes
until fully seated. Then secure the
mounting bracket to the wall anchors
using the two 1” screws.
Situation C: Combination
Where there is no wood present, first
screw the plastic wall anchor into
the pre-drilled hole using a Phillips
screwdriver.
Then secure the mounting bracket in
place using the two 1” screws.
Drywall
Plastic Anchors
Mounting Bracket
1” Screws
Wood
4Lock Into Place
With the alarm activated and the alarms
fully networked together, position the
smoke alarm onto the center of the
bracket and turn clockwise. The alarm
will lock into place.
Note: Smoke alarms are not to be
used with detector guards unless the
combination has been evaluated and
found suitable for that purpose.
How to Mount the Battery Powered Alarm
1Mark
Place the mounting bracket against the
ceiling or wall, and using the mount-
ing bracket as a template, mark the
top and bottom holes with a pencil.
2Drill
Using a 1/8” (3mm) drill bit, drill
two pilot holes in the center of the
two marked hole locations. This will
determine if a wood beam or stud is
present.
3 Fasten Bracket
Situation A: Wood
If wood is present behind the drywall,
securely fasten the mounting bracket
to the wall using the two 1” screws.
1/8” (3mm) drill bit
Wood
Drywall
Mounting Bracket
1” Screws
If installing an AC powered alarm,
with the electrical power off to the
line, simply attach the bracket to the
electrical box with the existing screws.
See wiring diagram in this manual for
connection information.
Smoke Manual with FCC and IC Statement.indd 16-17 8/5/2013 11:59:31 AM

18 19
Cleaning Your Alarm
Over time dust might collect inside your alarm, altering its performance. If this
occurs, the unit can false alarm or the WARNING icon will flash and the horn will
chirp every 30 seconds. To clean the alarm perform the following:
Remove the alarm from its bracket. If the
smoke alarm is wired to the AC power lines,
the wire harness must be disconnected.
Gently vacuum all the outside surfaces care-
fully or wipe with a clean cloth.
Locate the black smoke chamber on the back
surface of the smoke alarm.
If the WARNING icon flashing persists,
return the alarm to the manufacturer.
Twist the chamber counter-clockwise to
remove.
Carefully clean both the chamber and the
empty alarm cavity with compressed air.
With the AC wire harness reconnected (if
AC alarm type), re-install on the ceiling/wall
bracket with a clockwise twist.
Re-install the smoke chamber into the cavity
with a clockwise rotation. Align the dots on
chamber and housing to ensure a proper fit.
Press and release the Test button on the front
face to verify the alarm is still functioning
properly.
Black
Line (Hot)
Neutral
Signal
White
Red
Black
Line (Hot)
Neutral
Signal
White
Red
How to Wire and Mount the AC Powered Alarm
When installing an AC powered alarm (Model EX20AC SMK), the mounting location is
determined by the position of the electrical box that will power the alarm. Electrical
power to the box must be disconnected prior to alarm connection and
installation!
With the AC power turned off, connect
the wire harness provided with the alarm.
Connect the black wire of the harness to
the black wire(s) in the electrical box.
Typical
Circuit
End of
Line
Circuit
Align and attach the mounting bracket
with the two screws from the electrical
box. Pass the wire harness through the
center of the bracket.
Plug the wire harness into the back of the
alarm.
Press and twist the alarm clockwise into
place (see Step 4 of previous section).
Reconnect power to the AC lines of the
smoke alarm circuit. The POWER icon will
glow continuously.
Using the supplied orange wire nut, cap
the red wire(s) (not used) and push it
back inside the electrical box.
Connect the white wire of the harness to
the white wire(s) in the electrical box.
Smoke Manual with FCC and IC Statement.indd Sec1:18-Sec1:19 8/5/2013 11:59:31 AM

20 21
Important Fire/Emergency Safety Information
Be prepared for fire emergencies:
Plan Your Escape
• Draw a floor plan of your home.
• Show two ways out of each room.
• Discuss escape routes with everyone in your home.
• Agree on an outside meeting place where you’ll gather after escaping.
Be Prepared
• Familiarize every member of the household with the sound of the smoke, CO
and heat alarms.
• Have everyone in the home memorize the fire department’s emergency
phone number.
• Instruct each person to call the emergency number from a neighbor’s
phone or a mobile phone used outside the home.
• Teach everyone to unlock and open all windows, and release security bars.
• Make sure security bars are equipped with quick-release devices.
• Keep exits clear and free from furniture and clutter.
Practice!
• Hold home fire drills at least twice a year.
Get Out and Stay Out
• Once you’ve escaped from a fire, do not go back inside for any reason.
• Make fire drills realistic by pretending some escape paths are blocked by
smoke or fire.
If you live in an apartment building
• Learn and practice your building’s evacuation plan.
• If you hear a fire alarm, react immediately.
• Know the location of all building exits and fire alarm boxes.
• Use the stairs ... never use an elevator during a fire.
• If exits are locked or blocked, report the problem to your building’s
management.
Escape Tips
• Close doors behind you as you escape to slow the spread of fire and smoke.
• If you have to escape through smoke, crawl on your hands and knees, keeping
your head one to two feet above the floor, where the air will be clearest.
• Test the doorknob and spaces around the door with the back of your hand. If
the door is warm, try another escape route. If the door is cool, open it slowly.
Close it quickly if smoke pours through.
Alarm Specifications
Operating Voltage
EX20 SMK 3VDC
EX20-AC SMK 120VAC, 60 Hz
Standby Current
EX20 SMK less than 10uA
EX20-AC SMK 1mA (AC)/20uA (backup battery)
Alarm Current
EX20 SMK 120mA (max.)
EX20-AC SMK 25mA (max.)
Battery Type Non-replaceable Lithium Manganese
Sensitivity 2.1±1.1% Obscuration
Operating Ambient Temperature 40°F - 100°F
Operating Humidity 0 - 95% Non-condensing
Alarm Dimensions 5.1” x 5.1” x 2.125”
Mounting Base Dimensions 5.0” x 5.0”
Weight 0.9 lbs (with bracket)
Heat Sensing
Fixed Temperature 135ºF
Rate of Rise 20ºF / minute, > 100ºF
Listings UL; CSFM: IC 9299A-NX14
FCC Compliance Statement and IC Notice:
This device complies with part 15 of the FCC Rules. This Class B digital apparatus
complies with Canadian ICES-003 and RSS210. Operation is subject to the following
two conditions: (1) This device may not cause harmful interference, and (2) this
device must accept any interference received, including interference that may cause
undesired operation.
This equipment has been tested and found to comply with the limits for a Class
B digital device, pursuant to part 15 of the FCC Rules. These limits are designed
to provide reasonable protection against harmful interference in a residential
installation. This equipment generates, uses and can radiate radio frequency energy
and, if not installed and used in accordance with the instructions, may cause
harmful interference to radio communications. However, there is no guarantee that
interference will not occur in a particular installation. If this equipment does cause
harmful interference to radio or television reception, which can be determined by
turning this equipment off and on, the user is encouraged to try to correct the
interference by one or more of the following measures:
(1) Reorient or relocate the units. (2) Increase the separation between the equipment
and receiver. (3) Connect the equipment into a different circuit from that to which the
receiver is connected. (4) Consult the dealer or an experienced technician for help.
FCC Caution: Changes or modifications not expressly approved by Exigents Sensors
could void the user’s authority to operate the equipment.
Smoke Manual with FCC and IC Statement.indd Sec1:20-Sec1:21 8/5/2013 11:59:31 AM

22 23
For a period of 24 months from the date of purchase, Exigent Sensors LLC
warrants to you, the original consumer purchaser, that your Exigent Smoke Alarm
will be free from defects in workmanship, materials, and construction under
normal use and service. If a defect in workmanship, materials, or construction
should cause your Exigent Smoke Alarm to become inoperable within the
warranty period, Exigent Sensors LLC will repair your Exigent Smoke Alarm or
furnish you with a new or rebuilt replacement Exigent Smoke Alarm without
charge to you except for your costs of shipping the Exigent Smoke Alarm to
Exigent Sensors LLC for warranty coverage. Your repaired or replacement Exigent
Smoke Alarm will be returned to you without charge and will be covered under
this warranty for the balance of the warranty period.
This warranty will not apply if inspection of your Exigent Smoke Alarm
shows that the damage or failure was caused by abuse, misuse, abnormal usage,
faulty installation, improper maintenance, or work other than that performed by
authorized service personnel.
Any warranties implied under any State law, including implied warranties
of merchantability and fitness for a particular purpose, are limited in duration
to the period of this limited warranty. Some states do not allow limitations on
how long an implied warranty lasts, so the above limitation may not apply to
you. Neither the Crossfire manufacturer nor Exigent Sensors LLC will be liable
for any loss, damage, incidental or consequential damages of any kind arising in
connection with the sale, use, operation, inoperability, malfunction, or repair of
your Exigent Smoke Alarm. Some states do not allow the exclusion or limitation
of incidental or consequential damages, so the above limitation or exclusion may
not apply to you.
If a defect in workmanship, materials, or construction should cause your
Exigent Smoke Alarm to become inoperable within the warranty period, to
obtain warranty coverage you must ship the Exigent Smoke Alarm to Exigent
Sensors LLC, with shipping costs prepaid by you. You must also pack the Exigent
Smoke Alarm to minimize the risk of it being damaged in transit. You must also
enclose a return address. Exigent Smoke Alarms returned for warranty service
should be sent to: Exigent Sensors LLC, 11331 Markon Drive, Garden Grove, CA
92841, accompanied by proof of purchase.
If Exigent Sensors LLC receives an Exigent Smoke Alarm in a damaged
condition as the result of shipping, you will be notified and you may need to file
a claim with the shipper.
This Limited Warranty gives you specific legal rights, and you may also have
other rights which vary from state to state. This is your copy of the Limited
Warranty on your Exigent Smoke Alarm. Please retain it, along with proof of
purchase showing the date of purchase and the identity of the purchaser, in a
safe place.
Limited WarrantyWarning! Limitations of Smoke Alarms
Wireless smoke alarms have been proven to be both effective and reliable,
but they may not be effective under all conditions. No alarm design can offer
total protection of life and property. A smoke alarm is not a substitute for an
adequate homeowner’s fire insurance or life insurance policy.
Smoke alarms will not work without a source of power. The alarm will not
operate and the alarm will not sound if the batteries have died or been
deactivated. Or in the case of an AC powered alarm, the wiring has not been
properly connected.
Radio communication between alarm units may fail to take place if significant
changes to the home have occurred since installation and testing. Moving
large objects such as a refrigerator or metal cabinet could impede alarm radio
performance.
The alarm warning signal may not be heard. A deep sleeper, hearing-impaired
person, young child or someone impaired by drugs or alcohol may not awaken
in response to an alarm activation. This can occur even when an alarm is located
inside the individual’s bedroom. Be sure fire drills are practiced that take this
possibility into account.
Current studies have shown smoke alarms may not awaken all sleeping
individuals, and that it is the responsibility of individuals in the household that
are capable of assisting others to provide assistance to those who may not be
awakened by the alarm sound, or to those who may be incapable of safely
evacuating the area unassisted.
Smoke alarms may not always activate and provide early enough warning. A
smoke alarm will only activate when it is maintained in working order and
sufficient smoke reaches the unit. Certain fires can originate inside of walls,
attics or on the other side of closed doors. This may prevent smoke from
reaching the alarm.
Smoke alarms may not be effective in certain situations, such as: Fires where the
victim is intimate with a flaming fire; for example, when a person’s clothes catch
fire while cooking; Fires where the smoke is prevented from reaching the alarm
due to a closed door or other obstruction; Incendiary fires where the fire grows
so rapidly that an occupant’s egress is blocked even with the properly located
alarms.
SMOKE ALARMS CAN NOT GUARANTEE THAT YOU WILL NEVER SUFFER ANY
DAMAGE OR INJURY FROM A FIRE.
Smoke Manual with FCC and IC Statement.indd Sec1:22-Sec1:23 8/5/2013 11:59:31 AM

24 REV 07.30.13 90-4070-00
11331 Markon Drive
Garden Grove, CA 92841
The Exigent Smoke Alarm manufacturer guarantees to replace at no
cost to the original owner any Exigent Smoke Alarm that has been materially
damaged or destroyed by an accidental fire. To obtain a replacement alarm
under this Lifetime Fire Replacement Guarantee, you must return the damaged
or destroyed smoke alarm to the manufacturer within 90 days of the fire,
accompanied by a complete activation report and verification report from the
applicable fire department. To obtain a replacement under this guarantee,
contact the manufacturer at www.Exigentalarms.com or at (714) 895-8477, to
receive information as to the address to which you should send your damaged
or destroyed Exigent Smoke Alarm and accompanying information.
Lifetime Fire Replacement Guarantee
25 Year Product Replacement Guarantee
After the above Limited Warranty has expired, commencing on the first
day of the 25th month and extending through the last day of the 324th
month following the date of purchase, the manufacturer of the Exigent
Smoke Alarm guarantees to repair or replace the smoke alarm at a preferred
owner discounted price which includes shipping and handling and is adjusted
annually. This Product Replacement Guarantee does not create any obligations
or liabilities on the part of Exigent Sensors LLC.
This guarantee is extended only to the original purchaser and is available
when the smoke alarm is sent to the manufacturer, with a description of any
problem and proof-of-purchase. This replacement guarantee will not apply if
the manufacturer’s inspection reveals that the damage or failure is a result of
abuse, misuse, improper maintenance, abnormal usage, or work performed by
unauthorized service personnel. At least an annual cleaning (according to the
directions supplied in this owner’s manual or set forth at www.exigentalarms.
com) is recommended to prolong the useful life of your Exigent Smoke Alarm.
To obtain a replacement under this guarantee, contact the manufacturer
at www.exigentalarms.com or at (714) 895-8477, to receive information as
to then-applicable pricing and for the address to which you should send your
Exigent Smoke Alarm along with payment for your replacement alarm. Be sure
to enclose your return address and daytime telephone number. The EX20 SMK
manufacturer will ship the new replacement unit to you upon its receipt of all
of the foregoing materials and information.
This Product Replacement Policy does not alter or affect your Limited
Warranty, set forth above.
Smoke Manual with FCC and IC Statement.indd Sec1:24 8/5/2013 11:59:32 AM
Table of contents
