Exploranium GR-100 User manual

GR-100
Personal Radiation Monitor
User's Manual
Revision 1.2, Software Version 1V81, November 2004
Part Number: 32014-1

GR-100 User's Manual Revision 1.2
PROPRIETARY NOTICE
USERS ARE HEREBY NOTIFIED THAT THIS MANUAL CONTAINS TECHNICAL INFORMATION OF A PROPRIETARY
NATURE. THIS INFORMATION IS NECESSARY FOR TECHNICALLY KNOWLEDGEABLE USERS TO UNDERSTAND
SYSTEM OPERATION AND TO SATISFY THEMSELVES THAT THE SYSTEM IS PERFORMING CORRECTLY.
EXPLORANIUM ACCEPTS THAT IT IS THE RIGHT OF SUCH USERS TO BE PRIVY TO THIS INFORMATION.
HOWEVER THIS DOCUMENTATION IS PROVIDED SOLELY FOR THE BENEFIT OF OWNERS OF THE GR-100
SYSTEM AND DISSEMINATION OF THE DETAILED TECHNICAL INFORMATION PROVIDED MAY BE CONSIDERED
AS LEGALLY CONTRAVENING THE NORMAL SUPPLIER/CUSTOMER RELATIONSHIP.
UNAUTHORIZED RELEASE OF DETAILED TECHNICAL INFORMATION TO A THIRD PARTY WILL BE CONSIDERED
AS A CONTRAVENTION OF USER AGREEMENTS
SAIC/Exploranium – Proprietary Page ii Revision Date: November 2004

GR-100 User's Manual Revision 1.2
Table of Contents
1.0 Overview.............................................................................................................. 1
1.1 Introduction .............................................................................................................1
1.2 System description ...................................................................................................1
2.0 Operation ............................................................................................................. 4
2.1 Push button .............................................................................................................4
2.2 Battery ....................................................................................................................4
2.3 Power on .................................................................................................................5
2.4 Power off .................................................................................................................6
2.5 Updating the Background screen ...............................................................................6
2.6 Monitor mode...........................................................................................................6
2.7 Dose rate.................................................................................................................7
2.8 Alarms .....................................................................................................................8
2.8.1 Alarm Level Setting ................................................................................................8
2.8.2 Alarm Level actions ................................................................................................8
2.8.3 Search Response....................................................................................................9
3.0 Setting up the Unit ............................................................................................ 11
3.1 Search Mode ..........................................................................................................11
3.2 Setting Parameters .................................................................................................11
3.3 Setting DATE/TIME.................................................................................................12
3.4 Long Count Mode ...................................................................................................13
3.5 Return to Monitoring Mode .....................................................................................13
3.6 Remote setup.........................................................................................................14
3.7 Earphone ...............................................................................................................14
3.8 Battery charging.....................................................................................................15
3.9 Belt mounting ........................................................................................................16
3.10 Gamma alarm test..................................................................................................16
4.0 Monitor 100U PC software ................................................................................ 17
4.1 Testing the GR-100 ................................................................................................19
4.2 Setting up parameters ............................................................................................22
4.2.1 Vibrator ............................................................................................................... 23
4.2.2 Buzzer ................................................................................................................. 23
4.2.3 LCD..................................................................................................................... 23
4.2.4 Dose Units ........................................................................................................... 24
4.2.5 Discriminator ....................................................................................................... 24
4.2.6 Alarm Threshold................................................................................................... 24
4.2.7 Info.....................................................................................................................24
4.3 Data retrieval .........................................................................................................25
4.3.1 Alarm Data Retrieval ............................................................................................ 26
4.3.2 Diagnostic Events Retrieval................................................................................... 28
4.3.3 Accumulated Dose Data Retrieval.......................................................................... 29
SAIC/Exploranium – Proprietary Page iii Revision Date: November 2004

GR-100 User's Manual Revision 1.2
5.0 Technical specifications..................................................................................... 32
5.1 Gamma detector and analog processor ....................................................................32
5.2 Neutron detector and analog processor ...................................................................32
5.3 Monitoring .............................................................................................................32
5.4 Searching...............................................................................................................33
5.5 Dosemeter .............................................................................................................33
5.6 Clock - Calendar .....................................................................................................33
5.7 Data storage ..........................................................................................................33
5.8 Data output ...........................................................................................................34
5.9 Display ..................................................................................................................34
5.10 Power supply option ...............................................................................................34
5.11 Connectors.............................................................................................................35
5.12 Connectors.............................................................................................................35
5.13 Environmental ........................................................................................................ 35
5.14 Accessories ............................................................................................................35
Appendix A Error messages...................................................................................... 37
SAIC/Exploranium – Proprietary Page iv Revision Date: November 2004

GR-100 User's Manual Revision 1.2 1.0 Overview
1.0 Overview
1.1 Introduction
The GR-100 is one of the most advanced, yet simple to use, personal radiation monitors deployed in
customs, security, military and emergency response applications. It has been designed to provide
accurate and reliable measurement of gamma and neutron radiation, trigger visual and audio alarms to
warn the operator, and accurately measure exposure Dose Rate over the full spectrum range. It also
aids the operator in search and location of the source of the detected radiation. The spectrum of the
source can be measured and stored in the memory. The unit is typically used as a belt-mounted monitor
or a hand-held search detector. It automatically stores alarm events date and time and dose data in its
memory for subsequent retrieval to a PC. Its simple one-button operation and user-friendly operator
interface make it truly an ideal front-line tool for a variety of users involved in detection and interception
of radioactive and nuclear materials.
1.2 System description
Standard GR-100 Personal Radiation Monitor system consists of:
• GR-100 Personal Radiation Monitor Unit
• Two “AA” Alkaline Batteries
• Earphone With Volume Control
• Belt Mounted Carrying pouch
• PC Interface Cable
• CD With GR-100 Monitor Software
• GR-100 User Manual
• Shipping Case
The following optional equipment is also available:
• Rechargeable Nickel-Cadmium Battery
• Rechargeable Nickel Metal Hydride Battery
• Battery Charger and Cable Assembly
• Battery Charger/PC Interface Cable Assembly
• 0.25 Micro-Currie Cesium137 Test Source
The GR-100 Personal Radiation Monitor is supplied in two versions:
• GR-100 – equipped with CsI gamma detector
• GR-100N – equipped with both CsI gamma and LiI neutron detectors
The neutron detector option must be selected at the time of purchase.
SAIC/Exploranium – Proprietary Page 1 Revision Date: November 2004

GR-100 User's Manual Revision 1.2 1.0 Overview
The following figure shows the front and back views of the GR-100 unit.
Y
ellow LED lamp
indicating gamma
radiation alarm.
Red LED lamp indicating
neutron radiation alarm
Graphic LCD
showing
operating
parameters and
radiation
measurements
results
A
udio transducer
indicating radiation
alarm and source
intensity
Push button
used to select
operating
parameters and
functions
Rubber cover
to protect
Connector
PC interface
connector
Earphone
j
ac
k
Belt clip
Production
label with
serial number
Cover for battery
compartment
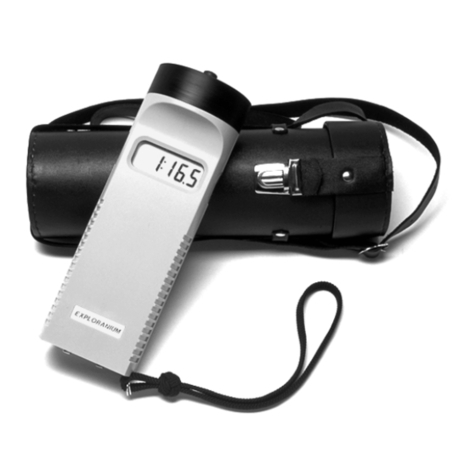
The unit is housed in a rugged ABS plastic case designed to withstand adverse weather conditions. It
has a universal removable stainless steel clip for mounting on a variety of waist belts. The Operator
interface is facilitated by graphic liquid crystal display (LCD) and a single push button. The Radiation
alarm is displayed via one digit LED display on the top of the unit. This display is clearly visible when unit
is worn on a belt. An Alarm is also indicated with an audio beeper and a vibrator. An earphone with
volume control is provided for operation in noisy environments. It connects to an audio jack located at
the bottom of the unit under a rubber protection cap. This cap also conceals a USB connector for
interfacing the unit to a PC or/and to a Battery Charger. All functions and settings are controlled with
the button on the front panel. The Battery compartment is accessible by lifting the removable cover
plate on the back of the unit. For additional protection during operations, the unit can be inserted into a
belt mounted leather pouch. The earphone can remain connected to the unit when in the pouch. You
can set up, store, and retrieve parameters and data from the instrument by connecting it to any desktop
or notebook computer that has the GR-100 Monitor software installed.
SAIC/Exploranium – Proprietary Page 2 Revision Date: November 2004
GR-100 User's Manual Revision 1.2 1.0 Overview
GR-100 Personal Radiation Monitor Accessories
The following figure shows the GR-100 accessories:
Belt-mounted carrying
pouch 0.25 Micro-Currie
Cesium137 Test
Source
CD With GR-100
Monitor Software
PC interface cable
Earphone with Volume Control
SAIC/Exploranium – Proprietary Page 3 Revision Date: November 2004
GR-100 User's Manual Revision 1.2 2.0 Operation
2.0 Operation
2.1 Push button
The push button is used as a function selection switch. There are 3 basic ways to use this button:
• SHORT PRESS – Short depression of the button, lasting more than 0.1 seconds but less then 1
second.
• LONG PRESS – Long depression lasting, lasting more than 1 second but less then 2 seconds.
• HOLD – Press and hold for more than 5 seconds.
Activation shorter than 0.1 sec is called SPIKE and is ignored by the system. Activation longer than 2
seconds starts the Switch OFF procedure, but if activated for less than 5 seconds it changes to LONG.
2.2 Battery
The unit operates off a single AA battery. The system recognize two types of batteries – rechargeable or
non-rechargeable. Non-rechargeable means alkaline battery and two types of rechargeable batteries can
be used: Nickel-Cadmium (NiCd) or Nickel Metal Hydride (NiMH).
The battery is loaded by removing the battery cover – use a finger-nail or coin in the groove in front of
the slot on the rear to lever the battery door open. Insert the battery in the battery compartment, being
sure to place the bottom of the battery on the spring and the top to the brass terminal. Seat the battery
firmly in place above the removal strap then clip the battery cover in place.
NOTE: All measured data is stored in non-volatile memory and they remain in the memory even if the
battery is removed after the correct power-down sequence.
CAUTION: If you remove the battery while the GR-100 is in operation, your data will be lost. Please use
the correct power-down sequence before removing the battery to ensure that data will not be lost.
NOTE: The time/date information will be lost if the battery is removed for more than one minute.
Therefore, it is recommended to replace battery within one minute to avoid the time and date reset.
First prepare the new battery to be installed. Then remove the old battery and quickly replace it with the
new one. If you experience any problem with the new battery, reinstall the old battery back until the
problem is resolved. The old, nearly discharged battery will not be sufficient for operation of the
equipment, but it will keep the time and date for a while. If the time and date is lost, it can be easily
reset manually upon first power-up, or by the PC when connected.
SAIC/Exploranium – Proprietary Page 4 Revision Date: November 2004

GR-100 User's Manual Revision 1.2 2.0 Operation
2.3 Power on
To power on the GR-100, make a LONG press with the front panel push button. The STARTUP screen is
displayed for approximately 5 seconds:
• GR-100 is the instrument model number
• 1V7 is the current firmware version installed in the unit
• #3284 is the unit’s serial number
During the start-up the unit performs a series of internal self-testing procedures and verifies that the
alarm indicators are functioning. You can observe the following:
• BUZZER beeps (if enabled)
• RED light flashes as a lamp tests
• YELLOW light flashes as a lamp tests
• VIBRATOR vibrates (if enabled)
The unit recognizes during the start-up procedure if the battery was replaced and proceeds with
additional tests and set-up procedures. During those tests you have to select the battery type to assure
proper operation.
The SHORT press advances display to the next battery type selection
(RECHARGEABLE). The LONG press confirms the selected battery type and
continues the power-up sequence. The next warning will be displayed if the
remaining capacity of the battery is less than about 5 – 10 %. It is possible to
continue using the unit for a few hours, but it is recommended to change or
charge battery soon.
NOTE: To save remaining battery power, the backlighting cannot be activated
when LOW BATTERY is displayed.
If you continue using the unit and the battery becomes completely discharged,
the following screen is displayed and the unit is turned OFF.
If battery was not replaced within one minute, or after the first power-up, the
Set Date/Time screen is displayed before battery selection is requested.
To set the date, SHORT press changes the year (YY) and LONG press confirms
the selected setting and moves the cursor to month (MM) and than to day (DD).
After confirming the Day setting, the screen changes to time setting.
The setting of the hours (HH) and minutes (MM) are analogous, the seconds are
only displayed but it is not possible to set them. The procedure continues via
selecting the battery as described above.
EXPLORANIUM
GR-100
1V7 #3284
NEW BATTERY
SELECT TYPE
NON-RECHARGE
LOW BATTERY
PRESS MODE
BATTERY
DISCHARGED
SWITCH OFF
SET DATE/TIME
YY
00/01/01
SET DATE/TIME
HH
00:00:00
SAIC/Exploranium – Proprietary Page 5 Revision Date: November 2004

GR-100 User's Manual Revision 1.2 2.0 Operation
2.4 Power off
To power the unit OFF press HOLD (press button and hold for about 5 seconds) until the following
sequence of displays is seen and the power goes OFF. Note that if you release the button at any point
before power-off is completed, the system will take it as a LONG press and it will go back to the
SETTING screens.
NOTE: If powering down from other displays, the first message appears according to the LONG press
and after 5 seconds the power will go OFF.
SEARCH
SWITCH OFF
3
SWITCH OFF
2
SWITCH OFF
1
2.5 Updating the Background screen
After initial start up the system must accumulate a radiation background level to
assess the local background. Be sure to do this while at a sufficient distance from
possible radiation sources. The display shows a 5 second countdown (5, 4, 3, 2, 1)
during this process.
12:57
UPDATING
BACKGROUND
4
At the end of this period the local background is stored in memory. Later, the background level is
updated regularly every 10 seconds and used for Alarm Level calculations.
2.6 Monitor mode
After the STARTUP screen is displayed for a few seconds and UPDATING BACKGROUND is completed,
the unit goes to monitoring mode and the MONITOR screen is displayed.
SAIC/Exploranium – Proprietary Page 6 Revision Date: November 2004

GR-100 User's Manual Revision 1.2 2.0 Operation
NOTE: In normal background conditions (absence of radiation sources), the count rate should be
between 5 and 25 cps and the dose rate about 50 - 250 nGy/h, 50 - 250 nSv/h or 5 - 25 mR/h.
The battery status icon is fully black when battery is fully charged. As the battery capacity goes down
the black filling decreases to the right-hand side. The icon is “empty” if the capacity drops down to
about 10 %.
The YELLOW LED light flashes faintly every three seconds to show the system is operational and battery
is OK. If battery is low, the RED LED light starts flashing.
2.7 Dose rate
The GR-100 is an instrument that accurately displays the computed Dose-Rate over the full spectrum
range. The unit is calibrated so that whether the source is Americium, Cesium, Cobalt or any other
isotope, the Dose Rate computation is accurate. This is achieved by using an internal spectrometer
analysis system that compensates for spectral influence of the Dose Rate. The Dose Rate is shown in
both Monitor and Search modes in the bottom part of the display.
Note: The displayed Dose Rate is a 10 second moving average. It means that the value is renewed
every second, but it is calculated from the signal measured during the last 10 seconds.
Current Dose Rate can be measured in three different units:
• Gy/hr (Grays per hour) units are used mostly in Europe for radiation Dose Rate measurements.
• R/hr (Roentgens per hour) units of exposure to radiation are used mostly in North America.
• Sv/hr (Sievert per hour) units are used for equivalent Dose Rate when the person’s health risk is
assessed.
The measurement range is 0.01 – 100 µSv/hr, covering the range from very low background to the
danger level. When the actual dose rate is higher than 100 µSv/hr, the message OVERLOADED is
displayed instead of the dose rate value. The display returns to show the dose rate when radiation level
drops below 100 µSv/hr.
The calibration point for dose rate is defined as the center of the gamma detector, which is 3 cm from
the top edge of the unit (in the middle of display), 1 cm from the right edge and 1.3 cm under the face
side. The irradiation direction is from the side opposite the display.
The Dose Rate is accumulated in the GR-100 memory during operation in Monitoring or Searching mode
and stored every hour, or when the unit is powered down. The results can be downloaded to a PC and
saved. The Dose Rates are always stored in nSv/h units no matter what selected units are set for
viewing on the display.
SAIC/Exploranium – Proprietary Page 7 Revision Date: November 2004

GR-100 User's Manual Revision 1.2 2.0 Operation
2.8 Alarms
For normal use the unit is operated in the MONITOR mode. In this mode, the signal is analyzed for
alarm conditions and the results are updated every second.
2.8.1 Alarm Level Setting
After start-up a 5 second average of the local radiation background is computed and stored in memory.
This is the
S art Background
. The system automatically updates this background every 10 seconds using
a special algorithm that creates an accurate representation of the local background. This is referred to as
the
Local
Background
.
t
The Alarm Threshold is a parameter in the unit’s memory that you can set. The unit automatically sets
the Gamma Alarm Threshold by applying the Gamma Parameter that you set via the PC Monitor 105
program to the background. The Gamma Alarm threshold setting represents the number of standard
deviations (Sigma) of the local background radiation signal by which the measured signal must exceed
the background signal to trigger an alarm. The gamma threshold is constantly adapting to varying
background conditions.
The local background is constantly updated unless an alarm occurs, in which case the updating is
suspended until the alarm is cancelled and Monitoring mode is restarted. It is strongly recommended
that you step back from the source before switching to Monitor mode to make sure the background is
truly reflective of only the local radiation level and not the anomalous level due to the detected source.
Also note that once the alarm threshold is set using this technique, the unit is usable in any local
radiation setting without further need for readjustment. The alarm level is automatically changed to
adapt to local radiation conditions.
2.8.2 Alarm Level actions
The GR-100 unit is typically worn on a belt. You are alerted to an alarm by an audio beep and/or
vibration action, depending on the system settings selection. In alarm condition, you can glance down at
the unit and see the flashing LEDs through the transparent windows as a visual reinforcement that an
alarm has occurred.
The following indications are present when an alarm occurs:
• The AUDIO transducer beeps in a warning mode of 5 triple-beeps that are approximately 2 secs
apart.
• The appropriate LED lights up (YELLOW=Gamma, RED=Neutron) in a
flashing mode ones per second. GAMMA ALARM
PRESS BUTTON
44.4 µR/h
• The VIBRATOR is activated 5 times, provided it is enabled.
• The LCD screen shows:
SAIC/Exploranium – Proprietary Page 8 Revision Date: November 2004

GR-100 User's Manual Revision 1.2 2.0 Operation
In this case the unit indicates that a GAMMA alarm has occurred. The displayed dose rate is the
maximum value measured during the period the alarm message is on the screen. In the alarm
condition, the displayed value is obtained from 1 second measurements. The short integration time is
used to learn about the dose rate maximum to make searching (in Search Mode) the radiation “hot spot”
easy. The real dose rate, the measure of the health hazard, is stored in the memory as dose history.
Press SHORT to go to the SEARCH MODE. After
pressing SHORT, the following screen is displayed:
As noted above, in the SEARCH mode the count
rate, dose rate and audio tone are used to
accurately locate the source of radiation. The
higher value or the higher frequency of beeping
means that the detector is closer to the source.
A SHORT press of the button at any time in the
SEARCH mode will return the unit to the MONITOR
mode. If no action is taken in SEARCH mode for
15 minutes, the unit will return to the monitoring mode automatically.
2.8.3 Search Response
The following response is obtained in the SEARCH mode:
• As the unit approaches radioactive material the COUNT display (234 above) increases to show
that the radiation intensity is increasing.
• If any neutron radiation is present, the neutron data will be displayed in counts/second.
• As the radiation intensity increases, the AUDIO frequency will increase proportionally (if enabled),
thus making it easy to locate the source in an “eyes-free” manner.
• The audio signal responds to radiation from just above the alarm threshold level to very high
level (the count rate of 2000 cps) in progression of beep frequency. The frequency of beeps is
proportional to the count rate in non-linear manner. Using this method, the response to low
radiation levels is enhanced to enable the search for distant or shielded sources. The beep
frequency remains constant above 2000 counts per second.
SAIC/Exploranium – Proprietary Page 9 Revision Date: November 2004


GR-100 User's Manual Revision 1.2 3.0 Setting up the Unit
3.0 Setting up the Unit
To access the unit set-up screens from the MONITOR mode, do a LONG press. The sequence starts with
SEARCH. In any of the following screens a SHORT press advances to the next selection and the LONG
press activates the selected function or parameter.
• SEARCH - switches to the SEARCH mode when the unit is not in alarm.
• SETTINGS – enables activation of the audio beeper, vibrator and backlight. SHORT press toggles
between ON or OFF.
• DATE/TIME – enables date and time setting.
• LONG COUNT – enables measurement over an extended period of time.
• MONITOR – returns back to the monitoring mode.
3.1 Search Mode
While in the monitor (MON) display, press LONG until you see:
SEARCH
Release the button when the search screen is displayed. Subsequent LONG
press will select the search mode, the following screen will be shown briefly and then
the full SEARCH screen will be displayed.
SEARCH
SELECTED
3.2 Setting Parameters
A LONG press in the monitor mode followed by a SHORT press brings on the SETTINGS
screen:
SETTINGS
Setting mode is entered with another LONG press:
SETTINGS
SELECTED
The first screen that follows is used to set the beeper ON or OF:
SETTINGS
BEEPER ON
SAIC/Exploranium – Proprietary Page 11 Revision Date: November 2004

GR-100 User's Manual Revision 1.2 3.0 Setting up the Unit
The SHORT press toggles the beeper setting between ON and OFF, the LONG press confirms the
selected setting and advances the screen to the next parameter. If there is no action for 15 seconds
during the parameter setting procedure, the unit returns to the monitoring mode. The procedure
proceeds with setting the following three parameters:
• BEEPER ON / OFF – this determines whether the internal audio beeper (or earphone) is active
for alarms and search. The beeper cannot be turned off if the vibrator is also turned off. One of
the two alarm indicators must always be activated.
• VIBRATOR ON / OFF – some users want a covert alarm capability so they want to use the
vibrator rather than the beeper. It is recommended placing the GR-100 into the breast pocket in
this case. The vibration may not be noticed when the unit is belt mounted. However the
vibrator uses a lot of electrical power, thus shortening the battery life. This function is not
essential and therefore, it is recommended that the vibrator be set to OFF to conserve battery life
• BACKLITE ON / OFF – In low light conditions the backlight makes the display substantially
more visible. If ON, the display is illuminated during switching ON procedure; in case of ALARM,
during SEARCH mode operation and 10 seconds after any button activation. During backlighting
the battery drain is increased about 10 times. Normally it decreases the battery life 2 or 3 times
according to the ratio between MONITOR and SEARCH mode. In the rare occasions that this
feature is actually required it can be temporarily enabled as described below. So normally it is
recommended that this function be OFF.
After confirming the backlight status selection via LONG press, the unit resumes the monitoring mode.
3.3 Setting DATE/TIME
DATE/TIME
A LONG press in the monitor mode followed by two SHORT presses brings on the
DATE/TIME setting screen:
DATE/TIME
SELECTED
Then LONG press confirms the selection:
SET DATE/TIME
YY
00/01/01
Follow the same procedure as in 2.3 to set correct date and time:
To set date, SHORT press changes the year (YY) and LONG press confirms the
selected setting and moves the cursor to month (MM) and than to day (DD). After
confirming the Day setting, the screen changes to time setting. SET DATE/TIME
HH
00:00:00
The setting of the hours (HH) and minutes (MM) are analogous, the seconds are only displayed but it is
not possible to set them. The SHORT press changes the value, the LONG confirms it. After confirming
the minutes via LONG press the unit returns to monitoring mode.
SAIC/Exploranium – Proprietary Page 12 Revision Date: November 2004

GR-100 User's Manual Revision 1.2 3.0 Setting up the Unit
3.4 Long Count Mode
From the MONITOR display press LONG and than three times SHORT to bring
the LONG COUNT setting screen on:
Press LONG to confirm the selection:
This activates the LONG COUNT feature and starts the counting cycle. The LONG COUNT screen is
similar to the monitor screen except the MON symbol is replaced with the counting time period.
This mode of operation allows you to make longer time of measurement to
obtain higher sensitivity and more precise results for low level radiation in
constant radiation field. You can terminate the counting cycle at any time by
pressing LONG. The following screen appears after termination of the counting
period:
• G- means column with the gamma data
• N- means column with the neutron data
• The first data row (28620, 2) indicates the total number of counts per
the total counting time period for the respective gamma and neutron
detector.
• The second data row (31, 0.00) indicates the count rate with the respective gamma and neutron
detector.
• The third data row (901 sec) indicates the total counting time period in seconds.
• The SHORT press resumes the standard monitoring mode again.
3.5 Return to Monitoring Mode
If you enter the function selection routine by mistake, you can return to the
monitoring mode by pressing SHORT four times.
You can select the monitoring mode by pressing LONG:
Consecutive SHORT presses move the selection in a loop sequence: SEARCH –
SETTINGS – DATE/TIME – LONG COUNT – MONITOR until you confirm one of the
selections. If no action is taken by the operator for 15 seconds, the unit reverts back to the monitoring
mode automatically.
LONG COUNT
LONG COUNT
SELECTED
12:57
N 0 234
1
44.4 µR/h
G N
28620 2
31 0.00
901 sec
MONITOR
MONITOR
SELECTED
SAIC/Exploranium – Proprietary Page 13 Revision Date: November 2004

GR-100 User's Manual Revision 1.2 3.0 Setting up the Unit
3.6 Remote setup
The GR-100 is supplied with an external RS-232 serial cable that plugs into a connector on its base. The
other side of the cable is connected to the serial port on a PC running the Monitor 100U Remote Control
Software supplied by Exploranium on the CD included with the unit. Operating instructions for this
software are described in Section 4 of this manual. The software allows you to set-up remotely all
system parameters and operating functions and retrieve stored data.
3.7 Earphone
The earphone supplied with the unit can be used in noisy environment, or in covert operations. The
earphone can be plugged into a special connector on the base of the unit after lifting the rubber cover.
The earphone jack is located under the
rubber cover on the left-hand side. The
right-hand side is fixed to avoid the loss of
the cover. When connected, it
automatically disables the internal audio
beeper.
NOTE: The BUZZER must be enabled for
this function to work.
When the earphone is unplugged the unit
automatically reverts to internal audio
functions.
Figure Earphone Connection
If the GR-100 is used with the belt mounted leather carrying pouch, connect the
right-angle earphone plug as shown in the figure above. Hold the cable along the left
side of the case and insert the unit into the leather pouch with the cable running
along the side of the pouch as shown in the next figure. There is space provided
inside the pouch for the connector to fit. GR-100 can be taken out of the pouch
without disconnecting the earphone.
Earphone Used
in Belt Pouch
SAIC/Exploranium – Proprietary Page 14 Revision Date: November 2004

GR-100 User's Manual Revision 1.2 3.0 Setting up the Unit
3.8 Battery charging
Rechargeable batteries and the charger are available as an optional equipment Either Ni-Cd or Ni-MH
batteries can be charged inside the unit. The 110 VAC/12 VDC (or 220 VAC/12 VDC) adapter connects to
the mini-USB jack at the bottom of the unit using a separate cable supplied with the option.
CAUTION: Using any other cable can cause fatal damage to the instrument!
Open rubber cover located on the bottom of the GR-100 and insert power cable adapter to the mini-USB
jack in the centre. Handle the cover on its left hand side where the earphone connector is located. The
right-hand side is fixed to avoid the loss of the cover. You must be sure that proper battery type is
selected! If not, remove the battery, check its type, re-install it and switch the unit ON. The request for
battery type selection appears during the start up procedure after a new battery was installed.
Connecting the AC power pack to an electrical outlet begins the charging cycle. Battery charging
proceeds regardless of whether the unit is turned ON or OFF.
NOTE: This function is disabled in the PARAMETERS SETTING mode!
IMPORTANT: Never connect external power to the GR-100 if the battery is not correctly placed in the
battery compartment!
While charging the battery, the yellow LED is ON continuously to indicate
charging is in progress and the LCD displays the following screen: CHARGING ON
TIME 0 min
1.40V 221mA
The charging time in minutes is displayed in the middle row; the voltage on the batteries and the
charging current is shown in the bottom row. Normal battery charging takes out about 8 hours, from
fully discharged to fully charged, for the rechargeable batteries specified. When
the battery is charged to about 95 % capacity, charging goes to the trickle mode
and the yellow LED starts flashing once every 10 seconds. The display indicates
end of charging but if the unit is not disconnected, the trickle charging continues
every ten seconds preserve full battery capacity.
BAT. CHARGED
TIME 468 min
1.40V
After disconnecting the power adapter the GR-100 returns to previous point of operation. From
MONITORING or SEARCH mode, it goes to UPDATING BACKGROUND and then to MONITORING mode.
If the unit was OFF before charging started, it switches OFF when charging is completed. If charging
was started from the display BATTERY DISCHARGED SWITCH OFF or LOW BATTERY message, the Start
up procedure checks the battery voltage.
Note: Charging of the battery must be done in an area within temperature range from 10°C to 30°C.
SAIC/Exploranium – Proprietary Page 15 Revision Date: November 2004

GR-100 User's Manual Revision 1.2 3.0 Setting up the Unit
3.9 Belt mounting
The GR-100 is equipped with a clip for breast pocket or belt mounting, and is also furnished with a
leather carrying pouch, which can also be attached to the belt. If GR-100 is used with the leather
carrying pouch only, the clip should be removed from the unit for smooth insertion into case.
If the earphone is used for covert operations with belt mounted leather carrying pouch, connect the plug
and insert GR-100 into the leather pouch with the cable on the left-hand side of the unit and close the
case. There is space enough for the connector inside the case. It is then easily possible to take out the
GR-100 from the case and follow the display during SEARCHING without disconnecting the earphone.
3.10 Gamma alarm test
For fast and easy alarm test, use the reference source included with the unit. Run GR-100 in the monitor
mode and move the reference source close to the back right-hand side of the instrument. GR-100 must
show GAMMA ALARM within 2 seconds.
NOTE: Used reference source has very low activity (0.25 mCi = 9.25 kBq) of Cesium-137. It is not
classified as a controlled radioactive source. The source is also encapsulated and therefore handling it by
the operator for testing purpose is safe.
SAIC/Exploranium – Proprietary Page 16 Revision Date: November 2004
Table of contents
Other Exploranium Measuring Instrument manuals