9 / 20
NOTICE!Autoguiding requires an appropriate software (see below).
Autoguiding Software
The following software packages, among others, can be used for autoguiding with this camera:
PHD-Guiding, GuideDog, Metaguide, Guidemaster (free of charge) or AstroArt, MaxIm DL (fee pay-
able)
DOWNLOAD PHD-Guiding: https://openphdguiding.org
DOWNLOAD GuideDog: http://barkosoftware.com/GuideDog
10 Optimizing the camera settings for long
exposures
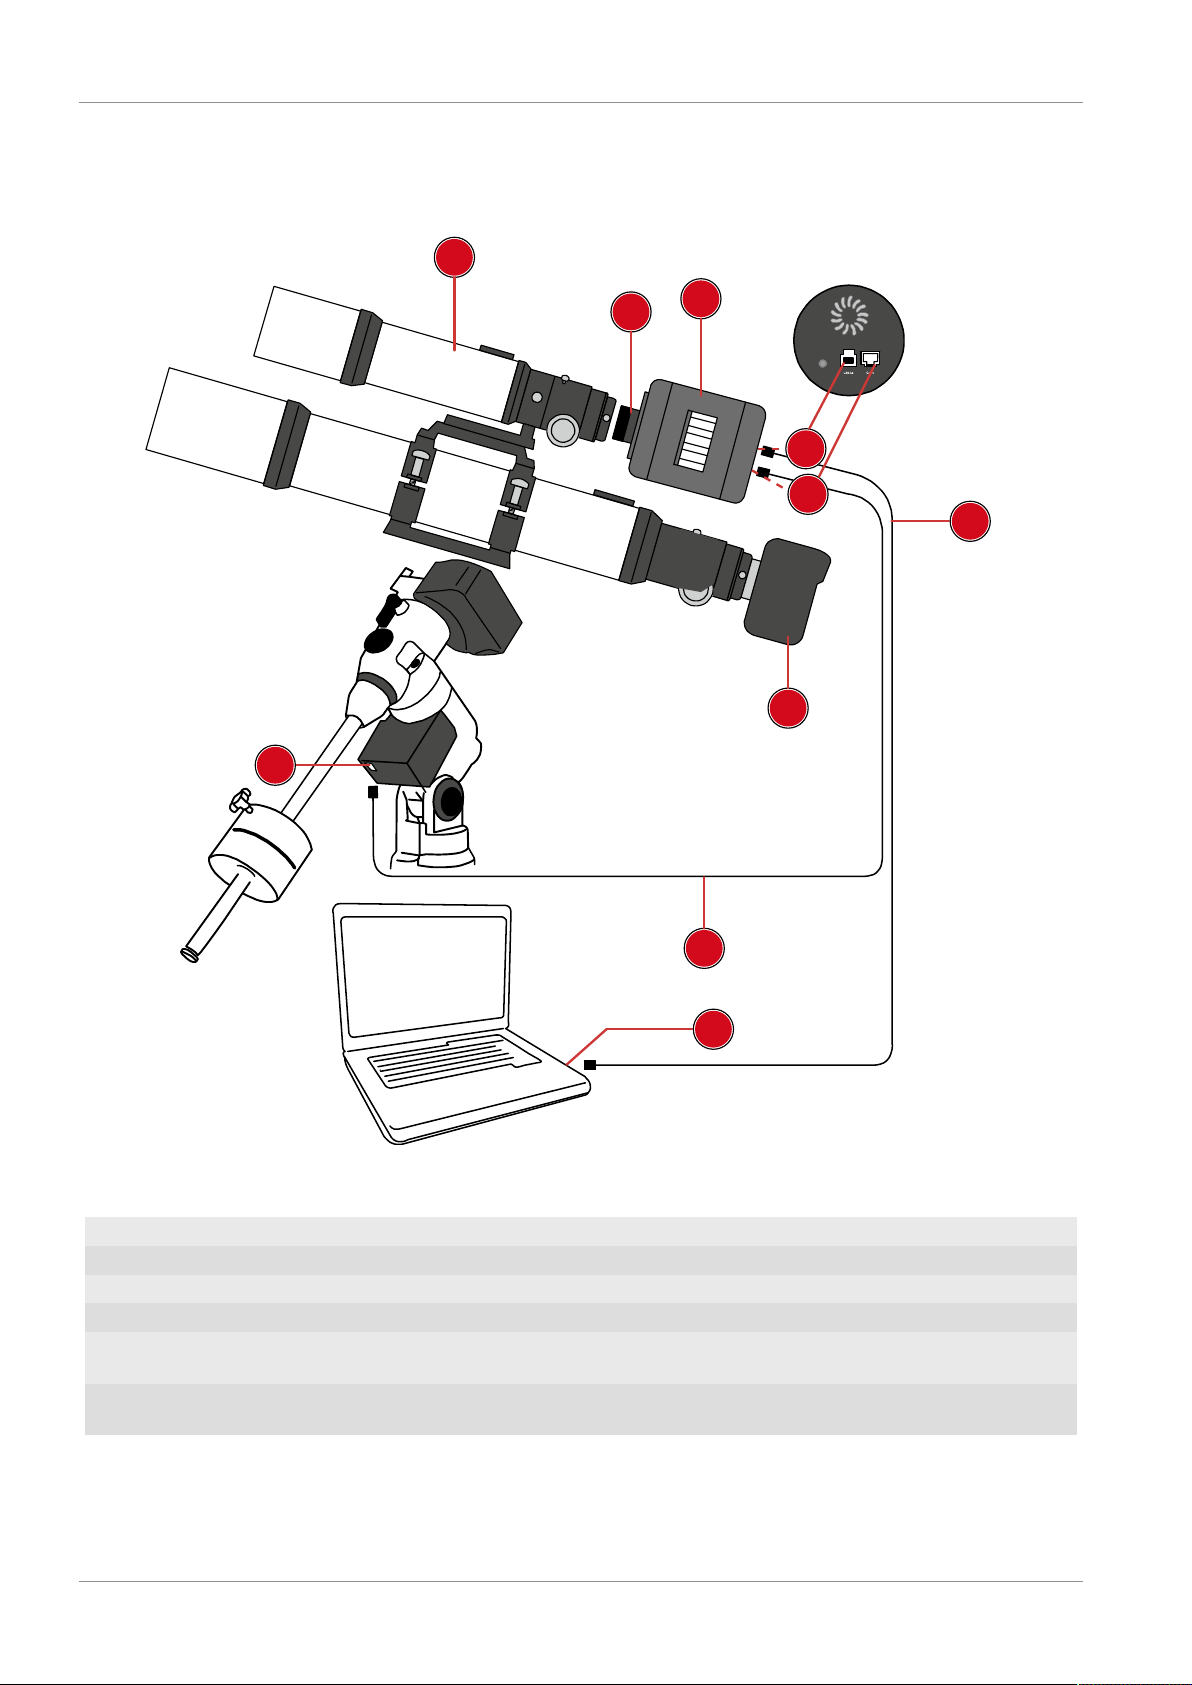
Image 2
Image 1 Image 3 Image 4
Illustration5: Menu windows relevant for optimization in the supplied software
To ensure that the camera delivers the best possible image results for long exposures over 1 minute,
you can optimally adjust the setting values for gain and black level depending on the desired exposure
time. Refer to Table 1 for help. Proceed as follows for the setting:
1. Select the desired exposure time (e.g. 6 minutes). (Image 1)
2. Open the "Acquisition & Resolution" settings menu. Click on the field with the current value for the
"Gain" and enter 158. Confirm the entry with [ENTER]. The value 1.58 is set. (Image 2)
3. Select the image format and bit depth according to Table 1. (Image 2+3)
4. Open the "Black Level" setting menu. Move the slider until you reach the appropriate value (e.g.
440). (Image 4)
5. Start the capturing images.
NOTICE!These are recommended guide values determined under real test conditions. Individual
adjustments may be necessary and depend on external factors such as ambient temperature.
Exposure
time
Gain Black level Format Bit depth e/ADU Read noise Full Well
6 minutes 1.58 440 RAW (fit) 12 2.03 1.81 8318.91
5 minutes 1.58 380 RAW (fit) 12 2.03 1.81 8318.91
4 minutes 1.58 303 RAW (fit) 12 2.03 1.81 8318.91
3 minutes 1.58 233 RAW (fit) 12 2.03 1.81 8318.91
2 minutes 1.58 172 RAW (fit) 12 2.03 1.81 8318.91
1 minute 1.58 112 RAW (fit) 12 2.03 1.81 8318.91
Table1: Table 1
11 Cleaning and maintenance
• Before cleaning the device, disconnect it from the power supply (remove plug or remove batteries)!
• Only clean the device externally using a dry cloth. Do not use cleaning solution to prevent damage
to the electronic parts.