manuals.online logo
Brands
  1. Home
  2. •
  3. Brands
  4. •
  5. Explore Scientific
  6. •
  7. Telescope
  8. •
  9. Explore Scientific Truss Tube Dobsonian Series User manual

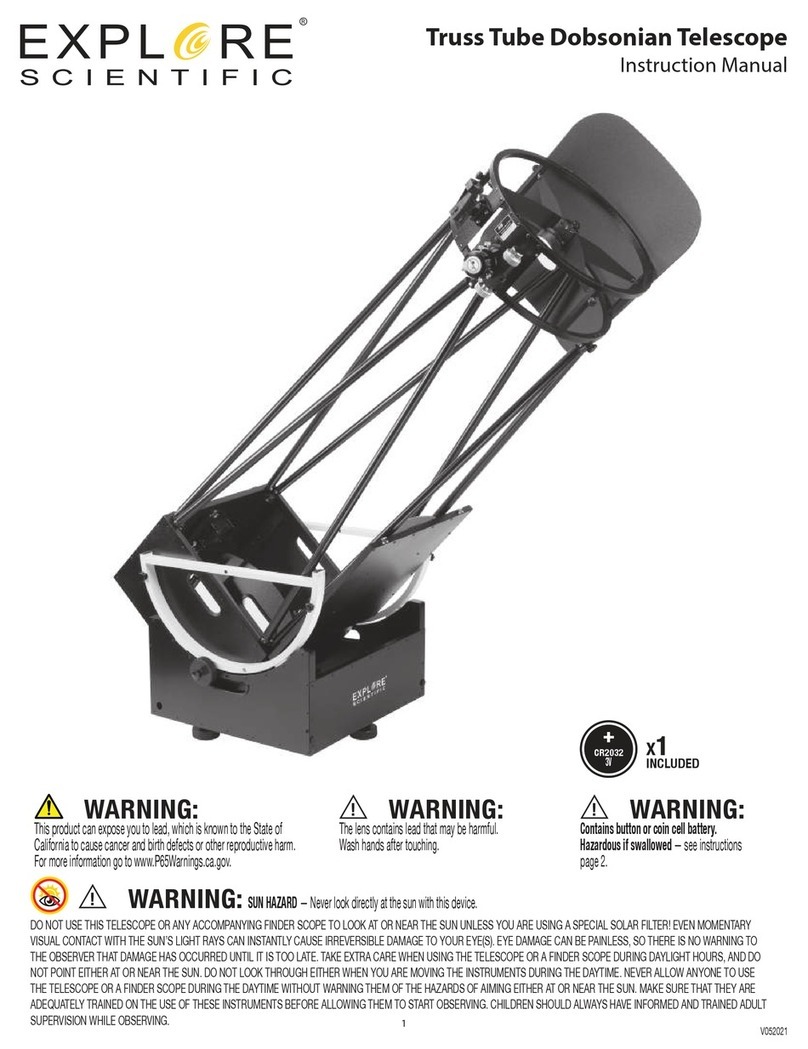
Explore Scientific Truss Tube Dobsonian Series User manual

User Manual
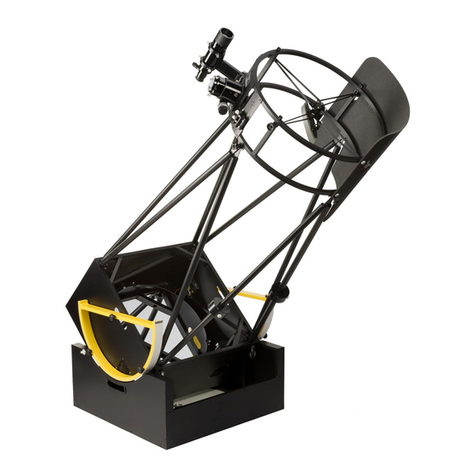
Explore Scientific Truss Tube Dobsonian Telescopes
DANGER!
DO NOT use this telescope or any accompanying finder scope to look at or near the Sun unless you are using a special
solar filter! Even momentary visual contact with the Sun’s light rays can instantly cause irreversible damage to your
eye(s). Eye damage can be painless, so there is no warning to the observer that damage has occurred until it is too
late. Take extra care when using the telescope or a finder scope during daylight hours, and do not point either at or
near the Sun. Do not look through either when you are moving the instruments during the daytime. Never allow anyone
to use the telescope or a finder scope during the daytime without warning them of the hazards of aiming either at or
near the Sun. Make sure that they are adequately trained on the use of these instruments before allowing them to start
observing. Children should always have informed and trained adult supervision while observing.
Contents
Overview Telescope Parts
Unboxing and checking for completeness
Assembly
Collimation
Adjusting the Red Dot Finder
Using a Dobsonian telescope
Calculating magnification
Observing
Hints and tricks
Maintaining the optics
Specifications
Accessory
Explore Scientific service
All Explore Scientific telescopes and telescope accessories are subject to constant technical improvement. Minor changes of
product specifications that happen during the improvement of the product are subject to change without notice.
Please keep this manual for future reference and do not throw it away.
Figure 1
Revision
Figure 1: Telescope parts overview
1. Focusser with 10:1 reduction
2. Secondary cage unit with secondary mirror
3. Collimation-tool for the main mirror
4. Trusses
5. Altitude wheels
6. Rockerbox
7. Lid mirror box
8. Mirror box
9. Red dot finder
Revision
10. 1” Focuser Extension
11. Clutch
The revision consists of the clutch and the 4mm
hex screw with the plastic sleeve. The center
rocker knob will be replaced with the hex screw
and sleeve (Figure 2). This will allow for the
installed clutch to ride against rocker without hitting
any knobs. The clutch is installed on the rocker
box on the center threaded hole above the center
of the handle (Figure 3). The clutch is with the
teflon to the rocker side and set to the up position.
Figure 2 Figure 3
Unboxing and checking contents
Please Note: We recommend that you keep the original shipping box and packing materials if possible, in case your scope
should ever need to be returned for service or warranty purposes.
Inside the main package, you will find:
Two yellow altitude wheels
Rockerbox
Red dot finder
Secondary cage with finder bracket and 2“ focuser with reduction (10:1)
4 Pairs of trusses
Collimating tool for the main mirror
Main mirror box
Stray light protection
8 Screws:
4 short screws with knob to secure the secondary cage to the truss pairs
2 long screws with knob to secure the altitude wheels directly to the main mirror box itself
2 long thinner screws with knob to connect the altitude wheels to the lid of the main mirror box
1” focuser extension
Clutches
When you open the box, the first thing you will find are the trusses. (figure 2):
Figure 2
The trusses are already assembled in four pairs. You will also find the collimation tool for the main mirror of the telescope. Carefully
remove the parts from the box, unwrap them and remove the foam parts that secure the rest.
Figure 3
After removing the trusses, you will find two boxes. The smaller one contains the mirror box and the other contains the rocker box.
On the outer left you can see one of the altitude wheels, the stray light cover for the secondary cage is visible in the upper part of
the box. Remove all parts from the box and unwrap everything.
When you open the lid of the mirror box you will see the following setup:
Figure 4
Inside the mirror box you will see a foam insert that contains some small parts, clutches, extension and the red dot finder. This
foam insert also protects the main mirror during transit. It also gives you the opportunity to store/transport eyepieces or
accessories. Remove the insert and the protective paper from the main mirror. We recommend keeping the soft paper covering
because it can protect the mirror from dust and dirt without giving off fluff.
In the other box there is the secondary cage unit and the rocker box (See figure 5):
Figure 5
Take both parts out of the box and carefully remove the protective paper from the secondary mirror.
Assembly
If you are assembling your telescope for the first time, we recommend doing so in a warm room.
First, place the mirror box onto a table to attach the altitude wheels to the mirror box. You will notice that each altitude wheel has
two holes. One of the holes matches the threaded hole on the mirror box, and the other matches the threaded hole in the lid of
the mirror box.
Important: You have four possibilities to attach the altitude wheel onto the mirror box of the telescope. There are two sets of holes
on both sides of the mirror box. Having two sets gives you an additional degree of freedom to balance your telescope. If you are
just using lightweight eyepieces (1.25”) we recommend attaching the altitude wheels to the lower set of holes. If you are using a
coma corrector, heavy eyepieces or both we recommend using the upper set of holes.
Though the distance of the holes in the altitude wheels appears to be similar, the orientation of the wheels on the mirror box DOES
matter – holes will not align if the altitude wheels are mounted in the wrong orientation. We recommend marking the position of
the altitude wheels so that everything works on the first try next time you assemble the telescope. We recommend using
luminescent color that enables you to assemble the telescope in complete darkness so your eyes can adapt to the night skyfaster.
Luminous color or luminous stickers are available from model making sources.
After attaching the altitude wheels onto the mirror box, place the rocker box on the ground and insert the mirror box into the rocker
box. Make sure that the two fans on the back of the mirror box are on the side of the rocker box that has the deep undercut (see
figure 6). Next, you will need to install a clutch on each side of the rocker box. These hold the structure’s weight and enable it to
move but not slip. To install, place the clutch with the tension pad facing the altitude wheel into the hole nearest the end of the
box with the fans. Attach the clutch by screwing in the large thumb knobs until the tension pad presses firmly against the wheel.
Figure 6
Now look at the mirror box from above. You will notice threaded rods that are sticking out of the corners of the mirror box.There
is a wing nut riding on each of those inward pointing threaded rods. Unscrew the wing nuts to the end of the threaded rods, making
sure that they don´t come off and risk falling onto the main mirror.
Unwrap the truss pairs. Each pair of trusses isconnected by a metal bracket that has a groove on the other side. Slide the bracket
with the groove over the threaded rod and fasten the trusses with the wing nut.
Note: After you have fastened the wing nut,the trusses will be secured to the mirror box BUT they will still be able toswing freely
from side toside, which means they could bump into surrounding equipment or people if not carefully monitored. Toprevent the
trusses from moving too freely, fasten the screws that hold them a bit tighter but remember that you have to move the trusses
later so do not overtighten them.
Next, it is time toattach the secondary cage unit using the four short screws with knobs. Originally the telescope is designed to
have the focuser oriented on the right side, so that the red dot finder is above the focuser when you move the telescope.
Important: During the attachment of the secondary unit please make sure that you have control of the secondary cage at all
times. Ifyou are doing this for the first time you will need a few minutes to get accustomed tothe procedure, since you have to
hold the secondary cage with one hand and align the truss holes and the threaded hole of the secondary unitand insert the screw
with the other hand. If you are doing this for the first time, the help of a second person is very handy.
Align the holes in the upper ends of an opposing pair oftrusses, stick ascrew through both of them and insert the screw into one
of the threaded holes in the lower brackets of the secondary cage. Do not fully tighten the screws until all four screws are inserted
correctly – trying to force a screw into the threaded hole on the secondary unit will damage the thread. If assembled correctly, that
screws will go into the threads without the useof force. After allfour screws are placed into the threaded holes in the secondary
unit, tighten the screws being sure not to overtighten.
Now attach the stray light cover tothe secondary unit by pressing the four velcro pads onto their corresponding counterparts on
the secondary unit and attach the red dot finder bysliding it into its bracket.
The telescope is now fully assembled.
Collimating theoptical systems
Although the optics in your telescope were carefully collimated in our quality control department prior to leaving our facility, we
recommend collimating the telescope after reassembly. The whole procedure is straightforward and should takes onlya few
minutes after reassembly, ifyou have numbered your trusses and reassemble your telescope the same way it has been
disassembled.
Basically the collimation of the telescope is done in three steps:
Rough Collimation
Collimating the secondary mirror
If the telescope is collimated you should see the concentric images of your eye, the secondary mirror, the main mirror and the
focuser.
To test rough collimation:
1. Remove the eyepiece from the focuser and look through it. The secondary should appear round. If the secondary does not
appear round, tilt it with the three collimation screws that are located on the back side of the secondary holder.
2.Next check the reflection of the middle point of the main mirror in the secondary. If the reflection of the mark on the main mirror
is not in the center of the secondary, center it by using the three collimation screws like you did in step 1.
Figure 7
Adjusting the main mirror
Once the secondary appears round and the mark on the main mirror is centered, check the collimation of the main mirror. If the
reflection of your eye and the reflection of the secondary on the main mirror are not concentric, insert the collimating tool into one
of the collimation screws that are located on top and on each side of the main mirror. When you turn the collimation tool you will
notice that the hexagonal head of the tool will lock into the hexagonal head of the collimation screw. Now you can adjust the main
mirror by turning the collimation tool (see figure 8). Adjust the screws until the eye and the reflection of the secondary are centered
in the main mirror. Practice this until you get a feel of what a turn at one of the collimation screws is doing.
Fine Collimation
During fine collimation, locate Polaris and view it with high magnification. Note: Please take care that the telescope has time to
adapt to the ambient temperature before starting collimation – this will need up to 30 minutes (otherwise you will not get a good
star image). You may use the fans to speed up this process.
If the telescope is collimated well, you will see a system of dim rings of light surrounding a central bright spot — the so-called airy
disc. You will also notice a dim cross of light coming from this airy disc. This is the diffraction that is caused by the secondary
spider vanes. We have left this cross out off the next figures for clarity. What we want to see is shown in figure 11 – a central airy
disc that is surrounded by concentric rings. However, it is much more likely that the picture will be different – more like figure 9. It
is essential that you always center the star because outside of the optical axis all stars do show some distorted images. Note:
You will get those images only during moments of perfect steady air because air turbulence will distort this image. However the
collimation goal remains the same – getting a concentric star image. So let us assume you have good seeing and your eyepiece
shows you something like figure 9:
Figure 10 Figure 11
Figure 8
Try turning the main mirror collimation screws – when you are turning the right screw in the right direction, you will notice that the
distracting “tail” is getting shorter (figure 10):
Remember to recenter the star after you have turned a screw. When the telescope is perfectly aligned, you will see the picture of
figure 11 (when the air is perfect). During the use of your telescope you will get a feeling for this – it does not make sense to spend
a lot of time on collimation when the air is moving too much.
Important:Outside the optical axis (the middle of the field of view) all stars will be distorted and show tails directed tot he edge
of the field of view. If you are using cheap eyepieces those star images will be even more distorted because the off-axis aberrations
of the telescope and the eyepiece will add up. For this reason it is essential to recenter Polaris after every turn of a collimation
screwbecause the turning of the screw will also shift the star from its centered position. As mentioned before it may not be possible
to get a sharp star image during periods of turbulent air. In this case try to achieve a symmetric image during collimation and abort
the process, if you don’t see any more improvement. During those nights it is not recommended to use high magnification. Try to
enjoy low magnification objects like nebulae, clusters and galaxies in those nights instead of fretting over the bad conditions.
Using your Dobsonian
Your Explore Scientific Dobsonian is a precision optical instrument and should be used with care. Try to avoid exposing your
telescope to vibrations because this may cause the telescope to lose collimation.
Aligning the viewfinder
The red dot that is used by the finder scope is not readily visible during the day. For this reason you should align the finder scope
once it is dark.
To do this:
1. Insert an eyepiece with low magnification into the focuser of the telescope and make sure that the red dot finder scope has
loaded batteries and is switched on.
2. Look through the eyepiece and center an object that is easy to find at a minimum distance of more than 800m, like a street
lamp.
3. Look through the red dot finder and move your head until you see the red dot of light that is projected onto the glass window.
Adjust the finder with the two screws until the red dot is on top of the object that is centered in the telescope’s eyepiece. You can
fine-tune the finder collimation on a celestial object, like a bright star or a crater on the moon, by following the same procedure.
Focuser
The focuser of the Explore Scientific truss Dobsonian is equipped with a 10:1 reduction (figure 12).
Figure 9
This reduction makes fine focusing easy. You can lock the focuser by using the locking screws on the upper side of the focuser.
Tighten the screws until you feel some resistance – the focuser draw tube is now locked and will not move.
Notice:
Never try to force the focuser beyond the stops. Do not turn the focuser knobs while the focuser is locked. Turning the
focuser knobs while the focuser is locked may result in damage to the focuser.
Astronomical observations
The first observations should be performed during dusk so that you get familiar with your new telescope quickly. Always
remember never to look at or near the sun! Choose a land object that is easy to find and far away, such as a mountain top.
Roughly point the telescope at the object. Now look through the finder scope and move the telescope until the red dot of light
appears centered onto the object. If your are looking through an eyepiece with low magnification, you should now be able to see
the object in the telescope. Focus the image carefully, center it in the field of view and fine tune the alignment of the finder if
necessary. Now that you are getting more familiar with the telescope you can try to watch the Moon (if visible). It should be
possible to use the telescope without additional light now without problems. The Moon can be observed best during the periods
where less than 50% of its surface is bright. So you can see the detailed shadows that the sun is causing when the light hits the
craters from the side angle – creating a 3D-like experience. We recommend using a neutral density filter for the Moon that reduces
the glare. During a Full Moon, the surface appears evenly bright without contrast and prominent structures.
If you are spending a few successive nights watching the Moon you will notice the change in the appearance of the mountains,
craters and maria due to the change of the phase of the Moon – a very interesting effect!
The planets
During their orbit around the sun the planets are continuously changing their position on the sky. When they are visible, the
following planets are especially suited for observations with your telescope:
Venus:
The diameter of Venus is about 9/10 the diameter of the Earth, and it is the third brightest object in the sky (after the Sun and the
Moon). As Venus orbits the Sun, you can observe the change of the light phases — sickle, half Venus, full Venus — very much
like the phases of the moon. The planetary disc of Venus appears white because the sunlight is reflected by a compact layer of
clouds that covers all surface details.
Mars:
The diameter of Mars is about half of the Earth’s diameter. In a telescope, Mars will appear as a tiny red-orange disk. You may
see a tiny white patch when you look at the polar regions that are covered in ice. About every two years, when Mars and Earth
reach their closest distance you can discover new features.
Jupiter:
The biggest planet in our solar system is Jupiter. In a telescope, the gas giant appears as a disk that is covered in dark lines.
Those lines are cloud bands in the atmosphere of Jupiter. Even with low magnification, 4 of the 67 moons of Jupiter are often
visible. These are the Galilean moons (Io, Ganymed, Europa and Callisto). Because those moons are orbiting Jupiter the visible
number and position changes. Sometimes a moon passes above the planetary disc of Jupiter – then the shadow of the moon can
be spotted on the planet as a sharp dark spot.
Saturn:
Saturn has a diameter about nine times the Earth’s diameter and appears as small roundish disc with a distinct set of rings that
bulge out from the edges of the planetary disc. Galileo, who was the first human observer of this planet in 1610, couldn´t know
that the planet had rings. Instead, he described Saturn as having “ears“. The rings of Saturn mainly consist of billions of icy
particles – ranging from tiny dust to the size of a house. The biggest division in the rings, the so called “Cassini division” should
be easily seen with your telescope in nights of steady air. Titan, the biggest of the 62 moons of Saturn, is also visible as a bright,
starlike object in the vicinity of the planet. Up to six moons may be detected in your telescope.
Deep-Sky-Objects
To locate constellations, stars or other deep-sky-objects, it makes sense to use a star chart. We will list a selection of deep sky
objects here:
Stars are giant objects that mainly consist of gas. Due to the nuclear fusion in their core they radiate energy and shine. The stars
are extremely far away. Because of this vast distance they appear as tiny spots of light in your telescope, despite their size – no
matter how big your telescope is.
Nebulae are giant interstellar clouds of gas and dust. Within those clouds new stars are being born. The premier nebula on the
northern hemisphere is the Great Orion Nebula, a diffuse nebula that looks like a fuzzy patch of light in the sword that branches
off of Orion’s Belt. Also known as M42, it contains many intriguing features that pop to life in a telescope.
An open cluster is a group of young stars that were born in a single diffuse nebula not too long ago (on an astronomical time
scale). The Pleiades is an open cluster that is relatively young, having formed within the last 100 million years, and lies relatively
close to Earth at about 440 light years away. Found in the Taurus constellation, it consists of more than 1,000 confirmed stars,
although an average of only six are visible to the naked eye. A dark sky free of light pollution can help a dedicated observer see
around a dozen Pleiades stars, but you telescope will quickly reveal many more of the elusive members of this legendary
cluster.
Constellations are big patterns of stars that were believed to be celestial representations of men, gods and objects by old
civilizations. Those patterns are too big to be observed at a single glance through a telescope. If you want to become familiar with
the constellations, start with a pattern that is easy to find, like the Big Dipper in the constellation Ursa Major. Try to locate the other
constellations in the neighborhood of this constellation in the second step and move on to even more distant patterns.
Galaxies are gigantic accumulations of stars, nebulae and clusters that are held together by gravity. Most galaxies have a spiral
shape (like for example our own galaxy, the milky way), but there are also galaxies with elliptical or irregular shapes. The closest
spiral galaxy is the Andromeda-Galaxy (M31). The core of M31 looks like a bright patch of light in your telescope – under dark
clear skies you will be able to detect features in this object with your telescope.
Tips and Tricks
Marking with luminous paint: As noted above in the section about assembly it is very helpful to mark the positions of the altitude
wheels and the trusses. This helps when assembling the telescope at night and keeps collimation issues at a minimum.
We also recommend marking your screws with a patch of luminous paint because it makes finding lost parts a lot easier to find
when dropped in the grass and often makes it unnecessary to use a flashlight, which would disturb the night vision of other
observers.
Image orientation:You may have noticed that objects appear to be upside down and mirrored in your telescope. This is the case
in almost every astronomical telescope and does not cause any problem during astronomical observations. Because of the Earth’s
rotation all objects seem to drift across the field of view. To compensate this movement you have to move the telescope smoothly
and slowly. The higher the magnification the more accurate this tracking movement has to be. Another solution is to place the
object on the eastern rim of the field of view and let it drift across the field, then reposition it on the eastern rim again. However –
this method only works with good eyepieces that are delivering a sharp image up to the edge of the field.
Vibrations: Try to avoid touching the eyepiece during observations. Touching the eyepiece and the slight shiver of the hand will
cause unsteady views.
Night vision: Give your eyes some time to adapt to the darkness. This takes about 20-30 minutes after an exposure to a bright
light – even if it is a short exposure. Use a dim light with a red filter to read star charts or draw objects – dim red light does not
influence your eye’s adaption very much.
Horizon viewing: Planets and other objects that are close to the horizon are severely influenced by air movement and
absorbance. It is much better to time your observations in a way that those objects are close to the meridian, so that they are on
their highest position possible. If the image is dim or moving fast, use a smaller magnification. Using too much magnification is a
mistake that is made very often by beginners.
Warm Clothing:Even in the summer the nights may get very cold during clear nights, especially on the mountains. Always
remember to bring warm clothing like thick jackets, beanies, gloves, winter shoes and thick socks – even if your were sweating
during the day. It is hard to enjoy even the best night when you are freezing!
Explore your observing site during the day:The ideal site should be far off of frequently used streets and other light sources
that would prevent your eyes from adapting to the dark. Keep in mind that it is likely to get foggy in the vicinity of open water, such
as river valleys or lakes. The ground should be solid and relatively flat. You can observe in the city, but try to get to a place some
distance away, where you can see the Milky Way if possible. You can get really good conditions as close as 50 km outside of
cities. If relocating to a more rural area is not a possibility, try to position your scope away from as many artificial light sources as
possible. An old astronomers quote says: “ You cannot really replace a dark sky by anything than a darker sky”
Calculating magnification
The magnification that a telescope gives you at the sky is determined by two factors: The focal length of the telescope and the
focal length of the eyepiece. You will find the focal length of almost all eyepieces written on the eyepiece body.
The magnification is determined by the following formula:
Magnification. = Telescope focal length divided by eyepiece focal length
For example, a 12” dobson and a 24mm eyepiece:
Magnification. = 1525mm/24mm = 64x
The eyepiece type, like Modified Achromatic, Plössl or Super Plössl, does not have any influence on the magnification, but
determines other optical properties like apparent field, chromatic error correction and flatness of the field of view.
The maximum usable magnification is about two times the diameter of the aperture in millimeters. However, in nights of bad to
average seeing much lower magnifications will produce a more detailed and steadier image. High magnifications should only be
used during periods of extremely steady air on special objects, like double stars. When you are starting to observe an object,
always start with a low magnification. Then center the object in the field of view and focus with care. Now you can try a higher
magnification. When the image is becoming fuzzy or is moving, go back to the last magnification. Atmosphere – and thus seeing
conditions – is always changing. Please notice that a sharp image at a low magnification will show you more than an over-
magnified fuzzy view.
Specifications
10“ Model
Tube: Open truss design
Upper tube ring: Metal tubing, incl. secondary spider and holder, plus focuser and truss connectors.
Mirror box: with main mirror and cell, fans and truss connectors
Trusses: Powder coated aluminum with connectors.
Secondary spider: 4-arm, steel
Main mirror: 10” (254 mm), parabolic, BK-7 like glass, aluminum coated with protective layer,
Focal length: 1270 mm
Focal ratio: f/5
Resolving power: 0,51 arc seconds
Visual limiting magnitude: approx.14.5 mag
Focuser: 2" rack and pinion 1:10, aluminum, with 1,25” reducer.
Mount: Dobson
Finder: Deluxe red dot finder
Tube weight: 20,2 kg.
Rocker box weight: 6,7 kg.
Total weight: 26,4kg
12“ Model
Tube: Open truss design
Upper tube ring: Metal tubing, incl. secondary spider and holder, plus focuser and truss connectors.
Mirror box: with main mirror and cell, fans and truss connectors
Trusses: Powder coated aluminum with connectors.
Secondary spider: 4-arm, steel
Main mirror: 12” (305 mm), ), parabolic, BK-7 like glass, aluminum coated with protective layer,
Focal length: 1524 mm
Focal ratio: f/5
Resolving power: 0,43 arc seconds
Visual limiting magnitude: approx.14.5 mag
Focuser: 2" rack and pinion 1:10, aluminum, with 1,25” reducer.
Mount: Dobson
Finder: Deluxe red dot finder
Tube weight: 22,9 kg.
Rocker box weight: 7,1 kg.
Total weight: 30 kg
16" Model
Tube:Open truss design,
Upper tube ring: Metal tubing, incl. secondary spider and holder, plus focuser and truss connectors.
Mirror box: with main mirror and cell, fans and truss connectors
Trusses: Powder coated aluminum with connectors.
Secondary spider: 4-arm, steel
Main mirror: 16” (406 mm), ), parabolic, BK-7 like glass, aluminum coated with protective layer,
Focal length: 1825 mm
Focal ratio: f/4,5
Resolving power: 0,32 arc seconds
Visual limiting magnitude: approx.16 mag
Focuser: 2" rack and pinion 1:10, aluminum, with 1,25” reducer.
Mount: Dobson
Finder: Deluxe red dot finder
Tube weight: 30 kg.
Rocker box weight 10 kg.
Total weight: 40 kg
Accessories:
Explore Scientific has a large portfolio of accessories available for your telescope. For a complete overview of these accessories,
visit www.explorescientific.com
If you have any question regarding this product, please do not hesitate to contact our Customer Service department at (866) 252-
3811 or service@explorescientific.com. In case of the unlikely event that your telescope needs service or repair at our facility,
please contact one of our customer service representatives before sending anything back. The large majority of service issues
can be dealt with on the phone without sending anything back to us.
Service and Maintenance
Your Explore Scientific truss Dobsonian is a precision instrument that will provide many years of fun. When you are treating this
telescope with the same care as for example a expensive camera, it is very unlikely that you will ever need to return it for service
or maintenance.
Please note the following recommendations for maintaining your telescope:
a) Try to avoid cleaning the optics. A little dust on the optical system will not deteriorate the performance of the optical
system by any noticeable amount. A little dust should not be a reason to clean the optics.
b) If cleaning the optics is necessary it is best to brush away the dust with a fine camel hair brush as it is used for
photographic equipment. Please do NOT use optical lens cleaning tissues as many contain fiberglass particles that can
be abrasive.
c) Organic dirt (fingerprints etc.) can be removed from the optical surface with a mixture of 3 parts distilled water and one
part pure isopropyl alcohol (99%). Only use soft, white, unscented, lotion-free tissues to wipe optics. Soak the mirror to
dissolve the dirt and remove the fluid with short, cautious strokes. Remember to change tissues every few strokes.
d) While you are using your telescope during the night you will eventually have dew condensing on the surfaces. This will
not cause any trouble – your telescope is designed to take a little moisture without problems. When you store the
telescope, however, we recommend wiping the surfaces (except for the optics) with a dry cloth and giving the telescope
some time to evaporate the water on the optics by putting the telescope into a dry room with the lid of the mirror box
open. Wait until all water has dried off before storing the telescope.
Recycling
Please dispose of the package properly. Please note that you have to consider the legal obligations when you want to recycle the
telescope. You will get the actual recycling regulations from your local recycling agency or the ministry that issued the regulations.
This manual suits for next models

3

Other Explore Scientific Telescope manuals

Explore Scientific DOB2036-00 User manual

Explore Scientific

Explore Scientific DOB2036-00 User manual

Explore Scientific David H. Levy Comet Hunter User manual

Explore Scientific

Explore Scientific David H. Levy Comet Hunter User manual

Explore Scientific APOLLO COMBO SET User manual

Explore Scientific

Explore Scientific APOLLO COMBO SET User manual

Explore Scientific FirstLight series User manual

Explore Scientific

Explore Scientific FirstLight series User manual

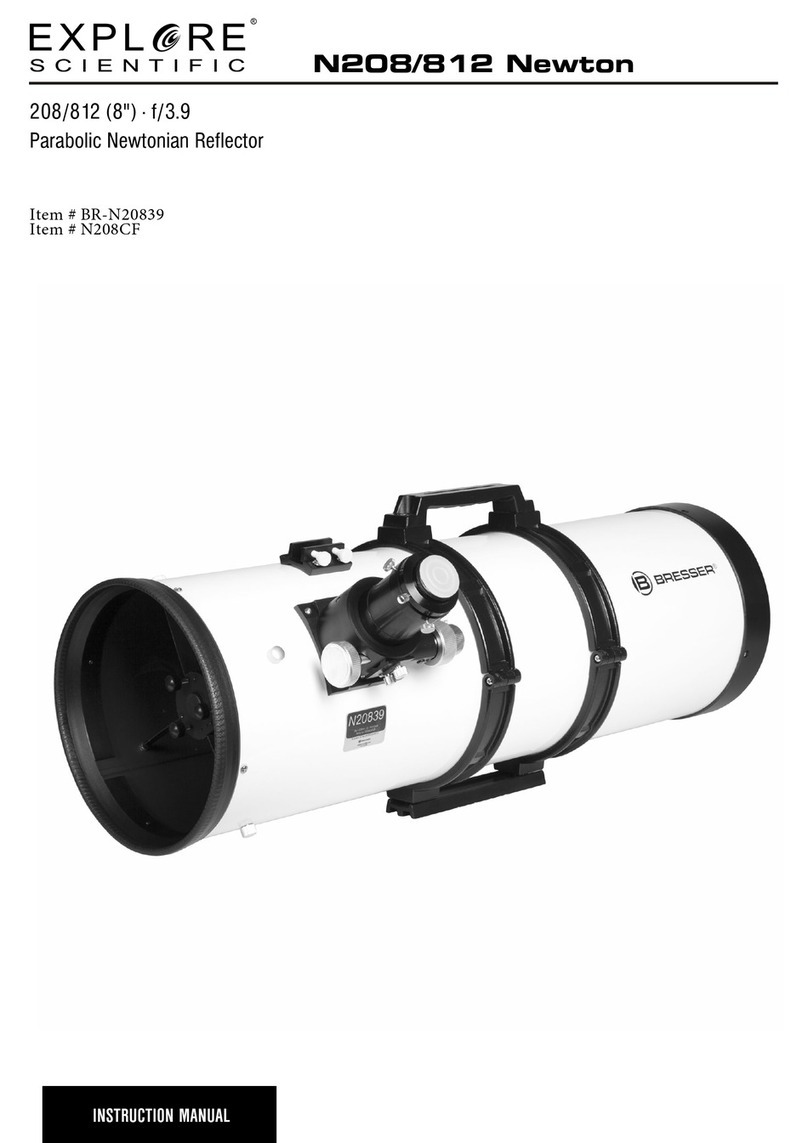
Explore Scientific N208/812 Newton User manual

Explore Scientific

Explore Scientific N208/812 Newton User manual

Explore Scientific Photo-Newton PN-208 User manual

Explore Scientific

Explore Scientific Photo-Newton PN-208 User manual

Explore Scientific Truss-tube Dobsonian User manual

Explore Scientific

Explore Scientific Truss-tube Dobsonian User manual

Explore Scientific Truss Tube Dobsonian Telescopes User manual

Explore Scientific

Explore Scientific Truss Tube Dobsonian Telescopes User manual

Explore Scientific ED APO User manual

Explore Scientific

Explore Scientific ED APO User manual

Explore Scientific David H. Levy Comet Hunter MN-152 User manual

Explore Scientific

Explore Scientific David H. Levy Comet Hunter MN-152 User manual

Explore Scientific AR Doublet Series User manual

Explore Scientific

Explore Scientific AR Doublet Series User manual

Explore Scientific 20 Ultra Light Dobsonian Gen II User manual

Explore Scientific

Explore Scientific 20 Ultra Light Dobsonian Gen II User manual

Popular Telescope manuals by other brands

Meade Starfinder Reflecting Telescope instruction manual

Meade

Meade Starfinder Reflecting Telescope instruction manual

National Geographic NT114CF instruction manual

National Geographic

National Geographic NT114CF instruction manual

SKY-WATCHER NEWTONIAN manual

SKY-WATCHER

SKY-WATCHER NEWTONIAN manual

Celestron Super C8 Plus instructions

Celestron

Celestron Super C8 Plus instructions

Meade MEADE 226W operating instructions

Meade

Meade MEADE 226W operating instructions

JMI Telescopes NGT-12.5 owner's manual

JMI Telescopes

JMI Telescopes NGT-12.5 owner's manual

ORION TELESCOPES & BINOCULARS SkyView Pro 80mm ED EQ 9884 instruction manual

ORION TELESCOPES & BINOCULARS

ORION TELESCOPES & BINOCULARS SkyView Pro 80mm ED EQ 9884 instruction manual

Celestron Advanced VX 91519 instruction manual

Celestron

Celestron Advanced VX 91519 instruction manual

Celestron Ultima 9 1/4 installation guide

Celestron

Celestron Ultima 9 1/4 installation guide

Bresser 12x30 Stoertebeker operating instructions

Bresser

Bresser 12x30 Stoertebeker operating instructions

Celestron StarSense 94008 instruction manual

Celestron

Celestron StarSense 94008 instruction manual

Celestron ASTRO FI 127 MAK Quick setup guide

Celestron

Celestron ASTRO FI 127 MAK Quick setup guide

Olivon AZ2 user manual

Olivon

Olivon AZ2 user manual

Praktica Delta 20-60x77 Product guide

Praktica

Praktica Delta 20-60x77 Product guide

Bresser TRAVEL instruction manual

Bresser

Bresser TRAVEL instruction manual

Orion XT4.5 instruction manual

Orion

Orion XT4.5 instruction manual

Celestron PowerSeeker 50 instruction manual

Celestron

Celestron PowerSeeker 50 instruction manual

Bresser EQ Series instruction manual

Bresser

Bresser EQ Series instruction manual

manuals.online logo
manuals.online logoBrands
  • About & Mission
  • Contact us
  • Privacy Policy
  • Terms and Conditions

Copyright 2025 Manuals.Online. All Rights Reserved.