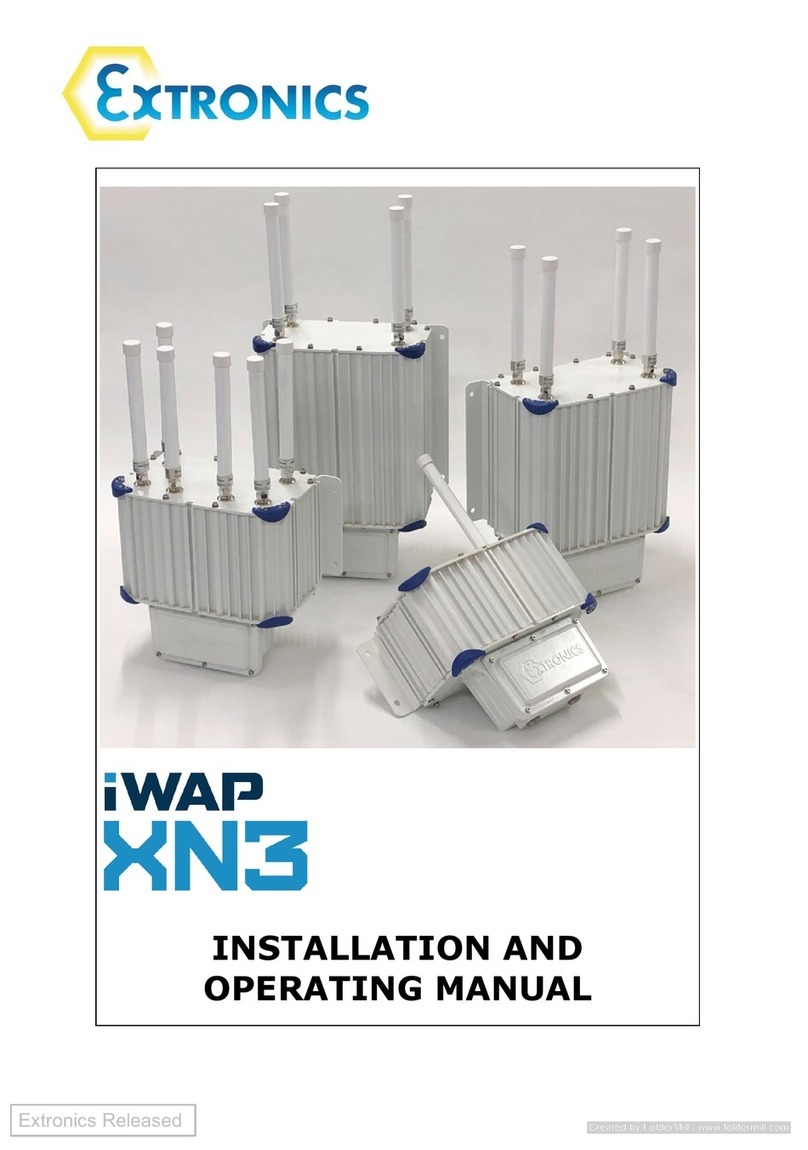
extronics iWAP XN3 User manual

INSTALLATION AND
OPERATING MANUAL

XN3 Installation and Operating Manual
2
Document Number X124391(5) Refer to Extronics DDM for release status.
Based on type approval documents X123263 and X124186.
The Photograph on the front page shows the XN3 Aluminium Enclosure
version.
For warranty information, refer to Terms and Conditions at
http://www.extronics.com
© 2021 Extronics Limited. This document is Copyright Extronics limited.
Extronics reserve the right to change this manual and its contents without
notice, the latest version applies.

XN3 Installation and Operating Manual
3
Contents
1Introduction ................................................................................................... 4
2Safety Information and Notes ........................................................................... 5
2.1 Storage of this Manual ............................................................................... 5
2.2 Special Conditions for Safe Use / Conditions particulières d’utilisation .............. 5
2.2.1 ATEX/IECEx .............................................................................................. 5
2.2.2 MET......................................................................................................... 5
2.3 List of Notes ............................................................................................. 6
3Installation....................................................................................................10
3.1 Mounting.................................................................................................10
3.2 Opening and Closing the Enclosure .............................................................12
3.2.1 Opening the front cover plate ....................................................................12
3.2.2 Closing the Enclosure................................................................................12
3.3 Cable Entries ...........................................................................................13
3.3.1 Typical Cable Entries and Connections ........................................................13
3.4 Earthing ..................................................................................................14
3.4.1 Location of XN3 enclosure external earth bond points ...................................14
3.5 Electrical Installation ................................................................................15
3.6 Power Supply / Input Connector.................................................................16
3.7 Fuse Rating .............................................................................................16
3.8 External Overcurrent Protection .................................................................16
3.9 Data Connections .....................................................................................17
3.9.1 Copper Ethernet.......................................................................................17
3.9.2 Power-Over-Ethernet (POE) .......................................................................17
3.9.3 Optical Fibre ............................................................................................17
3.9.4 Console Port ............................................................................................18
3.10 Intrinsically Safe RF Outputs......................................................................18
3.10.1 Example of RF threshold power calculation ..................................................18
3.11 Antenna Requirements..............................................................................20
3.12 Antenna Installation .................................................................................20
3.13 Ex Main Enclosure Test .............................................................................20
4Intended Purpose Usage .................................................................................21
4.1 Transportation and Storage .......................................................................21
4.2 Authorized Persons ...................................................................................21
4.3 Cleaning and Maintenance .........................................................................21
4.4 Cleaning and Maintenance Intervals............................................................21
4.5 Aggressive substances and environments ....................................................21
4.6 Exposure to external stresses ....................................................................21
5Pole Mounting................................................................................................22
6Technical Data...............................................................................................23
7Marking information .......................................................................................24
7.1.1 ATEX/IECEx .............................................................................................24
7.1.2 MET........................................................................................................25
8Type Codes ...................................................................................................26
8.1.1 ATEX/IECEx .............................................................................................26
8.1.2 MET........................................................................................................26
9EU Declaration of Conformity...........................................................................27

XN3 Installation and Operating Manual
4
1Introduction
The iWAP XN3 has been designed to enable the deployment of popular wireless
access points, radio and communications equipment or Industrial Internet of
Things IIoT /Industry 4.0 devices in Zone 2 /Division 2 hazardous areas (Gas or
Dust). Available in 4 different heights, designated Model 15, 24, 30 and 36, the
iWAP XN3 will suit a wide range of equipment sizes, from a small (IIoT) device to
an industrial access point with wireless gateway in the same enclosure.
The RF outputs of the iWAP XN3 are galvanically isolated to make them intrinsically
safe, allowing users to choose non-certified antennas for use with their wireless
hardware –such as the Extronics iANT2xx range of high quality rugged outdoor
antennas. Any antennas not listed in the Extronics range must be assessed by the
user to ensure they meet the requirements for installation of non-electrical
equipment in hazardous areas.
A range of access points from Cisco and Aruba, have been assessed by our
engineers, following the guidelines of our Notified Body, as suitable for use in the
iWAP XN3 and complying with all regulations. Wireless access points, radio and
communications equipment or IIoT /Industry 4.0 devices can be chosen by the
customer as required.
With IP66 / Type 4 (NEMA standards) ingress protection and a Marine grade
copper-free aluminium alloy, e-coat with epoxy powder coated enclosure plus the
option of surge protection, the iWAP XN3 is suitable for a wide variety of industrial
and off-shore locations including chemical and pharmaceutical plants, oil
refineries, FPSOs and oil and gas platforms.

XN3 Installation and Operating Manual
5
2Safety Information and Notes
2.1 Storage of this Manual
Keep this user manual safe and in the vicinity of the device. All persons required
to work on or with the device should be advised on where the manual is stored.
Conserver ce manuel d’utilisation en lieu sûr et à proximité de l’appareil. Toutes
les personnes devant travailler sur ou avec l’appareil doivent être informées de
l’endroit où est rangé le manuel.
2.2 Special Conditions for Safe Use / Conditions particulières
d’utilisation
2.2.1 ATEX/IECEx
1. The equipment is not to be mounted in a high airflow dust laden atmosphere
and should only be cleaned with a damp cloth.
2. The equipment is to be mounted in a vertical orientation with the Ec connection
box at the base.
3. The connection between the antenna and the factory installed N-type connector
shall maintain at least IP54.
4. The ‘ec’ portion of the enclosure may contain a USB console connection. When
fitted this connection is for service purposes only and shall not be used in
normal operation.
2.2.2 MET
1. The equipment is not to be mounted in an area with a high airflow dust laden
atmosphere, in addition, cleaning of the enclosure shall only be with a damp
cloth. L’équipement ne doit pas être monté dans une zone à l’atmosphère à
haut débit d’air chargé de poussière. En outre, le nettoyage du boîtier ne doit
être effectué qu’avec un chiffon humide.
2. The enclosure shall only be mounted in a vertical orientation with the top plate
face up. Le boîtier doit être monté uniquement orienté à la verticale, avec la
plaque supérieure face vers le haut.
3. The connection between the antenna and the factory installed N-type connector
shall maintain at least IP54. La connexion entre l’antenne et le connecteur de
type N installé en usine doit préserver au moins un IP54.
4. The ‘ec’ portion of the enclosure may contain a USB console connection. When
fitted this connection is for service purposes only and shall not be used in
normal operation. La partie « ec » du boîtier peut contenir une connexion à
une console USB. Lorsqu’elle est montée, cette connexion sert uniquement à
des fins d’entretien et ne doit pas être utilisée en fonctionnement normal.
5. Temperatures may exceed 70°C at the junction box gland entry point and 80°C
at the cable branching point, use suitably rated cable and cable entry devices.
La température peut dépasser 70 °C au point d’entrée du presse-étoupe du
boîtier de raccordement, et 80 °C au point de dérivation du câble. Utiliser un
câble et des dispositifs d’entrée de câbles d’une puissance suffisamment
adaptée.

XN3 Installation and Operating Manual
6
2.3 List of Notes
The notes supplied in this chapter provide information on the following.
•Warning!
oPossible hazard to life or health.
•Caution
oPossible damage to property.
•Important
oPossible damage to enclosure, device or associated equipment.
•Information
oNotes on the optimum use of the device
Warning! Installation of the XN3 must be performed in accordance with
IEC 60079-14 and IEC 60079-25. Maintenance and inspection
must be performed in accordance with IEC 60079-17.
Avertissements! L’installation de l’iWAP XN3 doit être effectuée
conformément aux normes CEI 60079-14 et CEI 60079-
25. La maintenance et l’inspection doivent être réalisées
conformément à la norme CEI 60079-17.
Warning! Installation of the XN3 is only to be performed by skilled
electricians and instructed personnel in accordance with
national legislation.
Warning! The XN3 contains INTRINSICALLY SAFE circuits.
Warning! The XN3 Intrinsically Safe RF output ports are located in the
positions shown in Section 3.3. Only antennas in accordance
with Section 3.11 may be connected to these ports. Refer to vi
Warning! The XN3 MUST be earthed. It must be connected to the plant
earth system using at least one of the external bonding points,
using a minimum 4mm2conductor. The earth cable must be
installed in accordance with the requirements of IEC 60079-
14. Refer to Section 3.4 for details. The cover plate earth bond
must not be removed.
Avertissements! L’iWAP XN3 doit être mis à la terre. Il doit être raccordé
au système de mise à la terre de l’installation, en
utilisant au moins un des points externes de liaison à la
terre, avec un conducteur d’un minimum de 4 mm2. Le
câble de terre doit être installé conformément aux
exigences de la norme CEI 60079-14.
Warning! The XN3 front cover plate earth bond must not be removed.

XN3 Installation and Operating Manual
7
Avertissements! La liaison à la terre de la plaque de protection de l’iWAP
XN3 ne doit pas être retirée.
Warning! The XN3 internal power input connector has an earth
connection, which must be terminated to the protective earth
conductor of the incoming power supply.
Warning! The XN3 must NOT be installed in hazardous areas requiring
Category 1, 2, M1 or M2 equipment.
Warning! The XN3 enclosure must NOT be opened when an explosive
gas or dust atmosphere is present, or when the equipment is
energized.
Avertissements! L’iWAP XN3 ne doit pas être ouvert dans une atmosphère
contenant de la poussière ou un gaz explosif, ni lorsque
l’équipement est sous tension.
Warning! The XN3 enclosure must be secured only with the bolts
supplied, and these must be tightened to the correct torque
value. See Section 3.2.2 for details. Contact Extronics for
replacement bolts.
Avertissements! La plaque de protection de l’iWAP XN3 ne doit être fixée
qu’avec les boulons fournis et serrés à la valeur de
couple correcte.
Warning! The XN3 enclosure must only be fitted with suitably approved
cable entry devices. See Section 3.3 for details.
Avertissements! L’iWAP XN3 ne doit être monté qu’avec des composants
d’entrée de câbles correctement évalués.
Warning! Do not exceed the RF Threshold Power for the equipment
group in which the XN3 and its antennas are to be
installed; it must be controlled in accordance with IEC 60079-
0, and must not exceed the following levels:
IIC –2W (+33dBm)
IIB –3.5W (+35.4dBm)
IIA –6W (+37.7dBm)
III –6W (+37.7dBm)
See Section 3.10.1 for an example of how to calculate the RF
Threshold Power

XN3 Installation and Operating Manual
8
Avertissements! Ne pas dépasser la puissance RF seuil pour le groupe
d’équipement, dans lequel le XN3 et ses antennes
doivent être installés ; il doit être contrôlé
conformément à la norme CEI 60079-0.
Warning! The XN3 must not be modified in any way.
Warning! Hazardous voltages are present within the XN3 enclosure.
Warning! Hot surfaces may be present on the XN3 enclosure - observe
any warning labels fitted.
Warning! Optical radiation hazards may be present within the XN3
enclosure –observe any warning labels fitted.
Warning! The XN3 may weigh up to 25Kg. Exercise care when handling
and mounting.
Warning! DO NOT lift the XN3 using the threaded entries or N-type RF
connectors. Good manual handling practice should be
followed.
Warning! User access: Normal user access to the enclosure is through
the cover plate and junction box
Avertissements! Accès utilisateur: L’accès normal d’un utilisateur au
boîtier s’effectue par la plaque de protection et le boîtier
de raccordement.
Warning! Special access: If the main enclosure is opened, integrity of
the main enclosure sealing must be confirmed by a competent
person
Avertissements! Accès special: Si le boîtier principal est ouvert,
l’intégrité de son étanchéité doit être confirmée par une
personne compétente.
Warning! Console port connections can only be used during setup or
maintenance activities. They should not be left connected in
a hazardous area.
Avertissements! Les connexions du port de la console ne peuvent être
utilisées que pendant les opérations de configuration ou
de maintenance.

XN3 Installation and Operating Manual
9
Warning! Internal cells or batteries if applicable must only be replaced
with cells or batteries of the same type.
Avertissements! Les cellules ou batteries internes, le cas échéant, ne
doivent être remplacées que par des cellules ou batteries
du même type.
Warning! The XN3 protective plastic transport caps fitted to all threaded
cable entries MUST be replaced with suitably certified cable
glands or stopping plugs before installation in a hazardous
area.
Warning! Although antennas connected to the Intrinsically Safe RF
outputs of the XN3 may be installed in a hazardous areas
requiring Category 1 equipment, the XN3 enclosure must NOT
be installed in these environments.
Warning! Maintenance and inspection of the XN3 must be performed in
accordance with IEC 60079-17.
Important Before setting the units to work, read the technical
documentation carefully.
Important The latest version of the technical documentation or the
corresponding technical supplements is valid in each case.
Important Do not exceed the power supply parameters specified on the
XN3 external rating plate.
Important Ensure that only the correct fibre transceiver format/power is
connected to the XN3. Damage to the XN3 fibre interface or
customer equipment may occur if the wrong format/excessive
optical power is used.
Important Ensure that NO TOOLS come into contact with the gasket of
the enclosure, as this may cause irreparable damage and
render the unit unsafe.
Important The XN3 may be powered from a number of different power
sources, depending on its configuration. Refer to the rating
plate of the unit supplied for details.
Important There should be no need to enter the unit and change the fuse
as it is resettable.

XN3 Installation and Operating Manual
10
3Installation
3.1 Mounting
Mount the XN3 enclosure to a suitable structure, using the mounting points shown.

XN3 Installation and Operating Manual
11
Figure 1: Aluminium Enclosure Mounting Dimensions

XN3 Installation and Operating Manual
12
3.2 Opening and Closing the Enclosure
3.2.1 Opening the front cover plate
•Remove all bolts using a metric hex key. Store the bolts carefully to avoid
damage or loss.
•Ensure care is taken when removing the cover. Do not use a screwdriver or any
other sharp implement to prise the cover apart as it may damage the sealing
gasket.
3.2.2 Closing the Enclosure
•Inspect the gasket to ensure its sealing integrity. If the front cover gasket is
damaged it must be replaced.
•Check all bolts are the correct type and free from damage.
•Re-insert the bolts and hand-tighten only.
•Using a torque wrench fitted with an 3mm hex head, tighten the bolts in
opposite corners of the enclosure, then work clockwise around the front cover.
Tighten to a torque of 3.5Nm.
Figure 1: Opening XN3 Front Cover Plate

XN3 Installation and Operating Manual
13
3.3 Cable Entries
3.3.1 Typical Cable Entries and Connections
A typical XN3 enclosure is supplied with entries and connectors as shown in Figure
3.
•Connections A-D are INTRINSICALLY SAFE outputs providing galvanically
isolated RF signals (see Section 3.10 for details), carried on conventional 50Ω
impedance N-type female connections. The N-type connections are the front
part of the bulkhead which transit through the enclosure and are approved as
part of the XN3 ATEX/IECEx certification.
•Apply suitably assessed glands to cable entries (marked E and F) as appropriate
oThread maximum size is M25x1.5 or 3/4” NPT depending on customer
specification.
•The position and configuration of cable entries and connections can vary
depending on the XN3 ordered. Mark off connections inside the junction box.
oRemove cover plate and keep bolts for reassembly
oWhen refitting cover plate, only use supplied bolts and tighten to torque
3.5Nm. Check seal position and condition.
oCheck with Extronics for more information if required.
Figures 3: XN3 entries and connectors

XN3 Installation and Operating Manual
14
3.4 Earthing
3.4.1 Location of XN3 enclosure external earth bond points
There are M6 threaded earth boss bonding point situated within the junction box,
Figure 4. Removal of the front cover plate is required to access the area. Before
putting in service:
•Perform applicable electrical safety checks.
•Visually check integrity of seals.
Figure 4: XN3 Enclosure External Earth Bond Points
Figure 5: External connection points
Earth bonding point
Cover retaining strap point

XN3 Installation and Operating Manual
15
3.5 Electrical Installation
View inside junction box:
See Figure 6 and Table1.
Figure 6: XN3 Internal Connections Showing All Options
Interface Plate
G
F
D
E1
1
B
E2
C

XN3 Installation and Operating Manual
16
Designator
Purpose
Comments
B
Power input
Mains (L,N,E) or DC (+,-,E) input,
dependent on product configuration.
C
Fibre input cabled to
separate dual LC
coupler.
Can be replaced by a blanking plate,
depending on product options. None
fibre configurations will be supplied
with a difference PCBA.
D
Ethernet input
For or Ethernet connection. Alternative
connection to F
E1
Console port
Alternative connection to E2
E2
Console port
Maintenance / setup use only. Must not
be used when iWAP XN3 is in service.
Note* On some Access Points a USB
converter is supplied to enable a
connection using AP specific
maintenance cables.
F
PoE/PoE(+) input
Alternative connection to D for
Ethernet. 8-way push fit connector
G
Auxiliary port
Pressure test port
Table 1: XN3 Internal Connection/Features
3.6 Power Supply / Input Connector
The mains power connection is a phoenix socket on the PCB. The plug part is
Phoenix contact 1795789. It requires a minimum tightening torque of 0.5Nm.
Wire Type
Minimum Cross-
Sectional Area
Maximum Cross-
Sectional Area
Single Solid Core
0.2mm2
2.5mm2
Single Stranded Wire
0.2mm2
2.5mm2
Table 2: XN3 Power Connector Wire Gauges
3.7 Fuse Rating
The XN3 is fitted with a single resettable fuse on the Live circuit, of either 750mA
for AC input units or 2.5A for DC input.
If there is a power fault, the fuse may activate in which case power should be
removed from the unit and reapplied.
3.8 External Overcurrent Protection
The XN3 should be installed on a circuit with a double-pole circuit breaker of a
maximum rating of 25A. This is the maximum current rating of the smallest
internal chassis earth bond in accordance with EN60950-1 2.6.3.3. Refer to
Extronics if it becomes necessary to exceed this rating.

XN3 Installation and Operating Manual
17
3.9 Data Connections
3.9.1 Copper Ethernet
Information Check that the line speed of the switch port to which the
XN3 is connected matches the XN3 port configuration,
otherwise communication may not be established.
If Copper Ethernet is specified, this will be terminated in a standard CAT5E RJ45
Socket on the front plate of the XN3, Position D in Figure 6. Typically, the interface
will be an IEEE 10/100/1000BaseT format, but this is dependent on the access
point installed.
Terminate the RJ45 plug as follows (EIA 568B standard):
3.9.2 Power-Over-Ethernet (POE)
If Power-Over-Ethernet (POE) is used, the format will depend on the access point
installed in the XN3. Ensure that the correct Power Sourcing Equipment (PSE) is
used. Connect the RJ45 cable per Section 3.9.1.
3.9.3 Optical Fibre
The XN3 optical fibre format may be any of the following, refer to product option
code #5 for details. Other optical formats are available on request.
MF
1000Bas
e-LX
LC Duplex
Multimode
-3 to -9.5dBm
(62/125µm)
-1 to - 9dBm
(50/125µm)
-19dBm
-1dBm
1310nm
550m
SF
1000Bas
e-LX
LC Duplex Single
-3 to -9.5dBm
-20dBm
-3dBm
1310nm
10km
Table 3: Fibre Formats
Pin
Function
1
OE/WE
2
OE
3
GN/WE
4
BE
5
BE/WE
6
GN
7
BN/WE
8
BN
Figure 7: RJ45 CAT5E EIA 568B Plug Wiring

XN3 Installation and Operating Manual
18
3.9.4 Console Port
There are two types of console port connectors that can be specified as below.
Only one type is possible on the same unit.
3.9.4.1 RJ45
The console port is a standard Cisco RS232 configuration port on an RJ45 socket.
The port for Cisco Access Points is 9600 baud, 8 data bits, no parity, 1 stop bit.
Other vendors may use different formats.
3.9.4.2 Mini USB
3.10 Intrinsically Safe RF Outputs
Refer to Figure 8 for location of Intrinsically Safe RF outputs.
3.10.1 Example of RF threshold power calculation
The following example shows how the RF threshold power may be calculated:
Maximum transmitter output power (from transmitter datasheet) = 20dBm
(100mW)
Coaxial cable loss = 2dB
Antenna gain = 5dBi
Threshold power = 20dBm –2dB + 5dBi
Threshold power = 23dBm (200mW)
Pin
Function
1
RTS
2
DTR
3
TXD
4
GND
5
GND
6
RXD
7
DSR
8
CTS
Pin
Function
1
Vcc
2
D-
3
D+
4
ID
5
GND
Table 4: Cisco console port wiring

XN3 Installation and Operating Manual
19
Standard configuration
Remote mounting
Enclosure earth
Non-hazardous area
Hazardous area
Antenna installed to
IEC 60079-14: 2014
Clause 16.2.3
Intrinsically safe
outputs. Minimum
IP54 connection
Coaxial cable
Notes: Marking of iWAP
XN3 must be observed
when locating antenna in
hazardous location
Maintain >500Vrms isolation between conductive
parts of antenna and nearby conductive
structures in accordance with IEC60079-14:2014
clause 16.2.3
Top mount antenna
Bottom mount antenna
Intrinsically
safe outputs.
Minimum IP54
connection

XN3 Installation and Operating Manual
20
Figure 8: XN3 IS RF Installation Diagram
3.11 Antenna Requirements
Antennas connected to the XN3 Intrinsically Safe RF outputs must be assessed as
‘simple apparatus’ in accordance with IEC 60079-11. Antennas supplied by
Extronics for use with the XN3 already meet these requirements. It is possible to
assess other antennas for this purpose, contact Extronics for details.
3.12 Antenna Installation
Antennas approved by Extronics for use with the XN3 may either be fitted directly
to the RF connectors of the XN3 or via a length of coaxial cable.
If antennas are sited remotely from the XN3 flameproof enclosure, any metallic
parts of the antennas must be isolated from earth by >500Vr.m.s, to prevent
hazardous earth currents from flowing in the coaxial cable.
3.13 Ex Main Enclosure Test
If required, the integrity of the main enclosure sealing can be checked. To order
at Pressure Test Kit use order code iWAPTK01.
Sealing integrity confirmed if under constant temperature conditions, the time
interval required for an internal pressure of 0.3kPa (+10%, -0%) below
atmosphere to change to half the initial value shall not be less than 180 seconds.
Conductive
mounting
structure
Antenna
Conductive parts of
antenna are earthed at
iWAP XN3 output socket
via coax cable
Coax cable
Table of contents
Other extronics Wireless Access Point manuals