The board must be tted 20 mm bene-
ath the under part of the stovetop.
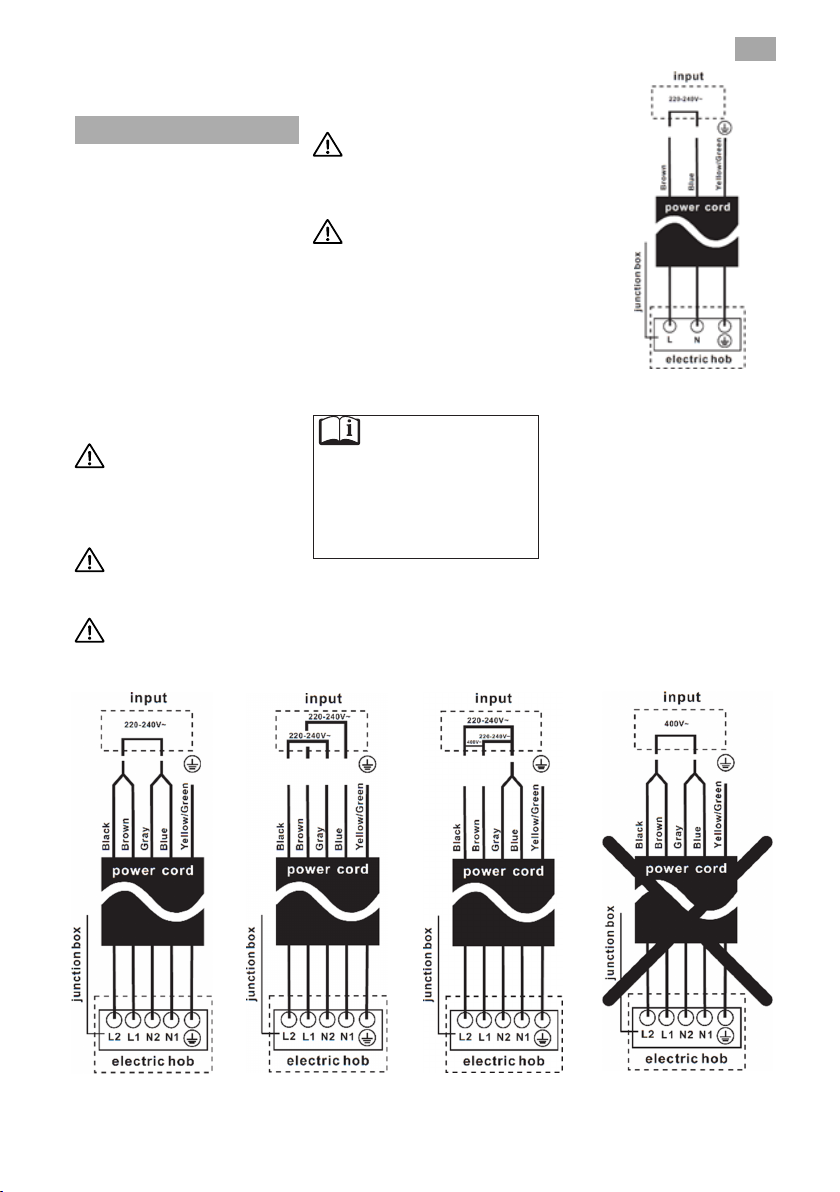
Electrical connection
Before you connect the stovetop to
the mains, check that the voltage
and frequency match those specied
on the stovetop nameplate, which is
underneath it, and on the Guarantee
Sheet, or if applicable on the technical
data sheet, which you must keep
together with this manual throughout
the product’s service life.
Ensure that the inlet cable does not
come into contact with the induction
top housing or the oven housing, if it
is installed in the same unit.
Warning:
The electrical connection
must be properly grounded,
following current legislation,
otherwise the induction hob may
malfunction.
Unusually high power surges
can damage the control system (like
with any electrical appliance).
It is advised to refrain from
using the induction hob during the
pyrolytic cleaning function in the
case of pyrolytic ovens, due to the
high temperature that this type of
device attains.
Only the official techni- cal
service can handle or repair the
appliance, including replacement
of the power cable.
Before disconnecting the hob
form the mains, we recommend
switching off the cutoff switch and
waiting for approximately 25
seconds before disconnecting from
the mains. This time is required to
allow for the complete discharge of
the electronic circuitry and thus
preclude the possibility of electric
shock from the cable terminals.
Keep the Guarantee
Certificate or the technical
data sheet together with the
instructions manual throughout
the product’s service life. These
contain important technical
information.
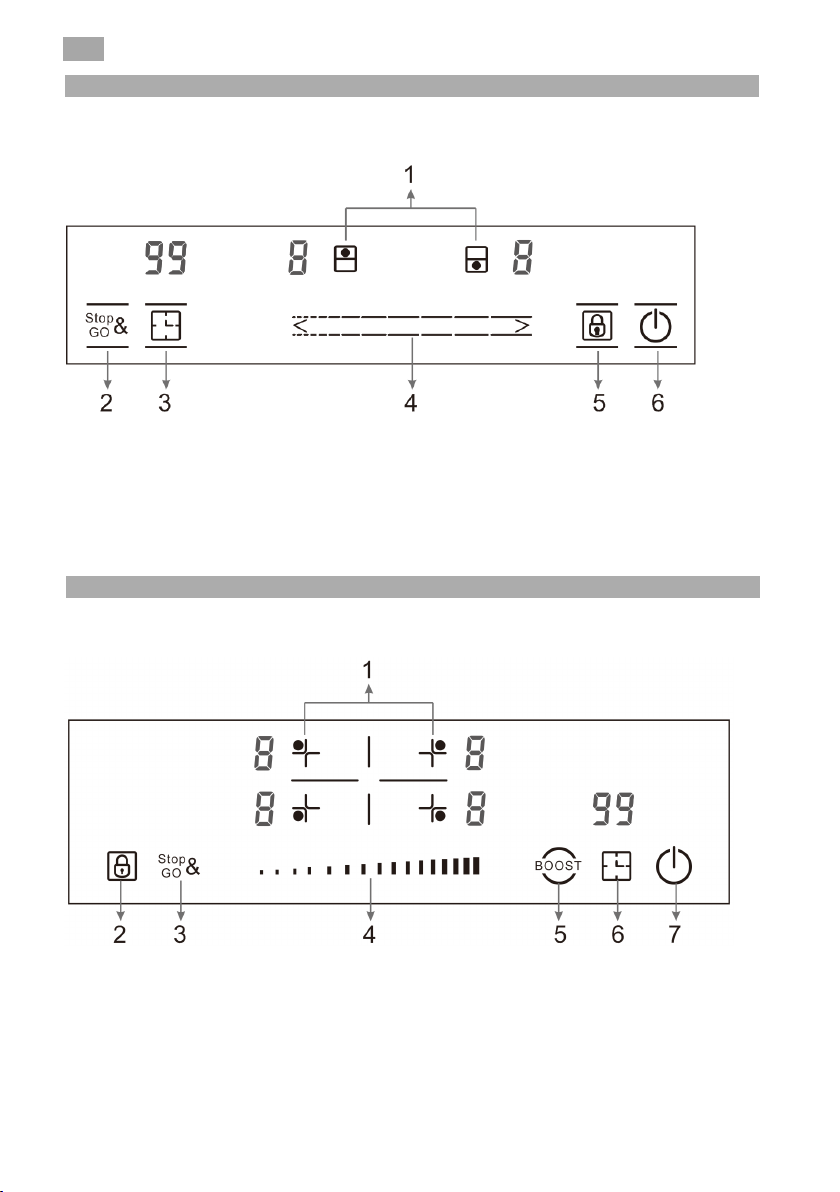
2 heating
zones hob
Electrical connection variants for hob with 3 and 4 heating zones