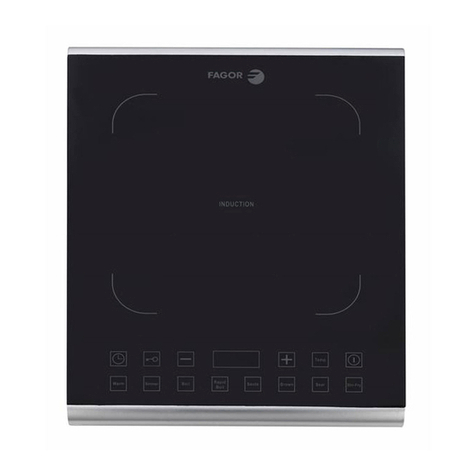
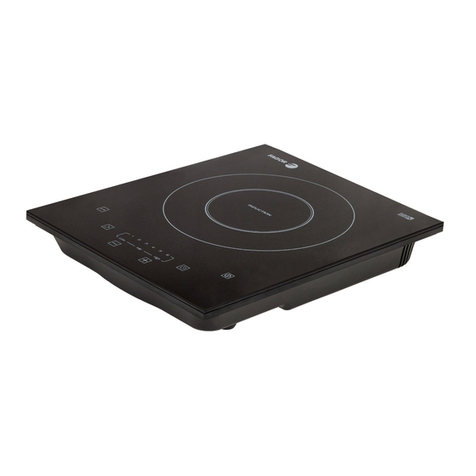
Fagor Countertop Induction Burner User manual

Countertop
Induction Burner
Placa de inducción portátil
Table de cuisson portative à induction
User’s Manual
Manual del Usuario
Manuel d’utilisation
C-I-B Manual.indd 1 2/23/10 9:36 PM

C-I-B Manual.indd 2 2/23/10 9:36 PM

1
ENGLISH
Contents
Introduction to Induction ..................................................................................... 2
How does induction work? ............................................................................ 2
What are the benefits of cooking with an induction cooktop? ...................... 2
What type of cookware can I use on Induction? ........................................... 3
General Safety Regulations ................................................................................. 3
Installing the induction cooktop.......................................................................... 5
Operating the induction cooktop ........................................................................ 6
Cleaning and maintenance .................................................................................. 9
Troubleshooting.................................................................................................. 10
ESPAÑOL............................................................................................................ 11
FRANÇAIS .......................................................................................................... 21
Warranty ............................................................................................................. 32
C-I-B Manual.indd 1 2/23/10 9:36 PM

2
ENGLISH
Introduction to Induction
Efficient: Induction cooking is the most
eco-friendly and energy-efficient way
to cook. Induction cooktops use 90%
of the energy produced, which is much
more energy-efficient than gas or elec-
tric cooktops. By recognizing the base of
the cookware, induction heats only the
diameter of the pot so very little energy
is wasted. Moreover, induction emits no
flame, so less residual heat is produced
in your kitchen.
Safe: There are no open flames and the
surface remains cool to the touch.
Fast: Heating and adjustments are im-
mediate, saving you at least 50% of
cooking time when compared to gas and
electric.
Even heat distribution: Hot spots and
rings are avoided because the bottom of
your cookware heats uniformly.
Easy to clean: The surface is flat and
smooth; spills and overflows do not
stick to the cooktop, so they can easily
be wiped away.
How does induction work?
An induction cooktop holds a series of
burners called induction coils (based on
magnetic principles). These coils gener-
ate magnetic fields that induct a warm-
ing reaction in steel and iron-based pots
and pans. This way, the cookware itself
heats the food, not the cooktop surface.
What are the benefits of cooking with an induction cooktop?
C-I-B Manual.indd 2 2/23/10 9:36 PM

3
ENGLISH
Induction compatible cookware
• StainlessSteel
• Enamel
• Castiron
Non-induction compatible
• Copper
• Glass
• Aluminum
• Potterytypevessels
What type of cookware can I use on Induction?
Note: The easiest way to check whether your cookware is compatible with an induc-
tion cooktop is to take a magnet and try to stick it to the bottom of the pot. If it sticks,
your pot will work on induction.
General safety regulations
The product you have purchased is a
state of the art induction cooktop. It
adheres to all of the latest safety and
technology standards; however, as with
any electric appliance, there are some
potential risks. Only operate this induc-
tion cooktop in accordance with the
instructions provided and only for its in-
tended household use.
Attention: In order to prevent possible
injuries or electric shock, please observe
the following:
• Never touch the induction cooktop
and the power plug with wet hands.
• Besuretooperatetheunitonaat,
level, non-metallic surface.
• Donotconnecttheinductioncook-
top to the same outlet with other
household appliances such as mi-
crowaves, etc. as it could overload
the outlet and trip a circuit breaker.
• Ifusinganextensioncordtoconnect
the cooktop, please note that a dam-
aged extension cord can cause the
unit to malfunction. Always check
yourextensioncordfordamageand
be sure it is compliant with the re-
quired voltage. Be sure not to place
cord where people can trip over it.
• Never attempt to unplug the induc-
tion cooktop by pulling on the power
cable.
• Donotmovetheinductioncooktop
during cooking or with hot cookware
on top of it.
• Do not place any empty cookware
on the induction cooktop while it
is functioning. An empty piece of
cookware will heat up very rapidly.
Although the cooktop has an over-
heating protection, the hot cookware
can still cause material damage or
personal injury.
• Do not place any metal objects on
the induction cooktop (other than the
cookware you intend to cook in).
• Checkthepowercable fordamage
fromtimetotime.Neveroperatethe
induction cooktop when the cable is
damaged. If the power cable shows
any signs of defect, let a qualified
electrician repair it. Do not let the
cord hang over the edge of a coun-
tertop or table.
C-I-B Manual.indd 3 2/23/10 9:36 PM

4
ENGLISH
• Donotheatupanyunopenedcans
of food on the induction cooktop. A
heated can of food could explode.
Only cook or heat food in induction
compatible cookware.
• Although the surface of the induc-
tion cooktop remains cool to the
touch because heat is transferred
directly to the pot, please note that
the residual heat from the cookware
will eventually warm up the cooking
surface, especially the area directly
underneath the pot. Be careful when
handling the cooktop after use and
let it cool down before storing.
• Scientic testshaveproven thatin-
duction cooktops do not pose a risk
to health.
However, persons with a pacemaker
should keep a minimum distance of
two feet from the induction cooktop
while it is operating.
• Do not place any magnetized ob-
jects like credit cards, cassettes etc.
on the glass surface while the induc-
tion cooktop is in operation.
The magnetic properties of the unit
can damage these items.
• In order to avoid overheating, do
not place any aluminum foil or metal
plates on the cooking surface.
• Donotinsertanyobjectslikewiresor
tools into the ventilation slots.
Attention: this may cause electric
shock.
• Never use the induction cooktop
when it is not functioning properly,
shows signs of damage or if it has
been dropped.
• Do not leave the induction cook-
top unsupervised during operation.
Keep children away from the induc-
tion cooktop.
• Do not submerge the induction
cooktop in water or other liquids and
do not wash it in the dishwasher.
• Do not operate the induction cook-
top on any metal table or surface.
• Only qualied experts may perform
repair and maintenance work on the
induction cooktop using authentic
FAGORreplacementandaccessory
parts. Never attempt to dissemble
and repair the induction cooktop
yourself!
• Thisproductisnotintendedforcom-
mercial or outdoor use; it is for indoor
and household use Only.
• Thisappliance hasapolarizedplug
(one blade is wider than the other).
To reduce the risk of electric shock,
this plug is intended to fit into a po-
larized outlet only one way. If the
plug does not fit fully into the outlet,
try turning it the other way around. If
it still does not fit, contact a qualified
electrician.Donotattempttomodify
the plug in any way.
• Donotplaceanything(papertowel,
cloth, aluminum foil) between the
cookware and the glass cooking sur-
face. This may cause a fire hazard.
• This appliance is not intended to
be operated by means of an exter-
nal timer or separate remote-control
system.
• WARNING: If the surface is cracked,
switch off the appliance immedi-
ately to avoid the risk of an electric
shock.Callourcustomerserviceat
1-800-207-0806.
C-I-B Manual.indd 4 2/23/10 9:36 PM
5
ENGLISH
• Unpack the cooktop, removing all
packaging materials. You may want
to keep the protective foam and the
box to make transportation of the
cooktop easier. However, do not let
children play with the plastic bags
or any other packaging materials.
• Placethecooktoponastableand
level non-metallic surface.
• Neverplacethecooktoponaam-
mable surface (e.g. table cloth, car-
pet, etc.).
• Do not block the ventilation slots
of the induction cooktop. This may
overheat the cooktop. Keep a mini-
mum distance of 3-5 inches from
walls and other objects, appliances,
etc.
• Do not place the induction cook-
top next to devices or objects that
react sensitively to magnetic fields
(e.g. radios, TVs, cassette recorders,
etc.).
• Donotplacetheinductioncooktop
nexttoopenres,heatersorother
sources of heat.
• Make sure that the power cable is
not damaged or compressed be-
neath the induction cooktop.
• Make sure that the power cable
does not come into contact with
sharp edges and/or hot surfaces.
• Prior to connecting the induction
cooktop, check whether the volt-
age indicated on the type plate
corresponds to the voltage supply
in your home. A wrong connection
may lead to damage to the induc-
tion cooktop and possible injury to
persons.
• The cooktop's surface is made of
temperature-resistant glass. In the
event that damage to the unit is
observed, even if it is only a small
crack on the glass surface, discon-
nect the induction cooktop from the
power supply immediately and con-
tact our customer service depart-
ment by calling 1.800.207.0806.
TECHNICAL DATA:
RatingVoltage 120V 60Hz 1600Watt
Power range 1-10
Timer range 0-150 mins
Suitable cookware diameter: 6” to 10”.
Larger pots may be used as long as stability and safety
is not compromised. The efficiency of the cooktop will
diminish slightly if larger than 10” pots are used.
Installing the induction cooktop
C-I-B Manual.indd 5 2/23/10 9:36 PM

6
ENGLISH
Operating the induction cooktop
Glass cooking surface
Control Panel
Ventilationslot
(in the back)
Child Safety
Lock Power
Level
Increase power or
increase minutes
on timer On/Off
Decrease power or
decrease minutes
on timer
Timer
C-I-B Manual.indd 6 2/23/10 9:36 PM

7
ENGLISH
Power levels:
POWER
SETTING WATTS HEATLEVEL
1 300 W intermittent heating, 2 seconds on, 3 seconds off) Low
2 300 W intermittent heating, 3 seconds on, 2 seconds off) Low
3 560 W Medium – Low
4 650 W Medium – Low
5 720 W Medium
6 800 W Medium
7 940 W Medium – High
8 1100 W Medium – High
9 1300 W High
10 1600 W High
1. Follow the instructions for proper
installation of the cooktop, found in
this manual. Plug the power cable
into a properly installed outlet.
2. The ON/OFF switch will illuminate
and an acoustic signal will sound.
3. Now the induction cooktop is in
standby mode.
4. Placesuitablecookwareinthecen-
ter of the glass surface.
5. Next, press the ON/OFF switch
once to turn the induction cooktop
on. An acoustic signal will sound
and the “power level” light will blink.
(If you do not press any other but-
tons in the next 30 seconds, the
cooktop will turn itself off.) Now
press the POWER LEVEL button.
The preset power level “5” will be
selected and the induction cooktop
will start heating. You will hear the
fan as it turns on.
Note:ifyoupressthePOWERLEV-
ELbuttonbeforeplacingasuitable
cookware on the glass, the cooktop
will not generate heat. It will beep
for ten seconds, and then turn off.
6. With the “+” and “-” keys you can
change the settings at any time in a
range from 1 – 10.
C-I-B Manual.indd 7 2/23/10 9:36 PM

8
ENGLISH
7. Timer Function. After selecting the
power level, press the TIMER key.
The display shows the number “0”.
Select the number of minutes you
want to cook for using the “+” and
“-” buttons. The timer will increase
by 5 minutes every time you press
the “+” button (up to a maximum
of 150 minutes), and decrease by 1
minute every time you press the “-”
button.
The display will show the remain-
ing time in minutes. Once the time
is up, an acoustic signal will sound
and the induction cooktop will auto-
matically turn off.
Note: you can change the selected
cooking time at any moment, by us-
ingthe“+”and“-”buttons.Chang-
ing the time will not affect the power
level settings.
You can also change to the power
level without affecting the preset
timebypressingthePOWERLEVEL
button and then the “+” and “-” but-
tons.
If you would like to stop the cooking
process before the timer has ended,
simplypresstheON/OFFbutton.
8. Child Safety Lock. To prevent chil-
dren from turning the cooktop on
accidentally or changing the cook-
ingsettings,taptheCHILDSAFETY
LOCK button. The light beside the
button will turn on and once acti-
vated, the cooktop will not respond
to power or timer changes.
When the CHILD LOCK is on, the
only button that will function is the
ON/OFFbutton.
To turn the child lock on/off, press
and hold the button for two seconds
until you hear a beep and the light
turns off.
9. Once the cooking or warming pro-
cess is finished, disconnect the
power cable from the outlet. Be sure
the unit is completely cool before
storing.
10. Remember:DoNOToperatethein-
duction cooktop if it is damaged in
any way or does not function prop-
erly.
11. The use of accessories and spare
parts not recommended by the
manufacturer may lead to damage
on the induction cooktop and inju-
ries.
C-I-B Manual.indd 8 2/23/10 9:36 PM

9
ENGLISH
When the CHILD LOCK is on, the
only button that will function is the
ON/OFFbutton.
To turn the child lock on/off, press
and hold the button for two seconds
until you hear a beep and the light
turns off.
9. Once the cooking or warming pro-
cess is finished, disconnect the
power cable from the outlet. Be sure
the unit is completely cool before
storing.
10. Remember:DoNOToperatethein-
duction cooktop if it is damaged in
any way or does not function prop-
erly.
11. The use of accessories and spare
parts not recommended by the
manufacturer may lead to damage
on the induction cooktop and inju-
ries.
Cleaning and maintenance
• Remove the power plug prior to
cleaningtheinductioncooktop.Do
not use any caustic cleaning agents
and make sure that water does not
penetrate inside of the induction
cooktop.
• Neverimmersetheinductioncook-
top, its cables or the plug in water or
other liquids.
• Wipe off the glass cooktop with a
damp cloth or use a mild, non-abra-
sive soap solution.
• Wipeoffthecasingandtheoperat-
ing panel with a soft cloth or a mild
detergent.
• Donotuseanyoilbasedcleansing
products in order not to damage the
plastic parts or the casing/operating
panel.
• Do not use any ammable, acidic
or alkaline materials or substances
near the induction cooktop, as this
may reduce the service life of the
induction cooktop and pose a fire
risk when the induction cooktop is
turned on.
• Inordertokeepyourcooktoplook-
ing new, make sure that the bot-
tom of your cookware does not
scrape the glass surface, although a
scratched surface will not impair the
use of the induction cooktop.
• Makesuretoproperlycleantheunit
before storing it in a dry place.
C-I-B Manual.indd 9 2/23/10 9:36 PM

10
ENGLISH
Ifthecooktopdetectsaninternal/externalerrororawrongconnection,itwilldisplay
the error message with a code number on the LED display panel and the cooktop
will stop functioning. These code numbers will allow you identify the cause of the
error and help you find the solution to the problem. If the problem has been solved the
error message will disappear and you will be able to continue using your cooktop. If
the error persists, please call our customer service for assistance. You can reach us
at 1-800-207-0806
E1: Electroniccontroloflowvoltage.(lessthan85V)
Solution: Make sure the cooktop is connected to the correct voltage.
E2: Electroniccontrolofhighvoltage(greaterthan145V).
Solution: Make sure the cooktop is connected to the correct voltage.
E3: Internal controlling sensor is malfunctioning.
Solution: Donotattempttorepairthecooktopyourself.Pleasecallourcustomer
service for instruction on how to send the unit back for repair.
E5: The temperature sensor underneath the glass panel is not making
proper contact.
Solution: Donotattempttorepairthecooktopyourself.Pleasecallourcustomer
service for instruction on how to send the unit back for repair.
E7: Overheating protection: internal temperature has risen above 176ºF.
Solution: Make sure there is a minimum distance of 5 inches between the ventila-
tion slot (found at the back of the cooktop) and any obstruction such as
awallorotherappliances.Unplug,lettheunitcooldown,plugbackin
and press the On/Off button.
E9: The temperature sensor underneath the glass panel is malfunctioning.
Solution: PresstheOn/Offbuttontoturnthecooktopoff,thenpressthebutton
again to turn it back on. If the error message does not disappear, con-
tact our customer service.
If you cannot determine the cause of the error and correct it, contact our customer
service department by calling 1.800.207.0806.
TROUBLESHOOTING
C-I-B Manual.indd 10 2/23/10 9:36 PM

11
ESPAÑOL
Índice
Introducción a la Inducción ............................................................................... 12
¿Cómo funciona la inducción?................................................................... 12
¿Cuáles son los beneficios de cocinar con una placa de Inducción? ..... 12
¿Qué tipo de ollas puedo usar en una Inducción?.................................... 13
Normas Generales de Seguridad ...................................................................... 13
Instalando la placa de inducción....................................................................... 15
Funcionamiento de la placa de inducción........................................................ 16
Limpieza y mantenimiento................................................................................. 19
Problemas y soluciones..................................................................................... 20
C-I-B Manual.indd 11 2/23/10 9:36 PM

12
ESPAÑOL
Introducción a la Inducción
Eficiente: la cocina de inducción es la
forma más eficiente y ecológicamente
responsable de cocinar. La inducción
utiliza el 90% de la energía producida,
que es mucho más eficiente que la coci-
naagasoeléctrica.Sedesperdiciamuy
poca energía porque la inducción recon-
oce la base de la olla y sólo calienta ese
diámetro. Además, al no haber llamas
abiertas no se disipa calor a la cocina.
Segura: no hay llamas abiertas y la su-
perficie de cristal no quema al tacto.
Rápida: el calentamiento y los ajustes
de temperatura son inmediatos, ahor-
rando un 50% o más del tiempo de coc-
ción comparado con cocinas de gas o
eléctricas.
Distribución uniforme del calor: los
puntos calientes y anillos se eliminan
dado que la base de sus cazuelas se
calienta uniformemente.
Fácildelimpiar: la superficie es plana y
lisa; la comida y líquidos derramados no
se pegan a la placa, de modo que pu-
eden limpiarse fácilmente.
¿Cómo funciona la inducción?
Unaplacadeinduccióncontieneunase-
rie de quemadores llamados bobinas de
inducción (basados en principios mag-
néticos).Estasbobinasgenerancampos
magnéticos que inducen una reacción
de calor en sartenes y cacerolas de base
ferro-magnética. De esta manera, es la
olla la que calienta la comida, no la su-
perficie de cristal de la placa.
olla
placa
bobinas de inducción
¿Cuáles son los beneficios de cocinar con una placa de Inducción?
C-I-B Manual.indd 12 2/23/10 9:36 PM

13
ESPAÑOL
Ollas y sartenes compatibles
con la inducción
• AceroInoxidable
• Ollasesmaltadas
• Hierroforjado
Ollas y sartenes no
compatibles con la inducción
• Cobre
• Cristal
• Aluminio
• Fuentestipocerámico
¿Qué tipo de ollas puedo usar en una Inducción?
Nota: La manera más sencilla de comprobar si sus ollas y sartenes son compatibles
con una placa de inducción es coger un imán e intentar pegarlo en la base de la cac-
erola.Sisepega,sucacerolafuncionaráenlainducción.
Normas Generales de Seguridad
El producto que ha comprado es una
placa de inducción con tecnología punta.
Cumpletodoslosestándarestecnológi-
cosydeseguridad.Sinembargo,como
concualquieraparato eléctrico,existen
algunos riesgos potenciales. Maneje
esta placa de inducción siguiendo es-
trictamente las instrucciones de este
manual y sólo en ámbito doméstico.
Atención:Paraprevenirposiblesheridas
o descargas eléctricas, tenga en cuenta
por favor lo siguiente:
• Nuncatoquelaplacadeinducciónyel
enchufe con las manos húmedas.
• Asegúresedecolocarlaunidadsobre
una superficie plana, nivelada y no
metálica.
• No conecte la placa de inducción al
mismo enchufe que otros electrodo-
mésticos como microondas, etc. ya
que podría sobrecargar el enchufe y
provocar un cortocircuito.
• Sivaaemplearuncabledeextensión
para conectar la placa, por favor tenga
encuentaqueuncabledeextensión
dañado puede ocasionar un fallo en la
placa de inducción. Asegúrese de que
elcabledeextensiónestáenbuenes-
tadoysoportaelvoltajerequerido.No
lo coloque por donde pasa la gente
para evitar tropiezos.
• No intente nunca desenchufar el
aparato tirando del cable de corriente.
• Nomuevalaplacadeinducciónmien-
tras esté cocinando o con cazuelas
calientes encima.
• No coloque ninguna cazuela vacía
sobre la placa de inducción cuando
esté en funcionamiento. Una cazuela
o una sartén vacía se calientan muy
deprisa. La placa tiene un programa
de protección interna contra sobreca-
lentamiento, pero aun así una cazuela
sobrecalentada puede ocasionar da-
ños materiales y personales.
• No coloque ningún objeto de metal
sobre la placa de inducción (aparte de
las cazuelas con las que usted tenga
intención de cocinar).
• Compruebeelcabledecorrientepara
posibles daños de vez en cuando.
Nunca use la placa de inducción en
el caso de que el cable esté dañado.
Sielcabledecorrientemuestraalgún
desperfecto, deje que un electricista
cualicado lo repare. No permita que
el cable cuelgue por el borde de la en-
cimera de cocina o la mesa.
C-I-B Manual.indd 13 2/23/10 9:36 PM

14
ESPAÑOL
• Nunca use la placa de inducción si
no está funcionando correctamente,
muestras signos de daño o ha sufrido
un golpe o caída.
• No deje la placa de inducción sin
vigilancia mientras esté funcionando.
Mantenga a los niños alejados de la
placa de inducción.
• No sumerja la placa de inducción en
agua u otros líquidos y no la lave en el
lavavajillas.
• Nopongaafuncionar laplacadein-
ducción sobre una mesa o superficie
metálica.
• Sólo expertos cualicados pueden ll-
evar a cabo reparaciones y trabajo de
mantenimiento en la placa de induc-
ción usando repuestos y accesorios
auténticosFAGOR.¡Nuncaintentede-
sarmar y reparar la placa de inducción
Ustedmismo!
• Esteproductonoestáconcebidopara
usoindustrialnienexteriores;essólo
yexclusivamenteparausoenelhogar.
• Nocalienteningunalatadecomidano
abiertaenlaplacadeinducción.Una
lata calentada podría explotar. Sólo
cocine o caliente comida en cacerolas
compatibles con la inducción.
• Aunque la supercie de cristal de la
placa no se calienta durante la coc-
ción porque el calor es transferido
directamente a la olla, por favor tenga
en cuenta que después de un tiempo
cocinando el calor residual de la olla
acabará calentando el cristal, espe-
cialmente el área que está justo deba-
jo de la olla. Tenga cuidado al manejar
la placa de inducción después de
cocinar, y deje que se enfríe antes de
guardarla.
• Pruebas cientícas han demostrado
que las placas de inducción no supo-
nen ningún riesgo para la salud. Sin
embargo, las personas con marca-
pasos deberían mantener una mínima
distancia de dos pies de la placa de
inducción mientras esté en funciona-
miento.
• No ponga ningún objeto magnetiza-
do (tipo tarjetas de crédito, cintas de
casette, etc.) sobre la placa mientras
esté en funcionamiento. Las propie-
dades magnéticas de la placa podrían
afectar estos objetos.
• Para evitar el sobrecalentamiento, no
coloque ningún papel de aluminio o
platos metálicos sobre la superficie de
cocina.
• Noinserteningúnobjetocomocables
o instrumentos en la rejilla de venti-
lación. Atención: esto puede causar
una descarga eléctrica.
- Este aparato tiene un enchufe polar-
izado (un lado es más ancho que el
otro).Parareducirelriesgodedescar-
ga eléctrica, el enchufe sólo se podrá
conectar a la toma de corriente de una
manera. Si ve que no puede conec-
tarlo correctamente, intente voltear el
enchufeyconectarlodenuevo.Noin-
tente modificar el enchufe de ninguna
manera.
• Nocoloqueningúnobjeto,papel,ser-
villetas, telas o metales entre la super-
ficie de cocción y la olla o cacerola en
la que cocine. Esto puede provocar
riesgo de incendio.
• Este aparato no está diseñado para
ser operado mediante temporizadores
omandosadistanciaexternos.
• Aviso: Si la supercie está dañada,
apáguelo inmediatamente para evi-
tar un riesgo ed descarga eléctrica, y
llame a nuestro servicio de atención al
cliente en el 1-800-207-0806
C-I-B Manual.indd 14 2/23/10 9:36 PM

15
ESPAÑOL
• Desempaquete la placa, quitando
todos los elementos de embalaje.
Si lo desea, puede guardar la caja
y los materiales de protección, para
facilitar el transporte de la placa en
el futuro. Sin embargo, asegúrese
de que los niños no jueguen con las
bolsas de plástico.
• Coloque la placa de inducción so-
bre una superficie estable y nivelada
no metálica.
• Nunca coloque la placa sobre una
superficie inflamable (por ejemplo
un mantel, alfombra, etc.)
• No bloquee las rendijas de venti-
lación de la inducción. Esto puede
sobrecalentar la placa. Mantenga
una distancia mínima de 3-5 pulga-
das desde las paredes u otros obje-
tos, electrodomésticos, etc.
• No coloque la placa de inducción
próxima a aparatos u objetos que
reaccionen sensiblemente a los
campos magnéticos (por ejemplo
radios, TVs, radio cassettes, etc.).
• No coloque la placa de inducción
cerca de llamas, calentadores u
otras fuentes de calor.
• Asegúresedequeelcabledecorri-
ente no siendo aplastado debajo de
la placa de inducción.
• Asegúresedequeelcablenoentra
en contacto con bordes afilados ni
superficies calientes.
• Antes de conectar la placa de in-
ducción, compruebe si el voltaje
indicado en el tipo de placa corre-
sponde con el voltaje instalado en
sucasa.Unaconexiónerróneapu-
ede dañar la placa de inducción y
posiblemente herir personas.
• Lasuperciedelaplacaestáhecha
de cristal resistente a altas tem-
peraturas.En casode quenote un
daño en el cristal, aunque sólo sea
una pequeña grieta en la superficie
de cristal, desconecte la placa de
inducción de la fuente de corriente
inmediatamente y contacte con
nuestro departamento de atención al
cliente llamando al 1.800.207.0806.
Instalando la placa de inducción
INFORMACIÓNTÉCNICA:
RangodeVoltaje 120V 60Hz 1600Vatios
Rangodepotencia 1 – 10
Rangodetemporizador 0 – 150 min.
Tamaño de olla adecuado de 6 a 10 pulgadas de diámetro del fondo.
Puedeusarunaollademásde10pulgadasdediámetro
de fondo siempre y cuando no comprometa la estabilidad
ni la seguridad. Tenga en cuenta que si usa una olla más
grande de 10 pulgadas, se reducirá ligeramente la eficien-
cia de la placa.
C-I-B Manual.indd 15 2/23/10 9:36 PM

16
ESPAÑOL
Funcionamiento de la placa de inducción
Superficie de cocción
de cristal
Panel de control
Rejilladeventilación
(en la parte trasera)
Bloqueode
Seguridad Potencia
Aumentar potencia
o minutos en el
temporizador On/Off
Disminuir potencia
o minutos en el
temporizador
Temporizador
C-I-B Manual.indd 16 2/23/10 9:36 PM

17
ESPAÑOL
Niveles de potencia:
NIVELES VATIOS NIVEL
1 300WCalorintermitente,2segundosencendido,
3 segundos apagado Bajo
2 300WCalorintermitente,3segundosencendido,2
segundos apagado Bajo
3 560 W Medio-Bajo
4 650 W Medio-Bajo
5 720 W Medio
6 800 W Medio
7 940 W Medio-Alto
8 1100 W Medio-Alto
9 1300 W Alto
10 1600 W Alto
1. Sigaconatenciónlasinstrucciones
de instalación de la placa de este
manual. Enchufe la placa a un en-
chufe adecuado y bien seguro.
2. Laluzalladodelbotónde“ENCEN-
DIDO/APAGADO” se iluminará y
oirá una señal acústica.
3. Ahora la placa de inducción está en
modo de espera.
4. Coloquelacacerolaadecuadaenel
centro de la superficie de cristal.
5. Seguidamente, pulse una vez el
botón de ENCENDIDO/APAGADO
para poner en funcionamiento la
placa de inducción. Oirá un pitido
y la luz al lado del botón “NIVEL
DE POTENCIA” parpadeará. Si
no pulsa ningún otro botón en los
siguientes 30 segundos, la placa se
apagará automáticamente.
Pulse ahora el botón “NIVEL DE
POTENCIA”.Laplacasepondráen
funcionamiento en el nivel de poten-
cia predeterminado (nivel 5). Oirá el
ventilador que se pone en marcha y
un leve zumbido que le indicará que
la inducción está funcionando cor-
rectamente.
Aviso:sipulsaelbotón“NIVELDE
POTENCIA” antes de colocar una
cacerola adecuada para inducción
sobre la placa, no se generará calor;
la placa pitará intermitentemente y
al cabo de 10 segundos se apagará.
C-I-B Manual.indd 17 2/23/10 9:36 PM

18
ESPAÑOL
6. Conlosbotones“+”y“-”ustedpu-
ede cambiar los niveles de potencia
en cualquier momento en un rango
de 1 a 10.
7. Temporizador Después de selec-
cionar el nivel de potencia, pulse
el botón del TEMPORIZADOR. La
pantallamuestraelnúmero“0”.Con
los botones “+” y “-”, puede selec-
cionar el tiempo de cocción desea-
do,hastaunmáximode150minu-
tos. Cada vez que pulse el botón
“+”, el tiempo aumentará en 5 minu-
tos; cada vez que pulse el botón “-”,
el tiempo disminuirña en 1 minuto.
La pantalla mostrará el número de
minutos seleccionado, y empezará
la cuenta atrás.
Al término de tiempo programado,
oirá un pitido y la placa se apagará
automáticamente.
Usted puede cambiar el tiempo
restante en cualquier momento,
usandolosbotones“+”y“-”.Esto
no afectará el nivel de potencia pre-
viamente seleccionado.
Tambien puede cambiar el nivel
de potencia sin que esto afecte al
tiempo preseleccionado, pulsando
el botón NIVEL DE POTENCIA,
seguidodelosbotones“+”y“-”.Si
desea parar el proceso de cocinado
antes de que el tiempo haya acaba-
do, simplemente pulse el botón de
ENCENDIDO/APAGADO.
8. Bloqueo de Seguridad. Para evitar
que los niños enciendan o cambien
las funciones de la placa de induc-
ción, presione el botón de BLO-
QUEO DE SEGURIDAD. Una vez
que presione sobre él, la luz al lado
del botón se encenderá activando
el mecanismo de seguridad. De
esta manera, la placa de inducción
no responderá a ningún cambio
aunque usted presione los botones.
Cuando el BLOQUE DE SEGURI-
DAD está activado, el único botón
que puede funcionar es el de EN-
CENDIDO/APAGADO.
Para desactivar el bloqueo de se-
guridad, mantenga presionado el
botón durante 2 segundos, hasta
que oiga un pitido y la luz desapa-
rezca.
9. Una vez que el proceso de coci-
nado o calentado haya acabado,
desconecte el cable de corriente
del enchufe. Asegúrese que la uni-
dad está completamente fría antes
de guardarla.
10. RecuerdenoutilizarlaPlacadeIn-
ducción Portátil si está dañada de
algún modo o no funciona adecua-
damente.
11. El uso de accesorios y recambios
no recomendados por el productor
puededañarlaPlacadeInducción
Portátilyprovocardañosfísicos.
C-I-B Manual.indd 18 2/23/10 9:36 PM
Table of contents
Languages:
Other Fagor Cooktop manuals

Fagor
Fagor IFA-30 AL User manual

Fagor
Fagor 3FIA-5GLST X Manual

Fagor
Fagor IFA-80 AL User manual

Fagor
Fagor VFA-70 S User manual

Fagor
Fagor 6FID-4GLS XA User manual

Fagor
Fagor Kore 900 Series Setup guide

Fagor
Fagor IFA-80 AL User manual

Fagor
Fagor IFA-90 AL User manual

Fagor
Fagor 2MFA-2GLS X User manual

Fagor
Fagor PORTIND User manual

Fagor
Fagor IFA-80 BF User manual

Fagor
Fagor FA320SX User manual

Fagor
Fagor IO-HOB-1174 User manual

Fagor
Fagor IO-HOB-1172 User manual

Fagor
Fagor 670041900 User manual

Fagor
Fagor IFA-90 BF User manual

Fagor
Fagor Kore 900 Series Setup guide

Fagor
Fagor 3FIA-5GLST X User manual

Fagor
Fagor IO-HOB-0970 User manual

Fagor
Fagor IFA-80 BF User manual