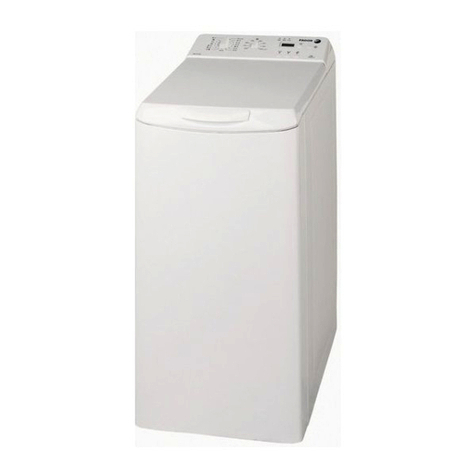
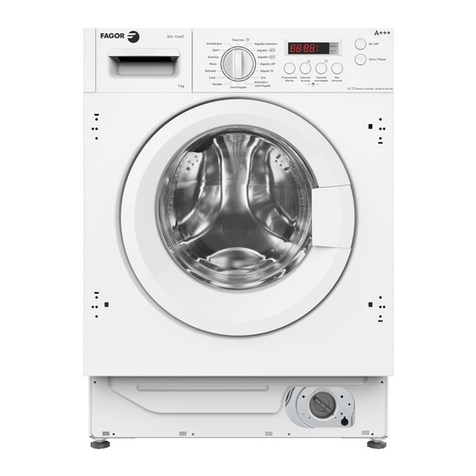
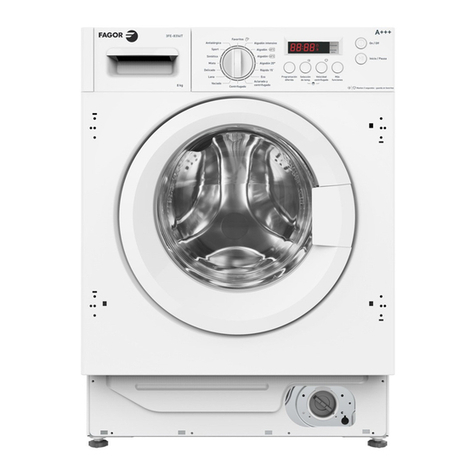
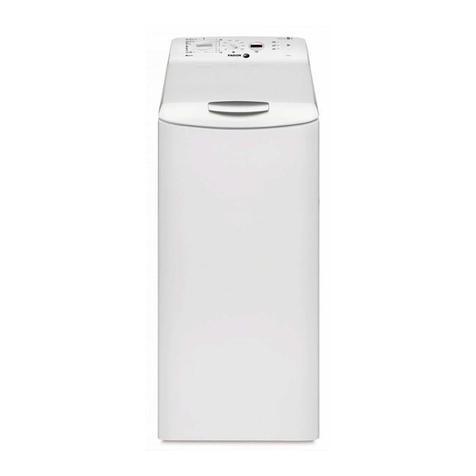
Fagor FEC-805T User manual

GUIDE D’UTILISATION
BEDIENUNGSANLEITUNG
NÁVOD K OBSLUZE
KEZELÉSI ÉS ÜZEMBE HELYZÉSI ÚTMUTATÓ
INSTRUCTIONS FOR USE
NÁVOD NA OBSLUHU

2
Page 3EN
CS Strana 27
Seite 19
DE
Důležité:
Před instalací a používáním výrobku se důkladně seznamte s instrukcemi obsaženými v tomto návodu k obsluze a
instalaci.
Vzhledem k tomu, že neustále zlepšujeme naše výrobky, vyhrazujeme si právo provádět na nich změny vedoucí ke zvýšení
jejich technických a funkčních vlastností.
FR Page 11
Important:
Avant de mettre votre appareil en route, veuillez lire attentivement ce guide d’installation et d’utilisation afin de vous familiariser
plus rapidement avec son fonctionnement.
Dans le souci d’une amélioration constante de nos produits, nous nous réservons le droit d’apporter à leurs caractéristiques
techniques, fonctionnelles ou esthétiques toutes modifications liées à leur évolution.
Wichtig:
Bitte lesen Sie vor der Inbetriebnahme des Gerätes diese Einbau- und Gebrauchsanleitung aufmerksam durch, damit Sie
sich sehr rasch mit seinem Betrieb vertraut machen können.
Da wir unsere Produkte ständig verbessern möchten, behalten wir uns das Recht vor, ihre technischen, funktionellen und
ästhetischen Merkmale zu verändern, damit sie mit der technischen Weiterentwicklung Schritt halten.
Warning:
Before installing and using your appliance, please carefully read this Guide to Installation and Use, which will allow
you to quickly familiarise yourself with its operation.
As part of our commitment to constantly improving our products, we reserve the right to make changes to them based on technical
advances to their technical and functional features and appearance.
HU Oldal 35
Fontos:
Mielőtt használná a mosógépet, figyelmesen olvassa el ezt az üzembehelyezési és használati utasítást. Így gyorsabban
megismeri a gép működését.
Termékeink állandó fejlesztése érdekében, fenntartjuk a jogot, hogy a fejlődéshez kapcsolódó technikai, működési
vagy esztétikai jellemzőket megváltoztassuk.
SK Strana 43
Important :
Avant de mettre votre appareil en route, veuillez lire attentivement ce guide d’installation et d’utilisation afin de vous fami plus
rapidement avec son fonctionnement.
Dans le souci d’une amélioration constante de nos produits, nous nous réservons le droit d’apporter à leurs caractéristiques
techniques, fonctionnelles ou esthétiques toutes modifications liées à leur évolution.

3
EN1 / INTRODUCTION TO YOUR MACHINE
Control panel
Handle for opening the lid (remains locked during the cycle)
Lever for raising the machine on castors (depending on the model)
Drain hose
Cross clamp
Water supply hose (not connected)
Power supply cable
A
• DESCRIPTION OF YOUR MACHINE
D 1 D 2
A
• SAFETY ADVICE
Important :
This machine is only for domestic use and is designed to
wash, rinse and spin machine-washable textiles.
Y
ou must observe the following instructions. We refuse to accept
any liability and the guarantee if you do not observe these
recommendations since this could result in damage to equipment
or physical injury.
— The machine must only be used in accordance with its normal method
of operation in order to avoid damaging your washing and your machine.
Only use washing and maintenance products certified for use in domestic
washing machines.
— If you pre-treat your washing with stain removers, solvents or, in general,
any inflammable or potentially highly explosive product, do not insert
them into the machine immediately.
Furthermore, you are also recommended not to use solvents or products
in aerosol cans near to your washing machine or any electrical appliance
in general in a poorly ventilated room (risk of fire and explosion).
— If any incidents occur and you cannot resolve them using the remedies
we recommend (see the section “INCIDENTS THAT MAY ARISE”), call
in a qualified professional.
— If you have to open your machine during a cycle (for example, to add
or remove washing), depending on the stage the programme is at (during
washing essentially), be careful of the temperature inside the machine,
which may be very high (risk of severe burns).
— When making a new installation, the machine must be connected to
the water supply with a new hose: the old hose must not be re-used.
— Do not let children play with the machine and keep your pets away
from it.
— You must immediately make any obsolete machine unusable.
Disconnect and cut off the power cable flush with the machine. Close
the water tap and remove the hose. Disable the door lock.
— If there is a risk of frost, disconnect the water hose and drain off any
water that may remain in the drain hose by placing this as low as possible
in a bowl.
• SAVING ENERGY
— Only programme a prewash when it is absolutely necessary: for
example, for very dirty sports or working clothes, etc.
— A low temperature programme is sufficient for impeccable washing
results when your washing is only slightly or moderately dirty.
— For washing that is only slightly dirty, select a short washing cycle
(“Rapid”, “Express” or “Flash”, depending on the model).
— Use the right amount of washing products for the hardness of the
water, the amount of washing and how dirty it is and follow the instructions
on the detergent packs.
• ENVIRONMENTAL PROTECTION
This appliance’s packaging material is recyclable. Help recycle it and
protect the environment by dropping it off in the municipal receptacles
provided for this purpose.
Your appliance also contains a great amount of recyclable material.
It is marked with this label to indicate the used appliances that
should not be mixed with other waste.
This way, the appliance recycling organised by your manufacturer
will be done under the best possible conditions, in compliance with
European Directive 2002/96/EC on Waste Electrical and Electronic
Equipment. Contact your town hall or your retailer for the used appliance
collection points closest to your home.
We thank you doing your part to protect the environment.
• CONTENTS
Safety advice . . . . . . . . . . . . . . . . . . . . . . . . . . . . . . . . . . . . . . . . . . .
Saving energy . . . . . . . . . . . . . . . . . . . . . . . . . . . . . . . . . . . . . . . . . .
Environmental protection . . . . . . . . . . . . . . . . . . . . . . . . . . . . . . . . . .
Description or your machine . . . . . . . . . . . . . . . . . . . . . . . . . . . . . . .
Removing the transport clamps . . . . . . . . . . . . . . . . . . . . . . . . . . . .
Moving your machine . . . . . . . . . . . . . . . . . . . . . . . . . . . . . . . . . . . . .
Connecting to the cold water supply . . . . . . . . . . . . . . . . . . . . . . . . .
Draining away the waste water . . . . . . . . . . . . . . . . . . . . . . . . . . . . .
Connecting to the electricity supply . . . . . . . . . . . . . . . . . . . . . . . . . .
Installing your machine . . . . . . . . . . . . . . . . . . . . . . . . . . . . . . . . . . . .
Textile maintenance codes . . . . . . . . . . . . . . . . . . . . . . . . . . . . . . . .
Loading your washing . . . . . . . . . . . . . . . . . . . . . . . . . . . . . . . . . . . .
Loading the washing products . . . . . . . . . . . . . . . . . . . . . . . . . . . . . .
Standard comparison testing programme . . . . . . . . . . . . . . . . . . . . .
Programming . . . . . . . . . . . . . . . . . . . . . . . . . . . . . . . . . . . . . . . . . . .
Some examples of programmes . . . . . . . . . . . . . . . . . . . . . . . . . . . . . .
Details of the programmes . . . . . . . . . . . . . . . . . . . . . . . . . . . . . . . . . .
Details of the options . . . . . . . . . . . . . . . . . . . . . . . . . . . . . . . . . . . . . .
Modifying a washing programme . . . . . . . . . . . . . . . . . . . . . . . . . . . . .
Automatic safety systems . . . . . . . . . . . . . . . . . . . . . . . . . . . . . . . . . . .
Cleaning the pump filter (option 1) . . . . . . . . . . . . . . . . . . . . . . . . . . . . .
Cleaning the pump filter (option 2) . . . . . . . . . . . . . . . . . . . . . . . . . . . .
Cleaning the machine. . . . . . . . . . . . . . . . . . . . . . . . . . . . . . . . . . . . . . .
Care of the internal components . . . . . . . . . . . . . . . . . . . . . . . . . . . . . .
Cleaning the products’ box . . . . . . . . . . . . . . . . . . . . . . . . . . . . . . . . . .
Periodic checks . . . . . . . . . . . . . . . . . . . . . . . . . . . . . . . . . . . . . . . . . . .
Replacing the power supply cable . . . . . . . . . . . . . . . . . . . . . . . . . . . .
Incidents that may occur . . . . . . . . . . . . . . . . . . . . . . . . . . . . . . . . . . . .
After-Sale Service . . . . . . . . . . . . . . . . . . . . . . . . . . . . . . . . . . . . . . . . .
Messages indicated by the various lights flashing . . . . . . . . . . . . . . . .
3
3
3
3
4
4
4
4
5
5
5
5
5
5
6
7
7
8
8
8
9
9
9
9
9
9
9
10
10
10

4
EN 2 / INSTALLING YOUR MACHINE
21D11D01D
10 mm
3/4
D 3
1
1
2
2
13
a
b
a
b
1
2
12
A
D 4
9D8D7D
D 5
D 6
• REMOVING THE TRANSPORT CLAMPS
Important :
Before using the machine in any way, you must first perform
the following operations.
These comprise removing all the components designed to immobilise
the drum in your machine during transport.
These so-called “releasing” operations are necessary for your machine
to operate correctly and to conform to the prevailing safety standards.
If they are not carried out completely, this could cause severe damage
to your machine while it is operating.
— Remove the washing machine from its plinth (check that the wedge
supporting the motor is not still inserted in the machine)
(
Diagram
D3)
— Remove the 4 screws with a screwdriver
(Diagram D4)
— Remove the cross clamp by removing the 2 screws
(Diagram
D5)
using a 10 or 13mm spanner (depending on the model). (Ensure
that you remove the two plastic braces fixed on the cross clamp at
the same time as the clamp itself).
— Replace the screws in their initial positions.
Warning:
You must block off the two holes using the hole covers
provided (supplied in the accessories bag)(Diagram D6)
— Remove the drum-tank assembly locking wedge
(Diagram D7)
.
To do this:
- Lift the lid on the machine
- Remove wedge
- Remove wedge
- Release the drum doors, locked in the lower position, by pressing
down on both eaves simultaneously.
Warning:
Remove the pipe support collars You must block off the
holes revealed with the hole covers supplied in the accessories
bag (Diagram D8).
Advice:
We would recommend that you keep all the locking
components since these must be refitted if you must subsequently
transport your machine again.
Information:
Your machine has been scrupulously checked before it left the
factory. You may therefore notice a little water still remaining in the
tank or the products box.
• MOVING YOUR MACHINE
• Mounting it on castors
If your machine is equipped with removable castors, you will be able
to move it quite easily.
To mount it on castors, swivel the lever on the bottom of the machine
from the right to the far left
(Diagram D9)
.
Important:
The machine must not rest on the “front” castors while it is
operating: remember to return the lever to its initial position.
• CONNECTING TO THE COLD WATER SUPPLY
Connect the supply hose
(Diagram D10)
:
— At one end to the connection on the back of the machine
— On the other end to a tap fitted with a threaded end 20mm dia. x 27
(3/4 BSP).
If you use a self-piercing tap, the useful aperture must have a minimum
diameter of 6mm.
Water supply:
- Minimum water pressure: 0.1 MPa or 1 bar
- Maximum water pressure: 1 MPa or 10 bars
• Replacing a water supply hose
When replacing the hose, ensure that the hose is tightly fastened and
that there is a seal at both ends.
• DRAINING AWAY THE WASTE WATER
Fit the hose bracket provided inside your machine to the end of the drain
hose and then connect the hose
(Diagram D11)
:
— Either, temporarily, over a sink or a bathtub.
— Or permanently to a ventilated U-bend.
If your installation does not have a ventilated U-bend, check that the
connection is not sealed. In fact, to avoid any waste water flowing
back into the machine, you are strongly recommended to leave an air
gap between the machine’s drain hose and the drainpipe.
In any case, the drain hose bracket must be placed at a height of 65 to
90cm higher than the base of the machine.
Important:
Ensure that the drain hose is tied firmly in place with cord to
avoid the bracket coming loose during draining and causing a flood.
The waste water can be drained away to the ground provided that the
drain hose passes through a point 65 to 90cm higher than the base of
the machine
(Diagram D12)
.
A
F
F
G

5
EN3 / PREPARING YOUR WASHING AND YOUR MACHINE
Pre-wash container (powder)
Wash container (powder or liquid)
Softener
Bleach
:
POWDERED DETERGENT
:
LIQUID DETERGENT
cl
D 13 D 14
• CONNECTING TO THE ELECTRICITY SUPPLY
Important:
For your safety, you must comply with the instructions below.
— Before connecting your machine, you must ensure that your
installation’s electrical characteristics match those of your machine (see
the details provided on the information plate affixed to the back of the
machine).
The electrical installation must comply with the prevailing standards and
the Electricity Board’s regulations in the country concerned, particularly
as regards Earthing and installation in shower rooms.
We cannot be held responsible for any incident caused by the machine
being incorrectly earthed.
Advice:
Advice on the electrical installation of your machine
— Do not use an extension lead, adapter or multiple socket.
— Never cut out the Earth wire.
— The socket must be readily accessible but out of the reach of children.
If in any doubt, please contact your installer.
Important:
Your machine conforms to European Directives 2006/95/CE
(Low Voltage Directive) and 2004/108/CE (Electromagnetic
Compatibility) .
• INSTALLING YOUR MACHINE
Important:
If you are installing your machine next to another machine or a
unit, we recommend that you leave a gap between them to allow for
air circulation.
Advice:
We also strongly recommend that you do NOT:
— Install your machine in a damp, poorly ventilated room.
— Install your machine in an area where it could be subject to water
splashes.
— Install your machine on a carpeted floor.
If you cannot avoid doing this, please take every precaution to avoid
blocking air circulation at the bottom of the machine in order to ensure
that the internal components are well ventilated.
• Levelling the machine:
Use a spirit level to check that the floor is horizontal: maximum slope
2°, i.e. a discrepancy of approximately 1cm over the width and of 1.5cm
over the depth of the machine.
• Adjustable feet
Some machines are fitted with two adjustable feet at the front to enable
you to compensate for any unevenness in the floor. Proceed as follows
to adjust the feet to level and stabilize your machine:
— Set the machine on its castors (or tilt it slightly backwards if it does
not have retractable castors)
— Screw in or unscrew the feet to adjust the height to suit the shape of
the floor
(Diagram D13)
— Set the machine back on its feet and check that it is stable.
• TEXTILE MAINTENANCE CODES
— Washing :Never exceed the indicated temperatures
— Use of cold diluted bleach possible:
—Iron:Low Medium High
—Dry clean: mineral spirit perchlorethylene
all solvents
—NB: A crossed-out code indicates that it is forbidden
• LOADING YOUR WASHING
Perform these actions in the following order:
• Open the machine
— Check that the Programme selector is correctly positioned on “O”.
— Depending on the model, lift the opening handle or press the push
button on the front of the machine.
The lid will open.
— Open the drum by pressing the button on the front door.
• Insert your washing
For optimum washing performance, place your washing, preferably
sorted and folded, in the drum, distributing it evenly without heaping it
up. Mix large and small items to obtain an optimum, well-balanced spin.
• Close the drum
Ensure that the drum is correctly closed.
Important:
Check that the three hooks and the border of the button are
fully visible.
• LOADING THE WASHING PRODUCTS
Important:
(Diagram D14)
— The “WASH” container may contain powder or liquid but liquid
detergent should not be used for programmes WITH
Prewash and/or
WITH
“Delayed Start” (depending on the model).
— Concentrated softener should be diluted with warm water.
— Concentrated bleach must be diluted.
— To fill the product containers correctly, place the lid fully open.
— Do not exceed the MAX level.
• Dispensing the detergent
The amount of detergent to be used depends on the hardness of the
water, the extent to which your washing is soiled and the amount of
washing to be washed.
Please refer to the dosing instructions on your pack of detergent.
Warning: in most cases, the detergent manufacturer’s recommendations
apply to the drum filled to the maximum. Adjust the dosage correctly to
the weight of the washing you have placed in the machine.
These recommendations will help you to avoid using too much detergent,
which causes foam to be produced. Too much foam can reduce your
machine’s performance and increase the length of the washing cycle
and the consumption of water.
• Detergents for woollens and delicate fabrics
You are recommended to use an appropriate detergent for washing
these fabrics (avoid placing such detergents directly on the drum because
they have an aggressive action on the metal).
• Before your first wash
Before making your first wash, we recommend that you carry out a
“COTTON 90 wash without pre-wash” and with no washing in the drum,
using a 1/2 measure of your usual detergent in order to eliminate any
residues from manufacturing that may remain in your machine.
•STANDARD COMPARISON TESTING PROGRAMME
Cotton 60°C - 5 kg - no options – max spin - duration 130 min.
To comply with the statement on the label, the tests are conducted in accordance with
European Directive 95/12/CEE.
cl

6
EN 4 / PROGRAMMING YOUR MACHINE
• PROGRAMMING Information:
All the buttons are on micro-
switches and do not remain depressed.
In any case, the”Start/Pause” button
cannot cancel a programme.
• Programming a washing cycle:
Indicator lights and position of the selectors
— Turn the selector to choose the most suitable programme and washing temperature for
the type of fabric to be washed.
NB:
Turning the selector to any position other than “O” provides power to the machine.
— Using the selector (depending on the model), choose:
- Either a suitable spin speed for your type of washing.
The spin speed is automatically restricted in the “Synthetics”, “Woollens / Delicates”
and “Hand wash” programmes.
- Or drip dry.
The cycle will finish with a gentle spin at 100 rpm.
- Or stop with tub full of water.
Your machine will stop with the tub full of water before the final spin.
— Use the buttons to select any options you wish.
— Start the programme by pressing “Start/Pause” 4
3
2
1”Wash” light flashing
(If you have selected rinse only or spin only,
it is the “Rinse/Spin” light that flashes
Selector on
- Position “800” for example
- Position ”100”
- Position
Light(s) for the option(s) selected
“Wash” light permanently lit
(The lights illuminate in succession to show
which phase the cycle is at)
A
2
— Press the "Start/Pause" button to interrupt the cycle.
— Add or remove the items of laundry *.
— Press the "Start/Pause" button to restart the cycle.
(*) The lid may take 1-2 minutes to unlock.
4
4Light flashing
Light permanently lit
A
A
• Adding or removing an item during the cycle
(impossible during spin):
Important :
Before starting your machine,
check that the power cable is plugged
in and the water tap is open. Also
ensure that the drum doors are closed
correctly and the machine’s lid is shut.
During the “End of Cycle” phase, any
action on one of the controls (the
selectors or the buttons) returns you to
“Programming” mode. As a safety
measure, when the cycle is over, we
recommend that you unplug the power
cable and turn off the water tap.
For more details on the various functions, please refer to the sections "DETAILS OF THE PROGRAMMES" and "DETAILS OF THE OPTIONS".
Information :
After a power failure, when the power is restored, the washing cycle automatically resumes at the point where it was interrupted.
• Cancelling while programming, washing or during a pause:
— Set the selector to the “O” position.
This can be done at any time during the cycle or during programming, or even during a pause.
NB :
- In all cases, after cancelling you must reprogramme everything from the start.
- If you have cancelled during the washing phase, remember to empty the water, if necessary.
1Selector set to ”O”
All the lights unlit
1
• End of the cycle:
NB:
After spinning, some models automatically position the drum opening at the top to
provide easy access to the washing. This operation lasts at most 3 minutes.
— Then, the “Stop” light comes on permanently, indicating that the cycle is over.
Set the selector to the “O” position.
You can now open the lid and remove your washing.
1The “Stop” light is permanently lit
4A
2
1
3
5
Start/Pause
Cycle progressNature of the washing and
the temperature
Spin speed setting
(depending on the model)
Options
(depending on the model)
Delayed
start setting
— ... Or use the selector (depending on the model) to select starting delayed by 1 to 19
hours and then press “Start/Pause” .
5The lights flash in succession until the cycle
effectively starts
A
4
(depending on the model)

7
EN4 / PROGRAMMING YOUR MACHINE
• Maintaining your machine’s performance
(Maintaining the pump filter):
You must clean the drain pump filter regularly (for how to do this, see the section “CLEANING THE PUMP FILTER”).
Important :
Your machine’s performance can be affected if you do not clean the pump filter regularly.
: These functions can be used alone or in combinations: no illogical combinations can be made.
To select the most suitable programme for your type of washing, follow the instructions on the labels that most textiles bear.
• SOME EXAMPLES OF PROGRAMMES
• DETAILS OF THE PROGRAMMES
The main programmes provided by the machine are as follows:
• Cotton / Whites
If your washing comprises hard-wearing white or coloured COTTONS.
Important :
When washing coloureds do not exceed a maximum
temperature of 60°C.
NB:
During the first few minutes of the programme, your machine
automatically evaluates the washing load you have introduced and
adapts the water consumption and the length of the programme
accordingly to provide a perfect wash
• Coloureds / Synthetics
If your washing comprises of DELICATE COLOURS, HARD-WEARING
SYNTHETICS or MIXED FIBRES
• Delicates / Woollens
If your washing comprises NETTING, DELICATE FABRICS, FRAGILE
TEXTILES or ”MACHINE-WASHABLE WOOLLENS”.
NB:
A programme with agitation and spin phases specially adapted to
these types of fabrics.
• Hand wash
If your washing comprises SILK or PARTICULARLY DELICATE FABRICS
NB:
A programme with a very gentle mechanical action and no
intermediate spins between rinses.
The cycle ends with a very gentle, progressive spin restricted to 600
rpm.
•Quick 30 min
This programme enables you to refresh a small load of 2.5 kg of lightly
soiled washing composed of WHITES, COTTONS, COLOUREDS or
HARD-WEARING SYNTHETICS.
The cycle time is restricted to around 30 minutes
In this programme, the washing temperature is automatically programmed
at 40°C.
Important :
For this programme, the doses of detergent should be
reduced by half.
• Rinse only
A separate rinse followed by a choice of:
— Either spin and drain
— Or drain only ("Drip-dry" option)
— Or a stop with the drum full of water.
• Spin only
This allows a separate spin and drain.
Important :
In the case of "Rinse only" followed by a spin or "Spin only",
ensure that you select a suitable spin speed for the type of washing
in the machine.
Important :
**
The cycle times are provided for an average value “without options”. They may vary according to the wash load, the temperature,
etc.
— If you programme a “Prewash”, you must add 18 to 25 minutes.
— If you programme “Extra rinse”, you must add 17 minutes.
*: Options depending on the model
HAND WASH
-
2.5
Programmes table
Type of textile
Max. load
(kg)
Temperature
(°C)
Prewash
Extra
Drip-dry
Full drum
stop
COTTON / WHITES
- 60°
- 90°
- 30°
5.0
2.5
1.5
COLOUREDS / SYNTHETICS
DELICATES / WOOLLENS
RINSE only
QUICK 30 min
SPIN only
Cycle length **
h = hour
min = minute
-
-
40°
-
10
min
18
min
30 min
31 min - 36 min
1 h 20 - 1h41
1 h 56 - 2h13
1.0
32
min
Easy
ironing
Additional programmes
100
*
*
*
*
rinse

8
EN 4 / PROGRAMMING YOUR MACHINE
• DETAILS OF THE OPTIONS
• Prewash
Specially designed for heavily soiled washing (mud, blood, etc.).
A specific initial agitation in cold water precedes a phase of heating to
30°C.
This agitation phase in cold water enables the particles soiling the washing
to be removed before the water is heated.
Important :
Detergent must be placed in the
""
container in the products
box.
• Easy ironing (depending on the model)
This option washes your laundry more gently, but with an identical
• Extra rinse
"Especially for sensitive and allergic skin": adds an extra rinse to the
washing cycle.
• Drip dry ”100”
Select this option if you just want to drip dry your washing .
If you programme “Drip dry”, the cycle will end with a gentle spin at
100 rpm.
• Full drum stop (depending on the model)
This function enables you to remove the washing from your machine
before the spin phase or to delay this phase with you washing remaining
in water to prevent creasing.
NB :
When the machine is stopped with the tub full of water, the
“Rinse/Spin” cycle progress light flashes.
Then:
— If you want to drain after spinning, use the selector to choose a
suitable spin speed for your type of washing.
The programme will end automatically.
— If you just want to drain, turn the selector to “Drip Dry” (position
”100”).
• MODIFYING A WASHING PROGRAMME
• During programming:
Anything can be changed before the “Start/Pause" button is
pressed.
• After the cycle has started:
You can change the type of textile (for example, switch from “COTTON”
to “SYNTHETICS”, etc.). In this case, check that the options you previously
selected are still there.
You must confirm your new selection by pressing the “Start/Pause"
button .
The machine may then possibly drain off some of its water.
• Throughout the cycle:
Depending on your model, the following changes are possible without
pressing the “Start/Pause" button .
— You can change the temperature for the same type of textile.
NB:
If the temperature achieved by the washing cycle is higher than your
new selection, heating the water stops immediately and the cycle
continues.
— You can alter the spin speed ( ) throughout the cycle.
— You can select “Drip Dry” (”100”) and “Full drum stop”
throughout the
washing phase.
— You can activate the “Extra rinse” option until rinsing starts (until
the “Rinse/Spin” cycle progress light illuminates).
— You can deactivate all the options throughout the cycle provided
that their action has not already finished.
• When the cycle is over:
When the “Stop” light is permanently lit, you can programme a new
cycle without having to reset the selector to the “O” position.
For this, all you have to do is turn one of the selectors or press one of
the buttons.
The “Wash” light starts to flash.
The machine is then ready to be reprogrammed.
• AUTOMATIC SAFETY SYSTEMS
• Lid opening safety system:
As soon as washing commences, the lid on your machine is locked.
When the cycle is finished or when the machine has stopped with the
drum full of water, the lid unlocks.
If you wish to open the lid during the cycle, press button briefly
and wait 1-2 minutes for the safety system to unlock the lid.
Important :
Depending on when you wish to open the lid during the cycle,
this time delay may be a little longer because a cooling down period
may also have to be included.
In fact, to avoid your being severely burnt, the lid safety system will
not open during the cycle unless the temperature inside the machine
is below a certain threshold.
• Water safety system:
During operation, constant control of the water prevents any overflows.
• Spin safety system:
Your washing machine is fitted with a safety system that restricts the
spin when poor load distribution is detected.
In this case, your washing may be insufficiently spun. Redistribute
your washing in the drum and programme a new spin.
• Anti-foam system:
You machine can detect when too much foam is being produced during
spinning.
At such times, spinning stops and the machine drains.
The cycle then restarts, adapting the spin rates and possibly adding
an extra rinse.
4
1
4
4
4
2
2
• Delayed start
(depending on the model)
You can delay the start of your programme by 1, 3, 6, 9, 12, 15 or 19
hours so that you can benefit from cheap rate electricity or to have the
cycle finish at a desired time.
To do this, use the selector to choose the time you want the cycle
to start and press “Start/Pause” .
NB:
- Even if you forget to press the “Start/Pause” button after
selecting this option, your choice will still be accepted after a few seconds.
flash in succession from left to right during the whole of the waiting
period before the cycle effectively starts.
4
4
5
• During delayed start
(Only for machines fitted with this function):
- Any kind of programme modification is accepted during a delayed
start’s waiting period.
- You can alter the length of a delayed start throughout the waiting
period before the cycle effectively starts.
NB :
-
During this period, selecting a new time cancels out the previous
selection. The new period selected is accepted based on the last selection
made.
- If you want to cancel the delayed start completely during this period,
set the selector to the “O” position and then briefly press the
“Start/Pause” button .
- You can only activate the “Prewash” and “
Easy ironing” o
r
waiting period.
4
5
„Extra rinse” , „Full drum stop”
options during a delayed start’s
washing performance. The spin speed is slower so that your laundry
creases less.
(depending on the model)
- The three cycle progress lights (Wash , Rinse/Spin and ”Stop”)

9
EN5 / MAINTAINING YOUR MACHINE
2
1
CLANG
1
2
A
D 15
32D22D12D02D
D 24
D 25
D 16 D 17 D 18 D 19
• CLEANING THE PUMP FILTER (Option 1)
The way to access your pump filter may differ according to the model
of the machine (see options 1 and 2).
This filter collects the small objects you may have inadvertently left in
your clothes and prevents them from disrupting the pump’s operation.
To clean the filter, proceed as follows:
— Open the drum doors. At the back of the drum, you will see a plastic
component
(Diagram D15)
— Release this
(Diagram D16)
.
To do this:
- Insert a rod (a pencil or a screwdriver, for example) into the hole in
the component
- Press down vertically with the rod, while pushing the component
over to the right until it is released from its housing
— Remove the component
— Turn the drum slightly towards the front of the machine, with the doors
open
(Diagram D17)
You can access the pump filter through the openings freed by
removing the plastic component .
— Remove the filter from its housing
(Diagram D17)
— Remove the various objects it may have in it
— Rinse it under the tap
(Diagram D18)
— Re-insert it, pushing it firmly into its housing after checking that the
housing is clean
— Re-insert the plastic component , ensuring that it is positioned
correctly in the openings at the bottom of the drum and pushing it to
the left until it is fully engaged
(Diagram D19).
• CLEANING THE PUMP FILTER (Option 2)
if your machine dopes not have the component shown in Diagram
D16, you must proceed as follows to clean your pump filter:
— Turn the drum to position the closed doors facing downwards: this
will reveal a plastic component
(Diagram D20)
— If your machine is fitted with one, remove the screw
— On certain types of machines, the component has a clip.
In this case, release the component by pressing on this clip while
sliding the component gently to the right
— Then, in all cases, turn the drum again, open the doors and remove
the component by sliding it in the direction of the arrow
(Diagram
D21)
— Turn the drum slightly towards the front of the machine, with the doors
open
(Diagram D22)
.
You can access the pump filter through the openings freed by
removing the plastic component .
— Remove the filter from its housing
(Diagram D22)
— Remove the various objects it may have in it
— Rinse it under the tap
(Diagram D23)
— Re-insert it, pushing it firmly into its housing after checking that the
housing is clean
— Re-insert the plastic component and the screw by performing
all the above operations in reverse order.
• CLEANING THE MACHINE
Important :
To clean the casing, the control panel and all the plastic parts
in general, use a sponge or a soft cloth dampened only with water
and liquid soap.
In all cases, do not use:
— Abrasive powders
— Metal or plastic sponges
— Alcohol-based products (alcohol, thinners, etc.)
• CARE OF THE INTERNAL COMPONENTS
To ensure better hygiene, we recommend that you:
— Leave the lid open for a short time after washing.
— Clean the plastic and rubber access components to the tank approximately
once a month using a slightly chlorinated product. Run a rinsing cycle to
remove any residue of this product.
— Run a washing cycle at 90°C at least once a month.
• CLEANING THE PRODUCTS’ BOX
Clean the products’ box regularly.
To do this:
— Press the bosses on each side of the box simultaneously to extract
it from its housing
(Diagram D24)
.
— Remove the siphons from the rear of the box and separate
the box from its front cover
(Diagram D25)
— Rinse everything under the tap (taking care to empty any excess water
remaining inside the box).
— Refit all the box’ components, ensuring that the box section itself is
properly clipped into the cover and then re-insert the complete assembly
into its location under the machine’s lid.
• PERIODIC CHECKS
To avoid any water damage, we recommend that you regularly check
the condition of the water and drain hoses. If you notice the slightest
cracking, do not hesitate to replace the hoses with identical ones available
from the manufacturer or his After-Sales Service. For how to replace
the water supply hose, please refer to the section “CONNECTING TO
THE COLD WATER SUPPLY”
• REPLACING THE POWER SUPPLY CABLE
Warning:
For your safety, the power cable and, depending on the
model, the complete electric box and its associated cable must only
be replaced by the manufacturer’s After-Sales Service or a qualified
electrician.
A
A
A
A
A
A
A

10
EN 6 / INCIDENTS AND MEANING OF PARTICULAR LIGHTS FLASHING
• MESSAGES INDICATED BY THE VARIOUS
LIGHTS FLASHING
• Incidents indicated, which you can rectify yourself
In this section, we explain how you can rectify these incidents very
easily yourself.
Your machine automatically detects some operating incidents and
indicates these by particular options lights flashing.
• NCIDENTS THAT MAY OCCUR
• The cycle does not start
— You have not pressed the "Start /Pause" button
— There is no power to the machine:
- Check that the plug is correctly in the socket
- Check the circuit breaker and the fuses.
— The water tap is closed
— The machine's lid is not closed properly
• A puddle of water forms around the machine
Warning:
First of all remove the plug and the fuse and shut off the
water supply tap.
While the machine is operating, the permanent level control prevents
the water from overflowing. If, despite this, water comes out of your
machine, it may be that:
— The drain hook is wrongly positioned in the drain pipe.
— The water supply hose is not sealed tightly at the machine or tap end:
- Check that the seals are in place and the connections are tight.
• Heavy vibration during spin
— All the transport materials have not been removed correctly from
the machine:
- Check that all the transport wedges have been removed (see
"REMOVING THE TRANSPORT CLAMPS").
— The floor is not level.
— Your machine is resting on its two “front” castors (depending on the
model):
- Reset your machine on its feet by pushing the castor engagement
lever to the right.
• The washing is not spun or not spun enough
— You have selected a programme with no spin, for example "Drip-dry"
— The spin safety system has detected poor distribution of the washing
in the drum:
- Untangle the washing and programme a new spin.
• The machine does not drain
— You have programmed "Full drum stop"
— The pump filter is blocked:
- Clean it (see "CLEANING THE PUMP FILTER" for the relevant
procedure)
— The drain hose is kinked or squashed
• The lid does not open
— The programme has not yet finished
The lid remains locked throughout the programme.
• The drum doors open very slowly
(On machines fitted with gently opening doors)
— Your machine has not operated for a long time
— It is located in too cold a position.
— Detergent residue (powder) is blocking the hinges
- In all cases, everything returns to normal after the doors have opened
initially
Important :
As a general rule, whatever the anomaly detected, you
should stop the machine, unplug the power cable and shut off the
water tap
• Incidents indicated that require a breakdown
Your machine also detects some operating faults that systematically
require the services of a breakdown engineer.
NB:
Before calling for your breakdown engineer, we would recommend that
you do the following:
-
Set the Programme selector to the “O” position and remove the
electrical plug for at least 10 seconds
-
Reconnect the plug and restart a washing cycle.
If the fault displayed persists, call your breakdown engineer and
remember to tell him which indicator lights were lit.
Important :
Do not restart a washing cycle if the drum remains locked or if
you notice water around your machine of if you notice a burning smell.
• AFTER-SALES SERVICE :
Possible maintenance on your washing machine should be undertaken by:
— either your dealer,
—
or another qualified mechanic who is an authorized agent for the brand
appliances.
When making an appointment, state the complete reference of your equipment
(model, type and serial number). This information appears on the manufacturer's
nameplate attached to the rear of the equipment.
Lights flashing Causes / Remedies
Drain hose not positioned properly.Check the drain
hose’s position in the drain: the connection must not
be airtight (see the section “DRAINING AWAY THE
WASTE WATER”).
Drum blocked. Check that a small item of laundry
(e.g. a handkerchief or a sock, etc.) has not slipped
down between the tub and the drum and is stopping
the drum from turning. To access the bottom of the
tub, please refer to the section ”CLEANING THE
PUMP FILTER
”.
Lid not closed properly. Check that the lid is closed
and then press the “Start/Pause” button again to
restart the cycle.
The water tap is closed. Check that the water tap
is open and then press the “Start/Pause” button
again to restart the cycle. This incident may also
be caused by the drain hose being poorly connected
(see the section “DRAINING AWAY THE WASTE
WATER”).
The pump filter is clogged.Clean the pump filter (for
how to do this, see the section “CLEANING THE
PUMP FILTER”) and then press the “Start/Pause”
button again to restart the cycle.
Also check the drain hose’s position in the drain: the
connection must not be airtight (see the section
“DRAINING AWAY THE WASTE WATER”).
In this case, these are the three cycle progress lights
that flash simultaneously.
engineer

11
FR1 / PRÉSENTATION DE VOTRE APPAREIL
•SOMMAIRE
Page
Démontage des brides de transport . . . . . . . . . . . . . . . . . . . . . . . . . .
Déplacement de votre appareil . . . . . . . . . . . . . . . . . . . . . . . . . . . . . .
Alimentation en eau froide . . . . . . . . . . . . . . . . . . . . . . . . . . . . . . . . . .
Evacuation des eaux usées . . . . . . . . . . . . . . . . . . . . . . . . . . . . . . . . .
Alimentation électrique . . . . . . . . . . . . . . . . . . . . . . . . . . . . . . . . . . . . .
Mise en place de votre appareil . . . . . . . . . . . . . . . . . . . . . . . . . . . . .
Chargement du linge . . . . . . . . . . . . . . . . . . . . . . . . . . . . . . . . . . . . . .
Chargement des produits de lavage . . . . . . . . . . . . . . . . . . . . . . . . . .
Page
Programmation . . . . . . . . . . . . . . . . . . . . . . . . . . . . . . . . . . . . . . . . . . .
Détail des programmes et des options . . . . . . . . . . . . . . . . . . . . . . .
Modification d’un programme de lavage . . . . . . . . . . . . . . . . . . . . . .
Sécurités automatiques . . . . . . . . . . . . . . . . . . . . . . . . . . . . . . . . . . . .
Nettoyage du filtre de pompe . . . . . . . . . . . . . . . . . . . . . . . . . . . . . . .
Entretien de votre appareil . . . . . . . . . . . . . . . . . . . . . . . . . . . . . . . . . .
Incidents pouvant survenir . . . . . . . . . . . . . . . . . . . . . . . . . . . . . . . . . .
Messages donnés par le clignotement des voyants . . . . . . . . . . . . .
Tableau de commande
Poignée d’ouverture du couvercle (restant verrouillée pendant le cycle)
Levier de mise sur roulettes (suivant le modèle)
Tuyau de vidange
Traverse de bridage
Tuyau d’alimentation en eau (non raccordé)
Cordon d’alimentation électrique
A
•DESCRIPTION DE VOTRE APPAREIL
D 1 D 2
•CONSIGNES DE SÉCURITÉ
Important :
Cet appareil, destiné à un usage exclusivement domestique, a
été conçu pour laver, rincer et essorer les textiles lavables en machine.
Respectez impérativement les consignes suivantes. Nous déclinons
toute responsabilité et garantie en cas de non respect de ces
recommandations pouvant entraîner des dégâts matériels ou
corporels.
— Cet appareil n’est pas prévu pour être utilisé par des personnes (y compris
les enfants) dont les capacités physiques, sensorielles ou mentales sont
réduites, ou des personnes dénuées d’expérience ou de connaissance, sauf
si elles ont pu bénéficier, par l’intermédiaire d’une personne responsable
de leur sécurité, d’une surveillance ou d’instructions préalables concernant
l’utilisation de l’appareil.
— L’appareil ne doit être utilisé que conformément au mode d’emploi,
pour éviter des dommages à votre linge et à votre appareil. Utilisez seulement
des produits de lavage et d’entretien certifiés pour l’emploi dans les machines
à laver à usage domestique.
— Si, avant lavage, vous traitez votre linge à l’aide de détachants, dissolvants
et, en règle générale, de tous produits inflammables ou à fort pouvoir
détonant, ne l’introduisez pas immédiatement dans l’appareil.
De même, il vous est fortement recommandé de ne pas utiliser de solvants
ou de produits en bombe aérosol à proximité de votre lave-linge et plus
généralement d’appareils électriques dans une pièce mal aérée (risque
d’incendie et d’explosion).
— Si des incidents se produisent et que vous ne pouvez les résoudre grâce
aux remèdes que nous vous préconisons (voir chapitre “INCIDENTS POUVANT
SURVENIR”), faites appel à un professionnel qualifié.
— Si vous êtes amené à ouvrir votre machine en cours de cycle (par exemple :
pour ajouter ou retirer du linge), suivant la phase dans laquelle se trouve le
programme (en lavage essentiellement), prenez garde à la température intérieure
qui peut être très élevée (risque de brûlures graves).
— Lors d’une nouvelle installation, l’appareil doit être raccordé au réseau
de distribution d’eau avec un tuyau neuf, le tuyau usagé ne doit pas être
réutilisé.
— Ne laissez pas les enfants jouer avec l’appareil et éloignez les animaux
domestiques.
— Les appareils usagés doivent immédiatement être rendus inutilisables.
Débranchez et coupez le câble d’alimentation au ras de l’appareil. Fermez
l’arrivée d’eau et enlevez le tuyau. Rendez la fermeture de la porte inutilisable.
— En cas de risque de gel, débranchez le tuyau d'arrivée d'eau et vidangez
l'eau qui pourrait subsister dans le tuyau de vidange en plaçant ce dernier
le plus bas possible dans une cuvette.
•ÉCONOMIES D’ÉNERGIE
— Ne programmez le prélavage que lorsque c’est absolument nécessaire :
par ex. pour des vêtements de sport ou de travail très sales, etc...
— Pour du linge peu ou moyennement sale, un programme à basse
température est suffisant pour obtenir un résultat de lavage impeccable.
— Pour du linge peu sale choisissez un cycle de lavage court.
— Dosez le produit de lavage selon la dureté de l’eau, le degré de salissure
et la quantité de linge et respectez les conseils sur les paquets des produits
lessiviels.
•PROTECTION DE L’ENVIRONNEMENT
Les matériaux d’emballage de cet appareil sont recyclables. Participez à
leur recyclage et contribuez ainsi à la protection de l’environnement en
les déposant dans les conteneurs municipaux prévus à cet effet.
Votre appareil contient également de nombreux matériaux
recyclables. Il est donc marqué de ce logo afin de vous indiquer que
dans les pays de l’Union Européenne les appareils usagés ne doivent
pas être mélangés avec d’autres déchets.
Le recyclage des appareils qu’organise votre fabricant sera ainsi réalisé
dans les meilleures conditions, conformément à la directive européenne
2002/96/CE sur les déchets d’équipements électriques et électroniques.
Adressez vous à votre mairie ou à votre revendeur pour connaître les points
de collecte des appareils usagés les plus proches de votre domicile.
Nous vous remercions pour votre collaboration à la protection de
l’environnement.
A
12
12
12
12
13
13
13
14
15
16
16
17
17
18
18
13

FR 2 / INSTALLATION DE VOTRE APPAREIL
12
•DÉMONTAGE DES BRIDES DE TRANSPORT
Important :
Avant toute utilisation, il est impératif d’effectuer les opérations
décrites ci après.
Ces opérations consistent à retirer toutes les pièces qui servent à immobiliser
la cuve de votre appareil pendant le transport.
Ces opérations dites ”de débridage” sont nécessaires pour le bon
fonctionnement de votre appareil et le respect des normes en vigueur
en matière de sécurité.
Si ces opérations n’étaient pas effectuées dans leur totalité, cela pourrait
causer des dommages graves à votre appareil pendant son fonctionnement.
— Retirez le lave-linge de son socle (vérifiez que la cale servant au
maintien du moteur n'est pas restée coincée sous la machine)
(Fig. D3)
— Enlevez les 4 vis à l'aide d'un tournevis
(Fig. D4)
— Déposez la traverse en ôtant les deux vis
(Fig. D5)
à l'aide d'une clé
de 10 ou de 13 mm (suivant le modèle)
(assurez-vous que les deux entretoises en plastique fixées sur la traverse,
sont bien retirées en même temps que cette dernière)
— Remontez les vis à leur emplacement initial.
Attention :
Obstruez impérativement les deux trous à l'aide des cache-
orifices prévus à cet effet (fournis dans le sachet d'accessoires)
(Fig. D6)
— Retirez la cale d'immobilisation de l'ensemble tambour-cuve
(Fig. D7)
.
Pour cela :
- soulevez le couvercle de la machine
- retirez la cale
- retirez la cale
- libérez les portillons du tambour, bloqués en position basse, en appuyant
simultanément sur les deux volets.
Attention :
Enlevez les colliers support tuyaux et obstruez
impérativement les trous à l’aide des caches (fournis dans le
sachet d'accessoires) (Fig. D8)
Conseil :
Nous vous conseillons de conserver toutes les pièces de
bridage, car il faudra obligatoirement les remonter si vous devez, par la
suite, transporter votre machine.
Information :
Avant sa sortie d’usine, votre appareil a été minutieusement
contrôlé ; il est donc possible que vous constatiez la présence d’un peu
d’eau dans la cuve ou au niveau des boîtes à produits.
•DÉPLACEMENT DE VOTRE APPAREIL
•Mise sur roulettes
Si votre machine est équipée de roulettes escamotables, vous pouvez la
déplacer facilement.
Pour la mise sur roulettes, faites pivoter de la droite jusqu'à l'extrémité
gauche le levier situé au bas de l'appareil
(Fig. D9)
.
Important :
En fonctionnement, la machine ne doit pas reposer sur ses
roulettes "avant" : n'oubliez pas de ramener le levier dans sa position
initiale.
•ALIMENTATION EN EAU FROIDE
Branchez le tuyau d'alimentation
(Fig. D10)
:
— d'une part, sur le raccord situé à l'arrière de la machine
— d'autre part, sur un robinet muni d'un embout fileté Ø 20x27 (3/4 BSP).
Si vous utilisez un robinet auto-perceur, l’ouverture pratiquée doit être d’un
diamètre de 6 mm minimum.
Arrivée d'eau :
- Pression d'eau mini : 0,1 MPa ou 1 bar
- Pression d'eau maxi : 1 MPa ou 10 bar
•Remplacement du tuyau d’alimentation en eau
Au moment du changement, veillez au bon serrage et à la présence du joint
aux deux extrémités
•ÉVACUATION DES EAUX USÉES
Raccordez le tuyau de vidange,
(Fig. D11)
:
— soit, de façon provisoire, sur un évier ou une baignoire
— soit, de façon permanente, sur un siphon ventilé.
Si votre installation n’est pas équipée d’un siphon ventilé, veillez à ce que
le raccordement ne soit pas étanche. En effet, pour éviter tout refoulement
d’eaux usées dans la machine, il est vivement recommandé de laisser libre
passage à l’air entre le tuyau de vidange de la machine et le conduit
d’évacuation.
Dans tous les cas, la crosse de vidange devra être placée à une hauteur
comprise entre 65 et 90 cm par rapport à la base de la machine.
Important :
Veillez à bien maintenir le tuyau de vidange au moyen d'un lien
afin d’éviter que la crosse ne se dégage en cours de vidange et
provoque une inondation.
Pour une évacuation correcte des eaux usées, ne faites pas suivre
au tuyau de vidange un chemin trop sinueux. En effet, la multiplication
des coudes nuit à l’efficacité de la pompe de vidange.
Il est possible d’évacuer les eaux usées au sol, à condition que le tuyau de
vidange passe par un point situé à une hauteur comprise entre 90 et 65
cm par rapport à la base de la machine
(Fig. D12)
A
21D11D01D
10 mm
3/4
D 3
1
1
2
2
13
a
b
a
b
1
2
12
A
D 4
9D8D7D
D 5
D 6
F
F
G

13
FR3 / PRÉPARATION DE VOTRE LINGE ET DE VOTRE APPAREIL
Bac prélavage (poudre)
Bac lavage (poudre ou liquide)
Assouplissant
Javel
: LESSIVE POUDRE : LESSIVE LIQUIDE
cl
D 13 D 14
•ALIMENTATION ÉLECTRIQUE
Important :
Pour votre sécurité, il est impératif de vous conformer aux
indications données ci-dessous.
— Avant de connecter l’appareil, vous devez impérativement vous assurer
que ses caractéristiques électriques sont compatibles avec celles de votre
installation (voir les indications portées sur la plaque signalétique fixée au
dos de l’appareil).
L'installation électrique doit être conforme aux normes en vigueur et aux
prescriptions des Autorités Electriques du pays concerné, en particulier
pour la mise à la terre et l'emplacement dans une salle d'eau
Nous ne pouvons pas être tenus pour responsable de tout incident causé
par une mauvaise installation électrique.
Conseil :
Conseils pour l'installation électrique de votre appareil
— N'utilisez pas de prolongateur, adaptateur ou prise multiple.
— Ne supprimez jamais la mise à la terre.
— La prise de courant doit être facilement accessible mais hors de portée
des enfants.
En cas d’incertitude, adressez-vous à votre installateur.
Important :
Votre appareil est conforme aux directives européennes
2006/95/CE (directive basse tension) et 2004/108/CE (compatibilité
électromagnétique).
•MISE EN PLACE DE VOTRE APPAREIL
Important :
Si vous placez votre machine à côté d'un autre appareil ou d'un
meuble, nous vous conseillons de toujours laisser entre eux un espace
pour faciliter la circulation de l’air.
Conseil :
D’autre part, nous vous déconseillons fortement :
— d'installer votre appareil dans une pièce humide et mal aérée.
— d'installer votre appareil dans un lieu où il pourrait être soumis à des
projections d’eau.
— d'installer votre appareil sur un sol en moquette.
Si vous ne pouvez l'éviter, prenez toutes les dispositions pour ne pas gêner
la circulation de l'air à sa base, afin d’assurer une bonne ventilation des
composants internes.
•Mise à niveau
Vérifiez à l'aide d'un niveau que le sol est horizontal : inclinaison maxi 2°,
soit un écart d'environ 1 cm mesuré sur la largeur et de 1,5 cm sur la
profondeur de la machine.
•Pieds réglables
Certaines machines sont équipées de deux pieds réglables placés à l’avant
permettant de compenser les inégalités du sol. Pour régler l’horizontalité
et la stabilité de la machine, procédez comme suit :
— mettez la machine sur ses roulettes (ou basculez-la légèrement vers l’arrière
si elle n’est pas munie de roulettes escamotables)
— en fonction de la configuration du sol, vissez ou dévissez le ou les pieds
pour le ou les régler en hauteur
(Fig. D13)
— remettez la machine sur ses pieds et vérifiez sa stabilité.
•CODE D’ENTRETIEN DES TEXTILES
—
Lavage
: ne dépassez jamais les températures indiquées
—
Chlorage dilué à froid possible
:
—
Repassage
: doux moyen fort
—
Nettoyage à sec
: essence minérale
perchloréthylène tous solvants
—
Nota :
un code barré indique son interdiction
•CHARGEMENT DE VOTRE LINGE
Effectuez les opérations dans l'ordre suivant :
•Ouverture de la machine
— Vérifiez que le sélecteur de programmes est bien positionné sur
”O”.
— Soulevez la poignée d’ouverture située à l’avant de la machine. Le couvercle
s’ouvre.
— Ouvrez le tambour en appuyant sur le poussoir situé sur le portillon avant.
•Introduction du linge
Pour des performances de lavage optimum, placez le linge, préalablement
trié et déplié, dans le tambour, sans le tasser et en le répartissant
uniformément. Mélangez les grosses et petites pièces pour obtenir un
essorage optimum, sans formation de balourd.
•Fermeture du tambour
Assurez-vous de la bonne fermeture du tambour.
Important :
Vérifiez que les trois crochets et le liseré du poussoir sont bien
visibles.
•CHARGEMENT DES PRODUITS DE LAVAGE
Important :
(Fig. D14)
— Le bac ”LAVAGE” peut contenir les poudres et les liquides, toutefois,
ne pas utiliser de lessive liquide pour les programmes AVEC prélavage
et/ou AVEC “départ différé” (suivant modèle).
— L’assouplissant concentré est à diluer à l’eau chaude.
— La javel concentrée doit être impérativement diluée.
— Pour un remplissage correct des bacs à produits, mettez le couvercle
dans sa position maximale d'ouverture.
— Ne dépassez pas le niveau MAX
.
•Dosage de la lessive
La quantité de lessive à utiliser dépend de la dureté de l’eau, du degré de
saleté de votre linge et de la quantité de linge à laver.
Reportez-vous toujours aux prescriptions de dosage figurant sur l’emballage
de vos produits de lavage.
Attention : les préconisations des fabricants de lessive correspondent, dans
la plupart des cas, à un remplissage maximal du tambour. Adaptez
correctement votre dosage au poids du linge introduit dans la machine.
Ces préconisations vous éviteront un dosage excessif responsable de la
génération de mousse. Une surproduction de mousse peut diminuer les
performances de votre machine et augmenter la durée de lavage ainsi que
la consommation d’eau.
•Lessives pour lainages et textiles délicats
Pour le lavage de ces textiles, il est recommandé d’utiliser une lessive
appropriée (évitez de mettre cette dernière directement sur le tambour
car certains de ces produits sont agressifs pour le métal).
•Avant le premier lavage
Avant d’effectuer votre première lessive, nous vous recommandons de faire
un cycle de lavage ”COTON 90° sans prélavage”, sans linge et en utilisant
une 1/2 dose de votre lessive habituelle. Ceci, afin d’éliminer les résidus
de fabrication pouvant éventuellement subsister dans la machine.
•PROGRAMME POUR LES ESSAIS COMPARATIFS
ET NORMALISÉS
Coton 60°C - 5 kg - sans options - essorage maxi - durée 130 min.
Pour l’annonce écrite sur l’étiquette énergétique, les tests sont faits selon la directive
européenne 95/12/CEE.
cl

14
FR 4 / PROGRAMMATION DE VOTRE APPAREIL
Information :
Toutes les touches sont à micro-
course et ne restent pas enfoncées.
La touche ”Départ/Pause” ne peut
en aucun cas annuler un programme.
Important :
Avant de mettre votre machine en
marche, vérifiez que le cordon électrique est
branché et le robinet d’eau ouvert. Assurez-
vous aussi de la bonne fermeture des
portillons du tambour et du couvercle de la
machine.
Dans la phase ”fin de cycle”, toute action sur
un des éléments de commande (sélecteurs
ou touches) permet de revenir en mode
”programmation”.
Par mesure de sécurité, à la fin d’un cycle, il
est conseillé de débrancher le cordon
électrique puis de fermer le robinet d'arrivée
d'eau.
•PROGRAMMATION
Options
Réglage du départ différé
(suivant le modèle)
Départ/PauseDéroulement du cycleNature du linge et température
Réglage de la vitesse d’essorage
5
A
23
1
•Programmation d’un cycle de lavage :
Voyants et position des sélecteurs
— Tournez le sélecteur pour choisir le programme et la température de lavage les mieux
adaptés à la nature de votre linge.
Nota : Le fait de tourner le sélecteur sur une position autre que „O” met la machine sous
tension.
— Choisissez, à l’aide du sélecteur (suivant le modèle d’appareil)
- soit une vitesse d’essorage adaptée à la nature de votre linge.
La vitesse d'essorage est automatiquement limitée dans les programmes "Mixte“,
"Délicat/Laine” et ”Lavage main”
- soit un égouttage.
Le cycle se terminera par un essorage doux à 100 trs/min.
- soit un arrêt cuve pleine.
Votre machine s’arrêtera cuve pleine d’eau avant l’essorage final.
— Choisissez ou non les options à l’aide des touches .
— Choisissez un départ immédiat en appuyant sur ”Start/Pause” ...
— ... ou choisissez un départ différé de 1 à 19 heures à l’aide du sélecteur (suivant le
modèle) et, ensuite, appuyez sur ”Start/Pause” .
53
5
4
2
1Voyant (Lavage) clignotant
Si vous avez choisi de faire un rinçage seul ou un
essorage seul, c’est le voyant (Rinçage/
Essorage) qui clignote
sélecteur sur
- position ”600” par exemple
- position ”100”
- position
voyant(s) de la ou des options sélectionnée(s)
voyant (Lavage) allumé fixe
(les voyants s’allument successivement pour
indiquer dans quelle phase se trouve le cycle)
les voyants clignotent successivement jusqu’au
départ effectif du cycle
A
A
2
— Appuyez sur la touche ”Start/Pause” pour interrompre le cycle.
— Mettez ou enlevez la ou les pièces de linge*.
— Appuyez sur la touche ”Start/Pause” pour continuer le cycle.
(*)
l
e temps de déverrouillage du couvercle est dépendant de la température intérieure de
la machine et peut prendre, pour des raisons de sécurité, plusieurs minutes dans le cas d’une
interruption d’un lavage supérieur à 40°C.
Nota : Si vous avez choisi un départ différé, vous pouvez accéder instantanément au tambour
à tout moment pendant la phase précédant le départ du cycle de lavage sans interrompre
et relancer le cycle.
5
5voyant clignotant
voyant allumé fixe
A
A
•Mettre ou enlever une pièce pendant le cycle
(impossible pendant l’essorage) :
Pour avoir plus de précisions sur les différentes fonctions, reportez-vous aux chapitres ”DÉTAILS DES PROGRAMMES” et ”DÉTAILS DES OPTIONS”.
Information :
A
près une coupure de courant, à la remise sous tension le cycle de lavage reprendra systématiquement là où il a été interrompu.
•Annulation en cours de programmation, de lavage ou pendant une pause :
— Mettez le sélecteur sur la position ”O”.
Cette opération peut se faire à tout moment, pendant le cycle ou pendant la programmation
ou même pendant une pause.
Nota :
- Dans tous les cas, une annulation vous oblige, ensuite, à tout reprogrammer depuis le début.
- Si vous avez annulé en cours de lavage, pensez à vidanger l’eau si nécessaire.
1sélecteur sur ”O”
tous les voyants éteints
1
•Fin du cycle :
Nota : Après l’essorage, certains modèles positionnent automatiquement leur tambour
ouverture en haut pour faciliter l’accès au linge. Cette opération dure au maximum 3 minutes.
— Ensuite, le voyant ”
Stop
“ s’allume ”fixe”, ce qui indique la fin du cycle.
Mettez le sélecteur sur la position ”O”.
Vous pouvez dès lors, ouvrir le couvercle et retirer votre linge.
1
voyant ”Stop” allumé fixe
4
(suivant le modèle)
(suivant le modèle)

15
FR4 / PROGRAMMATION DE VOTRE APPAREIL
: Ces fonctions peuvent être utilisées seules ou cumulées - les combinaisons illogiques sont impossibles
•DÉTAILS DES PROGRAMMES
Les principaux programmes offerts par cette machine sont :
•Coton
Pour une charge de linge composée de
COTON
blanc résistant ou de
couleur.
Important :
Si vous lavez du linge de couleur, ne dépassez pas la
température de 60° maxi.
Nota : Dans les premières minutes de ce programme, votre lave-linge
estime automatiquement la charge du linge introduit. Il adapte en
conséquence la consommation d’eau et la durée du programme
pour un lavage parfait.
•Mixte
Pour une charge de linge composée de COULEURS DÉLICATES,
SYNTHÉTIQUES RÉSISTANTS ou FIBRES MÉLANGÉES.
•Délicat /Laine
Pour une charge de linge composée de VOILAGES, TEXTILES
DÉLICATS, LINGE FRAGILE et LAINES ”LAVABLES EN MACHINE”.
Nota : Programme avec cadences de brassage et essorages
adaptés à la nature de ces textiles.
•
Lavage main
Pour une charge de linge composée deSOIEou de TEXTILES
PARTICULIÈREMENT DÉLICATS
Programme avec action mécanique très faible et ne comportant
pas d’essorages intermédiaires pendant les rinçages.
•Flash 30 min
Ce programme vous permet de rafraîchir une charge de linge peu sale
de 2,5 kg composée de COTON, BLANC, COULEURS ou
SYNTHÉTIQUES RÉSISTANTS.
Sa durée est limitée à 30 minutes.
Dans ce programme, la température de lavage est automatiquement
programmée à 40°C.
Important :
Pour ce programme, les doses de lessive doivent être
réduites de moitié.
•
RINÇAGE seul
Permet un essorage séparé avec vidange.
Important :
Si vous désirez faire un essorage, prenez garde de bien
choisir une vitesse d’essorage adaptée à la nature du linge introduit
dans la machine.
•Maintenir les performances de votre lave-linge
(Entretien du filtre de pompe) :
Vous devez régulièrement nettoyer le filtre de la pompe de vidange (voir façon de procéder dans le chapitre “NETTOYAGE DU FILTRE DE POMPE”).
Important :
Si vous ne nettoyez pas régulièrement le filtre de pompe, les performances de votre machine risquent d’en être affectées.
Pour choisir le programme le mieux adapté à la nature de votre linge, conformez-vous aux indications figurant sur les étiquettes apposées sur la plupart
des textiles.
•EXEMPLES DE PROGRAMMES
Important :
** Les temps de cycles sont donnés pour une valeur moyenne ”sans options” et peuvent varier en fonction de la charge de linge, de la
température ...
—
Si vous faites un programme avec ”Prélavage”, vous devrez ajouter de 18 à 25 minutes.
—
Si vous faites un programme avec ”Rinçage plus”, vous devrez ajouter 17 minutes.
*: Options suivant le modèle
LAVAGE MAIN
-
2.5
Tableau des programmes
Nature du textile
Charge
maximale
de linge sec
(kg)
Température
(°C)
Prélavage
Rinçage
plus
Égouttage
Arrêt
cuve pleine
COTON
- 60°
- 90°
- 30°
5.0
2.5
1.5
MIXTE
DÉLICAT/LAINE
RINÇAGE seul
Flash 30 min
ESSORAGE seul
Durée du
cycle **
h = hod
-
-
40°
-
10 min
18 min
30 min
31 min - 36 min
1 h 20 - 1 h 41
1 h 56 - 2 h 13
1.0
32 min
Repassage
facile
Programmes complémentaires
100
•
ESSORAGE seul
Phase de rinçage suivie, au choix :
— soit d’un essorage avec vidange
— soit d’une vidange seule (option ”égouttage”)
— soit d’un arrêt cuve pleine d’eau.
Nota :
Le cycle se termine par une phase d’essorage très douce et progressive
limitée à 600 tr/min.
***
*

16
FR 4 / PROGRAMMATION DE VOTRE APPAREIL
•DÉTAILS DES OPTIONS
•Prélavage
Spécialement conçu pour du linge souillé (boue, sang...).
Un premier brassage à froid spécifique précède une phase de chauffage
à 30°C.
Ce brassage à froid permet d’enlever, avant chauffage, les particules
souillant le linge.
Important :
Il est nécessaire d’introduire du détergent dans le bac
””
de la
boîte à produits.
•Repassage facile
Cette option permet aussi de laver plus délicatement votre linge tout en
conservant des performances identiques. La vitesse des essorages est
moins élevée pour limiter le froissage du linge
.
•Rinçage plus
"Spécial peaux sensibles et allergiques" : ajoute un rinçage supplémentaire
au cycle de lavage.
•Égouttage (
position
”100”
)
Cette fonction, pour du linge très délicat, permet de supprimer l’essorage
et de passer directement à la vidange du lave-linge.
•Arrêt cuve pleine
Cette fonction permet de retirer du linge de votre machine avant la phase
d’essorage ou de différer cette phase d’essorage, ceci permettant à votre
linge de rester dans l’eau afin d’éviter le froissage.
Nota : Lorsque la machine est arrêtée cuve pleine d’eau, le voyant de
déroulement du cycle (Rinçage/Essorage) clignote.
Ensuite, suivant le type d’appareil, deux cas peuvent se présenter :
—
la sélection de ”l’Arrêt cuve pleine” se fait par l’intermédiaire d’un
sélecteur rotatif :
- si vous désirez faire une vidange avec essorage,
choisissez, à l’aide du sélecteur , une vitesse d'essorage adaptée à
la nature du linge.
Le programme se terminera automatiquement.
- si vous désirez faire une vidange seule, choisissez, à l’aide du sélecteur
, la fonction “égouttage” (position ”100”).
—
la sélection de ”l’Arrêt cuve pleine” se fait par l’intermédiaire d’une
touche :
dans ce cas, pour terminer le programme, appuyez de nouveau
sur la touche ” ”.
•Départ différé
(suivant le modèle)
Vous pouvez retarder le départ de votre programme de 1, 3, 6, 9, 12,
15 ou 19 heures afin de bénéficier du tarif heures creuses ou pour obtenir
une fin de cycle à l’heure désirée.
Pour cela choisissez à l’aide du sélecteur le moment du départ du
cycle et appuyez sur ”Start/Pause” .
Nota :
- Si, après avoir sélectionné cette option, vous avez omis d’appuyer sur la
touche ”Start/Pause”, la sélection sera, néanmoins, prise en compte
au bout de quelques secondes.
- Les trois voyants de déroulement du cycle ( ”Lavage”, ”Rinçage/
Essorage
”
et “Stop”) clignotent successivement de gauche à droite puis de
droite à gauche pendant toute la période d’attente précédant le départ effectif
du cycle.
•MODIFICATION D’UN PROGRAMME DE LAVAGE
•Pendant la programmation :
Avant d’appuyer sur la touche ”Start/Pause” , toutes les
modifications sont possibles.
•Après le départ du cycle :
Vous pouvez modifier le type de textile (par exemple passer de “COTON”
à “MIXTE”, etc...). Dans ce cas, vérifiez que les options précédemment
sélectionnées le sont toujours.
Votre nouveau choix doit être validé en appuyant sur la touche
”Start/Pause” .
La machine peut alors éventuellement vidanger une partie de son eau.
•Pendant tout le cycle :
Selon votre modèle, les modifications suivantes sont possibles sans
appuyer sur la touche ”Start/Pause” .
— pour un même type de textile, vous pouvez modifier la température.
Nota : Si la température atteinte par le cycle de lavage est plus élevée
que votre nouveau choix, le chauffage de l’eau est immédiatement arrêté
et le cycle continue.
— Vous pouvez modifier les vitesses d’essorage pendant tout le cycle.
— Vous pouvez sélectionner un “égouttage” (100) et un “arrêt cuve
pleine”( ) pendant toute la durée du lavage.
— Vous pouvez activer l’option ”Rinçage plus” jusqu’au début du
rinçage (jusqu’à ce que le voyant de déroulement du cycle (Rinçage/
Essorage) s’allume).
— Vous pouvez désactiver toutes les options pendant toute la durée
du cycle dans la mesure où leur action n’est pas déjà terminée.
•Pendant le départ différé
(Uniquement pour les appareils
équipés de cette fonction)
:
— Toutes les modifications de programme sont prises en compte pendant
la période d’attente d’un départ différé.
— Vous pouvez modifier la durée du “départ différé” pendant toute la
période d’attente précédant le départ effectif du cycle.
Nota :
- Pendant cette période, le choix d’un nouveau temps annule la
précédente sélection. La nouvelle durée choisie est prise en compte à
partir de la dernière sélection.
- Si, pendant cette période, vous voulez annuler totalement le “départ
différé”, mettez le sélecteur sur la position ”O” et, ensuite, appuyez
brièvement sur la touche ”Start/pause” .
Le cycle démarrera immédiatement.
— Vous pouvez activer ou modifier les options (Prélavage) et
(Repassage facile) pendant toute la période d’attente d’un “départ différé”.
•En fin de cycle :
Lorsque le voyant ”Stop” est allumé ”fixe”, vous pouvez programmer un
nouveau cycle sans avoir à ramener le sélecteur sur la position ”O”.
Il suffit pour cela de tourner un des sélecteurs ou d’appuyer sur une des
touches.
Le voyant (Lavage) se met à clignoter.
La machine est alors prête pour une nouvelle programmation.
•SÉCURITÉS AUTOMATIQUES
•Sécurité d'ouverture du couvercle :
Dès que le cycle de lavage a démarré, le couvercle de votre appareil se
verrouille.
Dès que le cycle est terminé ou lorsque la machine est arrêtée cuve pleine
d'eau, le couvercle se déverrouille.
Si vous avez programmé un "départ différé", le couvercle n'est pas verrouillé
pendant toute la période d'attente précédant le départ du cycle.
Si vous souhaitez ouvrir le couvercle pendant le cycle, appuyez brièvement
sur la touche et attendez au moins 1 à 2 minutes afin que la sécurité
du couvercle se déverrouille.
Important :
Suivant le moment du cycle où vous désirez ouvrir le couvercle,
ce délai peut être plus long car il faut lui ajouter une période de
refroidissement.
En effet, en cours de cycle, pour que la sécurité du couvercle se
déverrouille, la température intérieure de la machine ne doit pas
dépasser un certain seuil, ceci afin de vous éviter des brûlures graves.
•Sécurité des eaux :
En cours de fonctionnement, le contrôle permanent du niveau d’eau prévient
tout débordement éventuel.
•Sécurité d'essorage :
Votre lave-linge est équipé d'une sécurité qui peut limiter l'essorage
lorsqu'une mauvaise répartition de la charge est détectée.
Dans ce cas votre linge peut être insuffisamment essoré. Répartissez,
alors, uniformément votre linge dans le tambour et programmez un nouvel
essorage.
•Sécurité anti-mousse :
Votre lave-linge sait détecter une trop forte production de mousse lors de
l’essorage.
A ce moment-là, l’essorage s’arrête et la machine est vidangée.
Ensuite le cycle reprend son cours en adaptant les cadences d’essorage
et en ajoutant éventuellement un rinçage supplémentaire.
5
1
5
3
5
5
5
5
3
2
2
(suivant le modèle)
(suivant le modèle)
(suivant le modèle)
(suivant le modèle)

17
FR5 / ENTRETIEN DE VOTRE APPAREIL
•NETTOYAGE DU FILTRE DE POMPE (option 1)
Suivant le modèle d’appareil, la façon d’accéder au filtre de pompe peut
être différente (voir les options 1 et 2).
Ce filtre récupère les petits objets que vous avez pu laisser par mégarde
dans les vêtements et évite qu'ils ne perturbent le fonctionnement de la
pompe.
Pour le nettoyer procédez comme suit :
— ouvrez les portillons du tambour. Au fond de ce dernier vous voyez
apparaître une pièce en plastique
(Fig. D15)
— déverrouillez cette pièce
(Fig. D16)
.
Pour cela :
- introduisez une tige (un crayon ou un tournevis, par exemple) dans le
trou situé sur la pièce
- tout en appuyant verticalement à l’aide de cette tige, poussez la pièce
vers la droite jusqu’à ce qu’elle s’échappe de son logement
— retirez la pièce
— tournez légèrement le tambour, portillons ouverts, vers l'avant de la machine
(Fig. D17)
Par les ouvertures laissées libres par le retrait de la pièce , vous avez
accès au filtre de pompe .
— retirez-le de son logement
(Fig. D17)
— enlevez les différents objets se trouvant à l'intérieur
— rincez-le sous le robinet
(Fig. D18)
— remettez-le en place en le poussant bien à fond dans son logement après
avoir vérifié la propreté de ce dernier
— remettez la pièce en place en prenant soin de bien la positionner
dans les ouvertures au fond du tambour et en la poussant vers la gauche
jusqu’à ce qu’elle soit parfaitement encliquetée
(Fig. D19)
.
•NETTOYAGE DU FILTRE DE POMPE (option 2)
Si votre appareil n’est pas équipé de la pièce représentée sur la Figure D16,
pour nettoyer votre filtre de pompe, vous devrez procéder comme suit :
— tournez le tambour pour positionner les portillons fermés vers le bas :
vous voyez apparaître une pièce en plastique
(Fig. D20)
— si votre appareil en est muni, retirez la vis
— sur certains types d’appareils, la pièce est pourvue d’un clip . Dans
ce cas déverrouillez la pièce en appuyant sur ce clip tout en la faisant
légèrement glisser vers la droite
— ensuite, dans tous les cas, tournez de nouveau le tambour, ouvrez les
portillons et retirez la pièce en la faisant glisser suivant la flèche
(Fig.
D21)
— tournez légèrement le tambour, portillons ouverts, vers l'avant de la machine
(Fig. D22)
.
Par les ouvertures laissées libres par le retrait de la pièce , vous avez
accès au filtre de pompe .
— retirez-le de son logement
(Fig. D22)
— enlevez les différents objets se trouvant à l'intérieur
— rincez-le sous le robinet
(Fig. D23)
— remettez-le en place en le poussant bien à fond dans son logement après
avoir vérifié la propreté de ce dernier
— remettez la pièce en place ainsi que la vis en refaisant toutes ces
opérations dans l’ordre inverse.
•NETTOYAGE DE L'APPAREIL
Important :
Pour le nettoyage de la carrosserie, du tableau de commande, et,
en général, de toutes les pièces en plastique, utilisez une éponge ou un
chiffon humidifié avec de l’eau et du savon liquide uniquement.
Dans tous les cas, proscrire :
— les poudres abrasives
— les éponges métalliques ou plastiques
— les produits à base d'alcool (alcool, diluant ...)
•ENTRETIEN DES PIÈCES INTERNES
Pour garantir une meilleure hygiène, nous vous recommandons :
— de laisser le couvercle ouvert quelques temps
après le lavage,
— de nettoyer, environ une fois par mois, les parties en plastique et en
caoutchouc de l’accès à la cuve, à l’aide d’un produit légèrement chloré.
Pour éliminer tous résidus de ce produit, effectuer un rinçage.
— de faire un cycle de lavage à 90°C au moins une fois par mois.
•NETTOYAGE DE LA BOÎTE À PRODUITS
Nettoyez régulièrement la boîte à produits.
Pour cela :
— appuyez simultanément sur les bossages se trouvant de part et d'autre
de la boîte, celle-ci s'extrait de son logement
(Fig. D24)
.
— retirez les siphons situés à l’arrière de la boîte et séparez cette
dernière de son enjoliveur avant
(Fig. D25)
— rincez le tout sous le robinet (prenez soin de vider l'excédent d'eau qui
pourrait subsister à l'intérieur de la boîte)
— remontez tous les éléments de la boîte en veillant à ce que la partie
boîte proprement dite soit bien clippée dans la partie enjoliveur, puis remettez
l’ensemble à sa place sous le couvercle de la machine.
•VÉRIFICATIONS PÉRIODIQUES
Pour éviter des dégâts des eaux, nous vous recommandons de vérifier
régulièrement l'état des tuyaux d'arrivée d'eau et de vidange. Si vous constatez
le moindre fendillement, n'hésitez pas à les remplacer par des tuyaux
identiques disponibles auprès du fabriquant ou de son Service Après Vente.
Pour le remplacement du tuyau d’alimentation en eau
,
reportez-vous au
chapitre “ALIMENTATION EN EAU FROIDE”.
•REMPLACEMENT DU CORDON D’ALIMENTATION
ÉLECTRIQUE
Attention :
Pour votre sécurité, le remplacement du cordon électrique ou,
selon votre modèle, de l’ensemble boitier électrique et son cordon
associé, doit impérativement être effectué par le service après vente
du fabricant ou un professionnel qualifié.
A
A
A
A
A
A
A
2
1
CLANG
1
2
A
D 15
32D22D12D02D
D 24
D 25
D 16 D 17 D 18 D 19

18
FR 6 / INCIDENTS ET CLIGNOTEMENTS PARTICULIERS DES VOYANTS
• SERVICE APRES VENTE:
Les éventuelles interventions sur votre appareil doivent être effectuées :
— soit par votre revendeur,
— soit par un autre professionnel qualifié dépositaire de la marque.
Lors de votre appel, mentionnez la référence complète de votre appareil
(modèle, type et numéro de série). Ces renseignements figurent sur la plaque
signalétique fixée au dos de l’appareil.
•INCIDENTS POUVANT SURVENIR
•Le cycle ne démarre pas
— Vous avez omis d’appuyer sur la touche ”Start/Pause”.
— L’appareil n’est plus alimenté en électricité :
- vérifiez si la prise de courant est correctement branchée.
- vérifiez le disjoncteur, les fusibles.
— Le robinet d’arrivée d’eau est fermé.
— Le couvercle de l’appareil est mal fermé.
•Une flaque d’eau se forme autour de la machine
Attention :
Retirez tout d’abord la prise de courant ou coupez le fusible
correspondant et fermez le robinet d’arrivée d’eau.
Pendant le fonctionnement de l’appareil, le contrôle constant du niveau
empêche l’eau de déborder. Si, malgré cela, de l’eau sort de la machine, il
se peut que :
— la crosse de vidange soit mal positionnée dans le conduit d’évacuation.
— les raccordements du tuyau d’alimentation en eau sur la machine et sur
le robinet ne soient pas étanches :
- vérifiez la présence des joints ainsi que le serrage des raccords.
•Fortes vibrations lors de l’essorage
— Votre appareil n’a pas été correctement débridé :
- vérifiez si toutes les cales servant au transport ont bien été retirées (voir
chapitre ”DÉMONTAGE DES BRIDES DE TRANSPORT”)
— Le sol n’est pas horizontal.
— Votre appareil repose sur ses deux roulettes "avant" (suivant le modèle)
- reposez l’appareil sur ses pieds en repoussant le levier de mise sur
roulettes vers la droite.
• Le linge n’a pas été essoré ou est insuffisamment essoré
— Vous avez sélectionné un programme sans essorage, par ex. ”Egouttage”.
— La sécurité d’essorage a détecté une mauvaise répartition du linge dans
le tambour :
- détassez le linge et programmez un nouvel essorage.
• La machine ne vidange pas
— Vous avez programmé un “Arrêt cuve pleine”.
— Le filtre de la pompe de vidange est obstrué :
- nettoyez-le (voir façon de procéder dans le chapitre ”NETTOYAGE DU
FILTRE DE POMPE”)
— Le tuyau d’évacuation est plié ou écrasé.
• Le couvercle ne s’ouvre pas
— Le programme n’est pas encore terminé.
Le couvercle reste verrouillé pendant toute la durée du programme.
• Les portillons du tambour s’ouvrent trop lentement
(pour les machines équipées de portillons à ouverture douce)
— Votre machine n’a pas fonctionné depuis longtemps.
— Elle est située dans un local trop froid.
— Des résidus de lessive (poudre) bloquent les charnières.
- dans tous les cas, tout rentre dans l’ordre après la première ouverture.
Important :
De manière générale et quelle que soit l’anomalie constatée,
il convient d’arrêter la machine, de débrancher le cordon
d’alimentation électrique et de fermer le robinet d’arrivée d’eau.
•MESSAGES DONNÉS PAR LE CLIGNOTEMENT
DES VOYANTS
•Incidents signalés dépannables par vous-même
Dans ce chapître, nous vous expliquons comment remédier vous-
même, très facilement à ces incidents.
Votre appareil détecte de lui-même certains incidents de fonctionnement
et vous le signale par un clignotement particulier des voyants d’options.
Dans ce cas, ce sont les trois voyants de déroulement
du cycle qui clignotent simultanément.
•Incidents signalés nécessitant un dépanneur
Votre appareil détecte aussi certains défauts de fonctionnement qui
nécessitent l’intervention systématique d’un dépanneur.
Nota :
Avant d’appeler votre dépanneur, nous vous conseillons de procéder
comme suit :
- mettez le sélecteur de programmes sur la position ”O” et
débranchez la prise de courant pendant au moins 10 secondes
- rebranchez la prise et relancez un cycle de lavage.
Si le défaut affiché persiste, appelez votre dépanneur sans oublier de
lui signaler quels étaient les voyants allumés.
Important :
Ne pas relancer de cycle de lavage, quand, le tambour reste
bloqué ou si vous constatez la présence d’eau autour de votre machine
ou encore si vous constatez une odeur de brûlé.
Voyants
clignotant Causes / Remèdes
Tuyau de vidange mal positionné. Vérifiez le
positionnement du tuyau de vidange dans le conduit
d’évacuation : le raccordement ne doit pas être étanche
(voir chapitre ”ÉVACUATION DES EAUX USÉES”).
Tambour bloqué. Vérifiez si une petite pièce de linge (ex.
mouchoir, chaussette,...) n’est pas passée entre la cuve
et le tambour et ne bloque la rotation de ce dernier. Pour
avoir accès au fond de la cuve, reportez-vous au chapitre
“NETTOYAGE DU FILTRE DE POMPE”.
Couvercle mal fermé. Vérifiez la fermeture du couvercle,
puis appuyez de nouveau sur la touche “
Start/Pause
”
pour relancer le cycle.
Robinet d’arrivée d’eau fermé. Vérifiez l’ouverture du
robinet d’arrivée d’eau, puis appuyez de nouveau sur la
touche “Start/Pause” pour relancer le cycle. Cet incident
peut aussi être provoqué par un mauvais raccordement
du tuyau de vidange (voir chapitre ӃVACUATION DES
EAUX USÉES”).
Le filtre de pompe est bouché . Nettoyez le filtre de pompe
(voir façon de procéder dans le chapitre “NETTOYAGE
DU FILTRE DE POMPE”), puis appuyez de nouveau sur la
touche “Start/Pause” pour relancer le cycle.
Vérifiez aussi le positionnement du tuyau de vidange dans
le conduit d’évacuation: le raccordement ne doit pas être
étanche (voir chapitre ”ÉVACUATION DES EAUX USÉES”).

19
DE1 / VORSTELLUNG DES GERÄTS
Bedienungstafel
Öffnungsgriff des Deckels (bleibt während des Zyklus verriegelt)
Hebel zum Ausfahren der Fußröllchen (je nach Modell)
Abwasserschlauch
Transportsicherung
Wasserzulaufschlauch (nicht angeschlossen)
Netzkabel
A
• GERÄTEBESCHREIBUNG
D 1 D 2
A
• INHALT
Sicherheitsvorschriften . . . . . . . . . . . . . . . . . . . . . . . . . . . . . . . . . . . .
Energieeinsparung . . . . . . . . . . . . . . . . . . . . . . . . . . . . . . . . . . . . . . . .
Umweltschutz . . . . . . . . . . . . . . . . . . . . . . . . . . . . . . . . . . . . . . . . . . .
Gerätebeschreibung . . . . . . . . . . . . . . . . . . . . . . . . . . . . . . . . . . . . . .
Entfernen der Transportsicherungen . . . . . . . . . . . . . . . . . . . . . . . . .
Versetzen des Geräts . . . . . . . . . . . . . . . . . . . . . . . . . . . . . . . . . . . . .
Kaltwasserversorgung . . . . . . . . . . . . . . . . . . . . . . . . . . . . . . . . . . . . .
Abwasserableitung . . . . . . . . . . . . . . . . . . . . . . . . . . . . . . . . . . . . . . .
Stromspeisung . . . . . . . . . . . . . . . . . . . . . . . . . . . . . . . . . . . . . . . . . .
Aufstellen des Geräts . . . . . . . . . . . . . . . . . . . . . . . . . . . . . . . . . . . . .
Pflegecodes der Textilien . . . . . . . . . . . . . . . . . . . . . . . . . . . . . . . . . .
Einlegen der Wäsche . . . . . . . . . . . . . . . . . . . . . . . . . . . . . . . . . . . . .
Einfüllen der Waschmittel . . . . . . . . . . . . . . . . . . . . . . . . . . . . . . . . .
Programm für die Vergleishs- und Normtests . . . . . . . . . . . . . . . . .
Programmieren . . . . . . . . . . . . . . . . . . . . . . . . . . . . . . . . . . . . . . . . . .
Programmbeispiele . . . . . . . . . . . . . . . . . . . . . . . . . . . . . . . . . . . . . . . .
Programmdetails . . . . . . . . . . . . . . . . . . . . . . . . . . . . . . . . . . . . . . . . . .
Optionsdetails . . . . . . . . . . . . . . . . . . . . . . . . . . . . . . . . . . . . . . . . . . . .
Änderung eines Waschprogramms . . . . . . . . . . . . . . . . . . . . . . . . . .
Automatische Sicherungen . . . . . . . . . . . . . . . . . . . . . . . . . . . . . . . . .
Reinigen des Pumpenfilters (option 1) . . . . . . . . . . . . . . . . . . . . . . . .
Reinigen des Pumpenfilters (option 2) . . . . . . . . . . . . . . . . . . . . . . . .
Reinigen des Geräts . . . . . . . . . . . . . . . . . . . . . . . . . . . . . . . . . . . . . . .
Pflege der internen Bauteile . . . . . . . . . . . . . . . . . . . . . . . . . . . . . . .
Reinigen des Waschmittelbehälters . . . . . . . . . . . . . . . . . . . . . . . . . .
Regelmäßige Prüfungen . . . . . . . . . . . . . . . . . . . . . . . . . . . . . . . . . . . .
Austausch des Netzkabels . . . . . . . . . . . . . . . . . . . . . . . . . . . . . . . . .
Mögliche Störungen . . . . . . . . . . . . . . . . . . . . . . . . . . . . . . . . . . . . . . .
Kundendienst . . . . . . . . . . . . . . . . . . . . . . . . . . . . . . . . . . . . . . . . . . .
Durch das Blinken der Kontrollleuchten angezeigte Meldungen . . .
• SICHERHEITSVORSCHRIFTEN
Wichtig:
Dieses Gerät ist ausschließlich für den Haushaltsgebrauch
bestimmt. Es wurde für das Waschen, Spülen und Schleudern von
maschinenwaschbaren Textilien entwickelt.
Unbedingt folgende Vorschriften einhalten. Wir lehnen bei
Nichteinhaltung dieser Empfehlungen, was zu Personen- und
Sachschäden führen kann, jegliche Haftung und Garantie ab.
— Das Gerät darf nur entsprechend der Gebrauchsanweisung verwendet
werden, um Schäden an der Wäsche und am Gerät zu vermeiden.
Ausschließlich Wasch- und Pflegemittel verwenden, die für den Einsatz
in Haushaltswaschmaschinen vorgesehen sind.
— Sollte die Wäsche vor dem Waschen mit Fleck- oder Lösungsmitteln
oder generell mit brennbaren oder stark detonationsfähigen Produkten
behandelt worden sein, darf sie nicht sofort in die Maschine gelegt
werden. Desgleichen empfehlen wir Ihnen, Lösungsmittel oder
Sprühdosen nicht in der Nähe der Waschmaschine und generell in der
Nähe von Elektrogeräten in einem schlecht belüfteten Raum zu benutzen
(Brand- und Explosionsgefahr).
— Sollten Störungen auftreten, die nicht anhand der empfohlenen Abhilfen
gelöst werden können (siehe Kapitel „MÖGLICHE STÖRUNGEN“), einen
qualifizierten Fachmann zu Rate ziehen.
— Sollten Sie die Maschine während des Zyklus öffnen müssen
(beispielsweise, um Wäsche einzulegen oder herauszunehmen), müssen
Sie je nach Phase des Programmablaufs (im Wesentlichen während der
Hauptwäsche) auf die möglicherweise sehr hohe Innentemperatur achten
(Gefahr schwerer Verbrennungen).
— Bei einer Neuinstallation muss das Gerät mit einem neuen Schlauch
am Wassernetz angeschlossen werden. Der gebrauchte Schlauch darf
nicht wiederverwendet werden.
— Keine Kinder mit dem Gerät spielen lassen und Haustiere fernhalten.
— Altgeräte müssen sofort unbrauchbar gemacht werden. Den
Netzstecker ziehen und das Netzkabel direkt am Gerät abschneiden.
Den Wasserzulauf schließen und den Schlauch entfernen. Den
Türverschluss unbrauchbar machen.
— Bei Frostgefahr den Wasserzulaufschlauch vom Wasserhahn trennen
und alles Wasser entleeren, das im Abwasserschlauch sein könnte,
indem dieser so tief wie möglich in eine Wanne gelegt wird.
• ENERGIEEINSPARUNG
— Eine Vorwäsche nur programmieren wenn absolut notwendig:
beispielsweise für stark verschmutzte Sport- oder Arbeitskleidung usw.
— Bei gering oder normal verschmutzter Wäsche genügt ein Programm
bei niedriger Temperatur für ein einwandfreies Waschergebnis.
— Für gering verschmutzte Wäsche ein kurzes Waschprogramm („Kurz“,
„Express“ oder „Flash“ – je nach Modell) wählen.
— Das Waschmittel entsprechend der Wasserhärte, dem
Verschmutzungsgrad und der Wäschemenge dosieren. Die Hinweise
auf den Waschmittelpackungen beachten.
• UMWELTSCHUTZ
Die Verpackungsmaterialien dieses Geräts sind recyclebar. Entsorgen
Sie sie in den von den Gemeinden eigens zur Verfügung gestellten
Containern und trage Sie auf diese Weise zu Ihrem Recycling und zum
Umweltschutz bei.
Ihr Gerät enthält zahlreiche recyclingfähige Materialien. Es wurde
deshalb mit diesem Zeichen versehen, um Sie darauf hinzuweisen,
dass diese Geräte nach ihrem Gebrauch nicht mit dem übrigen
Hausmüll entsorgt werden dürfen. Das von Ihrem Hersteller in
die Wege geleitete Recycling kann somit in Übereinstimmung mit der
europäischen Richtlinie 2002/96/CE über Elektro- und Elektronik-
Altgeräte unter optimalen Bedingungen erfolgen. Ihre Gemeindebehörden
oder Ihr Händler informieren Sie gerne über die zu Ihrem Wohnort am
nächsten liegenden Sammelstellen.
Wir danken Ihnen für Ihren Beitrag zum Umweltschutz.
1919
19
19
19
20
20
20
21
21
21
21
21
21
22
23
23
24
24
24
25
25
25
25
25
25
25
26
26
26
20

20
DE 2 / GERÄTEINSTALLATION
21D11D01D
10 mm
3/4
D 3
1
1
2
2
13
a
b
a
b
1
2
12
A
D 4
9D8D7
D 5
D 6
• ENTFERNEN DER TRANSPORTSICHERUNGEN
Wichtig:
Vor jeglichem Gebrauch müssen unbedingt die nachfolgend
beschriebenen Schritte durchgeführt werden.
Diese Schritte bestehen darin, alle Teile zu entfernen, die zur Sicherung
der Gerätetrommel während des Transports dienen.
Das Entfernen der Transportsicherungen ist für den einwandfreien
Gerätebetrieb und für die Einhaltung der geltenden Sicherheitsnormen
notwendig.
Sollte dies nicht vollständig geschehen, könnte dies zu schweren
Beschädigungen des Geräts während dessen Betriebs führen.
—
Die Waschmaschine von ihrem Sockel entfernen.
(Prüfen, ob die Verkeilung
die den Motor hält, unter der Maschine geblieben ist.)
(Zeichnung
D3).
—
Die 4 Schrauben mit einem Schraubendreher entfernen
(Zeichnung
D4).
—
Den Verbindungsriegel ausbauen: Hierfür die beiden Schrauben
(Zeichnung
D5)
mit einem 10er oder 13er Schlüssel (je nach Modell) entfernen.
(Sich davon überzeugen, dass die beiden, auf dem Verbindungsriegel befestigten
Kunststoffzwischenstücke gleichzeitig mit dem Riegel entfernt werden).
—
Die Schrauben wieder an der ursprünglichen Stelle einsetzen.
Achtung:
Die beiden Löcher unbedingt mit den hierfür vorgesehenen
Abdeckungen (im Zubehörbeutel enthalten) verschließen.
(
Zeichnung
D6)
—
Den Hemmklotz der Trommel-Wannen-Einheit entfernen
(Zeichnung D7)
.
Hierfür:
-
den Maschinendeckel anheben
-
den Keil entfernen
-
-
Die in der unteren Position blockierten Trommeltüren durch gleichzeitiges
Drücken auf beide Klappen öffnen
.
Achtung:
Die Schlauchhalterungen entfernen und die Löcher unbedingt
mit den hierfür vorgesehenen Abdeckungen (im Zubehörbeutel
enthalten) verschließen
(Zeichnung D8).
Tipp:
Wir empfehlen das Aufbewahren aller Transportsicherungen, da
diese für den eventuellen, späteren Transport der Maschine unbedingt
wieder eingebaut werden müssen
Information:
Vor dem Verlassen des Werks wurde das Gerät sorgfältig
geprüft; es ist daher möglich, dass sich etwas Wasser in der Wanne
oder in den Waschmittelbehältern befindet.
• VERSETZEN DES GERÄTS
• Auf Fußröllchen stellen:
Wenn die Maschine mit versenkbaren Fußröllchen ausgestattet ist, kann
sie leicht verschoben werden
Um die Maschine auf die Fußröllchen zu stellen, den Hebel im unteren
Geräteteil von rechts bis zum linken Anschlag drehen
(Zeichnung D9).
Wichtig:
Während dem Betrieb darf die Maschine nicht auf den
„vorderen“ Fußröllchen ruhen: nicht vergessen, den Hebel wieder in
seine Ausgangsstellung zu bringen.
• KALTWASSERVERSORGUNG
Den Zulaufschlauch
(Zeichnung
D10
)
:
—
einerseits am Anschluss auf der Geräterückseite.
—
andererseits an einem Wasserhahn mit Gewindenase, Durchmesser 20x27
(3/4’’ BSP) anschließen.
Beim Einsatz eines selbstbohrenden Hahns muss die geschnittene Öffnung
einen Durchmesser von mindestens 6 mm haben.
Wasserzulauf:
-
Mindestwasserdruck: 0,1 MPa oder 1 bar
-
Höchstwasserdruck: 1 MPa oder 10 bar
• Austausch des Wasserzulaufschlauchs
Beim Austausch auf ein gutes Festdrehen und auf das Vorhandensein
der Dichtung an beiden Enden achten.
• ABWASSERABLEITUNG
—
Am Ende des Abwasserschlauchs den mit der Maschine mitgelieferten
Bogen montieren und den Schlauch
(Zeichnung
D11
)
:
—
entweder provisorisch an einem Waschbecken oder an einer Badewanne.
—
oder dauerhaft an einem belüfteten Geruchverschluss anschließen.
—
Sollte die Anlage nicht mit einem belüfteten Geruchverschluss ausgestattet
sein, darauf achten, dass der Anschluss nicht luftdicht ist. Um ein Zurückwerfen
von Abwasser in die Maschine zu vermeiden, wird in der Tat dringend
empfohlen, einen freien Luftdurchlass zwischen dem Ablassschlauch der
Maschine und der Abwasserleitung zu lassen.
—
Der Entleerungsbogen muss auf jeden Fall in einer Höhe zwischen 65 und
90 cm vom Maschinenboden angebracht werden.
Wichtig:
Darauf achten, dass der Abwasserschlauch mit einem Band
gehalten wird, um zu vermeiden, dass sich der Bogen während dem
Entleeren löst und eine Überschwemmung verursacht.
Das Abwasser kann auch am Boden abgeführt werden, vorausgesetzt, dass
der Abwasserschlauch über einen Punkt geführt wird, der sich zwischen
65 und 90 cm über dem Maschinenboden befindet
(Zeichnung
D12
)
.
A
den Keil entfernen
D
F
F
G
This manual suits for next models
2
Table of contents
Languages:
Other Fagor Washer manuals

Fagor
Fagor F-2814 User manual

Fagor
Fagor FE-1158 Instructions for use

Fagor
Fagor FET-5310 User manual

Fagor
Fagor FFT-96-106-116 Service manual

Fagor
Fagor 3FE-8112 User manual

Fagor
Fagor LA-11 User manual

Fagor
Fagor FA-5812 Manual

Fagor
Fagor FET-2086 User manual

Fagor
Fagor 3FE-7112 User manual

Fagor
Fagor FFT-76 Service manual

Fagor
Fagor Washing machine Assembly instructions

Fagor
Fagor FU-6116IT User manual

Fagor
Fagor FET 3106N User manual

Fagor
Fagor 3FE-8212 User manual

Fagor
Fagor FF-8012 User manual

Fagor
Fagor IO-WMS-1731 User manual

Fagor
Fagor 3FE-7212 User manual

Fagor
Fagor 3FE-9214 User manual

Fagor
Fagor 925010156 User manual

Fagor
Fagor 3FE-8812 User manual