FAME Grand 3100 User manual

07/2020
EPI0001116-000
User Manual
Grand 3100

Congratulations on your new
FAME
Digital Piano Grand 3100!
Thank you for choosing a
FAME
product. Thanks to efficient development and economical produc-
tion,
FAME
makes high-quality products at a fantastic price possible.
Please read these operating instructions carefully to be informed about all functions of this product
and keep them for future reference
Have fun with your new product!
Your
FAME
Team
Guarantee:
The current general terms and conditions and guarantee
conditions of Music Store professional GmbH apply.
Can be viewed under: www.musicstore.de
If you have any questions or suggestions,
please contact us:
Music Store professional GmbH
Istanbulstr. 22-26
51103 Köln
Managing Director: Michael Sauer
WEEE-Reg.-Nr. DE 41617453
Tel: +49 221 8884-0
Fax: +49 221 8884-2500
Intended use:
The Fame Grand 3100 is a digital piano designed to play sounds on the keyboard and make them
audible through built-in speakers or headphones. Improper use of the product is considered improper
and can lead to personal injury or property damage. No liability is assumed for damage resulting from
improper use.
It must be ensured that the device is operated exclusively by trained and competent users who are in
full possession of their mental, physical and sensory abilities. The use by other persons is only permit-
ted under the supervision or guidance of a person responsible for their safety.
Scope of delivery
Quantity Content
1x Digital Piano
1x
Manual
2

Important safety instructions! Please read before connection!
CAUTION! (Electro Magnetic Interference)
The normal function of the product may be disturbed by Strong Electro Magnetic
Interference. If so, simply reset the product to resume normal operation by following
the owner‘s manual. In case the function could not resume, please use the product
in other location.
DANGER! (For babies and children)
Dispose of or store any packaging material properly! Packaging material must be
kept out of the reach of babies and children due to the danger of suffocation.
Make sure that children never use the device unattended! In addition, make sure
that children do not remove (small) parts from the device, as they could suffocate
by swallowing parts!
DANGER! (Electric shock due to high voltages in the device)
The housing must not be removed! There are no parts to be maintained in the
device. Inside the unit there are components which are under high electrical
voltage.
Before each use, check the device for damage or the absence of components,
protective devices or housing parts. If this is the case, do not use the device!
Leave maintenance and repair work to a qualified service workshop or contact
your dealer.
DANGER! (Electric shock due to short circuit)
Modifications to the power cord or plug are prohibited. If the power cord is dama-
ged, it must be replaced immediately with an original spare part from the
manufacturer. Failure to do so may result in fire or death due to electric shock!
WARNING! (Damage to hearing)
The unit may generate volumes that may cause temporary or permanent hearing-
loss. Over time, even seemingly uncritical levels can cause hearing damage. Reduce
the volume immediately if ear noise or hearing loss occurs. If this is not possible,
keep a greater distance or use adequate hearing protection.
Hint! (Fire hazard due to overheating)
The maximum permissible ambient temperature of this device is 40°C.
Ensure that the unit is placed in a place with adequate ventilation, out of the reach
of direct heat sources, naked flames and combustible materials and liquids.
The ventilation slots of the device must not be taped or covered.
3

Hint! (Operating conditions)
Due to its structural characteristics, the device is designed for indoor operation
(IP20). Never expose the device to rain, moisture or liquids as this may cause
damage.
Vibrations, dust or solar radiation can also lead to damage, avoid them!
Do not apply excessive force to the switches or controls.
Do not let paper, metallic, or other objects into the instrument. If this happens,
remove the electric plug from the outlet. Then have the instrument inspected by
qualified service personnel.
Disconnect all cables before moving the instrument.
Hint! (Power supply)
It is essential that you check that the device voltage matches your local mains
voltage. It is highly recommended that you fuse your mains socket with a residual
current circuit breaker (FI).
Please connect the designated AC adaptor to an AC outlet.
If you do not use your device for a longer period of time, disconnect it from the
power supply in order to minimize danger. The same applies to storm conditions
such as thunderstorms, floods, etc.
Hint! (Commissioning)
All connections of the device should be made before switching on.
Use only high-quality cables for connections.
Hint! (Installation)
Be sure to inspect the device for damage before using. Optimum use of the
original packaging or suitable transport or storage packaging to protect the pro-
duct when not in use optimally against influences such as dust or moisture, etc.
Hint! (Possible damage due to magnetic fields)
Loudspeakers generate a static magnetic field. Please keep an appropriate distance
from other equipment that may be affected or damaged by an external magnetic
field.
4

Hint! (Interferences with other electrical devices)
Radios and televisions placed nearby may experience reception interference.
Operate this unit at a suitable distance from radios and televisions.
If this equipment does cause harmful interference to radio or television reception,
which can be determined by turning the equipment off and on, the user is
encouraged to try to correct the interference by one or more of the
following measures:
• Reorient or relocate the receiving antenna
• Increase the separation between the equipment and receiver.
• Connect the equipment into an outlet on a circuit different from that to which
the receiver is connected.
• Consult the dealer or an experienced radio/TV technician for help.
THE FCC REGULATION WARNING (for USA)
This equipment has been tested and found to comply with the limits for a Class B
digital device, pursuant to Part 15 of the FCC Rules.
These limits are designed to provide reasonable protection against harmful interfe-
rence in a residential installation. This equipment generates, uses, and can
radiate radio frequency energy and, if not installed and used in accordance with the
instructions, may cause harmful interference to radio communications. However,
there is no guarantee that interference will not occur in a particular installation.
Symbols on device and packaging:
The lightning flash symbol warns the user about non-insulated current and the risk
of electrocution
The exclamation mark symbol warns the user about important maintenance and
operating instructions in the manual
Intended for indoor use
Read manual
5

6
PLUGS & CONNECTORS................................07
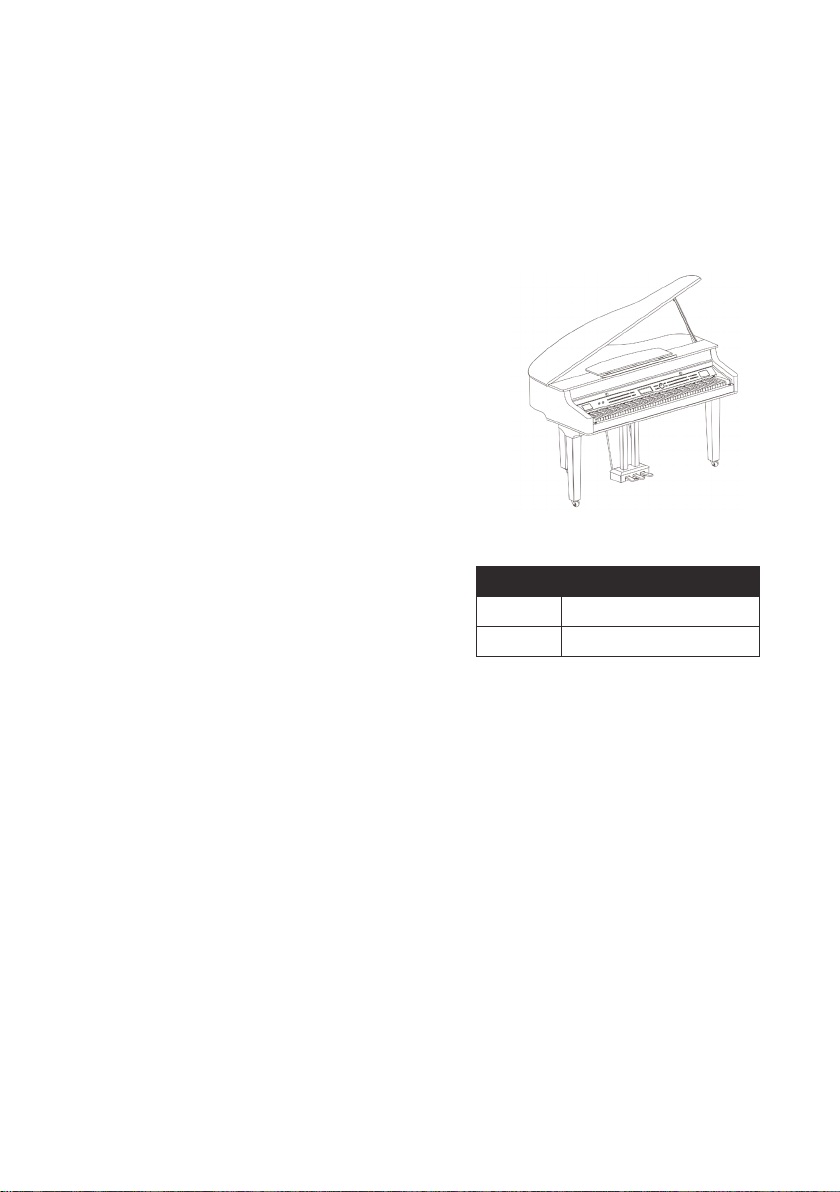
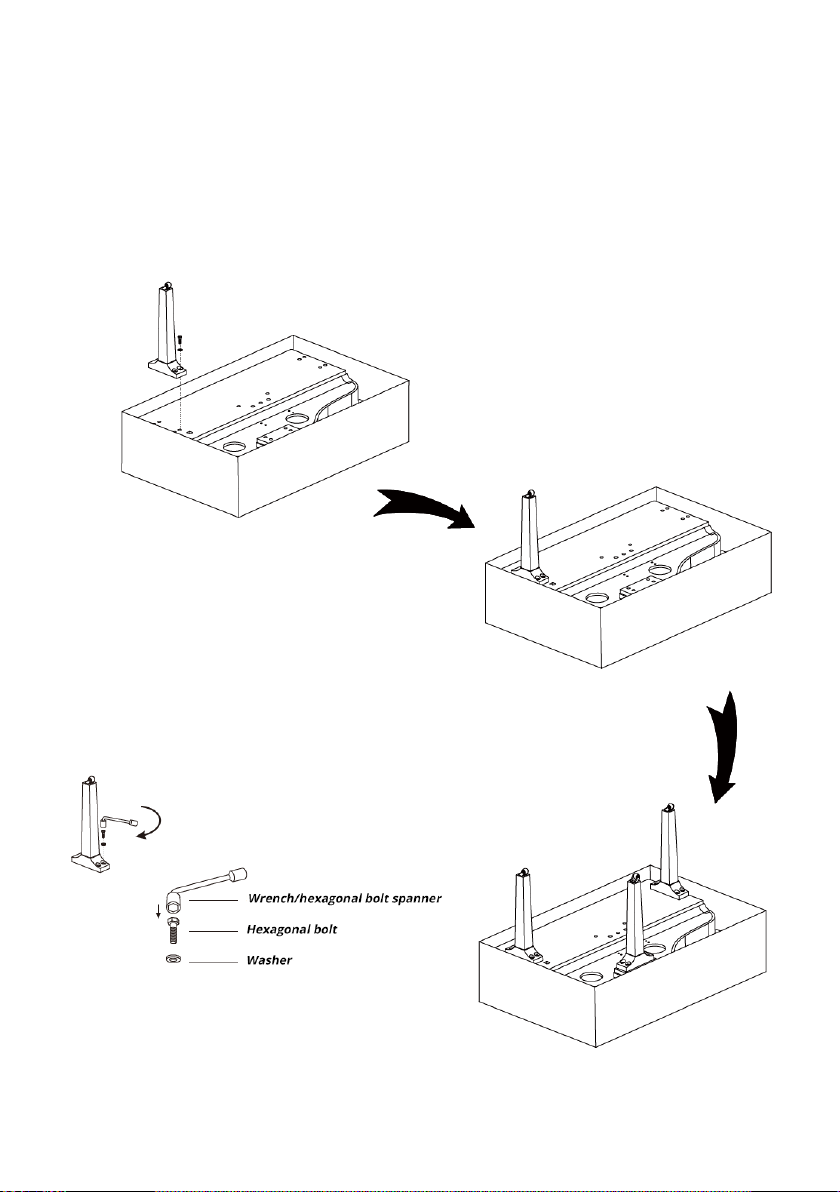
SET UP
Set Up Guide..............................................07-11
PANEL & DISPLAY DESCRIPTION
Front Panel......................................................12
Rear Panel.......................................................13
LCD Display.....................................................14
CONNECTIONS.........................................15/16
POWER SUPPLY..............................................17
SETTINGS
Master Volume................................................17
Brilliance..........................................................18
Playing the Demos...........................................18
Playing Voices..................................................19
Playing Different Voices...................................20
PIANO MODE................................................21
TWINOVA......................................................22
AUTO ACCOMPANIMANT........................23/24
CHORD BASSICS............................................25
Adjusting Tempo..............................................26
ONE TOUCH SETTING O.T.S..........................27
METRONOME................................................27
MIXER............................................................28
DSP EFFECT...............................................29/30
HARMONY.....................................................31
FUNCTION MENU
Tune................................................................33
Octave.............................................................33
Touch Response...............................................33
Chord Type......................................................33
Lower split Point..............................................33
Twinova Split Point...........................................34
Harmony Type.................................................34
EQ...................................................................34
String Resonance.............................................35
Soft Pedal........................................................35
Freeze..............................................................35
Contents:
Metronome Beat.............................................36
Fade Time.......................................................36
MIDI Output Channel......................................36
Song Looping..................................................36
Auto Power Off...............................................36
Bluetooth Link.................................................37
Factory Reset...................................................37
PERFORMANCE MEMORY.............................38
SONG RECORDING...................................39-41
AUDIO RECORDING.......................................41
SONG.............................................................42
BLUETOOTH...................................................43
CONNECTING USB FLASH DRIVE............44/45
MIDI...............................................................45
SPECIFICATIONS.......................................46/47
TROUBLESHOOTING.....................................48
CLEANING......................................................49
ENVIRONMENTAL PROTECTION...................49
VOICE LIST................................................50-60
STYLE LIST................................................61/62
SONG LIST......................................................63
DEMO SONGS................................................63
CHORD LIST...................................................64
MIDI IMPLEMENTATION CHART...................65

7
Plugs and connectors:
Setup:
Setup Guide:
1. Before proceeding to assemble the stand, check
that all the parts listed below are included:
Headphone output - 2x 6.3mm stereo jack sockets - center left signal, first ring
Right signal shaft - ground
LINE Out - 2 x 6.3mm mono jack socket - center signal, shaft ground
LINE In - 2 x 6.3mm mono jack socket - centre signal, shaft ground
Mic In - 6.3mm mono jack socket - center signal, shaft ground
MIDI IN/Out/THRU - 3 x 5pin DIN
USB - for connection to a computer
Special connection for the pedals
This section contains information about setting up your instrument and preparing to play. Please read
through this section carefully before turning the power on.
AccessoriesAccessories AccessoriesAccessories
APedal component FWasher
BRight leg component GM 12 x 45mm hexagonal bolt
CLeft leg component H⌀3 x 15mm screw
DRear leg component ICopper pole
EPiano body JWrench

2. Follow the steps below to assemble the stand. You will need a Phillip‘s screwdriver (not supplied).
A. Reverse the carton upside down and then place it horizontally on the floor.
(Make sure the bottom surface is on the upside.) Then open the box, and remove the foams which
are used to protect the piano body, as shown in the picture.
8

B. Put the Left leg component (C) on the left side of the Piano body (E). Then align the sunken hole
on the Leg component to that on the Piano body.
Place a washer into this sunken hole, then use the Wrench (J) to securely tighten the Hexagonal bolt
(G)(2 on each side) in clockwise direction, as shown in the picture. (Make sure the direction of the
components is correct before screwing) Affix the Right leg component (B) and Rear leg component
(D) to the Piano body (E) in the same way.
9
How to screw a hexagonal bolt?
a. Put a Washer into the sunken hole on the leg component.
b. Put a hexagonal bolt into the sunken hole.
c. Use the Wrench to tighten the bolt in clockwise direction.

10
C. Use Screws (H) to affix the two Copper poles (I) onto the back of the Pedal component (A), as
shown in the picture.
(Make sure the direction of the components is correct before screwing.)
D. Carefully reverse the Pedal component, then affix the Pedal component and the Copper poles to
the Piano body with Hexagonal bolts (G).

11
E. Set the piano upright, as shown in the picture. Carefully reverse the piano. Avoid damaging any
legs or the pedal component.
At this point the Piano is fully assembled.
Attention!
Caution: Carefully reverse the piano. Avoid damaging any legs.

12
Panel & Display Description
Front Panel:
1. [VOLUME] knob
Adjust the master volume.
2. [BRILLIANCE] knob
Adjust the brilliance.
3. [REC] button
- USB flash drive inserted: press the button to
enter Audio Recording.
- USB flash drive not inserted: press the button to
enter MIDI Recording.
- Press and hold the button to enter the recording
setting menu.
4. [TEMPO +/-] buttons
Press to edit the tempo value.
5. STYLE select buttons
Directly set a preset style. Press a button once to
select the first preset style, press it again to select
the second preset style.
6. [A.B.C.] button
Press it to turn the A.B.C. function on or off.
Press and hold it to enter the Chord setting menu.
7. [FADE IN/OUT] button
Press it to turn the Fade In or Fade Out on or off.
Press and hold it to enter the Fade Time setting
menu.
8. [INTRO/ENDING 1] button
Play the Intro or Ending pattern 1.
9. [INTRO/ENDING 2] button
In style mode: play the Intro or Ending pattern 2.
In song mode: mute/activate the left hand part.
10. [MAIN A] button
In style mode: play the Main pattern A.
In song mode: mute/activate the right hand part.
11. [MAIN B] button
In style mode: play the Main pattern B.
In song mode: play the current song in a loop.
12. [MAIN C] button
In style mode: play the Main pattern C.
In song mode: play all songs in a loop.
13. [MAIN D] button
In style mode: play the Main pattern D.
In song mode: rewind the song playback.
In Bluetooth mode: play the previous Bluetooth
song.
14. [SYNC STOP] button
In style mode: turn the Sync Stop function on or
off.
In song mode: fast forward the song playback.
In Bluetooth mode: play the next Bluetooth song.
15. [SYNC START] button
In style mode: turn the Sync Start function on or
off.
In song mode: pause the song playback.
In Bluetooth mode: pause playing the Bluetooth
song.
16. [START/STOP] button
Start or stop playing a song or a style.
Start or stop playing a Bluetooth song.
17. [METRO] button
Press it to turn the Metronome on or off.
Press and hold it to enter the Metronome setting
menu.
18. [FUNCTION] button
Press it to enter the Function menu.
19. [DEMO] button
Press it to enter Demo mode.

13
20. [MIXER] button
Press it to enter the Mixer menu.
21. [STYLE] button
Press it to enter Style mode.
22. [USB] button
Press it to enter the USB Play menu.
Press and hold it to enter the USB menu.
23. [VOICE] button
Press it to enter Voice mode.
24. [SONG/ ] button
When Bluetooth is disabled, press it to enter
Song mode.
When Bluetooth is connected, press it once to
enter Bluetooth mode, press it again to switch to
Song mode.
25. Data Dial
Adjust the parameters.
30. [STORE] button
Save current panel settings to one of the memo-
ries.
Press [STORE] and [M1] together to save the
settings to M1.
31. VOICE Select buttons
Directly select a preset voice.
Press a button once to select the first preset voice,
press it again to select the second preset voice.
32. [M1]-[M6] buttons
In memory mode: recall panel settings from one
of the memories.
In O.T.S. mode: recall voice settings that match
the current style..
33. [O.T.S.] button
Press it to turn the One Touch Setting function on
or off.
34. [DUAL] button
Press it to turn the Dual function on or off.
26. [+/YES] button
Increase the value.
Press [+/YES] and [-/NO] together to
restore default settings.
27. [-/NO] button
Decrease the value.
Press [+/YES] and [-/NO] together to
restore default settings.
28. [BANK] button
Select a memory bank.
29. [FREEZE] button
Press it to turn the Freeze function
on or off.
Press and hold it to enter the Freeze
setting menu.
30. [STORE] button
Save current panel settings to one of the memories.
Press [STORE] and [M1] together to save the settings
to M1.
35. [PIANO] button
Press it to enter Piano Mode.
36. [LOWER] button
Press it to turn the Lower function on or off.
Press and hold it to enter the Split Point setting
menu.
37. [TWINOVA] button
Press it to turn the Twinova function on or off.
Press and hold it to enter the Twinova Split setting
menu.
38. [HARMONY] button
Press it to turn the Harmony function on or off.
Press and hold it to enter the Harmony setting menu.
39. [TRANSPOSE +/-] buttons
Adjust the transpose value.
40. [DSP] button
Press it to turn the DSP effect on or off.
Press and hold it to enter the DSP setting menu.

14
1. Function Indicators
2. 192 x 16 Dot Matrix LCD
3. Function Indicators
4. Chord
5. Transpose
6. Beat
7. Measure/Beat/Time
8. During playback, shows the MIDI Channel Volume
When playback stops, shows the track Volume
9. Tempo
10. Memory/O.T.S.
11. Function Indicators
LCD Display:

15
Connections:
1. PEDAL jack
Connect the pedal component.
2. MIDI OUT, MIDI IN, MIDI THRU jacks
Use a standard MIDI cable to connect the MIDI
OUT jack of the instrument to the MIDI IN jack of
an external device. The instrument will transmit
MIDI messages to the external device and work as
a MIDI controller.
Use a standard MIDI cable to connect the MIDI IN
jack of the instrument to the MIDI OUT jack of an
external device. The instrument will receive MIDI
messages from the external device and work as a
sound source.
Use a standard MIDI cable to connect the MIDI
THRU jack of the instrument to the MIDI IN jack of
an external device. The instrument will relay the
MIDI messages it has received from its MIDI IN to
the next device.
3. USB jack
Use a standard USB cable to connect the USB jack
of the instrument to the USB port of a computer.
With USB, you can save a keyboard performance
to the computer or use the instrument to play
back music played on the computer.
Note:
Do not set the USB MIDI device to be both input
and output simultaneously when configuring the
software on your computer. Otherwise, the sound
will be overlapped when playing the keyboard.
4. MIC input
Before connecting or disconnecting a microphone,
set the master volume level to minimum. Plug the
microphone into the MIC jack, then adjust the
master volume to an appropriate level.
Note: Please unplug the microphone when it is not
in use.
5. MIC Volume knob
Rotate it to adjust the input volume of the micro-
phone.
6. AUX IN jack
The AUX IN jacks receive audio signals from an
external audio source such as an MP3 or a CD player.
Connect the AUX IN jacks of the instrument to the
OUTPUT jack of an MP3/CD player. The instrument’s
speakers will play the music transmitted from the
external player, and you can play along.
7. AUX OUT jack
The AUX OUT jacks deliver the output of the
instrument to external audio equipment such as a
keyboard amplifier, stereo sound system, mixing
console, or recording interface. Connect the AUX
OUT jacks of the instrument to the INPUT jack of the
external audio equipment. Use the R and L jacks for
stereo output or just the L jack for mono output.
Note:
1. Turn off the power to all devices before connec-
ting or disconnecting external equipment.
2. To avoid damaging the speakers, set the master
volume level to minimum before turning on the
power.
8. AC POWER INLET
Connect the AC power cable to this inlet.

16
9. PHONES jack
Plug a pair of standard stereo headphones into the
PHONES jack for private practice or late-night play-
ing. When headphones are connected, the internal
speakers will be muted, and the sound can only be
heard from the headphones.
Note:
To avoid the risk of hearing loss, do not use
headphones at high volume level for a long period
of time.
10. USB Port
Connect a USB flash drive to the instrument to
save the data you’ve created to the USB flash
drive. You can also load files from a USB flash drive
to the instrument, or use the instrument to play
back files saved on USB flash drive.
Note:
To avoid errors or damaging the USB flash drive,
do not remove it when reading or writing is in
progress.

17
1. Before connecting the power supply, please set
the [POWER] switch to “OFF” and set the master
volume level to minimum.
2. Connect the AC power cable to AC power
supply jack on the rear panel.
3. Plug the AC power cable into an appropriate
AC outlet.
4. Press the [POWER] switch. The LCD will light up
and display the welcome interface, indicating the
instrument is powered on.
5. When you are ready to turn the instrument off,
press and hold the [POWER] switch for a second.
The LCD light will turn off.
Note:
1. In order to save energy, the instrument will
automatically shut down after
30 minutes when not in use. (see Auto Power Off).
2. For your safety, please unplug the instrument
when it is not in use or during a thunderstorm.
Rotate the [VOLUME] knob clockwise to increase
the master volume or counter-clockwise to decrea-
se it. Adjust to set the desired volume level.
Note:
If the speakers do not produce sound, check if the
master volume is set too low or if headphones are
plugged into the PHONES jack.
Power Supply:
Adjusting the Master Volume

18
Use the [BRILLIANCE] knob to adjust the overall
brilliance level. The brilliance is set to medium by
default. Rotate the knob clockwise to
brighten the sound, or counter-clockwise to mel-
low the sound.
The instrument features several professional de-
mos. Please refer to the Demo List for details.
1. Start playing the demo.
Press the [DEMO] button to enter Demo mode and
start playing the demos in a continuous loop. The
LCD shows the current demo number and name.
2. Select a demo.
Use the data dial or [+/Yes]/[-/No] buttons to select
a desired demo.
3. Stop playing the demo.
Press the [START/STOP] button to stop playing and
exit Demo mode.
Note:
During demo playback, playing the keyboard will
not produce sound.
Adjusting the Brilliance:
Playing the Demos:

19
The instrument features a variety of realistic voices.
Please refer to the Voice List for details.
Playing a Voice
1. Enter the voice mode.
Press the [VOICE] button or one of the VOICE
select buttons to enter Voice mode. The “R1”
indicator appears and the LCD shows the
current voice number and name.
2. Select a voice to play.
Use the data dial or [+/Yes]/[-/No] buttons to select
a desired voice. You can also use the VOICE select
buttons to select a preset voice.
3. Play the selected voice.
Play the keyboard to use the selected voice for
performance.
Playing Two Voices Simultaneously
The Dual function allows two different voices to
be layered together, creating a more full and rich
sound. Turn this function on and select a voice for
the dual voice „R2“.
1. Turn on the dual function.
Press the [DUAL] button to turn on the Dual
function. The “R2” indicator appears and the LCD
shows the current dual voice number and name.
2. Select a dual voice.
Use the data dial or [+/Yes]/[-/No] buttons to select
a dual voice. You can also use the VOICE select
buttons to select a preset voice.
3. Play the voices.
Play the keyboard and you will hear two different
voices playing together, just like two different
instruments being played at the same time.
4. Turn off the dual function.
Press the [DUAL] button again to turn off the Dual
function.
Playing the Voices:

20
Playing Different Voices with Both
Hands
The Lower function splits the keyboard into two
areas so as to create different voices for each of
your hands. The left hand voice is the lower
voice “L”.
1. Turn on the lower function.
Press the [LOWER] button to turn on the Lower
function. The “L” indicator appears. The LCD
shows the current lower voice number and name.
2. Select a lower voice.
Use the data dial or [+/Yes]/[-/No] buttons to select
a lower voice. You can also use the VOICE select
buttons to select a preset voice.
3. Play the voices.
Play the keyboard with both hands and you will
hear two different voices from the left and right
hand areas.
4. Set the lower split.
Press and hold the [LOWER] buttons to enter the
lower split setting menu, then use the [+/Yes]/[-/
No] buttons or press a key on the keyboard to
assign the lower split.
Press [+/YES] and [-/NO] at the same time to re-
store the default lower split.
5. Turn off the lower function.
Press the [LOWER] button again to turn off the
lower function.
Switch between Voice R1 / R2 / L
The voice “R1” is turned on by default, and can-
not be turned off. The dual voice “R2” and lower
voice “L” can be turned on/off as desired. In voice
mode, when the R1, R2, and L voices are all in use,
you can press the [VOICE] button repeatedly to
switch between different voice layers.
Lower Split
The key that splits the keyboard into the left and
right hand areas is called „Lower Split“. The de-
fault lower split is F#3 (34), however, you can
assign it to any other key. Please refer to the Func-
tion Menu for details.
Note:
1. When the Lower and Dual functions are in use,
only the right hand area will play the dual voices.
2. You can adjust the volume for voice R1/ R2/ L
separately in the Mixer.
Please refer to Mixer for details.
This manual suits for next models
1
Table of contents
Other FAME Musical Instrument manuals