FAME DIY-Kit ST-Style User manual

ENGLISH
FAME
DIY-Kit ST-Style
For a complete ST style electric guitar.
GIT0056427-00
0 12/2021
Bedienungsanleitun
g User’s Manual

Important safety instructions! Please read!
DANGER! (for babys and children)
Ensure that plastic covers, packaging, etc. are disposed of properly and are out of reach of babies and
small children. Risk of suffocation!
Make sure that children do not detach small parts from the product. They could swallow the parts and
choke on them!
Do not allow children to play with the product unsupervised.
CAUTION! (Danger of cuts to the hands)
When assembling and screwing the individual parts, pay attention to sharp edges on tools, screws and
components.
Intended use
All parts, components and tools of the J&D DIY kit are used to assemble a musical instrument.
Accordingly, all parts of the kit included in the delivery may only be used for this purpose and in
accordance with the instructions. Any other use, as well as operation under other operating conditions,
is expressly not intended and may lead to damage to property or personal injury! No liability will be
accepted for damage resulting from use other than that for which it was intended.
It must be ensured that all work steps are carried out exclusively by users who are in full possession
of their mental, physical and sensory abilities. The use of other persons is expressly permitted only at
the request of a person responsible for their safety who instructs or supervises the use.
ENGLISH

Symbols on the unit and packaging:
The lightning symbol warns the user of the presence of uninsulated voltage and
the risk of electric shock.
The exclamation mark symbol draws the user's attention to important
maintenance and operating instructions in the operating instructions.
The lightning flash warns you of dangerous voltage that is accessible from the
outside. A connection to any terminal marked with this symbol may only be
made with prefabricated cable that complies with the manufacturer's
recommendations or with cable that has been installed by qualified personnel.
Only suitable for indoor use.
Read the operating instructions.
Please read the warnings and instructions carefully and follow them to ensure safe
and proper use.
ENGLISH

Congratulations on your new FAME DIY-Kit ST-Style!
Thank you for choosing the FAME DIY kit ST-Style. The kit contains all the components in the
form of the wood parts, hardware parts and assembly accessories for a complete ST-Style electric
guitar.
In order to be informed about all functions of this product, please read the instruction manual carefully
and keep it for later use.
Have fun with your new instrument!
Your FAME Team
Warranty:
The current general terms and
conditions and warranty
conditions of Music Store
professional GmbH.
Available at: www.musicstore.de
If you have any questions or suggestions,
please contact:
Music Store professional GmbH
Istanbulstr. 22-26
51103 Köln
Managing Director: Michael
Sauer
WEEE-Reg.-Nr. DE 41617453
Tel: +49 221 8884-0
Fax: +49 221 8884-2500
Intended use:
All parts, components and tools of the Fame DIY kit serve to assemble a musical instrument.
Accordingly, all parts of the set included in the delivery may only be used for this purpose and in
accordance with the instructions. Other uses, as well as use under other operating conditions, are
expressly not intended and may result in damage to property or personal injury! No liability is
accepted for damage resulting from improper use.
It must be ensured that all work steps are carried out exclusively by users who are in full possession
of their mental, physical and sensory abilities. Use by other persons is expressly permitted only at the
request of a person responsible for their safety, who will instruct or supervise the use.
ENGLISH

Scope of Delivery
The following parts are included in the Fame DIY kit ST-Style:
1. 1x Body, pre-drilled
2. 1x Maple neck, with fretboard and nut
3. Electronics (prewired):
a. 1x Pickguard, 3-play W/B/W
b. 19x Mounting screws, 12.3 mm
c. 1x Single-coil neck
d. 1x Single-coil middle
e. 1x Single-coil bridge
f. 6x Pickup screw
g. 6x Pickup spring
h. 1x Volume potentiometer 250K log.
i. 2x Tone potentiometer 250K lin.
j. 1x Volume knob, white
k. 2x Tone knob, white
l. 2x Capacitor, 47 nF
m. 1x Pickup switch, 5-Way
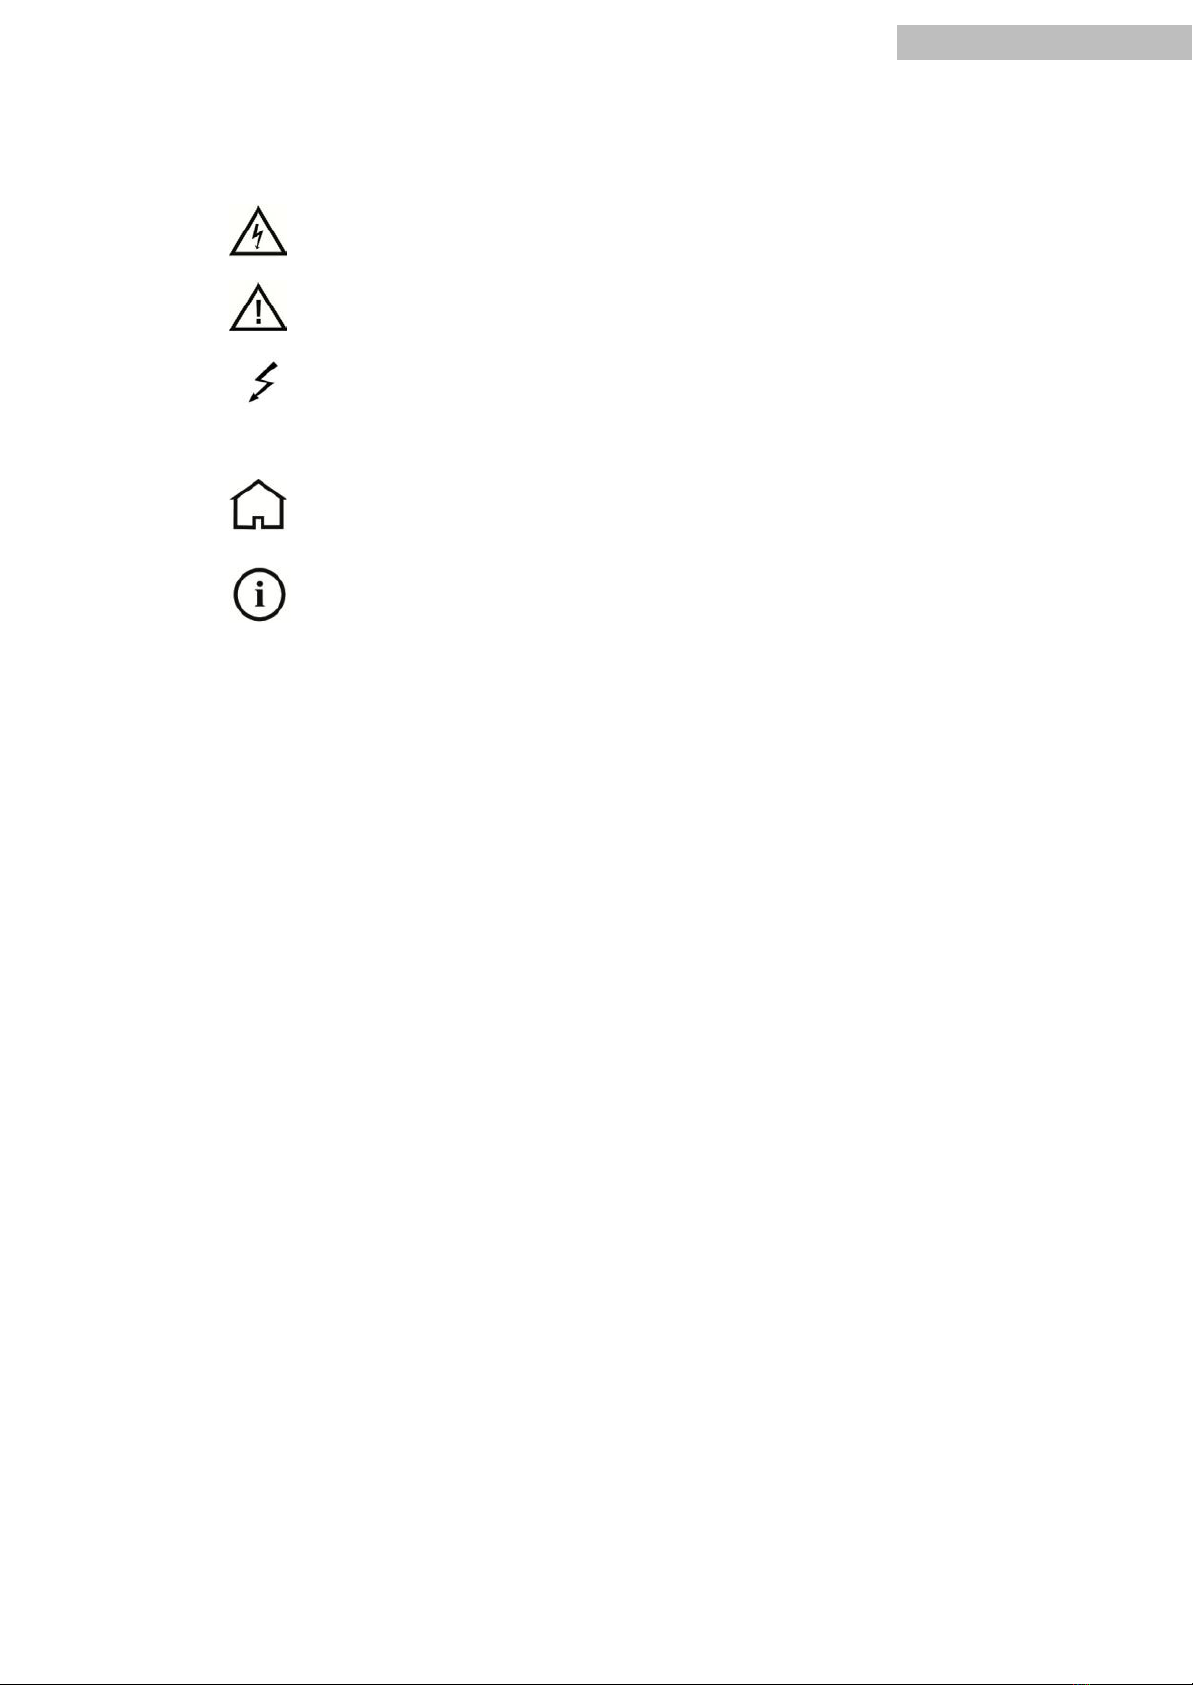
4. Vintage-Tremolo (pre-installed):
a. 1x Block
b. 1x Base plate, Chrome
c. 3x Mounting screw (block and base
plate)
d. 6x String saddle (saddle,
spring, screw, 2x grub screw)
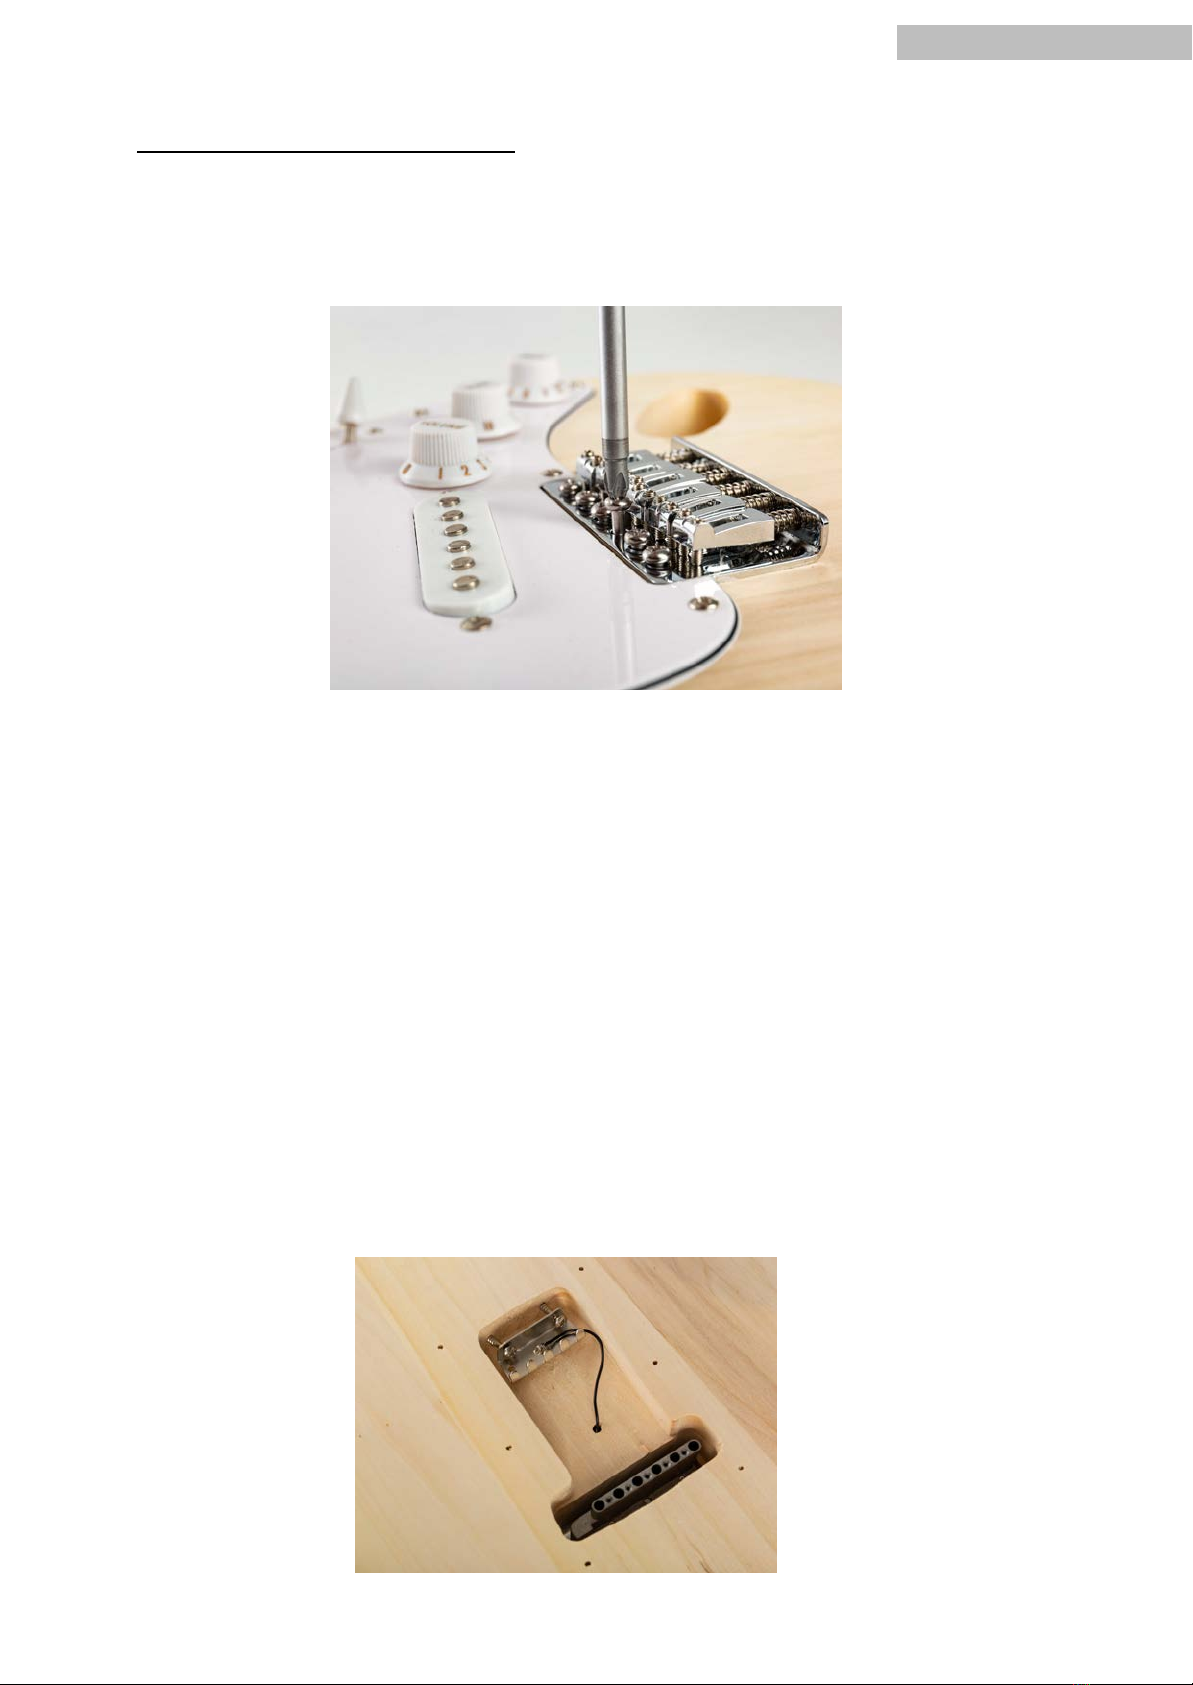
5. 1x Tremolo spring claw
6. 2x Mounting screws for spring claw, 35.3 mm
7. 3x Tremolo springs
8. 6x Mounting screws for bridge, 27.8 mm
9. 1x Tremolo arm, with white cap
10. 1x Cover plate tremolo compartment, white
11.6x Die-cast tuners, chrome
a. 6x Lock nut for tuner
b. 6x Washer for tuner
c. 6x Mounting screw for tuner,
11.7mm
12. 2x Butterfly string guides
a. 1x Mounting screw, 11.7mm
b. 1x Mounting screw, 13.7mm
c. 1x Mounting sleeve, short
d. 1x Mounting sleeve, long
13. 1x Neck cover plate, chrome
a. 1x Base for neck cover plate
b. 4x Neck screws, 46.2mm
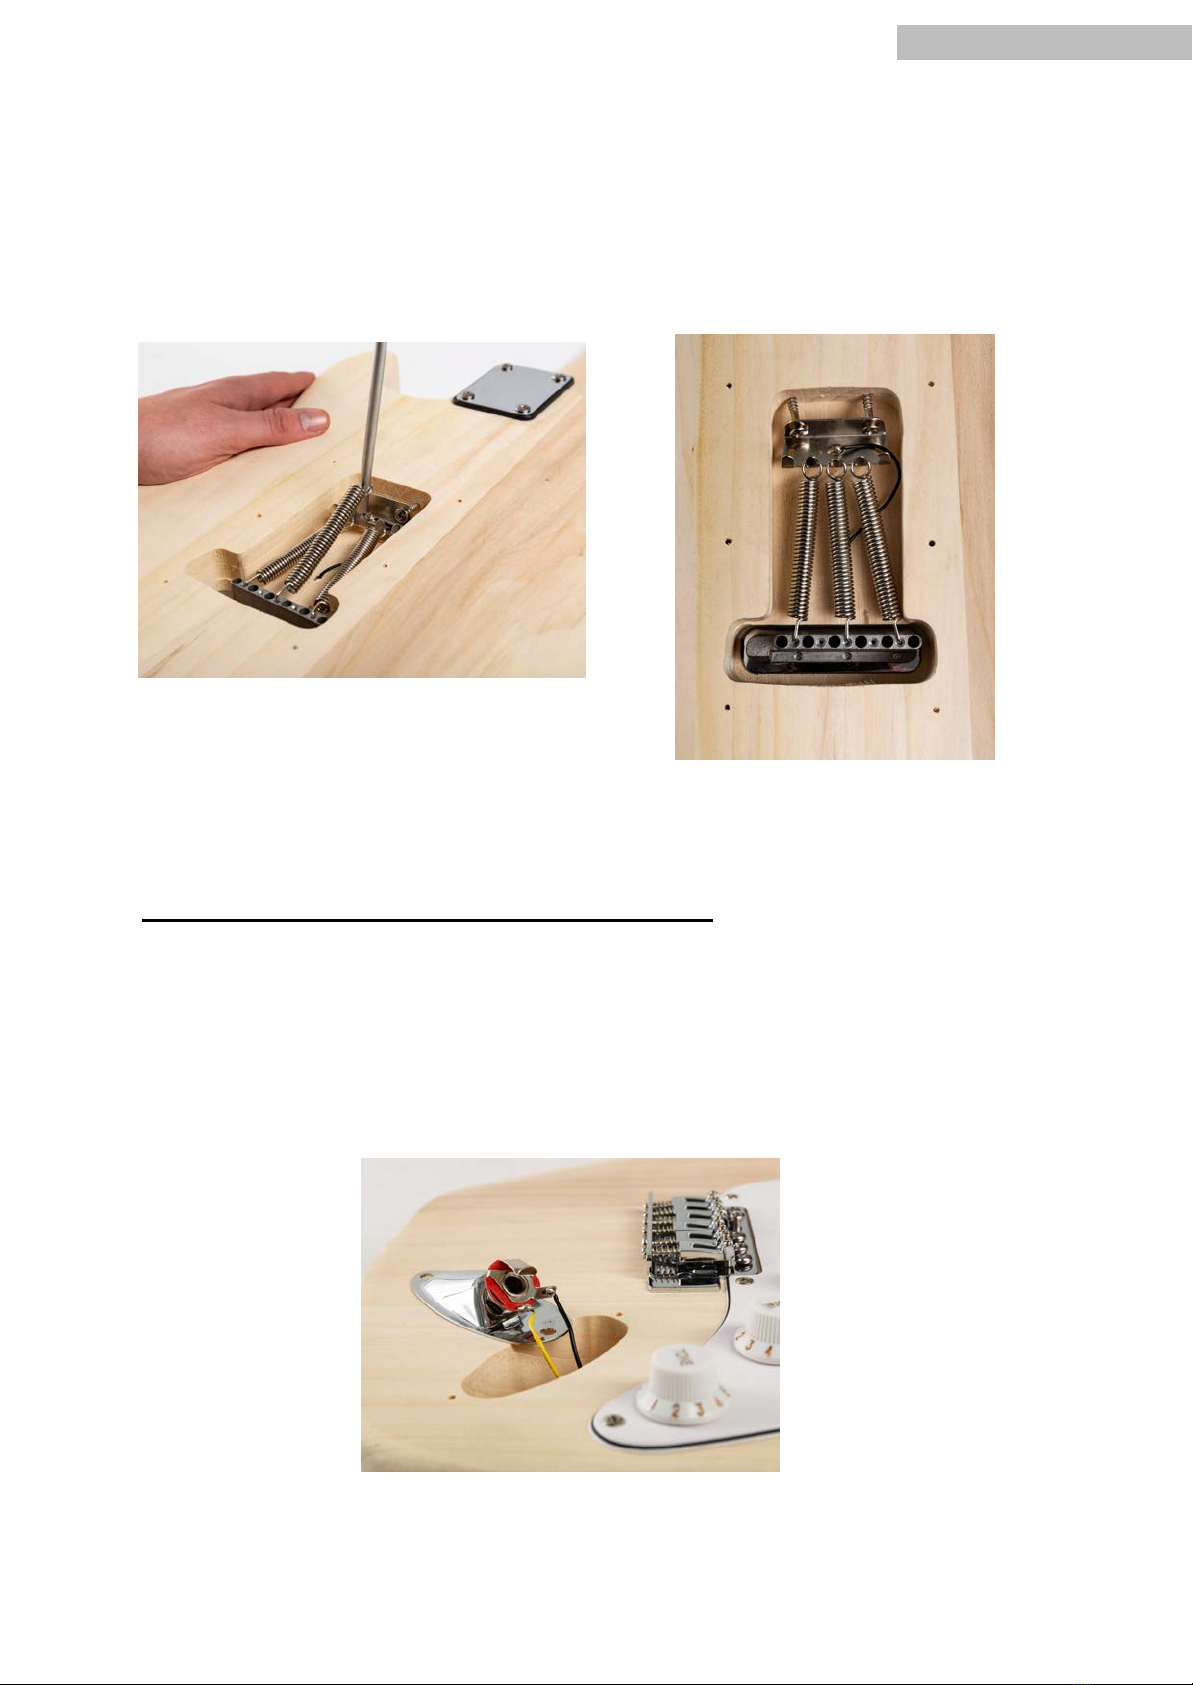
14. 1x Output socket (preinstalled)
a. 1x Fastening nut
b. 1x Lock nut
c. 1x Socket mount, chrome
15. 2x Strap pin, chrome
a. 2x Rubber washers
b. 2x Mounting screw, 25.3 mm
16. Solder
17. 1x String set
18. 1x Instrument cable
19. 1x Allen key, large
20. 1x Allen key, small

•
1
,,
..
.!
•
.
.
.ll•
3
!"
3b!
' -
13a
13
a-
d
!12
b- C !
17
ENGLISH

Required tools:
•Drill/Drill-press
•Wood drill bit, 2 mm
•Phillips screwdriver (small and medium)
•Spanner, 10 mm
•Wire cutter
•Soldering iron
Optional tools:
•Fret files and saddle files
•Sandpaper or chisel
•Accessories for painting and finishing (e.g. stain, cloth, etc.)
Preparation: Body and neck finish (optional)
Both the body and the neck are sanded ready for lacquering at the factory, so that they can easily
accept oil- or wax-based stains as well as lacquer from spray cans. As wood is a natural material that
expands or contracts under different temperature and humidity conditions, it is recommended to seal
the body and the back of the neck with a lacquer finish. All drillings and milled holes for attachments
and electronics, the neck pocket as well as the fingerboard and the frets should be well taped
beforehand, as they may no longer fit accurately due to an additional layer of varnish.
Caution: Carry out any painting work on a clean and dust-free surface and in well-ventilated
surroundings at all times!
Tip 1: For best results, it is advisable to try out the colour and technique used on a
separate piece of wood.
Tip 2: Although the body and neck are pre-sanded at the factory, any irregularities in the
sanding can be corrected with fine-grained sandpaper (1000 grit) to ensure that the wood
absorbs the colour evenly.
Tip 3: To avoid cracks and bursts in the lacquer, the lacquer should cure for at least 3-4 days,
depending on the lacquer used, before attaching parts to the body or neck.
ENGLISH

DIY-Kit ST-Style – Building instructions
Step 1: Body and neck attachment
First make sure that the heel of the neck (2) fits exactly into the neck pocket of the body (1) and
rework it with some sandpaper or a chisel if necessary. Ideally, the neck heelsits in the neck pocket
without play.
When the neck is aligned in the pocket, place the neck cover plate (13) together with the matching
base (13a) on the back of the neck pocket and screw the body, neck and cover plate together with
the four matching screws (13b) (see illustration).
Step 2: Install tuners
Insert the six tuners (11) from behind into the holes provided on the headstock and fasten the tuner
tabs with the mounting screws (11c).
As soon as these are in place, place a washer (11b) over the winding axle of each tuner from the
front and screw them together with the lock nuts (11a) (see illustration).
ENGLISH

Step 3: Vintage-Tremolo assembly
To attach the vintage tremolo to the ST-style electric guitar, first place the pre-assembled vintage
tremolo (4) from the front into the recess provided in the body and screw all six fastening
screws (8) into the pre-drilled holes in the body (see illustration).
Attention: The six bridge screws should not be screwed in completely, but should protrude a little bit to
ensure a smooth function of the tremolo! We recommend that the screw heads protrude approx. 1-2
mm.
In the next step, the spring claw (5) can be fixed in the tremolo compartment of the body. Turn the
body over and screw the spring claw into the tremolo compartment with the enclosed spring claw
screws (6) so that the five claws are visible from above. The claw screws are not screwed completely
into the body and should protrude approx. 2 cm from the holes provided so that the working point of
the tremolo can be better adjusted during later setup.
Once the claw is mounted, the bridge ground should be soldered on first before inserting the springs.
Lead the black cable, which is routed via the small hole in the tremolo compartment, to the spring
claw, if necessary remove a piece of the insulation to free approx. 5 mm of the wire tip and solder the
connecting cable to the intended contact point of the spring claw. For the later assembly of the
springs, it is helpful to lead the cable to the side of the claw (see illustration).
ENGLISH

Now the three tremolo springs (7) can be fitted. To stretch the springs to the right length for
mounting, hang the springs with the hook in the tremolo block and draw the spring with the help of a
screwdriver until the round opening of the spring can be hooked on the spring claw (see picture). If
necessary, the mounting screws of the spring claw can be loosened a little to make it easier to install
the springs.
Step 4: Wiring and mounting the output jack socket
To connect the output jack (14) with the pre-wired electrics of the ST-style electric guitar, only the
two contacts of the output jack have to be soldered. The connecting cables required for this are
already routed into the milling provided in the body, whereby the yellow signal cable must be
connected to the tip contact and the black earth cable to the sleeve contact of the socket (see
illustration).
Once both contacts are soldered to the intended terminal, screw the output socket into the recess on
the body using the two screw tabs of the socket mount (14c) and the matching screws (3b).
ENGLISH

Step 5: Stringing and mounting the tailpiece
Now string the enclosed nickel strings (17) onto the instrument to be able to check the
functionality of the electrics and to adjust the setup of the ST-style electric guitar. To do this, feed
each string from below through the matching guide in the tremolo block, through the tailpiece and up
to the tuners, where the strings are wound with 2-3 axle windings. When winding and tuning up,
make sure that each string lies in the matching notch on the nut and on the string rider of the bridge
and sits with the ball end up to the stop in the tremolo block.
The two butterfly string guides (12) serve to adjust the string angle of the highest four strings on
the head plate and thereby increase the contact pressure on the nut. Drill a hole about 5 mm deep
between the d and g strings at the height of the tuners for the A string using a 2 mm drill bit and
screw one of the two string guides (12) with the mounting screw (12b) and the long mounting
sleeve (12d) until the string angle is adjusted to the angle of the low E and A strings.
The second string guide is for the b and estring and is attached a little further towards the tip of the
headstock (approximately at the level of the g- and d-string tuners). Drill a hole here between the b-
and e-string and fasten the string guide (12) with the short mounting screw (12a) and the
short mounting sleeve (12c) (see illustration).
ENGLISH

Step 6: Tremolo adjustment
Before fitting the cover plate of the tremolo compartment, it is recommended to adjust the response
of the vintage tremolo. First make sure that the mounting screws of the vintage tremolo (8)
have approx. 1 mm play. Then you can screw in the tremolo arm (9) and adjust the tightness of the
tremolo by screwing in the spring claw. If the tremolo is too sluggish, simply loosen the two screws of
the spring claw until the desired working point is reached.
Step 7: Attach cover plate and strap pins
Once the tremolo is adjusted as desired, screw the cover plate (10) to the back of the body with the
six remaining mounting screws (3b). Screw the strap pins (15) together with the rubber
washers (15a) and the matching strap pin screws (15b) into the holes provided on the upper
body horn and the lower part of the body.
ENGLISH

Adjusting the neck curvature
The integrated truss rod offers the possibility to adjust the neck curvature with an Allen key. Access
to the neck tension rod is located on the headstock behind the nut. The following applies here:
•When the neck tension rod is tightened (clockwise rotation), the neck tilts back and
becomes straighter.
•When the neck tension rod is loosened (turn counterclockwise), the neck tilts forward and
becomes concave.
When adjusted optimally, all strings on the first frets should be playable without buzzing and without
having too much distance to the fingerboard. Please note that adjustments should only be made in
small steps (maximum quarter turns) and that the neck should be given a little time to adjust after
each step. After each change, tune the strings to the correct pitch and examine the neck curve before
making further adjustments to the truss rod.
Adjust string action
Depending on your playing habits, you can also adjust the string action by screwing the grub screws
of the tremolo tailpiece higher or lower into the tailpiece. Loosen the string tension beforehand to
make adjustments to the bridge easier. Again, a flatter string action is easier to play, but if it is too flat,
it can cause noise when playing.
Adjusting the intonation
To adjust the intonation of the instrument precisely, each string saddle on the bridge has its own
adjusting screw. To do this, use a tuner to compare the harmonics of the 12th fret (touch the string
with the finger of the left hand above the 12th fret bar when striking it) with the pitch of the fretted
12th fret and then adjust the difference.
•If the fretted note is higher than the harmonics note, the string length from the 12th fret to
the bridge is too short. The string saddle must therefore be screwed further back.
•If the fretted note is lower than the harmonics note, the string length from the 12th fret to
the bridge is too long. In this case, the string saddle must be screwed further forward.
As soon as the instrument is tuned, the neck curve is adjusted, the string action is adapted to the
respective playing style and all strings intonated correctly, you hold a completely playable electric
guitar in your hands!
ENGLISH

Cleaning:
Regular cleaning of the appliance to remove dirt and dust increases the
longevity of the product. Always disconnect the instrument from the
mains before cleaning it! Never clean the unit when it is wet! A dry
microfiber cloth is best.
Ventilation grilles and openings should always be kept free of dust and
dirt. Compressed air sprays suitable for electrical components are
recommended for this application.
Environmental protection
Environmentally friendly materials have been selected for the packaging that can be recycled in the
normal way. Ensure that plastic covers, packaging, etc. are disposed of properly.
Do not simply throw these materials away, but ensure that they are recycled. Observe the
instructions and labels on the packaging.
Disposal of packaging:
Ensure that paper packaging, plastic material, etc. are sent separately to the appropriate recycling
facilities. Observe the corresponding disposal instructions on the packaging.
Disposal of batteries:
Batteries do not belong in the rubbish! Please take batteries to the appropriate collection points or
disposal stations as required by the authorities.
Disposal of your old appliance:
Do not dispose of the appliance with household waste! This appliance is subject to the WEEE
Directive (Waste Electrical and Electronic Equipment) in its currently valid version.
The appliance is to be disposed of by an authorised waste disposal company or by your
local waste disposal authority. The regulations valid in your country must be observed!
Manufacturer:
MUSIC STORE professionalGmbH
Istanbulstraße 22-26,
51103 Köln, Germany
ENGLISH

MS ID: GIT0056427-000
12/2021
Notes
Table of contents
Other FAME Musical Instrument manuals