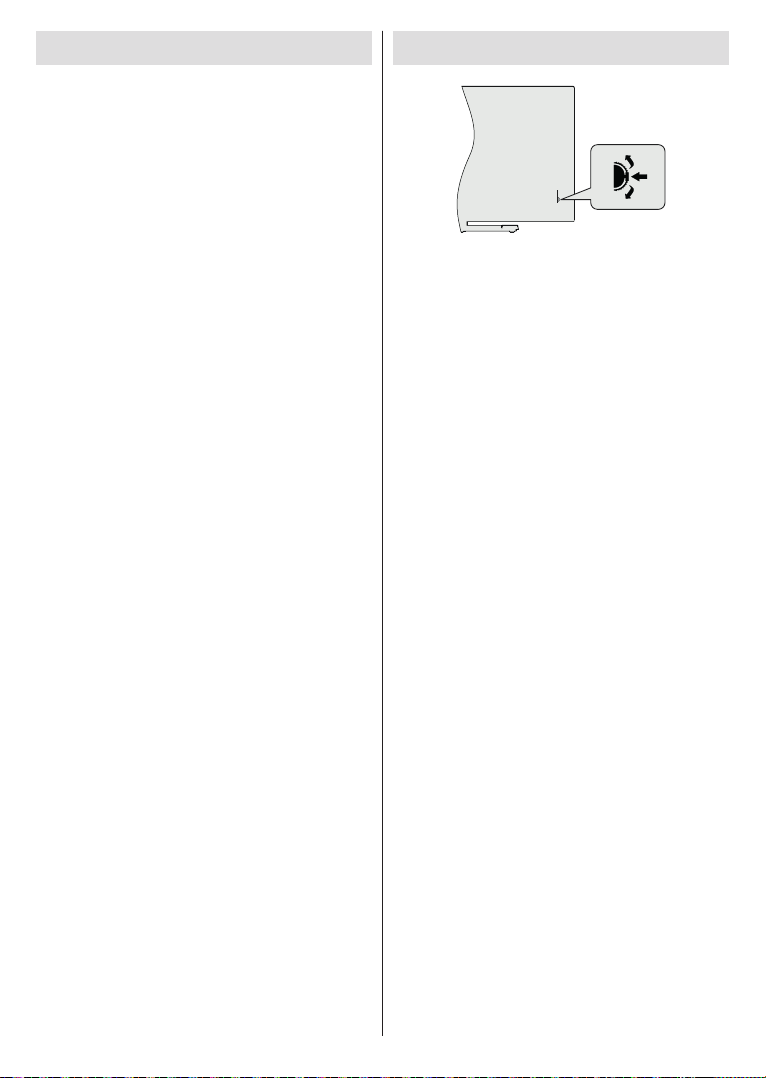
F&U FLA7520UH User manual

English - 1 -
Table of Contents
Safety Information.................................................2
Introduction ...........................................................4
Accessories Included ............................................4
Features................................................................4
Stand Installation & Wall Mounting .......................5
Antenna Connection..............................................5
Other Connections ................................................6
Turning On/Off the TV........................................... 7
TV Control & Operation.........................................7
Remote Control.....................................................8
Initial Setup Wizard ............................................... 9
Home Screen ...................................................... 11
Live TV Mode Menu Content ..............................12
Channels .........................................................12
TV Options.......................................................12
Record.............................................................13
Settings ...............................................................13
Network & Internet...........................................13
Channel ...........................................................14
Accounts & Sign In ..........................................16
Apps ................................................................16
Device Preferences .........................................16
Remote & Accessories ....................................19
Channel List ........................................................19
Programme Guide...............................................20
Connecting to the Internet...................................20
Multi Media Player...............................................21
From USB Connection.....................................21
From a Mobile Device via DMR.......................22
USB Recording ...................................................22
Instant Recording ............................................22
Watching Recorded Programmes ..................22
Timeshift Recording.........................................22
Disk Format .....................................................22
Schedule List...................................................23
CEC.....................................................................23
Google Cast ........................................................23
HBBTV System ...................................................24
Quick Standby Search ........................................24
Software Update .................................................24
Troubleshooting & Tips .......................................25
VGA Input Typical Display Modes.......................25
AV and HDMI Signal Compatibility...................... 26
Supported File Formats for USB Mode...............27
Video ...............................................................27
Audio ...............................................................27
Picture .............................................................29
Subtitle.............................................................30
Supported DVI Resolutions.................................30
Specification........................................................31
Licences..............................................................32
Disposal Information ...........................................32

English - 2 -
Safety Information
CAUTION
RISK OF ELECTRIC SHOCK
DO NOT OPEN
CAUTION: TO REDUCE THE RISK OF ELECTRIC SHOCK DO
NOT REMOVE COVER (OR BACK).
NO USER-SERVICEABLE PARTS INSIDE. REFER
SERVICING TO QUALIFIED SERVICE PERSONNEL.
Note: Follow the on screen instructions for operating the
related features.
In extreme weather (storms, lightning) and long inactivity
periods (going on holiday) disconnect the TV set from the
mains.
The mains plug is used to disconnect TV set from the mains
and therefore it must remain readily operable. If the TV set is
not disconnected electrically from the mains, the device will
still draw power for all situations even if the TV is in standby
IMPORTANT - Please read these
instructions fully before installing or
operating
WARNING: This device is intended to be
used by persons (including children) who are
capable / experienced of operating such a device
unsupervised, unless they have been given
supervision or instruction concerning the use of
the device by a person responsible for their safety.
Use this TV set at an altitude of less than 2000 meters
above the sea level, in dry locations and in regions
with moderate or tropical climates.
The TV set is intended for household and similar
general use but may also be used in public places.
For ventilation purposes, leave at least 5cm of free
space around the TV.
The ventilation should not be impeded by covering
or blocking the ventilation openings with items, such
as newspapers, table-cloths, curtains, etc.
The power cord plug should be easily accessible. Do
not place the TV, furniture, etc. on the power cord.
you an electric shock. Handle the power cord by the
plug, do not unplug the TV by pulling the power cord.
Never touch the power cord/plug with wet hands as
this could cause a short circuit or electric shock.
Never make a knot in the power cord or tie it with
other cords. When damaged it must be replaced, this
Do not expose the TV to dripping or splashing of
such as vases, cups, etc. on or over the TV (e.g.,
on shelves above the unit).
Do not expose the TV to direct sunlight or do not
or near the TV.
Do not place any heat sources such as electric
heaters, radiators, etc. near the TV set.
Do not place the TV on the floor and inclined
surfaces.
out of the reach of the babies, children and domestic
animals.
Carefully attach the stand to the TV. If the stand is
prevent the TV from tilting. Do not over-tighten the
screws and mount the stand rubbers properly.
Do not dispose of the batteries in fire or with
WARNING
Batteries must not be exposed to excessive heat
Excessive sound pressure from earphones or
headphones can cause hearing loss.
ABOVE ALL - NEVER let anyone, especially
children, push or hit the screen, push anything
into holes, slots or any other openings in the case.
Caution Serious injury or death
risk
Risk of electric shock Dangerous voltage risk
Maintenance Important maintenance
component
Markings on the Product
The following symbols are used on the product as
a marker for restrictions and precautions and safety
such information for security reasons.
Class II Equipment: This appliance is
designed in such a way that it does not require
a safety connection to electrical earth.
Hazardous Live Terminal: The marked
terminal(s) is/are hazardous live under normal
operating conditions.
iCaution, See Operating Instructions: The
marked area(s) contain(s) user replaceable
coin or button cell batteries.
CLASS 1
LASER PRODUCT
Class 1 Laser Product: This
product contains Class 1 laser
source that is safe under rea-
sonably foreseeable condi-
tions of operation.

English - 3 -
WARNING
Do not ingest the battery, Chemical Burn Hazard
This product or the accessories supplied with the
product may contain a coin/button cell battery. If the
coin/button cell battery is swallowed, it can cause
severe internal burns in just 2 hours and can lead
to death.
Keep new and used batteries away from children.
If the battery compartment does not close securely,
stop using the product and keep it away from children.
If you think batteries might have been swallowed or
placed inside any part of the body, seek immediate
medical attention.
– – – – – – – – – – – –
Never place a television set in unstable or inclined
locations. A television set may fall, causing serious
personal injury or death. Many injuries, particularly to
children, can be avoided by taking simple precautions
such as;
Using cabinets or stands recommended by the
manufacturer of the television set.
Only using furniture that can safely support the
television set.
Ensuring the television set is not overhanging the edge
of the supporting furniture.
Not placing the television set on tall furniture (for
example, cupboards or bookcases) without anchoring
both the furniture and the television set to a suitable
support.
Not standing the television set on cloth or other
materials placed between the television and supporting
furniture.
Educating children about the dangers of climbing on
furniture to reach the television set or its controls.
If your existing television set is being retained and
relocated, the same considerations as above should
be applied.
– – – – – – – – – – – –
Apparatus connected to the protective earthing of the
building installation through the MAINS connection or
through other apparatus with a connection to protective
earthing – and to a television distribution system using
hazard. Connection to a television distribution system
has therefore to be provided through a device providing
electrical isolation below a certain frequency range
(galvanic isolator)
WALL MOUNTING WARNINGS
Read the instructions before mounting your TV on
the wall.
The wall mount kit is optional. You can obtain from
your local dealer, if not supplied with your TV.
Do not install the TV on a ceiling or on an inclined
wall.
accessories.
the TV from fall. Do not over-tighten the screws.
Figures and illustrations in this user manual are
actual product appearance. Product design and

English - 4 -
Introduction
Thank you for choosing our product. You’ll soon be
enjoying your new TV. Please read these instructions
carefully. They contain important information which will
help you get the best from your TV and ensure safe
and correct installation and operation.
Accessories Included
Remote Control
Batteries: 2 x AAA
Instruction Book
Features
Remote controlled colour TV
AndroidTM operating system
Google Cast
Voice Search
Fully integrated digital terrestrial/cable/satellite TV
(DVB-T-T2/C/S2)
HDMI inputs to connect other devices with HDMI
sockets (HDMI 2.0 support)
USB input
Stereo sound system
Teletext
Headphone connection
Automatic programming system
Manual tuning
Sleep timer
VGA input
Ethernet (LAN) for Internet connectivity and service
802.11 a/b/g/n/ac built in WLAN Support
HbbTV
Ultra HD (UHD)
known as 4K) which provides resolution of 3840 x
2160 (4K:2K). It equals 4 times the resolution of Full
HD TV by doubling the pixel count of the Full HD TV
both horizontally and vertically. Ultra HD contents are
supported from HDMI, USB inputs and over DVB-T2
and DVB-S2 broadcasts.
High Dynamic Range (HDR) / Hybrid Log-
Gamma (HLG)
Using this feature the TV can reproduce greater
dynamic range of luminosity by capturing and then
promises better picture quality thanks to brighter, more
realistic highlights, more realistic colour and other
intended to achieve, showing the hidden areas of
dark shadows and sunlight with full clarity, colour
and detail. HDR/HLG contents are supported via
native and market applications, HDMI, USB inputs
and over DVB-S broadcasts. Set the related HDMI
source input as EDID 2.0 or Auto EDID from the
HDMI EDID Version option in the Settings>Device
Preferences>Inputs menu in order to watch HDR/
HLG content, if the HDR/HLG content is received
through an HDMI input. The source device should
also be at least HDMI 2.0a compatible in this case.
Dolby Vision
Dolby Vision™ delivers a dramatic visual experience,
astonishing brightness, exceptional contrast, and vivid
colour, that brings entertainment to life. It achieves this
stunning image quality by combining HDR and wide
colour gamut imaging technologies. By increasing the
brightness of the original signal and using a higher
dynamic colour and contrast range, Dolby Vision
presents amazing true-to-life images with stunning
detail that other post-processing technologies in the
TV aren’t able to produce. Dolby Vision is supported
via native and market applications, HDMI and USB
inputs. Set the related HDMI source input as EDID
2.0 or Auto EDID from the HDMI EDID Version option
in the Settings>Device Preferences>Inputs menu
in order to watch Dolby Vision content, if the Dolby
Vision content is received through an HDMI input.
The source device should also be at least HDMI 2.0a
compatible in this case. In the Settings>Device Pref-
erences>Picture>Picture Mode
picture modes will be available if Dolby Vision content
is detected: Dolby Vision Bright and Dolby Vision
Dark. Both allow the user to experience the content
ambient lighting conditions. While watching Dolby
Vision Content via an internet streaming application
you will not be able to access the Picture menu and
set the Picture Mode.

English - 5 -
Stand Installation &
Wall Mounting
Assembling / Removing the pedestal
Preparations
Take out the pedestal(s) and the TV from the packing
case and put the TV onto a work table with the screen
panel down on the clean and soft cloth (blanket, etc.)
Do not hold the screen panel part.
Make sure not to scratch or break the TV.
Assembling the pedestal
1. Place the stand(s) on the stand mounting
pattern(s) on the rear side of the TV.
2. Insert the screws provided and tighten them gently
Removing the pedestal from the TV
Be sure to remove the pedestal in the following way
when using the wall-hanging bracket or repacking
the TV.
Put the TV onto a work table with the screen panel
down on the clean and soft cloth. Leave the stand(s)
protruding over the edge of the surface.
Remove the stand(s).
When using the wall mount bracket
Your TV is also prepared for a VESA-compliant wall
mount bracket. If it is not supplied with your TV, contact
your local dealer to purchase the recommended wall-
hanging bracket.
Holes and measurements for wall mount bracket
installation;
W
H
VESA WALL MOUNT MEASUREMENTS
Hole Paern
Sizes (mm)
W H
600 400
Screw Sizes
Length (X) min. (mm) 15
max. (mm) 20
Thread (Y) M8
Antenna Connection
Connect the aerial or cable TV plug to the AERIAL
INPUT (ANT-TV) socket or satellite plug to the
SATELLITE INPUT (ANT SAT) socket located on the
rear side of the TV.
Rear side of the TV
1
2
ANT SAT
ANT-TV
1. Satellite
2. Aerial or cable
If you want to connect a device to the TV,
make sure that both the TV and the device
are turned off before making any
connection. After the connection is done,
you can turn on the units and use them.

English - 6 -
Other Connections
any connection. After the connection is done, you can turn on the units and use them.
Connector Type Cables Device
COMPONENT Component
Video
Connection
(back) VGA to Component Connection Cable
HDMI
Connection
(back&side)
VGA
Connection
(back)
AUDIO IN
VGA/
Component
Audio
Connection
(back) Component/VGA Audio Cable
SPDIF SPDIF
(Optical Out)
Connection
(back)
COMPOSITE Composite
(Audio/Video)
Connection
(back) Audio Video Cable
HEADPHONE Headphone
Connection
(side)
USB
Connection
(side)
CI
Connection
(side)
CAM
module
LAN Ethernet
Connection
(back) LAN / Ethernet Cable
To enable VGA/Component audio,
you will need to use the back audio
inputs with a VGA/Component audio
cable for audio connection. When
using the wall mounting kit (contact
your dealer to purchase one, if not
supplied), we recommend that you
plug all your cables into the back of
the TV before mounting on the wall.
Insert or remove the CI module only
when the TV is SWITCHED OFF. You
should refer to the module instruction
manual for details of the settings. The
USB inputs on the TV support devices
up to 500mA. Connecting devices that
have current value above 500mA may
damage your TV. When connecting
equipment using a HDMI cable to your
TV, to guarantee sucient immunity
against parasitic frequency radiation
and trouble-free transmission of high
denition signals, such as 4K content,
you have to use a high speed shielded
(high grade) HDMI cable with ferrites.

English - 7 -
Turning On/Off the TV
Connect power
IMPORTANT: The TV set is designed to operate on
220-240V AC, 50 Hz socket.
After unpacking, allow the TV set to reach the ambient
room temperature before you connect the set to the
mains.
Plug the power cable to the mains socket outlet. The
TV will switch on automatically.
To switch on the TV from standby
If the TV is in standby mode the standby LED lights
up. To switch on the TV from standby mode either:
Press the Standby button on the remote control.
Press the centre of the control switch on the TV in.
The TV will then switch on.
To switch the TV into standby
The TV cannot be switched into standby mode via
control switch. Press and hold the Standby button on
the remote control. dialogue will appear on
the screen. Highlight OK and press the OK button. The
TV will switch into standby mode.
To power down the TV completely, unplug the power
cord from the mains socket.
Quick Standby Mode
In order to switch the TV into quick standby mode
either;
Press the Standby button on the remote.
Press again to go back to operating mode.
Press the centre of the control switch on the TV in
and hold it down for a few seconds.
Press again to go back to operating mode.
TV Control & Operation
The control switch allows you to control the Programme
and Quick Standby-On functions of the TV.
Note: The position of the control switch may dier depending
on the model.
To change channel in Live TV mode: Press the
centre of the control switch in, the information banner
will appear on the screen. Scroll through the stored
channels by pushing the control switch up or down.
Press the centre
of the control switch in and hold it down for a few
seconds, the TV will turn into quick standby mode.
The TV cannot be
switched into standby mode via control switch.
To turn on the TV: Press the centre of the control
switch in, the TV will turn on.
Note: Live TV settings menu OSD in Live TV mode cannot be
displayed via control switch.
Operation with the Remote Control
Press the Menu button on your remote control to
display Live TV settings menu when in Live TV mode.
Press Home button to display or return to the Home
Screen of the Android TV. Use the directional buttons
to move the focus, proceed, adjust some settings and
press OK to make selections in order to make changes,
set your preferences, enter a sub-menu, launch an
application etc. Press Return/Back to return to the
previous menu screen.
Input Selection
Once you have connected external systems to your
Source button on your remote control consecutively
or use the directional buttons and then press the OK
mode. Or enter the Inputs menu on the Home Screen,
select the desired source from the list and press OK.
Changing Channels and Volume
You can adjust the volume by using the Volume
+/- buttons and change the channel in Live TV mode
by using the Programme +/- buttons on the remote.

English - 8 -
Remote Control
1
2
3
4
5
6
7
8
9
10
11
12
13
14
15 16
17
18
19
20
21
22
23
24
25
26
1. Standby: Quick Standby / Stanby / On
2. Numeric buttons: Switches the channel in Live
TV mode, enters a number or a letter in the text
box on the screen
3. Language: Switches among sound modes
(analogue TV), displays and changes audio
language (digital TV, where available)
4. Volume +/-
5. Microphone: Activates the microphone on the
remote
6. Home: Opens the Home Screen
7. Guide: Displays the electronic programme guide
in Live TV mode
8. OK:
views channel list (in Live TV mode)
9. Back/Return: Returns to previous menu screen,
goes one step back, closes open windows, closes
teletext (in Live TV-Teletext mode)
10.
11. Menu: Displays Live TV Settings menu in Live
TV mode
12. Coloured Buttons:Follow the on-screen
instructions for coloured button functions
13. Rewind: Moves frames backwards in media such
as movies
14. Stop: Stops the media being played
15. Record: Records programmes in Live TV mode
16. Pause: Pauses the media being played,
starts timeshift recording in Live TV mode
Play: Starts to play selected media
17. Text: Opens and closes teletext (where available
in Live TV mode)
18. Fast forward: Moves frames forward in media
such as movies
19. Source: Shows all available broadcast and
content sources in Live TV mode
20. YouTube: Launches the YouTube application
21. Exit: Closes and exits from displayed Live TV
Settings menus, closes the Home Screen
22. Directional buttons: Navigates menus, setting
options, moves the focus or cursor etc., sets
record time and displays the subpages in Live
TV-Teletext mode when pressed Right or Left.
Follow the on-screen instructions.
23. Info: Displays information about on-screen
content
24. Programme +/-: Increases/Decreases channel
number in Live TV mode
25. Mute:
26. Subtitles: Turns subtitles on and off (where
available)

English - 9 -
Standby Button
Press and hold the Standby button on the remote
control. dialogue will appear on the screen.
Highlight OK and press the OK button. The TV will
to switch the TV into quick standby mode or to switch
on the TV when in quick standby or standby mode.
Inserting the Batteries into the Remote
Remove the screw that secure the battery compartment
the cover gently. Insert two 1.5V - size AAA batteries.
Make sure the (+) and (-) signs match (observe correct
polarity). Do not mix old and new batteries. Replace
only with same or equivalent type. Place the cover back
on. Then screw the cover back on again.
To pair remote with the TV
accessories will be performed before the initial setup
starts. You will need to pair your remote control with
your TV at this point.
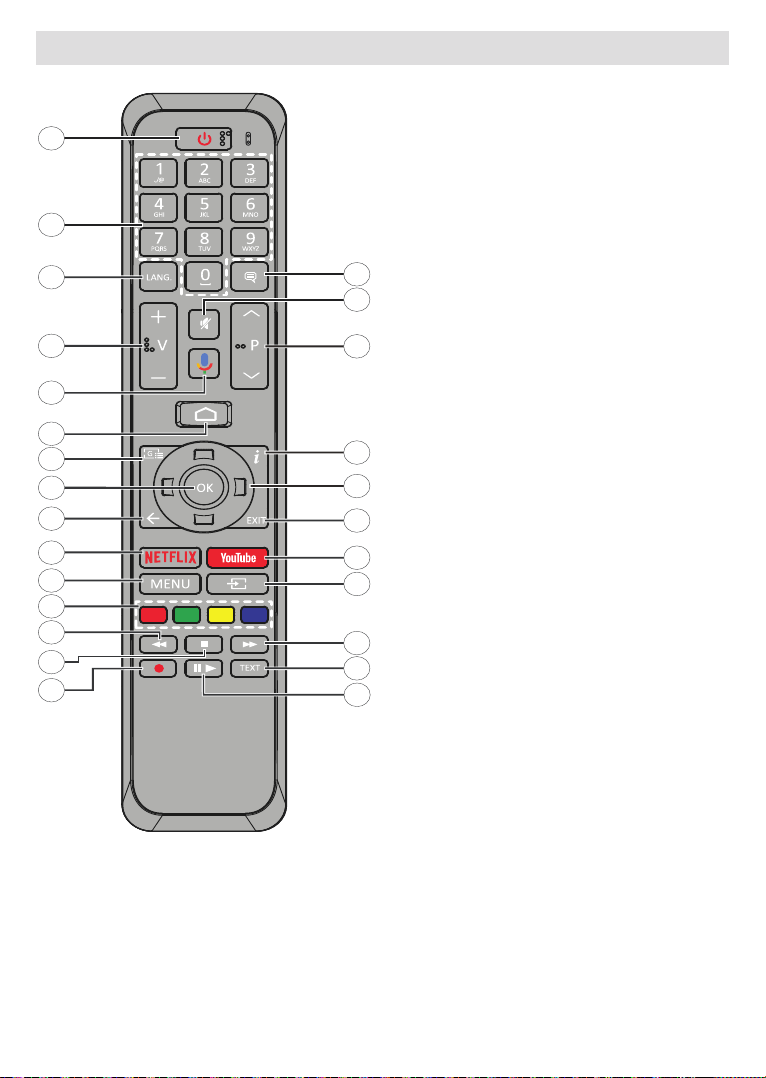
Press and hold the Source button on the remote for
about 5 seconds, the LED on the remote will light up.
Then release the Source button, the LED will start
to blink. That means the remote is in pairing mode.
name of your remote and press OK when it appears
on the TV screen.
When the paring process was successful, the LED
the remote will enter to sleep mode after 30 seconds.
Initial Setup Wizard
Note: Follow the on-screen instructions to complete the initial
setup process. Use the directional buttons and the OK button
on the remote to select, set, conrm and proceed.
-
cessories will be performed before the initial setup
starts. Follow the on-screen informations to pair your
remote control and other wireless accessories with
your TV. Press Exit to end adding accessories and
start the setup.
3. Welcome Message and Language Selection
“Welcome” message will be displayed along with
the language selection options listed on the screen.
Select the desired language from the list and press
OK to continue.
4. Quick Setup
If you didn’t priorly connect your TV to the internet via
Ethernet a screen will be displayed where you can
transfer your Android phone’s WLAN network and
Google Account to your TV. Highlight Continue and
press OK to proceed. Follow the on-screen instructions
on your TV and your phone to complete the process.
You can also skip this step by selecting Skip option.
Some steps may be skipped depending on the settings
made in this step.
If you did priorly connect your TV to the internet via
Ethernet a message will be displayed stating that you
are connected. You can choose to continue with wired
connection or change the network. Highlight Change
network and press OK if you want to use wireless
connection instead of wired connection.
5. Network Connection
You will be directed to the next step automatically, if you
connect your TV to internet via Ethernet at this point. If
not, available wireless networks will be searched and
listed on the next screen. Select your WLAN network
from the list and press OK to connect. Enter the
password using the virtual keyboard if the network is
password protected. Select the Other network option
from the list, if the network that you want to connect
has hidden SSID.
If you prefer not to connect to the internet at this point
you can skip this step by selecting Skip option. You
can connect to internet later using the Network &
Internet menu options in the Settings menu from
the Home Screen or from the TV options menu in
Live TV mode.
This step will be skipped if internet connection has
been established in the previous step.
6. Sign in to your Google account
If connection succeeds, you can sign in to your Google
account on the next screen. You need to be signed in
to a Google account in order to use Google services.
This step will be skipped if no internet connection has
been established in the previous step or if you already
signed in to your Google account in Quick Setup step.
By signing in, you will be able to discover new
apps for videos, music and games on Google Play;
get personalised recommendations from apps like
YouTube; buy or rent the newest movies and shows on
Google Play Movies & TV; access your entertainment,
control your media and ask about anything with Google
Assistant. Highlight Sign In and press OK to proceed.
Sign-in options are as following:
Use your phone or computer: You can use a
browser on your phone or computer to sign in.
Highlight this option and press OK button. A code
will be displayed on the TV screen. Make sure your
phone or computer is on the same network as your
TV. Open the given website (androidtv.com/setup,
follow on-screen instructions for the up-to-date
website url) in your phone’s or computer’s browser
and enter the code you see on your TV screen into
on your device and complete the process.
Use your remote: Using this option you can sign in to
your Google account by entering your e-mail address
or phone number and your password.

English - 10 -
If you prefer not to sign in to your Google account at this
point you can skip this step by selecting Skip option.
7. Terms of Service
Terms of Service screen will be displayed next. By
continuing, you will agree to the Google Terms of
Service, the Google Privacy Policy and the Google
Play Terms of Service. Highlight Accept and press
OK
also view Terms of Service, Privacy Policy and
Play Terms of Service on this screen. To display the
content an internet connection is needed. A message
will be displayed mentioning the web site address on
which these informations can also be viewed, in case
internet access is not available.
8. Location
On the next screen, you can allow or disallow Google
and third party apps to use your TV’s location informa-
tion. Select YesOK. To skip this
No and proceed by
pressing the OK button. You can change this setting
later using the Settings>Device Preferences>Loca-
tion menu on the Home Screen.
9. Help improve Android
Automatically send diagnostic information to Google,
like crash reports and usage data from your device
and apps. This information won't be used to identify
you. Select YesOK. To skip this
No and proceed by
pressing the OK button. You can change this setting
later using the Settings>Device Preferences>Usage
& Diagnostics menu on the Home Screen.
Informations on Google services and some features of
your TV will be displayed next. You can turn on person-
al results for Assistant by choosing the related option
when prompted. Press OK consecutively to proceed.
10. Country
In the next step select your Country from the list and
press OK to continue.
11. Password
Depending on the country selection you made in the
(PIN) at this point. Press OK to proceed. The selected
PIN cannot be 0000. This PIN will be required in order
to access some menus, contents or to release locked
channels, sources etc. You will have to enter it if you
are asked to enter a PIN for any menu operation later.
12. Select TV Mode
In the following step of the initial setup, you can set
the TV’s operation mode either as Home or as Retail.
Retail
environment. This option is intended only for store
use. It is recommended to select Home for home use.
13. Tuner Mode
Note: If you don’t want to perform a tuner scan, select one of
the available options anyway. You can skip the scan at some
later stage of the installation wizard. If you skip this step you
can perform a channel search later using the related Channels
menu options.
The next step is the selection of the tuner mode. Select
your tuner preference to install channels for Live TV
function. Antenna, Cable and Satellite options are
available. Highlight the option that corresponds to
your environment and press OK or Right directional
button to proceed.
Antenna
If Antenna option is selected, the TV will search for
digital terrestrial and analogue broadcasts. On the next
screen highlight Scan option and press OK to start
the search or select Skip Scan to continue without
performing a search.
Cable
If Cable option is selected, the TV will search for
digital cable and analogue broadcasts. If any, available
operator options will be listed on the Select Operator
screen. Otherwise this step will be skipped. You
can select only one operator from the list. Highlight
the desired operator and press OK or the Right
directional button to proceed. On the next screen
select Scan option to start a search or select Skip
Scan to continue without performing a search. If Scan
next. Scan Mode, Frequency(KHz), Modulation,
Symbol Rate(Ksym/s), Network ID options may need
to be set. To perform a full scan set the Scan Mode as
Full/Advance if available. Depending on the selected
operator and/or Scan Mode some options may not be
available to be set.
Once you are done with setting available options,
press the Right directional button to proceed. The TV
will start to search available broadcasts.
Satellite
If Satellite option is selected, Satellite Type screen
will be displayed next. Preferred Satellite and General
Satellite options will be available. Select one and press
OK to proceed.
If Preferred Satellite option is selected, next screen
will be Select Operator screen. You can select only
one operator from the list. Highlight the desired
operator and press OK or the Right directional button
to proceed. Some of the following options may be
preset depending on the selected operator in this
step. Check the parameters before proceeding and
adjust if necessary.
screen will be displayed
next. First Antenna type should be set. Universal,
Single Cable and Jess Singlecable options are
available. If you set the antenna type as Universal,

English - 11 -
press the Right directional button to proceed to the
next step. If the antenna type is set as Single Cable or
Jess Singlecable,there will be three more additional
options on the screen:
Tuner, Band frequency and . User
option will be available if the Band frequency
is set as . Set these options if available
and press the Right directional button to proceed.
After the parameters on the
Setting screen are configured according to your
environment the next step may be Select Satellite
depending on the selected antenna type and operator
in the previous steps. Highlight the desired satellite
option and press OK to set the parameters. The
Satellite Status
set as On
satellite and to enable scan this option should be set
as OnBack button and select next satellite
changes, press the Right directional button to proceed.
Channel Scan screen will be displayed next. Select
Scan and press OK or the Right directional button
Skip Scan to proceed without performing a scan and
complete the initial setup.
screen will be displayed next
if Scan option is selected. Following options will be
available: Scan Mode and Channels. You can choose
to perform a full scan or a network scan. Set the
Scan Mode accordingly. If you are going to perfrom a
network scan, make sure that you have adjusted the
Frequency, Symbol Rate (Ksym/s) and Polarization
parameters under the Transponder option accurately
on the Select Satellite screen. You may not be able
to change the Scan mode setting depending on the
previous selections. If the Channels option is set
as Free encrypted channels will not be installed.
Additional options may also be available depending
according to your preferences. Once you are done
with setting the available options, press the Right
directional button to start scan while Scan Mode or
Channels is highlighted. While the search continues
you can press the Back button to cancel the search.
The channels that have already been found will be
stored in the channel list.
When the initial setup is completed “Complete”
message will be displayed. Press OK
setup.
A disclaimer of liability will be displayed on the screen.
You can use Up and Down directional buttons to scroll
through and read the entire text. Highlight Accept and
press OK to proceed.
Home Screen will be displayed. You can highlight Live
TV app and press OK to switch to Live TV mode and
watch TV channels.
Home Screen
be connected to the Internet. Connect the TV to a
home network with a high-speed Internet connection.
You can connect your TV wirelessly or wired to your
modem/router. Refer to the Network & Internet
and Connecting to the Internet sections for further
information on how to connect your TV to the internet.
The Home menu is the centre of your TV. Press the
Home button to display Home Screen. From the
Home menu you can start any application, switch to a
TV channel, watch a movie or switch to a connected
device. Depending on your TV setup and your country
selection in the initial setup the Home menu may
The available options of the Home Screen are posi-
tioned in rows. To navigate through the Home Screen
options use the directional buttons on the remote.
Apps, YouTube, Google Play Movies & TV, Google
Play Music and Google Play related rows and rows of
the applications you have installed might be available.
Select a row then move the focus to the desired item
in the row. Press OK button to make a selection or to
enter a sub-menu.
On the upper left of the screen, search tools will be
located. You can choose either to type a word to start
a search via the virtual keyboard or try voice search
option if your remote has a built-in microphone.
Move the focus to the desired option and press OK
to proceed.
On the upper right of the screen, , Inputs,
Networks & Internet (will be named as Connected or
Not Connected according to the current connection
status) options and the current time will be displayed.
using the Date & time menu options from the
Settings>Device Preferences menu.
First row will be the Apps row. Live TV and Multi
Media Player apps will be available alongside with
other apps. Highlight Live TV and press OK to switch
to Live TV mode. If the source was set to an option
other than TV previously, press the Source button and
set as TV in order to watch live TV channels. Highlight
Live TV and press OK to browse the connected USB
devices or media servers and play/display the installed
through the speakers of the TV or through the speaker
sound output preference from the Speaker option in
the Settings>Device Preferences>Sound menu.

English - 12 -
Live TV Mode Menu Content
the Menu button on the remote to see Live TV menu
options. To switch to Live TV mode you can either press
the Exit button or highlight the Live TV app from the
Apps row and press OK on the Home Screen.
Channels
Add to My Favorites: Add the channel that is currently
being watched to the previously selected favourite list.
Program Guide: Open the electronic programme
guide. Refer to the Programme Guide section for
detailed information.
New Channels Available: Start a search for new
channels. Select the channel source application
or tuner. Then make the settings according to your
environment and preferences if necessary. You
can use the Channel menu options to search for
braodcast channels. Refer to the Channel section
for more information. When complete highlight Done
and press OK.
TV Options
Source: Display the list of input sources. Select the
desired one and press OK to switch to that source.
Picture Mode: Set the picture mode to suit your
preference or requirements. Picture mode can be
set to one of these options: User, Standard, Vivid,
Sport, Movie and Game. You can use User mode to
create customised settings. Go to Settings>Device
Preferences>Picture for detailed setting options.
Display Mode: Set the aspect ratio of the screen.
your preference.
Speakers: To hear the TV audio from the connected
compatible audio device set as External Audio
System. Set as TV Speakers to use the speakers of
your TV for sound output.
Power
Sleep Timer:
want your TV to enter sleep mode automatically.
OK to turn
the TV to turn the screen on again. Note that you
can not turn the screen on via the Volume +/-,
Mute and Standby buttons. These buttons will
function normally.
Set the behaviour of
the TV, when no signal is detected from the currently
set input source.
CI Card: Display available menu options of the CI card
in use. This item may not be available depending on
the input source setting.
Manual OAD Download:
through the DTV signal manually. This item may not
be available depending on the input source setting.
Advanced Options
Soundtracks: Set your language preference
for soundtracks. This item may not be available
depending on the input source setting.
Blue Mute:
your preference. When turned on, blue background
will be displayed on the screen when no signal is
available.
Default Channel: Set your default startup channel
preference. When the Select Mode is set as
User Select, Show Channels option will become
available. Highlight and press OK to see channel
list. Highlight a channel and press OK to make a
selection. Selected channel will be displayed, every
time the TV is turned back on from quick standby
mode. If the Select Mode is set as Last Status, the
last watched channel will be displayed.
Interaction Channel: Turn the Interaction Channel
MHEG PIN Protection: Turn the MHEG PIN
disables access some of the MHEG applications.
Disabled applications can be released by entering
the right PIN.
HBBTV Settings
HBBTV Support: Turn the HBBTV function on
Do Not Track: Set your preference regarding the
tracking behaviour for HBBTV services.
Cookie Settings: Set your cookie setting preference
for HBBTV services.
Persistent Storage: Turn the Persistent Storage
Block Tracking Sites: Turn the Block Tracking
Device ID:
Reset Device ID: Reset the device ID for HBBTV
on dialogue will be displayed.
Press OK to proceed, Back to cancel.
Subtitle
Subtitle Tracks: Set your subtitle track preference,
if any available.
Analog Subtitle: Set this option as , On or Mute.
If Mute option is selected, the analogue subtitle will

English - 13 -
be displayed on the screen but the speakers will be
muted simultaneously.
Digital Subtitle Language: Set one of the listed
preference.
2nd Digital Subtitle Language: Set one of the
listed language options as second digital subtitle
language preference. If the selected language in the
Digital Subtitle Language option is not available, the
subtitles will be displayed in this language.
Subtitle Type: Set this option as Normal or Hearing
Impaired. If Hearing Impaired option is selected,
it provides subtitle services to deaf and hard of
hearing viewers with additional descriptions.
Teletext
Digital Teletext Language: Set the teletext
language for digital broadcasts.
Decoding Page Language: Set the decoding
page language for teletext display.
OAD:
through the DTV signal. Set the Auto Download
option as Yes
upgrade function.
BISS Key: “Click To Add Biss Key” message will
be displayed. Press OK button to add a biss key.
Frequency, Symbol Rate (KSym/s), Polarization,
Program ID and CW Key parameters will be
available to be set. Once you are done with the
settings highlight Save Key and press OK to
save and add the biss key. This option will not be
available if the Channel Installation Mode under
the Settings>Channel menu is not set as Preferred
Satellite or General Satellite.
Auto Sleep:
want your TV to enter sleep mode automatically. 4
Hours, 6 Hours and 8 Hours options are available.
Set as Never to disable.
System Information: Display detailed system
information on the current channel such as Signal
Level, Signal Quality, Frequency etc.
Version Info: Display system information such as
Model Name, Version and Serial Number.
Settings: Refer to Settings section for detailed
information.
Record
Record List: The recordings will be displayed if any
available. Highlight a recording of your choice and
press the Yellow button to delete it or press the Blue
button to view detailed information. You can use Red
and Green buttons to scroll the page up and down.
Device Info: Connected USB storage devices will
be displayed. Highlight the device of your choice and
press OK to see available options.
Set TimeShift: Tag the selected USB storage
device or a partition on it for time shift recording.
Set PVR: Tag the selected USB storage device or
a partition on it for PVR.
Format: Format the selected USB storage
device. Refer to USB Recording section for more
information
Speed Test: Start a speed test for the selected USB
storage device. The test result will be displayed
when completed.
Schedule List: Add reminders or record timers using
the Schedule List menu.
Time Shift Mode: Enable or disable timeshift recording
feature. Refer to USB Recording section for more
information.
Settings
You can access the Settings menu from the Home
Screen or from the TV options menu in Live TV mode.
Network & Internet
the options of this menu. You can also highlight the
Connected/Not Connected icon on the Home screen
and press OK to access this menu.
Wi-Fi: Turn the wireless LAN (WLAN) function on
Available networks
When the WLAN function is turned on, available
wireless networks will be listed. Highlight See all and
press OK to see all networks. Select one and press OK
to connect. You may be asked to enter a password to
connect to the selected network, in case the network
is password protected. Additionally you can add new
networks by using the related options.
Other options
Add new network: Add networks with hidden SSID’s.
Scanning always available: You can let the location
service and other apps scan for networks, even when
OK to turn it on
Wow:
This function allows you to turn on or awaken your
TV via network.
Wol:
This function allows you to turn on or awaken your TV
via wireless network.
Ethernet
Connected/Not connected: Displays the status of
the internet connection via Ethernet, IP and MAC
addresses.

English - 14 -
Proxy settings: Set a HTTP proxy for browser manu-
ally. This proxy may not be used by other apps.
IP settings:
Channel
Channels
Options of this menu may change or become inac-
tive depending on the Channel Installation Mode
selection.
Channel Installation Mode - Antenna
Channel Scan: Start a scan for analogue and digital
channels. You can press the Back button to cancel the
scan. The channels that have already been found will
be stored in the channel list.
Update Scan: Search for updates. Previously added
channels will not be deleted, but any newly found
channels will be stored in the channel list.
Analog Manual Scan: Start a manual scan for
analogue channels. Enter the Start Frequency and
then select Scan Up or Scan Down. When a channel
is found the scan will be completed and the found
channel will be stored in the channel list.
Single RF Scan: Select the RF Channel by using
the Right/Left directional buttons. Signal Level and
Signal Quality of the selected channel will be shown.
Press OK to start scan on the selected RF channel.
The found channels will be stored in the channel list.
Manual Service Update: Start a service update
manually.
LCN: Set your preference for LCN. LCN is the Logical
Channel Number system that organizes available
broadcasts in accordance with a recognizable channel
number sequence (if available).
Channel Scan Type: Set your scan type preference.
Channel Store Type: Set your store type preference.
Favorite Network Select: Select your favourite net-
work. This menu option will be active, if more than only
one network is available.
Channel Skip: Set channels to be skipped when
switching the channels via Programme +/- buttons
on the remote. Highlight the desired channel/s on the
list and press OK to select/unselect.
Channel Sort: Replace the positions of the two
selected channels in the channel list. Highlight the
desired channels on the list and press OK to select.
When the second channel is selected, the position of
this channel will be replaced with the position of the
Channel Move: Move a channel to the position of
another channel. Highlight the channel you want to
move and press OK to select. Then do the same for a
second channel. When the second channel is selected,
of that channel.
Channel Edit: Edit channels in the channel list. Edit
the name and channel number of the selected channel
and display Network Name, Frequency, Color Sys-
tem and Sound System informations related to that
channel if available. Depending on the channel other
options may also be editable. You can press the Blue
button to delete the highlighted channel.
Analog Channel Fine-tune: Fine-tune an analogue
channel. A list of available analogue channels will be
displayed. Select the desired one from the list and
press OK button. Then change the frequency of the
channel by pressing Left/Right directional buttons.
Press OK to store the new frequency for that channel.
Press Back to cancel. This item may not be visible,
depending on whether or not the last watched channel
was analogue.
Clear Channel List: Delete all channels stored in the
channel list of the selected channel installation mode.
OK and press OK button to proceed. Highlight Cancel
and press OK to cancel.
Channel Installation Mode - Cable
Channel Scan: Start a scan for analogue and digital
cable channels. If available, operator options will be
listed. Select the desired one and press OK. Scan
Mode, Channel Scan Type, Frequency and Network
ID options may be available. The options may vary
depending on the operator and the Scan Mode
selections. Set the Scan Mode as Full if you don’t know
how to set up other options. Highlight Scan and press
OK to start the scan. You can press the Back button to
cancel the scan. The channels that have already been
found will be stored in the channel list.
Single RF Scan: Enter the Frequency value. Signal
Level and Signal Quality of the selected Frequency
will be shown. Highlight the Scan option and press
OK to start scan. The found channels will be stored
in the channel list.
LCN: Set your preference for LCN. LCN is the Logical
Channel Number system that organizes available
broadcasts in accordance with a recognizable channel
number sequence (if available).
Channel Scan Type: Set your scan type preference.
Channel Store Type: Set your store type preference.
Favorite Network Select: Select your favourite net-
work. This menu option will be active, if more than only
one network is available.
Channel Skip: Set channels to be skipped when
switching the channels via Programme +/- buttons
on the remote. Highlight the desired channel/s on the
list and press OK to select/unselect.

English - 15 -
Channel Sort: Replace the positions of the two
selected channels in the channel list. Highlight the
desired channels on the list and press OK to select.
When the second channel is selected, the position of
this channel will be replaced with the position of the
Channel Move: Move a channel to the position of
another channel. Highlight the channel you want to
move and press OK to select. Then do the same for a
second channel. When the second channel is selected,
of that channel.
Channel Edit: Edit channels in the channel list. Edit
the name and channel number of the selected channel
and display Network Name, Frequency, Color Sys-
tem, Sound System, Modulation and Symbol Rate
informations related to that channel. Depending on the
channel other options may also be editable. You can
press the Blue button to delete the highlighted channel.
Analog Channel Fine-tune: Fine-tune an analogue
channel. A list of available analogue channels will be
displayed. Select the desired one from the list and
press OK button. Then change the frequency of the
channel by pressing Left/Right directional buttons.
Press OK to store the new frequency for that channel.
Press Back to cancel. This item may not be visible,
depending on whether or not the last watched channel
was analogue.
Clear Channel List: Delete all channels stored in the
channel list of the selected channel installation mode.
OK and press OK button to proceed. Highlight Cancel
and press OK to cancel.
Channel Installation Mode - Preferred/General
Satellite
Satellite Re-scan: Start a satellite scan beginning
with the operator selection screen for the Preferred
Satellite channel installation mode or with the satellite
selection screen for the General Satellite channel
installation mode. When this scanning option is
available and thus the preferences you made during
the initial setup process may not be changed.
Satellite Add: Add satellite and perform a satellite
scan.
Satellite Update: Search for any updates by repeating
the previous scan with the same settings. You will also
If Channel Installation Mode is set to Preferred
Satellite this option may be named differently
depending on the available services. Highlight the
satellite and press OK
satellite parameters. Press the Right directional button
to proceed.
Satellite Manual Tuning: Start a manual satellite scan.
Favorite Network Select: Select your favourite net-
work. This menu option will be active, if more than only
one network is available.
Channel Skip: Set channels to be skipped when
switching the channels via Program +/- buttons on
the remote. Highlight the desired channel/s on the list
and press OK to select/unselect.
Channel Sort: Replace the positions of the two
selected channels in the channel list. Highlight the
desired channels on the list and press OK to select.
When the second channel is selected, the position of
this channel will be replaced with the position of the
Channel Move: Move a channel to the position of
another channel. Highlight the channel you want to
move and press OK to select. Then do the same for a
second channel. When the second channel is selected,
of that channel.
Channel Edit: Edit channels in the channel list. Edit
the name and channel number of the selected channel
and display Network Name, Frequency, Color Sys-
tem and Sound System informations related to that
channel if available. Depending on the channel other
options may also be editable. You can press the Blue
button to delete the highlighted channel.
Clear Channel List: Delete all channels stored in the
channel list of the selected channel installation mode.
OK and press OK button to proceed. Highlight Cancel
and press OK to cancel.
Note: Some options may not be available and appear as
grayed out depending on the operator selection and operator
related settings.
Channel Installation Mode
Set this option as Antenna, Cable, Preferred Satellite
or General Satellite.
Auto Channel Update
Channel Update Message
This item may not be visible, depending on the Chan-
nel Installation Mode selection.
Parental Controls
(*) To enter this menu PIN should be entered rst. Default
password is set to 1234. If you have dened a new password
after the initial setup process use the password that you have
dened. Some options may not be available or vary depending
on the country selection during the initial setup.
Channels Blocked: Select channel/s to be blocked
from the channel list. Highlight a channel and press
OK to select/unselect. To watch a blocked channel

English - 16 -
Program Restrictions: Block programmes according
to the age rating informations that are being broadcast-
ratings systems, restriction levels and age limits using
the options of this menu.
Inputs Blocked: Prevent access to the selected input
source content. Highlight the desired input option and
press OK to select/unselect. To switch to a blocked
Change PIN: Change the default PIN. Highlight this
option and press OK. You will need to enter the old
-
Audio Channel
Set the audio channel preference, if available. This
item may not be visible, depending on whether or not
the last watched channel was analogue.
Audio Language
language preference. This item may not be visible,
depending on whether or not the last watched channel
was digital.
2nd Audio Language
Set one of the listed language options as second
audio language preference. If in the Audio Language
setting selected language option is not supported, this
language preference will be considered. This item may
not be visible, depending on whether or not the last
watched channel was digital.
Open Source Licenses
Display Open Source Software license information.
Version
Displays system version number.
Accounts & Sign In
Google: This option will be available if you have signed
syncing preferences or remove your registered account
on the TV. Highlight a service listed in the Choose
synced apps section and press OK to enable/disable
data sync. Highlight Sync now and press OK to sync
all enabled services at once.
Add account: Add a new one to available accounts
by signing in to it.
Apps
Using the options of this menu, you can manage the
apps on your TV.
Recently opened apps
You can display recently opened apps. Highlight See
all apps and press OK to see all the apps installed
on your TV. The amount of storage space that they
needed will also be displayed. You can see the version
of the app, open or force to stop the running of the app,
uninstall a downloaded app, see the permissions and
data and cache etc. Highlight an app and press OK to
see available options.
Permissions
Manage the permissions and some other features
of the apps.
App permissions: The apps will be sorted by
permission type categories. You can enable disable
permissions for the apps from within these categories.
Special app access:
and special permissions.
Security & restrictions: Using the options of this
menu;
You can allow or restrict installation of apps from
sources other than the Google Play Store.
Set the TV to disallow or warn before installation of
apps that may cause harm.
Device Preferences
About: Check for system updates, change the device
name, restart the TV and display system informations
such as network addresses, serial numbers, versions
etc. You can also display legal information, manage
advertisings, display your advertising ID, reset it and
your interests.
Netflix ESN: Display your ESN number. ESN
especially to identify your TV.
Date & time: Set the date and time options of your
TV. You can set your TV to automatically update
the time and date data over the network or over the
broadcasts. Set corresponding to your environment
and preference. Disable by setting as if you want
to manually change the date or time. Then set date,
time, time zone and hour format options.
Timer
Power On Time Type: Set your TV to turn on by
itself. Set this option as On or Once to enable a
power on timer to be set, set as to disable. If
set as Once the TV will turn on only once at the
Auto Power On Time option below.
Auto Power On Time: Available if the Power On
Time Type is enabled. Set the desired time for your
TV to come on from standby using the directional
buttons and press OK to save the new set time.
itself. Set this option as On or Once to enable a
to disable. If

English - 17 -
set as Once
option below.
Available if the
Time Type is enabled. Set the desired time for your
TV to go to standby using the directional buttons and
press OK to save the new set time.
Language: Set your language preference.
Keyboard: Select your keyboard type and manage
keyboard settings.
Inputs: Show or hide an input terminal, change the
for HDMI CEC(Consumer Electronic Control) function.
Power
Sleep Timer:
want your TV to enter sleep mode automatically.
OK to
or on the TV to turn the screen on again. Note that
you can not turn the screen on via the Volume +/-,
Mute and Standby buttons. These buttons will
function normally.
to disable.
Set the behaviour of
the TV, when no signal is detected from the currently
set input source.
to disable.
Picture
Picture Mode: Set the picture mode to suit your
preference or requirements. Picture mode can be
set to one of these options: User, Standard, Vivid,
Sport, Movie and Game. You can use User mode
to create customised settings.
Dolby Vision Modes: If Dolby Vision content is detected
Dolby Vision Dark and Dolby Vision Bright picture mode
options will be available instead of other picture modes.
Brightness, Contrast, Saturation, HUE,Sharp-
ness settings will be adjusted according to the
selected picture mode. If one of these settings is
changed manually, Picture Mode option will be
changed to User, if not already set as User.
appearance preference for Dolby Vision content.
When turned on, Dolby Vision logo will be displayed
on the lower right side of the screen when Dolby
Vision content is detected.
Auto Backlight: Set your auto backlight preference.
, Low, Middle and Eco options will be available.
Set as to disable.
Backlight:
manually. This item will not be available if the Auto
Backlight is not set as .
Brightness:
screen.
Contrast:
Saturation:
screen.
HUE:
Sharpness: Adjust the sharpness value for the
objects displayed on the screen.
Gamma: Set your gamma preference. Dark, Middle
and Bright options will be available.
Color Temperature: Set your colour temperature
preference. User, Cool, Standard and Warm
options will be available. Set as User to adjust red,
green and blue gain values manually. If one of these
values is changed manually, Color Temperature
option will be changed to User, if not already set
as User.
Picture Format: Set the aspect ratio of the screen.
your preference.
HDR:
Advanced Video
DNR: Dynamic Noise Reduction (DNR) is the
process of removing noise from digital or analogue
signal. Set your DNR preference as Low, Medi-
um, Strong, Auto .
MPEG NR: MPEG Noise Reduction cleans up
block noise around outlines and noise on the back-
ground. Set your MPEG NR preference as Low,
Medium, Strong.
Adaptive Luma Control: Adaptive Luma control
adjusts contrast settings globally according to
content histogram in order to provide deeper black
and brighter white perception. Set your Adaptive
Luma Control preference as Low, Medium,
Strong.
Local Contrast Control: Local contrast control
provides ability to apply independent contrast set-
details and provides better contrast perception.
It makes higher depth impression by enhancing
dark and bright areas without any detail loss. Set
your Local Contrast Control preference as Low,
Medium, High.
DI Film Mode: It is the function for 3:2 or 2:2
or judder) which are caused by these pull down
methods. Set your DI Film Mode preference as
Auto or . This item
will not be available if Game Mode or PC Mode
is turned on.

English - 18 -
Blue Stretch: Human eye perceives cooler whites
as brighter white, Blue Stretch feature changes
White balance of mid-high grey levels to cooler
colour temperature. Turn the Blue Stretch function
Game Mode: Game mode is the mode which cuts
down some of the picture processing algorithms
to keep up with video games that have fast frame
rates.
PC Mode: PC Mode is the mode which cuts down
some of the picture processing algorithms to keep
signal type as it is. It can be usable especially for
RGB inputs.
HDMI RGB Range: This setting should be ad-
justed according to input RGB signal range on
HDMI source. It can be limited range (16-235)
or full range (0-255). Set your HDMI RGB range
preference. Auto, Full and Limit options will be
available. This item will not be available, if the
input source is not set as HDMI.
Color Tuner: Colour saturation, hue, brightness
can be adjustable for red, green, blue, cyan, ma-
more vivid or more natural image. Set the HUE,
Saturation, Brightness, and Gain values
manually. Highlight Enable and press OK to turn
this function on.
11 Point White Balance Correction: White bal-
ance feature calibrates TV’s colour temperature in
detailed grey levels. By visually or measurement,
grey scale uniformity can be improved. Adjust the
strength of the Red, Green, Blue colours and Gain
value manually. Highlight Enable and press OK to
turn this function on.
Reset to Default: Reset the video settings to factory
default settings.
Note: Depending on the currently set input source some menu
options may not be available.
Sound
Sound Style: For easy sound adjustment, you
can select a preset setting. User, Standard,
Vivid, Sports, Movie, Music or News options
will be available. Sound settings will be adjusted
according to the selected sound style. Some other
sound options may become unavailable depending
on the selection.
Balance: Adjust the left and right volume balance
for speakers and headphones.
Sound Surround: With Sound Surround, you can
enrich (expand and deepen) the sound quality of the
OK.
Equalizer Detail: Adjust the equalizer values ac-
cording to your preferences.
Speakers: To hear the TV audio from the connected
compatible audio device set as External Audio
System. Set as TV Speakers to use the speakers
of your TV for sound output.
Digital Output: Set the digital sound output prefer-
ence. Auto, Bypass, PCM, Dolby Digital Plus and
Dolby Digital options will be available. Highlight the
option you prefer and press OK to set.
SPDIF Delay: Adjust the SPDIF delay value.
Auto Volume Control: With Auto Volume Control,
you can set the TV to automatically level out sudden
adverts or when you are switching channels. Turn
OK.
Downmix Mode: Press OK to see the options and
set. Stereo and Surround options will be available.
Highlight the option you prefer and press OK to set.
Dolby Audio Processing: With Dolby Audio Pro-
cessing, you can improve the sound quality of your
TV. Press OK to see the options and set.
Dolby Audio Processing: Highlight this option
and press OK
Sound Mode: If the Dolby Audio Processing
option is turned on Sound Mode option will be
available to set. Highlight the Sound Mode option
and press OK to see the preset sound modes.
Smart, Movie, Music and News options will be
available. Highlight the option you prefer and
press OK to set.
Reset to Default: Resets the sound settings to
factory defaults.
Storage: View the total storage space status of the
TV and connected devices if available or reset the TV
to factory settings. To see detailed information on the
usage details highlight and press OK. There will also
be options for ejecting and formatting the connected
storage devices.
Home screen: Customise your home screen. Select
channels which will be displayed on the home screen.
Organize apps and games, change their order or get
more of them.
Retail mode: Highlight Retail mode and press OK.
Read the description, highlight Continue and press OK
if you want to proceed. Then highlight On to activate
or to deactivate and press OK. In retail mode your
and the supported features will be displayed on the
screen. Once activated, Retail messaging and PQ
Demo settings will become available. Set according
to your preferences. It is recommended not to activate
retail mode for home use.
Google: Select your active account, view permissions,
select which apps to include in search results, activate

English - 19 -
view open source licenses.
Chromecast built-in: View the open source licenses
and version number. By means of built-in chromecast
feature, you can cast the content from your mobile
device straight to your TV. Refer to the Google Cast
section for further information.
Screen saver: Set screensaver and sleep mode
options for your TV. You can choose a screensaver,
set wait time for the screensaver, set when the TV
goes into sleep mode or start the screensaver mode.
Location: You can allow the use of the wireless
connection to estimate the location, see the recent
location requests and allow or restrict the listed apps
to use your location information.
Usage & Diagnostics: Automatically send usage data
and diagnostic information to Google. Set according
to your preference.
Accessibility: Visually Impaired, AC4
Dialogue Enhancement, Captions, Text to speech,
Accessibility shortcut settings and/or turn Audio
Description, Hearing Impaired, High contrast text
Visually Impaired: Digital TV channels can
broadcast special audio commentary describing
on-screen action, body language, expressions and
movements for people with visual disabilities.
Speaker: Turn this option on if you want to hear
the audio commentary through the TV speakers.
Headphone: Turn this option on if you want to
route the sound of the audio commentary to the
TV’s headphone output.
Volume: Adjust the volume level of the audio
commentary.
Pan and Fade: Turn this option on if you want to
hear the audio commentary more clearly, when it
is available through broadcast.
Audio for the Visually Impaired: Set the audio
type for visually impaired. Options will be available
depending on the selected broadcast.
Fader Control: Adjust the volume balance
between the main TV audio (Main) and audio
commentary (AD).
Reset: Reset all TV settings to the factory default.
Highlight Reset and press OK
will be displayed, select Erase everything to proceed
initial setup will start. Select Cancel to exit.
Remote & Accessories
You can use wireless accessories, such as your remote
control, headphones, keyboards or game controllers
with your Android TV. Add devices to use them with
your TV. Select this option and press OK to start
searching available devices in order to pair them with
your TV. If available highlight Add accessory option
and press OK to start the search. Set your device to
pairing mode. Available devices will be recognized and
listed or pairing request will be displayed. Select your
device from the list and press OK or highlight OK and
press OK to start pairing.
Connected devices will also be listed here. To unpair
a device, highlight it and press OK. Then highlight
Unpair option and press OK. Then select OK and
press OK again to unpair the device from the TV. You
can also change the name of an connected device.
Highlight the device and press OK, then highlight
Change name and press OK again. Press OK again
use the virtual keyboard to change the name of the
device.
Channel List
The TV sorts all stored channels in the Channel List.
Press the OK button to open the Channel List in Live
TV mode. You can press the Red button to scroll up
the list page by page, or press the Green button to
scroll down.
channel in the channel list. Press the Yellow button
to display the Select More options. Available options
are Select Type, Sort and Find.
Select Type and press
the OK button. You can select among Digital, Radio,
Free, Encrypted, Analogue and Network options to
Broadcast option to see
all installed channels in the channel list.
To sort the channels highlight Sort and press the OK
button. Select one of the available options and press
OK again. The channels will be sorted according to
your selection.
Find and press the OK
button. Virtual keyboard will be displayed. Enter all or
a portion of the name or number of the channel you
keyboard and press OK. Matching results will be listed.
Note: If any option except Broadcast is selected in the
Select Type menu, you can only scroll through the channels
that are currently listed in the channel list using the Program
+/- buttons on the remote.
Editing the Channels and the Channel List
You can edit the channels and the channel list using
the Channel Skip, Channel Sort, Channel Move
and Channel Edit options under the Settings>Chan-
nel>Channels menu. You can access the Settings
menu from the Home Screen or from the TV options
menu in Live TV mode.
Note: The options Channel Sort,Channel Move and Channel
Edit may not be available and appear as grayed out depending
on the operator selection and operator related settings.

English - 20 -
Managing Favourite Channel Lists
channels. These lists include only the channels that
OK button to display
the channel list. Then press Blue button to access
favourite lists. If one of the lists is being displayed on
the screen you can press the Yellow button to open
the Favorite List Selection menu in order to switch
from one list to another. Select the desired list and
press the OK button. Highlight a channel in the list
and press the OK button to watch.
To add the currently watched channel to one of your
favourite lists select the desired favourite list as
described above and press the Menu button on the
remote. Then enter the Channels menu, highlight Add
to My Favorites option and press OK. The channel will
be added to the selected favourite list. To remove that
channel from the list open the favourite list, highlight
the channel and press Blue button. In this way only the
currently watched channel can be added or removed.
Programme Guide
By means of Electronic Programme Guide (EPG)
function of your TV you can browse the event schedule
of the currently installed channels on your channel
list. It depends on the related broadcast whether this
feature is supported or not.
Electronic Programme Guide is available in Live TV
mode. You can switch to Live TV mode by either
launching the Live TV application on the Home Screen
or selecting Channels input source from the Inputs
menu on the Home Screen. To access the programme
guide while in Live TV mode, press the EPG button on
your remote. Use the directional buttons to navigate
through the programme guide. You can use the Up/
Down directional buttons or Programme +/- buttons to
switch to previous/next channel on the list and Right/
Left directional buttons to select a desired event of
the currently highlighted channel. If available, the full
name, start-end time and date, genre of the highlighted
event and a brief information about it will be displayed
on the bottom of the screen.
Press Blue
the desired type quicker. Press Yellow button to see
detailed information on the highlighted event. You
can also use Red and Green buttons to see events
of previous day and next day. The functions will be
assigned to the coloured buttons on the remote when
they are available. Follow the on-screen informations
for accurate button functions.
The guide can not be displayed if TV input source
is blocked from the Settings>Channel>Parental
Controls>Inputs Blocked menu in Live TV mode or
on Home Screen.
Connecting to the Internet
You can access the Internet via your TV, by connecting
the network settings in order to enjoy a variety of
streaming content and internet applications. These
Settings>Network &
Internet menu. You can also highlight the Connected/
Not Connected icon on the Home screen and press
OK to access this menu. For further information refer
to Network & Internet section under the title of Home
Screen.
Wired Connection
Connect your TV to your modem/router via an Ethernet
cable. There is a LAN port on the rear side of your TV.
The status of the connection under the Ethernet
section in the Network & Internet menu will changed
from Not connected to Connected.
2
3
1
1. Broadband ISP connection
2. LAN (Ethernet) cable
3. LAN input on the rear side of the TV
You might be able to connect your TV to a network
In that case, you can connect your TV directly to the
network using an Ethernet cable.
1
2
1. Network wall socket
2. LAN input on the rear side of the TV
Table of contents
Other F&U Smart TV manuals