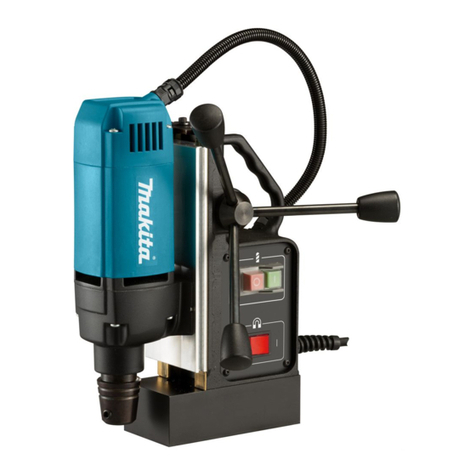
FE Powertools FE 30 User manual

1

2
Table of contents
1. Table of contents
2. Instructions Before Use - Safety Warning Explanation
3. Technical overview / Before Use: Fundamental Safety Precautions
4. Operating manual
4.1 Hole cutter selection
4.2 How to mount tools or adapters in a Weldon arbor
4.3 Drilling with hole cutters
4.4Drilling with twist drills
4.5 Speed and/or torque setting
5. Blockage and Cleaning
6. Maintenance / Troubleshooting
7. CE Declaration of Conformity
8. Warranty

3
2. Instructions Before Use - Safety Warning Explanation
Safety Warning Explanation
Following warnings are present in this manual
DANGER
A warning of this category draws attention to an impending dangerous situation.
If the dangerous situation is not avoided, it may lead to serious injury or even death.
Follow the instructions in this warning to avoid the danger of serious injury or even death.
WARNING
A warning of this category draws attention to a potentially dangerous situation.
If the dangerous situation is not avoided, it may lead to injuries.
Follow the instructions in this warning to avoid the risk of injury.
CAUTION
A warning of this category draws attention to potential material damage.
If the situation is not avoided, it may lead to material damage.
Follow the instructions in this warning to avoid material damage.
NOTE
A note draws attention to additional information that simplifies the use of the machine.
Instructions Before Use
The machine is intended solely for drilling operations in magnetic and non-magnetic metals, and for
cutting threads, countersinking and reaming within the limits specified in the technical data.
Use in any other or further way is not considered an intended use.
WARNING
Danger from use for other than the intended purpose!
If not used for its intended purpose and/or used in any other way, the machine may be or become a
source of danger.
Use the machine only for its intended purpose.
Observe the procedures described in these operating instructions.
No claims of any kind will be accepted for damage or injury resulting from use of the machine for other
than its intended purpose.
The risk has to be borne solely by the machine owner.

4
NOTE
If used commercially, pay attention to compliance with the accident prevention regulations and
the Safety at Work Ordinance.
Liability Disclaimer
All technical information, data and instructions for commissioning, operation and care of the machine
contained in these operating instructions represent the latest status at the time of printing.The
manufacturer assumes no liability for damage or injury resulting from failure to observe the operating
instructions, use for other than the intended purpose, unprofessional repairs, unauthorised
modifications or use of non-approved spare parts and accessories, tools and lubricants.
CAUTION
When using electrical tools, the following fundamental precautions must be taken to
protect against electric shock and the risk of injury and fire!

5
3.Technical overview / Before Use: Fundamental Safety Precautions

6
Fundamental Safety Precautions
Do not use the machine in flammable or potentially explosive environments.
Persons who due to their physical, mental or motor response abilities are unable to operate the
machine safely may only use the machine under supervision or instruction by a responsible person.
Persons with heart pacemakers or other medical implants must not use this machine.
Children must not be allowed to use the machine.
Inspect the machine for visible signs of damage before use. Do not use a visibly damaged machine.
Before beginning work, check the condition of the safety chain and the function of the switches on
the machine.
Repairs to the mains cable may only be carried out by a qualified electrician.
Repairs to the machine may only be carried out by an authorised workshop or by the works after-
sales service. Unqualified repairs can lead to considerable danger for the user.
Repairs to the machine during the warranty period may only be carried out by a service centre
authorised by the manufacturer, as otherwise the warranty will be voided.
Defective parts may only be replaced with original spare parts. Only these parts guarantee that the
safety requirements are satisfied.
Do not leave the machine unsupervised during operation.
Store the machine in a dry, temperate location out of the reach of children.
Do not leave the machine standing outdoors and do not expose it to moisture.
Make sure that your work area is sufficiently lit (>300 Lux).
Do not use low power machines for heavy working.
Make sure that your workplace is clean.
Keep the machine clean, dry and free of oil and grease.
Follow the instructions on lubricating and cooling the tool
Electric Shock Hazard
DANGER
Danger to life by electric shock!
Contact with live wires or components could lead to serious injury or even death!
Observe the following safety precautions to avoid electric shocks:
Do not open the housing of the machine. Risk of electric shock if live terminals are touched.
Never immerse the machine or the plug into water or other liquids.
Use only extension leads or cable drums with a cable crosssection of 1.5 mm².
Only use extension leads that are approved for the place of work.
Check the condition of the extension lead regularly and replace if damaged.
Avoid direct body contact with grounded parts (e.g., tubes, radiators, steel girders) to reduce
the risk of electric shock in the event of a defect.

7
WARNING
Improper handling of the machine increases the risk of injury!
Observe the following safety precautions to avoid injuring yourself and/or others:
Operate the machine only with the protective equipment stipulated in these operating
instructions (see section Personal protective equipment).
Do not wear protective gloves when the machine is running. A glove can be caught by the
drilling machine and torn off the hand. Risk of losing one or more fingers.
Remove loose jewellery before beginning work. Wear a hair net if you have long hair.
Always switch off the machine before changing tools, performing maintenance or cleaning.
Wait until the machine has come to a complete standstill.
Always remove the plug from the mains socket before changing tools, cleaning or performing
maintenance, in order to avoid unintentional starting of the machine.
Do not put your hand into the machine while it is in operation. Remove shavings only when the
machine is at a standstill. Wear protective gloves when removing swarf.
When working on scaffolding, the operator must be secured with a safety belt as the machine
can oscillate dangerously in the event of interruption to the power supply.
Check for secure clamping of the electromagnets on the substrate before every use (see
section Preparing).
Secure the machine with the safety chain supplied when working from an inclined or vertical
position or during overhead work. The machine could fall down if the magnet is loosened or
the power fails.
Check that the tool is tightened securely before using (see section Inserting the tool).
Do not allow the connecting cable to hang over edges (danger of tripping).
Prevention of Damage
CAUTION
Potential property damage in case of inexpert handling of the machine!
Observe the following instructions to avoid property damage:
Before connecting the machine, compare the connection data (voltage and frequency) on the
rating plate with those of your mains power supply. The data must correspond in order to
avoid damage to the machine.
Always carry the machine at the handle, not by the connecting lead.
Always pull the mains lead out of the plug socket at the plug, not at the mains lead.
Do not pinch the connecting lead.
Do not expose the connecting lead to heat or chemical liquids.
Do not pull the connecting lead across sharp edges or hot surfaces.
Lay the connecting lead in such a way that it cannot be caught and wound up in the rotating
part of the machine.

8
Installed Safety Features
Restart Protection
NOTE
The machine stops automatically of the magnetic clamp is switched off or in the event of a
power failure.
In order to prevent unexpected starting of the machine when the magnetic clamp is switched on again
or when the power supply returns after a power failure ("restarting protection"), the machine must be
switched on at the ON/OFF switch again.
Thermal overload protection
The machine is additionally equipped with thermal overload protection. If the machine becomes too hot,
it switches off automatically.
Carry out the following steps before continuing to work with the machine:
Remove any blockages that may have occurred.
Allow the machine to run at no-load speed for approx. 2 minutes.
The machine is then ready for operation again.
Used Symbols
Symbols present on the machine have the following meaning:
Symbol
Meaning
Electric shock hazard!
Read the operating instructions before beginning work!
Wear protective goggles and ear protection!

9
Personal Protective Equipment
Wear the following protective equipment at all times when working with the machine:
Symbol
Meaning
Close-fitting work protection clothing with a low tearing resistance
Goggles for protecting eyes against flying parts and liquids and ear protection in areas
with noise emission >80 dB(A)
Safety shoes to protect the feet from falling objects
Wear the following additional protective equipment during special operations
Symbol
Meaning
Helmet to protect your head from falling objects
Wear a safety belt where there is a danger of falling
Working gloves as protection against injury

10
4.1 Hole cutter selection
Before starting to drill make sure the cutter of your choice is the right one for the job you want to do.
Following cutters are available in the Fe Powertools program:

11
4.2 How to mount tools or adapters in a Weldon arbor?
WARNING
Risk of injury from incorrectly inserted tool or tool mounting .
Check by briefly turning the tool whether the collet is engaged.
1) Make sure the machine is disconnected from the power supply.
2) Put the center pilot in the cutter hole.
3) Put the cutter or adapter in the arbor, making sure the flat sides are exactly in front of the arbor
retaining screws (picture 1).
4) Tighten the retaining screws.
5) Check if the center pilot can move inside the cutter (up and down).
4.3 Drilling with hole cutters
1Place the machine at the desired position
CAUTION
Switch on the magnetic clamp only when the machine is standing on a magnetic substrate
to avoid overheating of the magnet.
For 100% magnet clamping force you need at least 10 mm of steel. Coatings, paintings and
dirt between magnet and workpiece will affect clamping force.
2Switch on the magnet
3Ensure that the magnetic drilling unit is secure on the working piece.

12
4Fill the arbor with lubrification/cutting oil in the special meant holes. Always use cutting oil
from your dealer.
5Set the right RPM by adjusting the gear switch and/or variable speed control.. The gear
switch can be found on the side of the gear box.
CAUTION
Switch over the gear stages only with the machine at standstill.
6Start the motor by pressing the green motor start button (I).
7Start bringing the cutter to the workpiece but handle with care and do not apply too much
pressure. The cutter has to find its way in to the material by itself. After 2 mm, the groove of
the cut will help the cutter maintain its place and you can increase the power. Still it is not
necessary to use a lot of pressure. Too much pressure will cause damage and breakage.
8After the cut is finished the slug will automatically be ejected from the cutter, switch the
machine off by pushing the red button(0).
9If the slug gets stuck in the cutter, move the machine to a flat surface. Switch on the magnet
and gently bring the cutter down in contact with the surface. This usually allows a slug to
straighten and to eject.
CAUTION
The slug will be ejected and is very hot
The machine can only be switched on when the magnetic clamp has been switched on.
Allow a severely overheated machine to run on at no-load speed for approx. 2 minutes to
let it cool down.
The machine switches off automatically in the event of a power failure or if the magnetic
clamp is switched off.

13
4.4 Drilling with twist drills
There are several accessories available to be able to use twist drills with your magnetic drill.
-Adapter Morse taper 2 – B16 taper connection
-Adapter Morse taper 2 – B18 taper connection
These taper adapters will allow you to attach a drill chuck on to the hole cutter arbor.
Model FE 50 X is equipped with a Weldon Morse taper adapter. It can be removed easily and a twist drill
or drill chuck with direct taper connection can be inserted in to the drilling unit.
Also twist drills with a direct Weldon connection are available (ranging from Ø 6 – Ø 12 mm)
1Place the machine at the desired position
2Switch on the magnet
CAUTION
Switch on the magnetic clamp only when the machine is standing on a magnetic substrate
to avoid overheating of the magnet.
For 100% magnet clamping force you need at least 10 mm of steel. Coatings, paintings and
dirt between magnet and workpiece will affect clamping force.
3Ensure that the magnetic drilling unit is secure on the working piece.
4Apply cutting oil to the twist drill and workpiece. Always use cutting oil from your dealer.
5Set the right RPM by adjusting the gear switch and/or variable speed control. The gear switch
can be found on the side of the gear box.
6Start the motor by pressing the green motor start button.
7Start bringing the twist drill to the workpiece but handle with care and do not apply too much
pressure. The drill has to find its way in to the material by itself. It is not necessary to use a lot of
pressure. Too much pressure will cause damage and breakage.
8After the cutting is finished switch the machine off by pushing the red button.

14
1.5 Speeds and Settings
Fe Powertools magnetic drills are provided with following speeds (load)
FE 30
460 min-1
FE 32 X
460 min-1
FE 50 X
250 min-1
450 min
-1
FE 50 X
50-250 min-1
100-450 min
-1
FE 60 RLX
70-280 min-1
120-480 min
-1
FE 100 R/L
40-140 min-1
120-480 min
-1
To adjust speed, set the required gear using the gear switch on the side of the gearbox.

15
5. Blockage
WARNING
Risk of injury from incorrectly inserted tool or tool mounting .
Check by briefly turning the tool whether the collet is engaged.
Blockages caused by a broken tool:
Switch off the machine. Remove plug from the mains socket.
Use the handle to move the machine slide to the upper position.
Replace defective tool. Remove shavings.
Other blockages:
Switch the machine of at the motor switch. Leave magnetic clamp switched on.
Use the handle to move the machine slide to the upper position.
Remove shavings and check tool.
Cleaning
WARNING
Switch off the machine and pull the mains plug out of the plug socket before starting
maintenance and cleaning.
When using compressed air for cleaning, wear protective goggles and protective gloves
and protect other persons in the working area.
CAUTION
Never immerse the machine in water or other liquids.
After Use:
Remove the installed tool.
Remove chips and coolant residues.
Clean the tool and the tool mounting on the machine.

16
Clean the guide of the machine slide.
Return the machine and accessories to the transport case.
6. Maintenance
WARNING
Danger caused by unqualified repairs!
Unqualified repairs can pose considerable dangers for the user and cause damage to the machine.
Repairs to electrical appliances may only be carried out by the works after-sales service or
by specialists trained by the manufacturer.
Adjusting the guide of the machine slide
If the guide of the machine slide (14) shows signs of backlash, it must be adjusted. Proceed as follows:
Loosen the clamping bolts.
Tighten the adjusting screws uniformly.
Tighten the clamping bolts again.
Replacing the carbon brushes
Replacement of the carbon brushes may only be carried out by Fe Powertools or by an authorised
repair workshop. Unauthorised repairs will void the warranty.
After-Sales Service/Service
Should you have any questions about after-sales service or service, please contact Fe Powertools. We
will be happy to give you the address of your nearest service partner.

17
Troubleshooting
Faults - causes and remedies
NOTE
If you cannot resolve the problem with the steps described above, please contact After-
Sales Service.
Fault
Possible cause
Remedy
The motor does not start
after pressing the ON/ OFF
switch or stops during
operation.
Plug not inserted into socket. Insert plug.
Automatic circuit breaker
tripped.
Switch on the automatic circuit breaker again.
The magnetic clamp is not
switched on. Switch on the magnetic clamp.
The internal safety switch has
switched off the machine due to
overheating. Allow the machine to cool down.
Direction of rotation not
selected. Preselect direction of rotation.
The torque cut-out has tripped.
Switch the machine off and on again.
The automatic circuit breaker
in the electrical distribution
board trips
Too many appliances connected
to the same power circuit. Reduce the number of appliances on the power circuit.
Machine is defective.
Contact After-sales Service.
The magnetic clamp does not
function.
Magnet not switched on. Switch on magnet.
The surface is not magnetic. Use a suitable base.
The lubrication system does
not function.
No lubricant available. Top up the lubricant.
Lubricant tap closed. Open the lubricant tap.
Connecting nipple clogged. Clean tank and nipple.

18
Storage/disposal
If you do not intend to use the machine for a longer period of time, clean it as described in chapter
Cleaning. Store the machine and all the accessories in the transport case in a dry, clean and frostfree
location.
Disposal of the packaging
The packaging protects the machine from transport damage. The packaging materials
have been selected according to environmental and waste disposal aspects and can
therefore be recycled.
The return of the packaging to the material cycle helps conserve raw materials and
reduces the production of waste.
When no longer required, dispose of the packaging materials in accordance with the
local regulations in force.
Disposal of the old appliance
Within the European Community, this product must not be disposed of in the
domestic refuse.
Dispose of the product in accordance with the EC Directive 2002/96/EC-WEEE (Waste
Electrical and Electronic Equipment).
Should you have any questions, please contact your local authority responsible for
waste disposal.
Disposal of the lubricant
WARNING
Observe the disposal instructions from the lubricant manufacturer.

19
Name/address of manufacturer:
Fe Powertools BV
Curieweg 30
2408 BZ Alphen aan den Rijn
The Netherlands
We hereby declare that the product
Model:
Magnetic core drilling machine
Type:
FE 30 – FE 32 X -FE 36 S - FE 50 X – FE 50 RLX – FE 100 R/L
Conforms to the following relevant regu
lations:
■EC Directive 2006/42/EC on
Machinery
The following harmonised standards
were applied in whole or in part:
●DIN EN ISO 12100:2011-13
●DIN EN 61029-1/A11:2011-11
●DIN EN 62841-1:2012-11
Responsible person for documentation
according to EC Directive 2006/42/EC - An-
nex II Pt.A.2. was:
______________________________
______________________________________
(Surname, forename, posit
ion in company of the manufacturer)
Alphen aan den Rijn, 1-3-2016
Mark Korsten, General Manager
________________________________________
(Legally binding signature of the issuer)
This manual suits for next models
5
Table of contents
Other FE Powertools Drill manuals
