Feelworld TX FT6 User manual
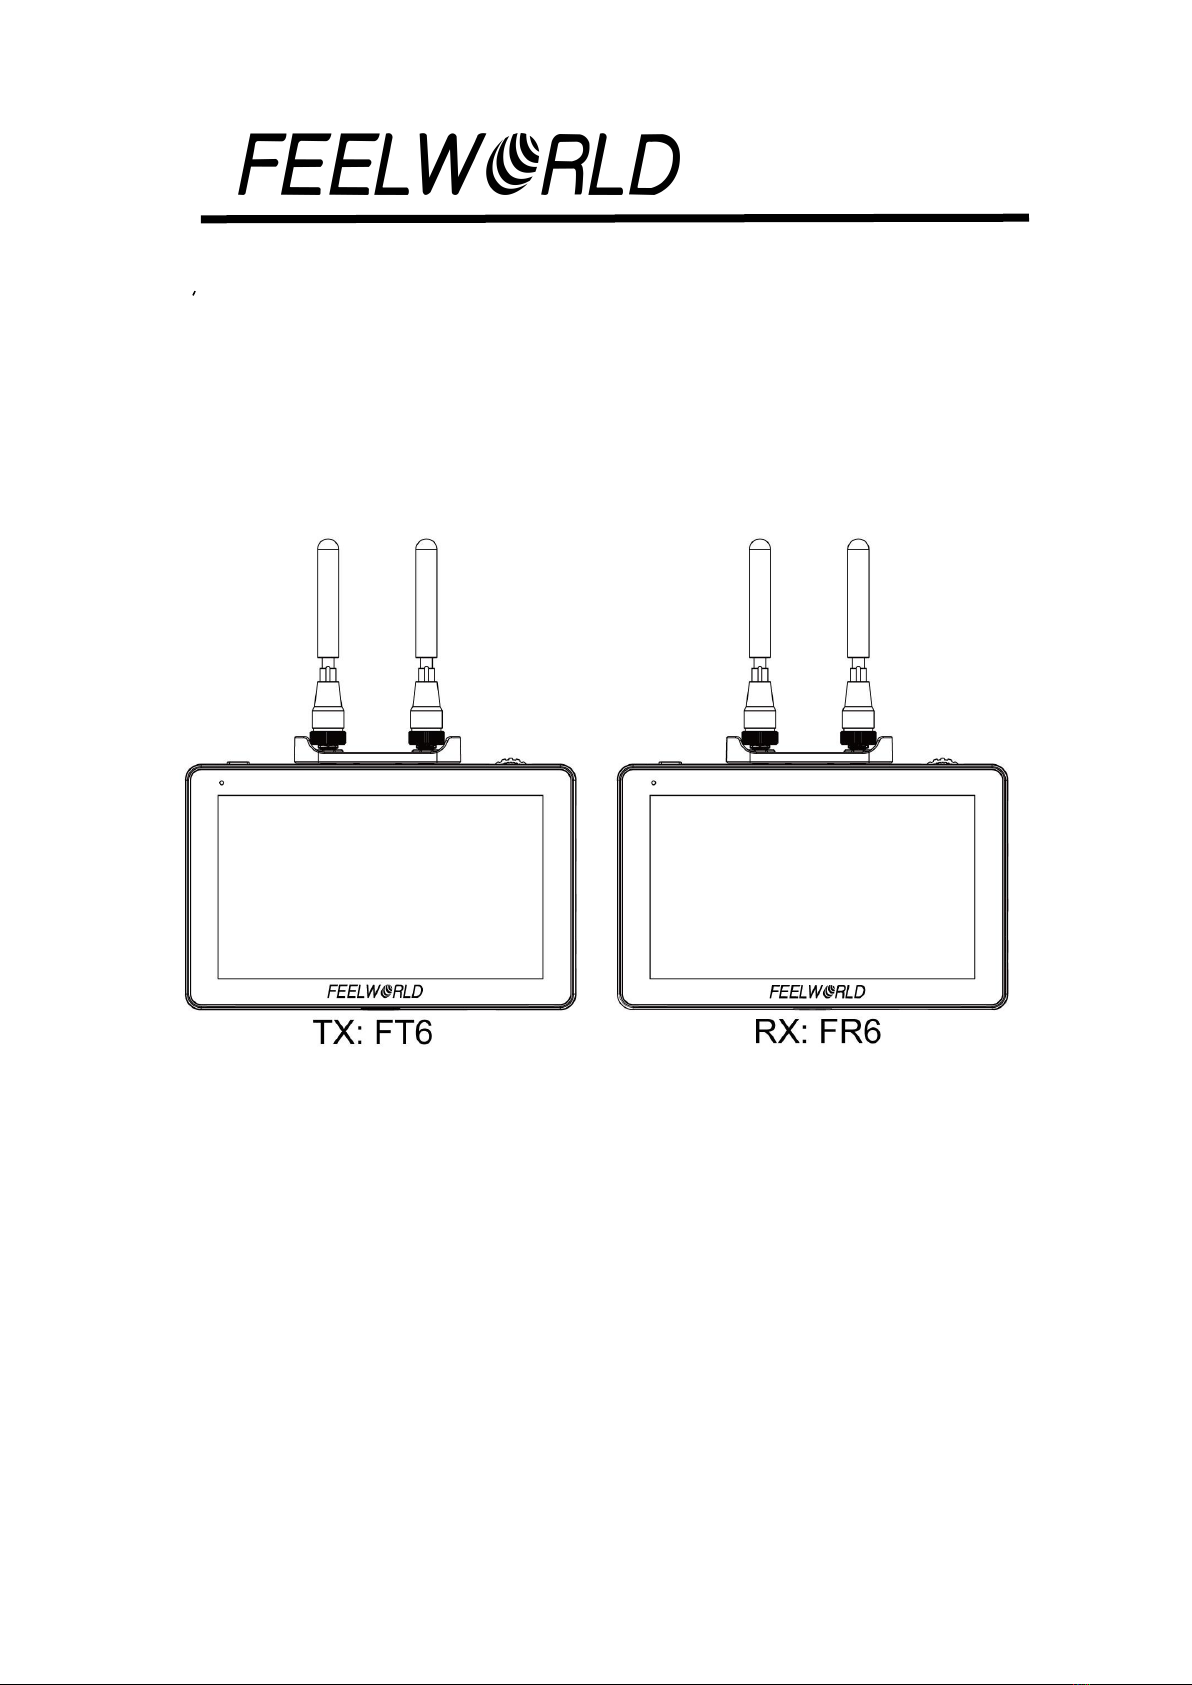
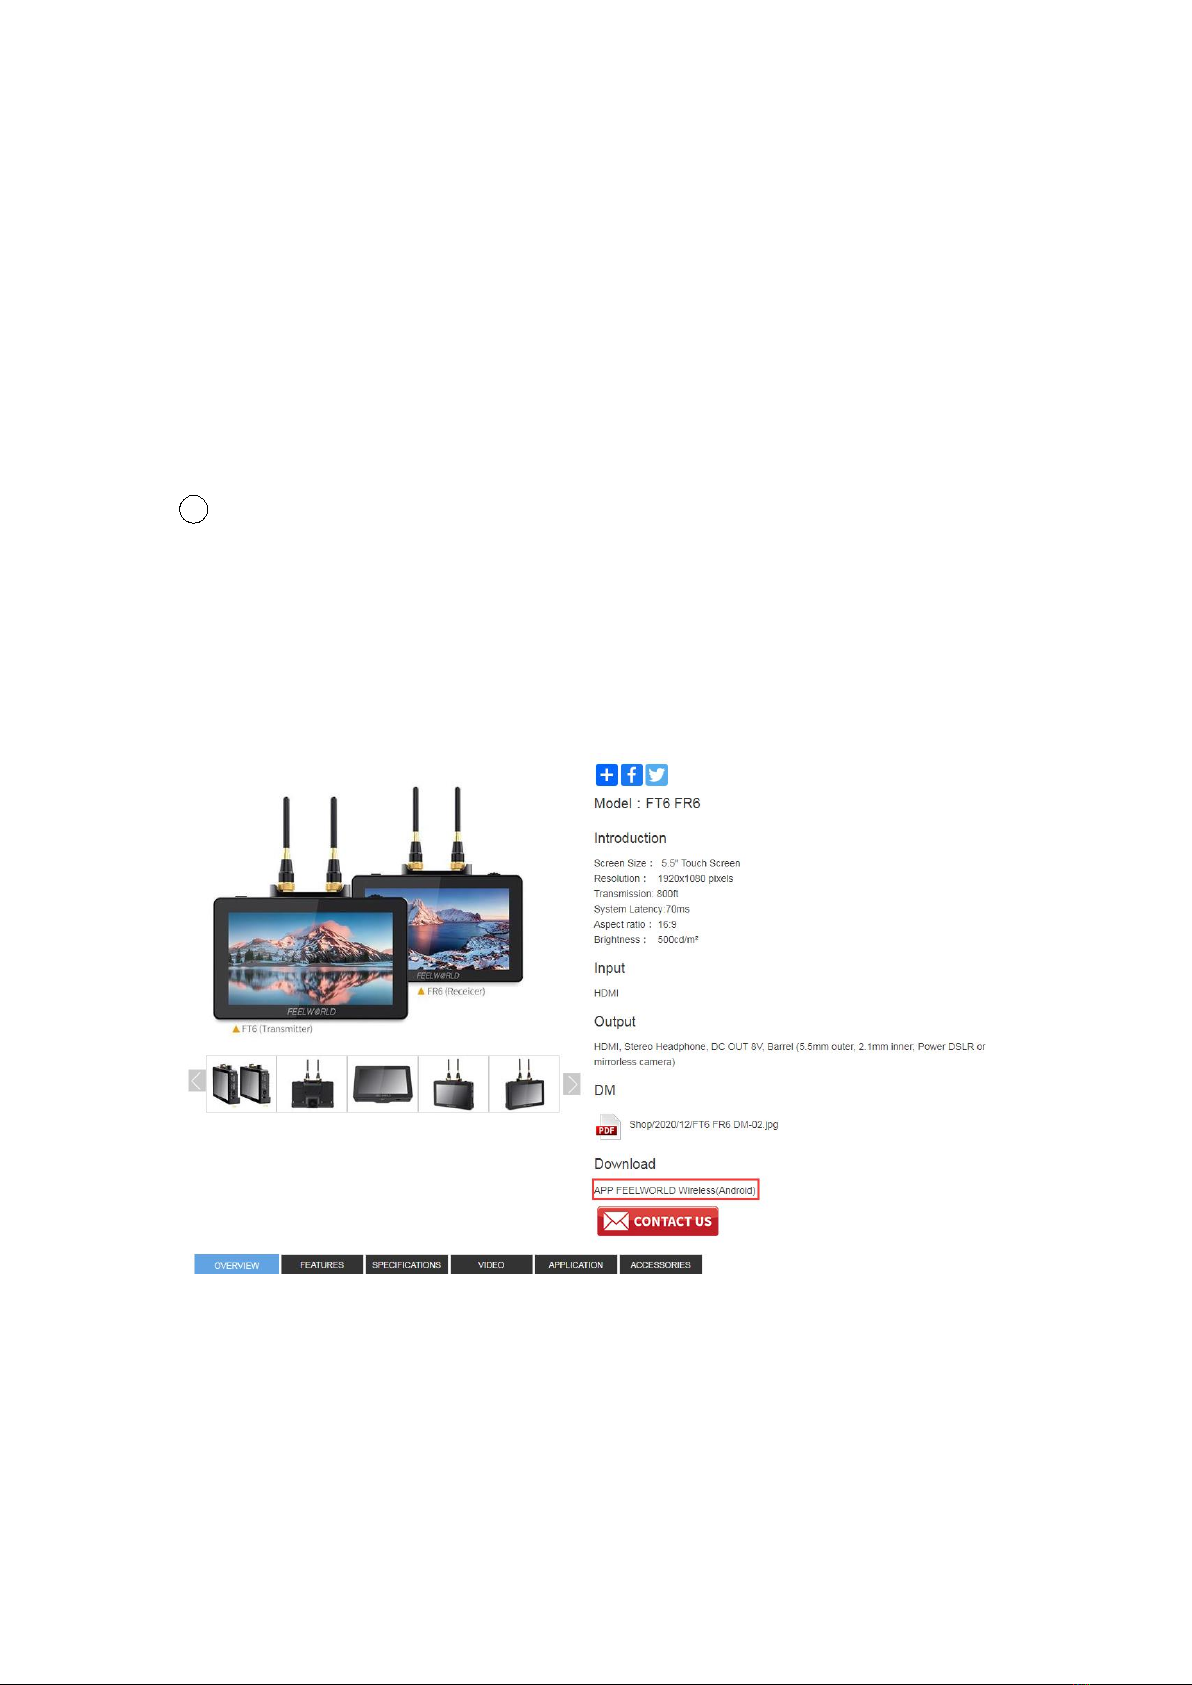
FT6 FR6
5.5″ Wireless Monitor Kit
HDMI/3D LUT/HDR
User Manual

1
Overview
Thank you for purchasing our wireless monitor kit. The kit is a set of
touch-screen monitors with built-in wireless modules. It supports the
resolution format of up to 1080P/60Hz in wireless mode. It comes with
H.264 codec to enable clearer video and lower latency.
Full HD color LCD monitor, which adopts advanced integrated DSP
circuits and energy-efficient IPS LED panel, delivers low power
consumption and stable performance. The kit comes with HDMI input
and output, reverse power(to cameras), touch screen, supporting 3D
LUT and HDR. It is portable, user-friendly. A wide variety of advanced
features is included, such as Histogram, Audio Meter, Focus Assist,
False Color, Zebra Exposure, Anamorphic.
The kit comes with dual battery slot, you can use the power adapter or
the external battery as power source.
To insure the best use of the unit, please read the
user’s manual carefully
CAUTION
● This product should not be exposed dripping or splashing.
● Please place the wireless monitor on a flat with hard and stable
surface.
● In order to reduce the risk of electric shock of fire, please do not
expose the receiver/ transmitter to rain or moisture.
● Please avoid the heavy impact and drop onto the ground when
move the product.

2
● The screen of this product is made of glass. Please do not drop the
screen towards the ground. Keep away from injury if the screen is
broken.
● Keep the product away from the heat source, and avoid the
prolonged exposures to the sun as the LCD screen will be
damaged.
● To avoid damaging the product, please do not take apart or repair
the unit by yourself without the adjustable components in the unit.
● In order to better maintain the LCD screen and protect the cover,
please follow the following ways to avoid damages.
1. Please refrain from using the hard objects to hit the screen.
2. Please do not force to wipe the screen.
3. Please do not use the chemical solutions to clean the screen.
4. Please do not spray any detergent on the screen.
5. Please do not write on the screen directly.
6. Please do not stick on the screen.
7. Please simply wipe with a clean soft cloth and make sure no
water on the screen.
Special Notice
● The impact of radio waves (such as the following environment may
cause the abnormal audio and video (blocked image, noise...etc.).
1) Transmit near the wall which is hard for the radio waves to get
through.
2) Quite close to the refrigerator, metal fitment and appliances, or
net to the crowded situation.
● This product has been tested and manufactured to comply with
national electrical safety rules, however, there will be noise caused by

3
the interference with other machines in rare cased. If the interference
is happened, please keep a certain distance away from other
machines.
● The product is susceptible to interference from 5GHz wireless local
area network or other wireless devices.
●Optimal range between transmitter and receiver is between 1 meter
and 30 meters with in line of sight indoor.
● It will take 30-40 seconds to boot the system before wireless
communication start, the media receiver can not be operated during
this time.
Features
Transmission range up to 250m/800ft (LoS);
Ultra-low latency: 70ms;
Up to 1080P60Hz;
Support APP monitoring;
Selectable channels to minimize interference;
Both the TX monitor and RX monitor support HDMI IN and HDMI
OUT, a second monitor can be working via HDMI LOOP OUT;
Can work as a monitor alone if the wireless module is deactivated;
5.5 inches 1920x1080 full HD IPS screen with touch function;
Support 3D LUT;
Support HDR monitoring;
A panoply of auxiliary functions, including histogram, focus assist
and many others, enabling optimized exposure and focus;
DC8V power out to power your cameras;
Attachable sunshade ensure better viewing in bright sunlight.

4
CONTENTS
1. Product Layout ------------------------------------------------ 5
1.1 Button Instruction --------------------------------------------- 6
1.2 Interface (bottom) --------------------------------------------- 6
1.3 Interface (right) ------------------------------------------------ 7
1.4 Power Supply Way ------------------------------------------- 8
1.5 Mounting -------------------------------------------------------- 9
1.6 Sunshade ------------------------------------------------------- 9
2. Menu Operation Instruction ------------------------------ 10
3. RTSP Mode Operation ---------------------------------------13
4. Menu Function Instruction ------------------------------ 16
5. Technical Specifications ----------------------------------- 20
6. Troubleshooting ---------------------------------------------- 22

5
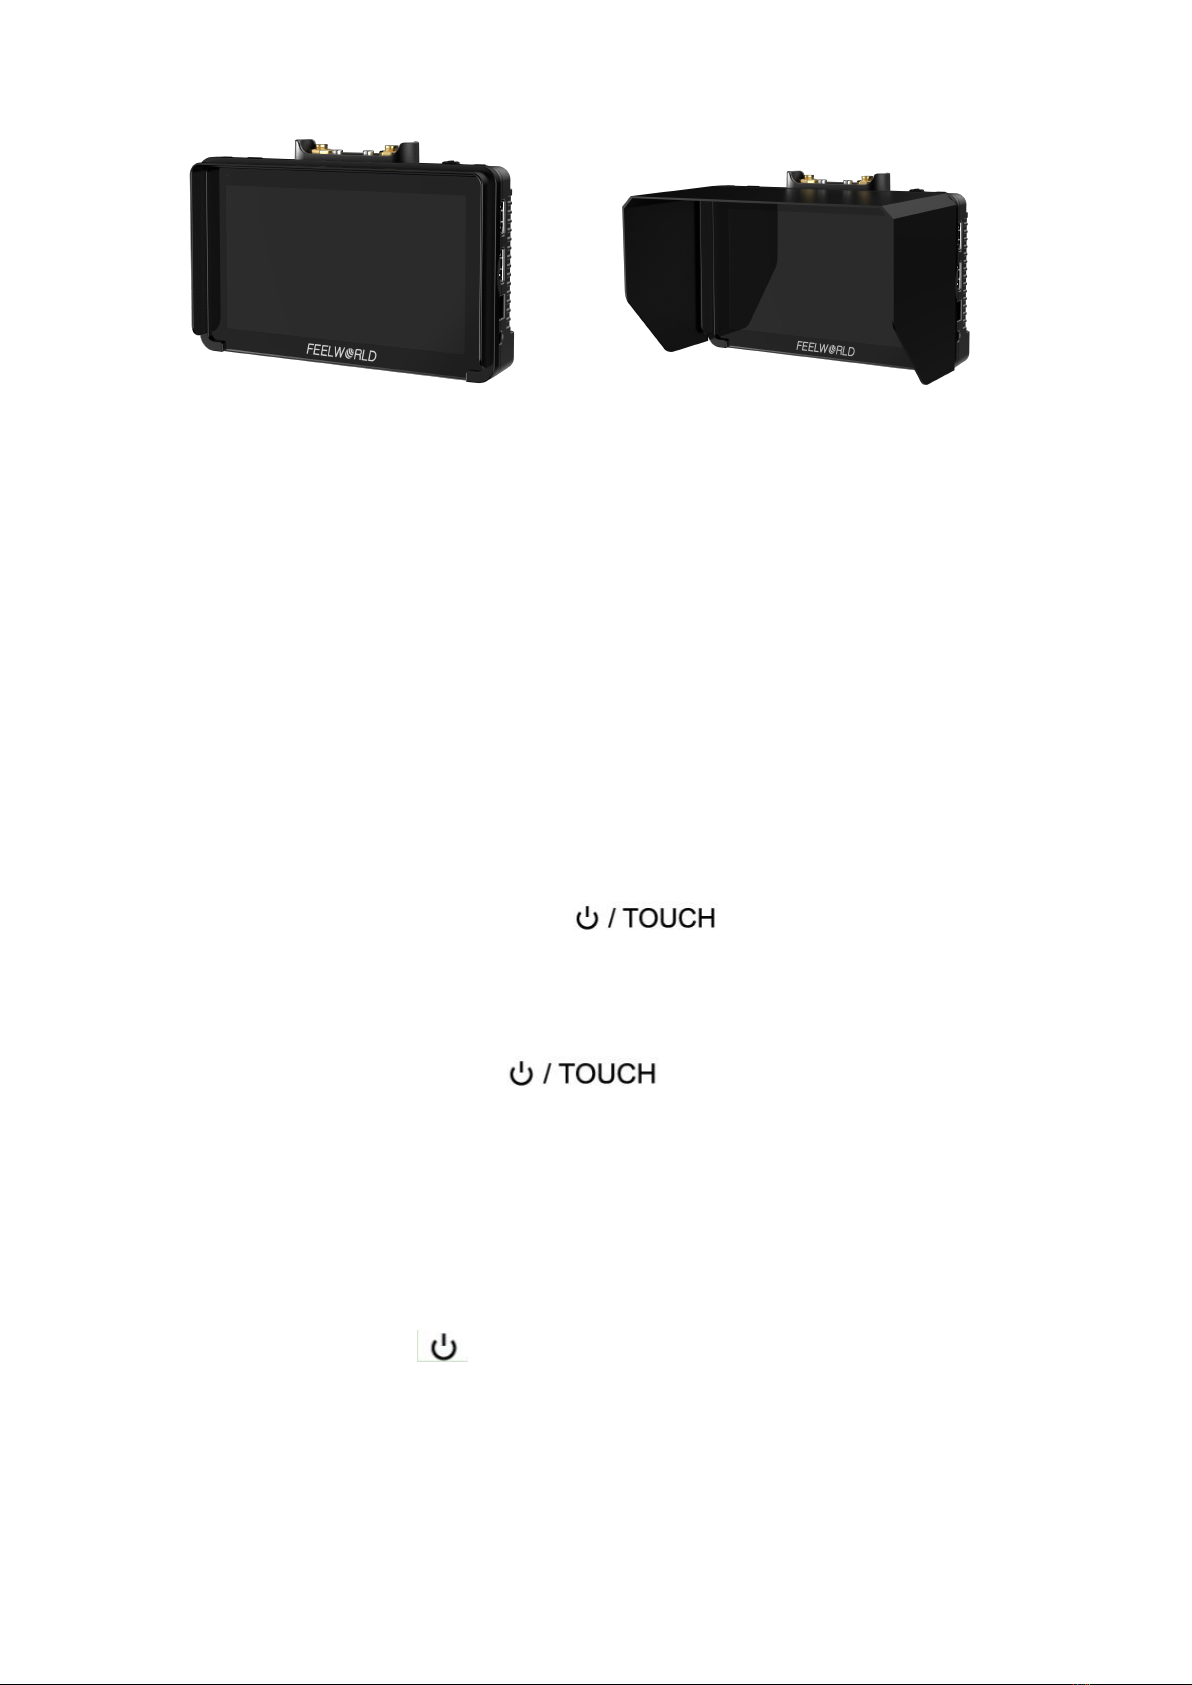
1. Product Layout
Front
Back
6
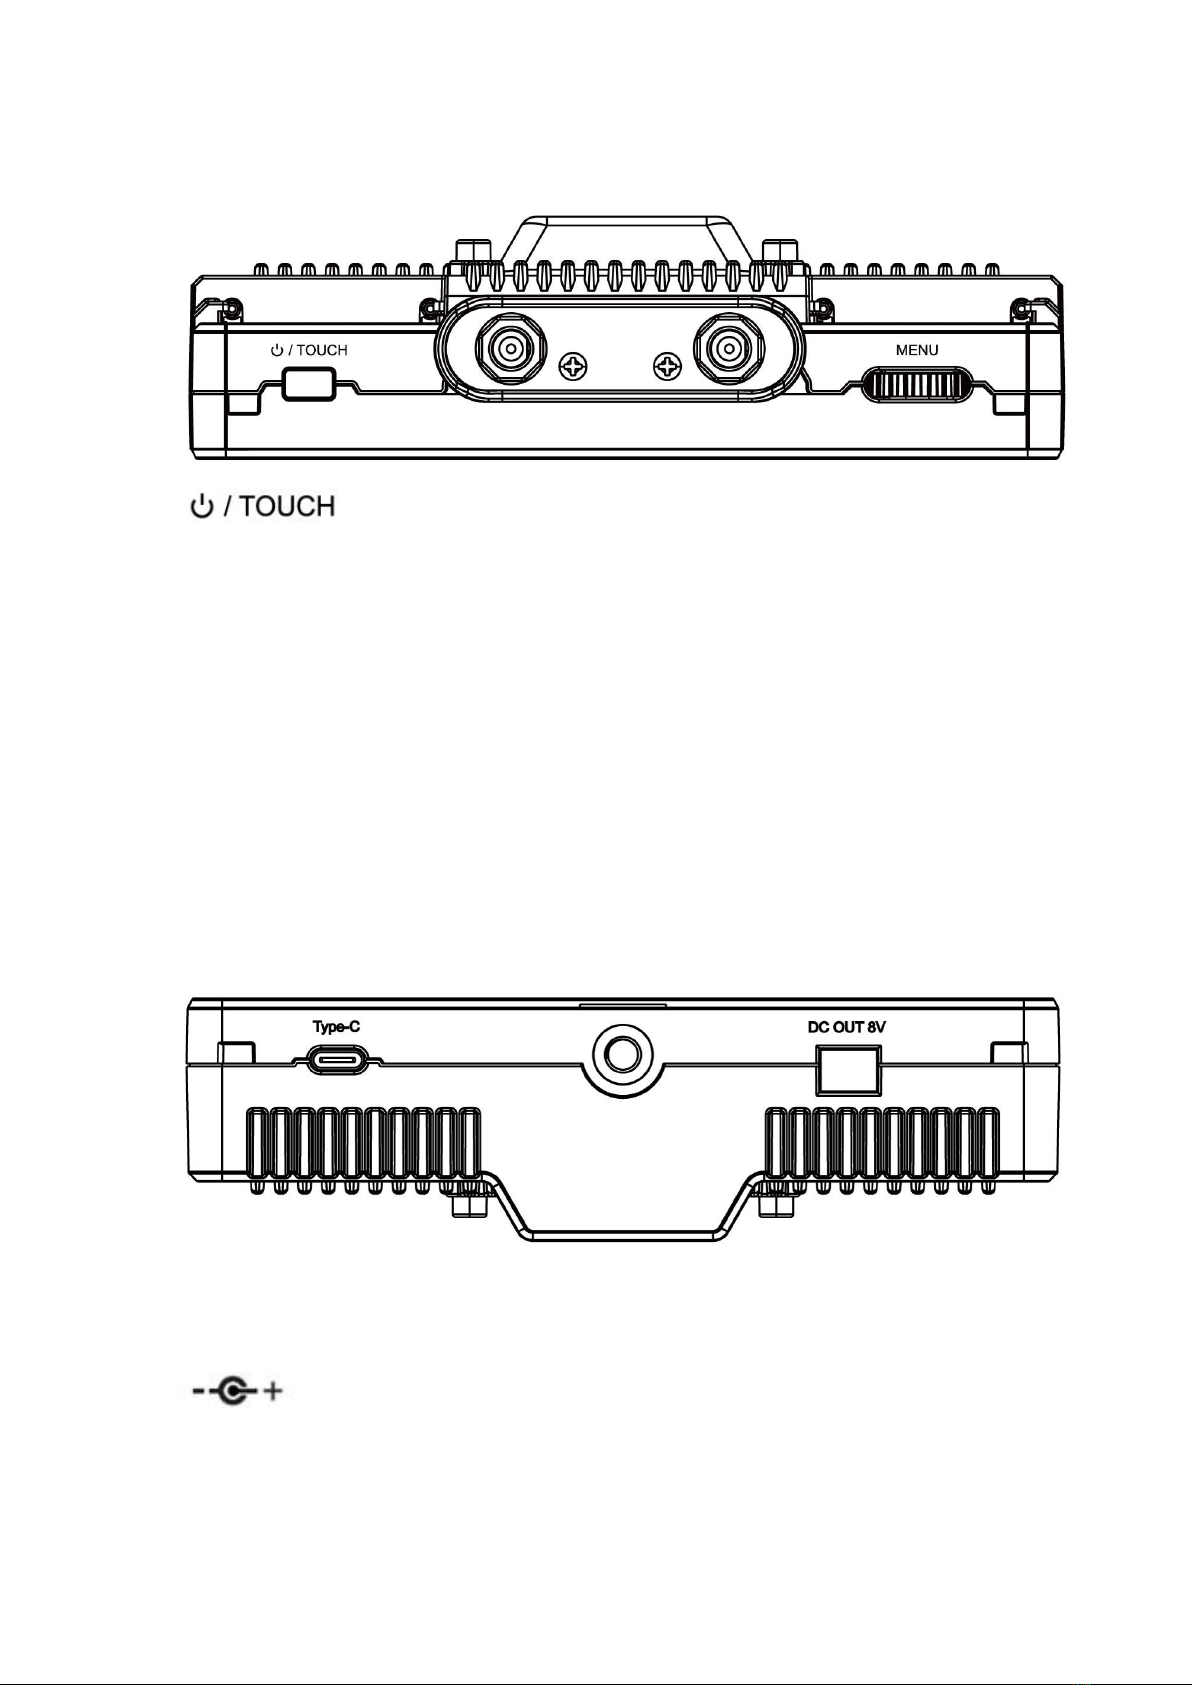
1.1 Button Instruction
:Long press to turn on and off the power; short press to
turn on and off the screen touch function
MENU: Long press to open the main menu and short press to open
the shortcut menu. Rotate the wheel to select a menu item, press it
again to open the corresponding menu function.
(See details: 2.Menu Operation Instruction)
1.2 Interface (Bottom)
Type-C: For 3DLUT upload via type-c to USB and for firmware upgrade
DC OUT 8V: DC power output interface, polarity as the output power

7
Barrel output for powering your camera with a separately available
DC coupler via adaptor (NP-FW50 Sony & LP-E6
Canon&DMW-BLF19 Panasonic). More adapters coming soon.
1.3 Interface (Right)
TX: Transmitter
RX: Receiver
HDMI IN: 1.4, HDMI signal input
HDMI OUT: 1.4, HDMI signal output
DC IN 12V: DC power input, polarity as the input power
:3.5mm earphone port output

8
1.4 Power Supply Way
(1) The rear cover of the monitor is equipped with F970 dual battery
plates, which is applicable to F970 series of batteries.
● Sony F970 battery plate for battery of Sony DV:
Sony F970 F960 F950 F930 F770 F750 F730 F570 F550 F530
series
●Battery switching instruction
When the battery/batteries is/are placed in the battery slot(s), battery
icon will appear on the upper right of the screen.
White battery icon: working; Gray battery icon: not working.
Double-tap the gray battery icon and it will be switched to a working
state in about 3 seconds, then it will be turned white.
(2) Barrel (5.5mm outer, 2.1mm inner) at the right of the
monitor, DC 7~24V Input.
Remark: It is recommended to use standard original F970 batteries.
Different specifications of the battery have different capability. The
working time for the monitor will be different. Higher capability
(working time) will be longer. Please take off the battery from the
monitor if you don’t use the monitor in a long time.
The battery not including, please purchase separately.
9
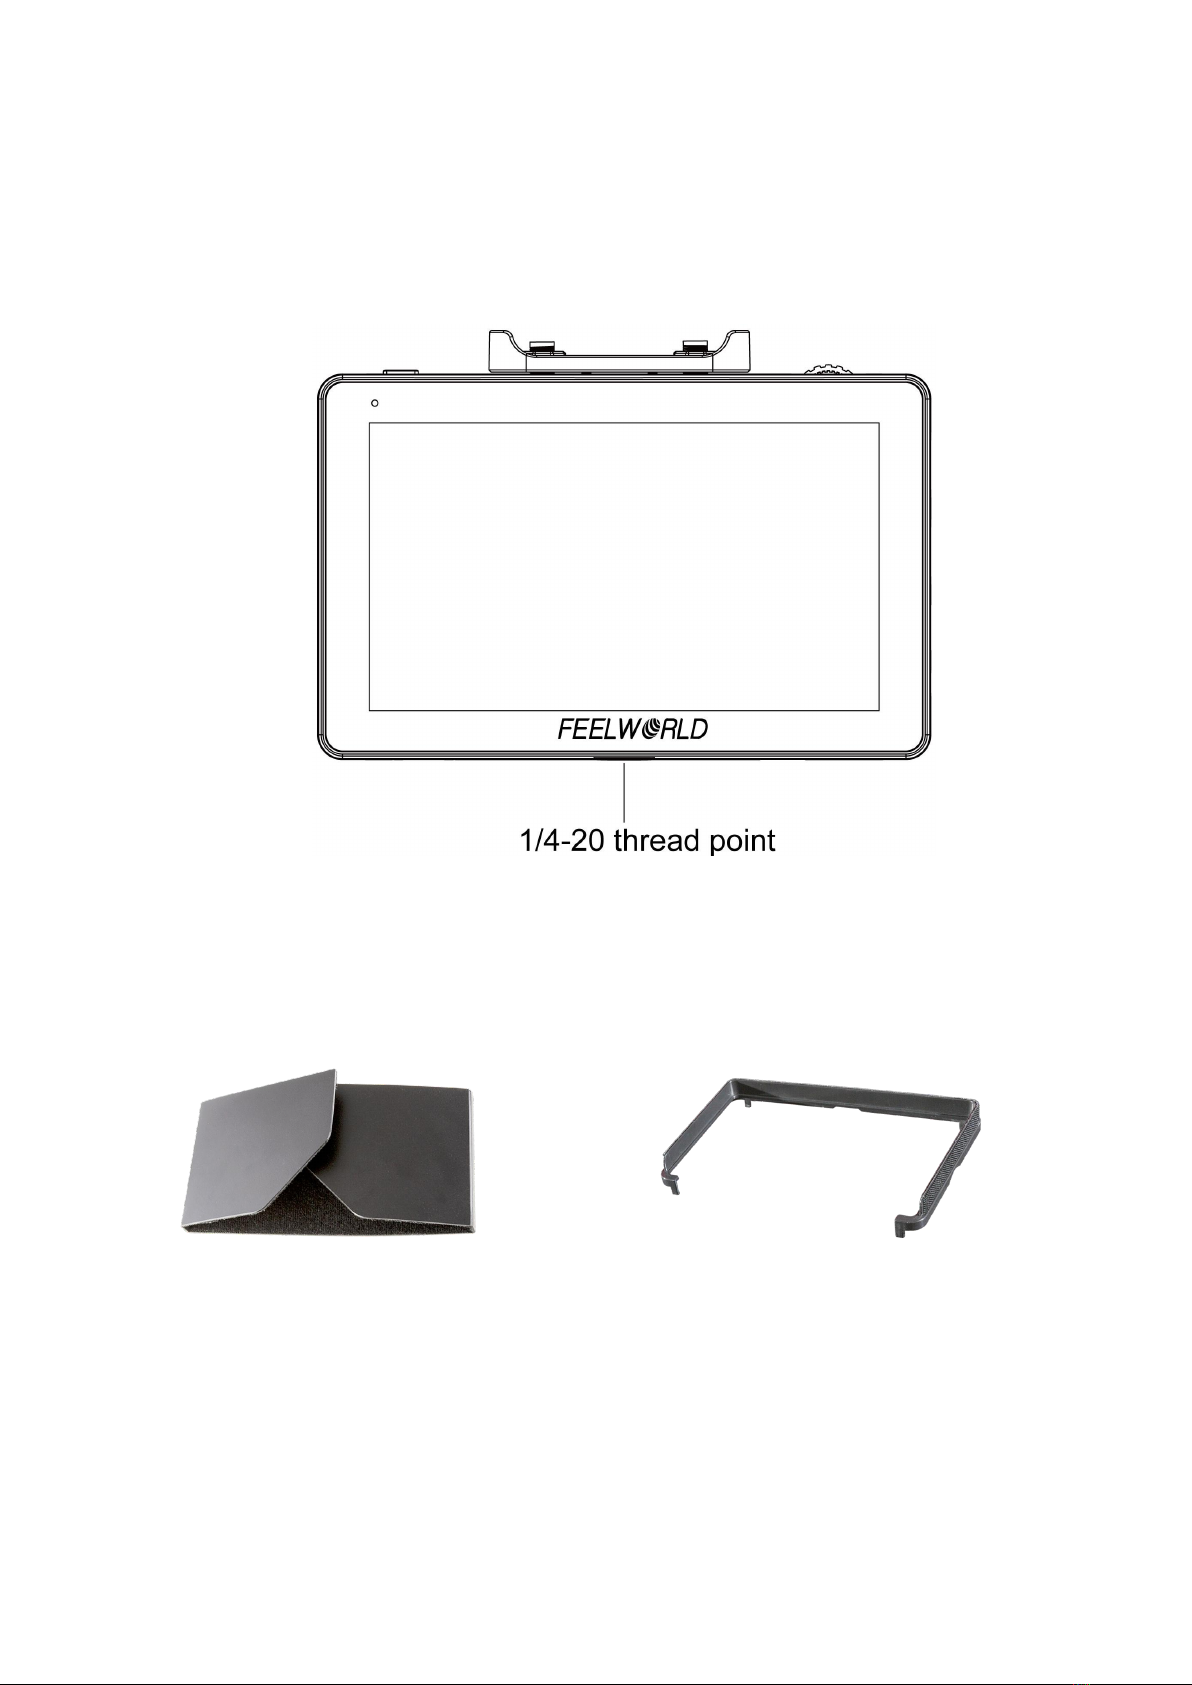
1.5 Mounting
There is a ¼-20 thread point on bottom can be easily connected to the hot
shoe mount, tripod fixed installation.
1.6 Sunshade
①Sunshade ②Sunshade Frame
10
③Fixed Frame ④Sunshade Application
First lock the Sunshade Frame ②with the monitor tightly ③.
Unfold the sunshade ①, and attach the Velcro part of the Sunshade to
the Sunshade frame ②, make sure they are tightly secured, and then
complete the sunshade installation ④.
2. Menu Operation Instruction
After the monitor is properly connected to the power supply, the
indicator light is on (red). Press button to turn on the
monitor power. The indicator light turns yellow. After inputting the HDMI
signal, the indicator light turns from yellow to green.
After startup, short press to select to turn the screen touch
function on or off.
After the TX monitor input the HDMI signal, the RX monitor will receive
the signal from it. Swipe from the right side of the screen to left to
access channel menu including switch, signal, 9 channels and WPS
pairing. Long press until it turns red to turn off the wireless function.
Note: there are channel 10,11 for option.
WPS pairing:
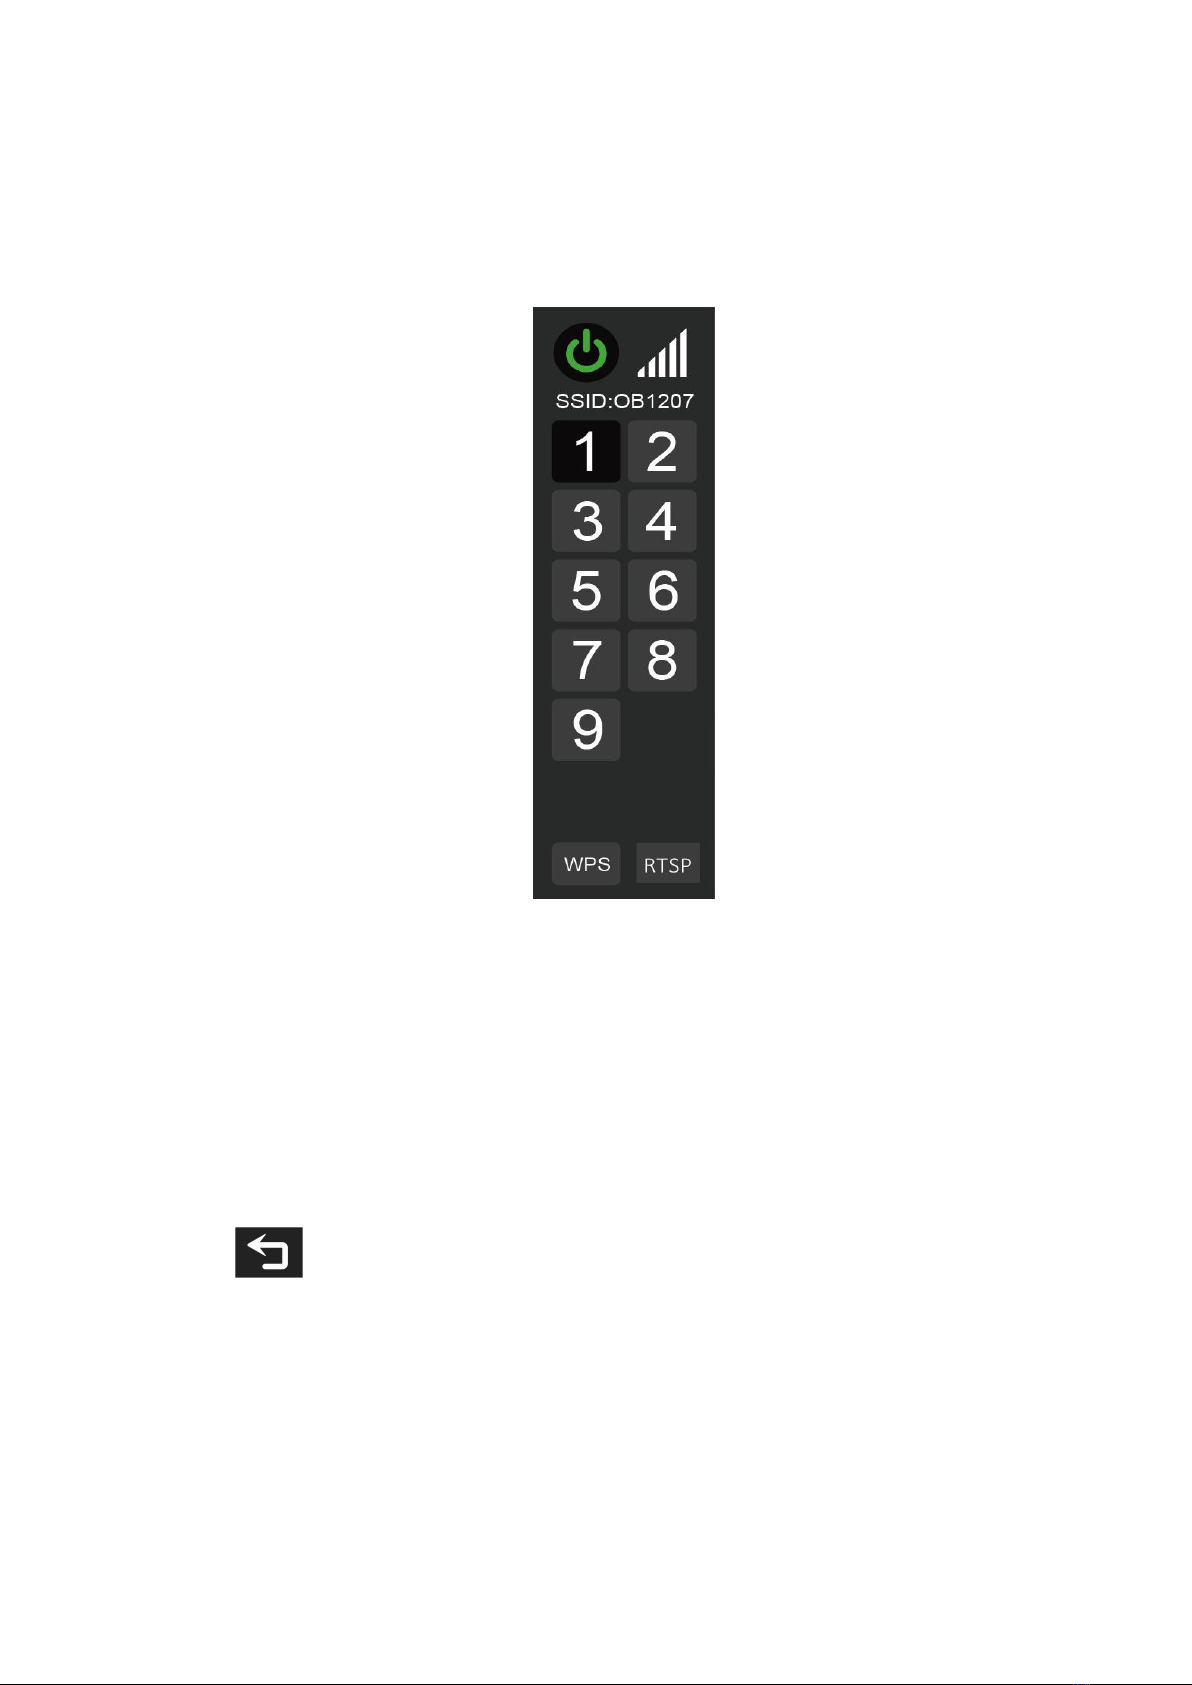
11
When there is a need to replace the transmitter or receiver, please tap
and hold WPS of both the transmitter and receiver about 1 second to
enter the pairing mode, and wait for the pairing to success.
(1). Directly touch the screen for menu operation (turn on the
screen touch function)
①.Double tap the screen to start the main menu and tap the relevant
option to enter the sub menu. You can select the needed option
and tap "<" or ">" to enable or disable it. Exit the menu by taping the
or tap away.
②.Swipe up to start the shortcut menu and select the relevant tool, then
tap the "<" or ">" to enable it.
③.Swipe up and down to adjust the backlight on the left side of the
screen (1/2 split screen) or volume on the right side of the screen.

12
④. Swipe from Right to Left to access the channel Menu. There are 9
channels for selection.
⑤. Tap away to exit.
Figure:
(2) Wheel Operation
①.When the menu is not displayed, directly rotate the wheel to
backlight or brightness adjustment. The wheel option can be set to
backlight or brightness in the menu .
②.Long press the MENU wheel to open the main menu (on the left side
of the screen). Rotate the wheel to select the secondary function
menu. After selecting it, press the wheel, then rotate the wheel to
select or set the option function.
③.Short press the MENU wheel to open the shortcut menu (below the
screen), rotate the wheel to select the shortcut menu option, press
the wheel to directly turn on/off the function, if you press the
parameter selection, repeat the above operation. The shortcut
13
menu will automatically exit after about 5 seconds without
operation.
3. RTSP Mode Operation
1. APP download (FEELWORLD Wireless)
Android
Enter the FT6 FR6 page at www.feelworld.cn, then get the APP
(FEELWORLD Wireless) to download.
iOS
Please search “FEELWORLD Wireless” to download in APP store.
②.Power on transmitter and select the CH5-CH9.

14
③.Tap and hold the RTSP of transmitter about 3 seconds to enter the
RTSP mode.(The RTSP frame shows black)
④.Open the APP of FEELWORLD Wireless, and connect the FT6 &
FR6 Wi-Fi.
⑤.Navigate to the WLAN Setting page and select the SSID (AP), which
starts with "FW" to connect. The SSID(AP) is shown on the top of the
channel menu.
⑥.Input the password (12345678) and select "CONNECT".

15
⑦.After the connection is successful, reopen the APP, enter the "FT6 &
FR6" page to select the connection (the "Connection" icon shows red),
then receive the real-time video.
⑧.Interfaces:Lock Screen, Brightness, Waveform, Focus Assist, Zebra,
Frame Guides, Zoom, False Color, Monochrome, 3D LUT, Audio Meters,
Settings, Image Capture, Video Recording, Return, Live Streaming.
⑨.Settings: Channel selection, channel scan, password setting.
Notes:
* Please contact sales person or local agent of FEELWORLD for
upgrade files.
* If there are multiple transmitters are used together, please distinguish
which transmitter’s Wi-Fi the smart-phone/iPad is connected to.
* Please switch the receiver to RTSP mode, which is the same to
transmitter. After that, the receiver also can monitor as the same as the
smart-phone/iPad.
* Connecting SSID (AP) will cause your Android devices to be unable to
access the Internet.
* Please install the new version of APP requires removing the old
version.
* APP does not support Android 6.0 and below.
16
4.Menu Function Instruction
All Waves
OFF, ON
Parade
OFF, RGB, YUV, Y
Vector
OFF, ON
Histogram
OFF, ON
Focus Assist
OFF, ON
The focus level and focus color items are
displayed after the focus assist is turned on.
Focus Level
1~10
Focus Color
yellow, red, green, blue, white
Audio Meter
OFF, ON
Zebra
OFF, ON
The zebra value item is displayed only after the
zebra is turned on.
Zebra Value
1%~100%
Monochrome
OFF, gray, red, green, blue
False Color
OFF, type 1, type2
Return
Please use the scroll wheel to return to the
previous menu or click on the main menu directly
Nine Grid
OFF, ON
Safety Marker
OFF, 70%, 80%, 90%, 16:9, 16:10, 4:3, 5:4,

17
1.85:1, 2.35:1
Center Marker
OFF, ON
Marker Mat
OFF, 16:9, 16:10, 4:3, 1.85:1, 2.35:1
The Marker Mat Alpha item is displayed after the
Marker Mat is turned on.
Marker Mat Alpha
0%, 25%, 50%, 75%
Marker Color
yellow, red, green, blue, white, black
Return
Please use the scroll wheel to return to the
previous menu or click on the main menu directly
Scan Mode
Under Scan, Over Scan
Video Aspect
auto, 16:9, 16:10, 4:3, 5:4, 1.85:1, 2.35:1,
stretch, user
Under the user, you can customize the Video Width
(100% ~ 200%), Video Height (100% ~ 200%)
Anamorphic Mode
OFF, 1.25x, 1.33x, 1.5x, 2.0x, 2.0x mag
Auto Mirror
OFF, ON
Flip H
OFF, ON
Flip V
OFF, ON
Zoom Times
OFF, 100%~300%
Freeze
OFF, ON
Pixel to Pixel
OFF, ON
Return
Please use the scroll wheel to return to the
previous menu or click on the main menu directly

18
HDR
OFF, HLG 2020, HLG 709, HLG P3
Lut Switch
OFF, ON
The Lut item is displayed after the Lut Switch is
turned on.
Lut
SLOG2, SLOG3, LOGC, VLOG
Lut Import
(Type-C)
After copying the 3D LUT file to the U disk and
inserting it into the Type-C to USB connector, you
can click the “<” or “>” key in the Lut Import(Type
C) to import the 3D LUT file or rotate the wheel to
import the 3D LUT file(up to 50 Luts).
Colortemp
5600K, 6500K, 9300K, user
Under the “user” item, the red, green, and blue
values of the image can be adjusted.
Backlight
1~100
Brightness
0~100
Contrast
0~100
Saturation
0~100
Hue
0~100
Sharpness
0~100
Return
Please use the scroll wheel to return to the
previous menu or click on the main menu directly

19
Wheel
Backlight, Volume
After selecting the wheel option, you can click the
“<” or “>” button in the wheel option, or rotate the
wheel to select one of the shortcut keys to set it to
the rotary wheel adjustment (when the menu is
not displayed).
Language
中文, English, 日本語, Deutsch, Français,
Italiano, Español, 한국, Pусский
Transparency
OFF, low, middle, high
OSD Time
5s, 10s, 15s, 20s, 25s, always
Touch
OFF, ON
Please short press the TOUCH button to turn on
the touch function again after choosing turn off
Volume
0~100
Mute
OFF, ON
Reset
OFF, ON
After selecting the reset option, you can click the
“<” or “>” key in the reset option or rotate the
wheel to restore the factory settings.
Firmware Update
After copying the update file to the U disk and
inserting it into Type-C to USB connector, and
then connect to the Type-C interface of the
monitor, you can click the “<” or “>” key in the
firmware update option or rotate the wheel to
update.
Return
Please use the scroll wheel to return to the
previous menu or click on the main menu directly
This manual suits for next models
1
Table of contents


