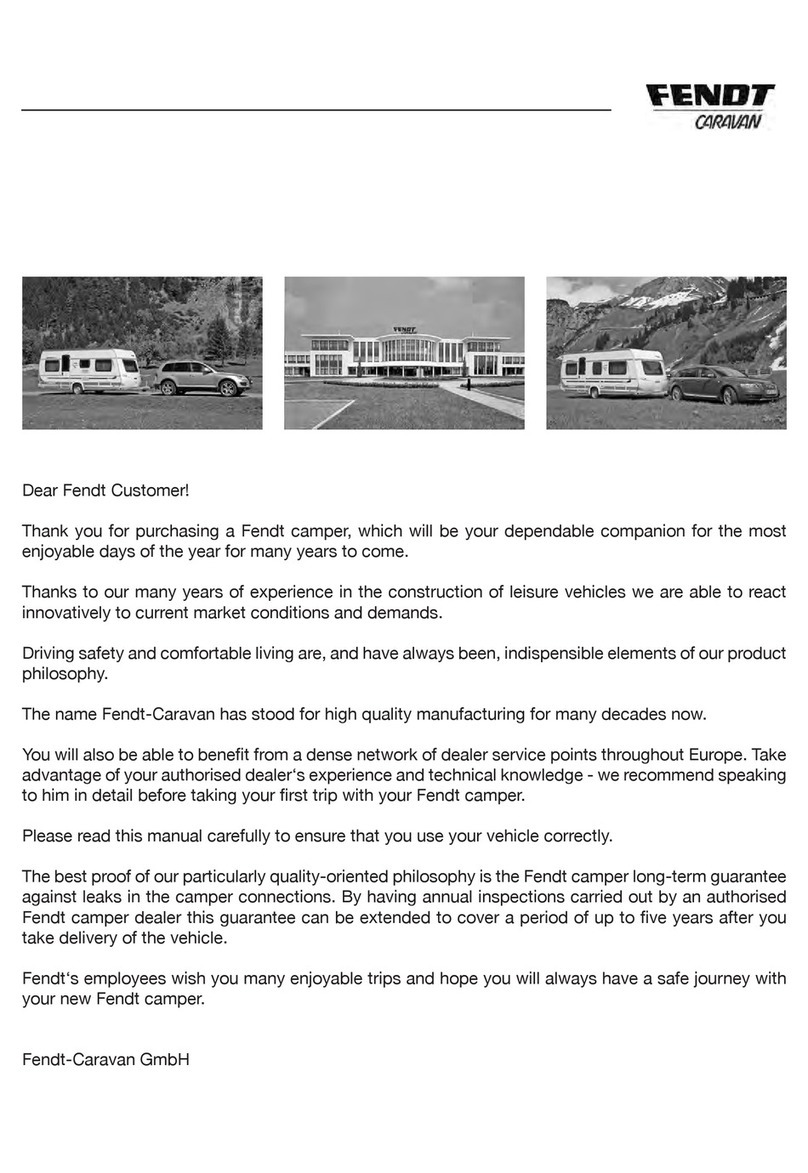
FENDT CARAVAN 2021 User manual

OPERATION GUIDE CARAVAN
GB
2021

1. Introduction
Dear Fendt Customer!
Thank you for purchasing a Fendt caravan, which will be your dependable companion for the most enjoyable
days of the year for many years to come.
Thanks to our many years of experience in the construction of leisure vehicles we are able to react innovatively
to current market conditions and demands.
Driving safety and comfortable living are, and have always been, indispensible elements of our product
philosophy.
The name Fendt-Caravan has stood for high quality manufacturing for many decades now.
You will also be able to benet from a dense network of dealer service points throughout Europe. Take advan-
tage of your authorised dealer‘s experience and technical knowledge - we recommend speaking to him in
detail before taking your rst trip with your Fendt caravan.
Please read this manual carefully to ensure that you use your vehicle correctly.
Fendt‘s employees wish you many enjoyable trips and hope you will always have a safe journey with your
new Fendt caravan.
Fendt-Caravan GmbH

1. Introduction
1 Introduction
1.1 General information...........................................................................................................................1
1.2 Markings in these operation instructions..........................................................................................1
2 Safety
2.1 General information...........................................................................................................................3
2.2 Before the drive.................................................................................................................................5
2.3 Loading .............................................................................................................................................6
2.4 Handling Performance ......................................................................................................................8
2.5 After the drive....................................................................................................................................9
3 Undercarriage and vehicle registration
3.1 General information.........................................................................................................................11
3.2 Safety coupling AKS 3004 ..............................................................................................................12
3.3 Locking brake facilitiesng und Radbremsen...................................................................................13
3.4 Overrunning equipment and wheel brakes .....................................................................................13
3.5 Rotating stanchions ........................................................................................................................15
3.6 Vehicle registration..........................................................................................................................16
3.7 General inspection ..........................................................................................................................16
3.8 Fit for a Speed of 100 km/h ............................................................................................................16
3.9 Denition of mass ...........................................................................................................................17
4 Wheels, tires
4.1 Tires ................................................................................................................................................19
4.2 Tire pressure ...................................................................................................................................19
4.3 Prole depth and age of tires..........................................................................................................20
4.4 Rims ................................................................................................................................................20
4.5 Changing the tire.............................................................................................................................22
5 Exterior structure
5.1 Ventilation and De-aerating.............................................................................................................24
5.2 External entry ..................................................................................................................................25
5.3 Service ap .....................................................................................................................................30
5.4 Toilet ap.........................................................................................................................................31
5.5 Gas-bottle container ap ................................................................................................................31
5.6 Roof and roof rail ............................................................................................................................32
5.7 Guide rail for outer tent ..................................................................................................................32
5.8 Bicycle carrier .................................................................................................................................32
5.8.1 Rear-mounted CARRYBACK bicycle carrier ..................................................................................33
5.9 Subsequent installation of an awning .............................................................................................34
6 Interior structure
6.1 Doors, aps, drawers and kitchen worktop ....................................................................................35
6.2 Converting the seating arrangement into a bed .............................................................................35
6.3 Bunk beds.......................................................................................................................................40
6.4 Windows .........................................................................................................................................42
6.5 Roof bonnets...................................................................................................................................42
7 Installation of electrical devices
7.1 Safety tips .......................................................................................................................................43
7.2 Electrical supply..............................................................................................................................43
7.3 Control panel...................................................................................................................................47
7.4 Lighting control system with switch/touch panel............................................................................48
7.5 Truma-iNet-System .........................................................................................................................68
7.6 Circuit diagram for lighting in the vehicle........................................................................................71
7.7 Lights in the caravan requiring extra switching ..............................................................................74
7.8 Electrical oor temperature control system ...................................................................................75
7.9 Microwave.......................................................................................................................................76
Table of Contents

1. Introduction
7.10 Air conditioning ...............................................................................................................................76
7.11 Multimedia ......................................................................................................................................77
7.12 Prewiring for antenna ......................................................................................................................77
8 Water
8.1 Water supply ...................................................................................................................................78
8.2 Warm water supply via Truma-Therme ...........................................................................................79
8.3 Water taps ......................................................................................................................................81
8.4 Cassette toilet ................................................................................................................................82
9 Gas
9.1 General safety rules for the use of liquid gas facilities....................................................................83
9.2 Gas supply ......................................................................................................................................84
9.3 Hot-air heating ................................................................................................................................86
9.4 Refrigerator .....................................................................................................................................92
9.5 Gas cooker......................................................................................................................................93
9.6 Oven................................................................................................................................................93
10 Accessories ............................................................................................................................................94
11 Maintenance and upkeep
11.1 Maintenance....................................................................................................................................95
11.2 Ventilation........................................................................................................................................96
11.3 Upkeep............................................................................................................................................97
11.4 Winter operation............................................................................................................................103
12 Waste disposal and environmental protection
12.1 The environment and mobile travel...............................................................................................106
13 Technical data
13.1 Tire pressure values ......................................................................................................................108
13.2 Technical data ...............................................................................................................................109
13.3 Measurements of Outer Tent Perimeter ........................................................................................111
13.4 Basic equipment ...........................................................................................................................113
13.5 Lighting..........................................................................................................................................114
Index ......................................................................................................................................................117

Marking of details using position numbers
1. Introduction
Our caravans are continuously being further developed. Please un-
derstand that we reserve the right to make changes to their equip-
ment, shape and technology. Therefore, Fendt shall not be liable for
any claims arising from the contents of this handbook. The equip-
ment used at the time of printing is described in this handbook and
should be transferred accordingly to the layouts of all the dierent
caravan variations.
Please understand that we cannot describe all of the individual vari-
ations. Your dealer will be pleased to answer any special questions
regarding the equipment and technology of your caravan.Check
our website www.fendt-caravan.com to nd the Fendt caravan
dealer or service partner closest to you.
Your Fendt caravan has been built in accordance with the latest
technology and recognised safety regulations. This vehicle con-
forms to the EN 1645-1 standard.
Despite all of these safety measures, it is possible that people may
be hurt or the caravan damaged if the safety instructions in this
handbook and the warnings posted on adhesive labels in the cara-
van are not followed.
1.1 General information
Before the rst trip
You should certainly familiarize yourself thoroughly with the con-
tents of this handbook; it is much more than a reference book.
1
1.2 Markings in these operation instructions
The handbook explains the caravan as follows:
Texts and illustrations
The texts which accompany illustrations are found directly to the
right of the illustrations.
Details in illustrations (here: entry door) are marked with position
numbers
j
.
Pictures may vary somewhat from the equipment in your caravan.
Lists
- Lists are based on key points and are preceded by a dash.
Procedural guidelines
• Procedural guidelines are also based on key points and begin
with a bullet point.
1

1. Introduction
2
Guidelines
Warnings
Environmental tips
Guidelines point out important details which ensure
the trouble-free function of the caravan and its equip-
ment. Please bear in mind that various models have
dierent equipment; therefore, varying descriptions
arepossible.
Warnings point out dangers which, if they are not
followed, could cause damage to equipment and/or
injury to persons.
Environmental tips show possible ways to reduce
strain on the environment.

3
2. Safety
Minimum distance between the warning
triangle and the caravan
2.1 General information
Warnings and information labels are attached both in-
side and outside the vehicle. These are meant for your
safety and may not be removed.
Emergency equipment
To be prepared for an emergency, you need at least three basic items
of rescue equipment (rst aid kit, warning triangle and re extinguisher)
which you should carry at all times and know how to use.
- rst aid kit
- warning triangle
- high-visibility vest
Fire prevention measures
• Never leave children unattended in the vehicle.
• Keep ammable materials away from all heating and cooking
appliances.
• Changes to the electrical system, gas system or built-in devices
may only be carried out by professional, authorised workshops.
• Place a re extinguisher at the main entry door.
• Ensure that everyone is familiar with the guidelines on the re
extinguisher.
• Place a re cover near the gas cooker.
• Keep all escape routes clear.
• Ensure that everyone is familiar with the re prevention
measures on site.
Keys
The following keys are provided with the caravan:
- Two keys which t into the following locks:
- entry door,
- service aps,
- toilet ap.
- gas-bottle container lid
- fresh-water tank lid
Fighting a re
• Evacuate all passengers immediately.
• Close the main shut-o valve on the gasbottle as well as the
shut-o valves on gaspowered appliances.
• Shut o the electrical supply
• Sound alarm and call the re department.
• Only ght the re yourself if this is possible without risk.
100 m

4
2. Safety
Smoke detector
The base for the smoke detector has already been installed in a
suitable place on the ceiling. To operate it, put the battery in (ma-
king sure that plus and minus are in the right direction) and fasten
the smoke detector to the base by turning it. The system has been
tted with a safety feature. If there is no battery or the battery has
not been put in correctly, the smoke detector will not t into the hol-
ding clamp. Test the device regularly (we recommend once a week)
or whenever you rst use the caravan after it has been unused for
a longer period of time, following the procedure described under
‚Test‘.
Test
Press the test button for at least 4 seconds until the alarm goes o.
This will activate a self-test program. The alarm goes o when the
electronic system (horn and battery) is working.
Exchanging the battery
Energy for the smoke detector system is provided by a 9-volt batte-
ry. The system will not work without a battery. Insert a new battery,
ensuring it is the correct type, when you hear the battery‘s warning
signal (a „peeping“ sound, easily heard, that is repeated every 30-40
seconds for approx. 7 days).
Evacuation plan
Hold a meeting with your family to discuss the possibilities for eva-
cuating the caravan. Everyone who uses the caravan should know
what to do in case re breaks out.
Please observe the manufacture‘s operating instruc-
tions.
What to do when the alarm goes o?
Leave the caravan immediately, either through the door or a win-
dow, depending on where the re has broken out, following the
evacuation plan you have discussed. Every second counts! Do not
waste any time getting dressed or packing your valuables, etc.As
soon as you are outside the caravan, keep moving until you are a
safe distance away from it. Notify the re department immediately
from a neighbour‘s telephone or use your cell phone. Do not, un-
der any circumstances, go back inside the burning caravan. Shout
loudly to warn any neighbouring caravans parked within the safety
zone. Do not enter the caravan until the re department has given
you permission to do so.
A smoke detector will not prevent res or put them out.
If it is working properly, it will merely provide you with
those possibly decisive seconds to save yourself and
notify emergency services.
Dometic Komfort-Produkte für Fendt-Freizeitfahrzeuge
Kühlschrank
Kocher
Schaltnetzteil
Klimaanlage
Fenster
Rauchmelder
Dachentlüfter
BEDIENUNGSANLEITUNG
)HQGW2'(ERRN6HLWH0LWWZRFK0DL

5
2. Safety
2.2 Before the drive
Exterior
Go around the carriage and prepare for the drive as follows:
Preparation of the vehicle
• The caravan must be hitched properly (see guidelines for the
safety hitch AKS3004).
• Release the handbrake for the caravan and place the contact-
breaking cable around the ball neck of the permanently atta-
ched tow coupling. If the tow coupling is detachable,
the contact-breaking cable must be hooked into the eyelet
provided on towing bracket the for that purpose.
• Tighten the tire bolts after driving the rst 50 km.
• Plug the 13-channel plug in the socket of the base vehicle.
• Inspect the vehicle lighting.
• Turn the winding stanchions up.
• Turn the front landing wheel up into its correct position (see pic-
ture), then lock and secure it. This must not interfere with the
function of the brake linkage or the contact-breaking cable.
• Turn o the gas bottles and secure them (heating is forbidden
while driving) Exception: using a licensed gas ow monitor
(e.g. Truma-Duo-Control CS)
• Empty the waste water tank.
• Close gas bottle compartment.
• Adjust outer mirrors on base vehicle.
• Check caravan's tire pressure (see tire pressure table).
• Close all windows.
• Close the service aps.
• Close and rmly lock roof bonnet.
• Shut o the light on the outer tent.
• Close and secure entry door.
• If necessary, pull the electrical cord to the 230 V mains supply
out of the exterior socket.
• If necessary, pull the television antenna inward as far as possi-
ble or fold over the satellite dish.
• If necessary, secure all bicycles and lash them to prevent slip
page, ensuring that they do not cover any lighting equipment.
• In winter, the roof must be free of snow and ice before you
begin to drive.
As the owner and driver, you are responsible for the condition of your
vehicle. Therefore, you must note the following points:
Please note that in some countries the safety line must
be attached to an eyelet or bracket that is securely
mounted on the car. In these countries, it is not suci-
ent to simply wrap it around the ball neck. Doing so will
be penalised by an administrative ne. Please inform
yourself in good time before beginning your journey
about the legal regulations in the countries you plan on
driving through.
Post a list with all signicant weights and measurements
of the carriage in a highly visible place in the base vehicle.

6
2. Safety
Interior
You must also prepare the interior of the vehicle.
Preparing the interior
• Sort all loose objects and store them in their respective com-
partments.
• Heavy and/or voluminous objects (e.g. TV/ radio) should be
stored safely and secured against slipping.
• If necessary, redirect refrigerator to 12-volt operation.
• Shut o all interior lighting.
•
Ensure that all uids, including those in refrigerator, are secured
to prevent leakage.
• Close main valve on gas container and quick-close valves on all
gas-powered appliances.
• Close all doors (incl. refrigerator door), drawers and aps tightly.
• Latch the sliding door.
• Lower table and secure it.
Staying in the caravan during the drive is prohibi-
ted by law!
Rules for loading
• Spread the load evenly between the left and right-hand side of
the caravan. Heavy or bulky objects belong in the lower storage
compartments and near the axle.
• If your caravan has a tandem axle: distribute the centre of
weight between the two axles.
• Never focus the load in the caravan to the rear (danger of
swinging back and forth).
• Heavy objects should be stowed securely to prevent them from
slipping.
• Lighter objects (clothing) should be stowed in the wall cupboards.
• You may not always be able to follow the recommended
stowing arrangement, because storage possibilities are distri-
buted throughout the entire interior of the caravan. If necessary,
stow heavy objects in the base vehicle.
• Store baggage in the interior in cupboards and storage com-
partments.
• Secure doors and aps.
• After loading, check total weight and axle load(s) at a public
weigh station.
The gross vehicle weight rating indicated in the vehi-
cle documents as well as the permitted drawbar load
may not be exceeded. Also note the permissible
drawbar load of your base vehicle.
Providing your base vehicle permits this and depen-
ding on the size of the caravan, you can improve the
driving quality by increasing the drawbar load.
The max. permissible load for the left and right wheels
each equals half the value (for a single axle) and one-
quarter of the value (for vehicles with a tandem axle)
respectively of the technically max. permissible maxi-
mum weight.
2.3 Loading

7
2. Safety
Stowage areas in the caravan
- Light objects
j
such as towels and lightweight laundry.
- Medium-weight objects
k
such as clothing, laundry and food.
- Heavy objects
l
such as the outer tent, boat motor or crates
of drinks.
If the caravan has been tted with a bicycle carrier on the draw-
bar, the increase in the drawbar load caused by the weight of the
bicycles must be counterbalanced by the rest of the load.
Drawbar load
You will only achieve optimum driving stability and decisively increase
your safety on the road if the drawbar load has been properly adjusted
for your combination of base vehicle and the caravan being pulled. The
drawbar load indicates the power the caravan's drawbar exerts on the
car's clutch.
Rules for the drawbar load
• Set the drawbar load correctly! You can, for example, use
normal bathroom scales: use a strip of wood (approx. 400 mm
long) to position them vertically under the coupling jaw. It may
also be possible to roughly estimate the drawbar load by means
of the drawbar load scales*mintegrated in the front landing
wheel, whereby the drawbar of the caravan must be in a hori-
zontal position.
• Always check the drawbar load before you start to drive!
• The specied drawbar load (see handbook or type plate) and
the permissible overall mass of the base vehicle and the
caravan may not be exceeded!
How to adjust the correct drawbar load:
1. Determine the maximum drawbar load of your base vehicle by
checking its documentation, the type plate or the drawbar plate.
2. Your Fendt caravan has a maximum permissible draw-
bar load of 100 kg.
3. Adjust the drawbar load on the caravan to the lower of the two
values by loading it carefully. At the same time, try to make full
use of this value.
4. The lower of the two specied values for the drawbar load, i.e.
that of the base vehicle or the caravan, may not be exceeded.
* model/series-specic
4
The lower a vehicle's centre of gravity is, the better
its performance in curves and on the road.
32 1

8
2. Safety
Driving around curves
Your carriage is considerably longer than a car.
Rules for driving around curves
• Do not take curves too quickly or too sharply!
• Take the curve at a somewhat wider radius when turning.
• Note that the caravan can sheer out of line over the rear.
Driving
Take a test drive or a safety training course before the rst long drive
to better acquaint yourself with the carriage in driving conditions.
Rules for driving
• Do not underestimate the length of the carriage.
• Exercise special caution when driving toward yards and
through gates.
• In conditions with strong side winds, slick ice or wet roads, the
carriage could move back and forth.
• Adjust driving speed to overall street and trac conditions.
• Long, lightly sloping roads are potentially dangerous. Measure
your speed from the outset in such a manner that the carriage
can be accelerated, if necessary, without endangering
other drivers or pedestrians.
• If the carriage moves back and forth on a sloping road, brake
carefully but rapidly if the carriage forms a line, i.e. if it is
stretched.
• Never increase speed if the carriage becomes pendulous.
• Do not drive down a hill any faster than you would drive up one.
• When overtaking or being overtaken by trucks or buses, the
carriage can be caught up in air suction. This may cause the
carriage to swerve or shtail.
2.4 Handling Performance
Please note that by installing a bicycle carrier on the
drawbar you may reduce the steering angle between
the car and the caravan.
Brakes
A trailer carriage behaves dierently from an individual vehicle whi-
le braking. Therefore, it is advisable (especially for inexperienced
drivers) to conduct several braking tests on a suitable surface. The
braking distance for a carriage is longer than that of an individual
vehicle. The load in the caravan also has a signicant inuence on
the braking distance.
Rules for braking
• Note the longer braking distance on wet roads.
• When driving down mountains or steep hills, do not use a higher
gear than when driving uphill.
• Principally, an overrunning brake system cannot dierentiate
between a "normal" braking procedure and driving over a pass,
which lasts for a longer period of time. This can cause the
wheel brakes to heat up strongly so that, if necessary, you must
give them sucient time to cool down.

9
2. Safety
Due to the design of the brakes, there may be increa-
sed wear in the brake lining during the initial break-in
phase. We recommend that, after you have driven ap-
prox. 700 - 1200 km, you have the basic setting for the
brakes checked by a specialist company and adjusted
if necessary (Initial inspection).
Not applicable for brakes with automatic adjustment
(e.g. AL-KO-AAAPremium Brake - new series in
2016 models)
Driving in reverse
Your Fendt caravan has a braking system with automatic reverse. This
makes driving in reverse possible without activating the overrunning
brake. However, in addition to rolling resistance, the residual brake
force must rst be overcome.
The next time the caravan moves forward the braking system will
work normally again.
Rules for driving in reverse
• The caravan tilts in the opposite direction in which you steer.
• Use a guide when driving in reverse.
Shunting
Your carriage is signicantly larger than a car.
Rules for shunting
• There is a signicant blind spot in shunting, even when the
exterior mirrors are properly adjusted.
• Use a guide when turning into dicult parking spots.
When positioning the caravan manually, only use the
steering handles at the front and rear ends of the cara-
van. Never push on the plastic parts or the walls.
2.5 After the drive Choosing a parking place
Rules for choosing a parking place
• The parking place should be as horizontal as possible.
• Check to see that the entry step is positioned horizontally (im-
portant for refrigerator function).
• Balance the lengthwise slant with the front landing wheel.
• Balance the crosswise slant by laying appropriate boards or a
ramp under a wheel.
Do not compensate dierences in height with the lift
stanchions.

10
2. Safety
Securing the vehicle
Rules for securing the vehicle:
• Set the parking brake.
• Only extend the rotating stanchions as far as necessary so that
the axle still bears part of the weight. (The crank is clipped to
the bottom of the gas-bottle container.)
• Lay mats under the lifting stanchions when on soft ground.
• Use stop-blocks to secure the wheels.
Redirecting electrical devices
Rules for redirecting electrical devices
• Open the main shut-o valve on the gasbottle as well as the
shut-o valves on the gas-powered appliances you require.
• Redirect the refrigerator from 12 V to gas or 230 V; otherwise,
the battery of the base vehicle could be depleted.
Water installation
Water left standing in the fresh water tank or the pipes quickly
becomes undrinkable.
Therefore, check the water pipes and the freshwater tank after each
use to ensure they are clean. If necessary, use chemical or biologi-
cal disinfectants and rinse well with sucient fresh water.

11
3. Undercarriage
3.1 General information
Greasing and oiling
Regularly examine and grease the sliding parts and stationary parts
of the undercarriage. If the caravan is used seldom, yearly mainte-
nance is required.
Overrun coupling for greasing and oiling
jGrease the tie rod around the gangway bellows
kGrease the bearing screws on the pivot arm and the brake
lever above the lubricating nipple
lGrease the joint of the joint head
mOil the joints of the spring brake on the brake lever
Recommended lubricant
multi-purpose grease in accordance with DIN 51825 KP2 G 30
Frame parts and axles are components of the undercarriage. No
technical modications are allowed; otherwise, the terms of operation
are no longer valid!
For the sake of trac safety, the vehicle undercarriage must be
maintained just as conscientiously as the base vehicle itself.
This
maintenance should be carried out by your Fendt dealer. If spare
parts are required, use only the original parts designated by the ma-
nufacturer.
Technical modications are only possible after the ma-
nufacturer has given his consent.
Generally, caravans are not suitable for pulling by
lorries or buses. If this is done permanently, they will
be damaged.
You can find further guidelines in the operating
instructions from the axle supplier.
Maintenance and adjustments to the brake system
may only be carried out by an authorised specialist
company!

12
3. Undercarriage
The caravan is equipped with an anti-rolling coup-ling in accordance
with ISO 11555-1. This safety coupling stabilises the caravan while
driving and ensures better driving performance.
WARNING: The laws of physics cannot be deed with a
safety hitch. If the limits (of speed and weight conditions)
are exceeded, traction and cornering force are reduced,
which then becomes the responsibility of the driver.
Therefore,
avoid elevated risks. Please take note of
the
permitted drawbar load for your base vehicle.
Use the drawbar load scales on the front landing wheel
to determine the current value of the drawbar load of the
caravan.
Please observe the manufacture‘s operating instruc-
tions (enclosed).
Noises while driving
Generally, the friction pads of the AKS 3004 do not make noises!
Any clicking, creaking and screeching noises could be caused by
the following
• foreign matter or dirt between the friction pad and the drawbar
ball
• dry operation of the drawbar/tie rod in the bushings of the over-
run coupling
• drawbar ball on the base vehicle can be removed and there is
too much tolerance in the lock mechanism
• surface coating has not been removed from drawbar ball
(grease, galvanised, Dacomet, varnish, KTL or any other coating)
3.2 Safety coupling AKS 3004

13
3. Undercarriage
To eliminate
• Clean the drawbar ball and the friction pads by lighting sanding
the pads with sandpaper (grain: 100-120).
• Use the lubricating nipple to grease the bushings. In addition,
pull the gangway bellows on the overrun coupling o towards
the front and grease all of the exposed drawbar.
• Lubricant: multi-purpose grease in accordance with DIN 51 825.
• Take the caravan to an authorised specialist company. Have the
contact surfaces checked for damages and the lock mechanism
checked that it is functioning correctly. If necessary, replace
the drawbar ball or, if permitted, regrease the lock mechanism
(please refer also to the operating manual for the removable
drawbar ball).
The components of the brake facilities, particularly the overrunning
equipment, wheel brakes and towbar were checked in accordance
with the appropriate EU Guidelines and may only be used in a licen-
sed combination.
If you alter or modify any components of the brake facilities, the
operation permission loses its validity. Modications may only be
made with the manufacturer's permission.
Parking the carriage
When parking the carriage, the locking brake of the caravan must
be activated.
To lock
• Pull the locking brake lever upward by the handle
j
until it
locks into place. The locking brake lever is pressed into the
nal position by the gas pressure spring.
To release
• Press the locking brake lever back into the original position.
3.3 Locking brake facilities
3.4 Overrunning equipment and wheel brakes
Overrun coupling
We recommend that you always check this is functio-
ning correctly before using the camper.
a) Hand brake
• Pull the hand brake lever and check that it has room to move freely
• Check the condition of the pneumatic spring
• Check the condition of the spring brake
b) Support wheel and immobilizing handle
• Check wheel for damages
• Release immobilizing handle and check screw thread
• Push support wheel up and down
• Pull immobilizing handle tight
• Use crank to crank the support wheel out and in again
1

14
3. Undercarriage
c) Tie rod bearing
• Pull out the tie rod as far as it will go
• Press the tie rod up and down - maximum tolerance: +/- 0.3 mm
(only for Euro-AE)
d) Mounting bolts for overrun coupling and coupling
• Check that all mounting bolts for the overrun coupling and the
coupling have been pulled tight.
e) Contact-breaking cable
• Check the ring of the contact-breaking cable, located on the
hand brake lever
• Check the condition of the cable guide
• Check the condition of the snap hook
• Check the condition of the cable
Brakes
The brake linings are wear and tear parts. Therefore, their condition
must be checked at least every 10,000 km, but no later than once
every year. If the overrun travel of the drawbar is signicantly increased,
it is necessary to adjust it sooner. This is often caused by heavy use:
the technically permissible maximum weight is utilised 100% and/or
frequent uphill drives.
• When driving downhill on a mountain pass, check to
ensure that the brakes are cooled suciently.
• Put the base vehicle into a lower gear and drive
downhill at slow speed.
• Stretch the trailer combination as often as possible
to avoid continuous bung by the caravan.
• Always make use of parking areas and passing points
to give the brakes a chance to cool o.
Please read the separately enclosed operating manual
of the axle/brake manufacturer.
Planned maintenance intervals
Allow only authorised companies to work on the bra-
ke system of your caravan. The documents provided
with your vehicle also include a list of the axle/brake
manufacturer‘s service stations.
If maintenance is not carried out at regular intervals as
specied, this may result in increased brake wear or a
malfunction that could lead to a complete failure of the
wheel brakes.

15
3. Undercarriage
The rotating stanchions may only be used for sup-
port, and not for leveling out or raising.
Brakes should be checked for the rst time or basic maintenance
should be carried out after driving 500 km, but no later than after
the rst six months, depending on which event occurs rst!
• Check the brakes and adjust them if necessary
Not applicable for brakes with automatic adjustment
(e.g. AL-KO-AAAPremium Brake )
3.5 Rotating stanchions The rotating stanchions are located in the front and rear under the
caravan.
Turning the rotating stanchions outward
• Park the vehicle as horizontally as possible.
• On soft ground, lay a sturdy mat or suitably sized board under
the rotating stanchions to prevent the caravan from sinking.
• Turn the rotating stanchions outward.
Turning the rotating stanchions inward
• With the crank, turn the rotating stanchions inward to the hori-
zontal position.
The crank for the rotating stanchions is located in the bottle con-
tainer at the front; it is clipped into a holder.
Check the brakes every 5,000 km or 12 months
• Check the brakes; if necessary, replace the brake pads.
• Adjust the brake pads.
Service the brakes every 10,000 km or 24 months
• Major brake inspection according to manufacturer’s specications.
Here is a brief summary of the most important aspects to ensure
that the caravan’s brakes operate safely:
• Ensure that the maximum load is not exceeded.
• It is imperative that the caravan and its components are
handled carefully and in a professional manner.
• The brakes can only function correctly if maintenance and up-
keep are carried out on a regular basis.
The AAA Premium Brakes are not self-cleaning, nor are
they maintenance free!
Maintenance intervals must be observed!
These intervals are reduced if the brakes are subjected
to heavy loads.

16
3. Undercarriage
In accordance with Section 29 of German Road Trac Licensing
Regulations, your caravan must undergo a major inspection every
two years. This major inspection may be carried out by the TÜV
(Technical Inspection Authority), DEKRA Vehicle Inspections or
another accredited technical support organisation.
The following documents must be presented at each inspection:
- motor vehicle registration certicate, Part I
- valid certicate of inspection for gas facilities, documenting instal-
lation. The initial certicate is located in the service package for the
caravan.
Vehicle identication number
The 17-digit vehicle ID number is located:
1.) stamped on the longitudinal chassis beam in the direction of
trac, on the right-hand side in front of the tire
2.) on the manufacturer‘s type plate in the gas-bottle container.
Please have the vehicle ID number at hand in case of inquiries or
when visiting your Fendt-Caravan dealer.
Picture may vary somewhat from the actual model.
3.7 General inspection
Manufacturer‘s type plate
3.8
Fit for a Speed of 100 km/h
1. Your Fendt caravan is technically equipped for a maximum
speed of 100 km/h. Under no circumstances may this speed be
exceeded!
2. Note the permissible maximum speeds for trailer carriages in
the country in which you are travelling!
3.6 Vehicle registration Every vehicle which uses public roads is subject to registration.
This includes your new caravan. You can register the caravan at
your local registration oce.
The following documents are required to initiate the registration
process:
- motor vehicle registration certicate, Part II
- insurance card
- personal identication or proof of residence
- possibly, power of attorney to have someone else register the
caravan
Please remember to apply for a suitable "100 km/h" sticker, should
you require one.
Table of contents
Other FENDT Caravan manuals
Popular Caravan manuals by other brands
MDC
MDC 15 Year Anniversary XT16HR Series owner's manual

AUSTRACK CAMPERS
AUSTRACK CAMPERS TALAWANA X15LS user manual

Tiffin Motorhomes
Tiffin Motorhomes WAYFARER 2021 owner's manual

AUSTRACK CAMPERS
AUSTRACK CAMPERS TALAWANA X16BLS user manual
Ausrv
Ausrv SUPERLITE 2021 owner's manual

PotteryBarn
PotteryBarn Airstream SPECIAL EDITION 2024 owner's manual
