manuals.online logo
Brands
  1. Home
  2. •
  3. Brands
  4. •
  5. Ferguson
  6. •
  7. Receiver
  8. •
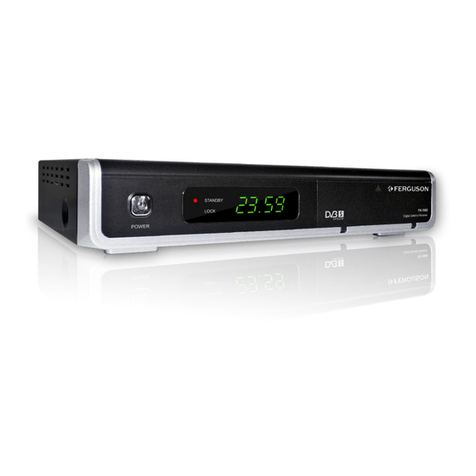
  9. Ferguson DF 9000 PVR User manual

Ferguson DF 9000 PVR User manual

DIGITAL SATELLITE RECEIVER
DF 9000 PVR
DF 9000 PVR
8VHU¶V*XLGH
'07&;&,395 'LJLWDO6DWHOOLWH5HFHLYHU
CONTENTS Page











CHANNEL MANAGER
Channel Manager
Favorite Channel
Move Channel
Lock Channel
Rename Channel
Delete Channel
Sort Channel
GAME
Hard Disk Recorder
Time-Shift mode
Play back mode
Timer Recording
EP Recording
File List
HDD Manager
7-Segment Display
EPG (Electronic Program Guide)
TIMER
ANTENNA DIRECTION HELP
RECEIVER INFORMATION
FRONT PANEL DISPLAY
TROUBLE SHOOTING








GENERAL FUNCTION
Select Channel
Pause the Frame
Previous Channel Recall
TV&Radio mode
TV&VCR mode
Channel Information
Volume&Audio Control








GENERAL INFORMATION
Main Feature
For your Safety
Unpacking
eneral Operation
Remote Control Unit
Front Panel
Rear Panel
INSTALLATION
Connecting to Antenna & TV
Connecting to TV & VCR using Scart
Connecting to TV using RCA support
Connecting to TV using S-VHS
Connecting to Digital Audio Output
Connecting to TV using RF support
Connecting to another receiver
MAIN PAGE
USER INSTALLATION
Antenna setup - 1) DiSEqC 1.2
Antenna setup - 2) Fixed
Antenna setup – 3) USALS
Channel search -1) DiSEqC 1.2
Channel search -2) Fixed
Channel search – 3) USALS
System setting
Parental Lock
Factory Default
















Page














COMMON INTERFACE 

A Digital Satellite Receiver is a convenient product that allows you to view a variety of programs
provided through satellite. This user’s guide covers the installation of the STB and the necessary
steps to implement various features. This also explains special features available only in this STB
in detail, which will allow you to make full of these feature.
0DLQ)HDWXUH
• Fully MPE 2, DVB compliant
• Capable of descrambling encrypted programs by Conax using built-in Conax descrambler
• 2 Slots common interface for Viaccess, Irdeto, CryptoWorks, Nagravision, Conax, SECA and more
• DiSEqC1.2 positioner for multi-satellites (128 satellites)
• C/Ku band control for each antenna
• Recording current program while playing back earlier program simultaneously
• Recording reservation function on Timer and EP
• Recording and playback with time delay (Time-Shift function)
• 3 steps (x4, x8, x16) Fast forward and Rewind function
• Pause and step playback function
• HDD management function (Play, Move, Lock, Rename, Delete, Format)
• Various playback function (Jump, Repeat, Shuffle, Slow playback)
• PI (Picture In raphic) support
• Provide friendly and easy-to-use menu system
• Various channel editing function
(favorite, moving, locking, renaming, deleting and sorting)
• User programmable various satellite & transponder information
• Automatic search for newly added transponder (Network Auto Search)
• Stores up to 5000 channels
• Easy and speedy software upgrade through RS-232 port
• Plug-and-play data transfer system (STB to STB)
• Timer function, automatically turns On/Off by setting function
(daily, weekly, monthly and one time)
• Automatic reserved channel moving system
• Provide Electronic Program uide (EP )
• OSD Teletext (DVB ETS 300 706) and Subtitle function support
• VBI Teletext support
• Antenna positioning help feature
• Selectable video output – CVBS, R B
• Provide various switch types, LNB types and NTSC/PAL monitor type
• SCPC/MCPC receivable from C/Ku band satellite
• Multi LNB controlled by DiSEqC 1.0, 22KHz and 0/12 volt switching
• 256 colors On-Screen-Display
• PAL/NTSC automatically conversion
• Last channel automatically saving
* 1 5$/,1)250$7,21
-3-
)RU<RXU6DIHW\
This STB has been manufactured to meet international safety standards. Please read all of the
safety and operating instructions before operating the product. And keep all safety and operating
instructions for future reference.
1. Main Supply : 90-250V AC, 50/60Hz, 30W
2. Overloading
Do not overload a wall outlet, extension cord, or adapter as this may result in fire electric shock.
3. Liquids
Do not expose the STB to rain or moisture. The apparatus shall not be exposed to dripping or
splashing water and that no objects filled with liquids, such as vases, shall be placed on the
apparatus.
4. Cleaning
Disconnect the STB from the wall outlet before cleaning. Do not use liquid cleaners or aerosol
cleaners. Use a light damp cloth for cleaning.
5. Ventilation
The slots on top of the STB must be left uncovered to allow proper airflow to the unit. Do not stand
the STB on soft furnishing carpets. Do not expose the STB to direct sunlight or do not place it near a
heater. Do not stack electronic equipments on top of the STB. Keep distance about minimum 10cm
from the wall when it’s installed.
6. Attachments
Do not use any attachments not recommended by product manufacturer as they may cause
hazards.
7. Connection to the Satellite Dish LNB
Disconnect the STB from the mains before connecting or disconnecting the cable from the satellite
dish. FAILURE TO DO SO CAN DAMA E THE LNB.
8. Connection to the TV
Disconnect the STB from the mains before connecting or disconnecting the cable from the TV.
FAILURE TO DO SO CAN DAMA E THE TV.
9. Earthing
The LNB cable MUST BE EARTHED to the system earth for the satellite dish. The earth system
must comply with SABS 061.
10. Location
Place the STB indoor in order to prevent potential damage from lightning, rain, or direct sunlight.
11. Servicing
Do not attempt to service this product yourself, as opening or removing covers may expose you to
dangerous voltage or other hazards. Refer all servicing to qualified service personnel.
* 1 5$/,1)250$7,21
-4-
8QSDFNLQJ
Throughout this manual you will notice that the everyday operation of your STB is based on
a series of user friendly on screen display and menus. These menus will help you get the
most from your STB, guiding you through installation, channel organizing, viewing and
many other functions.
All function can be carried out using the buttons on the RCU, and some of the function can
also be carried out using the buttons on the front panel.
If at any time when you using the menus you want to return to the normal TV mode, press
the TV/AV button.
The STB is easy to use, always at your command and adaptable for future advances.
Please be aware that new software may change the functionality of the STB.
In the case of your facing difficulties with the operation of your STB, please consult the
relevant section of this manual, including the Problem Shooting, or alternatively call your
dealer or a customer service adviser.
*HQHUDO2SHUDWLRQ
Make sure you have received all the items in the STB Satellite Receiver carton.
Digital Satellite Receiver (STB)
Remote Control Unit
$$$
$$$
$$$
$$$
BatteriesUser’s Guide
* 1 5$/,1)250$7,21
-5-
Key Function
Turns power ON/OFF of the DSR
When watching a channel, mutes the sound
0~9 Enter number of the required menu item or
select a channel number to watch.
TV/RADIO Switches between TV and Radio mode
Å
ÅÅ
ÅPR Switches back to previous channel
FAV Display the favorite channel list
INFO Shows information of the current channel
MENU Press this key one time to run menu on
screen, and call command box
Moves up / down a page in the channel list
OK, LIST
Executes the selected item in the menu
screen, or enters the desired value in any
input mode.
PR+, PR-
When watching a channel, change
channels, or moves to the next higher or
lower item in the menu.
When watching a channel, adjust the
volume, or move to the left or right item in
menu
EXIT Returns to the previous menu on the menu
screen or escape from the menu
ALT-
AUDIO
When watching a channel, switches the
audio languages
EPG Calls up the EP
(Electronic Program uide)
Selects the different audio modes.
TV/AV Switches between TV or AV mode.
Position Display position bar on the screen to adjust
the antenna or for manual search.
Switches to subtitle and teletext mode.
UHF Switches to UHF tuning mode
PAUSE Press once to pause the screen picture,
press once again to go to the normal mode
PAL/NTSC Switches between PAL or NTSC mode
5HPRWH&RQWURO8QLW5&8
* 1 5$/,1)250$7,21
-6-
)URQW3DQHO
* 1 5$/,1)250$7,21
-7-
.H\ )XQFWLRQ
0 18 6KRZVWKHPDLQPHQXDQGFRPPDQGER[RQWKHVFUHHQ
2. ([HFXWHVWKHVHOHFWHGLWHPLQWKHPHQX
;,7 HWXUQVWRWKHSUHYLRXVPHQXRQWKHPHQXVFUHHQ
7XUQVRQDQGRIIWKHSRZHURIWKHUHFHLYHU
&+ :KHQ ZDWFKLQJ FKDQJLQJ WR WKH SUHYLRXV DQG QH[W FKDQQHO RU
PRYHVWRWKHQH[WKLJKHURUORZHULWHPLQWKHPHQX
92/ :KHQZDWFKLQJDFKDQQHODGMXVWWKHYROXPHRUPRYHWRWKHOHIWRU
ULJKWLWHPLQWKHPHQX
-8-
5HDU3DQHO
POWER ON/OFF
CONNECT VIDEO TO TV USIN RCA JACK
CONNECT TO THE S-VHS JACK OF
TV OR VCR
CONNECT TO AUDIO R/L TO TV OR AUDIO TUNER
CONNECT TO 12V TO AN
EXTERNAL 0/12V WSITCH
CONNECT TO A TV OR VCR
CONNECT TO TV ANT INPUT
CONNECT TO TV AND VCR
USIN A SCART CABLE
CONNECT TO A PC FOR S/W UP RADE
LNB IN : CONNECT TO SATELLITE ANTENNA
LNB OUT : CONNECT TO THE OTHER RECEIVER
CONNECT TO DI ITAL
AMPLIFIER
* 1 5$/,1)250$7,21
7KLVVHFWLRQH[SODLQVWKHLQVWDOODWLRQRI67% HIHUWRWKHPDQXDOVVXSSOLHGZLWKWKHHTXLSPHQWIRU
WKHLQVWDOODWLRQRIRXWGRRUHTXLSPHQWVXFKDVWKHGLVKDQWHQQD:KHQDGGLQJQHZHTXLSPHQWEH
VXUHWRUHIHUWRWKHUHODWHGSDUWVRIWKHPDQXDOIRUWKHLQVWDOODWLRQ
&RQQHFWLQJWR$17 11$79
-9-
&RQQHFWLQJWR799&5XVLQJ6&$57VXSSRUW
,167$//$7,21
-10-
&RQQHFWLQJWR79XVLQJ5&$VXSSRUW
&RQQHFWLQJWR79XVLQJ69+6VXSSRUW
,167$//$7,21
&RQQHFWLQJWR'LJLWDO$PSOLILHU
-11-
,167$//$7,21
-12-
&RQQHFWLQJWR79XVLQJ5)VXSSRUW
&RQQHFWLQJWRDQRWKHU5HFHLYHU
,167$//$7,21
The main menu has 8 sub-menus as
follows.
- Channel Manager (HDD Manager)
- Program uide
-Timer
- User Installation
- Utility (Receiver Information, ame)
- Conditional Access
0$,13$*
To move up and down, press “PR+ or PR-”. To move left and right, press keys on
the RCU. Place cursor on the “User Installation”, then sub-menu will be displayed on the
screen. (Refer to the picture)
You can set up all the necessary functions and settings for the STB in this main page
-13-
This menu consists of 5 major sub-menus
as below.
-Antenna Setup
-Channel Search
-System Setting
-Parental Lock
-Factory Default
$QWHQQD6HWXS'L6 T& 
1)Antenna : You can select maximum 16
antennas with the combination
switches.
2) Satellite : Select your preferable satellite
3) LNB1, 2
: Enter the proper LNB frequency referring to
your LNB using numeric key on the RCU or use
KEY PAD displayed by pressing OK key.
If you have a dual LNB, enter the proper value
in the both of value box.
4) Switches (0/12 Volt, 22KHz Tone ,DiSEqC)
: You can select the switches with which you
want to configure the antenna.
5) C/Ku band control
: You can select C/Ku band
control by switches types.
86 5,167$//$7,21
-14-
6) East, West Limit
: Press E key on the RCU until your antenna will
be reach to be easternmost and then press OK
key on the RCU. The message of “Would you
like to set East limit of DiSEqC motor?” will be
displayed for your confirmation, please select
OK button by pressing OK key on the RCU and
then East limit value will be changed as SET.
The usage of West limit is same as East limit.
7) Reset DiSEqC limit
: If you want to reset the East limit or West limit,
place a cursor on Reset DiSEqC Limit button
and then press OK key on the RCU. The
message of “Would you like to reset limit for
DiSEqC positioner?” will be displayed for your
confirmation, please select OK button by
pressing OK key on the RCU.
The cursor will move to the East limit button so
that you can reset the limit. After that, please
reset West limit same as before.
After setting all necessaries, please EXIT to
finish antenna setup menu. The message of
“Are you sure to change the configuration of
Antenna setup?” will be displayed. Please
select OK button on the screen and then wait
for saving a data.
86 5,167$//$7,21
Ⴠ
ჀჀ
ჀAnt.Help Ⴠ
ჀჀ
ჀFixed Ⴠ
ჀჀ
ჀUSALS Ⴠ
ჀჀ
ჀCH Search
You can also use short-cut color keys at the bottom of the menu box
ღ
ღღ
ღ6KRUW
6KRUW6KRUW
6KRUW

&XW&RORU.H\V
&XW&RORU.H\V&XW&RORU.H\V
&XW&RORU.H\V
ღ
ღღ
ღ
-15-
$QWHQQD6HWXS)L[HG
After setting all necessaries, please push
Ⴠ
ჀჀ
ჀCH Search
on your Remote to finish antenna setup
menu and move to channel search page.
The message of “Are you sure to change the configuration of Antenna setup?”will be
displayed. Please select OK button on the screen and then wait for saving a data.
86 5,167$//$7,21
1) Antenna : You can select maximum 16 antenna
with the combination switches.
2) Satellite : Select your preferable satellite
3) LNB1, 2
: Enter the proper LNB frequency referring to your
LNB using numeric key on the RCU or use
KEY PAD displayed by pressing OK key.
If you have a dual LNB, enter the proper value in
the both of value box.
4) Switches (0/12 Volt/ 22KHz Tone/ DiSEqC)
: You can select the switches with which you want
to configure the antenna.
5) C/Ku band control : You can select C/Ku band
control by switches types.
-16-
$QWHQQD6HWXS86$/6
86 5,167$//$7,21
1)Antenna : You can select maximum 16
antennas with the combination switches.
2) Satellite : Select your preferable satellite
3) LNB1, 2
: Enter the proper LNB frequency referring to your
LNB using numeric key on the RCU or use KEY
PAD displayed by pressing OK key.
If you have a dual LNB, enter the proper value in
the both of value box.
the proper value in the both of value box.
4) Switches (0/12 Volt, 22KHz Tone, DiSEqC)
: You can select the switches with which you want
to configure the antenna.
5) C/Ku band control : You can select C/Ku band
control by switches types.
7KHGHIDXOWYDOXHLV³2))´
3UHFRQGLWLRQIRUXVLQJ86$/6
IXQFWLRQ
!&KHFNLIWKHSRVLWLRQRIWKHDQWHQQD
PRWRULVRQ³´ GHJUHH
!1RZWKHPD[LPXPOLPLWRIWKH
DQWHQQDLVPHWHU
:KHQ\RXFKRRVHWKHVDWHOOLWHRIZKLFK
\RXZDQWWRXVHWKH86$/6IXQFWLRQ
LWVGLUHFWLRQDQGORQJLWXGHZLOOEH
GLVSOD\HG
,QSXW<RXU/RQJLWXGHDQG<RXU
/DWLWXGH
3OHDVHUHIHUWRWKHPDQXDODWWDFKHGWR
WKH86$/60RWRU
,WZLOOVHDUFKIRU³6DWHOOLWH/RFDWLRQ´
DQGDXWRPDWLFDOO\JRWRWKH&KDQQHO
6HDUFKVFUHHQ
-17-
4) Transponder
: Select a transponder using
keys or if you press OK key,
transponder List will be displayed
so that you can select easily.
1) Antenna : Select your antenna number.
&KDQQHO6HDUFK'L6 T&
3) Position : After selecting a satellite, please
select Position button and then
keep pressing E or W key on the
RCU until selected satellite is
locked. If the satellite is locked
correctly, the white color of signal
label bar will be changed to
yellow.
2) Satellite : Select a satellite using
keys or if you press OK key.
Then, the list of satellite will be
displayed so that you can select
easily.
You can see the information of
the selected satellite in the right
side.
When you press OK key on the
RCU, the message of “Would you
like to set the value of current
positioner?” will be displayed for
your confirmation.
5) Frequency & Symbol Rate
:If you press Edit key on the
RCU in this menu, command box
will be displayed. Check edit
mode by pressing OK key on the
RCU and then you can go into
those columns to change the
value.
86 5,167$//$7,21
-18-
8) Advance
Selection : All/ FTA Only
You can search either All channels or FTA only
Sort : FTA/ CAS/ A~Z/ OFF
You can search either FTA channels, Scrambled
channels, A~Z or all channels.
NIT : On/ Off
Search Channels transmitted by satellite
network information table (NIT)
Search : SAT/ TP/ PID
1) Search channels in one satellite which
selected on Satellite column.
2) Search channels in one TP which
selected on TP column.
3) Search channels in one PID which
selected on PID column
6) Polarization
: Select Hor or Ver.
9) Delete TP : If you want to delete a TP,
select a TP to be deleted and
press MENU key on the RCU to
display command box. Then,
select Delete TP command and
the confirm message box will be
displayed.
10) Sat Name Edit
: If you want to change a name of satellite, select a satellite and press
MENU key on the RCU to display command box. Select Sat Name
Edit, then, Keypad Dialog box will be appeared. Using arrow key on
the RCU, you can edit the satellite name.
7) 22KHz : Select ON or OFF.
86 5,167$//$7,21
-19-
1) Antenna : Select your antenna number.
&KDQQHO6HDUFK)L[HG
2) Satellite : Select a desired satellite using
 keys or if you press OK key,
the list of satellite will be
displayed so that you can select
easily.
You can see the information of
selected satellite in the right side.
4) ~10) Please refer to DiSEqC 1.2
type antenna.
86 5,167$//$7,21
Ⴠ
ჀჀ
ჀEdit (Edit Mode):
If you want to edit those preprogrammed data such as Frequency, Symbol Rate, Polarization,
Skew and 22KHz, please press Ⴠ
ჀჀ
ჀEdit key on the RCU to display the command box. Check
edit mode by pressing OK key on the RCU and then you can go into those columns to
change the value.
Ⴠ
ჀჀ
ჀRe-Sync
When all location of searched satellites are shifted by unknown reason, you can realign all of
them at once if you adjust one satellite’s location.
ღ
ღღ
ღ6KRUW
6KRUW6KRUW
6KRUW

&XW&RORU.H\V
&XW&RORU.H\V&XW&RORU.H\V
&XW&RORU.H\V
ღ
ღღ
ღ
-20-
Not only short-cut color keys such as Ant Setup, Edit or Advance, but you can also press
“MENU” on the RCU to use all the sub-menus available in the CHANNEL SEARCH.

Other Ferguson Receiver manuals

Ferguson CF2000AT User manual

Ferguson

Ferguson CF2000AT User manual

Ferguson FT-8300 HD User manual

Ferguson

Ferguson FT-8300 HD User manual

Ferguson Ariva 4k User manual

Ferguson

Ferguson Ariva 4k User manual

Ferguson ARIVA 100E User manual

Ferguson

Ferguson ARIVA 100E User manual

Ferguson ARIVA ATV Combo User manual

Ferguson

Ferguson ARIVA ATV Combo User manual

Ferguson ARIVA Link 200 User manual

Ferguson

Ferguson ARIVA Link 200 User manual

Ferguson ARIVA T50 User manual

Ferguson

Ferguson ARIVA T50 User manual

Ferguson Ariva 220 Combo User manual

Ferguson

Ferguson Ariva 220 Combo User manual

Ferguson Ariva 102E User manual

Ferguson

Ferguson Ariva 102E User manual

Ferguson FK-Series User manual

Ferguson

Ferguson FK-Series User manual

Ferguson Ariva 255Combo User manual

Ferguson

Ferguson Ariva 255Combo User manual

Ferguson Ariva 52E User manual

Ferguson

Ferguson Ariva 52E User manual

Ferguson AV-660 User manual

Ferguson

Ferguson AV-660 User manual

Ferguson FERGUSON FDT 2000 DIGITAL TERRESTRIAL... User manual

Ferguson

Ferguson FERGUSON FDT 2000 DIGITAL TERRESTRIAL... User manual

Ferguson ARIVA 100 User manual

Ferguson

Ferguson ARIVA 100 User manual

Ferguson AC-8000PVR User manual

Ferguson

Ferguson AC-8000PVR User manual

Ferguson FDT 600 User manual

Ferguson

Ferguson FDT 600 User manual

Ferguson Ariva 210 Combo User manual

Ferguson

Ferguson Ariva 210 Combo User manual

Ferguson FT-8100 HD User manual

Ferguson

Ferguson FT-8100 HD User manual

Ferguson Ariva 120 combo User manual

Ferguson

Ferguson Ariva 120 combo User manual

Ferguson FT-8200 HD User manual

Ferguson

Ferguson FT-8200 HD User manual

Ferguson Ariva S300 User manual

Ferguson

Ferguson Ariva S300 User manual

Ferguson FK-1000 User manual

Ferguson

Ferguson FK-1000 User manual

Ferguson Ariva 54 User manual

Ferguson

Ferguson Ariva 54 User manual

Popular Receiver manuals by other brands

Onkyo TX-SR804 quick guide

Onkyo

Onkyo TX-SR804 quick guide

Mpow BH129B user manual

Mpow

Mpow BH129B user manual

Denon AVR-A100 Addendum sheet

Denon

Denon AVR-A100 Addendum sheet

Sansui R-5 operating instructions

Sansui

Sansui R-5 operating instructions

Automatic Technology FHCRX-1V2 installation instructions

Automatic Technology

Automatic Technology FHCRX-1V2 installation instructions

Sennheiser Tourguide 1039 instruction manual

Sennheiser

Sennheiser Tourguide 1039 instruction manual

Adtec RD-30 quick start guide

Adtec

Adtec RD-30 quick start guide

Delphi SA10101 user guide

Delphi

Delphi SA10101 user guide

Onkyo HT-R693 Basic Manual

Onkyo

Onkyo HT-R693 Basic Manual

Harman Kardon AVR 325 reference guide

Harman Kardon

Harman Kardon AVR 325 reference guide

Crestron PWR-FR-B installation guide

Crestron

Crestron PWR-FR-B installation guide

Lantronix A5135-H user guide

Lantronix

Lantronix A5135-H user guide

Spectra Precision LR30 user guide

Spectra Precision

Spectra Precision LR30 user guide

Denon AVR 4310CI Code List

Denon

Denon AVR 4310CI Code List

Jensen CDR362 Installation & owner's manual

Jensen

Jensen CDR362 Installation & owner's manual

Clarion CX501 Service manual

Clarion

Clarion CX501 Service manual

Zinwell ZMT-620HD Quick setup guide

Zinwell

Zinwell ZMT-620HD Quick setup guide

Harman Kardon AVR 1500 Service manual

Harman Kardon

Harman Kardon AVR 1500 Service manual

manuals.online logo
manuals.online logoBrands
  • About & Mission
  • Contact us
  • Privacy Policy
  • Terms and Conditions

Copyright 2025 Manuals.Online. All Rights Reserved.