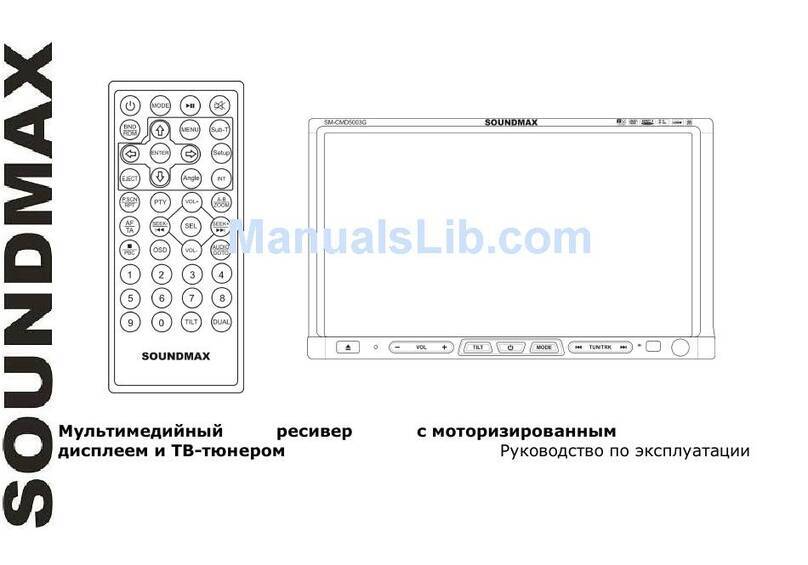
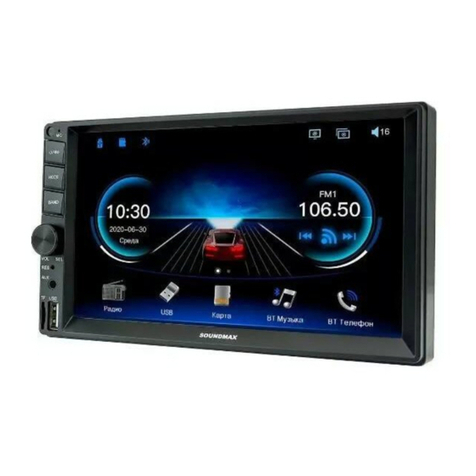
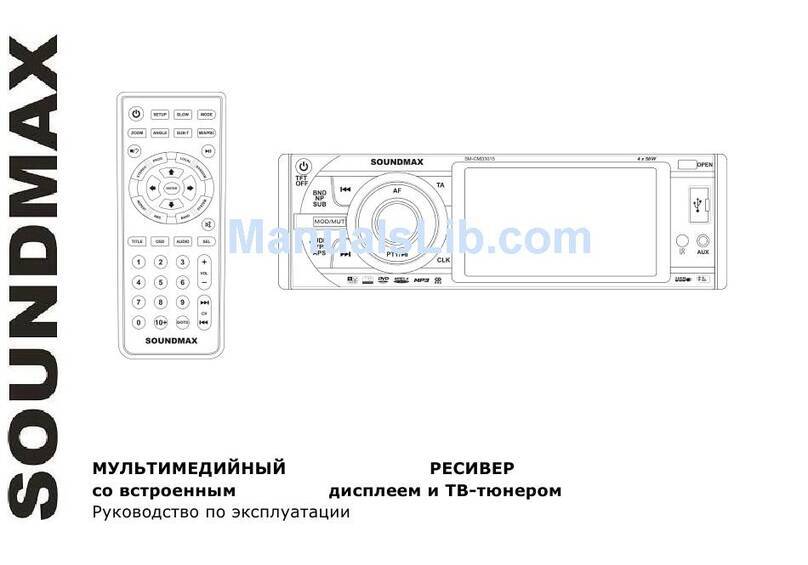
SoundMax SM-CMD3014 User manual

2
De a r custom er!
Thank you for purchasing our product. For safet y, it is st rongly recom m ended t o read this manual carefully
before connect ing, operat ing and/ or adjust ing the product and keep the m anual for refer ence in t he fut ure.
Ta ble of con t ent s
Table of contents............................................................................................... 2
Important safeguards......................................................................................... 3
Accessories....................................................................................................... 4
Installation/connection ....................................................................................... 5
Unit controls ....................................................................................................10
General operations............................................................................................14
Radio operat ions...............................................................................................19
TV-tuner operations ..........................................................................................21
Disc/USB/SD/MMC operations.............................................................................22
DVD setup menu ..............................................................................................27
Handling and cleaning discs................................................................................30
Troubleshooting guide .......................................................................................31
Specification ....................................................................................................32

3
I m porta nt sa feguar ds
‚Read carefully t hrough t he m anual t o fam iliarize y ourselves w ith t his unit .
‚Keep this manual handy as a reference for operating procedures and precaut ions. Do not allow persons
who have not read t hrough t his m anual t o use this unit .
‚“ CLASS 1 LASER PRODUCT”
This product contains a laser diode of higher class than 1. Laser beams from the optical pickup are
dangerous to t he eyes. To ensure continued safety, do not rem ove any covers or at tempt to gain
access to the inside of t he pr oduct. Refer all servicing t o qualified personnel.
‚Do not allow this unit to come int o contact with liquids. Elect rical shock could result. Also, dam age t o
this unit , sm oke, and overheating could result from contact with liquids or dust . Protect t his unit from
m oist ure.
‚Make sure that foreign objects do not get in side the unit ; t hey m ay cause m alfunct ions, or create safet y
hazar ds such as elect rical shock or laser beam exposure.
‚The beginning of operation is the moment of the unit installation. Before use the device in winter it is
recommended to heat up the passenger compartment during 20 seconds or to the operation
t em perat ur e.
‚Using the unit with the t em perat ure t hat goes beyond the operat ion tem perat ure great ly decreases the
operat ion resource of the screen and ot her com ponents of the unit and can result in an outage.
‚Disconnect t he vehicle’s negat ive battery t erm inal while m ount ing and connect ing t he unit.
‚The unit is designed for negative terminal of the battery, which is connected to the vehicle metal.
Please ensure it before inst allation.
‚When replacing the fuse, be sure to use one wit h an identical am perage rat ing. Using a fuse with a
higher amperage rat ing m ay cause serious dam age to the unit.
‚Do not allow the speaker wires to be shorted together when the unit is switched on. Otherwise it may
overload or burn out the power amplifier.
‚Make sure you disconnect the power supply and aerial if you will not be using the system for a long
period or during a t hunderstorm .

4
‚Make sure you disconnect the power supply if the system appears to be working incorrectly, is making
an unusual sound, has a strange smell, has smoke emitting from it or liquids have got inside it. Let a
qualified t echnician check t he sy stem .
‚Always keep t he volum e low enough so t hat you can hear sounds from outside t he vehicle.
‚Should t his product fail to operat e properly, contact your dealer or nearest service cent er.
Accessories
1. Receiver 1 pc
2. Front panel 1 pc
3. Protect ive case 1 pc
4. Rem ote cont roller 1 pc
5. I SO connect or 1 pc
6. Mount ing parts:
Nut 5 m m 1 pc
Spr ing washer 1 pc
Plain w asher 1 pc
Bolt 1 pc
Screw 4 pcs
Metal st rap 1 pc
Release key 2 pcs
Mounting collar 1 pc
Trim fram e 1 pc
Rubber cushion 1 pc
7. I nst ruct ion m anual 1 pc
8. Warrant y card 1 pc
9. Consum er inform ation 1 pc

5
I n st a llat ion / conne ct ion
‚Choose the mount ing location where the unit will not int erfere with t he norm al driving funct ion of the
driver.
‚Before finally inst alling t he unit, connect t he wiring and m ake sure that the unit works properly.
‚Consult wit h your nearest dealer if installation requires the drilling of holes or ot her m odifications of the
vehicle.
‚Install the unit where it does not get in the driver's way and cannot injure the passenger if there is a
sudden st op, like an emergency st op.
‚I f inst allat ion angle exceeds 30° from hor izont al, t he unit m ay not perfor m properly .
‚Avoid installing t he unit where it would be subject t o high tem perat ure, such as from direct sunlight, or
from h ot air , from t he heat er , or w here it w ould be subj ect t o d ust , d ir t or excessive vibr at ion.
D in Fr ont / Rea r -M ount
This unit can be pr oper ly inst alled eit her from 'Fr ont ' ( convent ional DI N Fron t - mou nt ) or ' Rear' ( DI N Rear -
m ount in st allat ion, ut ilizing t hreaded screw holes at t he sides of t he unit chassis) . For det ails, refer t o t he
follow ing illustrated installation m et hods.
D I N FR ON T - M O UN T ( M e t h od A )
1. Car dashboard
2. Sleeve
3. Screw
4. Nut
5. Spring washer
6. Screw
7. Met al st rap
8. Flat washer

6
1. Install the sleeve into the dashboard; ensure it is installed with the correct side and there are no
ob st acles ( w ir es, dashboar d elem en t s, etc) for t he u nit in st allat ion.
2. After installing the sleeve into the dashboard, bend tabs fitting to the size of
the dashboard t o fix the sleeve in place.
3. Use the metal strap to fix t he rear side of t he unit. Determ ine a place for fixing
and install the strap as shown in the picture. You can bend the strap to the
needed angle wit h your hands.
4. Make the necessary wire connect ions. Ensure the connect ions are correct.
5. I nstall t he unit int o t he sleeve unt il the side locks are fixed.
D ism a nt ling t h e u nit
– Trim f ram e
– Fr am e uninst all d irect ion
– Release key inser t ion
1. Sw it ch off t he unit and detach t he front panel.
2. I nsert your finger s into the groove in the front side of t he t rim fram e ( apply
som e effort t o det ach t he frame). Pull t he fram e t o detach it.
3. Insert the supplied release keys into the both sides of the unit body to click,
as shown in the pict ure. To ext ract t he unit from the dashboard, pull the
release keys or t he unit body t o pull it out . Before det aching t he unit, ensure
it is not fixed with t he m et al strap.
Trim f ra m e inst a lla t ion
To install the trim frame, press it to the unit body and push it to fix it in place. This should be done before
installing t he front panel; otherwise you are not able to install the trim fram e. When t he trim fram e being
inst alled, t he side w it h t he groove sh ould face dow n and fixed fir st .

7
2 . D I N R EAR- M OU N T ( M e t h od B)
For t his method, use t he screw h oles in t he lateral sides of t he unit. Fix t he un it w ith t he help of t he fact ory
radio m ount ing brackets.
1. Select a position in which the screw holes of t he bracket s ( 3) are aligned
with t he screw holes in the unit body, and screw in two screws ( 2) in each side.
2. Screw.
3. Fact ory radio m ount ing brackets.
4. Vehicle dashboard.
5. Lock ( r em ove t h is part ).
N ot e : The out er t rim fram e and m ount ing sleeve are not used for m et hod of inst allation.
I nst a lling t he f ront pa ne l
Insert the left lockers of the panel into the fixing holes on the left side of the body, then press on the right
par t of t he panel unt il a click.
To detach t he front panel, press OPEN butt on. When it unfast ens, carefully pull the panel out.
Ant i- t h ef t syst e m
The front panel of this unit can be st ored in t he included protective case when not in used and carried away
when you leave t he v ehicle t o det er t heft.
Switch off the power of the unit. Detach the front panel, then put it to the protective case and take it with
you.
Cautions: The contr ol panel can easily be dam aged by shocks. Aft er rem oving it , place it in a protect ive
case and be careful not to drop it or subject it t o st rong shocks.
The rear connect or t hat connects t he m ain unit and t he contr ol panel is an ext rem ely im port ant part . Be
careful not t o dam age it b y pressing on it with fingernails, pens, screwdrivers, et c.
N ot e : I f the control panel is dirty, wipe off the dirt with soft, dry cloth only. And use a cotton swab soaked
in isopropyl alcohol to clean t he socket on the back of t he contr ol panel.

8
Ele ct r ica l Con n ect ion
I SO Conn ect ion t a ble
Fu nct ion
Lo ca t ion
Conn ect or A Conn ect or B
1 - Rear r ight ( + ) - Pur ple
2Tel m ute/ Grey Rear r ight ( - ) - Purple/ Black
3 - Fr on t r ight ( + ) - Gr ey
4Bat ter y + 1 2V/ Yellow Fr ont r ight ( - ) - Gr ey / Black
5Aut o Antenna - Blue Front left (+ ) - White
6 - Fr on t lef t ( - ) - Whit e/ Black
7I gnition/ Red Rear left ( + ) - Green
8Ground/ Black Rear left (- ) - Green/ Black
N ot e : Aut o antenna wire is int ended for power supply of ant enna and rem ote cont rol of addit ional am plifier.

9
Park in g w ir e con ne ct ion
I f Parking cable is connected to hand brake switch, the video display of the TFT m onitor will be cont rolled by
driving st at us. When the car is m oving ahead, if t he video disc is played, t he screen shows warning and
blank screen. The war ning scr een will prevent t he driver from watching im ages.
Re v er se d r iv in g ca ble con ne ct ion
I f t he rear view video cam era is connected, the unit automatically switches to camera picture during reverse
driv ing. The unit r et urns t o t he orig inal w or k m ode aft er t he reverse dr iving is d one.

10
Un it con t rols
Fr on t pa ne l
1. TUN- but t on
2. EJECT but ton
3. VOL+ butt on
4. OK button
5. TUN+ but t on
6. TFT display
7. MODE button
8. I R sensor
9. 3/ PLAY/ PAUSE but t on
10. POWER/ MUTE but t on
11. OPEN but t on
12. 1/ PREVIOUS and 2/ NEXT
but t ons
13. AF/ REG but t on
14. TA/ EON button
15. AV input
16. MENU button
17. BAND button
18. 5/ REWI ND but ton
19. USB por t
20. 6/ F. FWD but ton
21. 4/ STOP but ton

12
Re m ot e cont roller ( RC)
1. MODE butt on
2. POWER button
3. UP cursor but t on
4. BND/ RDM butt on
5. ENTER button
6. LEFT cursor butt on
7. DOWN cursor button
8. EJECT butt on
9. PTY/ PROG but ton
10. P.SCN/ RPT but t on
11. SEEK-/ PREVI OUS but ton
12. AF button
13. OSD button
14. STOP/ PBC button
15. Digit but t ons
16. PLAY/ PAUSE but t on
17. MUTE butt on
18. MENU but t on
19. SUB- T but t on
20. RI GHT cursor but ton
21. SETUP butt on
22. ANGLE button
23. I NT but ton
24. VOL+ but t on 28. VOL- button
25. A- B/ ZOOM but t on 29. AUDI O/ GOTO but ton
26. SEL button 30. DUAL butt on
27. SEEK+ / NEXT button 31. TI LT but ton

13
Ch a nging t h e b a t t er y
1. Pr ess the catch and at the sam e t ime pull out the bat tery t ray ( pic. 1) .
2. I nsert the 1 lit hium batt ery, t ype CR2025 ( 3 V) battery with t he stam ped
( + ) m ark facing upward. I nsert the bat tery t ray int o t he rem ot e cont roller
( p ic. 2 ) .
W ar ning:
‚Store the battery where children cannot reach. If a child accidentally swallows the battery, consult a
doct or im m ediat ely.
‚Do n ot recharge, short, disassemble or heat the batt ery or dispose it in a fire.
‚Do not expose or bring int o contact t he bat tery with other m et allic m at erials. Doing t his may cause the
bat t ery t o give off heat , crack or start a fire.
‚When throwing away or saving the battery, wrap it in tape and insulate; otherwise, the battery may
giv e off heat , crack or start a fire.
‚Please direct the Rem ote cont roller to t he I R sensor of t he front panel.
Pic. 1 Pic. 2

14
Genera l opera tions
Re se t t h e u n it
Operating the unit for the first time or after replacing the car battery, you must reset the unit. Press EJECT
but t on and t hen press RESET button (hole) under the panel t o restore the unit t o t he original fact ory
settings.
Pow er b ut t on
Press any but t on to turn on t he unit. Press POWER butt on on the RC or press and hold POWER/ MUTE button
on the panel t o t urn off t he unit .
M onit or t ilt an gle
Press TILT button to enter the monitor tilt angle adjustment mode. Press LEFT/RIGHT cursor buttons
r epeat ed ly t o select t he posit ion: 0 = > 1 = > 2 = > 3 = > 4 = > 5 = > 6 . The m onitor w ill flip down accordingly.
Volum e cont rol
Press VOL+ butt on t o increase the volume level. Press VOL- butt on t o decrease the volume level.
Tur ning t h e sou nd off
When the power is on, press POWER/ MUTE but t on on t he panel or MUTE butt on on t he RC to t urn t he sound
off. Press it again or adjust volum e to t urn the sound on.
M ode se t t ing
Change playing mode in a sequence of: Radio = > DVD = > USB = > SD/MMC => TV = > AV in. The DVD,
USB and SD/ MMC m odes are available if cor responding storage is connect ed t o t he unit .
On- scre en disp la y ( OSD )
Press OSD but ton t o show t he current m ode inform at ion on t he display.

15
Se t ting t h e sou nd ch ara ct er ist ics
‚Press SEL but t on to ent er t he audio set t ing m enu consist ing of following item s: Bass = > Treble = >
Balance = > Fader = > EQ.
‚Press UP/ DOWN cursor buttons on the RC or VOL+ / VOL- buttons on the panel t o select a sett ing. Press
LEFT/ RI GHT cursor butt ons on t he RC or TUN- / TUN+ butt ons on t he panel t o adj ust t he setting.
‚Press SEL but ton again t o confirm and ret urn t o current m ode.
N ot e : I f turning off t he power all t he set t ings of each m ode will be saved. I f t urning off the ACC pow er all
the set t ings will reset t o default values. I f you don’t adj ust sett ing within several seconds after selecting the
desired set ting, t he unit will aut omatically ret urn t o the current m ode.
Se t ting ot her ch ar a ct er ist ics
‚In Radio or DVD mode press MENU button to enter the setting mode. In TV mode press MENU button
once t o enter TV m enu setting and t wice t o enter m enu set ting m ode.
‚I n t he m enu press UP/ DOWN cursor but t ons on t he RC or VOL+ / VOL- but t ons on the panel t o select a
setting page. Press ENTER but t on or LEFT cursor buttons on the RC or press TUN+ butt on or OK butt on
on the panel t o go t o t he selected page.
‚In the selected page press UP/DOWN cursor buttons on the RC or VOL+ /VOL- buttons on the panel to
select a set t ing. Press ENTER button on the RC or OK but ton on the panel to adjust t he selected sett ing.
‚Aft er you perform ed the adj ustment, press MENU butt on t o ret urn to t he setting page. Press MENU
but t on again to quit setting m enu.
‚Following sett ing pages are available:
AUDI O ( available in Radio, DVD and TV m odes) :
‚Bass: support 10 levels. Default level is 0.
‚Treble: support 1 0 levels. Default level is 0 .
‚Balance: support 10 levels for each left and right channel. Defau lt is left equal t o right .
‚Fader: support 10 levels for each front and rear channel. Default is fron t equal t o rear.
‚EQ: DSP OFF = > FLAT = > CLASSI CS = > POP = > ROCK.

16
PI CTURE ( available in DVD and TV m odes) :
‚Red: Adj ust level of red color. Support 50 levels. Default level is 25.
‚Green: Adj ust level of green color. Support 50 levels. Default level is 25
‚Blue: Adj ust level of blue color. Support 5 0 lev els. Default level is 25.
‚Br ight ness: Support 50 levels. Default level is 2 5
‚Cont rast : Support 50 levels. Default level is 2 5.
‚Sharpness: Support 15 levels. Default level is 10.
‚Screen: Adjust screen size: 16: 9 - 4: 3 - FULL.
‚Color reset: Resume color default status. (Select YES or NO by cursor buttons, no need to press OK or
ENTER butt on) .
DUAL ( available in Rad io, DVD an d TV m od es) :
‚Dual: Set DUAL Zone funct ion on / off.
‚Key: Use butt ons at CURRENT ( but t ons perform operat ions for the current m ode of the front zone) or
DVD ( but t ons per for m DVD fu nct ions).
‚Vol: Ad j ust level of DVD v olu m e, Supp or t 50 lev els. Def au lt level is 1 5.
RDS SETUP ( availab le in Radio , DVD and TV m odes) :
‚TA: Seek/ Alarm . I n TA SEEK m ode, the unit will seek for traffic announcement program w hen TA is
pressed; in TA ALARM m ode, no TA/ TP is displayed and t he alarm is set off.
‚PI : Mute/ Sound. PI sound refers to the recept ion noise when the AF funct ion t ries t o scan alternat ive
fr equency.
‚RETUNE: Long/ Short. RETUNE refers to the tim e period the unit allows for radio scan when reception is
int errupted. “ S” r ep resen t s a t im e per iod of 30 second s and “ L” r ep resen ts a t im e per iod of 9 0 secon ds.
‚MASK: DPI/ALL. During MASK DPI mode, the unit will mask only the AF which has different PI, this is
the default m ode; during MASK ALL mode, the unit will mask the AF which has different PI and no RDS
signal w it h high field st rengt h.
‚EON TA: DX/Local. If you want to receive information from local stations only, select EON TA LOC
m ode. Ot herw ise, select EON TA DX m ode.

17
‚REG: REG ON ( t h e r eceiver accep ts r eg ion al v ariant s of t h e t u ned st at ion w it h REG icon t u rned on ) , an d
REG OFF ( t h e receiver ign or es r eg ional v ar iant s) .
‚TA VOL: Adj ust level of TA volum e, support 50 levels. Default level is 15.
EXPERT ( available in Rad io, DVD an d TV m od es) :
‚DX: Set radio station search by DX or LOCAL mode. When the LOCAL function is on, the local stations
( st ations with weak radio signal) can be played. When DX is on, both local and dist ant stat ions (st at ions
with strong radio signal) can be played.
‚St ereo: Set radio reception at STEREO or MONO m ode. I m provem ent of reception of dist ant stat ions
can be done by select ing m ono m ode, which m ay cut down som e reception noise.
‚Beep: BEEP ON (beep sound will be heard when but t ons are pressed), BEEP 2ND ( beep sound will be
heard when butt ons are pressed and held) and BEEP OFF (no beep sound for but ton pressing).
‚Lou d: Set loudness on or off. LOUD funct ion is t o em phasize t he bass out pu t.
‚Sub woofer: Set Subwoofer out put on or off.
‚Backlight : Set OSD backlight: MI D = > HI GH = > LOW.
‚OSD color: Set OSD color : Dark = > Blue = > Violet = > Light blue.
CLOCK (av ailab le in Radio, DVD an d TV m od es) :
‚Clock : Select ON t o show t he curr en t t im e on t he display.
‚Clock hour : Set 12- / 24- hour t im e m ode.
‚Clock adj ust : Set t he curr ent t im e.
TI LT ( availab le in Rad io, DVD and TV m odes) :
Select one of available panel t ilt angles b y p ressing LEFT/ RI GHT cu rsor but t ons.
AV in j a ck
AV j ack is int ended to receive audio and video signals by connect ing to external device.

18
Subw oofer
Connect a subwoofer t o this unit using the Subwoofer output of t his unit. For subwoofer oper at ion an
ex ternal am plifier is required.
Du al zon e function
DUAL - dual zone function enabling user to listen to radio or watch TV in the front zone, and at the same
t im e play audio or video from disc, USB or m em ory card.
For Dual zone en external m onitor with is required having its own acoustic syst em and possibilit y of volum e
adj ust m en t .

19
Ra dio ope rat ions
Ba n d se le ct ion
Select the RADIO mode. Press BAND button on the panel or BND/RDM button on the RC to select the
desired band: FM1, FM2, FM3 ( OI RT) , AM ( MW).
M a nu al/ a ut om a t ic t un ing
‚Manual tuning: press TUN- / TUN+ but tons on t he panel or SEEK-/ PREVI OUS and SEEK+ / NEXT on t he
RC and hold for 2 seconds to enter the manual tuning mode. Press these but tons repeatedly to select a
frequency downward or upward step by step.
‚Aut om at ic t uning: press TUN- / TUN+ but t ons on the panel or SEEK-/ PREVI OUS and SEEK+ / NEXT on t he
RC repeatedly, t he aut om at ic search w ill start . I t w ill play when finds t he stat ion.
Progr am m ing tu ne r st ations
There are 6 numbered preset but t ons on the RC and panel, with which you can st ore and recall st at ions for
each band (18 FM, 6 AM). Select a station, then press and hold a preset button. The st ation will be saved in
the mem ory under the corresponding number. To recall a st ored st at ion, press t he corresponding preset
but t on.
Au to m e m ory st or e/ Preset scan
‚Aut o store: Select a band, press and hold P.SCN/RPT button on the RC to enter auto store mode. The
radio will aut om atically st ore 6 st at ions t o the 6 preset m em ories of the current band. To st op auto
st ore, press t he but t on again.
N ot e : During aut o stat ion preset , t he unit will search and store stat ions with t he st rong signal first, and
t hen weaker signal stations until t he m em or ies are full.
‚Preset scan: Select a band, press P.SCN/RPT button on the RC to scan all preset stations in the
m em ories of t he current band. To st op preset scan, press t he but t on again.

20
RDS funct ion
RDS ( Radio Dat a Syst em ) service availabilit y varies with areas. Please underst and if RDS service is not
available in you area, t he following service is not available, either .
AF ( Alt er na t iv e fr eque ncies) funct ion
Press AF but ton on t he RC or AF/ REG button on t he panel to enable AF funct ion. When t he radio signal
st rength is poor, enabling t he AF funct ion will allow the unit to autom at ically search another st at ion with the
sam e PI ( Pr ogr am I dent ificat ion) as t he curr ent st at ion but wit h st ronger signal str ength.
N ot e : AF indicat or on t he display will flash until RDS inform ation is received. I f RDS service is not available
in your area, t urn off the AF m ode.
TA ( Tra ffic a la rm ) fun ction
Pr ess TA/ EON but t on on t he panel t o act iv at e t he t r affic alar m funct ion.
When TA funct ion is act ivated, it will search t he st ation wit h TA inform at ion aut om atically. I f t here is no TA
inform at ion, it will search the stat ion with TP inform at ion aut omatically, if t here is no TP inform at ion eit her,
it will ret urn to t he previous stat ion after searching.
When receiving the stat ion with TP infor mation but wit hout TA inform at ion, TP icon is on and TA icon keeps
blinking; when receiving t he stat ion wit h TP and TA inform ation, bot h TP and TA icons are on.
When playing in other m ode and TA inform at ion is received, it will change t o t he radio m ode autom at ically.
After playing over, it will return t o the previous mode. Press TA/ EON button on the panel once to ignore the
received TA inform at ion, do it t w ice t o t ur n off t he funct ion.
PTY ( Pr og r am t yp e) funct ion
Press PTY/ PROG button on the RC t o open PTY program type list, and repeat pressing this button to select a
PTY type. After selecting the program type you want, press num ber buttons 1 - 6 on the RC to start search.
Press it again to stop the PTY search. If PTY code is different or not available, “PTY NONE” blinks on the
display.
Other manuals for SM-CMD3014
1
Table of contents
Other SoundMax Receiver manuals

SoundMax
SoundMax SM-CCR4705 User manual

SoundMax
SoundMax SM-2604 User manual

SoundMax
SoundMax SM-CDM1048 User manual

SoundMax
SoundMax SM-CMD3008 User manual

SoundMax
SoundMax SM-2600 User manual

SoundMax
SoundMax SM-RD2123UB User manual

SoundMax
SoundMax SM-CDM1044 User manual

SoundMax
SoundMax SM-CMD5003G User manual

SoundMax
SoundMax SM-2601 User manual

SoundMax
SoundMax SM-CDM1058 User manual