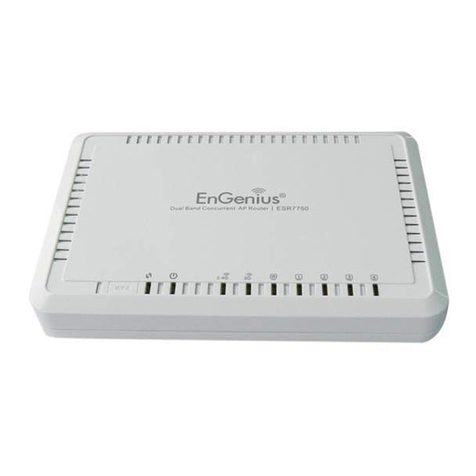
Ferimex E-4000 User manual


Traffic Manager -4000
Traffic manager is a multi function router, designed to cover the basic needs when buil-
ding wired or wireless, local or metropolitan networks. It's basic firewalling capabili-
ties and network address translations make it is easy to use for connecting a group of
computers to the internet. Class based traffic shaping allows to assign different custo-
mers different guaranteed bandwidths, but unused bandwidth could also be shared.
Quality of service could be achieved by classifying traffic not only by I addresses, but
also by application protocols or type of service field (TOS). Security could be impro-
ved by limiting access only to specific clients with assigned I addresses. The device
can be managed over serial port, or remotely by ssh or SNM . I traffic accounting
allows for measurement of transmitted data and could be used for charging by data
volume.
There are 3 models available:
W-2000 has 2 ethernet ports and 2 wireless ports that could be configured in fol-
lowing modes: A (access point), SA (station adapter) and WB (wireless bridge).
The second port is built in to be able to get the internet feed for wireless network.
W-1000 has 4 ethernet ports and one wireless port that could be used in SA and
AdHoc modes. It is suitable as a single wireless access device.
E-4000 has 4 ethernet ports. Except for wireless capabilities, all the other features
are same for all the models.
Device functions:
- router, bridge
- firewall (allowing/denying specific ports), masquerading (source NAT)
- tcp port redirector, bootp relay
- support for I aliases (multiple I addresses on one interface), static routing table
- limiting access to the device based on MAC address even on the ethernet port
- class based traffic shaping with guaranteed bandwith and unused bandwith sharing
- classifying traffic by I addresses, application ports and TOS field
- I traffic accounting
- management via SNM protocol or command line configuration (ssh, RS 232)
- firmware could be upgraded and configuration saved/restored via scp or tftp
- statistics, network diagnostics (ping, traceroute, iptraf, tcpdump)
- hardware watchdog for improved reliability
3
TRAFFIC MANAGER E-4000

First steps
Null modem serial cable
The device can be configured over standard null modem serial cable connected as fol-
lows:
9 pin female connector 9 pin female connector
pin 5 pin 5 (GND - GND)
pin 3 pin 2 (TX - RX)
pin 7 pin 8 (RTS - CTS)
pin 6 pin 4 (DSR - DTR)
pin 2 pin 3 (RX - TX)
pin 8 pin 7 (CTS - RTS)
pin 4 pin 6 (DTR - DSR)
Serial port setting
To configure the device via serial port, use the following parameter settings: 115200
bps, 8 data bits, no parity, 1 stop bit. To access a serial port in Microsoft Windows,
you can use program Hyperterminal (it is optional component available in accessori-
es/communication, check if it is installed). Configuration dialog looks like this:
4
TRAFFIC MANAGER E-4000

Front panel description
All the connectors and switches are mounted on the front panel.
- RS232 9pin M connector for connecting null modem serial cable
- ETH0-ETH3 RJ45 F ethernet connectors
- OWER power supply connector
Connecting the device to the ethernet
The device could be connected to the ethernet either through a hub (resp. switch) or
directly to the other computer (resp. traffic manager). When connecting to the
hub/switch, use a straight cable as follows:
8 pin RJ45 connector 8 pin RJ45 connector
pin 1 pin 1
pin 2 pin 2
pin 3 pin 3
pin 4 pin 4
pin 5 pin 5
pin 6 pin 6
pin 7 pin 7
pin 8 pin 8
When connecting directly to the other computer or traffic manager, use the crossed-
over cable with following pinout:
8 pin RJ45 connector 8 pin RJ45 connector
pin 1 pin 3
pin 2 pin 6
pin 3 pin 1
pin 4 pin 7
pin 5 pin 8
pin 6 pin 2
pin 7 pin 4
pin 8 pin 5
5
TRAFFIC MANAGER E-4000

Connecting to the mains supply
The device is power supplied with stabilised directed voltage of 5V. We recommend
using an uninterruptible power supply (U S).
First configuration
First configuration is usually done using a serial null-modem cable connected to the
serial port of a computer. The default ip address of first ethernet port (eth0) is
192.168.10.60, so you could also log in via ssh. Upon login the device will prompt for
a login and a password:
manager login: admin
password: admin
If you want to change the ip address, issue the following commands:
manager$ set eth0 ip 10.10.10.10/24
ipaddr: 10.10.10.10
netmask: 255.255.255.0
manager$ reload net
That sets the ip address and applies the settings. If the networing parameters are set
up correctly, you can access and configure the traffic manager via ssh on the new
address. All the configuration is done in command line.
Commands reference
help command
The help command shows available commands and their parameter syntax. With
argument, it shows more detailed description of the subsystem. Without arguments,
it gives this short overview of all the available commands:
show (if|wlan|eth|br)[:] # displays summary of all interfaces in given class
set|show <interface> [<ipparam>] # see help ip for more info
set|show cl[ass]|snmp|dl|download|redir|frw|firewall|cfg|config|system
<args>
show ver[sion]
route add|del|show|print|flush
reload [net|br|[work]|wlan|cfg|route|ac[cess]|class|frw|redir|snmp|sys-
tem]
restart
passwd # changes current user's password
help [ip|wlan|class|snmp|route|download|config]
<interface>: eth0-9, wlan0-9, br0-9
How to interpret the help text:
- the pipe symbol „|“ represents choice of alternatives
6
TRAFFIC MANAGER E-4000

- arguments enclosed in angle brackets “< >” denote symbolic parameters, where spe-
cific value should be substituted
- arguments enclosed in square brackets “[ ]“ are optional. If used on a keyword, they
represent possible abbreviations
- arguments enclosed in round brackets “( )“ group the alternatives, or denote nume-
ric value of named parameter value.
- arguments enclosed in compound brackets “{}“ denote the default value
Example of abbreviation:
set cl[ass] <class> <classparam> <value>
means that both following forms are equivalent:
set cl <class> <classparam> <value>
set class <class> <classparam> <value>
or set|sh[ow] <interface>|class|snmp|hostname <args>
<interface>: eth0-9, br0-9
means you can use interface name or specific keyword after set or show:
show eth0 <args>
sh class <args>
This syntax
help [ip|wlan|class|snmp|route|download|config]
means, that help command could be optionally followed by one of the given keywords.
set command
The set command is used to set all the parameters. The first argument denotes the
subsystem whose parameters is going to be set or directly a parameter:
- eth0-3, br0-9 – the networking interfaces
- class – configuring class based traffic shaping
- snmp – configuring snmp parameters
- system – configuring system parameters (date, hostname etc)
The second and further arguments specify individual parameters and their values.
Syntax:
set <interface>|class|snmp|download|redir|firewall|config|sys[tem] <args>
set frw|firewall <frwparam> [<value>]
set sys[tem] [host]name <hostname>
7
TRAFFIC MANAGER E-4000

Examples:
set eth0 access listed
set frw snat_ip1 10.10.1.0/24
set sys name gate
show command
The show command displays the current settings. It has analogous syntax to the set.
This commands displays the saved settings.
Syntax:
show<interface>|class|snmp|download|redir|firewall|config|sys[tem]
[<args>]
show sys temp[erature]]|date|time|ver[sion]|up[time]|[host]name
show (if|eth|br)[:] # displays summary of all interfaces in given
Examples:
manager$ show eth0
ip_addr: 242.225.10.1
netmask: 255.255.255.248
access: all(2)
verify: no(0)
or manager$ show eth0 access
access: listed(1)
add, del commands
Those commands create (delete) objects in specific subsystems. Their usage is docu-
mented with every subsystem. When add is used with array parameters, it uses the
parameter after the last one:
Example:
manager$ add frw snat_ip 1.1.1.1
snat_ip1: 1.1.1.1/32
manager$ add frw snat_ip 1.1.1.2
snat_ip2: 1.1.1.2/32
manager$ set frw snat_ip2 2.2.2.2
snat_ip2: 2.2.2.2/32
manager$ del frw snat_ip2
reload command
reload commands applies all the changes done by the set or route commands.
You can reload specific or all subsystems. More subsystems could be specified, sepa-
8
TRAFFIC MANAGER E-4000

rated by comma. Without arguments, the command reloads all the subsystem.
Syntax:
reload[net|br|[work]|wlan|cfg|route|ac[cess]|class|frw|redir|snmp|system]
Example:
manager$ show eth0 ipaddr
ipaddr: 195.168.233.46
manager$ reload network
Important notice: Without executing the reload command, the changes will not be
effective.
reboot command
The reboot commands restarts the device similar to the hardware reset. It is required
for firmware downloads.
Syntax:
reboot
passwd command
The password command is used to change the login password. The command will
prompt the current one, and then ask the new password twice (for validation).
Example:
manager$ passwd
Changing password for admin
Old password:
nter the new password (minimum of 5, maximum of 8 characters)
Please use a combination of upper and lower case letters and numbers.
New password:
Re-enter new password:
Password changed.
Remarks:
When prompted for „Old password“, „New password“ and „Re-enter new password“
input is not shown on the console (not even stars).
Default password is „admin“ and it is recommended to change it after login.
Setting IP addresses and netmasks
Setting the I addresses and netmask is done via following set commands:
9
TRAFFIC MANAGER E-4000

set <interface> ip <ip_addr>/<netmask>
set <interface> ipa[ddr] <ip_addr>
set <interface> netmask|nm <netmask>
set <interface> access all(2)|listed(1)|none(0)
set <interface> verify yes(1)|no(0)
show (if|eth|br)[:] # lists interfaces with configured IP address
add <interface>
del <interface>
- <interface> denotes a networking interface, e.g. eth0, br0-9
- <ip_addr> represents I address of the interface in decimal dotted notation,e.g.
195.168.233.65
- <netmask> I network mask, given either on of the following formats:
1. decimal dotted notation, e.g.: 255.255.255.252
2. abbreviated form, representing number of 1’s in binary representation:
255.255.255.252=11111111.11111111.11111111.11111100
thus, number of 1’s is 30
Example:
set eth0 ip 195.168.233.65/255.255.255.252
or abbreviated form:
set eth0 ip 195.168.233.65/30
1’s 32 30 29 28 27 26 25 24
Mask 255 252 248 240 224 192 128 0
set <if> access - none – no access is allowed
- all – no access restrictions
- listed – allow only stations that correspond to enabled classes
with their MAC address defined. On ethernet interfaces the
restriction is implemented in software, thus only communicati-
on with the Traffic Manager is restricted, communication bet-
ween stations on the segment is not influenced.
verify <boolean> - 0|no|false|off – no verification of valid I addresses is done
- 1|yes|true|on – allows communication only with stations that
correspond to classes with defined MAC and I address. class
enable is taken into account only if access=listed.
Changes are applied only after executing the command:
reload net[work]
10
TRAFFIC MANAGER E-4000

Changes to access/verify parameters are applied only after executing the command:
reload ac[cess]
To show the interface settings use the command:
show <interface>
Example:
manager$ show eth0
ipaddr: 195.168.233.65
netmask: 255.255.255.252
access: all(2)
verify: no(0)
Working with multiple IP address for an interface
Every interface could have more than one I address defined. The additional addres-
ses are called aliases. Every alias is represented with notation <interface>:<aliasnum>.
To set an alias on eth0, simply issue the following command:
set eth0:1 ip 241.100.10.1/30
reload net
Note, that aliases could not overlap, i.e. each alias has to be in its own network.
To delete the alias, use the del command, e.g.:
del eth0:1
To display the current settings use:
manager$ show eth0:1
ipaddr: 141.100.10.1
netmask: 255.255.255.252
Note: access and verify parameters are not displayed or accepted, because they are
relevant only to the main interface.
To list ip parameters of all interfaces, use the command:
sh[ow] if
To list ip parameters for a specific type of interfaces, use the command:
sh[ow] eth|br (note missing interface number)
11
TRAFFIC MANAGER E-4000

If you want to see only the aliased addresses, append the colon, e.g.:
manager$ sh if:
eth1:1 10.10.33.249 255.255.255.240 00:02:78:e0:34:9a
eth1:2 195.91.34.1 255.255.255.248 00:02:78:e0:34:9a
Setting up bridging
Bridge is a device, that transparently connects one or more network segments. Unlike
the hub, it forwards the traffic to the other segments only if needed. This way you
could join more segment to create a single I network thus saving precious address
space and avoiding unneeded routing setup.To configure a bridge, you need to create
a bridge interface and assing other interfaces to it.
Syntax:
add|del <bridge_if> <interface>
set <bridge_if> <ipparam>
reload net
help br
<bridge_if>: br0-9
- reload net is needed to make changes effective (reload br is a synonym)
Example:
manager$ add br0 eth0
added if: : br0
manager$ add br0 eth1
manager$ set br0 ip 195.80.111.1/28
added IP address for: br0
ipaddr: 1.2.3.4
netmask: 255.255.255.0
reload net
manager$ show br0
slaves: eth0 eth1
ipaddr: 1.2.3.4
netmask: 255.255.255.0
access: all
verify: 0
routing setup
To configure the rounting table, use the route command with the following syntax:
route show # show configured routes
route print|list # show current routes
route flush # flushes routes IMM DIAT LY
route add <routespec> # adds a static route
12
TRAFFIC MANAGER E-4000

route del <routespec> # delete a static route
route del <n> ... # delete route(s) by number(s)
<routespec>:
[-net] <subnet>[/<prefix>] gw <ip>
default gw <ip>
- reload route is needed to apply the changes
add|del|show route is also accepted syntax
Route params:
add add route to the routing table
del delete the route from the table. Use theroutespec, or route number as
shown in the show route command (note, that numbers change after
deletion).
show displays the configured routing table (will be efficent after reload)
print displays the current routing table
flush flushes the current routing table IMMEDIATELY. This could result in
disconnection, if you are connected via ssh and route is needed for the
connection.
reload apply changes made to the routing table
-net specifies that the target is a network
-host specifies that the target is a host
<target> I address of the target
<prefix> netmask of the target in a prefix notation
<gw> next hop router – gateway address
Example (listing current routing table):
manager$ route print
Kernel IP routing table
Destination Gateway Genmask Flags Metric Ref Use Iface
191.168.33.65 0.0.0.0 255.255.255.255 UH 0 0 0 eth0
191.168.33.69 0.0.0.0 255.255.255.255 UH 0 0 0 eth1
191.168.33.72 195.168.233.70 255.255.255.252 UG 0 0 0 eth1
191.168.33.64 0.0.0.0 255.255.255.252 U 0 0 0 eth0
191.168.33.68 0.0.0.0 255.255.255.252 U 0 0 0 eth1
127.0.0.0 0.0.0.0 255.0.0.0 U 0 0 0 lo
0.0.0.0 191.168.33.66 0.0.0.0 UG 0 0 0 eth0
Example (setting default gateway):
manager$ route add default gw 191.168.33.66
13
TRAFFIC MANAGER E-4000

The class subsystem
Class subsystem is given as a first paramter to commands add, del, set, show.
Syntax:
add cl[ass] <class> [<classnum>]
del cl[ass] <class>
set cl[ass] <class> <classparam> <value>
show cl[ass] <class> [<classparam>]
reload cl[ass]
help cl
First form adds a class, optionally with the given number. If not given, the number will
be assigned automatically. Second form deletes a class. Third form sets a class para-
meter. Fourth form displays class setting(s).
Example:
add cl office
Available <classparams>:
n[umber] <number> - class number. Could only be displayed.
na[me] <name> - class name
ena[ble] <boolean> - disabling |enabling of the class. disabled class will
disallow access of the corresponding client on interfa-
ces with access=listed.
ip<n> <ipaddr>/<mask> - ip addresses ranges of the class (n defaults to 1)
match<n> <param>=<value>:<param>=<value>:...
- allows additional I matching criteria, like protocol,
port, tos.
Following params are known (! means the criterion is
negated):
proto=[!](all|tcp|udp|icmp),
sport|dport=[!]<from>[-<to>],
tos=normal|min-cost|max-rel|max-thr|min-del
type=[!]<icmp-type-num>
mac <macaddr> - MAC address of the host represented by the class,
the format is: a1:b2:c3:d4:e5:f6
if <interface> - interface the client is connected to. It is required if
access restrictions are set (e.g. set <if> access listed,
resp. verify yes).
irate <rate>[-<maxrate>] - guaranteed input (download) rate. Unit is one of:
bit,kbit,mbit,bps,kbps,mbps, where bps means bytes
per s.
orate <rate>[-<maxrate>] - guaranteed output (upload) rate.
14
TRAFFIC MANAGER E-4000

rate <rate>[-<maxrate>] - sets both irate and orate
maxirate <rate> - maximal input (download) rate the class can get.
maxorate <rate> - maximal output (upload) rate the class can get.
maxrate <rate> - sets both maxirate and maxorate
par[ent] <class> - sets parent class. This way you can set class hierarchy
so that the child classes will share the bandwidth with
parent.
prio <class_prio> - defines priority of the traffic. Classes with the lowest
number get serviced first.
fprio <filter_prio> - specifies the order in which the traffic will be assig-
ned to a class for shaping purposes. Each packet will
belong to the class with lowest fprio that matches its
I address.
qdisc <qdisc> - queuing discipling specifying the way packets are sent
over the network. Default is esfq for leaf classes and
htb for non-leaf classes. Leaf classes could use follo-
wing values: sfq, esfq, red.
sfq (stochastic fairness queuing) qdisc tries to do fair
sharing between multiple connections.
esfq (enhanced sfq) qdisc tries to distribute the traffic
fairly between multiple hosts (by dest. address for
download, src. address for upload).
red (random early detection) starts to drop packets
with rising congestion, so it handles traffic peaks more
gracefully.
Classes are compound object that serve multiple purposes:
- access restrictions for clients - each client has a corresponding class by his MAC
address. To control his status set cl enable is used together with set <if> access lis-
ted. Also the class must have if parameter set for the correct operation.
- I address verification - to avoid clients using other I addresses than the assigned
ones, you assing the class its I and MAC address and set <if> verify 1 on the corres-
ponding interface and only the the traffic with the configured addresses will be allo-
wed.
- traffic shaping - packets are assigned to classes (if more classes overlap, the one with
the lowest fprio is used) by their ip and match settings and shaped according to the
rate settings. Classes form a hierarchy. Every class gets at least the guaranteed band-
width. If there is unused bandwidth at the parent, the class can get it up to its max-
rate. Classes with lower priority get serviced first. Classes with the same priority sha-
re unused bandwidth proportionally to their guaranteed rates. If the sum of the child
class guaranteed rates exceed the parent rate or maxrate, the parent setting isnt res-
pected. Only leaf classes are scheduled, hierarchy serves only as information about
sharing unused bandwidth.
- traffic accounting - every class is accounted for its traffic, matching is done via ip<n>
and match<n> parameters. If classes overlap, every matching class is accounted.
15
TRAFFIC MANAGER E-4000

Example:
We connect the client named office to the network attached to eth1 using a router. He
will get download speed of 64kbit and upload speed of 128kbit. He was assigned two
network ranges 10.10.10.0/29 and 10.10.11.0/29. We allow him to use the free band-
width up to 256kbit.
set cl office ip1 10.10.10.0/29
set cl office ip2 10.10.11.0/29
set cl office irate 64kbit
set cl office orate 128kbit
set cl office maxrate 256kbit
reload cl
If we want to make sure he will not use other ip addresses, we define the mac address
of his router and allow only verified addresses:
set cl office mac 00:a0:30:2a:3b:45
set eth1 verify 1
reload access
If you want to deny the client access to the network, you can make issue:
set cl office enable 0
set eth1 access listed
reload access
Firewall configuration
Firewall functionality is most frequently used, when using Traffic Controller as an
internet access device (model W-1000) directly at the customers site. Network address
translation allows to hide the local network behind the single externally visible I
address thus making the simple protection using the fact, that inner addresses are not
reachable from the external net. All the outbound connections from inner hosts get
their source address and port translated, so they all seem to be originating from the
firewall. This way single I address is used for the whole network.
The other useful feature is blocking specific TC /I ports (see add frw rule). To achi-
eve inbound connections to the inner network with private addresses, you can set up
tcp port redirector (see add frw redir). You can also configure bootp gateway, so that
all the bootp/dhcp requests will be forwarded there.
Syntax:
set|show frw|firewall [<frwparam> [<value>]]
add frw <arrayparam> <value> # uses next free arrayparam<n>
del frw <arrayparam>
<frwparam>:
bootpgw|bgw <bootpserver> # turns on bootp/dhcp gateway
16
TRAFFIC MANAGER E-4000

<arrayparam>:
snat_ip<n> <ip/mask> # translates src addr from the ip network on ifout
# (ifout - the interface used for default route)
rule<n> <rulespec> # allows firewall rule
ssh_ip<n> <ip/mask> # allowed IP/netmask
redir<n> [<laddr>:]<lport>-<raddr>[:<rport>] # starts tcp redirector from
# local <laddr>:<lport> to remote <raddr>:<rport>
<rulespec> =
<action>:[<chain>]:[<proto>]:[<src_ip>]:[<src_ports>]:[<dst_ip>]:[<dst_ports
>]:[<iif>]:[<oif>]
<action> # allow|deny
<chain> # in|out (traffic to/from this host)
# fwd (forwarded traffic), all (same as empty)
<iif>,<oif> # input/output interface name
<proto> # IP protocol (tcp,udp,icmp)
<src_ip>,<dst_ip> # src/dst ip address/mask
<src_ports>,<dst_ports> # src/dst ports. e.g.: 25,80,6000-6100,7000-7100
# missing values mean 'any'
- reload frw is needed to make the changes effective
- reload redir is needed to make the redir changes effective
Example: Traffic Manager is connected to the internet via eth0 and local network is
connected on eth1 (10.10.11.10/24) and eth2 (10.10.12.10/24).
manager$ set firewall snat_ip1 10.10.11.0/24
snat_ip1: 10.10.11.0/24
manager$ set firewall snat_ip2 10.10.12.0/24
snat_ip2: 10.10.11.0/24
set firewall snat_ip means, that all the packets originating from the given range will be
translated (their source address and port). The translation will be done on the ifout
interface – the one, that is used for the default route. Following commands allow
manipulating snat_ip parameters:
add frw snat_ip <ip/mask># add next free snat_ip<n>
del frw snat_ip<n>
set frw snat_ip<n> <ip>/<mask>
show frw snat_ip # show all snat_ip settings
Setting up blocking/unblocking rules:
add frw rule <rulespec> # add firewall rule<n>
del frw rule<n>
set frw rule<n> <rulespec>
show frw rule # show all rules
<rulespec> =
<action>:[<chain>]:[<proto>]:[<src_ip>]:[<src_ports>]:[<dst_ip>]:[<dst_ports
>]:[<iif>]:[<oif>]
<action> # allow|deny
<chain> # in|out (traffic to/from this host)
17
TRAFFIC MANAGER E-4000

# fwd (forwarded traffic), all (same as empty)
<iif>,<oif> # input/output interface name
<proto> # IP protocol (tcp,udp,icmp)
<src_ip>,<dst_ip> # src/dst ip address/mask
<src_ports>,<dst_ports> # src/dst ports. e.g.: 25,80,6000-6100,7000-7100
# missing values mean 'any'
This setting add a firewall rule for blocking (action deny) or allowing packets matching
the rule. Note that for forwarded traffic, the chain is fwd, chains in and out are only
for traffic destined for resp. originating from the Traffic Manager.
Setting up port redirection:
add frw redir [<localaddr>:]<localport>-<remotehost>[:<remoteport>]
set frw redir<n> [<localaddr>:]<localport>-<remotehost>[:<remoteport>]
del frw redir<n>
show frw redir
reload redir
This command configures TC port redirection, that useful in combination with NAT.
This way you can redirect inbound connections to the host on the network with trans-
lated private ip addresses, that would otherwise be unreachable. Useful for SMT ,
HTT , O 3 and other protocols.
Example: Traffic Controller has external I address 195.225.55.1 and connects a net-
work with private address 10.10.10.0/24. There is SNAT configured, so that connecti-
ons from the privatte network get their source address translated to the external
address. On the private network there is e.g. Microsoft Exchange running on the host
I 10.10.10.2/24.
Use the command:
add frw redir 195.225.55.1:25-10.10.10.2:25
reload redir
to achieve redirecting inbound connections from the internet to the exchange host.
Note: There could be only one service listening on a single local port.
Setting up ssh access restrictions
set frw ssh_ip<n> <ip>/<mask>
add frw ssh_ip <ip>/<mask>
del frw ssh_ip<n>
reload frw
Use this commands to manipulate the access to the ssh service only from a known
address ranges (e.g. to avoid a security hazard).
18
TRAFFIC MANAGER E-4000

SNMP configuration
Traffic Manager supports configuration over SNM . To set up SNM parameters, you
can use following commands:
set sn[mp] <snmpparam> <value>
show sn[mp] [<snmpparam>]
del sn[mp] <snmp-multi-param>
add|set sn[mp] <snmp-multi-param> <value>
reload snmp
snmpparam:
loc[ation] <location> string describing device location
con[tact] <contact> email address of the device admin
stat_period|sp <seconds> specifies how often are accounting stats updated
snmp-multi-param:
ro_ip<n> <ip/mask> range of I adresses that can be used to access the devi-
ce in read-only mode.
ro_comm<n> <community> community – string used for verifying access to the
SNM for read-only users.
rw_ip<n> <ip/mask> range of I adresses that can be used to access the devi-
ce in read-write mode. You can set multiple ranges
rw_comm<n> <community> community – string used for verifying access to the
SNM for read-write users.
All the changes get effective only after reload snmp.
All those multi params allow multiple values to be set.
Example:
set snmp ro_ip1 10.10.10.10
set snmp ro_comm1 public
set snmp ro_ip2 10.10.11.10
set snmp ro_comm1 public
Another way to add the following number in a range is:
add snmp rw_ip 192.168.1.1
add snmp rw_comm admin
Miscellaneous admin commands
Syntax:
show sys[tem] temp[erature]
Displays the ambient and C U temperature. This feature is dependent on the underly-
19
TRAFFIC MANAGER E-4000

ing hardware and might not work in some models.
show sys[tem] date|time
Displays the current day and time.
set sys[tem] date|time <datetime>|<timeserver> # uses port ntp(123)/udp
<datetime>: <d.m.yyyy> <hh:mm:ss >
Use this command to set the time and date. If <timeserver> address is given, the time
is retrieved via UD port ntp(123). If <timeserver> is not given, the time is set from
ntp.nasa.gov.
show ver[sion]
show sys[tem] ver[sion]
Displays the current firmware version.
show sys[tem] up[time]
Displays how long time has elapsed since the deviced booted.
set sys[tem] [host]name <hostname>
Use this command to set the hostname of the Traffic Manager to the <hostname>. The
hostname is always shown at the prompt. The value will get applied after reboot.
arp command
Syntax:
arp [-a]
arp –s <ip_address> <mac_address>
arp –d <ip_address>
arp command without argument shows the current arp table. It contains all the hosts
and their hardware MAC addresses that are communicating with the Traffic Manager.
It might be useful to check the association between I and MAC address in case you
are not using parameter verify=1 on the given interface. Note that arp entries are valid
only a short time and get periodically refreshed for validity.
The second and third form allow to set and delete arp entries.
20
TRAFFIC MANAGER E-4000

Example:
Address Hwtype Hwaddress Flags Mask Iface
241.255.55.4 other a0:b1:c2:d3:e4:f5 C eth0
241.255.55.5 other a0:b1:c2:d3:e4:f5 C eth0
241.255.55.6 other a0:b1:c2:d3:e4:f5 C eth1
241.255.55.10 other a0:b1:c2:d3:e4:f5 C eth1
241.255.55.11 other a0:b1:c2:d3:e4:f5 C eth1
241.10.55.5 other a0:b1:c2:d3:e4:f5 C eth0
Network diagnostics
There are a few basing network diagnostic tools available in Traffic Manager:
ping [<options>] <ip_address>
options:
-n use only numeric addresses (useful if DNS is not set up)
-s <size> use packets of size <size>
-c <count> send only <count> packets
This utility checks response of the given host using ICM protocol. Without arguments
the complete syntax is displayed. In some configurations, ICM protocol is blocked on
the firewall, so that ping doesnt work, even though the network is operational. Unless
–c option is given, the command will run until interrupted byt ctrl-C.
traceroute [-n] <ip_adress>
Displays the route packets take to the network host. Without arguments the comple-
te syntax is displayed.
ssh <ip_address> -l <username>
ssh <username>@<ip_address>
This command opens a encrypted terminal session to the remote host. Without argu-
ments the complete syntax is displayed.
telnet <ip_address> [<port>]
acket monitoring
tcpdump <options> –i <interface> <filter>
options:
-v more verbose report
-e show mac addresses
-n numeric output
21
TRAFFIC MANAGER E-4000
Table of contents
Popular Network Router manuals by other brands
Allied Telesis
Allied Telesis AT-8000S Series installation guide
D-Link
D-Link DES-3624 - Switch - Stackable user guide

MikroTik
MikroTik RouterBOARD SEXTANT G Quick setup guide and warranty information

Asus
Asus RT-AC66U B1 quick start guide
Motorola
Motorola Motomesh 1.0 user guide
TRENDnet
TRENDnet TEW-711BR Quick installation guide
