manuals.online logo
Brands
  1. Home
  2. •
  3. Brands
  4. •
  5. Festool
  6. •
  7. Drill
  8. •
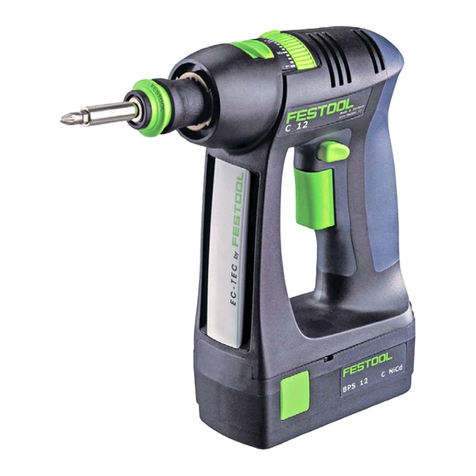
  9. Festool C 12 Li User manual

Festool C 12 Li User manual

klick
1
2
1
2
1-1
1-2
1-3
1-4
1-5
1-7
1-6
1-8
1-9
1-10
1-11
4 mm
Ø 5 mm
96 mm
3-1
3
4
5
WH-CE
CENTROTEC®
BF-FX
klick
12
klick
21
klick
4
3
3
5
6
4
6
8
7
DD-ES
1
2
DD-AS + BF-FX
+ WH-CE + BF-FX
+ WH-CE
1
2
33
C 12 Li, C 15 Li
13
GB
Original operating manual
The specified illustrations appear at the be-
ginning of the Operating Instructions.
1Symbols
2 Machine features
3Intendeduse
Cordless drills are suitable for drilling into
metal, wood, plastics and similar materials
as well as inserting and tightening screws.
The charger TRC 3 is designed for charging
the battery packs listed.
The user shall be liable for damage and
accidents resulting from non-specified
use; this also includes damage and
wear caused during industrial continu-
ous operation.
4 Technical data
1 Symbols .................................. 13
2 Machine features ...................... 13
3 Intended use............................ 13
4 Technical data .......................... 13
5 Safety instructions .................... 14
6 Operation ................................ 15
7 Settings................................... 16
8 Tool holder, attachments ............ 16
9 Working with the machine.......... 16
10 Service and maintenance ........... 17
11 Accessories .............................. 17
12 Disposal .................................. 17
13 Transport ................................. 17
14 Warranty ................................. 18
15 EU Declaration of Conformity...... 18
Warning of general danger
Risk of electric shock
Read the Operating Instructions/
Notes!
Wear ear protection.
Wear protective gloves.
Do not throw in the household waste.
[1-1] Torque thumbwheel
[1-2] Bit store
[1-3] LED lamp
[1-4] Gear switch
[1-5] Drilling symbol
[1-6] Screwdriving symbol
[1-7] Drilling/Fastening selector switch
[1-8] Right/left switch
[1-9] On/Off switch
[1-10] Belt clip
[1-11] Buttons for releasing the battery
pack
Cordless drill C12 Li C15 Li
Motor voltage 10.8 – 12 V 14.4 – 15.6 V
Idling speed* 1st gear 0 - 450 rpm
2nd gear 0 - 1500 rpm
Max. torque Soft material (wood) 20 Nm 25 Nm
Hard material (metal) 34 Nm 40 Nm
Adjustable torque** 1st gear 0.5 - 8 Nm
2nd gear 0.5 - 6 Nm
Chuck clamping range 1.5 - 13 mm
Drill diameter max. Wood 25 mm 35 mm
Metal 14 mm 16 mm
Tool holder in drill spindle 1/4 ’’ 1/4 ’’
Weight without battery pack with Centrotec 1.0 kg 1.0 kg
14
C 12 Li, C 15 Li
GB
* Speed specifications with fully charged battery pack.
** The maximum speed is reduced in the lower torque stages.
5Safetyinstructions
5.1 General safety instructions
WARNING! Read all safety warn-
ings and all instructions.
Failure to
follow the warnings and instructions may re-
sult in electric shock, fire and/or serious in-
jury.
Save all warnings and instructions for
future reference.
The term "power tool" in the warnings refers
to your mains-operated (corded) power tool
or battery-operated (cordless) power tool.
5.2 Machine-related safety instruc-
tions
–
Hold power tool by insulated gripping
surfaces, when performing an opera-
tion where the cutting accessory may
contact hidden wiring or its own cord.
Cutting accessory contacting a "live" wire
may make exposed metal parts of the
power tool "live" and could give the opera-
tor an electric shock.
–
The charger and power tool are not in-
tended for use by persons (including
children) with limited physical, senso-
ry or mental ability or without suffi-
cient experience and/or knowledge,
unless they are supervised by a per-
son responsible for their safety or
have been instructed on how the
charger or power tool is to be
used.
Children should always be super-
vised to ensure that they do not play with
the charger or the power tools.
–
Switch of the power tool immediately
if the tool is blocked. Always be pre-
pared for high reaction torques that
can cause kickback.
The tool blocks if:
- the power tool is overloaded or
- it becomes jammed in the workpiece be-
ing processed.
–
Wait until the power tool stops com-
pletely until placing it down.
The tool
can become entangled and lead to a loss of
control of the power tool.
–
Avoid unintentional activation. Ensure
that the on/off switch is in switched-
off position before inserting a battery.
Carrying the power tool with your finger at
the on/off switch, or inserting the battery
when the power tool is switched on, can re-
sult in accidents.
– Take care when drilling into walls as there
is a danger of rupturing concealed gas/wa-
ter pipes or cutting through power cables.
– Do not open the battery pack or the charg-
er. Even after disconnection from the
mains, there is still a high capacitor voltage
inside the charger.
– Make sure that metal objects (such as met-
al chips) or fluids do not collect in the bat-
tery pack retaining slots or enter the
Charger TRC 3
Mains voltage (input) 220 - 240 V ~
Mains frequency 50/60 Hz
Charging voltage (output) 7.2 - 18 V=
Rapid charging max. 3 A
Conservation charging current, pulsating approx. 0.06 A
Charging times for LiIon 1.3 Ah/ 2.6 Ah, 80 % approx. 22/ 45 min
LiIon 1.3 Ah/ 2.6 Ah, 100 % approx. 35/ 70 min
Permitted charging temperature range -5 °C to +45 °C
Temperature monitoring via NTC resistor
Battery pack BPC 12 Li BPC 15 Li
Voltage 10.8 V 14.4 V
Capacity 1.3 Ah 2.6 Ah
Weight 0.3 kg 0.6 kg
C 12 Li, C 15 Li
15
GB
machine through the air vent slits (danger
of short circuit).
– Do not charge battery packs from external
manufacturers. The charger is designed for
charging original battery packs only. Never
charge the battery packs in chargers from
external manufacturers. Otherwise there is
a danger of fire and explosion.
– Protect the battery pack from excessive
heat or constant heat sources such as sun-
light or naked flames. There is a risk of ex-
plosion.
– Never use water to extinguish burning Li-
Ion battery packs, always use sand or a
fire blanket.
5.3 Emission levels
Levels determined in accordance with EN
60745 are typically:
Vibration emission value a
h
(vector sum for
three directions) and uncertainty K mea-
sured in accordance with EN 60745:
The emission values specified (vibration,
noise) were measured in accordance with the
test conditions stipulated in EN 60745 and
are intended for machine comparisons. They
are also used for making preliminary esti-
mates regarding vibration and noise loads
during operation.
The emission values specified refer to the
main applications for which the power tool is
used. If the electric power tool is used for
other applications, with other tools or is not
maintained sufficiently prior to operation,
however, the vibration and noise load may be
higher when the tool is used. Take into ac-
count any machine idling times and down-
times to estimate these values more accu-
rately for a specified time period. This may
significantly reduce the load during the ma-
chine operating period.
6 Operation
6.1 Changing the battery pack [2]
L
The battery packs in the BPC series are
also suitable for use with the cordless
drills T 12+3/T 15+3 of the same voltage.
6.2 Charging the battery pack [3]
L
The battery pack is immediately ready for
operation upon delivery and can be
charged at any time independently of its
charge state without shortening the ser-
vice life.
The charger TRC 3 can be used to charge all
Festool battery packs of the BPS and BPC se-
ries. The charger automatically detects the
type of the inserted battery (NiCd, NiMH or
LiIon). A microprocessor controls the charg-
ing process in line with the charging state,
temperature and voltage of the battery pack.
The LED [3-1] on the charger indicates the
respective operating status of the charger.
LED yellow - lit continuously
Charger is ready to use.
LED green - flashing quickly
Battery pack is charged to maximum capac-
ity.
LED green - flashing slowly
Battery pack is charged with reduced cur-
rent, LiIon is charged to 80 %.
LED green - lit continuously
Battery pack is fully charged, or charging is
not started again, because the battery is
charged to more than 80 %.
LED red - flashing
General fault display, e.g. incomplete con-
tact, short circuit, battery pack faulty, etc.
LED red - lit continuously
Battery temperature is outside the permitted
range.
6.3 Charger wall mount
The charger TRC 3 has two elongated holes
on its back. It can be mounted on a wall us-
ing two screws (e.g. round head or flat head
screw with shank diameter of 5 mm) (see
Fig. [3]).
Sound pressure level L
PA
= 65 dB(A)
Noise level L
WA
= 76 dB(A)
Uncertainty K = 3 dB
CAUTION
Operating noise
Damage to hearing
X
Use ear protection!
Drilling in metal a
h
= 3,5 m/s
2
K = 1,5 m/s
2
Screws a
h
< 2,5 m/s
2
K = 1,5 m/s
2
16
C 12 Li, C 15 Li
GB
7 Settings
7.1 Changing direction of rotation
[1-8]
• Switch to the left = clockwise rotation
• Switch to the right = counterclockwise ro-
tation
7.2 Changing gear [1-4]
L
Only actuate the gear switch with the tool
switched off. Otherwise there is a risk of
damaging the gear unit.
• Gear switch forwards (digit 1 visible) =
1st gear
• Gear switch to rear (digit 2 visible) =
2nd gear
7.3 Fastening
Adjust the switch so that [1-7] its marking
faces the screw [1-6] symbol. The torque
can be adjusted in this position.
L
The switch-over function only works if the
machine is switched off.
X
Adjust the torque accordingly at the
torque [1-1] wheel:
Position 1 = low torque
Position 25 = high torque
The machine switches off when the preset
torque is reached and an acoustic signal
sounds. The machine only continues running
when the on/off switch is [1-9] released and
then pressed again.
7.4 Drilling
Adjust the switch [1-7] so that its marking
faces the drilling symbol [1-5]. Maximum
torque is set in this position.
8 Tool holder, attachments
8.1 Tool chuck CENTROTEC WH-CE
[4]
The tool chuck CENTROTEC WH-CE allows
you to change tools with a CENTROTEC
shank in a matter of seconds.
L
Always use a CENTROTEC tool chuck to
clamp CENTROTEC tools.
8.2 Chuck BF-FX [5]
The chuck BF-FX is used for clamping drill
and screwdriver bits.
8.3 Angle attachment DD-AS [6]
The angle attachment DD-AS (in part, addi-
tional equipment) permits drilling and screw-
driving at a right angle to the machine.
8.4 Eccentric attachment DD-ES [7]
The eccentric attachment (in part, additional
equipment) permits screwdriving near edges
with bits according to DIN 3126.
8.5 Tool holder in the drill spindle
[8]
Bits can be inserted directly in the hexagon
socket holder on the drill spindle to shorten
and reduce the weight of the machine.
9 Working with the machine
9.1 On/Off switch [1-9]
Press = ON, release = OFF
L
The speed of the machine depends on
how far the on/off switch is pressed in.
The LED lamp [1-3] lights up when the on/off
switch [1-9] is pressed and lights up the
working area.
9.2 Bit store [1-2]
The magnetic bit store is designed for hold-
ing bits or bit holders.
9.3 Acoustic warning signal
Acoustic warning signals sound and the ma-
chine switches off in the following operating
states:
– Battery flat or machine overloaded.
X
Change the battery.
X
Place the machine under reduced stress.
WARNING
Risk of injury, electric shock
X
Always disconnect the battery pack before
any type of work on the machine!
CAUTION
Tool has sharp edges and can cause cut-
ting injuries during a tool change.
X
Wear protective gloves!
CAUTION
Risk of injury
X
Clamp the tool centrally in the chuck!
peep ― ―
C 12 Li, C 15 Li
17
GB
– Machine is overheating.
X
You must allow the machine to cool before
using again.
– LiIon battery pack is faulty or has over-
heated.
X
Once the battery pack has cooled, per-
form a functional check using the charger.
10 Service and maintenance
Observe the following instructions:
– Keep the air slits on the machine and the
charger free and clean to ensure adequate
cooling.
– Keep the contacts on the machine, charger
and battery pack clean.
Information on battery packs
– Where possible, store the battery pack in a
cool, dry place at a temperature between
5°Cand25°C.
– Battery packs are most efficient at temper-
atures between 20 °C and 30 °C.
– Protect the battery pack from moisture,
water and heat.
– Significantly shorter operating times after
each charge indicate that the battery pack
is worn and should be replaced with a new
one.
– The LiIon battery pack is fully compatible
with the charger! Integrated electronics
prevent overloading and overheating dur-
ing the charging process.
– Do not leave flat battery packs in a charger
disconnected from the mains power supply
for longer than one month. There is a risk
of total discharge and the maximum power
of the battery pack may decrease.
– Store the battery pack in its packaging to
reduce the risk of short circuits..
– If LiIon battery packs are to be stored for
long periods without use, they should be
charged to 40 % capacity (approx.
15 mins. charging period).
11 Accessories
Use only original Festool accessories and
Festool consumable material intended for
this machine because these components are
designed specifically for the machine. Using
accessories and consumable material from
other suppliers will most likely affect the
quality of your working results and limit any
warranty claims. Machine wear or your own
personal workload may increase depending
on the application. Protect yourself and your
machine, and preserve your warranty claims
by always using original Festool accessories
and Festool consumable material!
The order numbers of the accessories and
tools can be found in the Festool catalogue or
on the Internet under "www.festool.com".
12 Disposal
Do not throw the power tool in your house-
hold waste! Dispose of machines, accesso-
ries and packaging at an environmentally re-
sponsible recycling centre. Observe the valid
national regulations.
EU only:
European Directive 2002/96/EC
stipulates that used electric power tools must
be collected separately and disposed of at an
environmentally responsible recycling cen-
tre.
Return used or faulty battery packs to your
local specialist retailer, Festool after-sales
service or a designated public waste man-
agement facility. The battery packs will then
be recycled. (Observe the regulations appli-
cable in your country). The batteries must be
discharged on return.
EU only:
European Directive 91/157/EEC
stipulates that faulty or used battery packs/
batteries must be recycled.
13 Transport
The equivalent amount of lithium in the LiIon
battery pack is less than the applicable limit
value and certified as per UN manual ST/SG/
AC.10/11/rev. 3 part III, subsection 38.3.
The LiIon battery pack is therefore not sub-
ject to national and international dangerous
goods regulations, neither as an individual
component nor as a fitted machine compo-
nent. However, dangerous goods regulations
may apply when several battery packs are
transported, in which case you may have to
fulfil special conditions. Refer to ADR special
regulation 230 for more information relevant
for the EU.
peep peep ―
peep peep peep
18
C 12 Li, C 15 Li
GB
14 Warranty
We offer a warranty for material and produc-
tion defects for all our tools in accordance
with the locally applicable legal provisions,
but for a minimum of 12 months. Within the
EU member states, the warranty period is 24
months (verification through invoice or deliv-
ery note). Damage caused by the operator,
natural wear, overloading, incorrect handling
or through the use of the equipment not
specified in the operating manual, or damage
which was known at the time of purchase, is
not covered by the warranty. Furthermore,
damage caused by the use of non-original
accessories and consumable materials (e.g.
sanding pads) is also excluded.
Complaints can only be accepted if the tool is
returned while still assembled to the supplier
or an authorised Festool Customer Service
workshop. Keep the operating manual, safe-
ty instructions, spare parts list and purchase
receipt in a safe place. Otherwise the current
warranty conditions of the manufacturer
shall apply.
Note
Due to continuous research and develop-
ment work, we reserve the right to make
changes to the technical content of this doc-
umentation.
15 EU Declaration of Conformi-
ty
We declare under sole responsibility that this
product complies with the following direc-
tives and standards:
2006/42/EC, 2004/108/EC, EN 60745-1, EN
60745-2-1, EN 60745-2-2, EN 55014-1, EN
55014-2.
We declare under sole responsibility that this
product complies with the following direc-
tives and standards:
2004/108/EC, 2006/95/EC, EN 60335-1, EN
EN 60335-2-29, EN 61000-3-2, EN 61000-3-
3, EN 61204-3.
Festool GmbH
Wertstr. 20, D-73240 Wendlingen, Germany
Dr. Johannes Steimel
Head of Research, Development and Techni-
cal Documentation
19.07.2010
REACh for Festool products, its accesso-
ries and consumable materials:
REACh is a European Chemical Directive that
came into effect in 2007. As "downstream
users" and product manufacturers, we are
aware of our duty to provide our customers
with information. We have set up the follow-
ing website to keep you updated with all the
latest news and provide you with information
on all the materials used in our existing prod-
ucts:
www.festool.com/reach
Cordless drill Serial no.
C 12 Li 496703
C 15 Li 496702
Year of CE mark: 2010
Charger Serial no.
TRC 3 494635, 494636, 494637
Year of CE mark: 2007

Other manuals for C 12 Li

4

This manual suits for next models

1

Other Festool Drill manuals

Festool DRC 18/4 User manual

Festool

Festool DRC 18/4 User manual

Festool C12 EC-TEC User manual

Festool

Festool C12 EC-TEC User manual

Festool C 18 Li Installation instructions

Festool

Festool C 18 Li Installation instructions

Festool C 18 Li Installation instructions

Festool

Festool C 18 Li Installation instructions

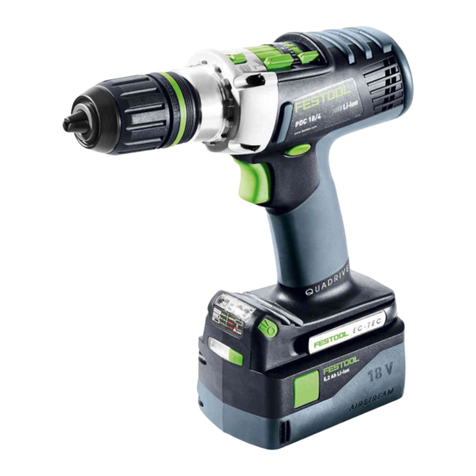
Festool PDC 18/4 User manual

Festool

Festool PDC 18/4 User manual

Festool DRC 18/4 Li Installation instructions

Festool

Festool DRC 18/4 Li Installation instructions

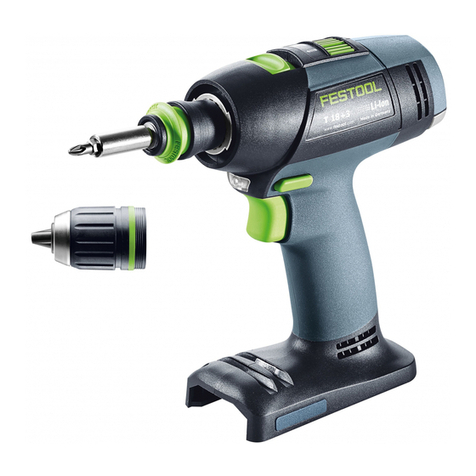
Festool T 18+3 Li User manual

Festool

Festool T 18+3 Li User manual

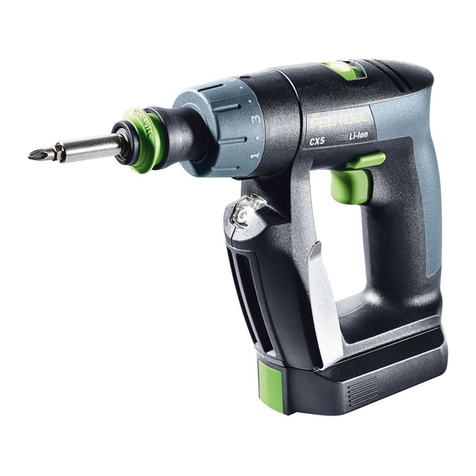
Festool CXS User manual

Festool

Festool CXS User manual

Festool T 18+3 Li Installation instructions

Festool

Festool T 18+3 Li Installation instructions

Festool T 18+3 Li Installation instructions

Festool

Festool T 18+3 Li Installation instructions

Festool T 15+3 Li Installation instructions

Festool

Festool T 15+3 Li Installation instructions

Festool PDC 18/4 User manual

Festool

Festool PDC 18/4 User manual

Festool DRC 18/4 User manual

Festool

Festool DRC 18/4 User manual

Festool PDC 18/4 User manual

Festool

Festool PDC 18/4 User manual

Festool TXS User manual

Festool

Festool TXS User manual

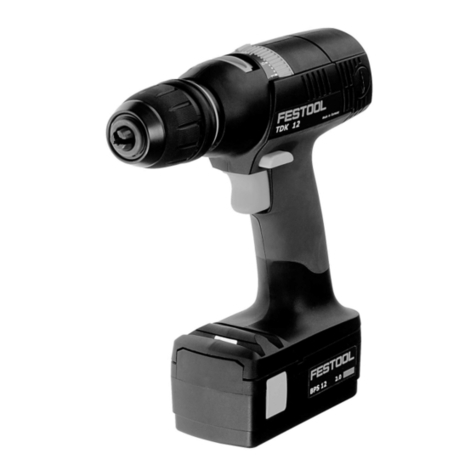
Festool TDK 12 User manual

Festool

Festool TDK 12 User manual

Festool CXS User manual

Festool

Festool CXS User manual

Festool TI 15 User manual

Festool

Festool TI 15 User manual

Festool TXS Installation instructions

Festool

Festool TXS Installation instructions

Festool C 18 Li User manual

Festool

Festool C 18 Li User manual

Festool DR 18/4 E Installation instructions

Festool

Festool DR 18/4 E Installation instructions

Festool T 18+3 Li User manual

Festool

Festool T 18+3 Li User manual

Festool C15 Li User manual

Festool

Festool C15 Li User manual

Festool PDC 18/4 Li Installation instructions

Festool

Festool PDC 18/4 Li Installation instructions

Popular Drill manuals by other brands

AGP DM10 Original instructions

AGP

AGP DM10 Original instructions

Bosch GSB 13 PROFESSIONAL operating instructions

Bosch

Bosch GSB 13 PROFESSIONAL operating instructions

Hitachi Koki DM 20V Handling instructions

Hitachi Koki

Hitachi Koki DM 20V Handling instructions

Narex EKK 26 E Original operating manual

Narex

Narex EKK 26 E Original operating manual

Stanley FATMAX KFFMED1250 Original instructions

Stanley

Stanley FATMAX KFFMED1250 Original instructions

BTI DKB 2200 SE Safety and users manual

BTI

BTI DKB 2200 SE Safety and users manual

Black & Decker 1901 owner's manual

Black & Decker

Black & Decker 1901 owner's manual

Husqvarna DMS 180 Operator's manual

Husqvarna

Husqvarna DMS 180 Operator's manual

Makita HP1640 instruction manual

Makita

Makita HP1640 instruction manual

WABECO BF1242 operating instructions

WABECO

WABECO BF1242 operating instructions

Pro D2148-RQ Product instructions

Pro

Pro D2148-RQ Product instructions

Atlas Copco LBB16 EP024 instructions

Atlas Copco

Atlas Copco LBB16 EP024 instructions

Fein BOP6 instruction manual

Fein

Fein BOP6 instruction manual

DeWalt DCD791 instruction manual

DeWalt

DeWalt DCD791 instruction manual

Stanley STDC411L manual

Stanley

Stanley STDC411L manual

Fieldmann FDV 2001-E instruction manual

Fieldmann

Fieldmann FDV 2001-E instruction manual

Husqvarna DM 200 Operator's manual

Husqvarna

Husqvarna DM 200 Operator's manual

Milwaukee 0240-20 Operator's manual

Milwaukee

Milwaukee 0240-20 Operator's manual

manuals.online logo
manuals.online logoBrands
  • About & Mission
  • Contact us
  • Privacy Policy
  • Terms and Conditions

Copyright 2025 Manuals.Online. All Rights Reserved.