manuals.online logo
Brands
  1. Home
  2. •
  3. Brands
  4. •
  5. Festool
  6. •
  7. Vacuum Cleaner
  8. •
  9. Festool CTL MINI Installation instructions

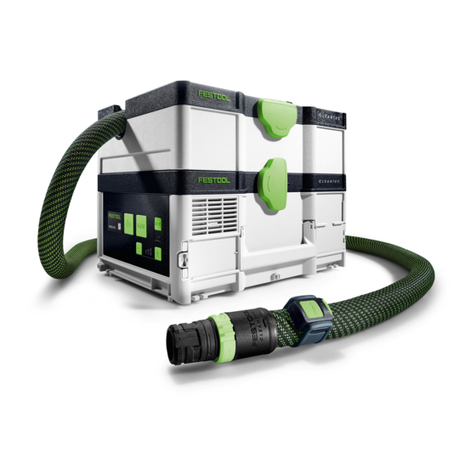
Festool CTL MINI Installation instructions

사용 설명서 원본 - 이동식 집진기 5
Original operating manual - Mobile dust extractors 9
CTL MINI
CTL MIDI
718235_001
Festool GmbH
Wertstraße 20
D-73240 Wendlingen
Tel.: +49 (0)7024/804-0
Telefax: +49 (0)7024/804-20608
www.festool.com
1A
1B
1-2
1-1
1-3
1-4
1-5
1-11
1-12
1-13
1-10
1-9
1-7
1-6
1-8
1
2
3
2-1
2-4
2-2
2-3
2
1
1
4
4-2
4-3
4-4
4-1
5
CTL MINI/MIDI
원본 사용 설명서
1 안전 수칙
경고! 본 도구와 함께 제공된 모든 안전 경고, 지침, 그림, 사양을 확인하십시오.
아래에 나온 수칙을 일부라도 따르지 않으면 감전, 화재 및 심각한 상해가 발생할
수 있습니다.
언제든지 참조할 수 있도록 모든 경고와 지침을 안전한 장소에 보관하십시오.
–신체, 감각 또는 정신 능력이 저하되거나 경험과 지식이 부족한 사람(어린이 포함)이
본 공구를 사용해서는 안 됩니다. 어린이가 본 공구를 가지고 놀지 않도록 지도하십시오.
–경고! 본 공구에는 유해한 분진이 포함될 수 있습니다. 적절한 보호 장비를 갖춘
공식 전문가만 유지보수 작업을 수행하고, 먼지통을 비우고, 필터를 교체할 수
있습니다.
–필터 시스템이 설치된 상태로 공구를 사용하십시오.
–폭발 및 화재 위험: 흡수 불가:
–불꽃 또는 고온의 분진
–가연성 또는 폭발성 물질(예: 마그네슘, 알루미늄, 가솔린, 희석제)
–공격성 물질(예: 산, 알칼리성 용액, 용제)
–열, 산/염기, 기체 등의 생성을 유도하는 화학 반응 물질(예: 반응성 2성분 물질,
알루미늄, 물)
–모든 국가 안전 규정과 재료 제조업체의 사양을 준수하십시오.
–항상 보호 장비를 착용하십시오.
–육안 검사에서 손상된 부분이 없으면 지침에 따라 건조한 환경에서 작업하십시오.
–공구에서 항상 지정된 목적에 맞는 소켓을 사용하십시오.
–플러그와 케이블을 정기적으로 점검하고, 손상된 경우 사고 예방을 위해 공식
AS 센터에서 손상된 부분의 교체를 요청하십시오.
–크레인 후크 또는 리프팅 장비를 이용해 공구를 들거나 운반하지 마십시오.
2 기호
기호 의미
일반적인 위험에 대한 경고
감전 위험
사용 설명서 및 안전 표지를
확인하십시오.
방진 마스크를 착용하십시오.
기호 의미
경고! 본 공구에는 유해한 분진이
포함될 수 있습니다.
가정용 쓰레기와 함께 버리지
마십시오.
클라이밍 금지
6
CTL MINI/MIDI
3 기술자료
이동식 집진기
전원 소비 400~1200 W
연결된 장치 소켓의 최대 부하 EU 2400 W
CH, DK 1100 W
GB 240 V / 110 V 1800 W / 500 W
최대 흡입 용량(공기), 집진기/터빈 95 m3/h / 222 m3/h
최대 진공, 터빈 24000 Pa
필터 표면 면적 5000 cm2
집진 호스 D 27/32 mm x 3.5 m-AS
네트 케이블 길이 7.5 m
EN 60704-2-1에 따른 음압 레벨/불확실성 K 72 dB(A) / 3 dB
보호 등급 IP X4
먼지통 용량 CTL 미니 10 l
CTL Midi 15 l
치수 L x W x H CTL 미니 430 x 330 x 420 mm
CTL Midi 430 x 330 x 470 mm
중량 CTL 미니 8.8 kg
CTL Midi 9.1 kg
4 전동 공구의 기능
[1-1] 흡입력 조절기
[1-2] 장치 소켓
[1-3] SysDoc
[1-4] 손잡이
[1-5] 흡입구
[1-6] 각도 어댑터
[1-7] 호스 보관부
[1-8] Systainer용 T-LOC 래치
[1-9] 먼지통
[1-10] 잠금 클립
[1-11] 스위치
[1-12], [1-13] 브레이크
사용 설명서의 전반부에 이와 관련된 그림이 나와
있습니다.
5 기본 용도
이동식 집진기의 용도
–분진 등급 'L'에 따라 최대 1 mg/m³ 집진
–수분 흡입
–IEC/EN 60335-2-69에 따라 상업적 사용 시 부하
증가
부적절한 사용 및 기본 용도에서 벗어난
사용에 대한 책임은 사용자에게 있습니다.
6 시운전
경고
미승인 전압 또는 주파수!
사고 위험
X전원 소스의 전압과 주파수가 공구의 이름판에
표시된 사양과 일치해야 합니다.
X국내 규정을 준수하십시오.
6.1 이동식 집진기 연결
경고
공구 급시동 시 부상 위험
X스위치를 'AUTO' 또는 'MAN'으로 설정하기
전에 연결된 공구의 스위치가 꺼져 있는지
확인하십시오.
스위치 [1-11]는 전원 스위치입니다.
스위치 위치 '0'
장치 소켓 [1-2]이 전원과 연결되지 않았고, 이동식
집진기가 꺼진 상태입니다.
'MAN' 스위치 위치
장치 소켓 [1-2]이 전원에 연결되어 있고, 이동식
집진기를 작동시킵니다.
7
CTL MINI/MIDI
'AUTO' 스위치 위치
장치 소켓 [1-2]이 전원에 연결되어 있고, 연결된
공구가 켜지면 이동식 집진기를 작동시킵니다.
X접지된 소켓에 플러그를 꽂으십시오.
공구를 사용하지 않을 때와 유지보수 및
청소 작업을 하기 전에 소켓에서 플러그를
빼십시오.
6.2 전동 공구 연결
경고
상해 위험
X최대 장치 소켓 연결 부하를 확인하십시오
('기술자료' 참조).
X전동 공구를 끄십시오.
X전동 공구를 장치 소켓 [1-2]에 연결하십시오.
6.3 흡입 호스 연결 [1A]
X집진 구멍 [1-5]에서 각도 어댑터 [1-6]에 흡입
호스를 연결하십시오
7 설정
7.1 흡입력 조정
X회전 노브[1-1]를 사용하십시오.
7.2 브레이크 사용 [1B]
X집진기의 앞부분을 살짝 들어올리십시오.
X브레이크 [1-13]를 제자리에 고정될 때까지
누르십시오.
X레버 [1-12]를 눌러서 푸십시오
7.3 모터의 가열 상태에 반응하는 속도
과열 방지 장치는 온도가 임계 수준에 도달하면
과열을 예방하기 위해 이동식 집진기를 끕니다.
X이동식 집진기를 끄고 약 5분 동안 식힌 다음
다시 켜십시오.
집진기가 켜지지 않으면 Festool 서비스
센터에 문의하십시오.
7.4 SYSDOC
T-LOC 래치 [1-8]를 이용해 보관 장소 [1-7]에
Systainer를 고정할 수 있습니다. T-LOC가 없는
Systainer는 SysDoc 래치 [1-3] 4개를 이용해
고정할 수 있습니다.
8 작업
8.1 건조한 물질 흡입
주의
유해 분진
기관지 손상
X항상 필터 또는 먼지 봉투를 사용하십시오.
허용 한계치를 초과하는 먼지를 집진할
때는 전기 또는 에어 공구 1개에서만 집진
작업을 하십시오.
전동 공구 작동 시 발생하는 먼지를 집진할 때는
다음 사항을 준수하십시오.
환기가 제대로 되고 있는지 확인하십시오. 국내
규정을 준수하십시오.
한계치: 배기 공기가 청정 공기량의 최대 50%
공식: 실내 공간 부피 VR x 공기 재생률 LW
8.2 습한 물질/액체 흡입
권장사항: 특수 습식 필터를 사용하십시오.
최대치에 도달하면 집진기가 자동으로 멈춥니다.
습기 흡입 후에는 기본 필터를 말리십시오.
주의
거품 및 액체 배출
X공구를 끄고 즉시 내부를 비우십시오.
8.3 작업 완료 후
X이동식 집진기를 끄고 전원 플러그를 빼십시오.
X전원 케이블을 감으십시오.
X먼지 트랩을 비우십시오.
X흡입 호스 [2-1]와 전원 케이블 [2-2]을 상단에
놓으십시오. 전원 케이블을 구멍 [2-3]으로 밀어
넣으십시오.
X이동식 집진기의 내외부를 깨끗하게 청소하고
닦으십시오.
X다른 사용자가 무단 출입할 수 없는 건조한
장소에 이동식 집진기를 보관하십시오.
8
CTL MINI/MIDI
9 서비스 및 유지관리
경고
상해 및 감전 위험
X공구의 유지관리 작업을 하려면 먼저 소켓에서
전원 플러그를 뽑으십시오.
X모터 하우징을 열어야 하는 모든 유지관리 및
수리 작업은 공식 서비스 작업장에서 처리해야
합니다.
고객 서비스 및 수리
제조사 또는 서비스 센터에서만 정식 고객
서비스와 수리 서비스가 제공됩니다. 다음
주소에서 가까운 지점을 찾아보십시오.
www.festool.com/Service
EKAT
1
235
4
Festool의 정식 부품만 사용하십시오.
주문 번호 확인: www.festool.com/Service
X정기적으로 레벨 센서 [4-1]를 청소하고 필터
봉지 [1-9]를 비우십시오.
다음 지침을 준수하십시오.
–제조업체 또는 지정된 담당자가 매년 1회 이상
분진 테스트를 통해 필터가 손상되었는지,
공구의 밀봉에 이상이 있는지, 모니터링 기능이
올바르게 작동하고 있는지를 확인해야 합니다.
–청소할 수 없는 부분은 불침투성 봉투에 버려야
합니다. 국내 폐기 규정을 준수하십시오.
9.1 필터 봉지 교체
참고
모터 손상
X필터가 장착되지 않으면 모터가 손상될 수
있으니 집진기를 절대 작동하지 마십시오.
X잠금 클립을 풀고 공구의 상단 부분을 제거
하십시오 [3].
X필터 봉지를 교체하십시오. 필터 봉지에 인쇄된
문구 확인
X공구의 상단 부분을 교체하고 잠금 클립을
닫으십시오.
보관 장소 [2-4]에 교체용 필터 봉지를
보관하십시오.
9.2 필터 요소 교체
X잠금 클립을 풀고 공구의 상단 부분을 제거
하십시오 [3].
X필터 요소가 위를 향하도록 공구의 상단 부분을
돌리십시오(그림 [4]).
X손잡이 [4-2]를 접고 홀더 [4-3]를 제거하십시오.
X사용한 필터 요소 [4-4]는 새 것으로 교체하십시오.
X사용한 필터는 관련 규정에 따라 폐기해야
합니다.
X홀더 [4-3]를 교체하고 손잡이 [4-2]를 제자리에
걸릴 때까지 내리십시오.
X공구의 상단 부분을 교체하고 잠금 클립을
닫으십시오.
액세서리, 필터, 소모품의 주문 번호는 Festool
카탈로그 또는 www.festool.com에서 확인할 수
있습니다.
10 환경
본 제품을 가정용 쓰레기와 함께 버리지
마십시오. 기기, 액세서리, 포장을 재활용
하십시오. 관련 국내 규정을 준수하십
시오.
9
CTL MINI/MIDI
Original operating instructions
1 Safety instructions
WARNING! Read all safety warnings, instructions, illustrations and
specifications provided with this tool. Failure to follow all instructions listed
below may resulti n electric shock, fire and/or serious injury.
Save all warnings and instructions for future reference.
– This appliance must not be used by persons (including children) with reduced
physical, sensory or mental capabilities, or lack of experience and knowledge.
Children need to be supervised to ensure they do not play with the appliance.
– WARNING! Machine may contain hazardous dust. Only authorised qualified
specialists with suitable protective equipment may perform maintenance,
empty the container and change the filter.
– Always operate with the filter system installed!
– Risk of explosion and fire: Do not absorb:
– Sparks or hot dust;
– Combustible or explosive materials (e.g. magnesium, aluminium, petrol,
diluting agents);
– Aggressive materials (e.g. acid, alkaline solutions, solvents);
– Chemically reactive materials, which lead to the generation of heat, acids/
bases, gases, etc. (e.g. reactive 2-component materials, aluminium and water).
– Observe all national safety regulations as well as the material manufacturer’s
specifications!
– Always use suitable protective equipment!
– If intact following a visual inspection, work in a dry environment according to
instructions!
– Always use the socket on the machine for the purpose specified!
– Check the plug and the cable regularly and should either become damaged,
in order to avoid a hazard, have them replaced by an authorised after-sales
service workshop.
– Do not lift or transport using a crane hook or lifting gear!
2 Symbols
Symbol Significance
Warning of general danger
Risk of electric shock
Symbol Significance
Read operating instructions and
safety notices!
Wear a dust mask.
10
CTL MINI/MIDI
Symbol Significance
Warning! The machine may contain
hazardous dust!
Do not dispose of as domestic
waste.
Symbol Significance
Climbing prohibited
3 Technical data
Mobile dust extractors
Power consumption 400 - 1200 W
Max. appliance socket connected load EU 2400 W
CH, DK 1100 W
GB 240 V / 110 V 1800 W / 500 W
Max. suction capacity (air), extractor/turbine 95 m3/h / 222 m3/h
Max. vacuum, turbine 24000 Pa
Filter surface area 5000 cm2
Suction hose D 27/32 mm x 3.5 m-AS
Length of the net cable 7.5 m
Sound pressure level as per EN 60704-2-1 /
Uncertainty K
72 dB(A) / 3 dB
Protection category IP X4
Container capacity CTL Mini 10 l
CTL Midi 15 l
Dimensions L x W x H CTL Mini 430 x 330 x 420 mm
CTL Midi 430 x 330 x 470 mm
Weight CTL Mini 8.8 kg
CTL Midi 9.1 kg
4 Machine features
[1-1] Suction power adjuster
[1-2] Appliance socket
[1-3] SysDoc
[1-4] Handle
[1-5] Intake opening
[1-6] Angle adapter
[1-7] Hose store
[1-8] T-LOC latch for Systainers
[1-9] Dust container
[1-10] Locking clip
[1-11] Switch
[1-12], [1-13] Brake
The specified illustrations appear at the beginning
of the Operating Instructions.
5 Intended use
Mobile dust extractor suitable for
– Extracting dust up to 1 mg/m³ according to dust
class ‘L’,
– Extracting water,
– Increased loads during commercial use,
according to IEC/EN 60335-2-69.
The user is liable for improper or non-
intended use.
6 Commissioning
WARNING
Unauthorised voltage or frequency!
Risk of accident
XThe mains voltage and the frequency of the
power source must correspond with the
specifications on the machine’s name plate.
XObserve country-specific regulations.
11
CTL MINI/MIDI
6.1 Connecting the mobile dust extractor
WARNING
Risk of injury from tools starting up unex-
pectedly
XBefore setting the switch to “AUTO” or “MAN”
position, make sure that the connected tool is
switched off.
The switch [1-11] serves as an on/off switch.
Switch position “0”
Appliance socket [1-2] is disconnected from the
power, mobile dust extractor is switched off.
”MAN” switch position
Appliance socket [1-2] is connected to the power,
the mobile dust extractor starts.
”Auto” switch position
Appliance socket [1-2] is connected to the power,
the mobile dust extractor starts when the con-
nected tool is switched on.
XInsert the plug into an earthed socket.
Pull the plug from the socket when the
machine is not in use and prior to main-
tenance and cleaning work.
6.2 Connecting electric power tools
WARNING
Risk of injury
XObserve the maximum appliance socket con-
nected load (see chapter “Technical data”).
XSwitch off the electric power tool.
XConnect the electric power tool to the appliance
socket [1-2].
6.3 Connecting the suction hose [1A]
XConnect the suction hose to the angle adapter
[1-6] on the extraction opening [1-5].
7 Settings
7.1 Adjusting the suction power
XUse the rotary knob [1-1].
7.2 Applying the brake [1B]
XRaise the front of the dust extractor slightly.
XPush down the brake [1-13] until it engages
into position.
XActuate the lever [1-12] to release.
7.3 Temperature cut-out
A temperature cut-out switches the mobile
dust extractor off when it reaches a critical
temperature to prevent overheating.
XSwitch off the mobile dust extractor, allow to
cool for about 5 minutes then switch on again.
Not possible to switch on: contact Festool
service workshop.
7.4 SYSDOC
A Systainer can be secured to the storage area
[1-7] using the T-LOC latch [1-8]. Systainers
without a T-LOC can be secured using four SysDoc
latches [1-3].
8 Working
8.1 Extracting dry materials
CAUTION
Hazardous dust
Damage to the respiratory passage
XAlways use a filter or disposal bag!
When extracting dust that exceeds the
permitted limit values, only extract from
a single machine (electric or air tool).
Observe the following when extracting dust
generated by operating electric power tools:
Ensure there is adequate ventilation! Observe
regional regulations!
Limit values: exhaust air max. 50% of the clear
air volume
Formula: room volume VRx air renewal rate LW
8.2 Extracting wet materials/liquids
Remove the filter bag!
Recommendation: use special wet filter.
The dust extractor stops automatically when the
maximum level is reached.
After wet extraction, allow the main filter to dry!
CAUTION
Escaping foam and fluids
XSwitch off and empty the machine immediately.
8.3 After finishing work
XSwitch off the mobile dust extractor and pull
out the mains plug.
XWind up the mains power cable.
12
CTL MINI/MIDI
XEmpty the dirt trap.
XPlace the suction hose [2-1] and mains power
cable [2-2] in the top section. Insert the mains
cable through the recess [2-3].
XVacuum and wipe off the inside and outside of
the mobile dust extractor.
XPlace the mobile dust extractor in a dry room
inaccessible to unauthorised users.
9 Service and maintenance
WARNING
Risk of injury, electric shock
XAlways disconnect the mains plug from the
socket before performing maintenance work
on the machine!
XAll maintenance and repair work which re-
quires the motor housing to be opened must
only be carried out by an authorised service
workshop.
Customer service and repair. Only
through manufacturer or service work-
shops: Please find the nearest address
at: www.festool.com/Service
EKAT
1
235
4
Use only original Festool spare parts!
Order No. at: www.festool.com/Service
XClean the level sensors [4-1] and empty the dirt
trap [1-9] regularly.
Observe the following instructions:
– The manufacturer or an instructed person
must perform a dust test at least once a year
to determine whether the filter is damaged, the
machine is sealed properly and the monitoring
features are functioning correctly.
– Anything that cannot be cleaned must be dis-
carded in impermeable bags. Observe appli-
cable disposal regulations!
9.1 Changing the filter bag
NOTE
Motor damage
XNever operate the extractor without a filter
element fitted as the motor may become
damaged.
XOpen the locking clips and remove the top
section of the machine [3].
XChanging the filter bag - see printing on filter
bag.
XReplace the top section of the machine and
close the locking clips.
A replacement filter bag can be stored in
the storage compartment [2-4].
9.2 Changing the filter element
XOpen the locking clips and remove the top
section of the machine [3].
XTurn the top section of the machine so that the
filter element is facing upwards (Fig. [4]).
XFold over the handle [4-2] and remove the
holder [4-3].
XRemove the used filter element [4-4] and
replace with a new one.
XDispose of the used filter element in accordance
with statutory regulations.
XReplace the holder [4-3] and fold over the
handle [4-2] until it latches into place.
XReplace the top section of the machine and
close the locking clips.
The order numbers for accessories, filters and
consumables can be found in the Festool cata-
logue or on the internet at www.festool.com.
10 Environment
Do not dispose of the device in house-
hold waste! Recycle devices, accesso-
ries and packaging! Observe the valid
national regulations.
경기도 의왕시 맑은내길 67, 501-2호
(오전동, 에이엘티지식산업센터)
(우) 16071
전화: 02-6022-6740
팩스: 02-6022-6799
http://www.festool.co.kr
Gyeonggi-do, Uiwang-si Clear No. 67, 501-2
(AM East, ADT Knowledge Industrial Center)
(R) 16071
phone: 02-6022-6740
fax: 02-6022-6799
http://www.festool.co.kr

Other manuals for CTL MINI

5

This manual suits for next models

1

Other Festool Vacuum Cleaner manuals

Festool CLEANTEC CTLC MIDI I User manual

Festool

Festool CLEANTEC CTLC MIDI I User manual

Festool CT MINI User manual

Festool

Festool CT MINI User manual

Festool CTL 48 E LE EC/B22 User manual

Festool

Festool CTL 48 E LE EC/B22 User manual

Festool CT MINI User manual

Festool

Festool CT MINI User manual

Festool CTL 22 E SG User manual

Festool

Festool CTL 22 E SG User manual

Festool Cleantec Series Installation instructions

Festool

Festool Cleantec Series Installation instructions

Festool CLEANTEX CT 26 E User manual

Festool

Festool CLEANTEX CT 26 E User manual

Festool CT MINI User manual

Festool

Festool CT MINI User manual

Festool CT 15 E User manual

Festool

Festool CT 15 E User manual

Festool CLEANTEX CTH 26 E/a User manual

Festool

Festool CLEANTEX CTH 26 E/a User manual

Festool CT 26 E HEPA User manual

Festool

Festool CT 26 E HEPA User manual

Festool CTM 26 E Installation instructions

Festool

Festool CTM 26 E Installation instructions

Festool CT 26 E HEPA User manual

Festool

Festool CT 26 E HEPA User manual

Festool CLEANTEX CTL 26 E SD Installation instructions

Festool

Festool CLEANTEX CTL 26 E SD Installation instructions

Festool CTM 26 E User manual

Festool

Festool CTM 26 E User manual

Festool CTH 26 E/a Installation instructions
Festool

Festool CTH 26 E/a Installation instructions

Festool CTL 48 E LE EC/B22 Installation instructions

Festool

Festool CTL 48 E LE EC/B22 Installation instructions

Festool CLEANTEX CTL 26 E SD Installation instructions

Festool

Festool CLEANTEX CTL 26 E SD Installation instructions

Festool CTL MINI User manual

Festool

Festool CTL MINI User manual

Festool CLEANTEC CT SYS HEPA User manual
Festool

Festool CLEANTEC CT SYS HEPA User manual

Festool CTM 22 E SG User manual

Festool

Festool CTM 22 E SG User manual

Festool CTL 22 E SG Installation instructions

Festool

Festool CTL 22 E SG Installation instructions

Festool CTLC SYS I User manual

Festool

Festool CTLC SYS I User manual

Festool CTM 26 E Installation instructions

Festool

Festool CTM 26 E Installation instructions

Popular Vacuum Cleaner manuals by other brands

Siemens VS01 series instruction manual

Siemens

Siemens VS01 series instruction manual

Euroclean WhisperClean Specifications

Euroclean

Euroclean WhisperClean Specifications

Kärcher FC 3d Cordless manual

Kärcher

Kärcher FC 3d Cordless manual

HAEGER VC-70C.042A User instructions

HAEGER

HAEGER VC-70C.042A User instructions

Xiaowa E5 Series Faq

Xiaowa

Xiaowa E5 Series Faq

Kenmore Intuition BU4021 Use & care guide

Kenmore

Kenmore Intuition BU4021 Use & care guide

iRobot Braava jet owner's guide

iRobot

iRobot Braava jet owner's guide

Hoover SH40060 owner's manual

Hoover

Hoover SH40060 owner's manual

Black & Decker Dustbuster manual

Black & Decker

Black & Decker Dustbuster manual

Hyundai H-VCC09 instruction manual

Hyundai

Hyundai H-VCC09 instruction manual

Drainvac COMMERCIAL Series owner's manual

Drainvac

Drainvac COMMERCIAL Series owner's manual

ZACO A9S Pro user manual

ZACO

ZACO A9S Pro user manual

Oreck XL2090RHM user guide

Oreck

Oreck XL2090RHM user guide

Nilfisk-Advance VHS110N1 CR instruction manual

Nilfisk-Advance

Nilfisk-Advance VHS110N1 CR instruction manual

Black & Decker FSMH1321 user manual

Black & Decker

Black & Decker FSMH1321 user manual

ZACO V5x user manual

ZACO

ZACO V5x user manual

LG Cord Zero A90 Series owner's manual

LG

LG Cord Zero A90 Series owner's manual

PROFILO PSP5U530 instruction manual

PROFILO

PROFILO PSP5U530 instruction manual

manuals.online logo
manuals.online logoBrands
  • About & Mission
  • Contact us
  • Privacy Policy
  • Terms and Conditions

Copyright 2025 Manuals.Online. All Rights Reserved.